The Summer Kitchen

Over the last few months, we’ve really been adding to our collection of milestones:

IMG_1204

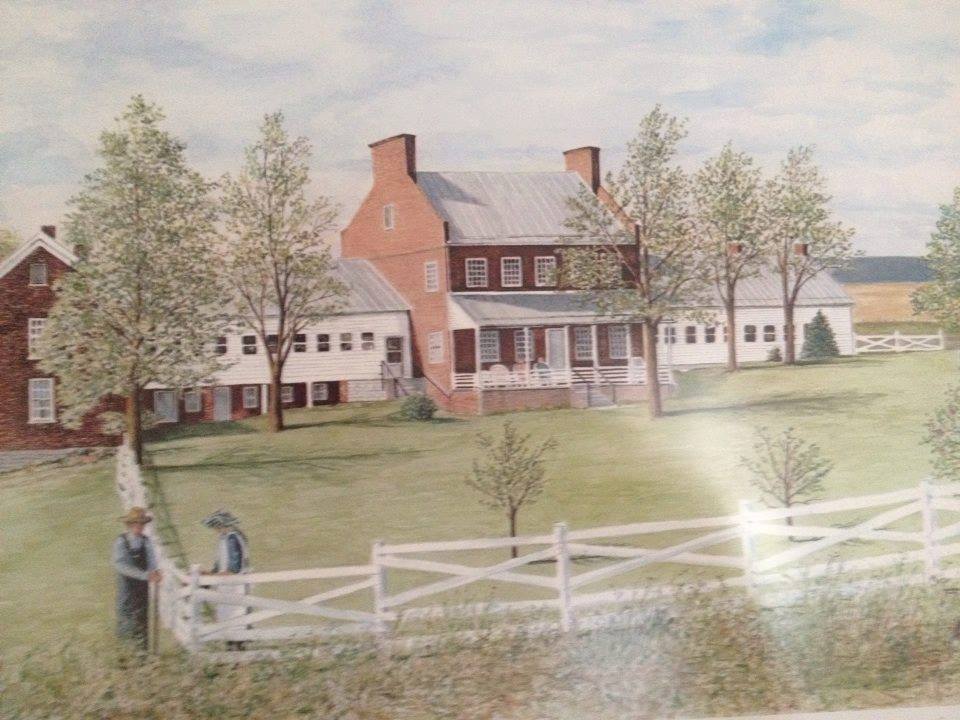
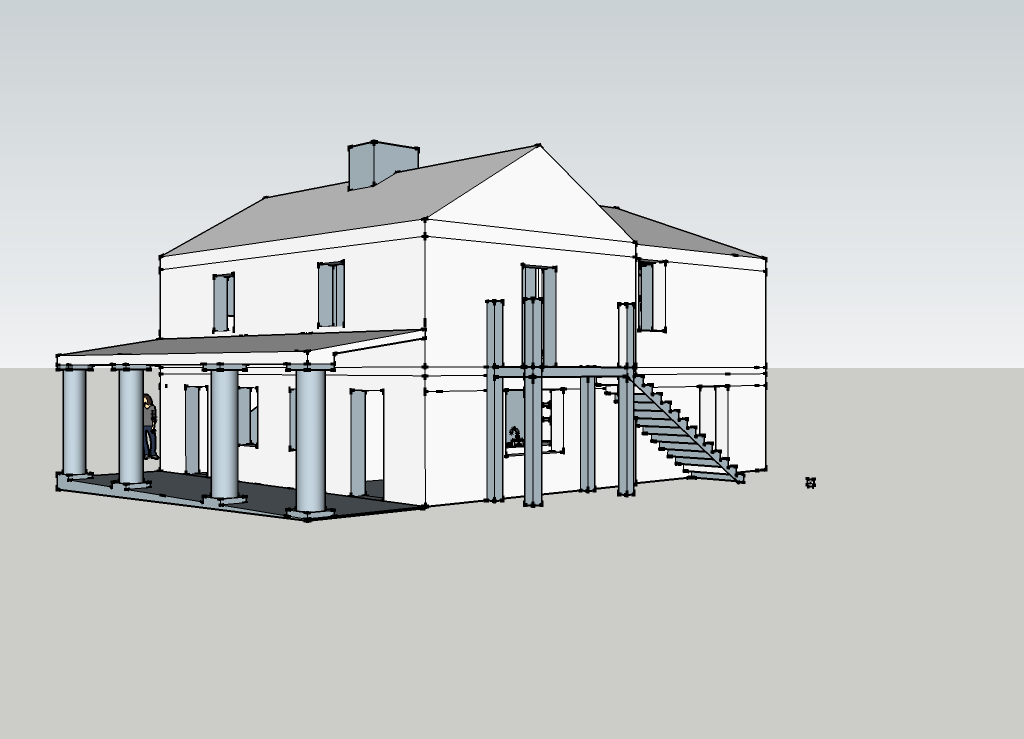
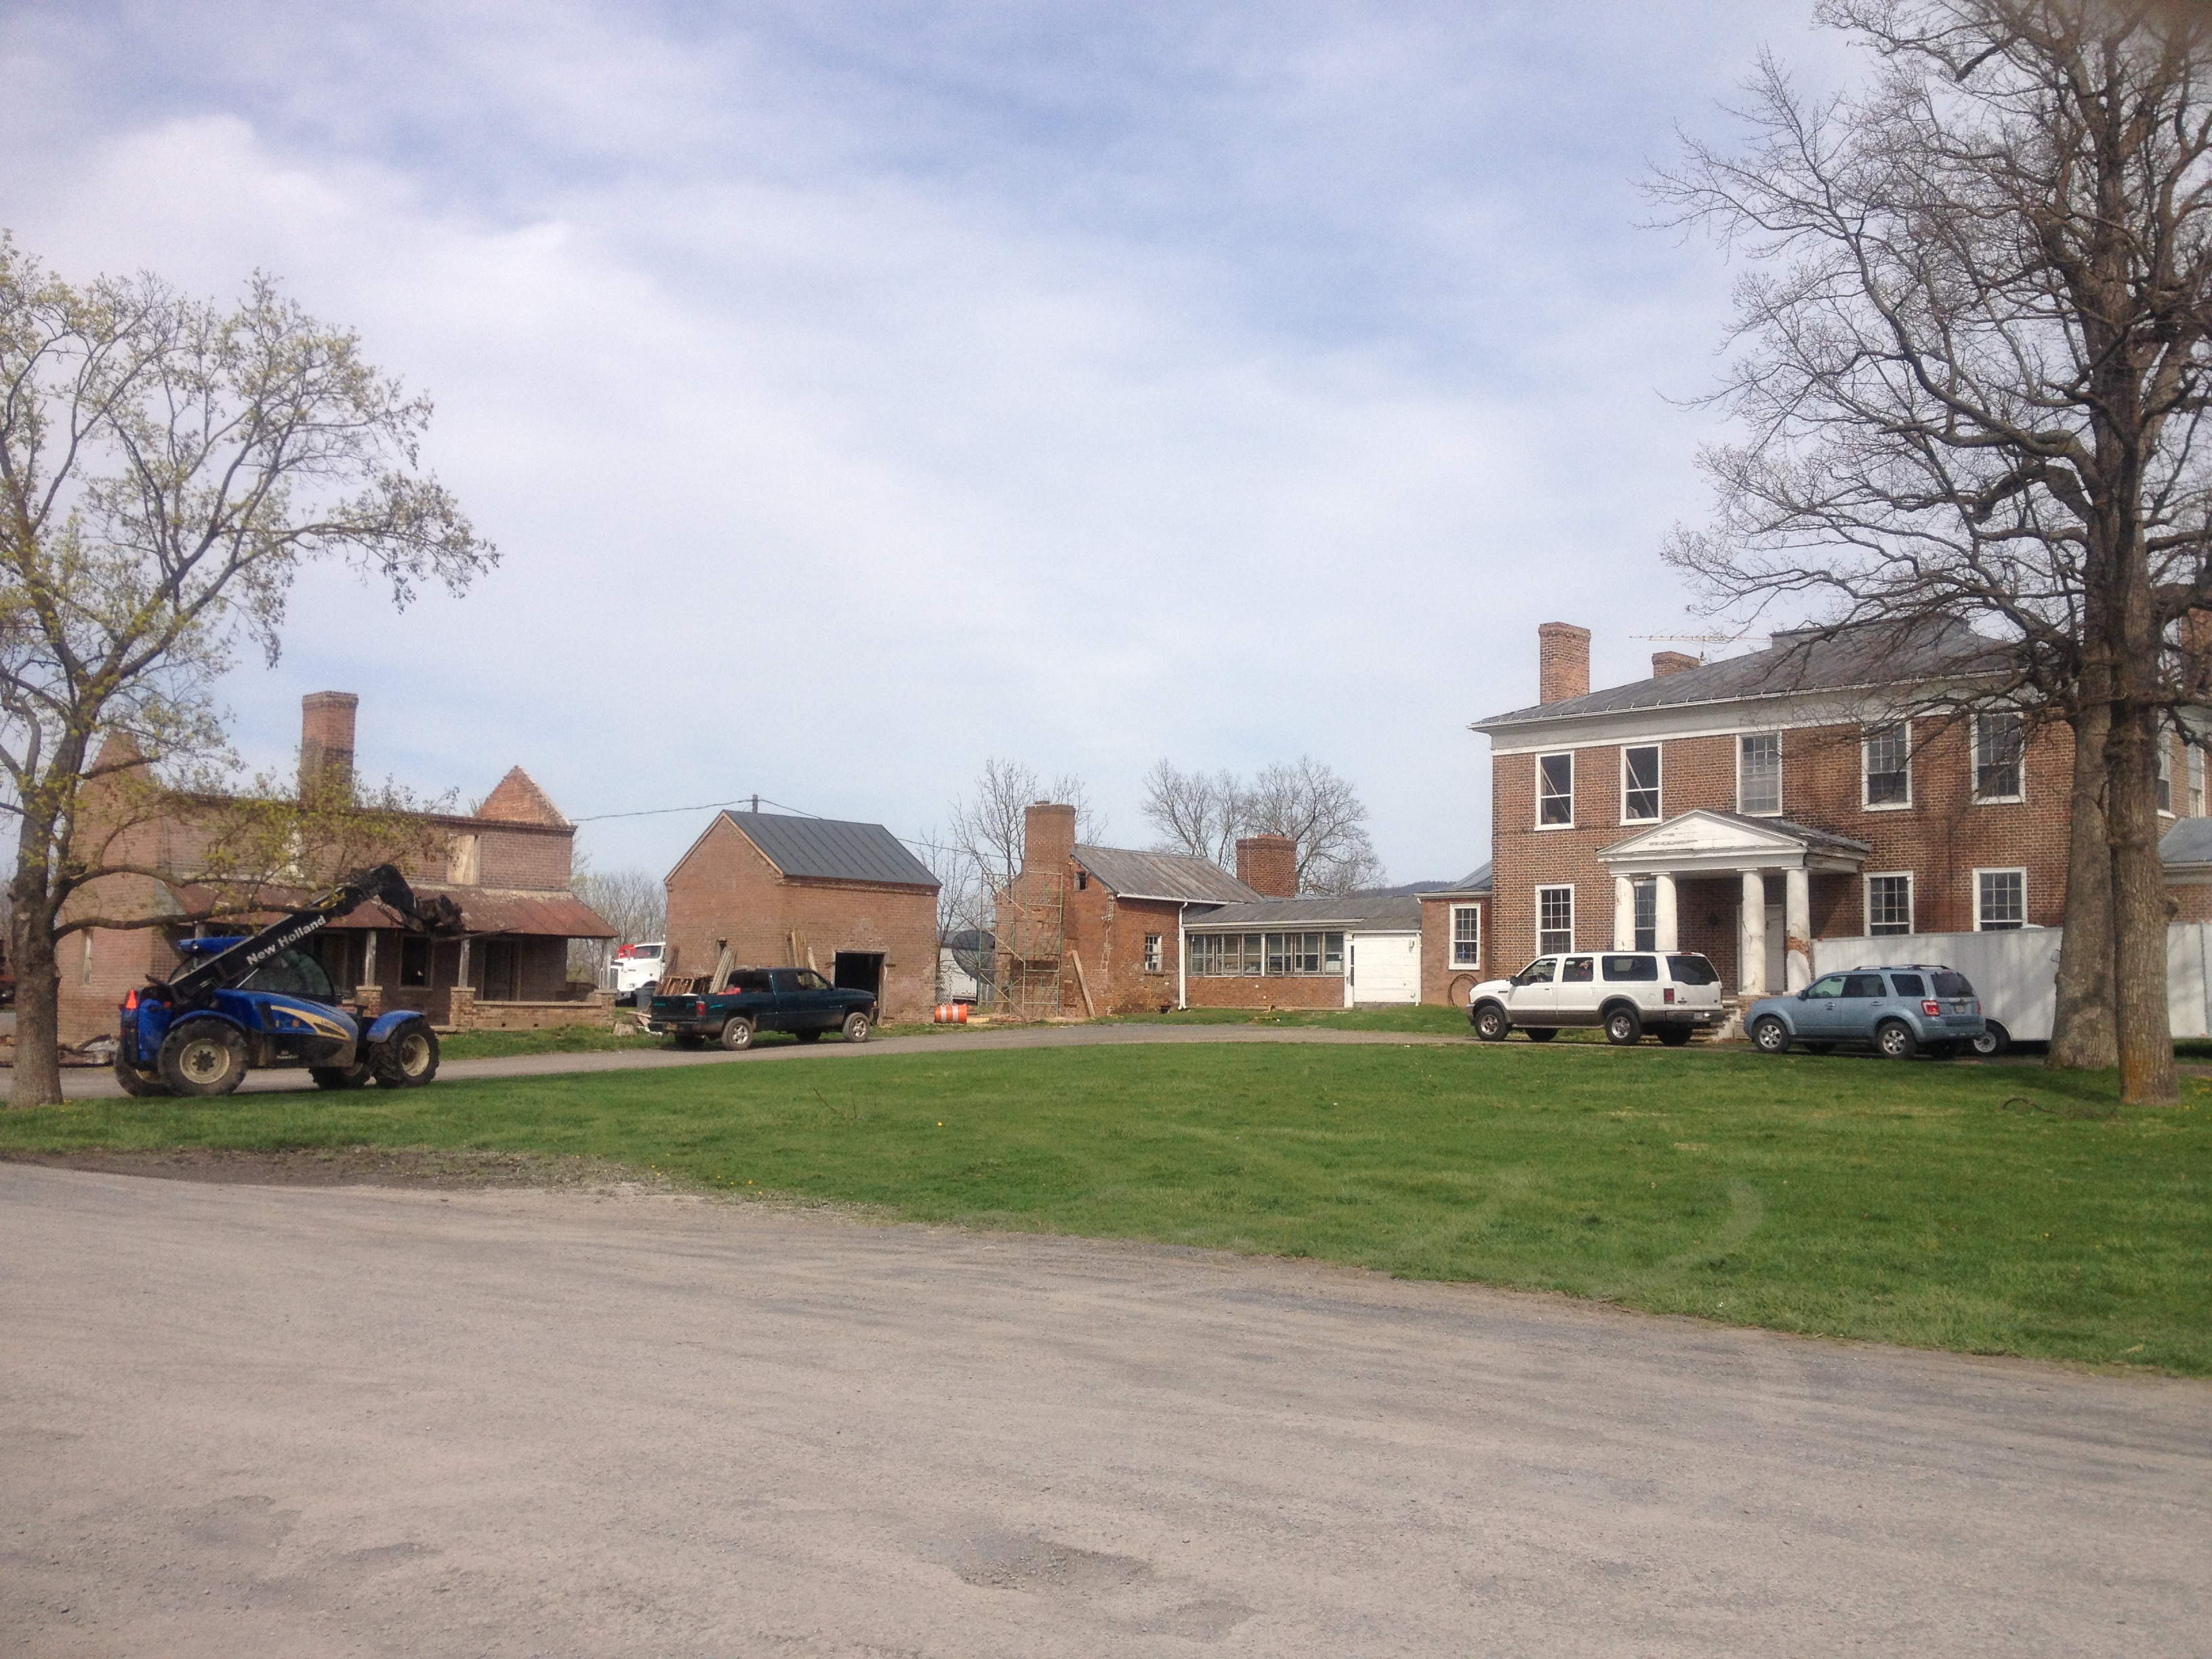
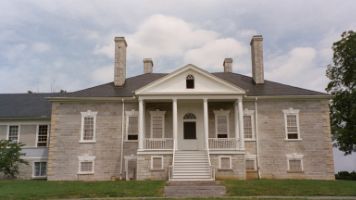
First one on deck for this blog:  the summer kitchen!  You may recall from prior posts that the Summer Kitchen has long been attached to the Big House, originally by an open-air breezeway, next by a 1960s/70s north-wing addition that enclosed the breezeway, and finally in our version of Edge Hill, via the kitchen pavilion space that replaces the 60s/70s addition.

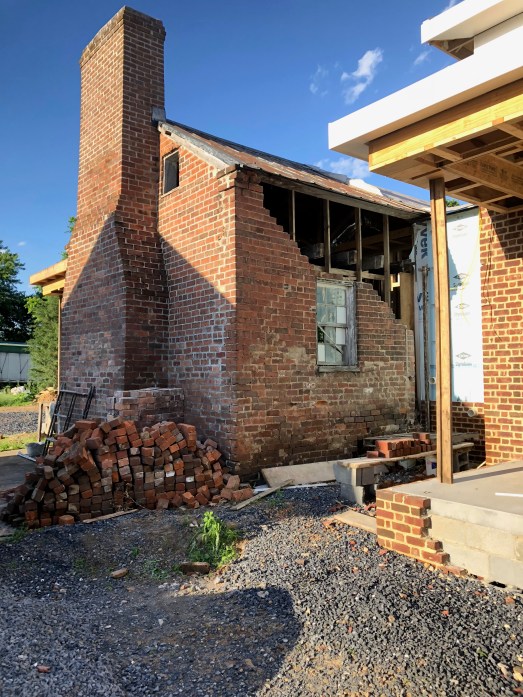
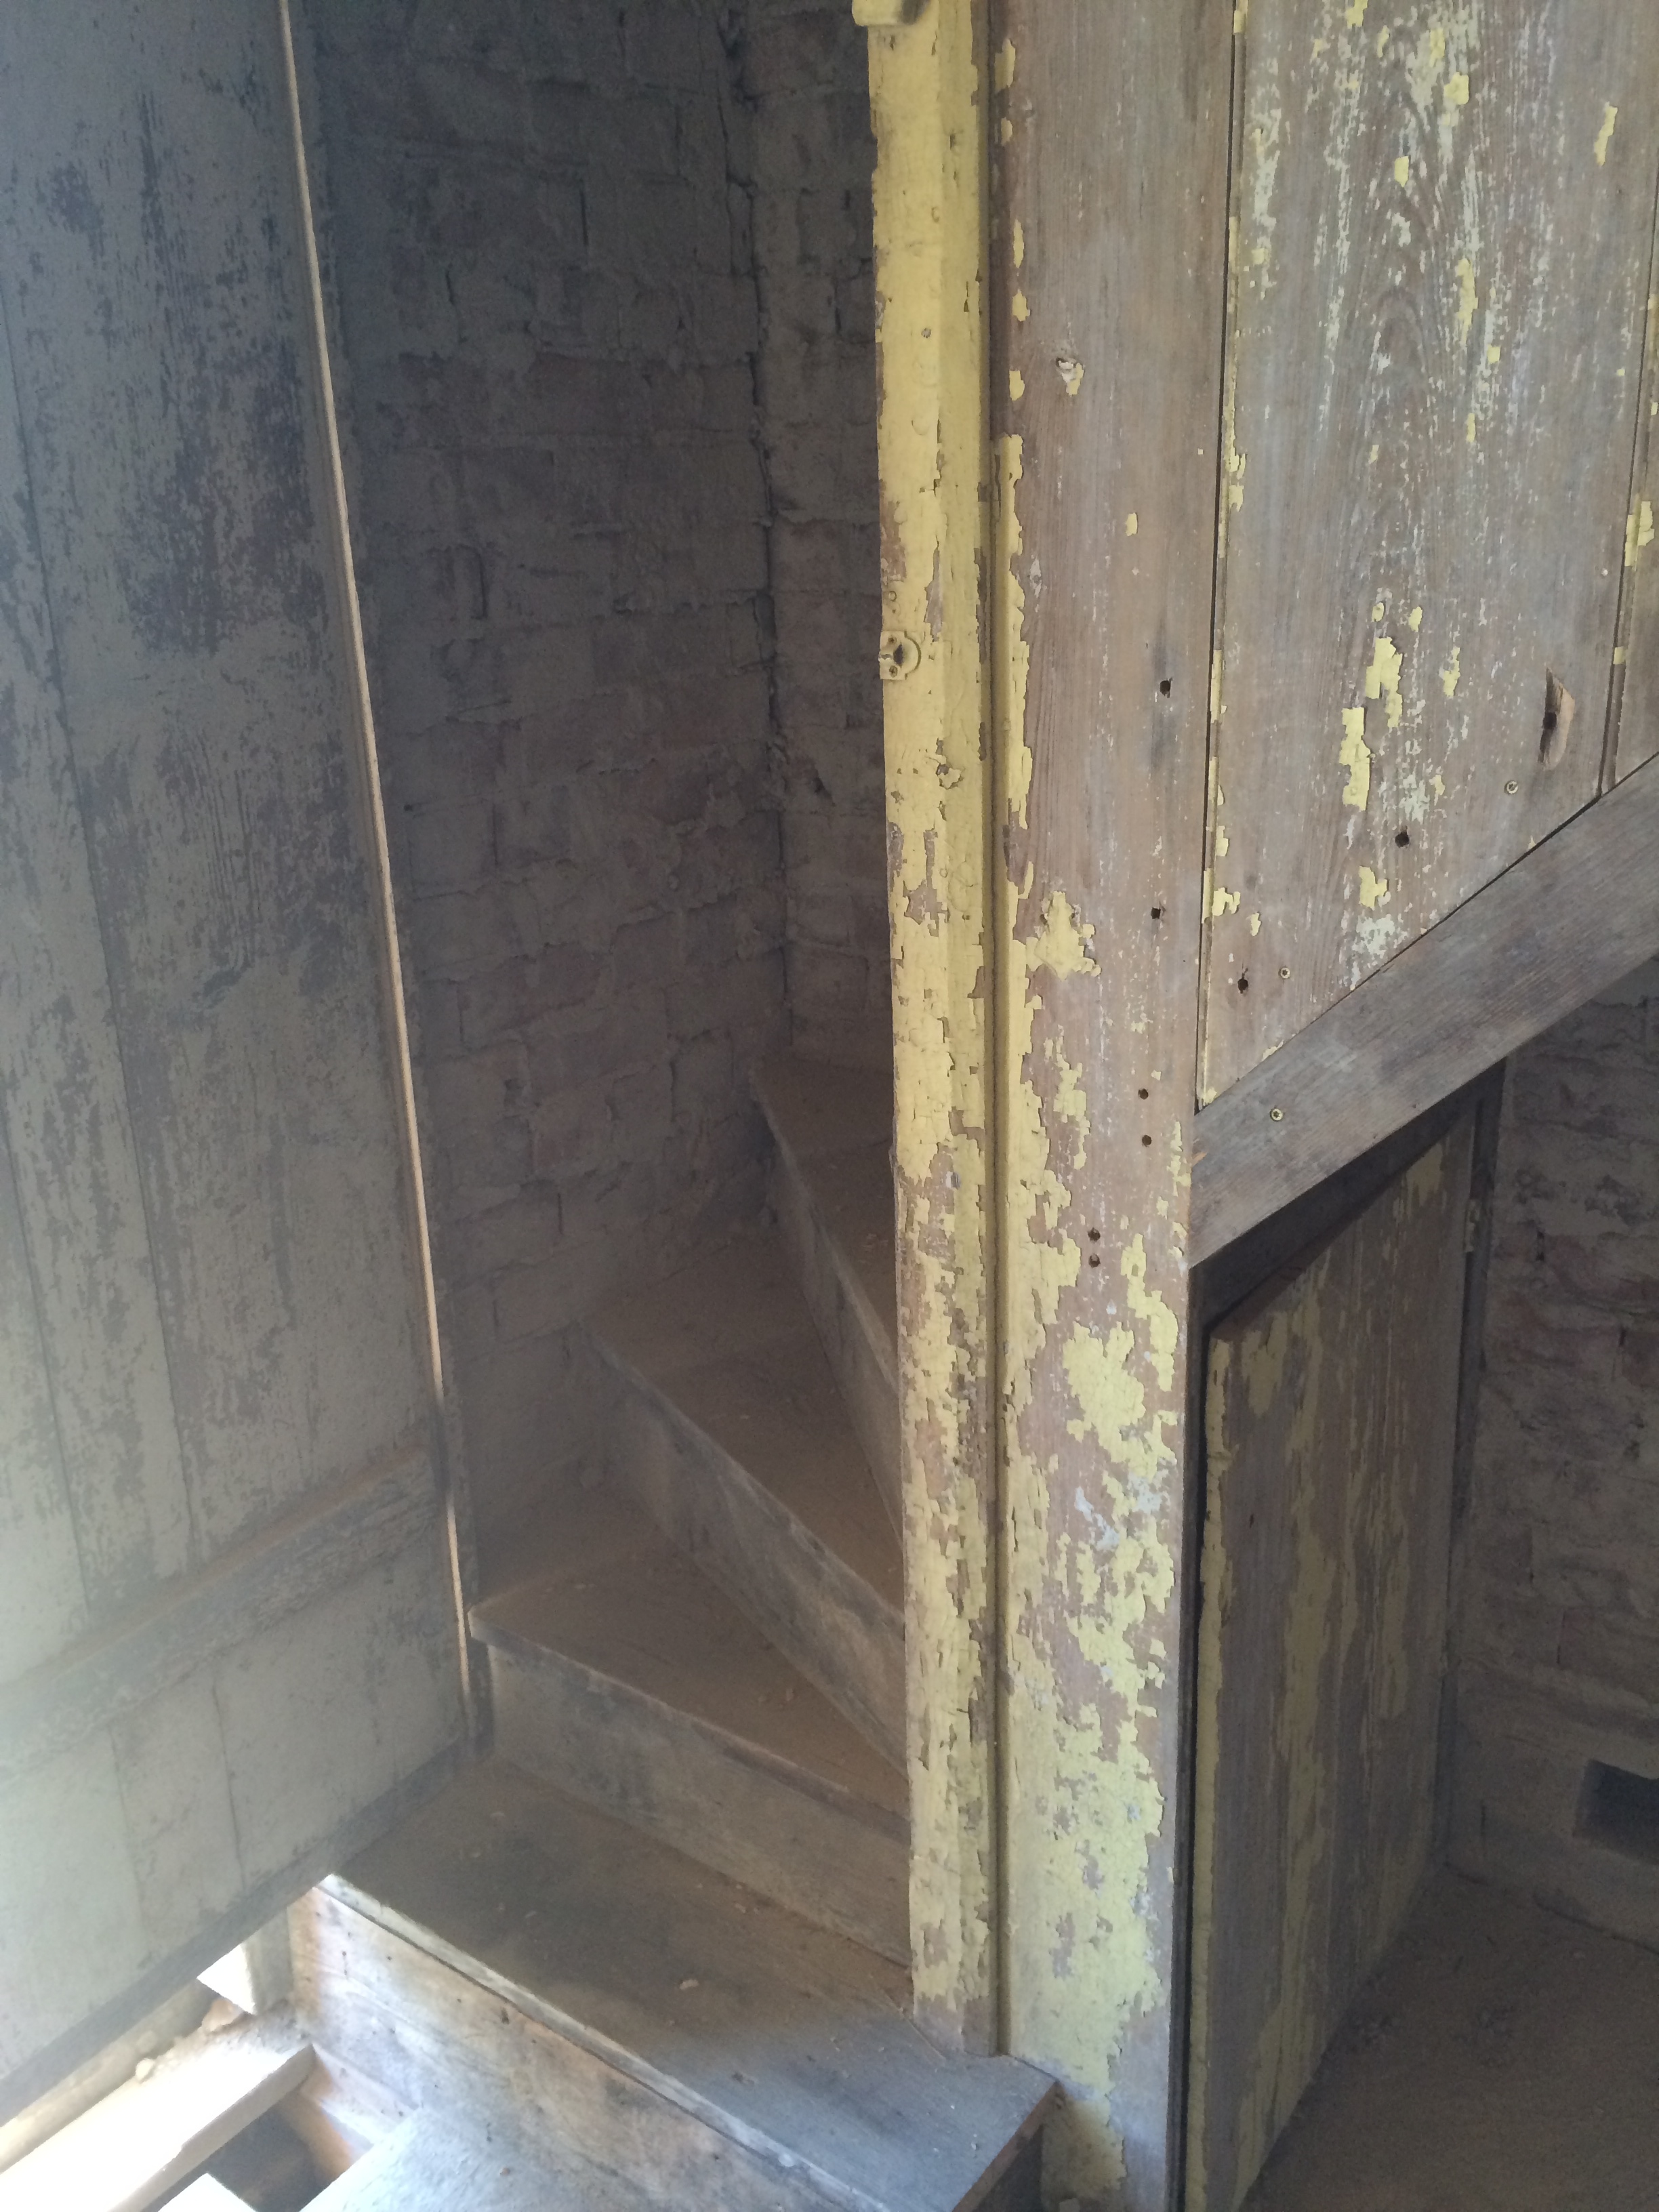
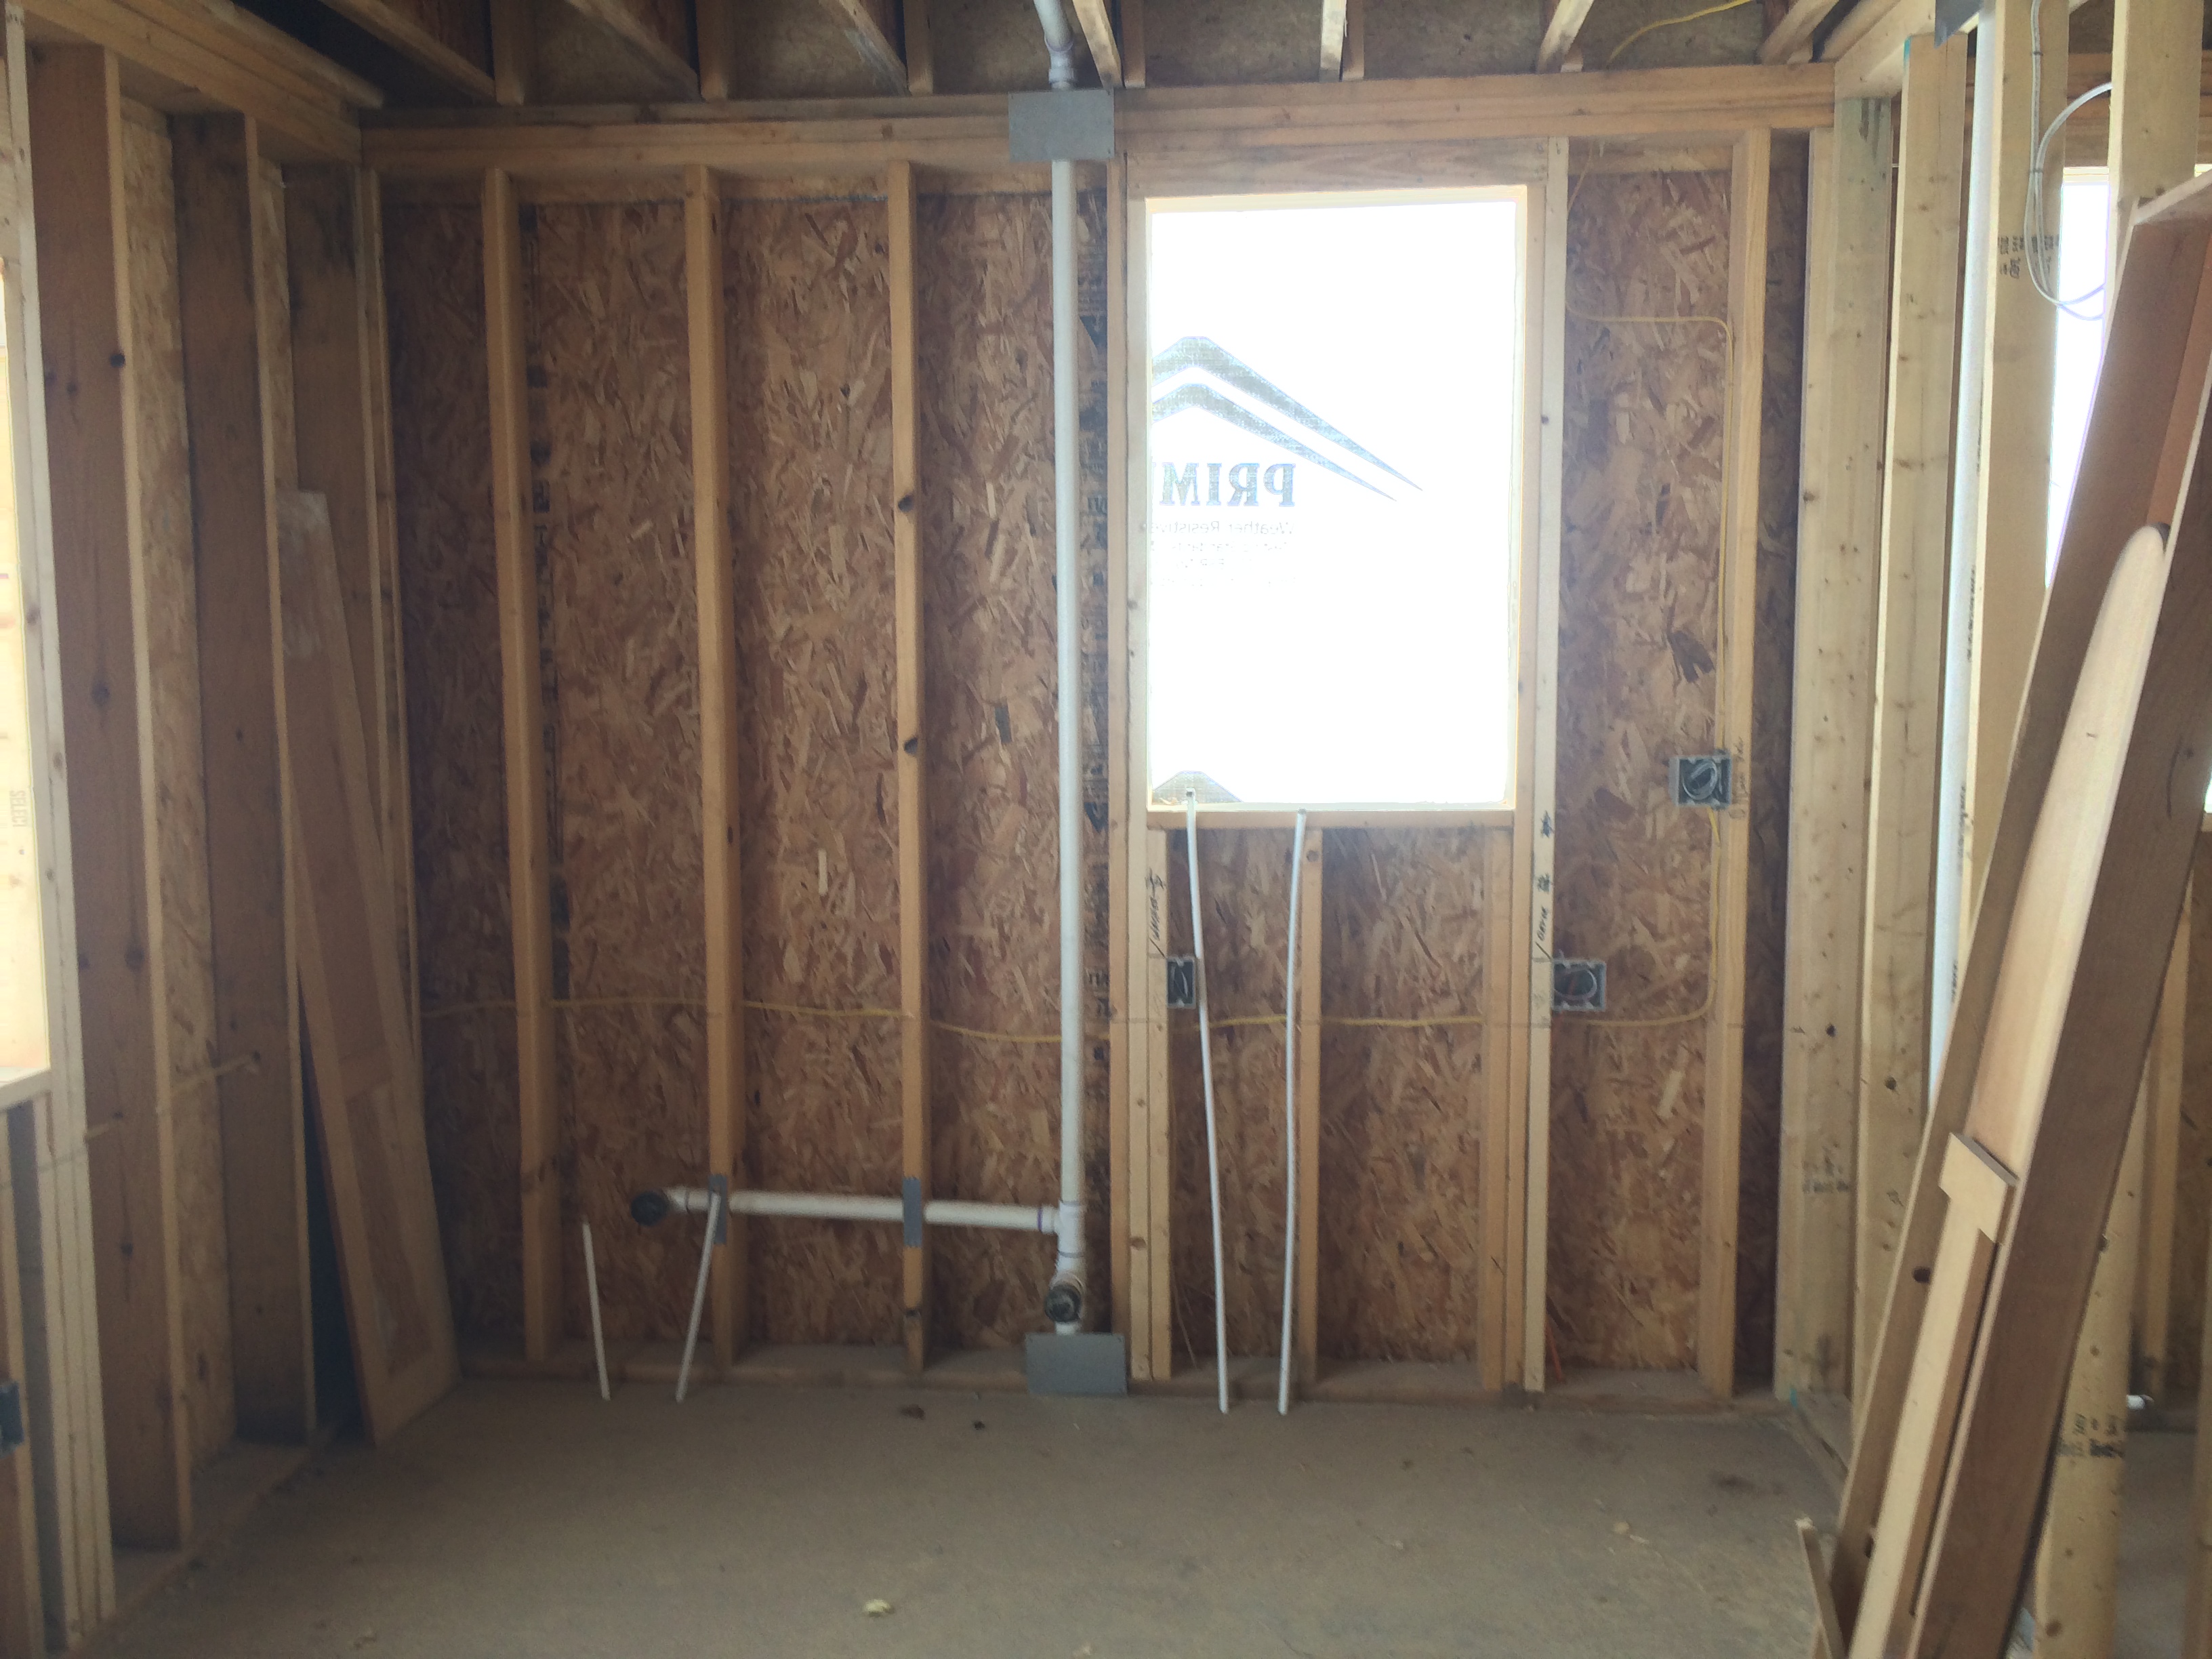
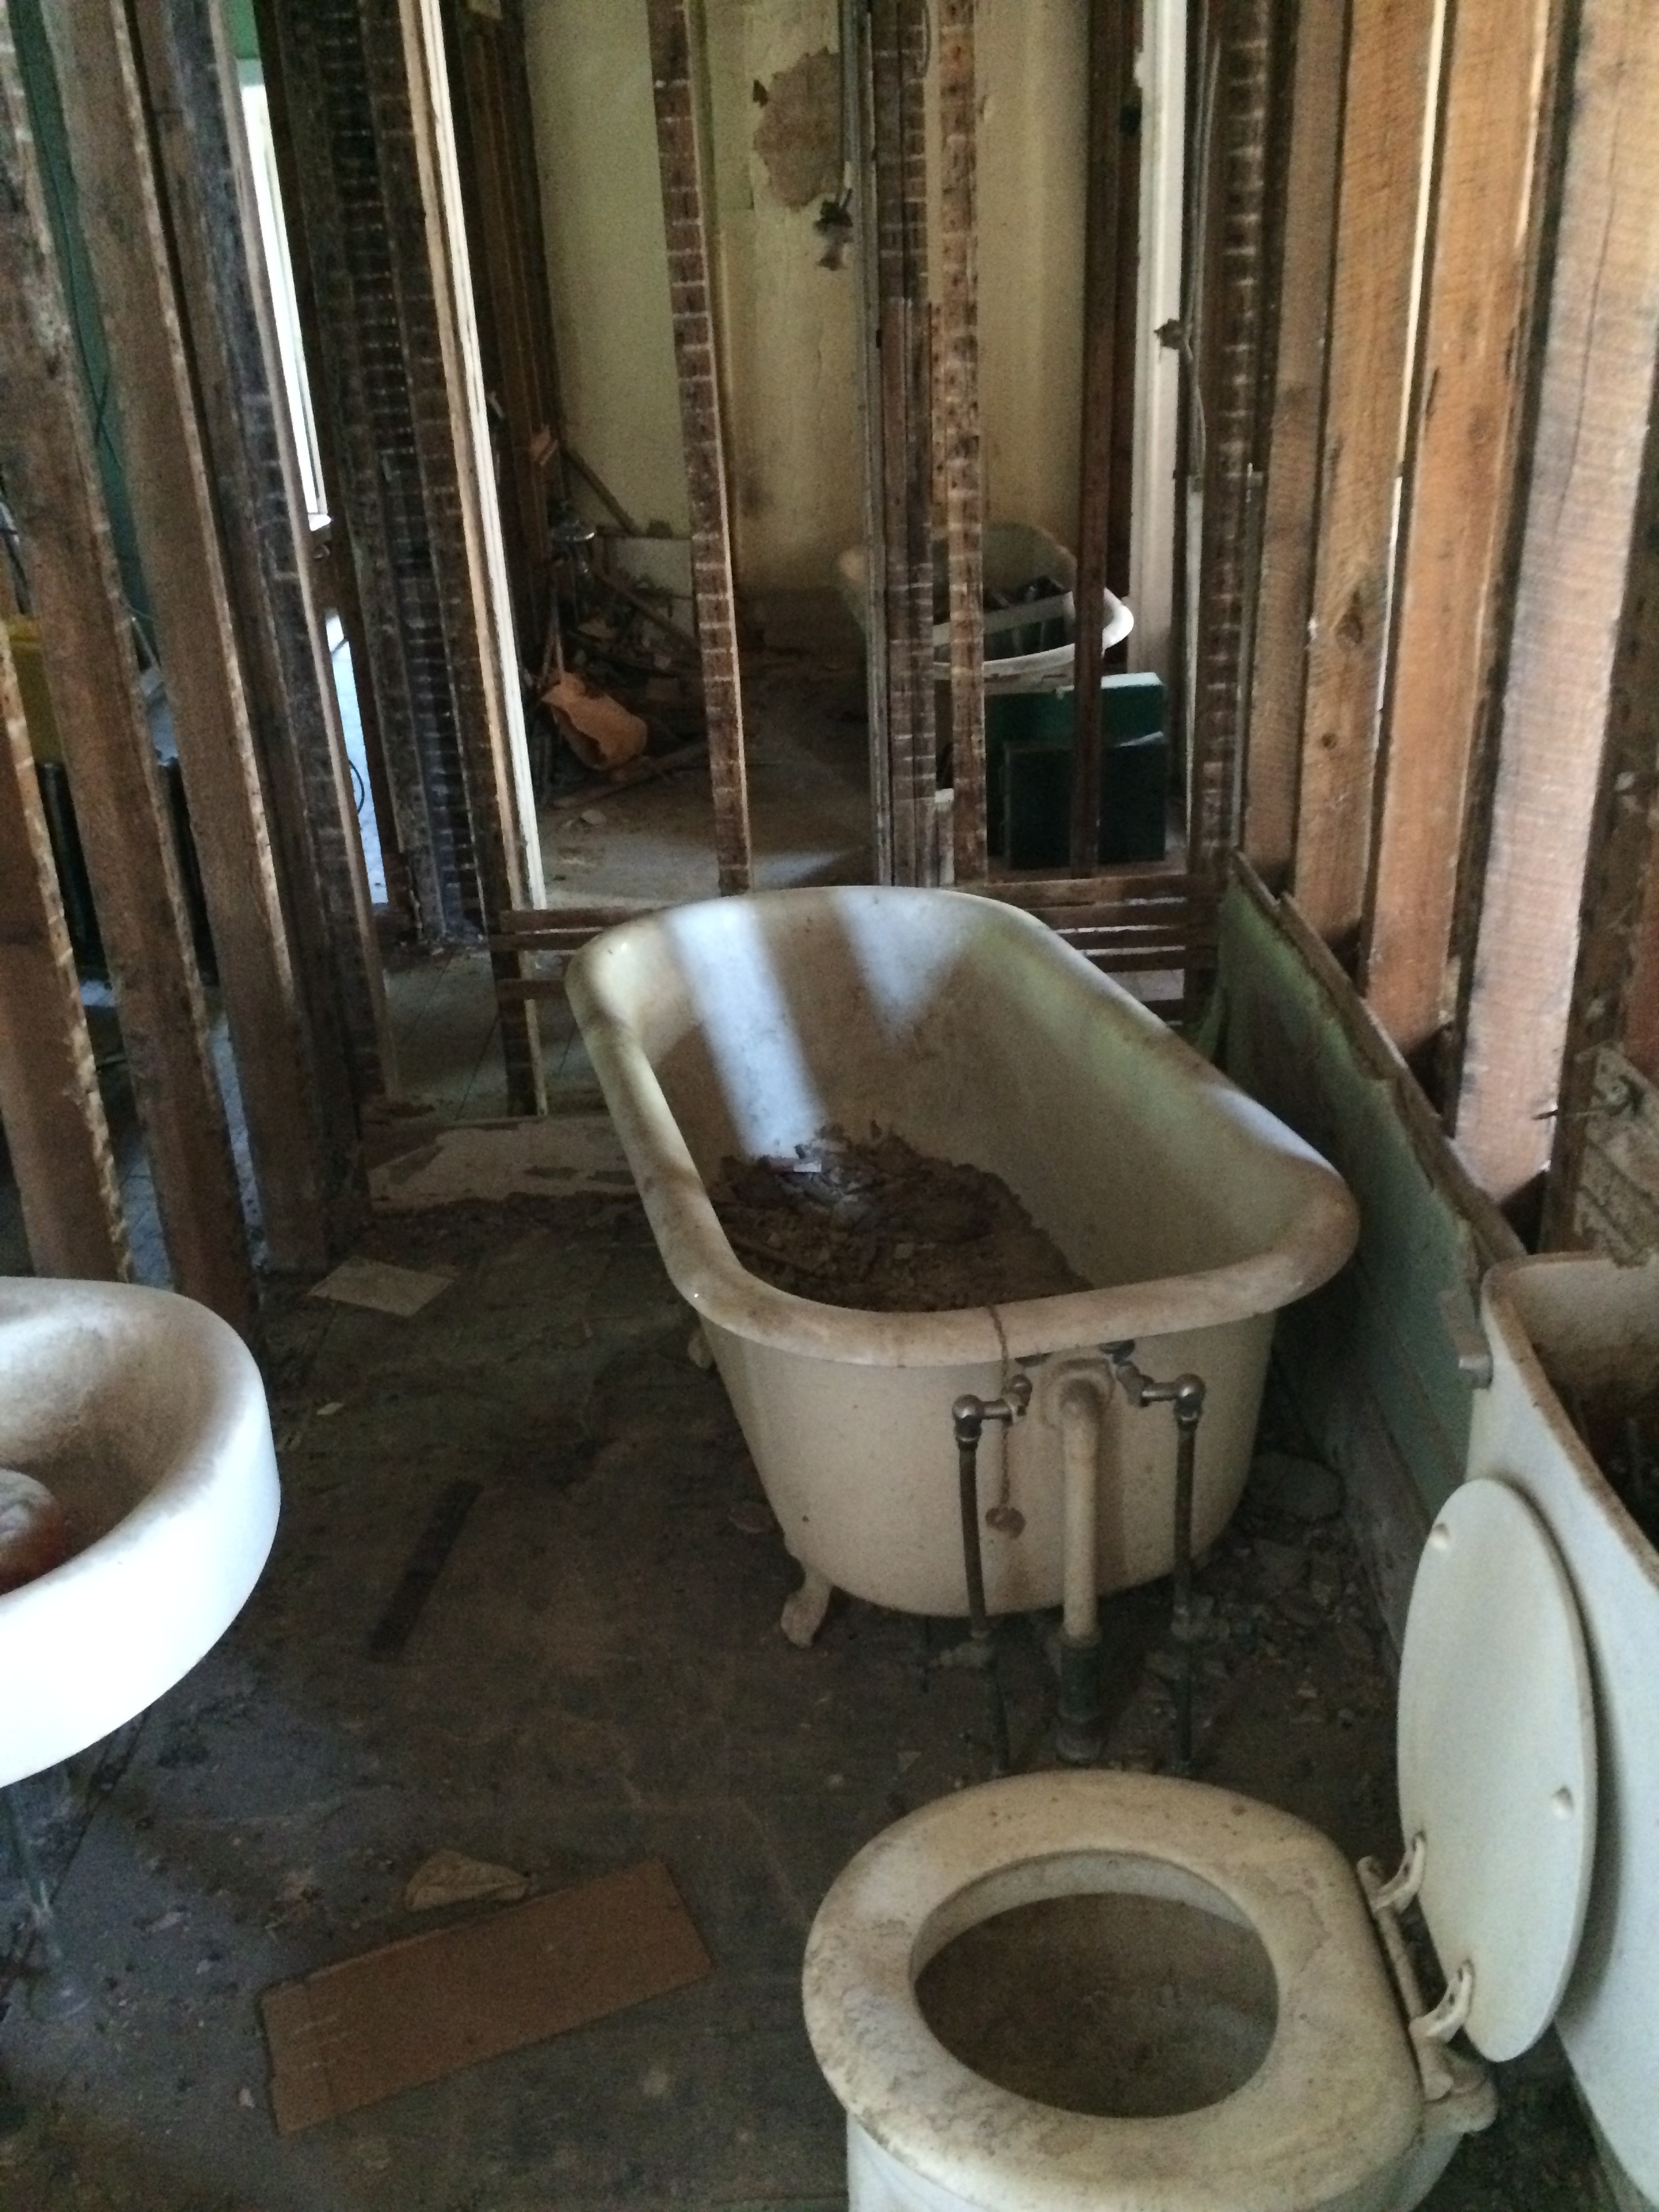
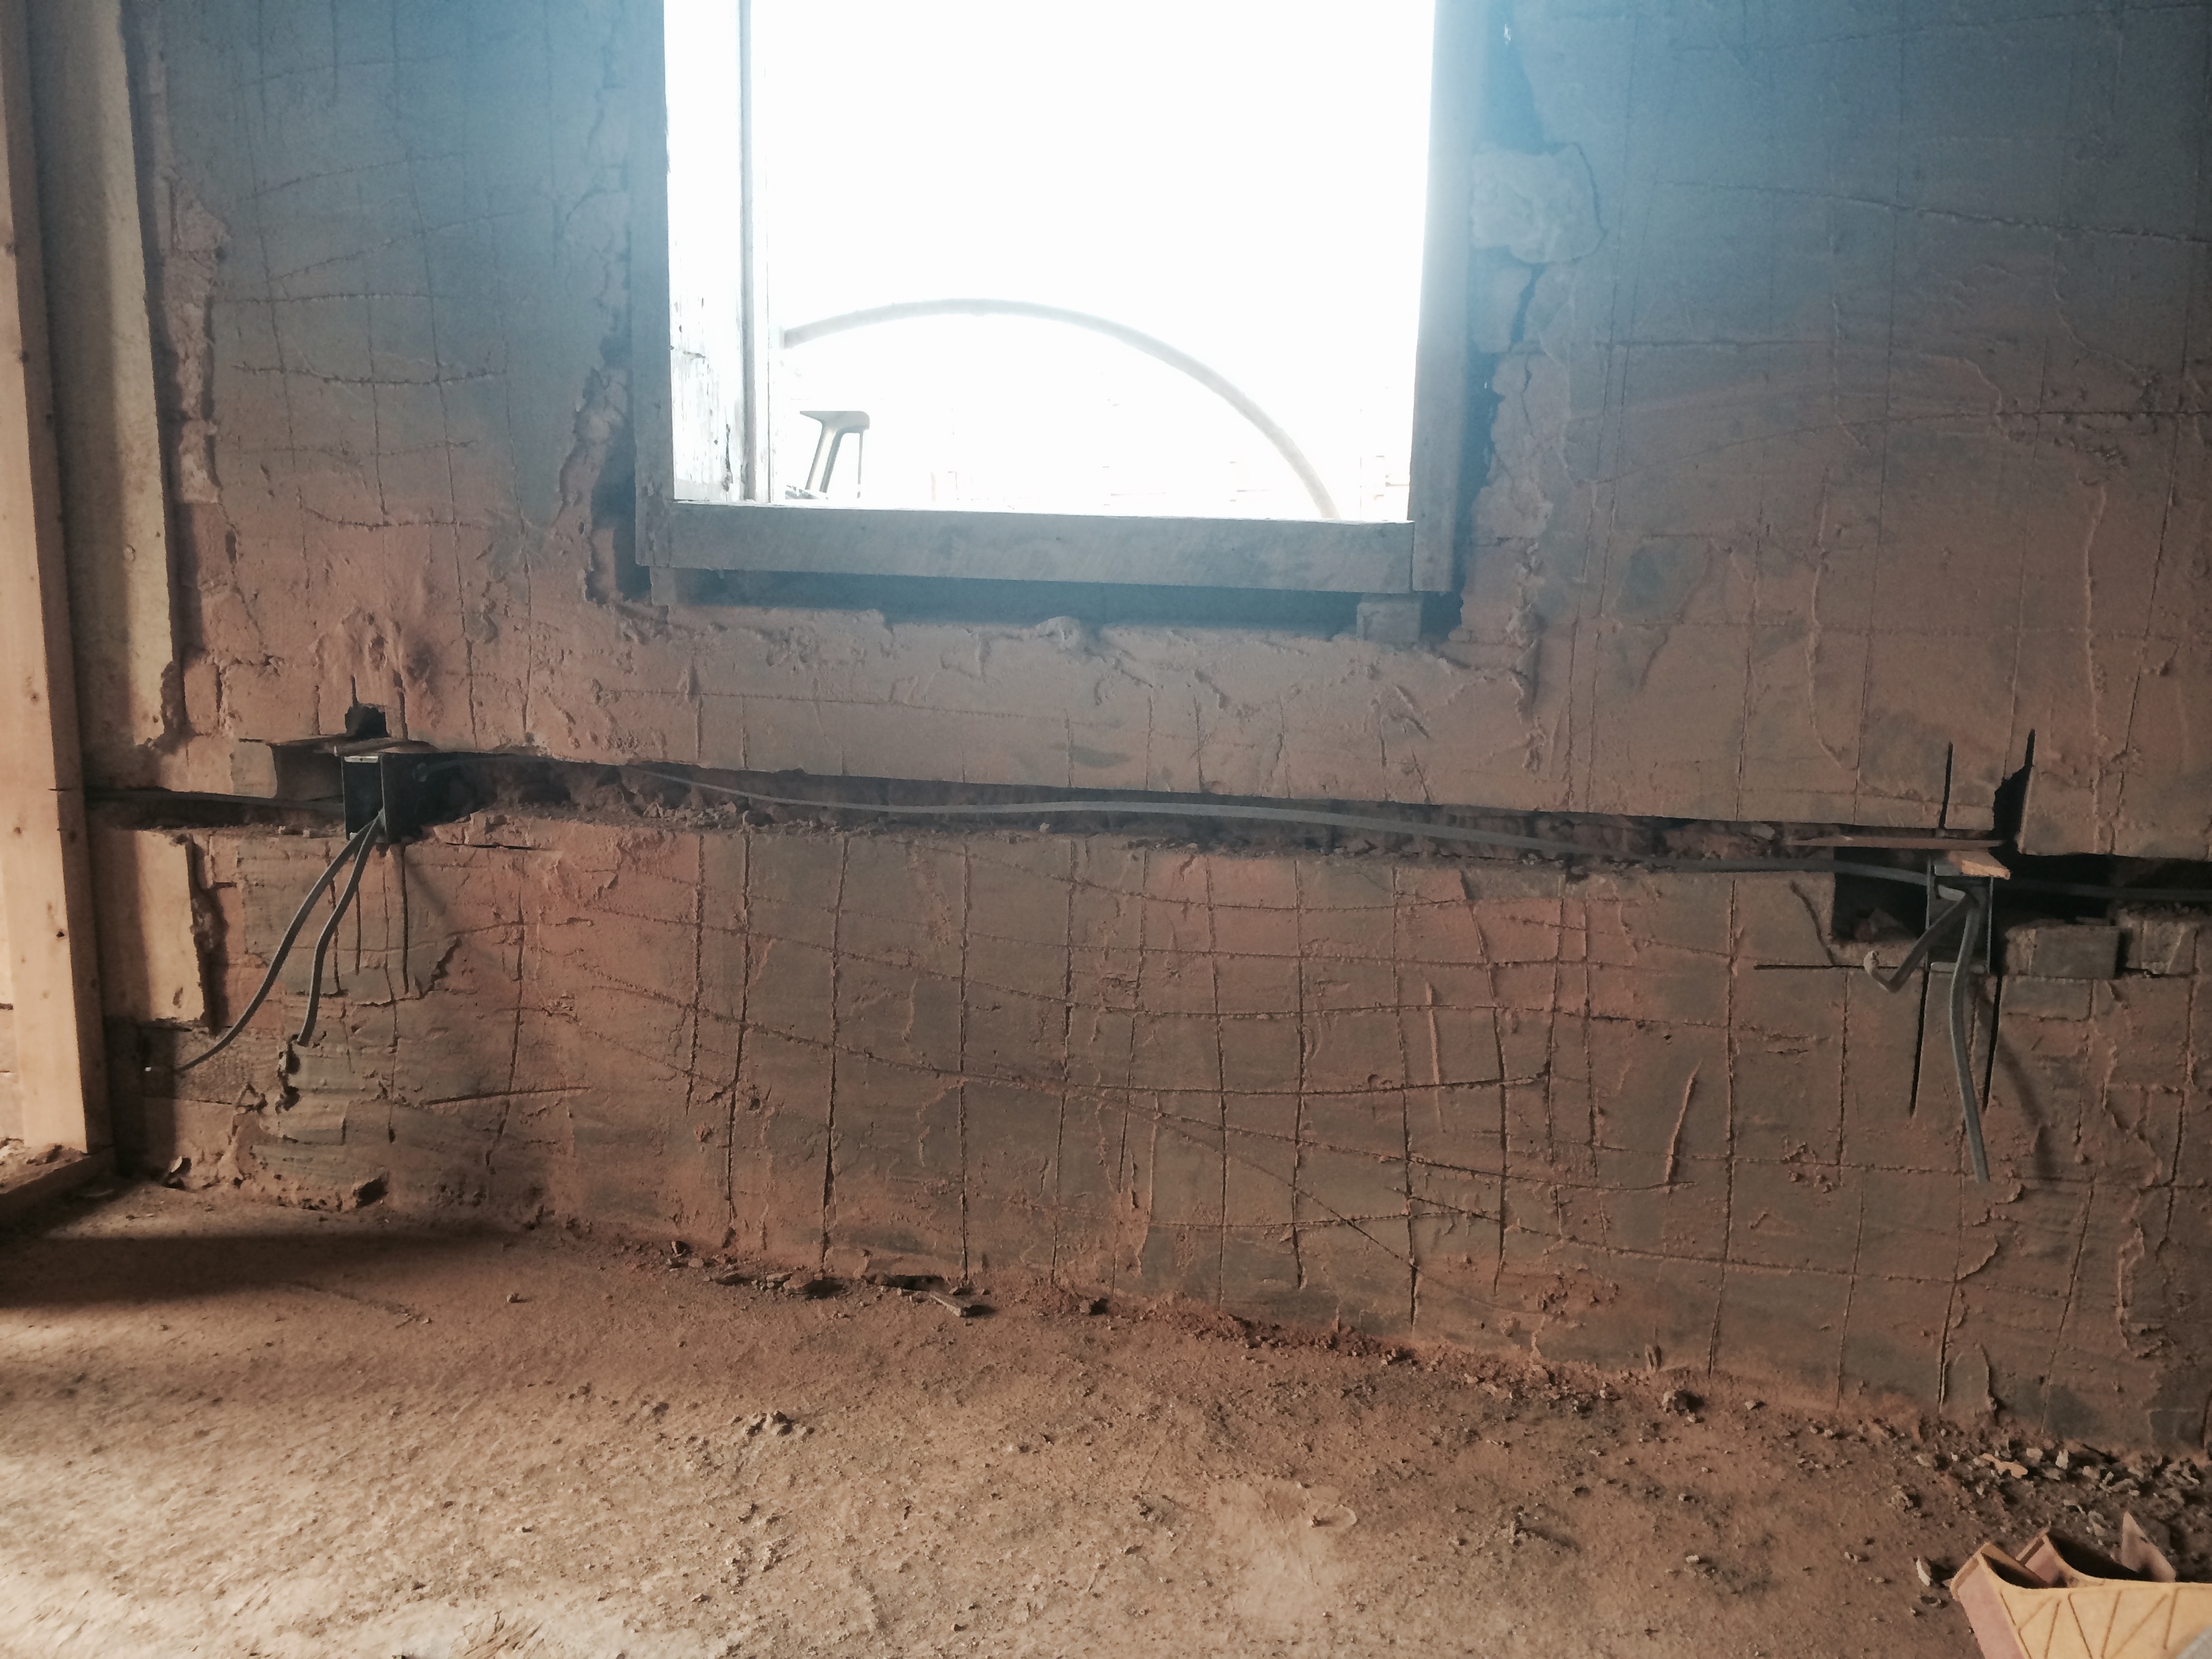
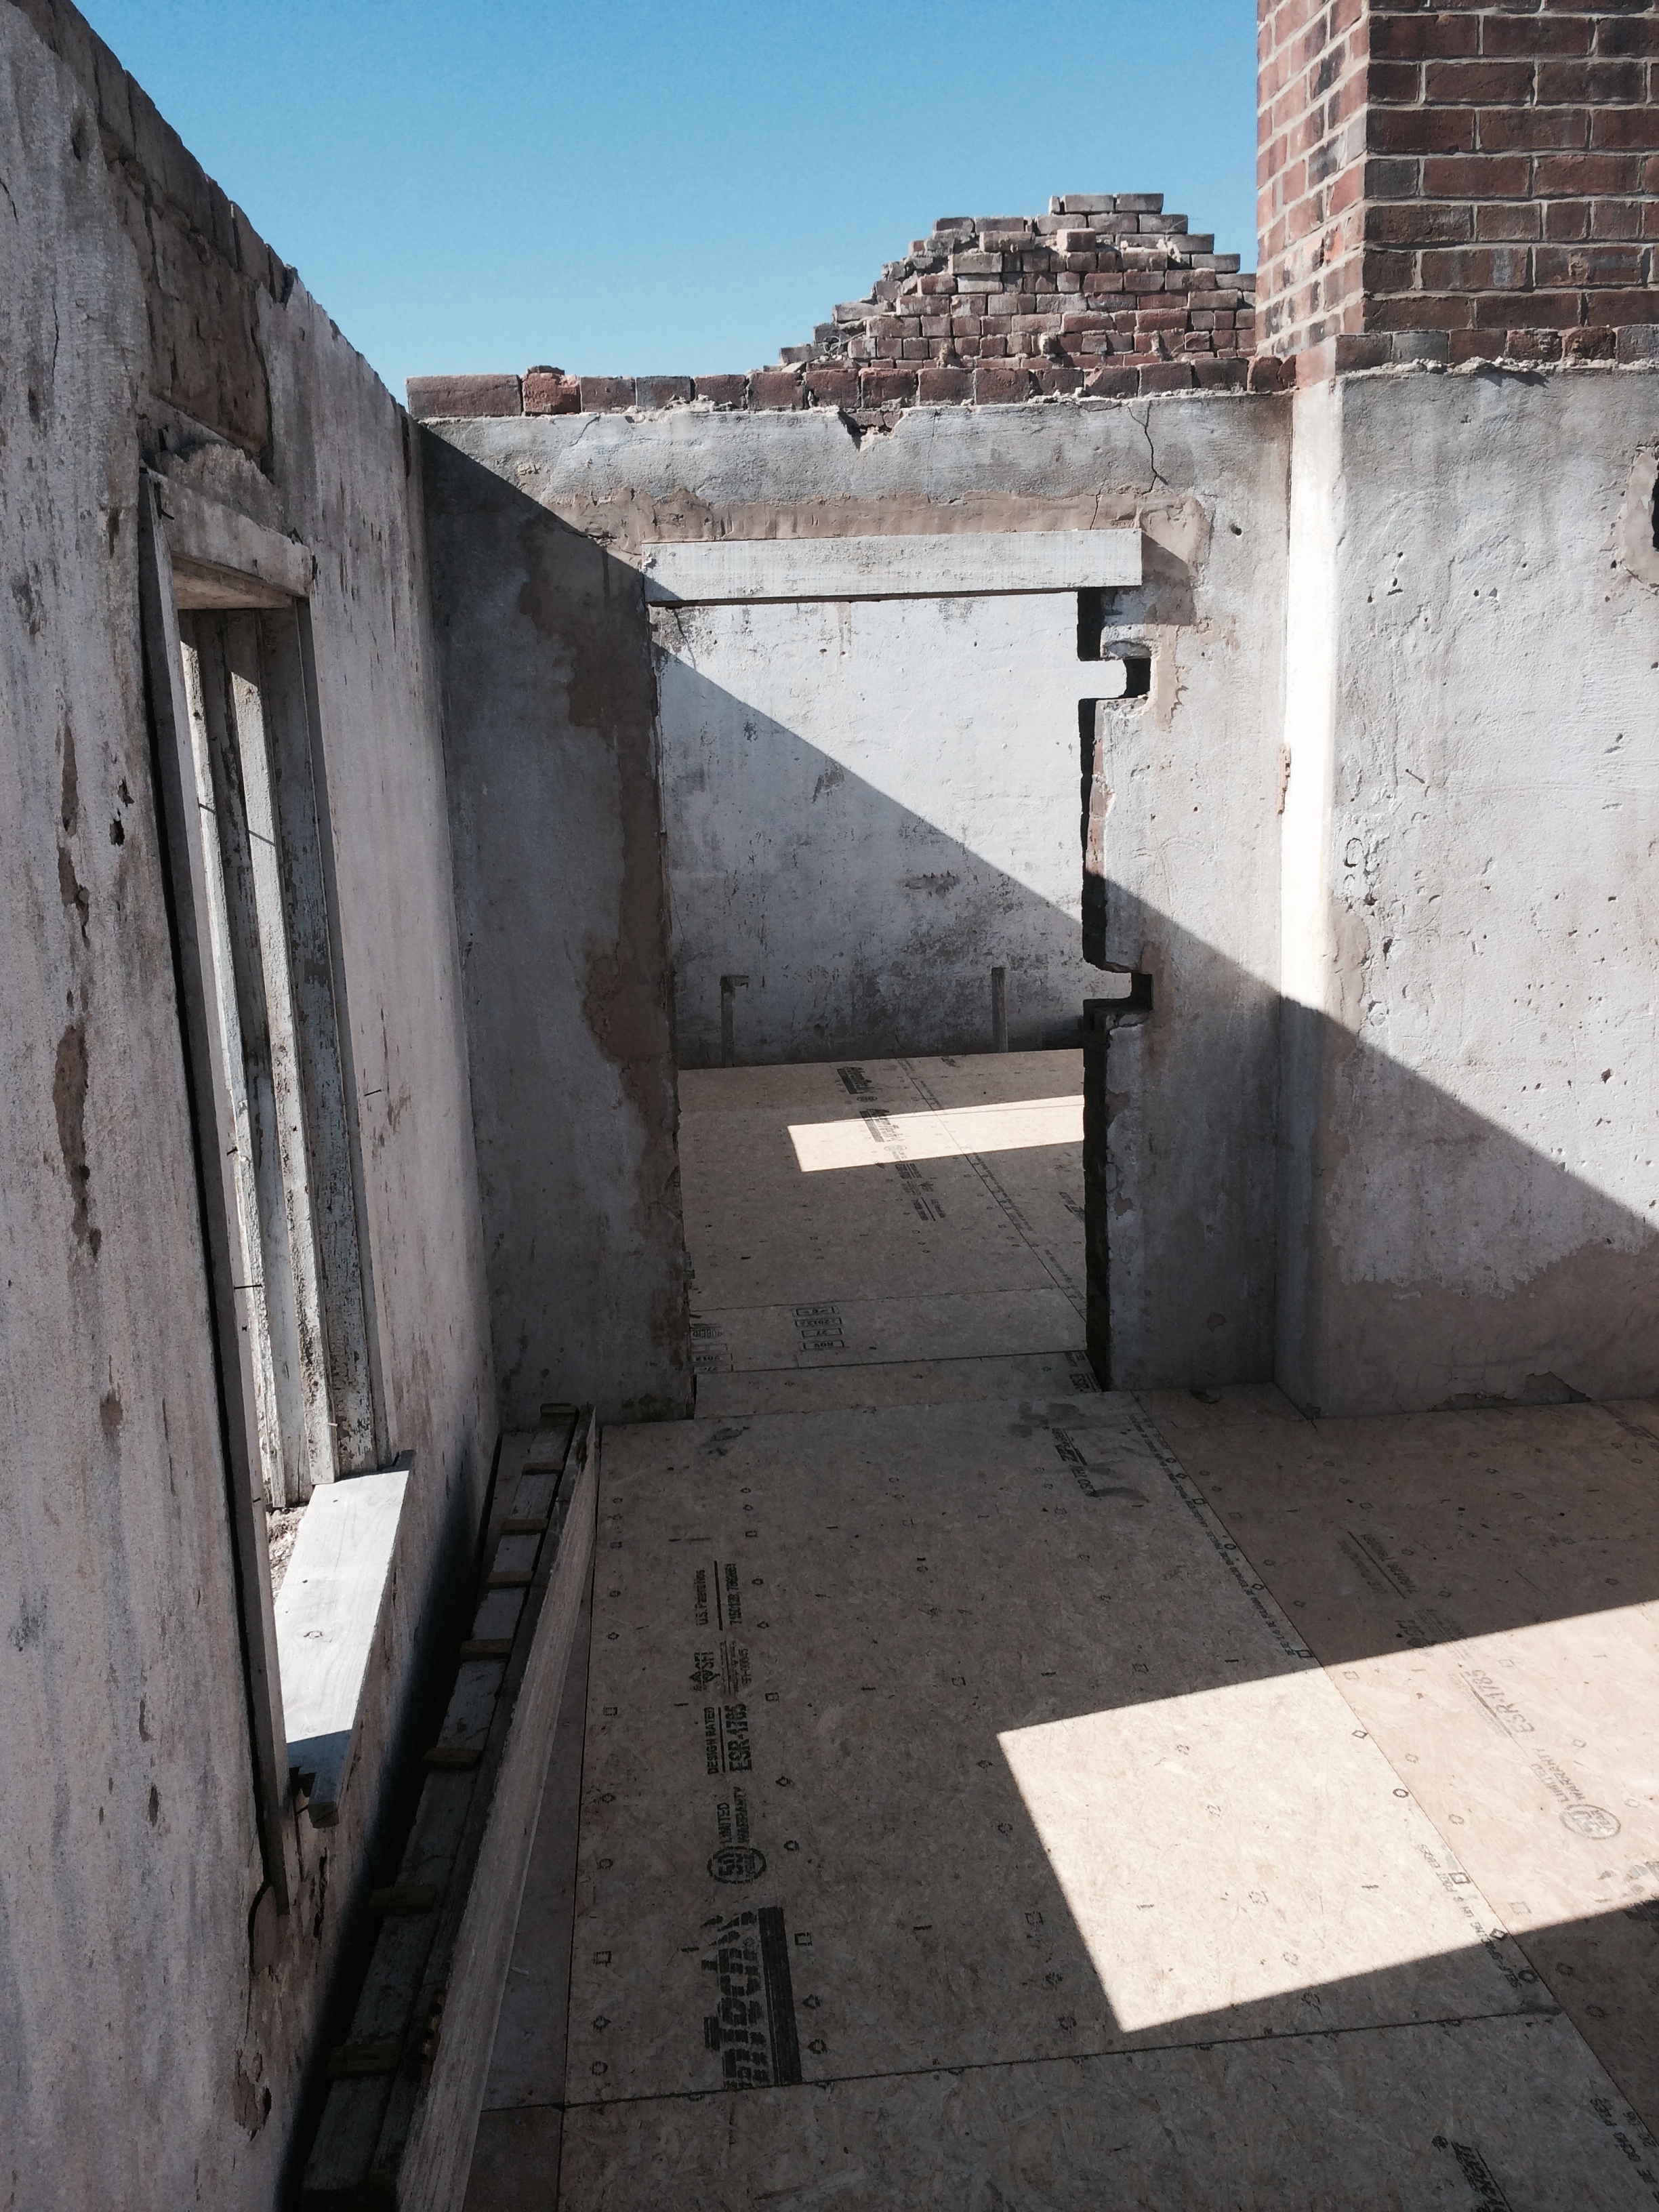
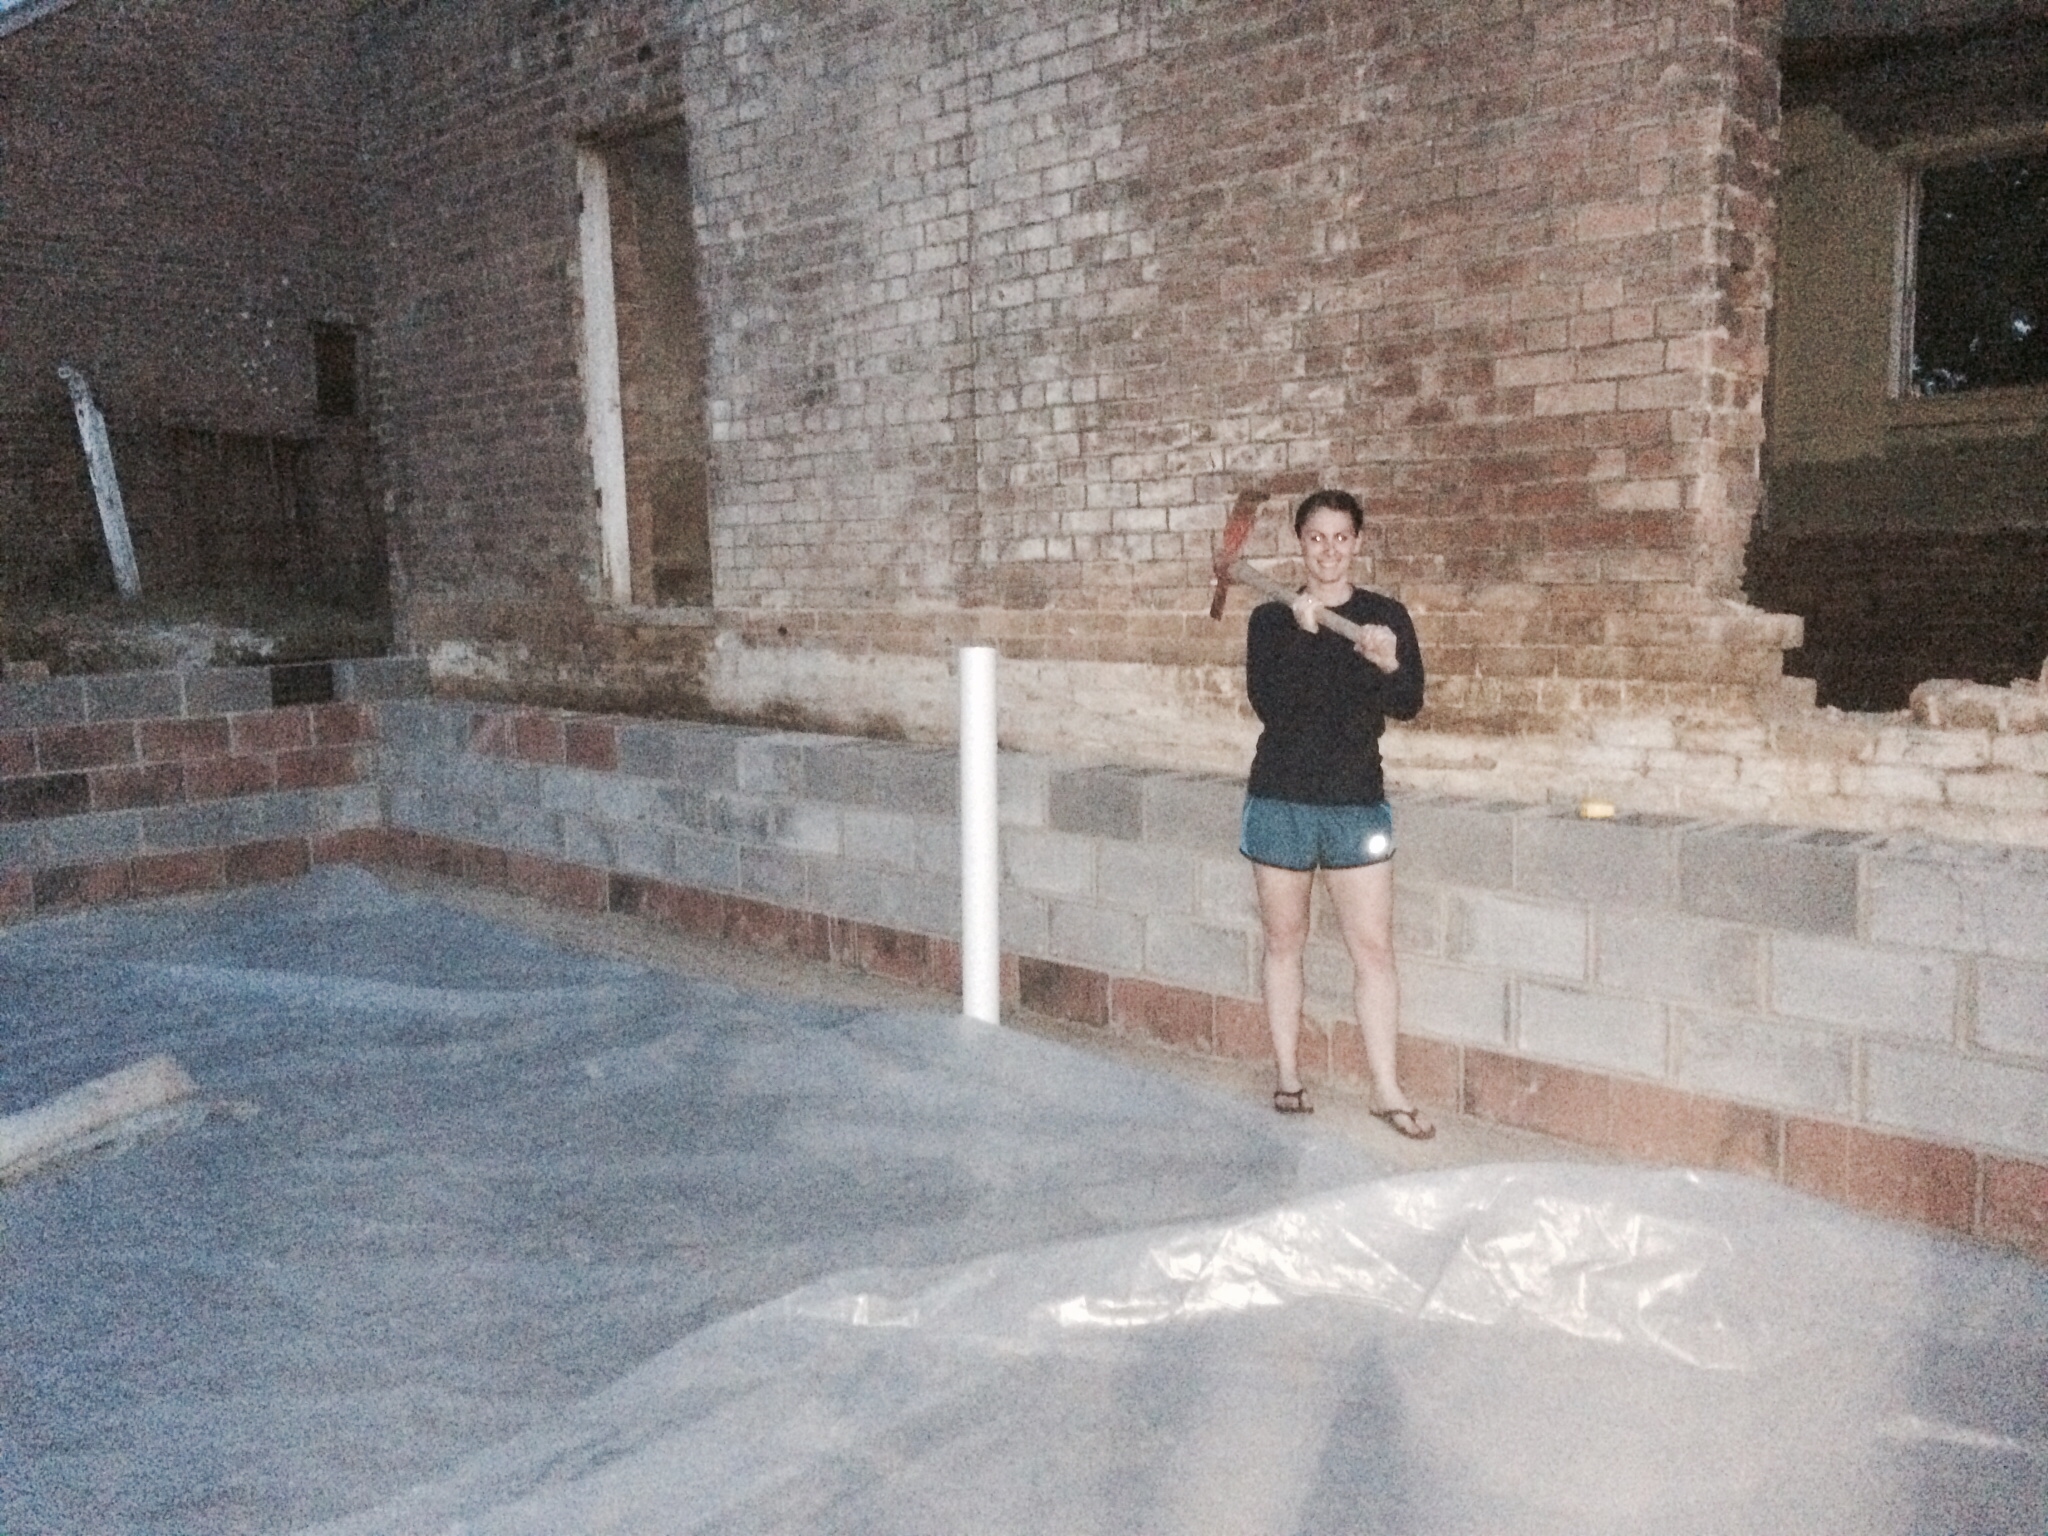
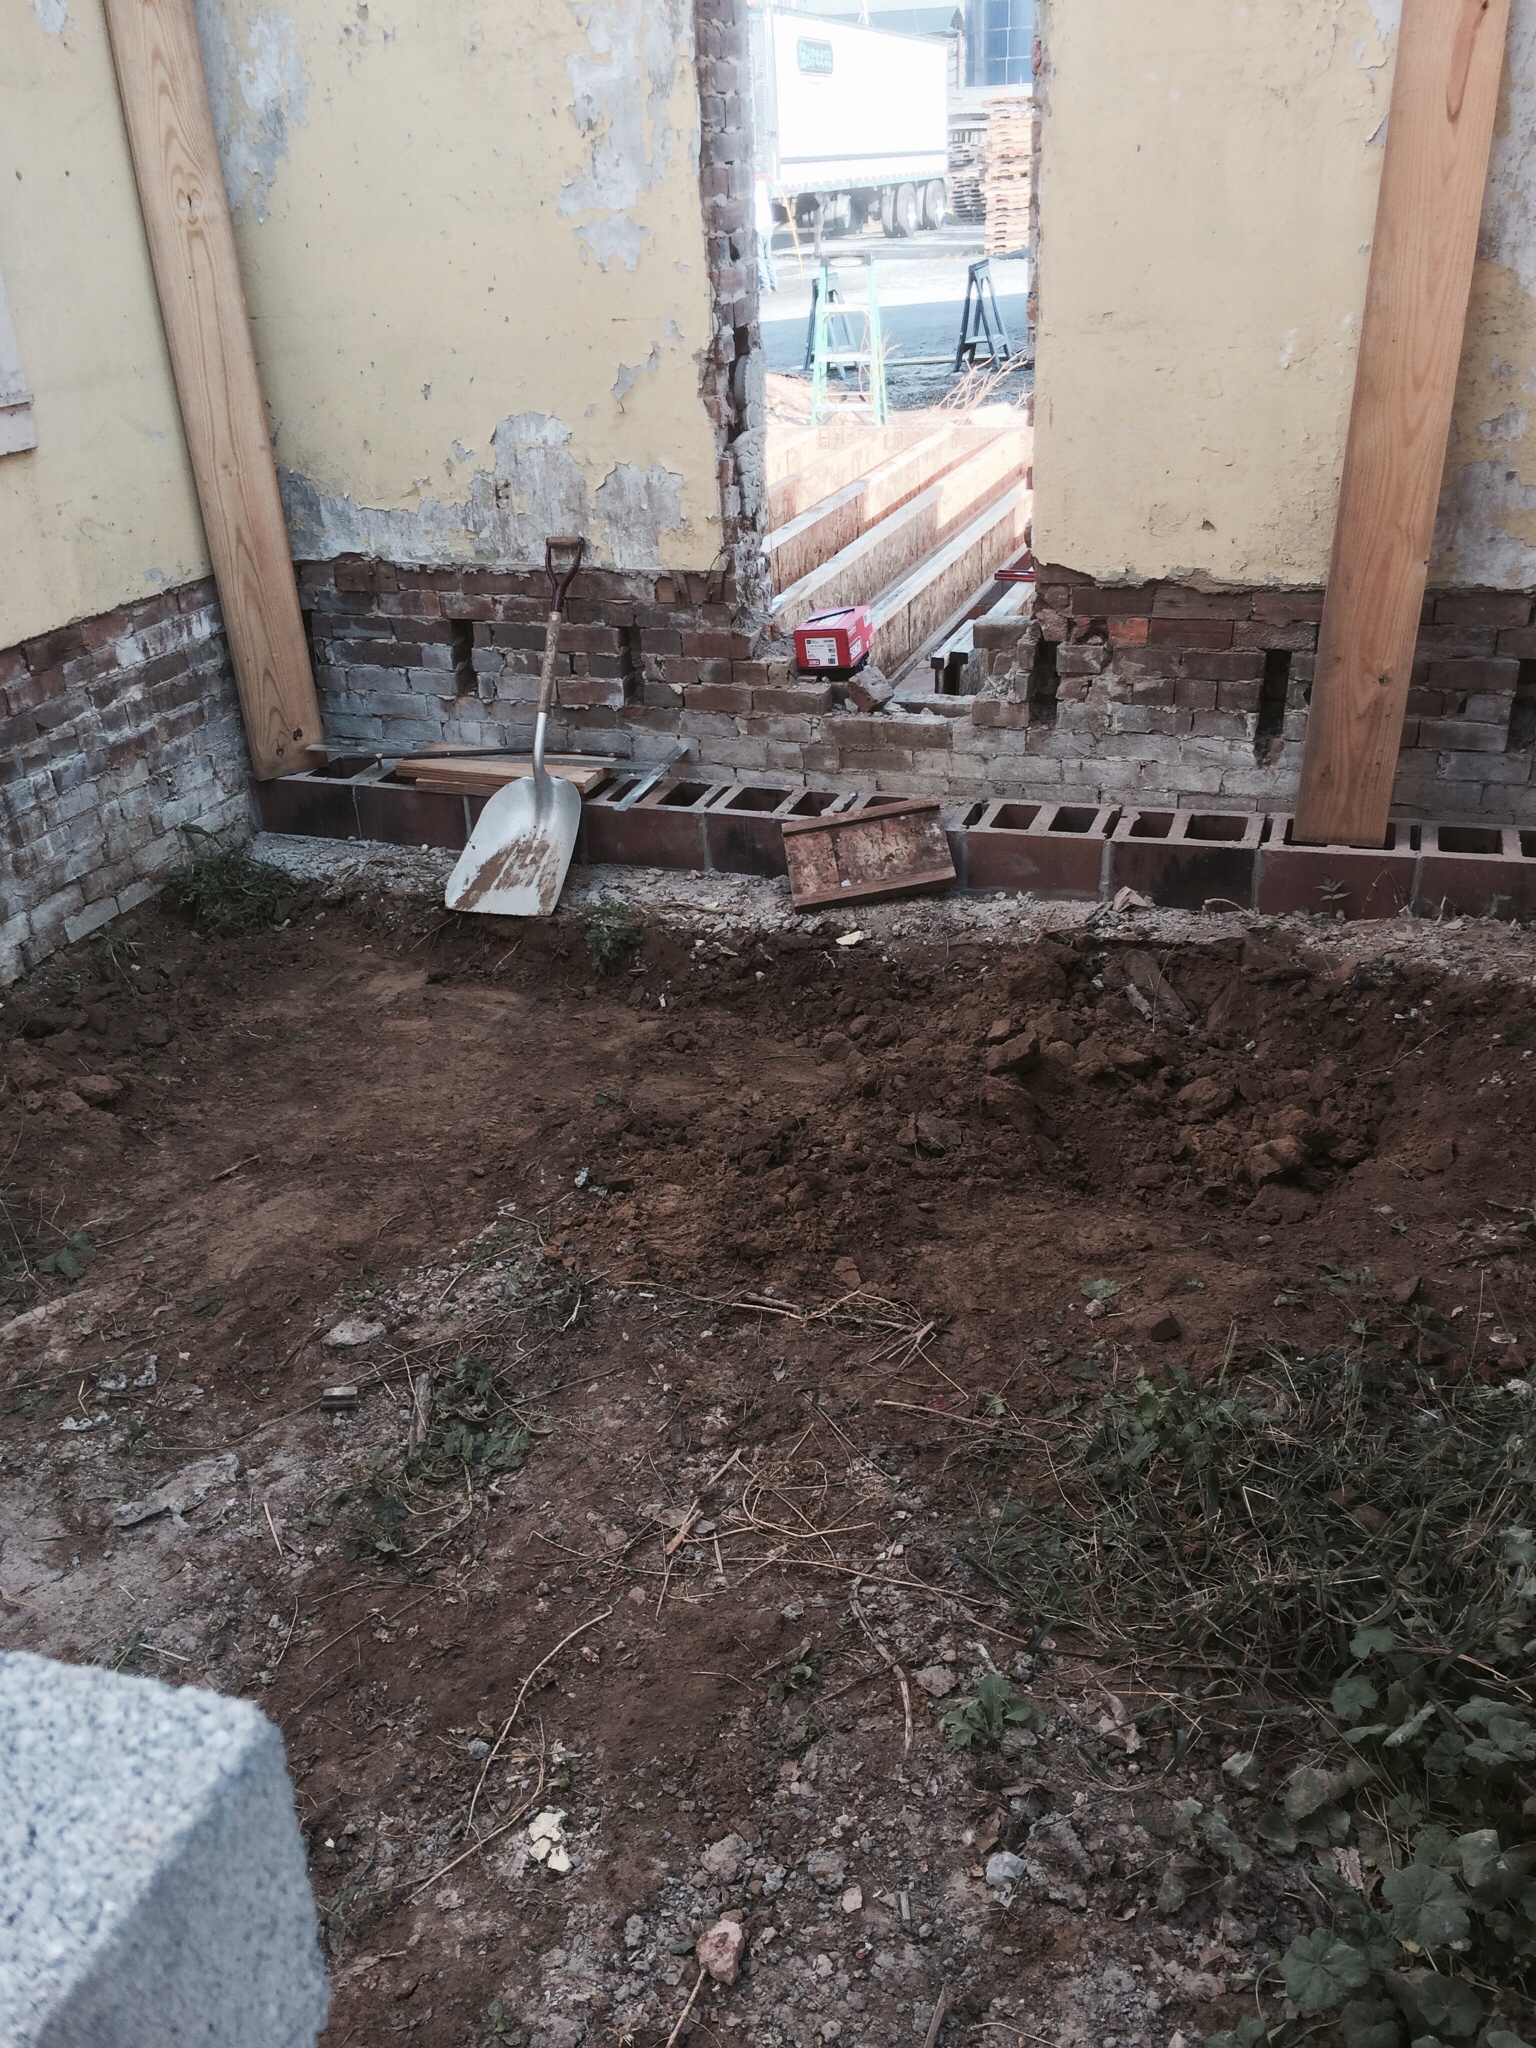
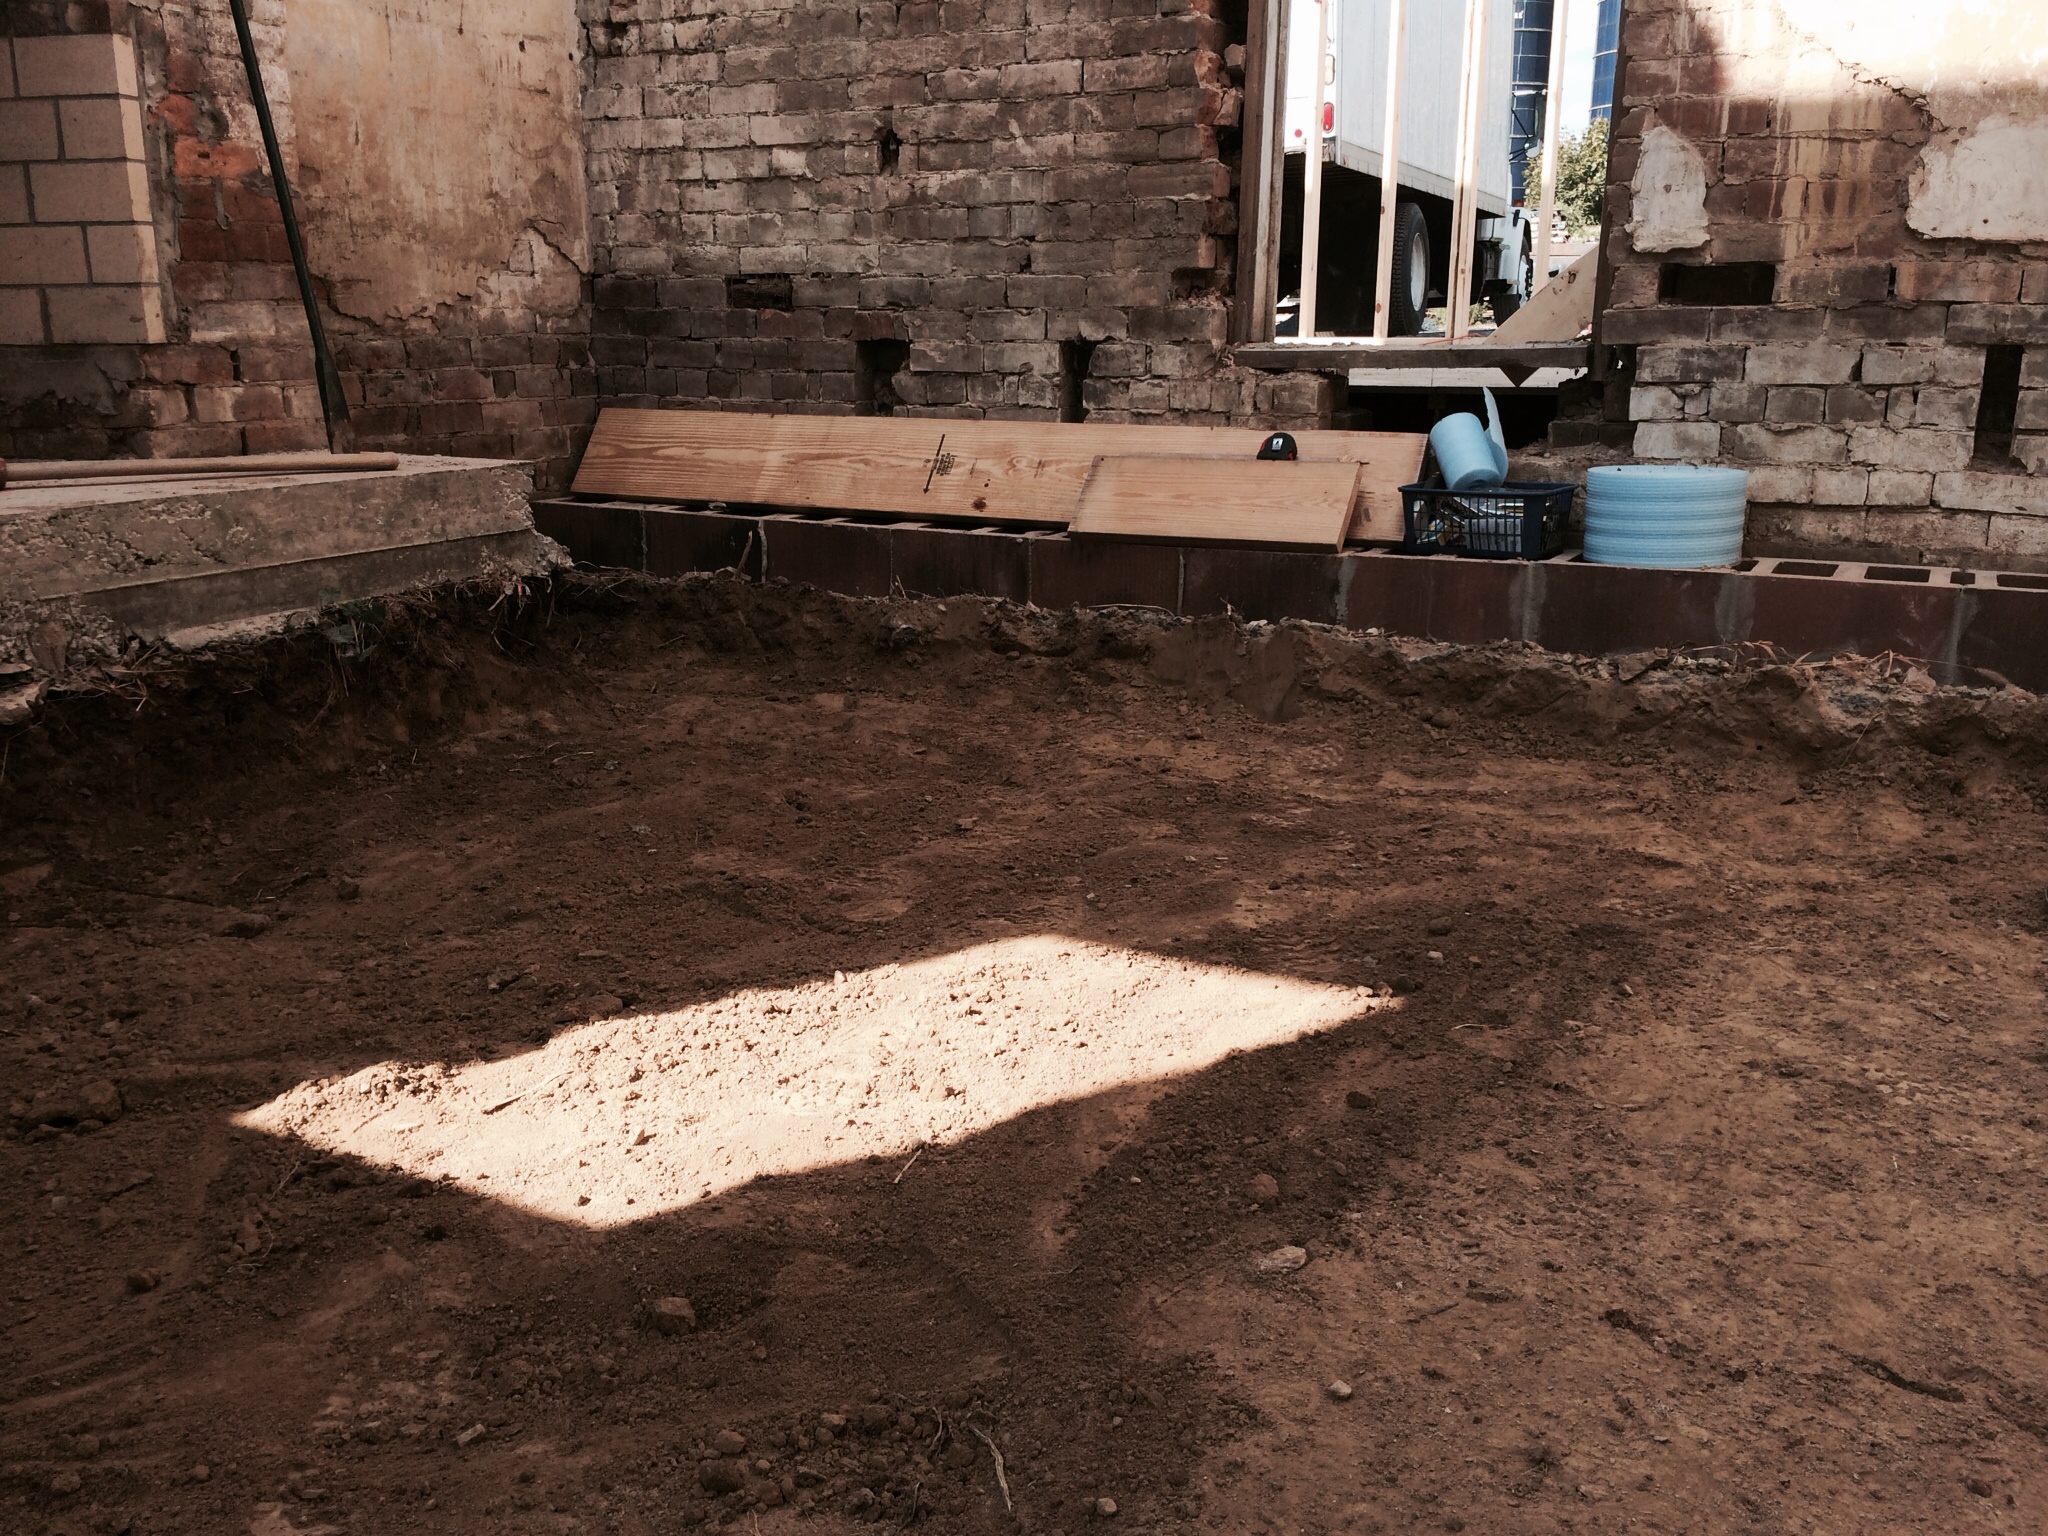
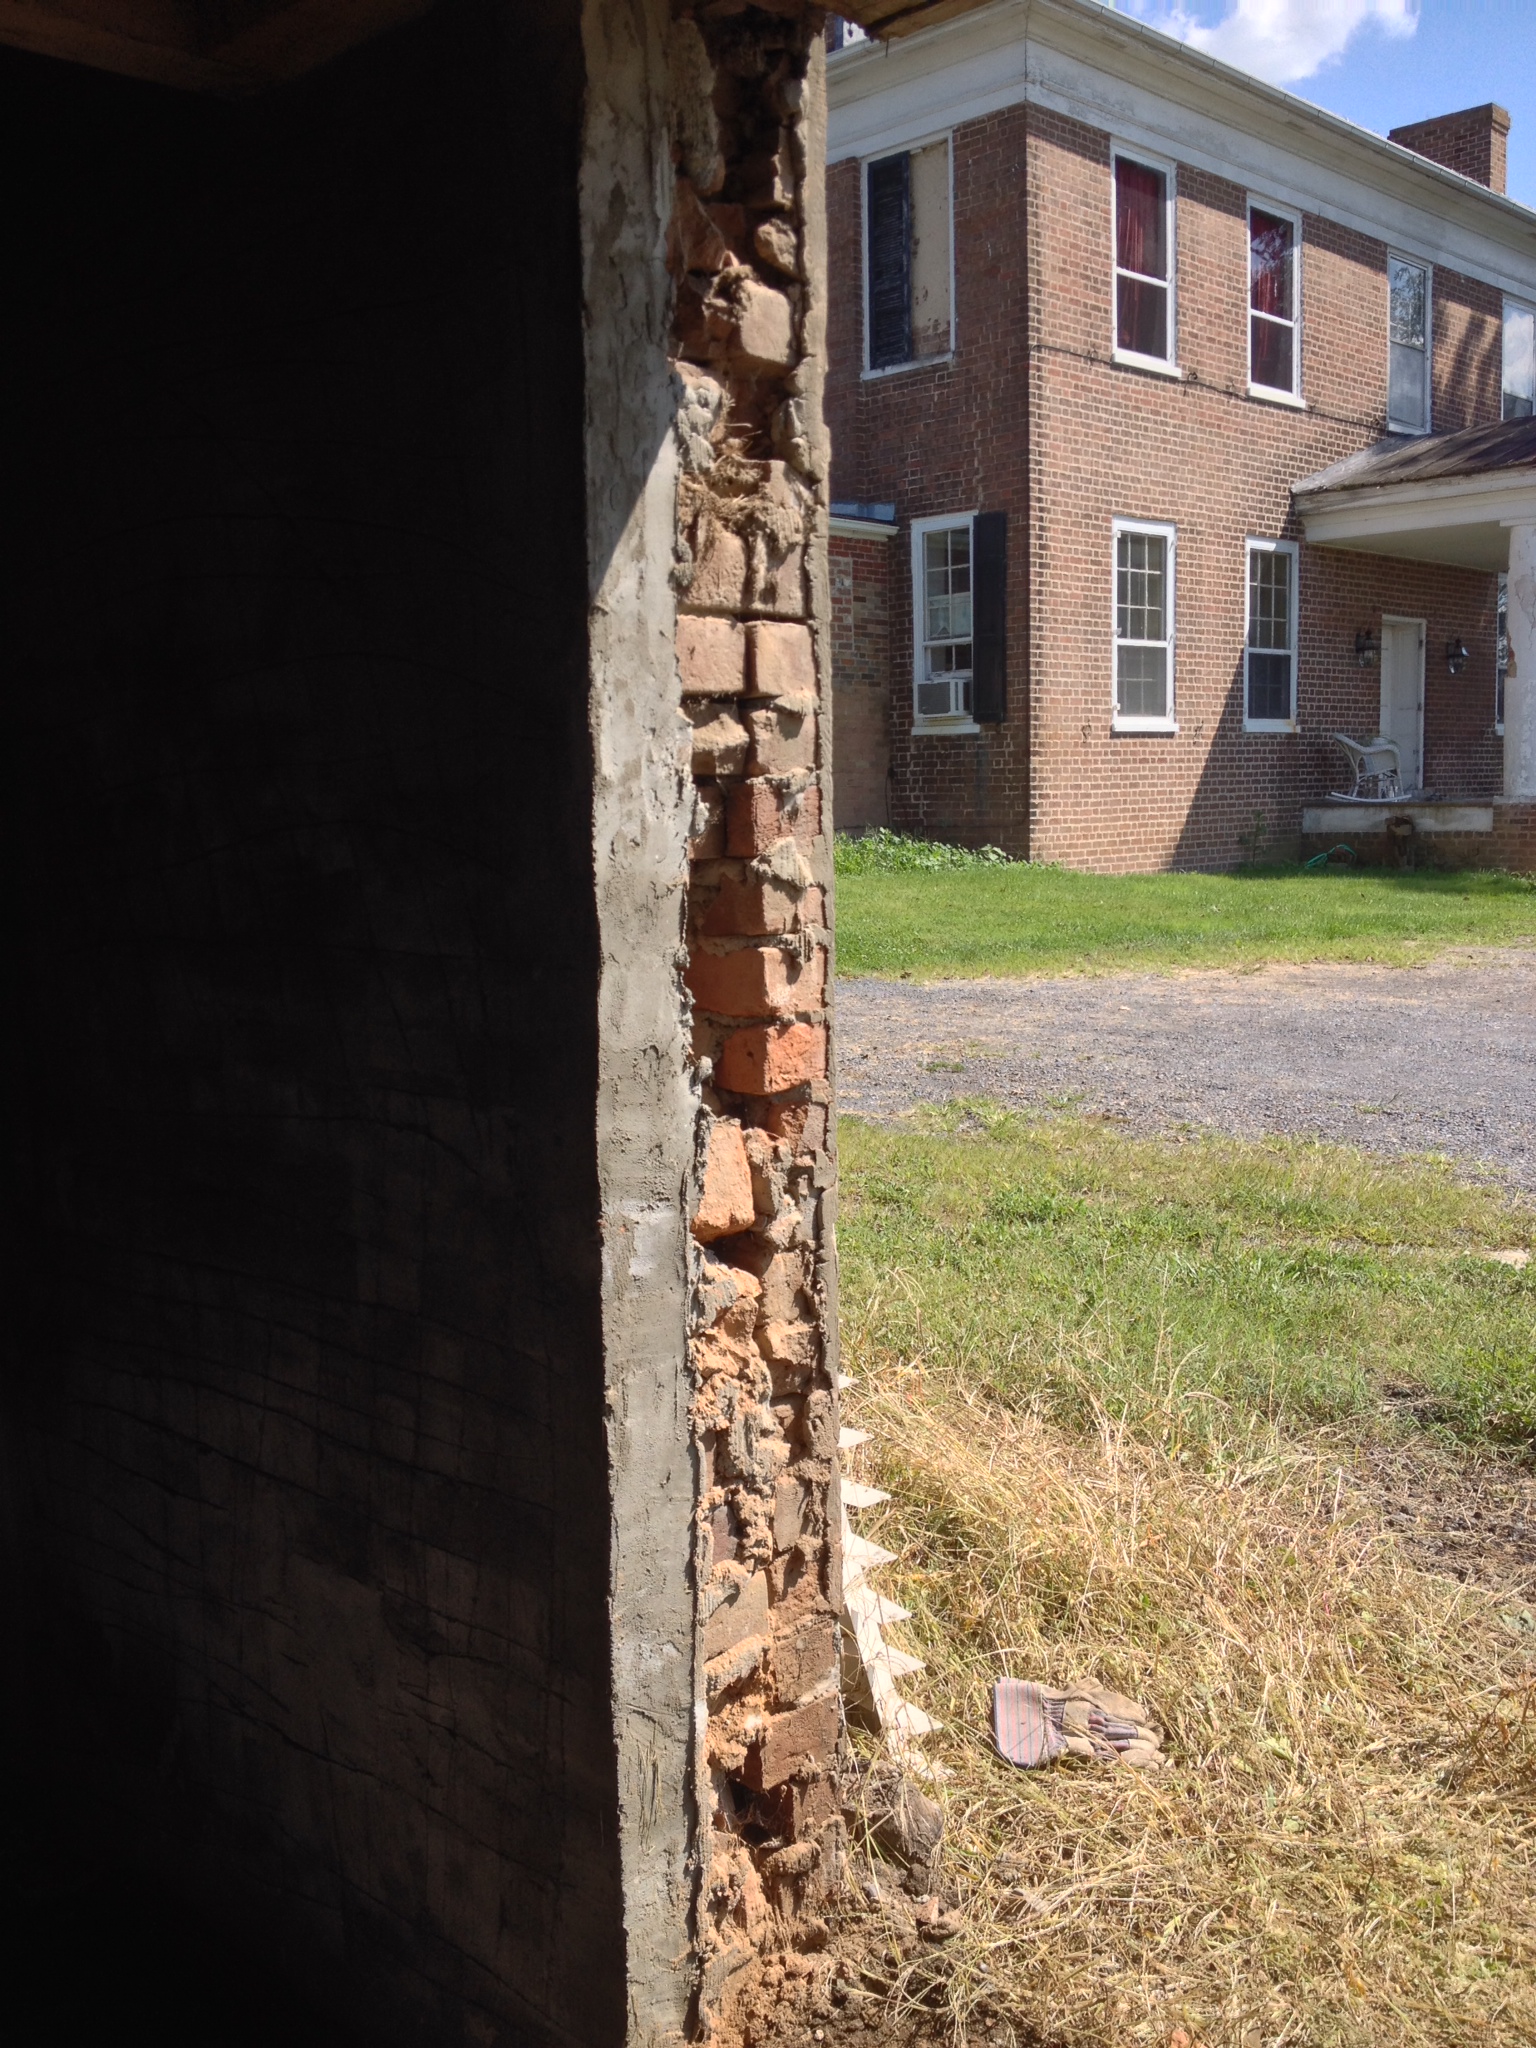
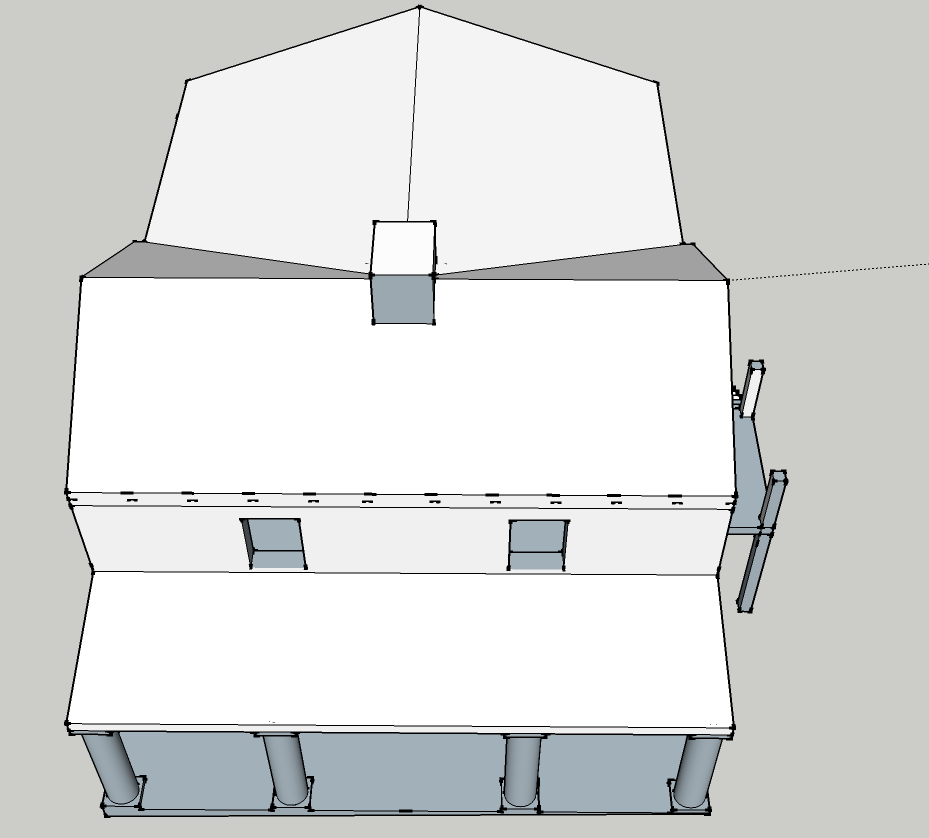
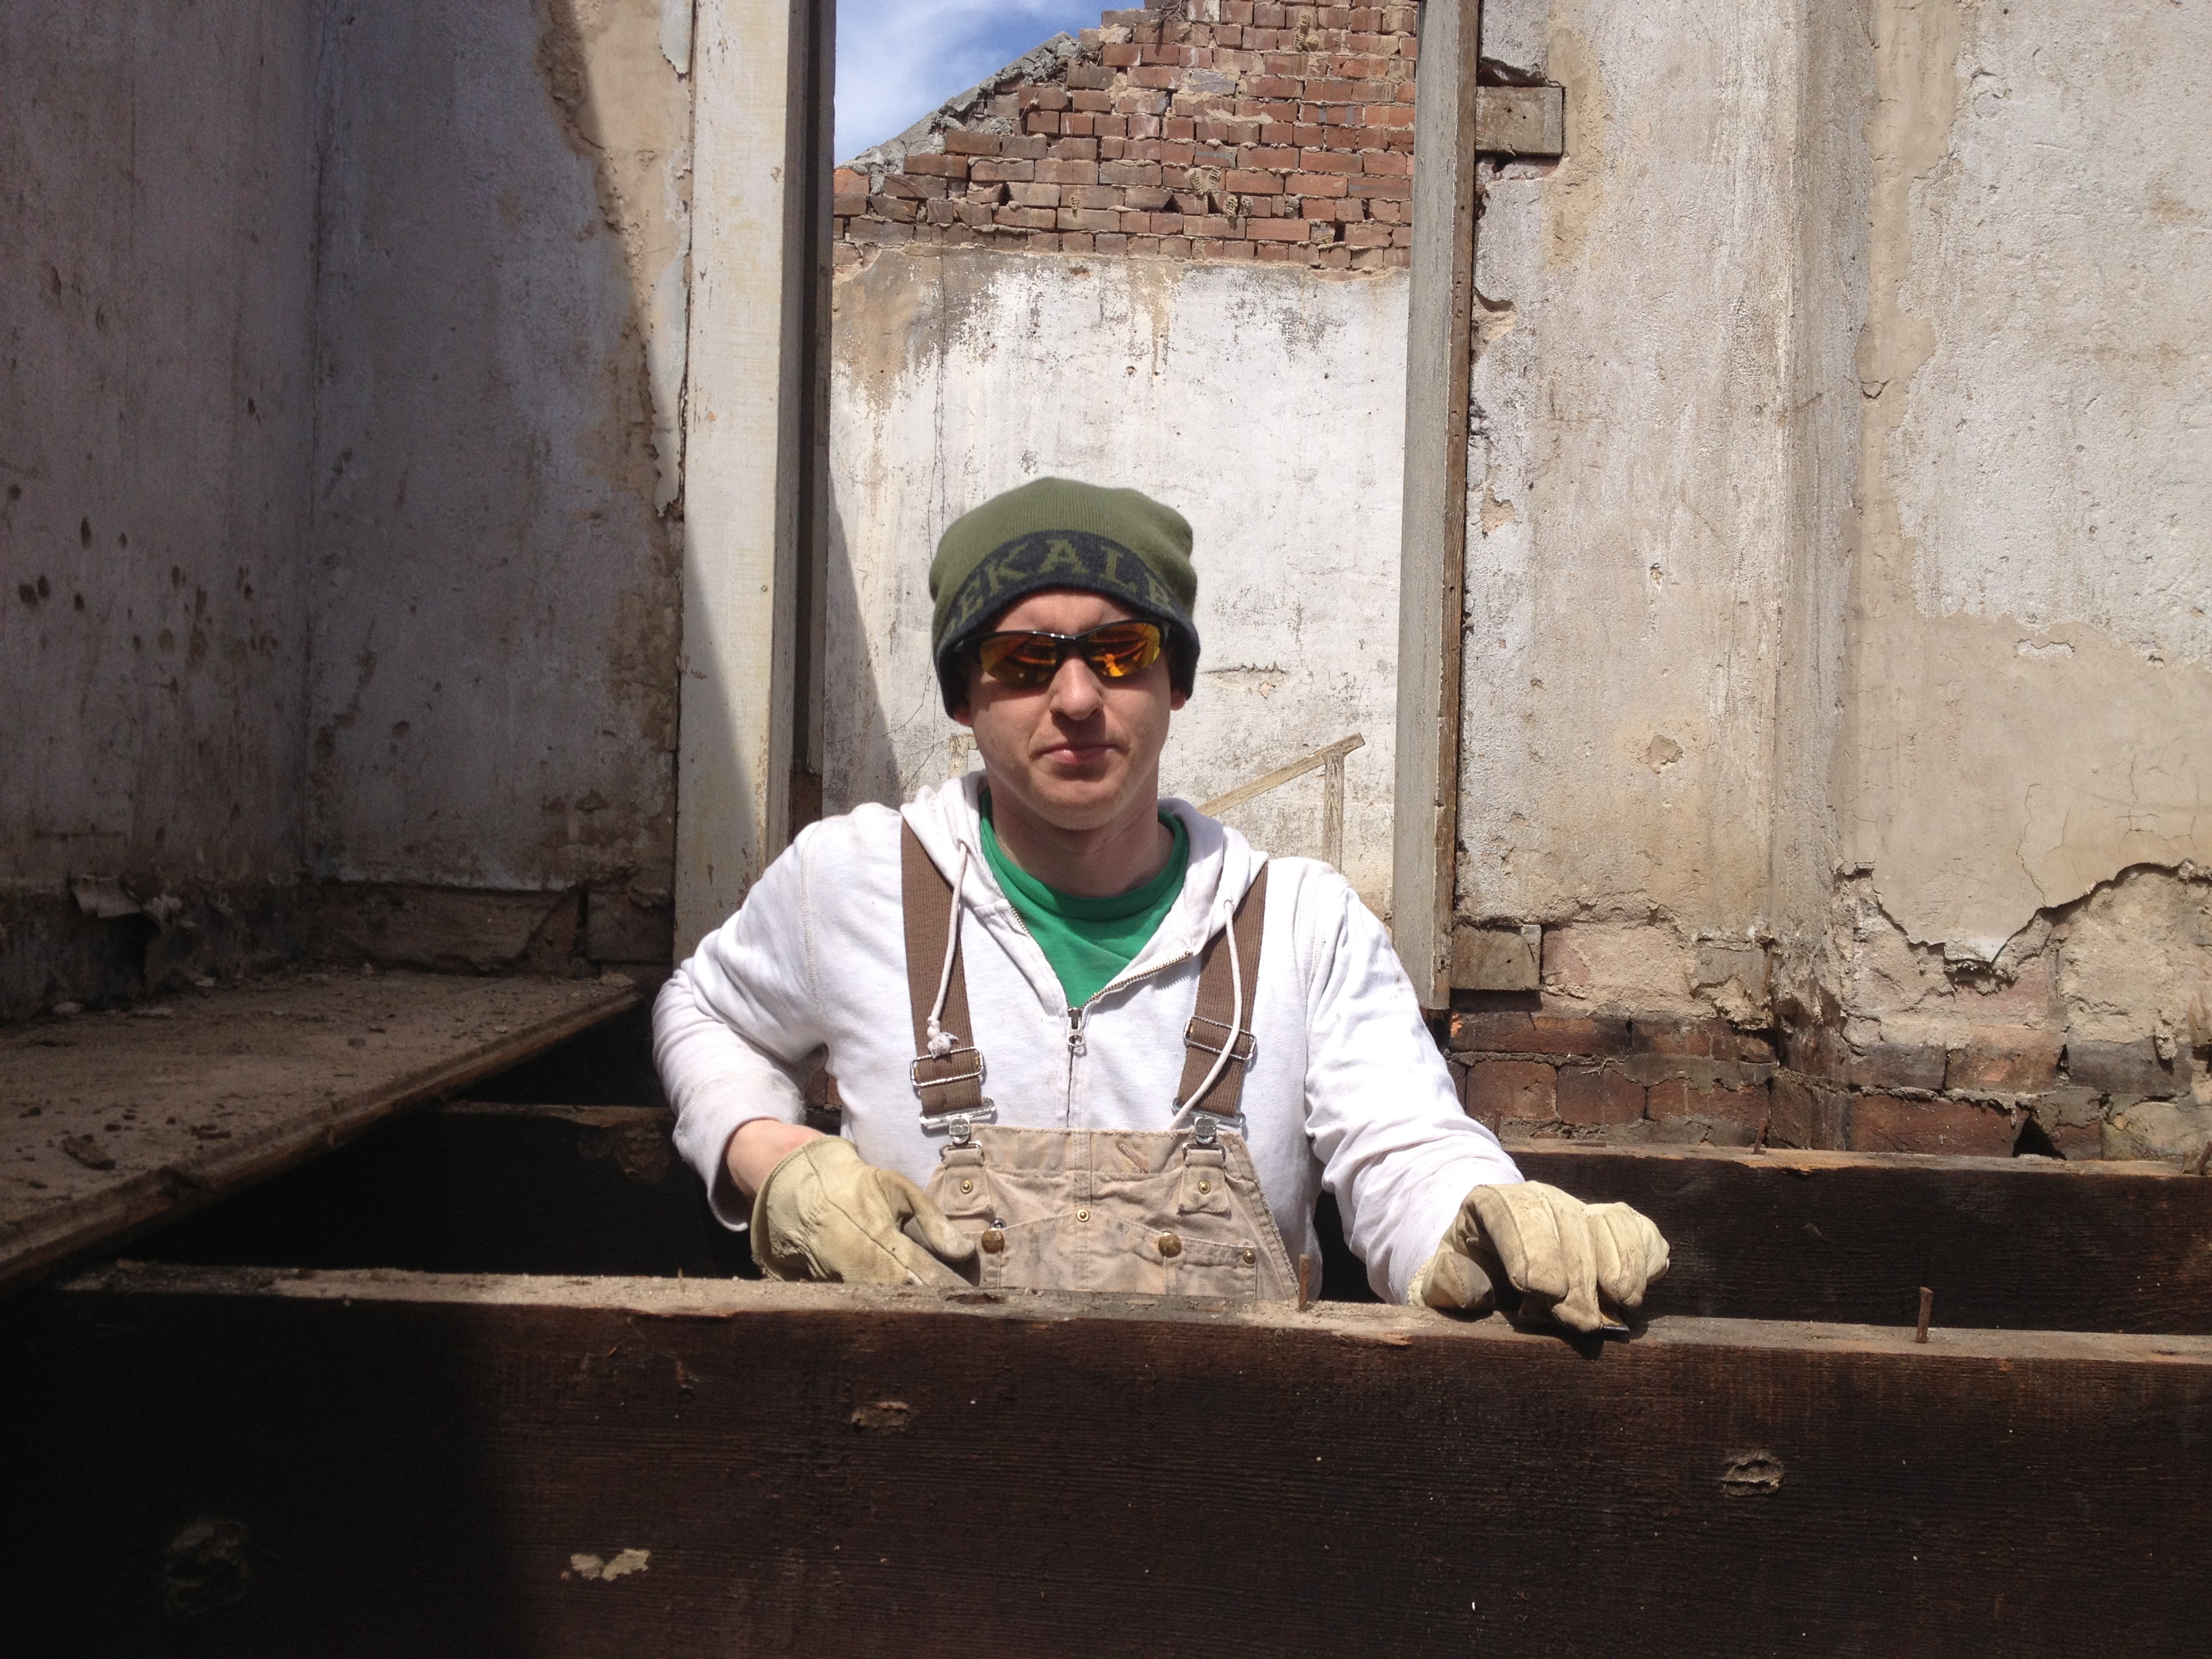
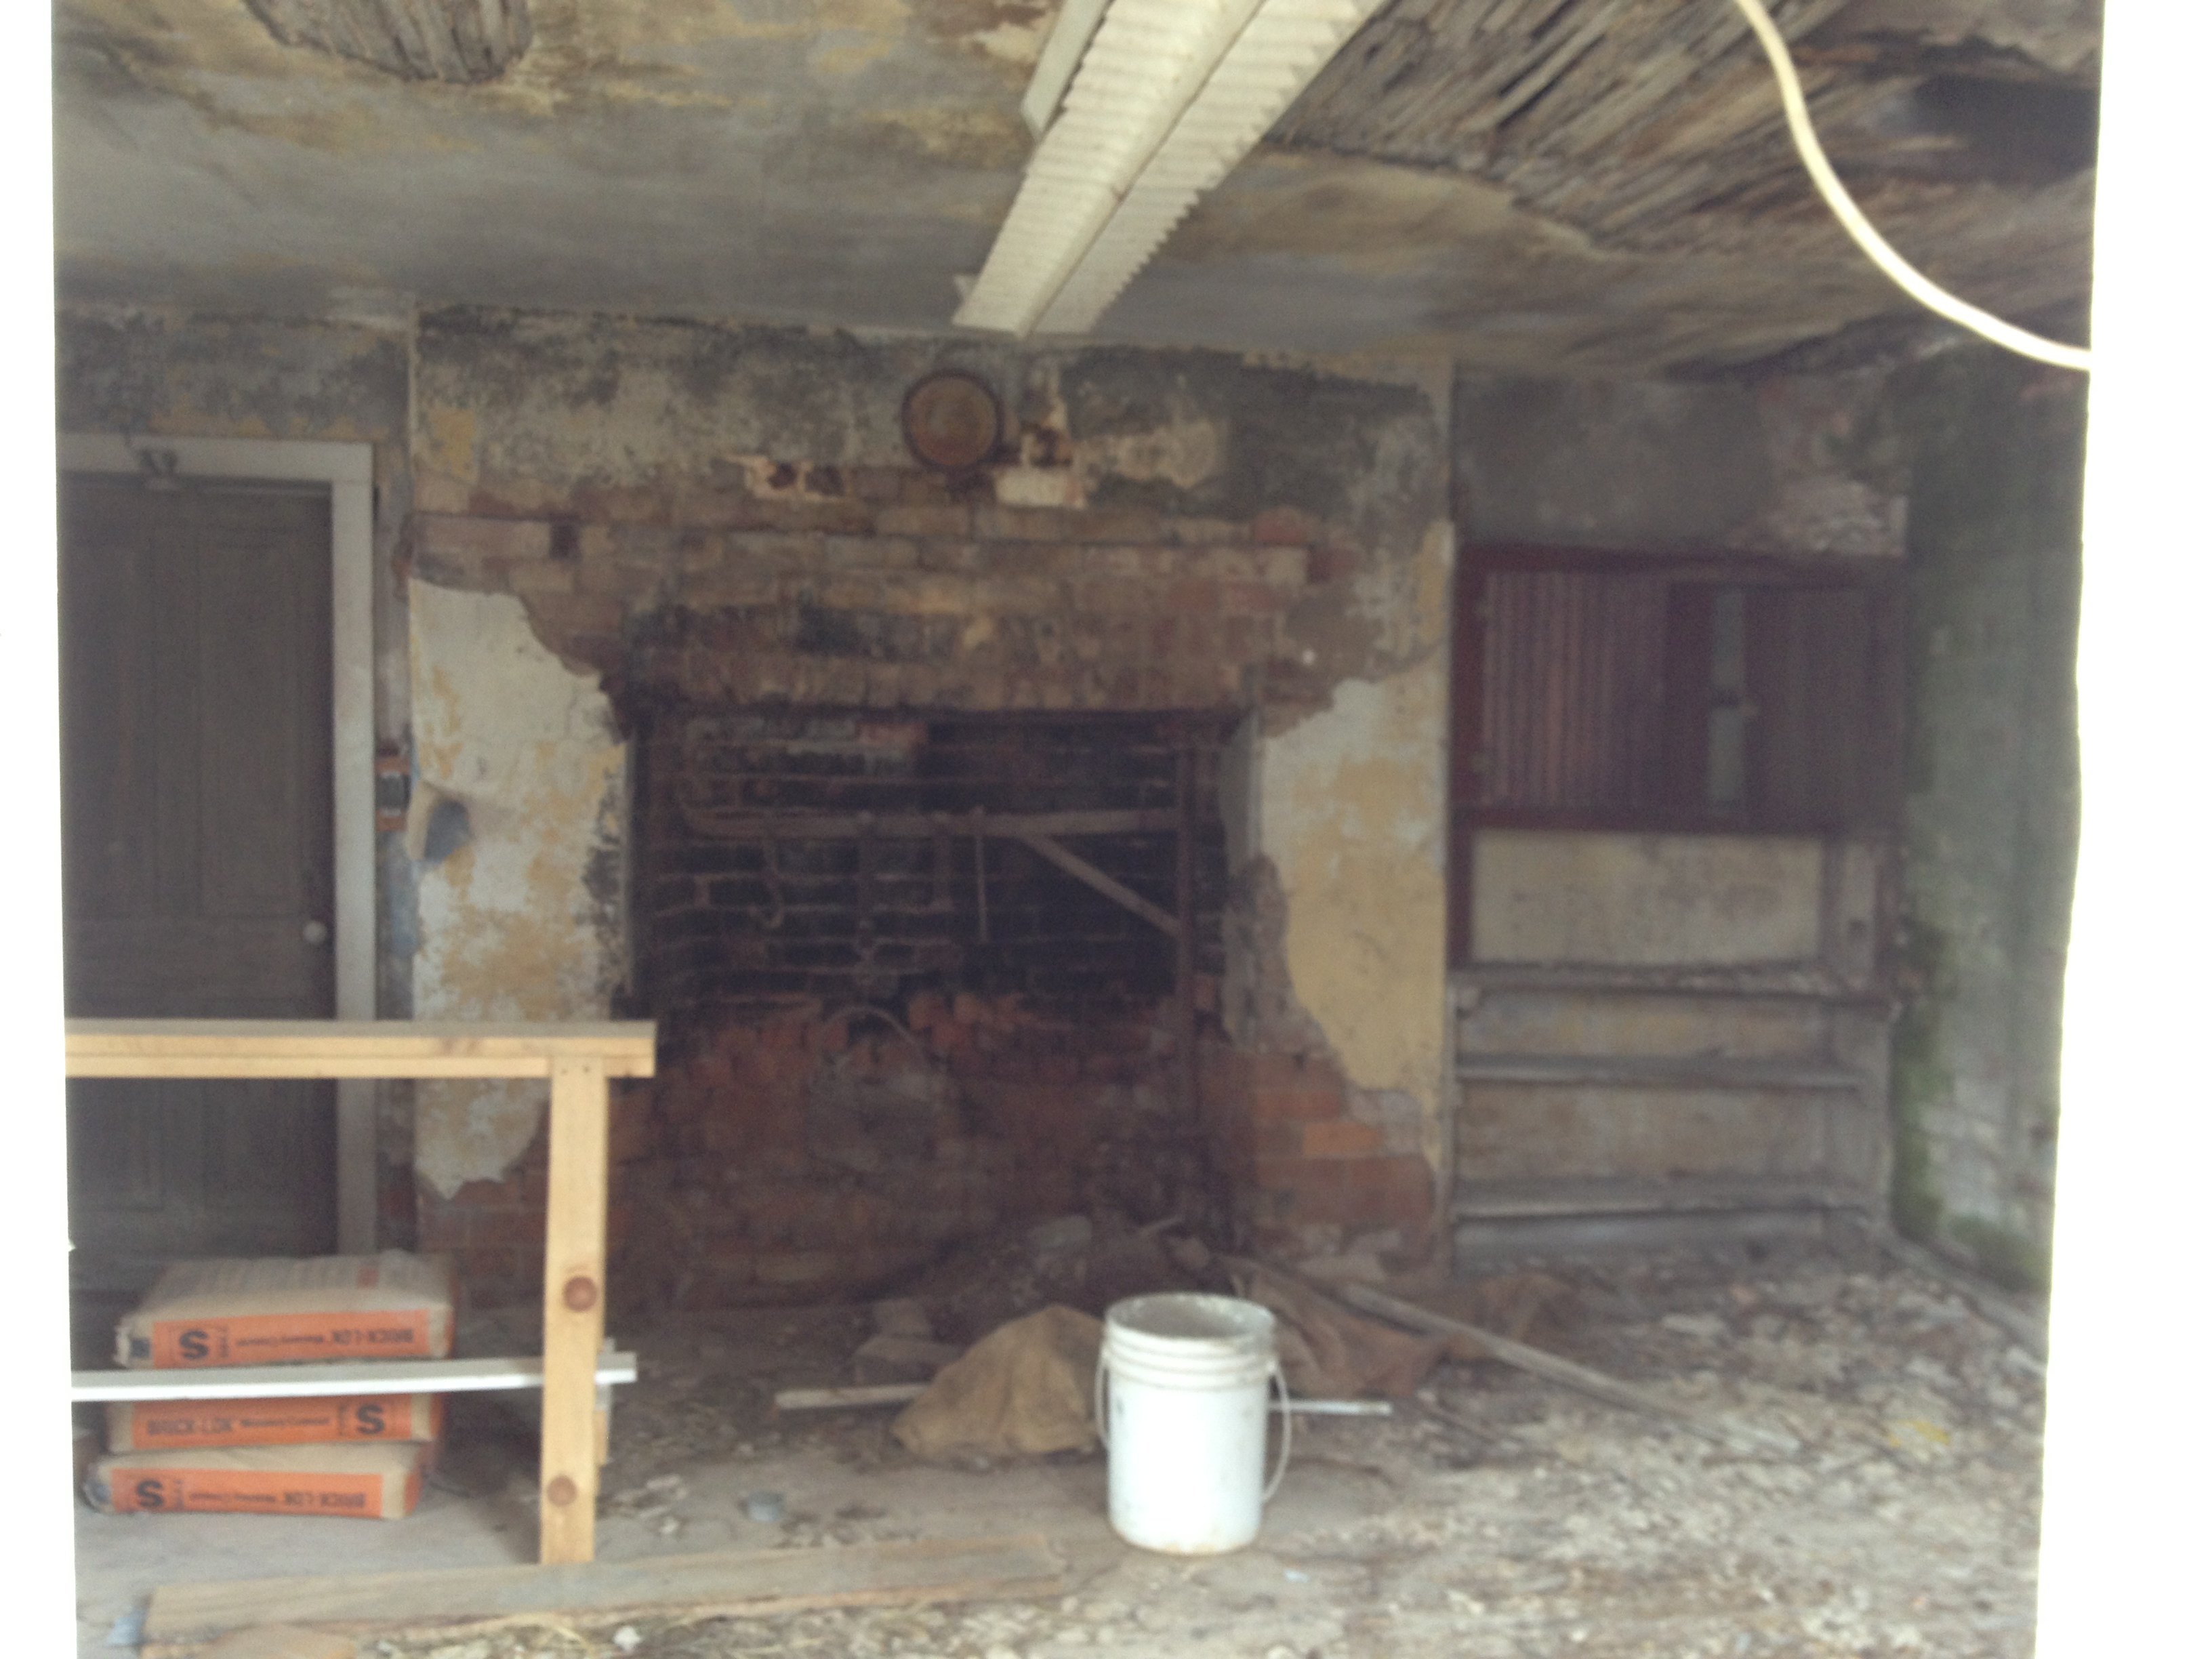
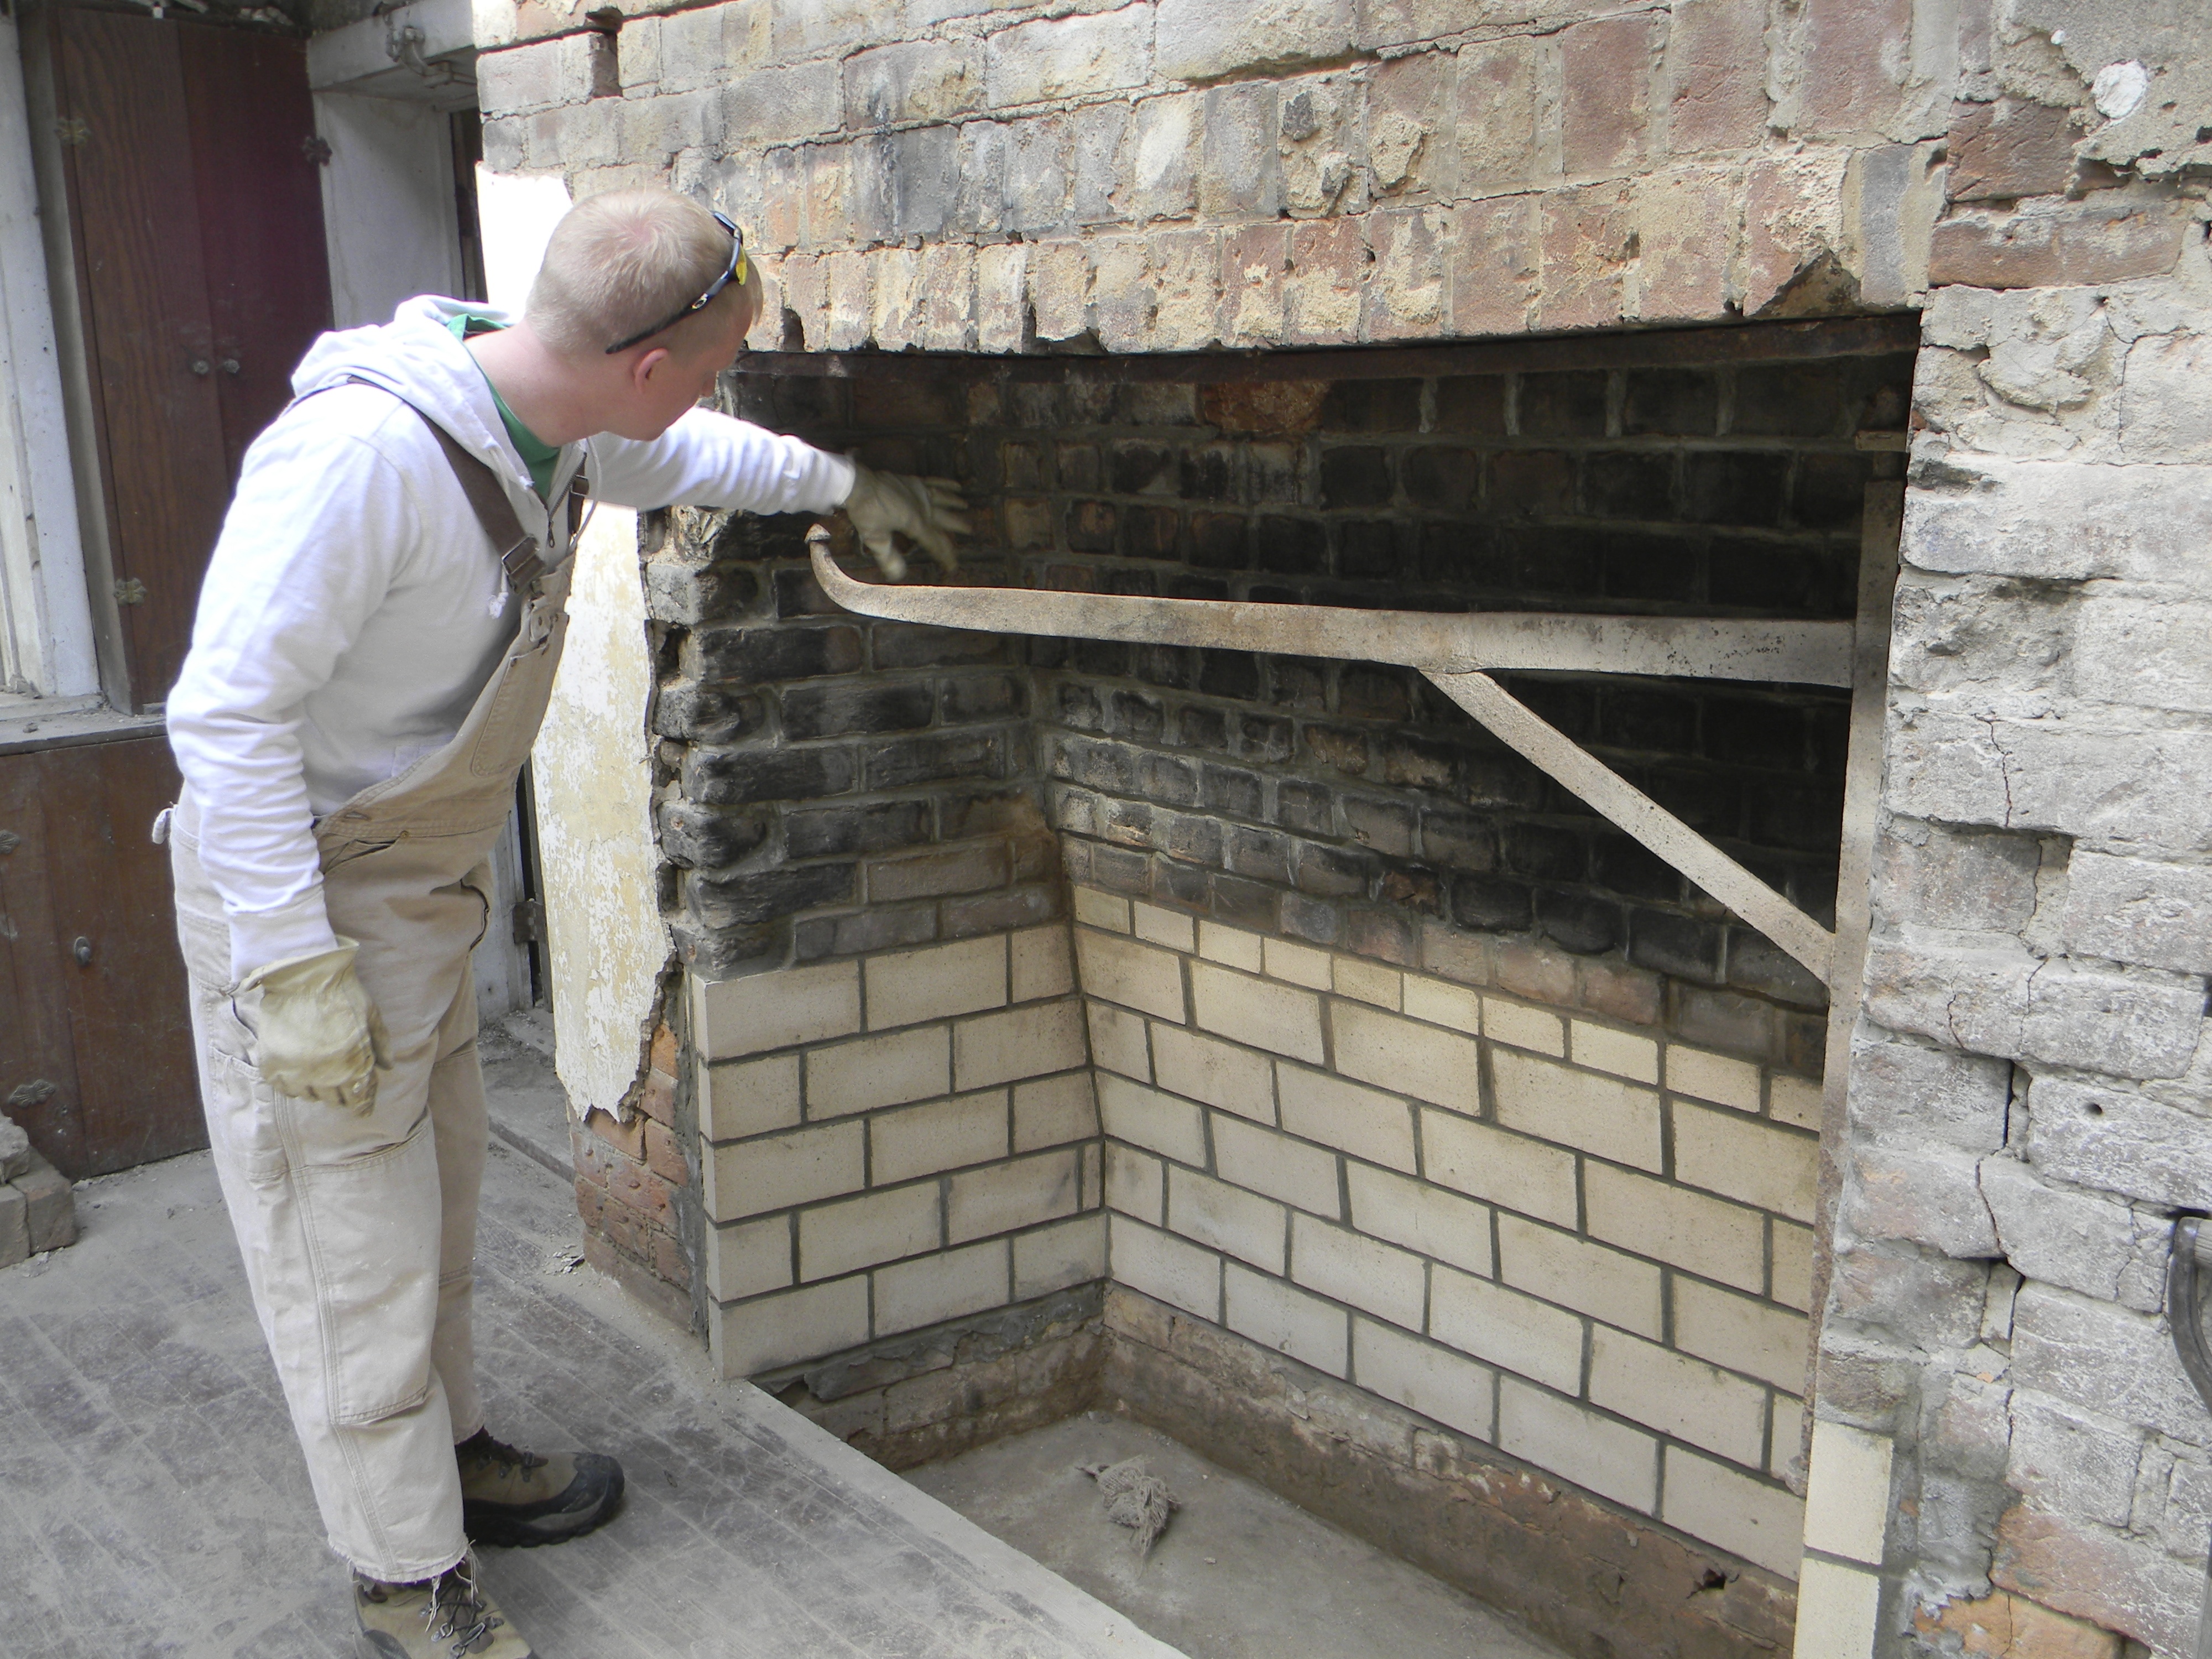
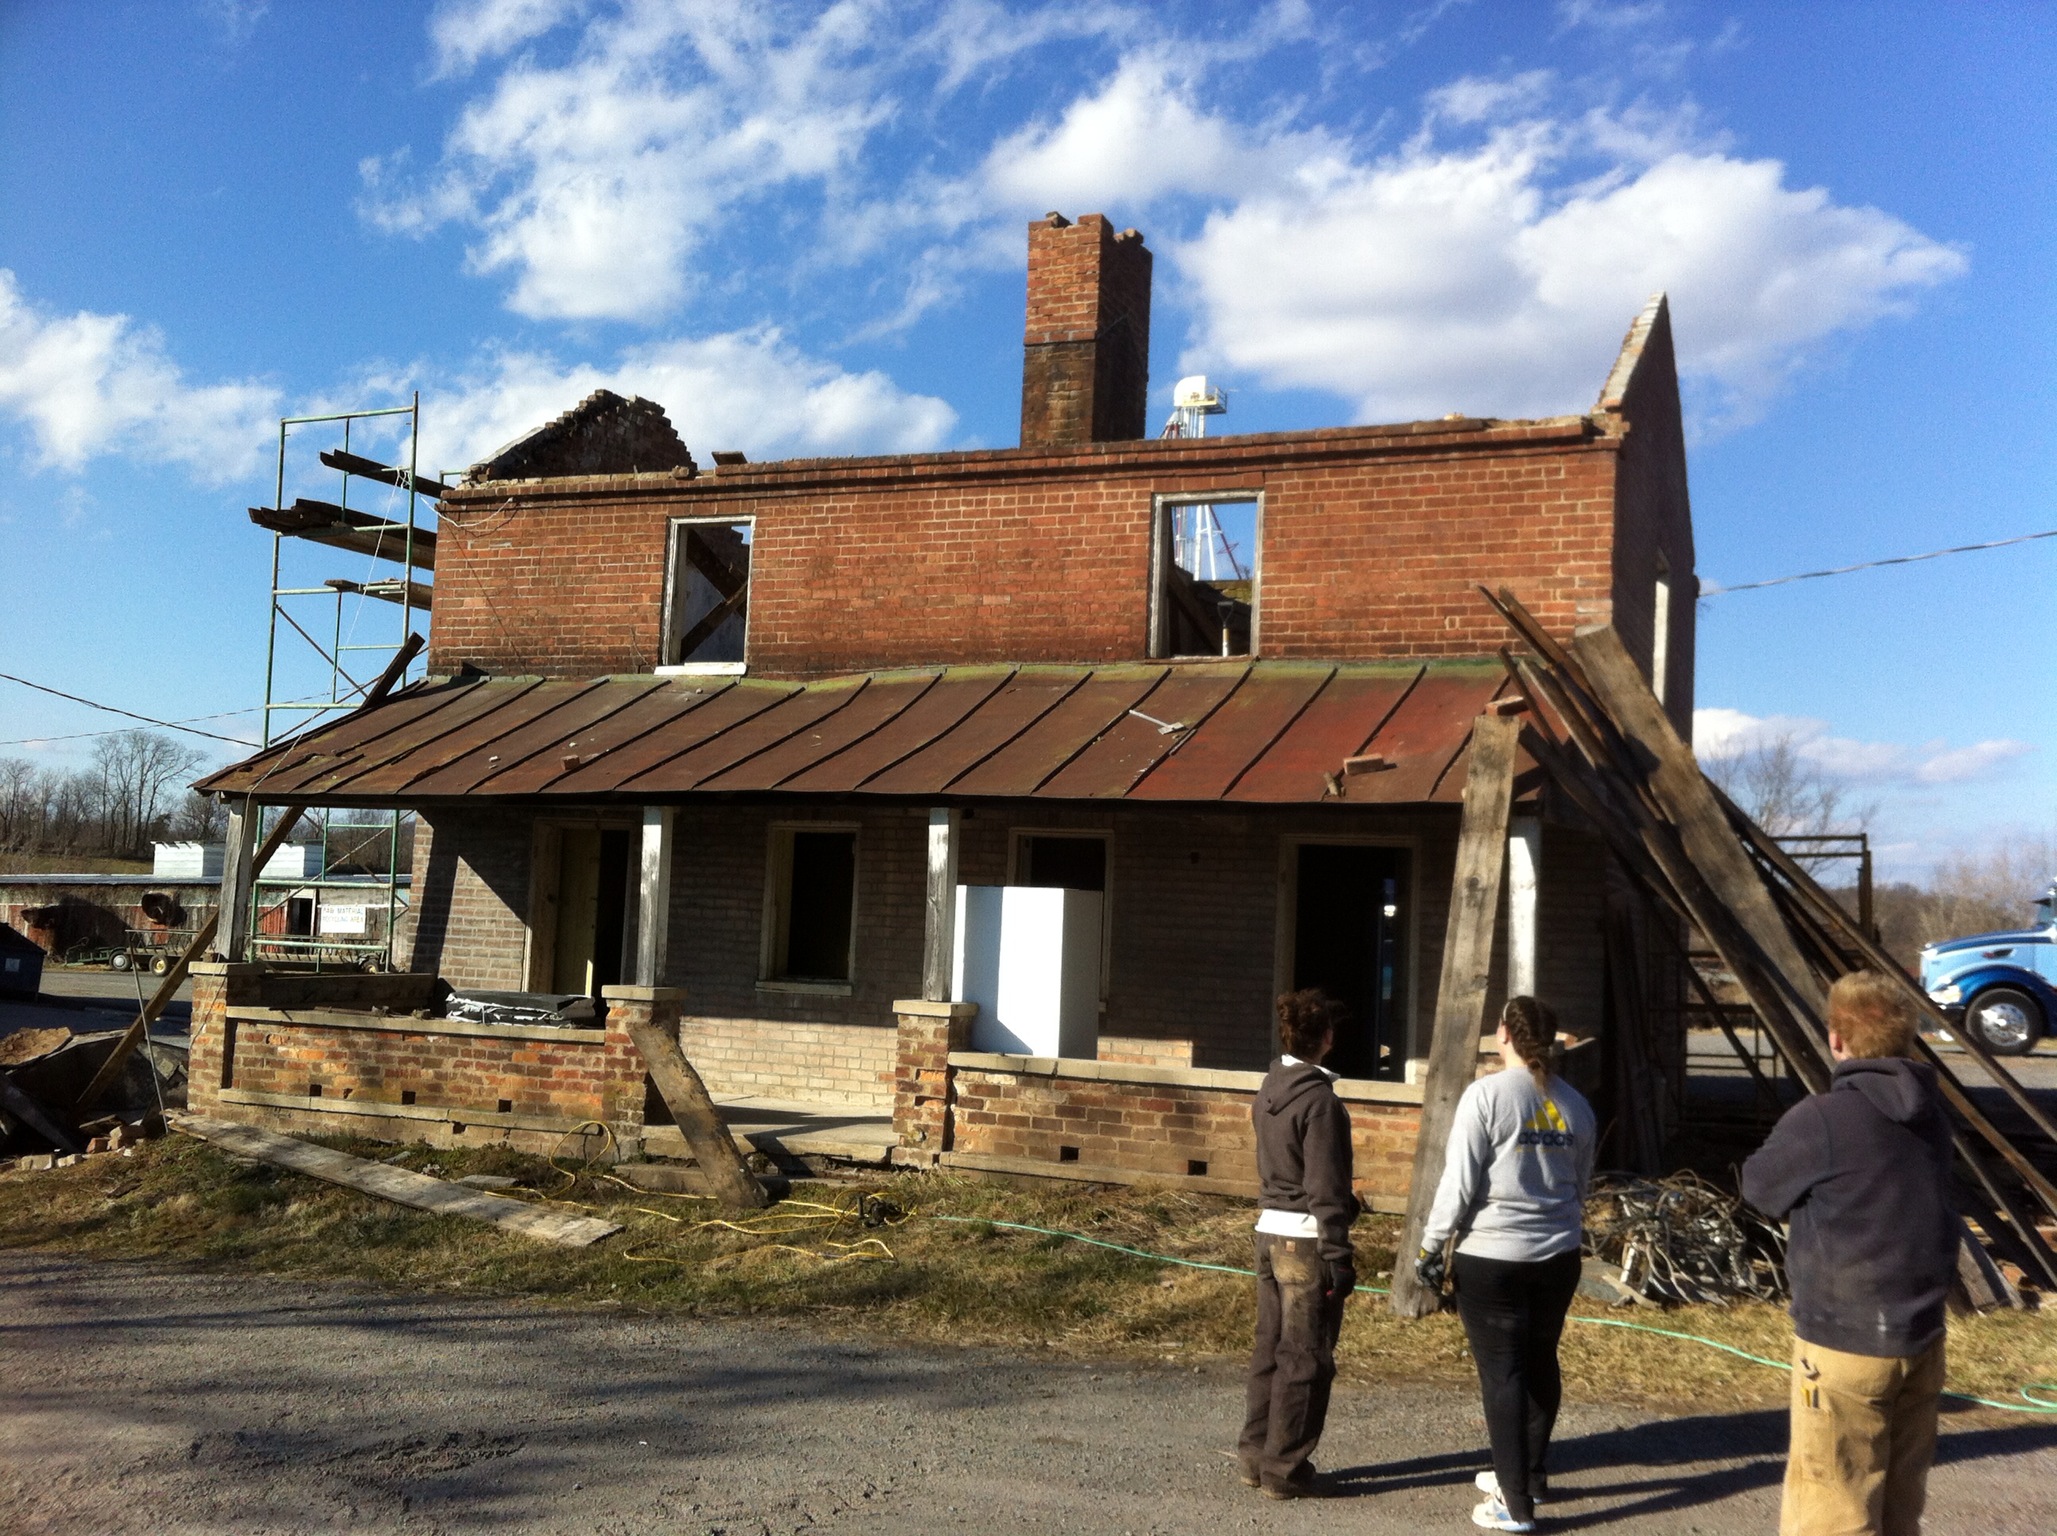
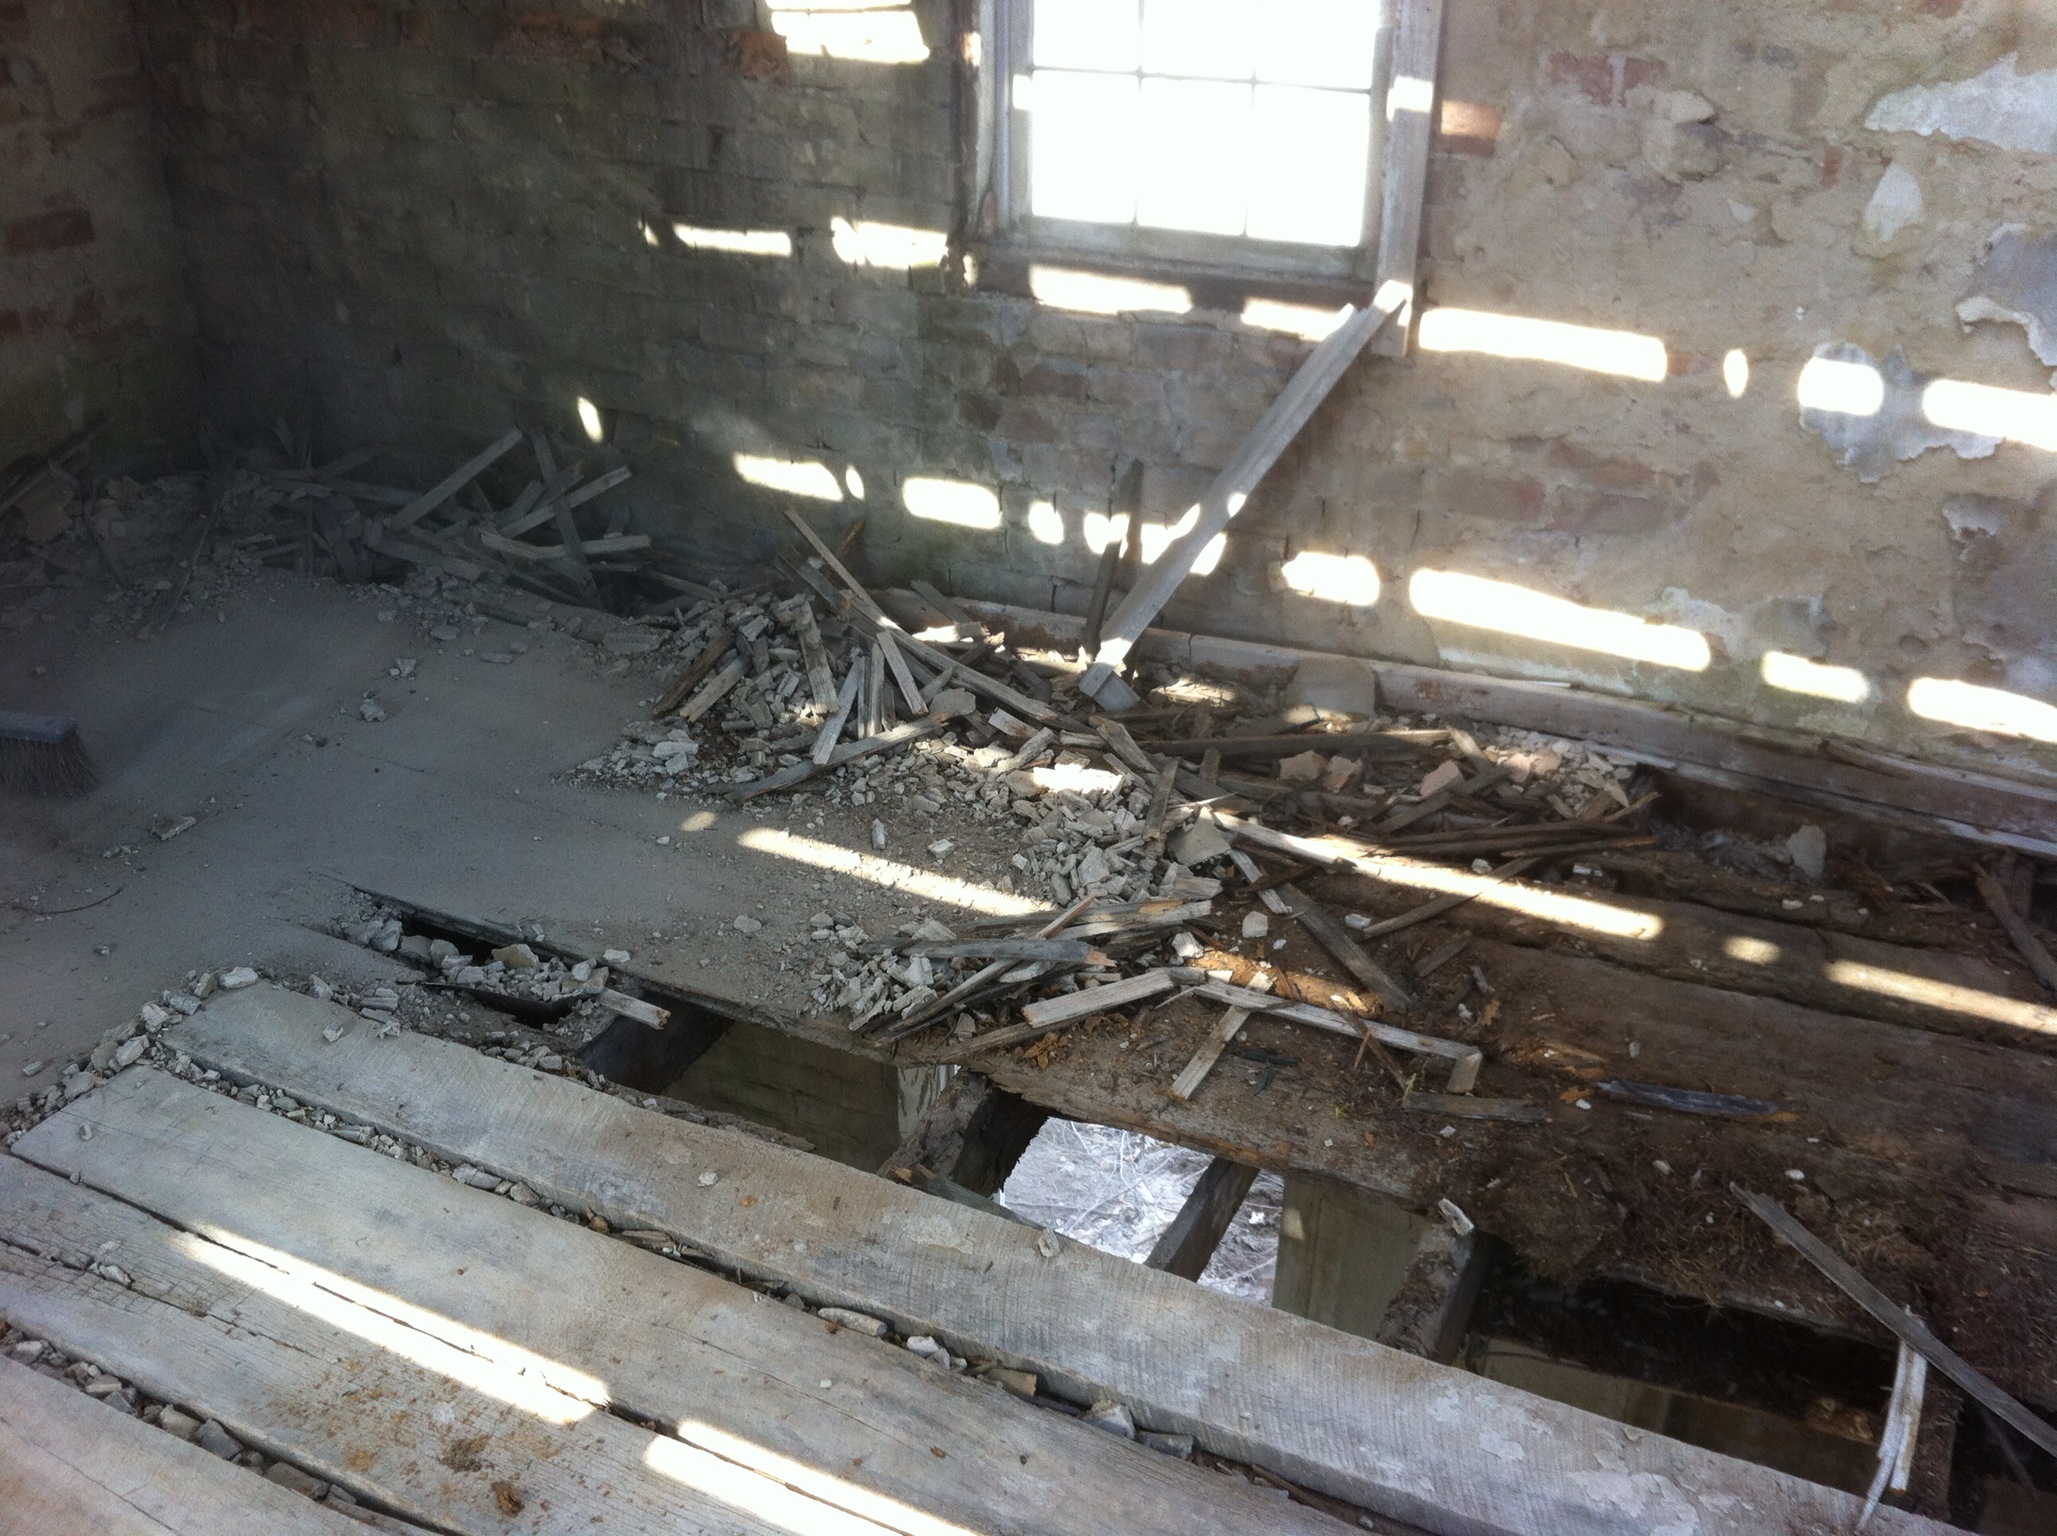
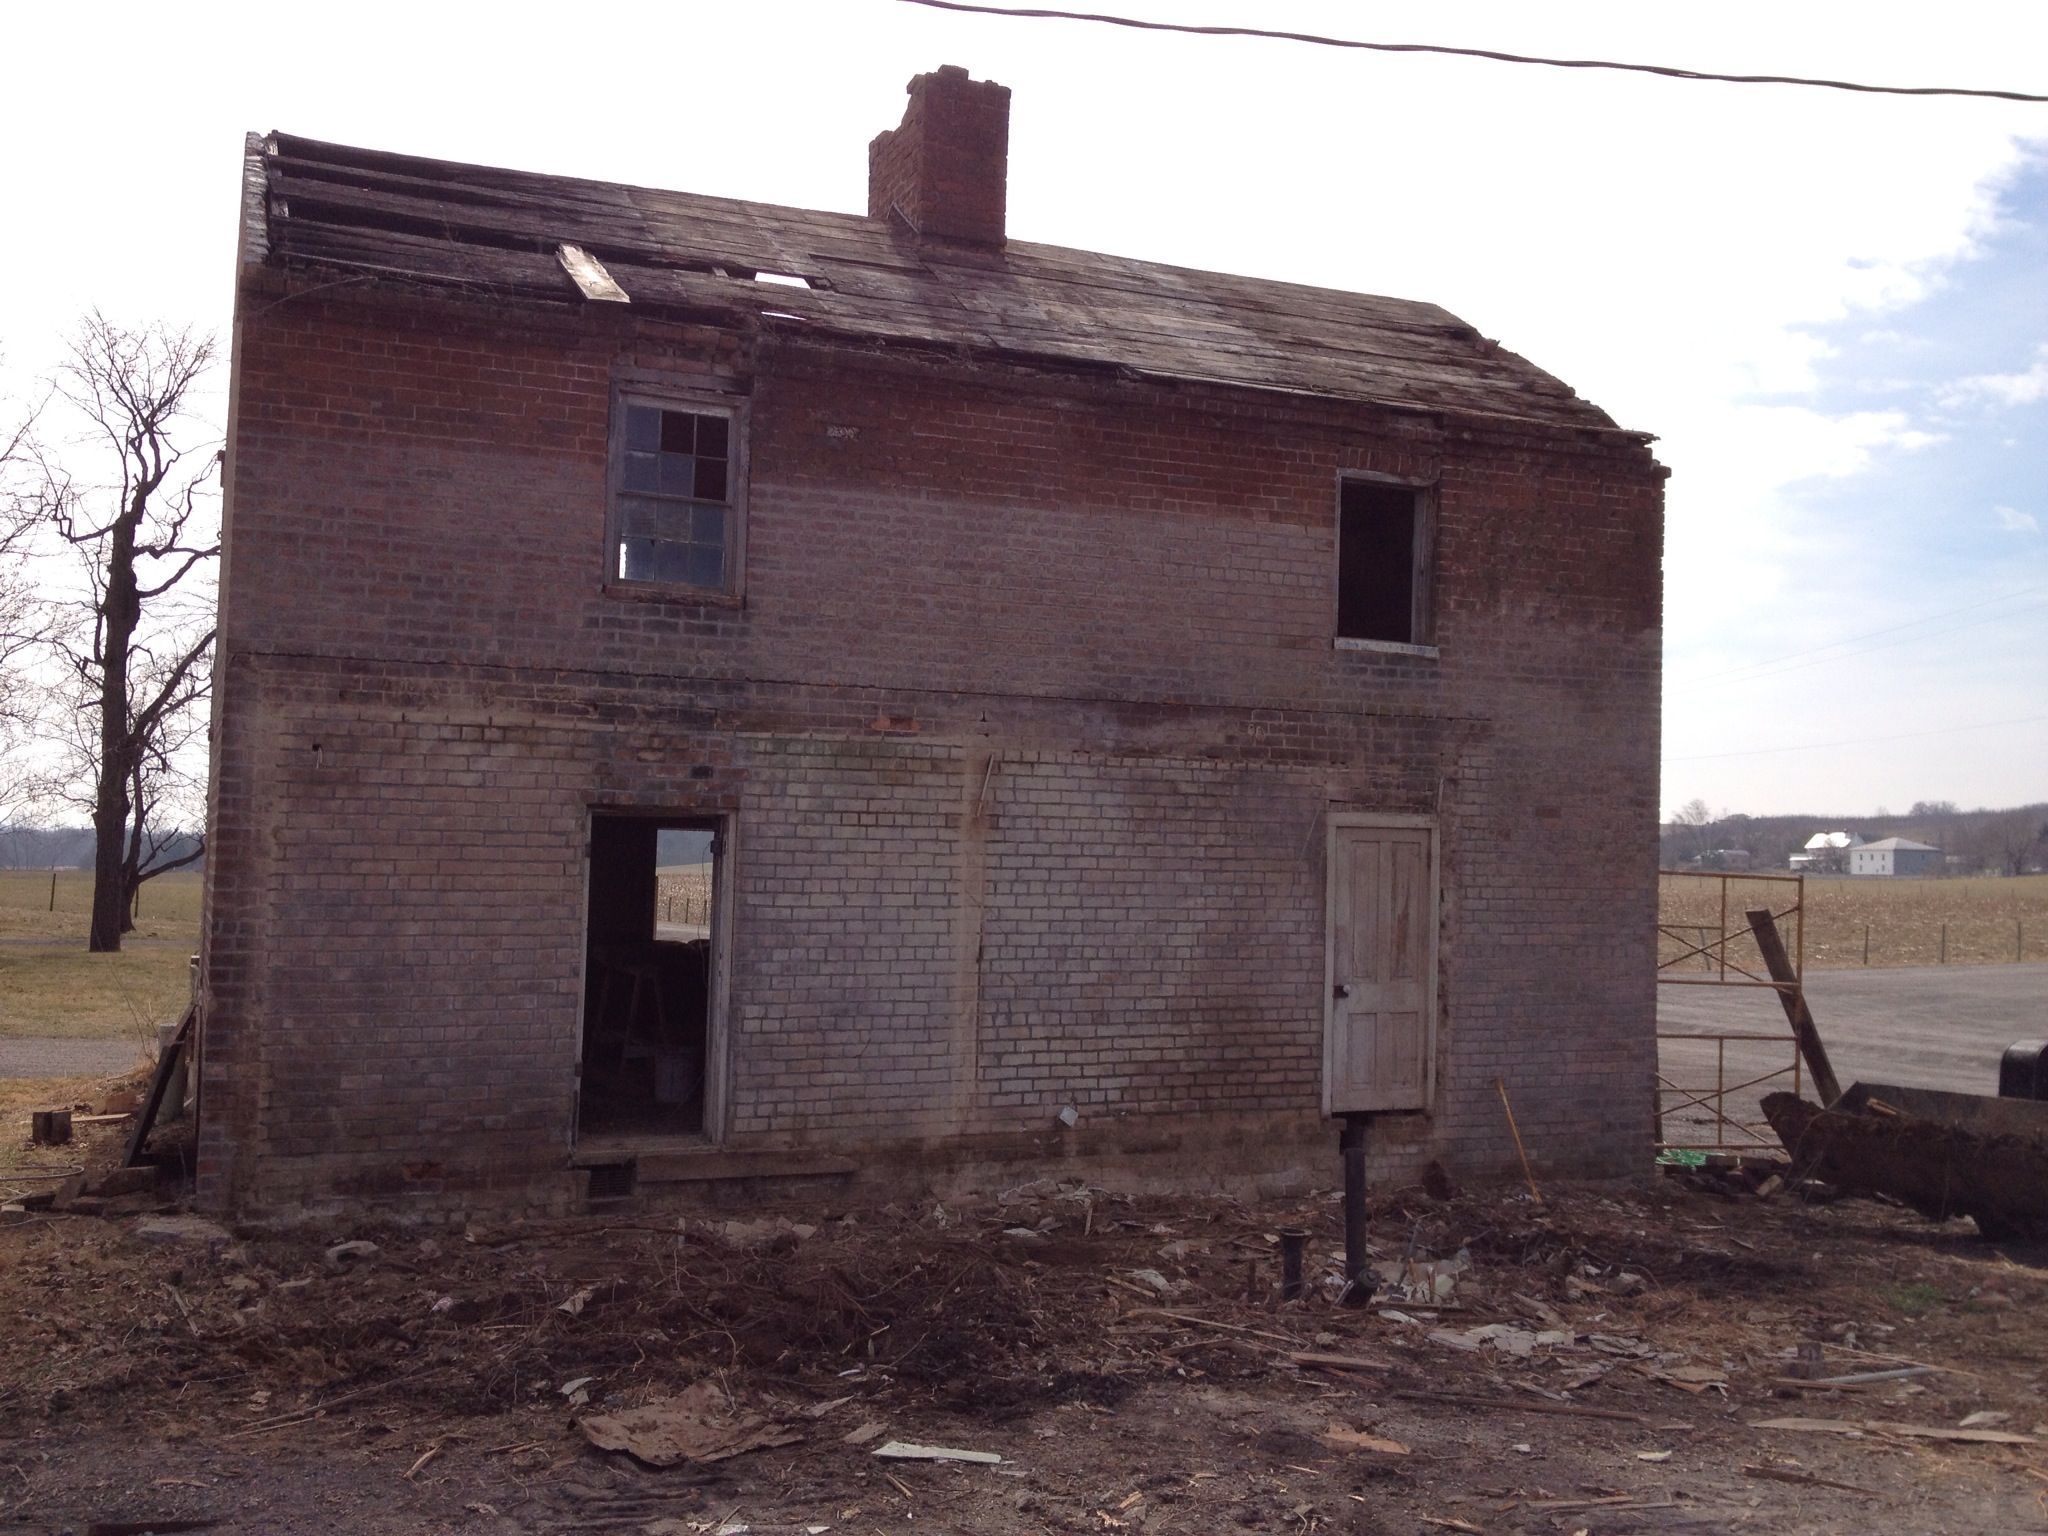
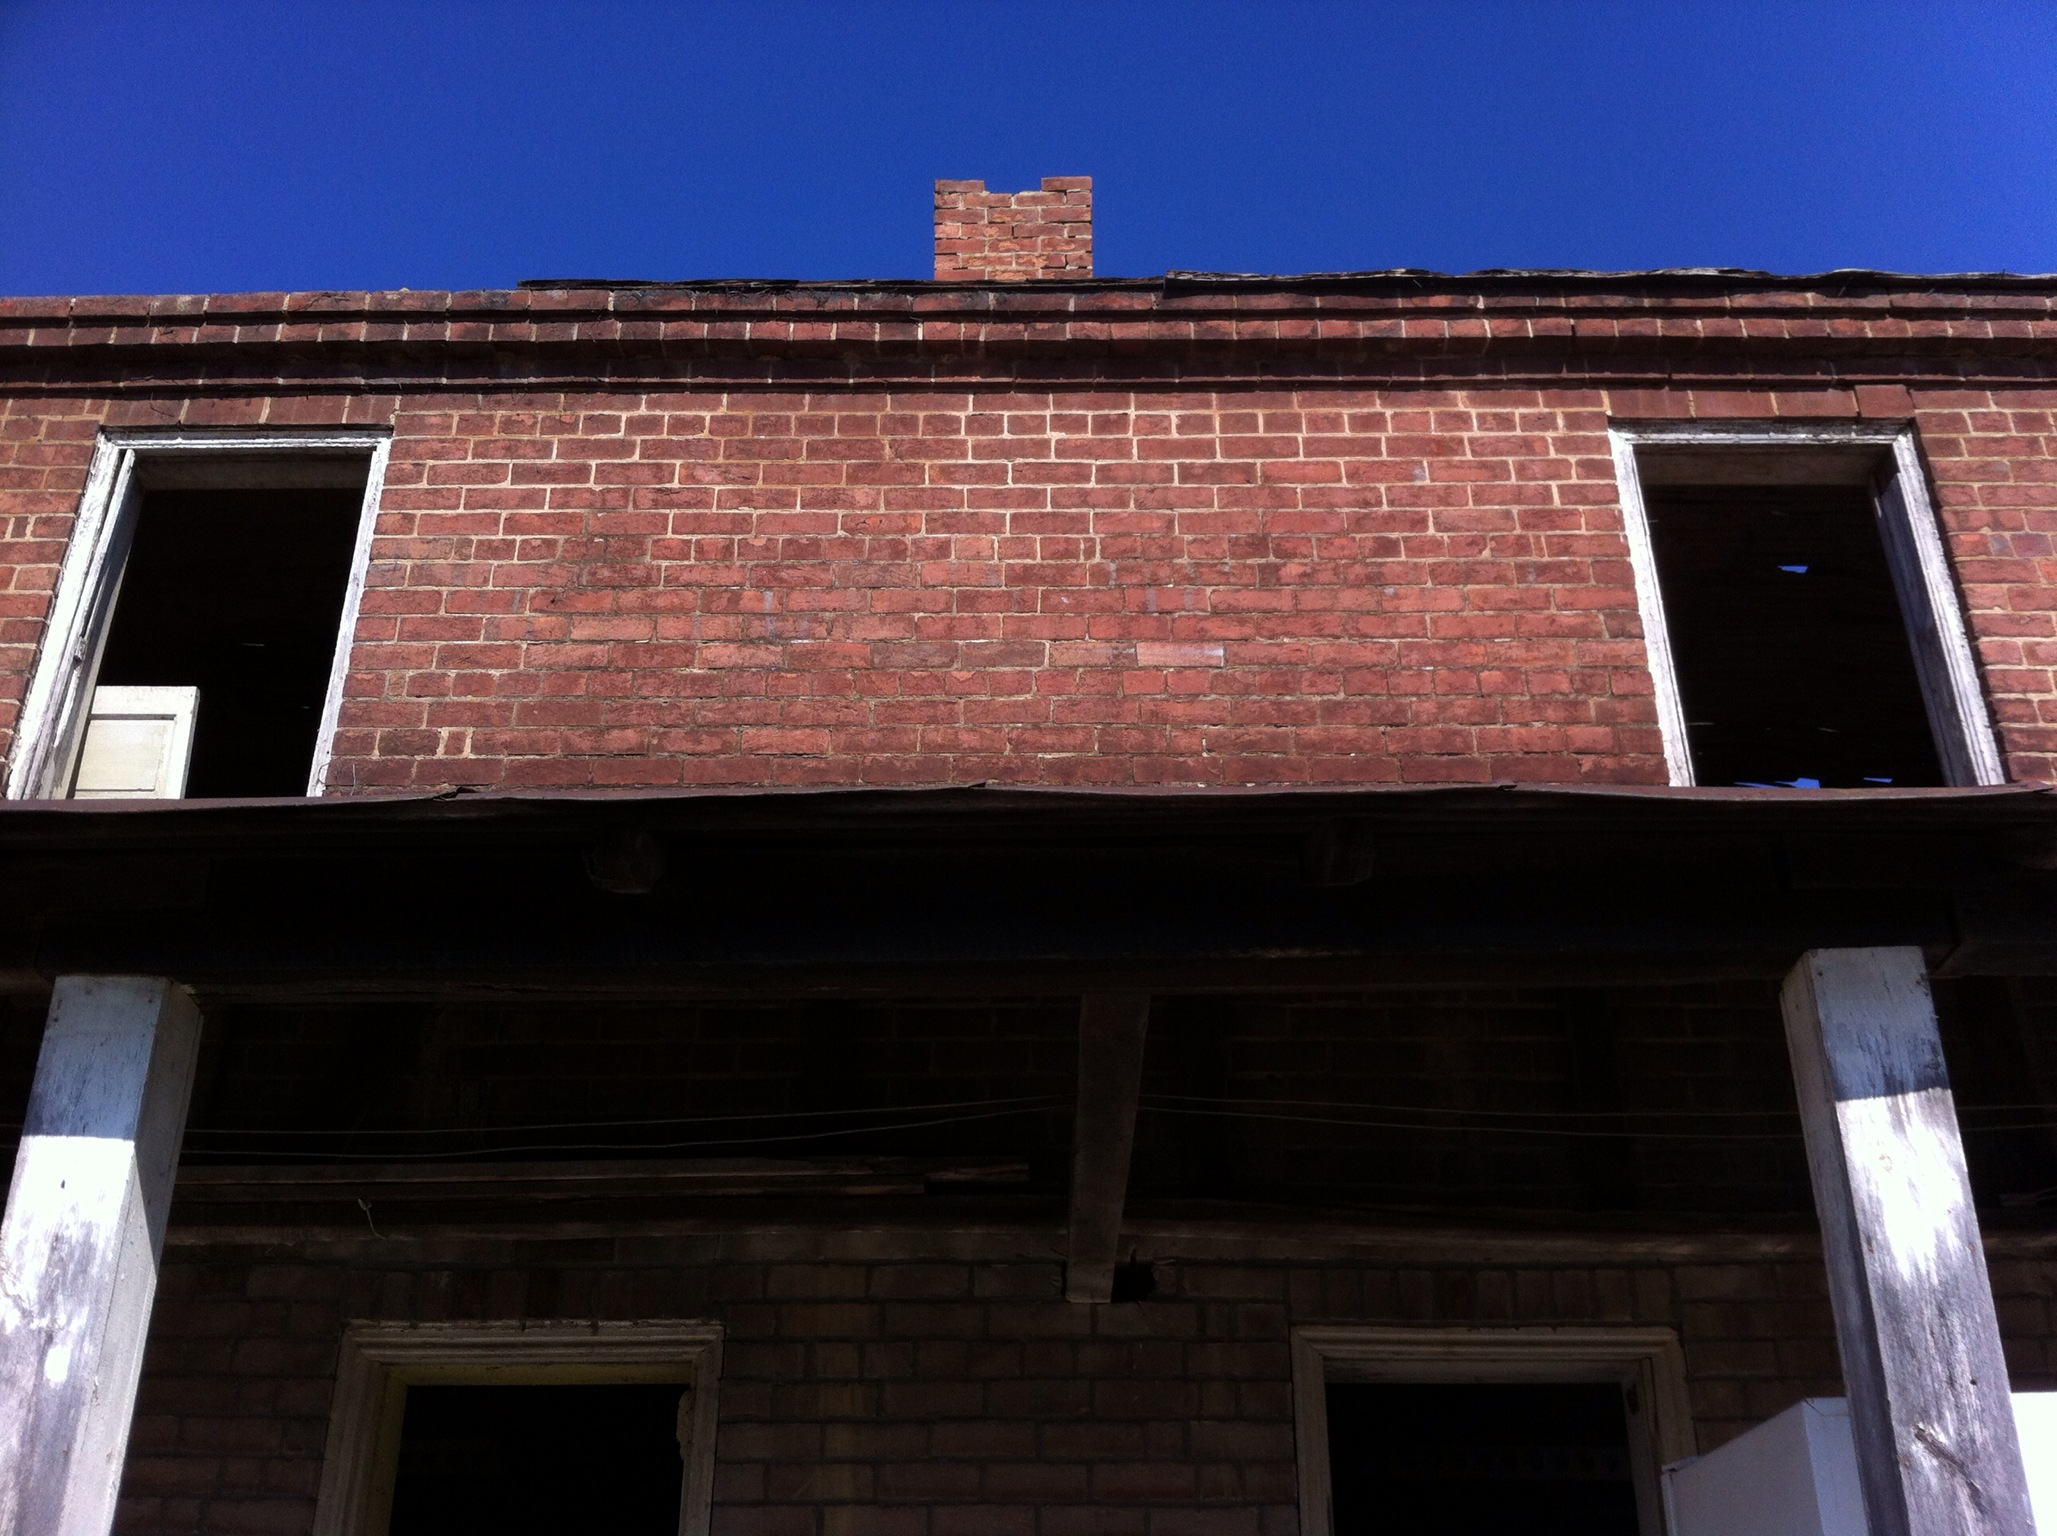
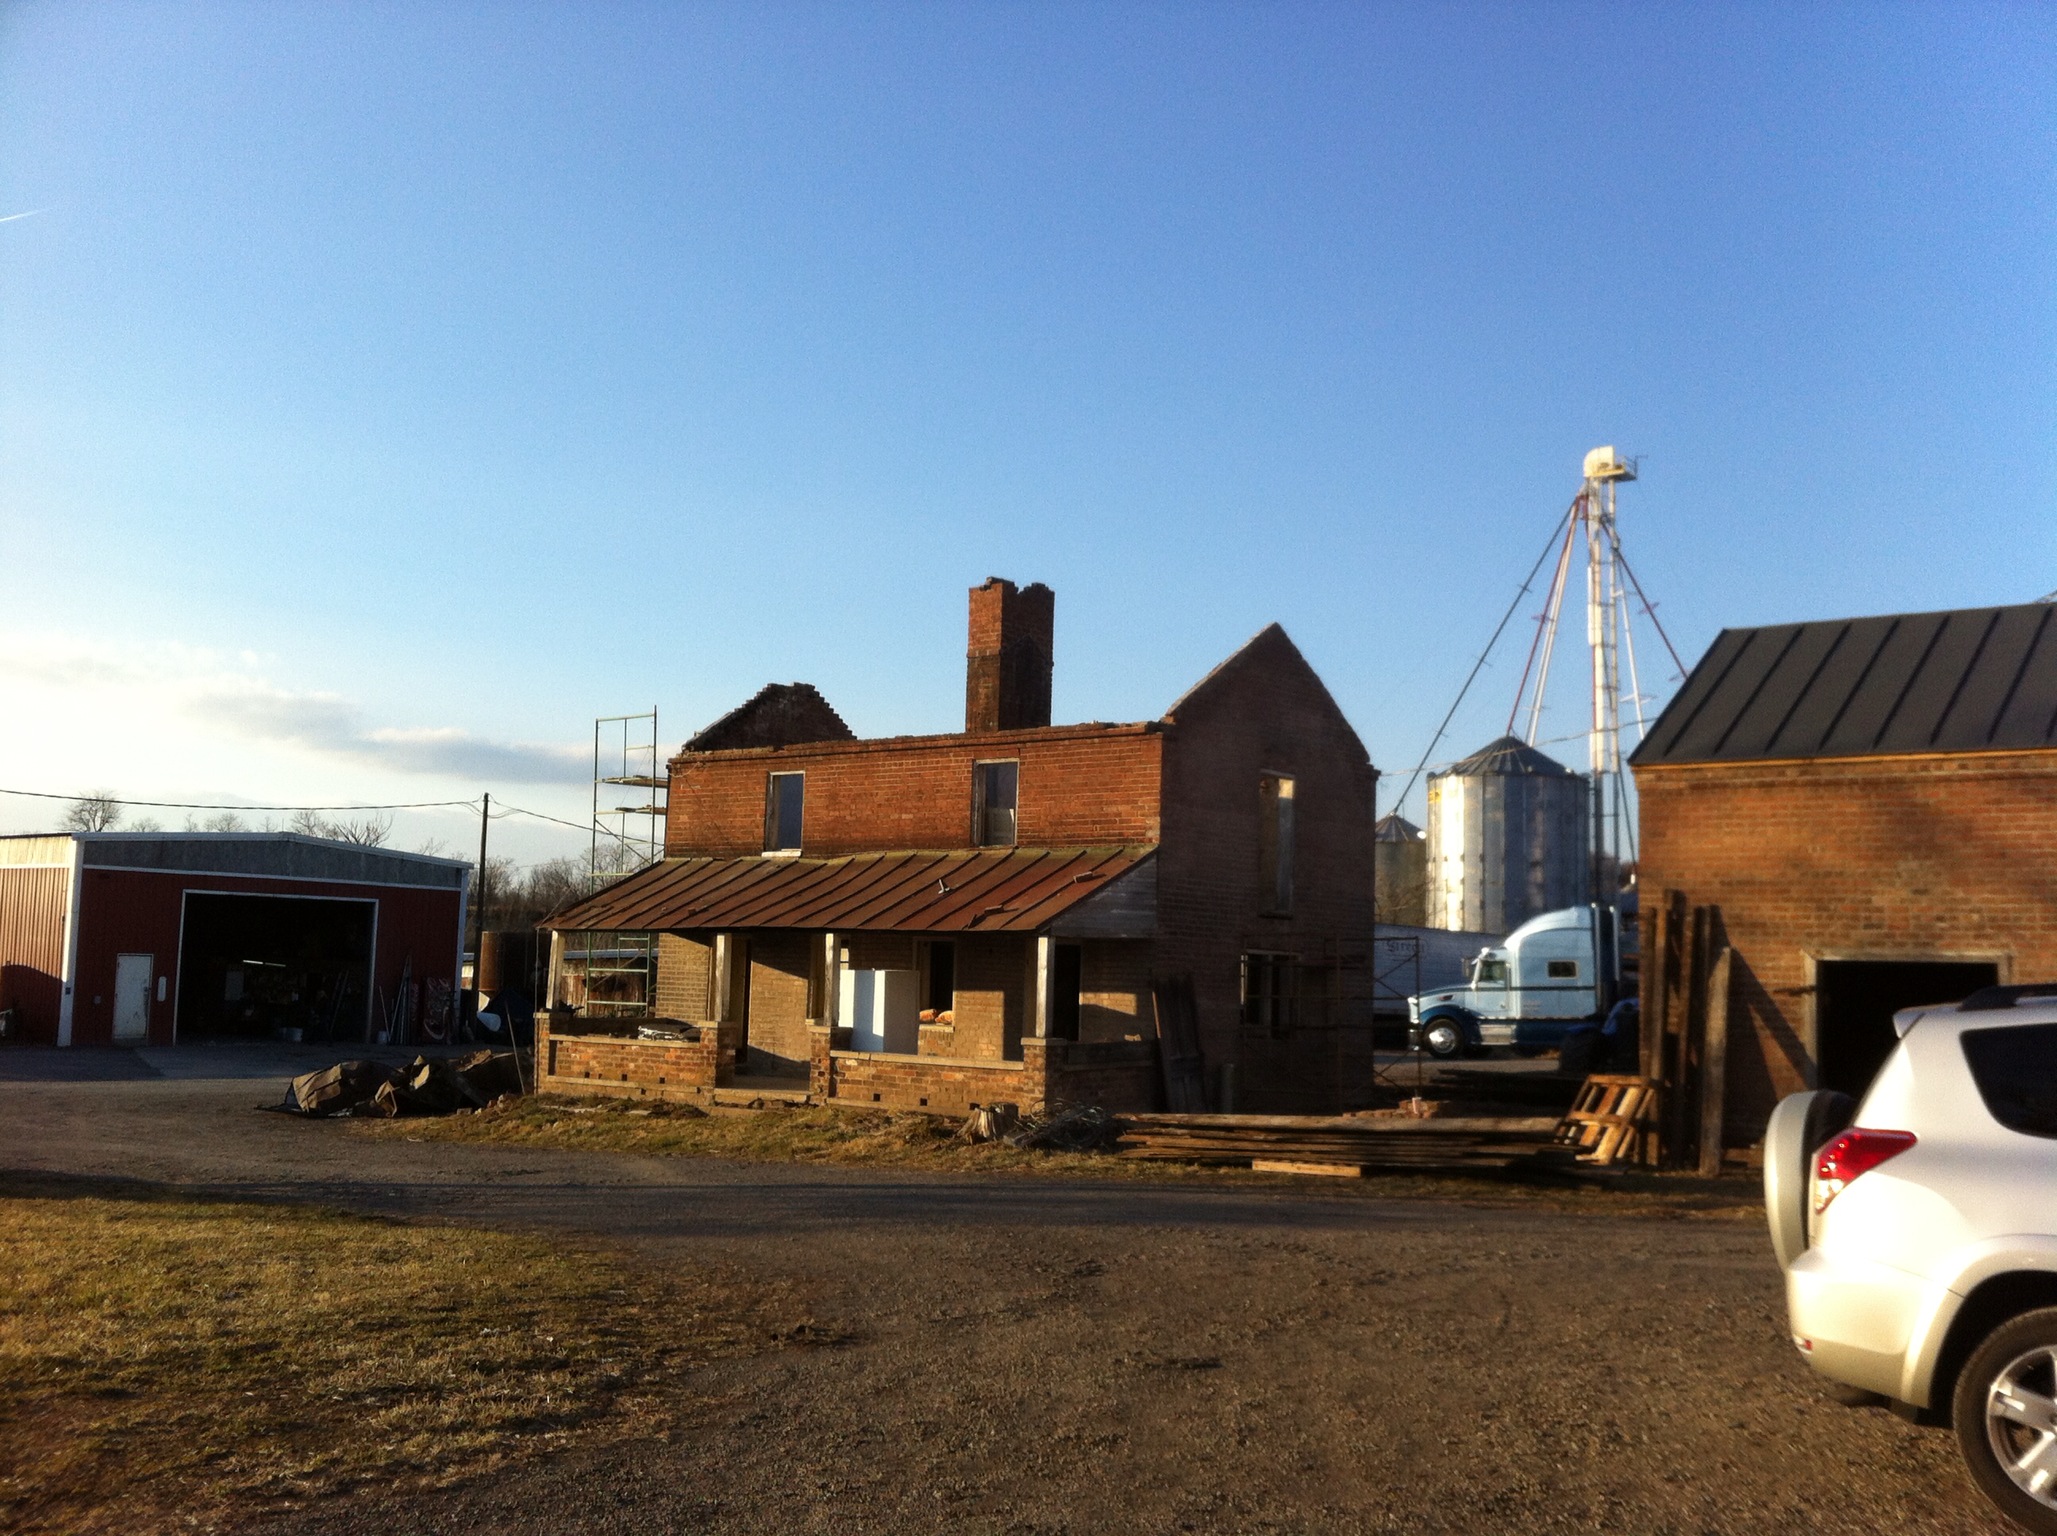
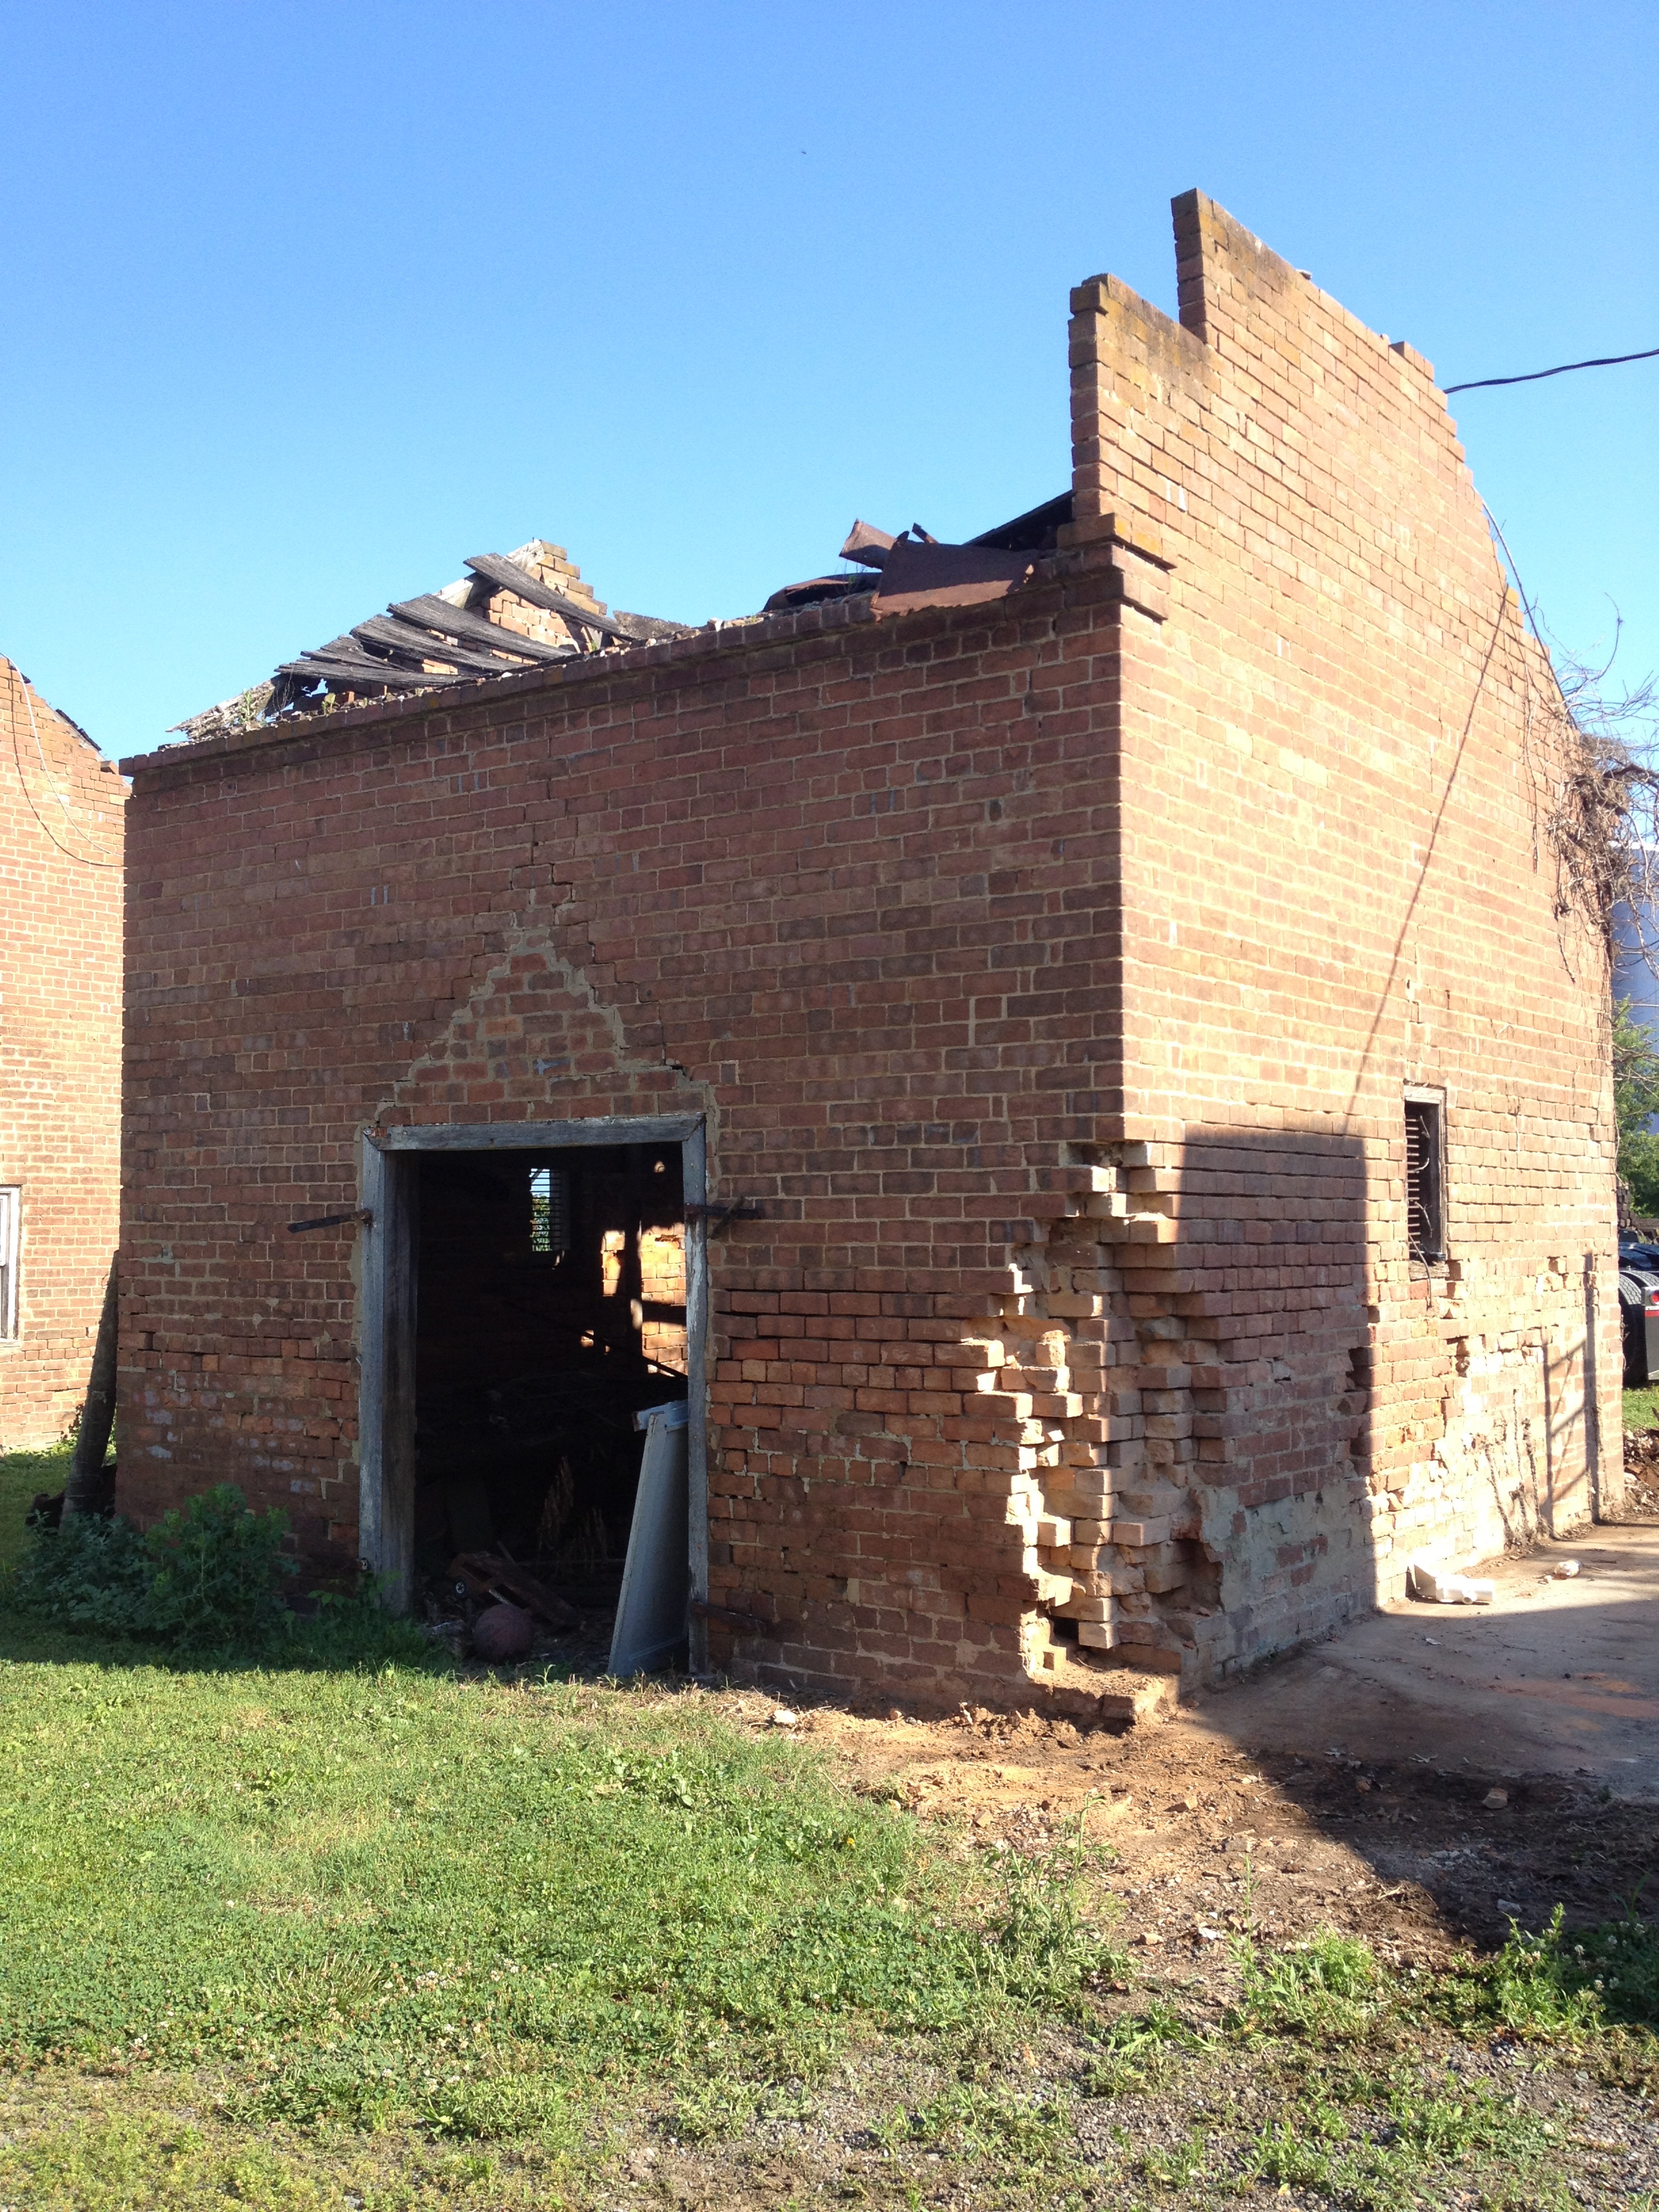
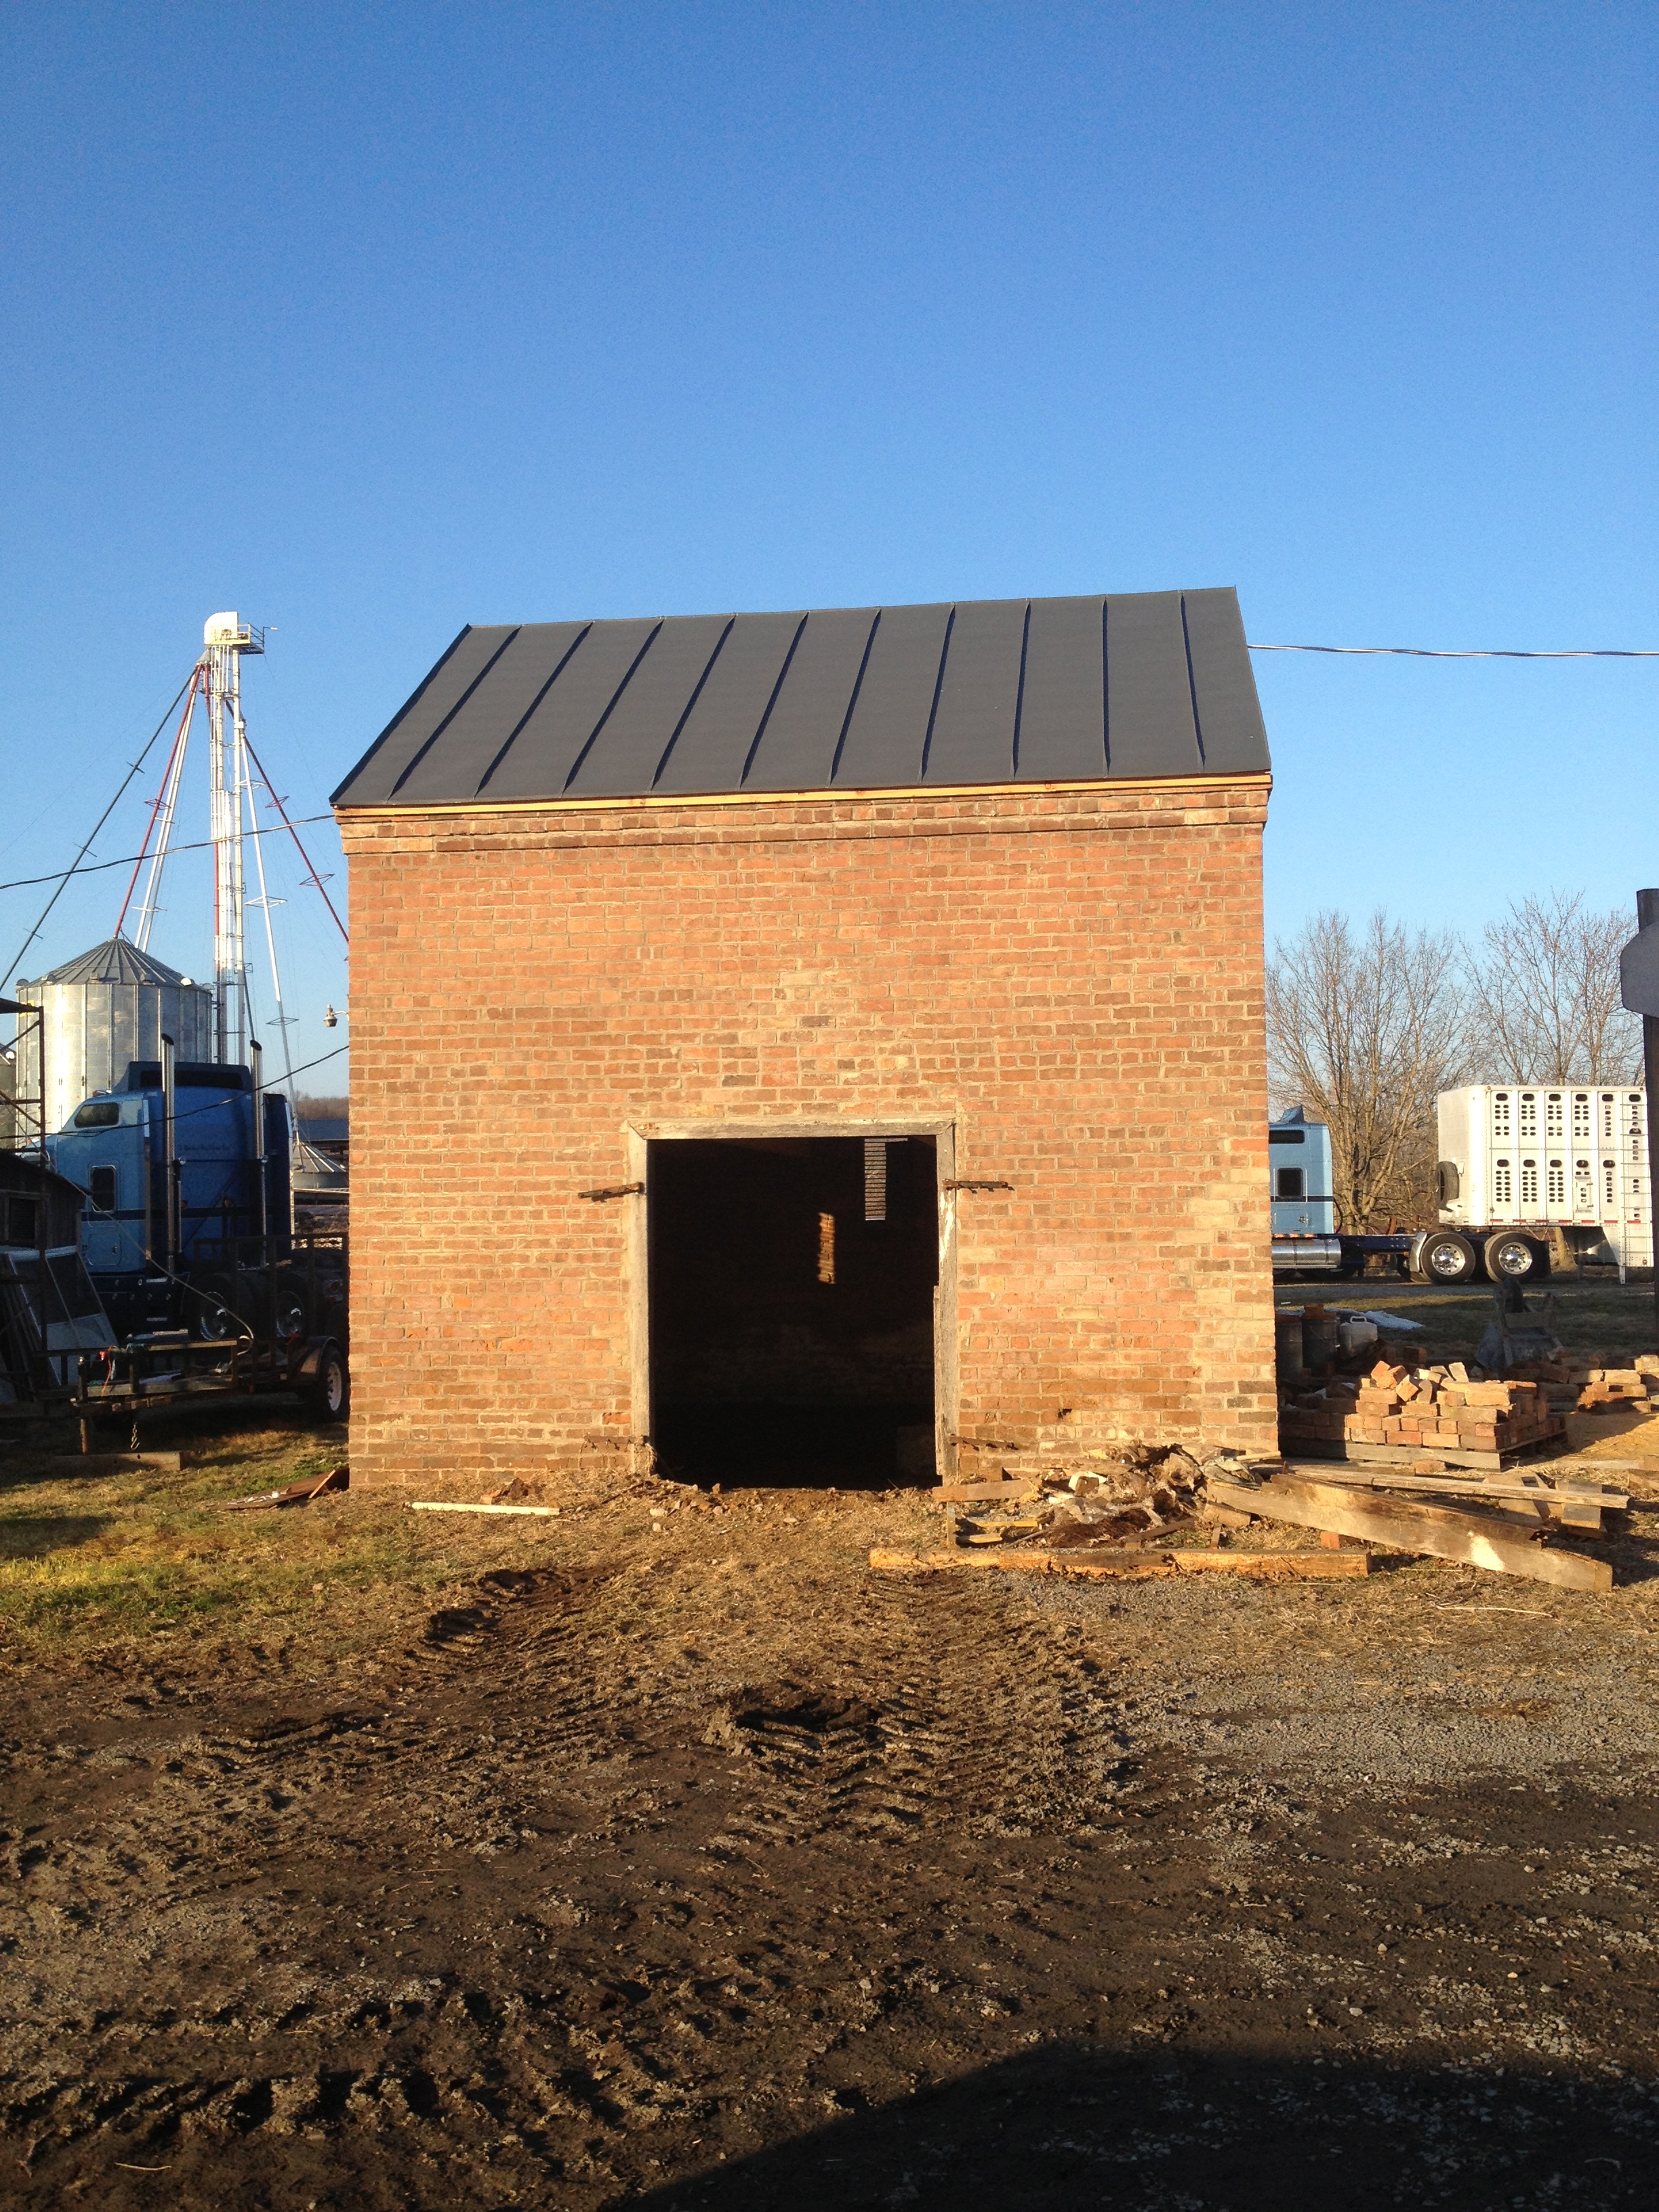
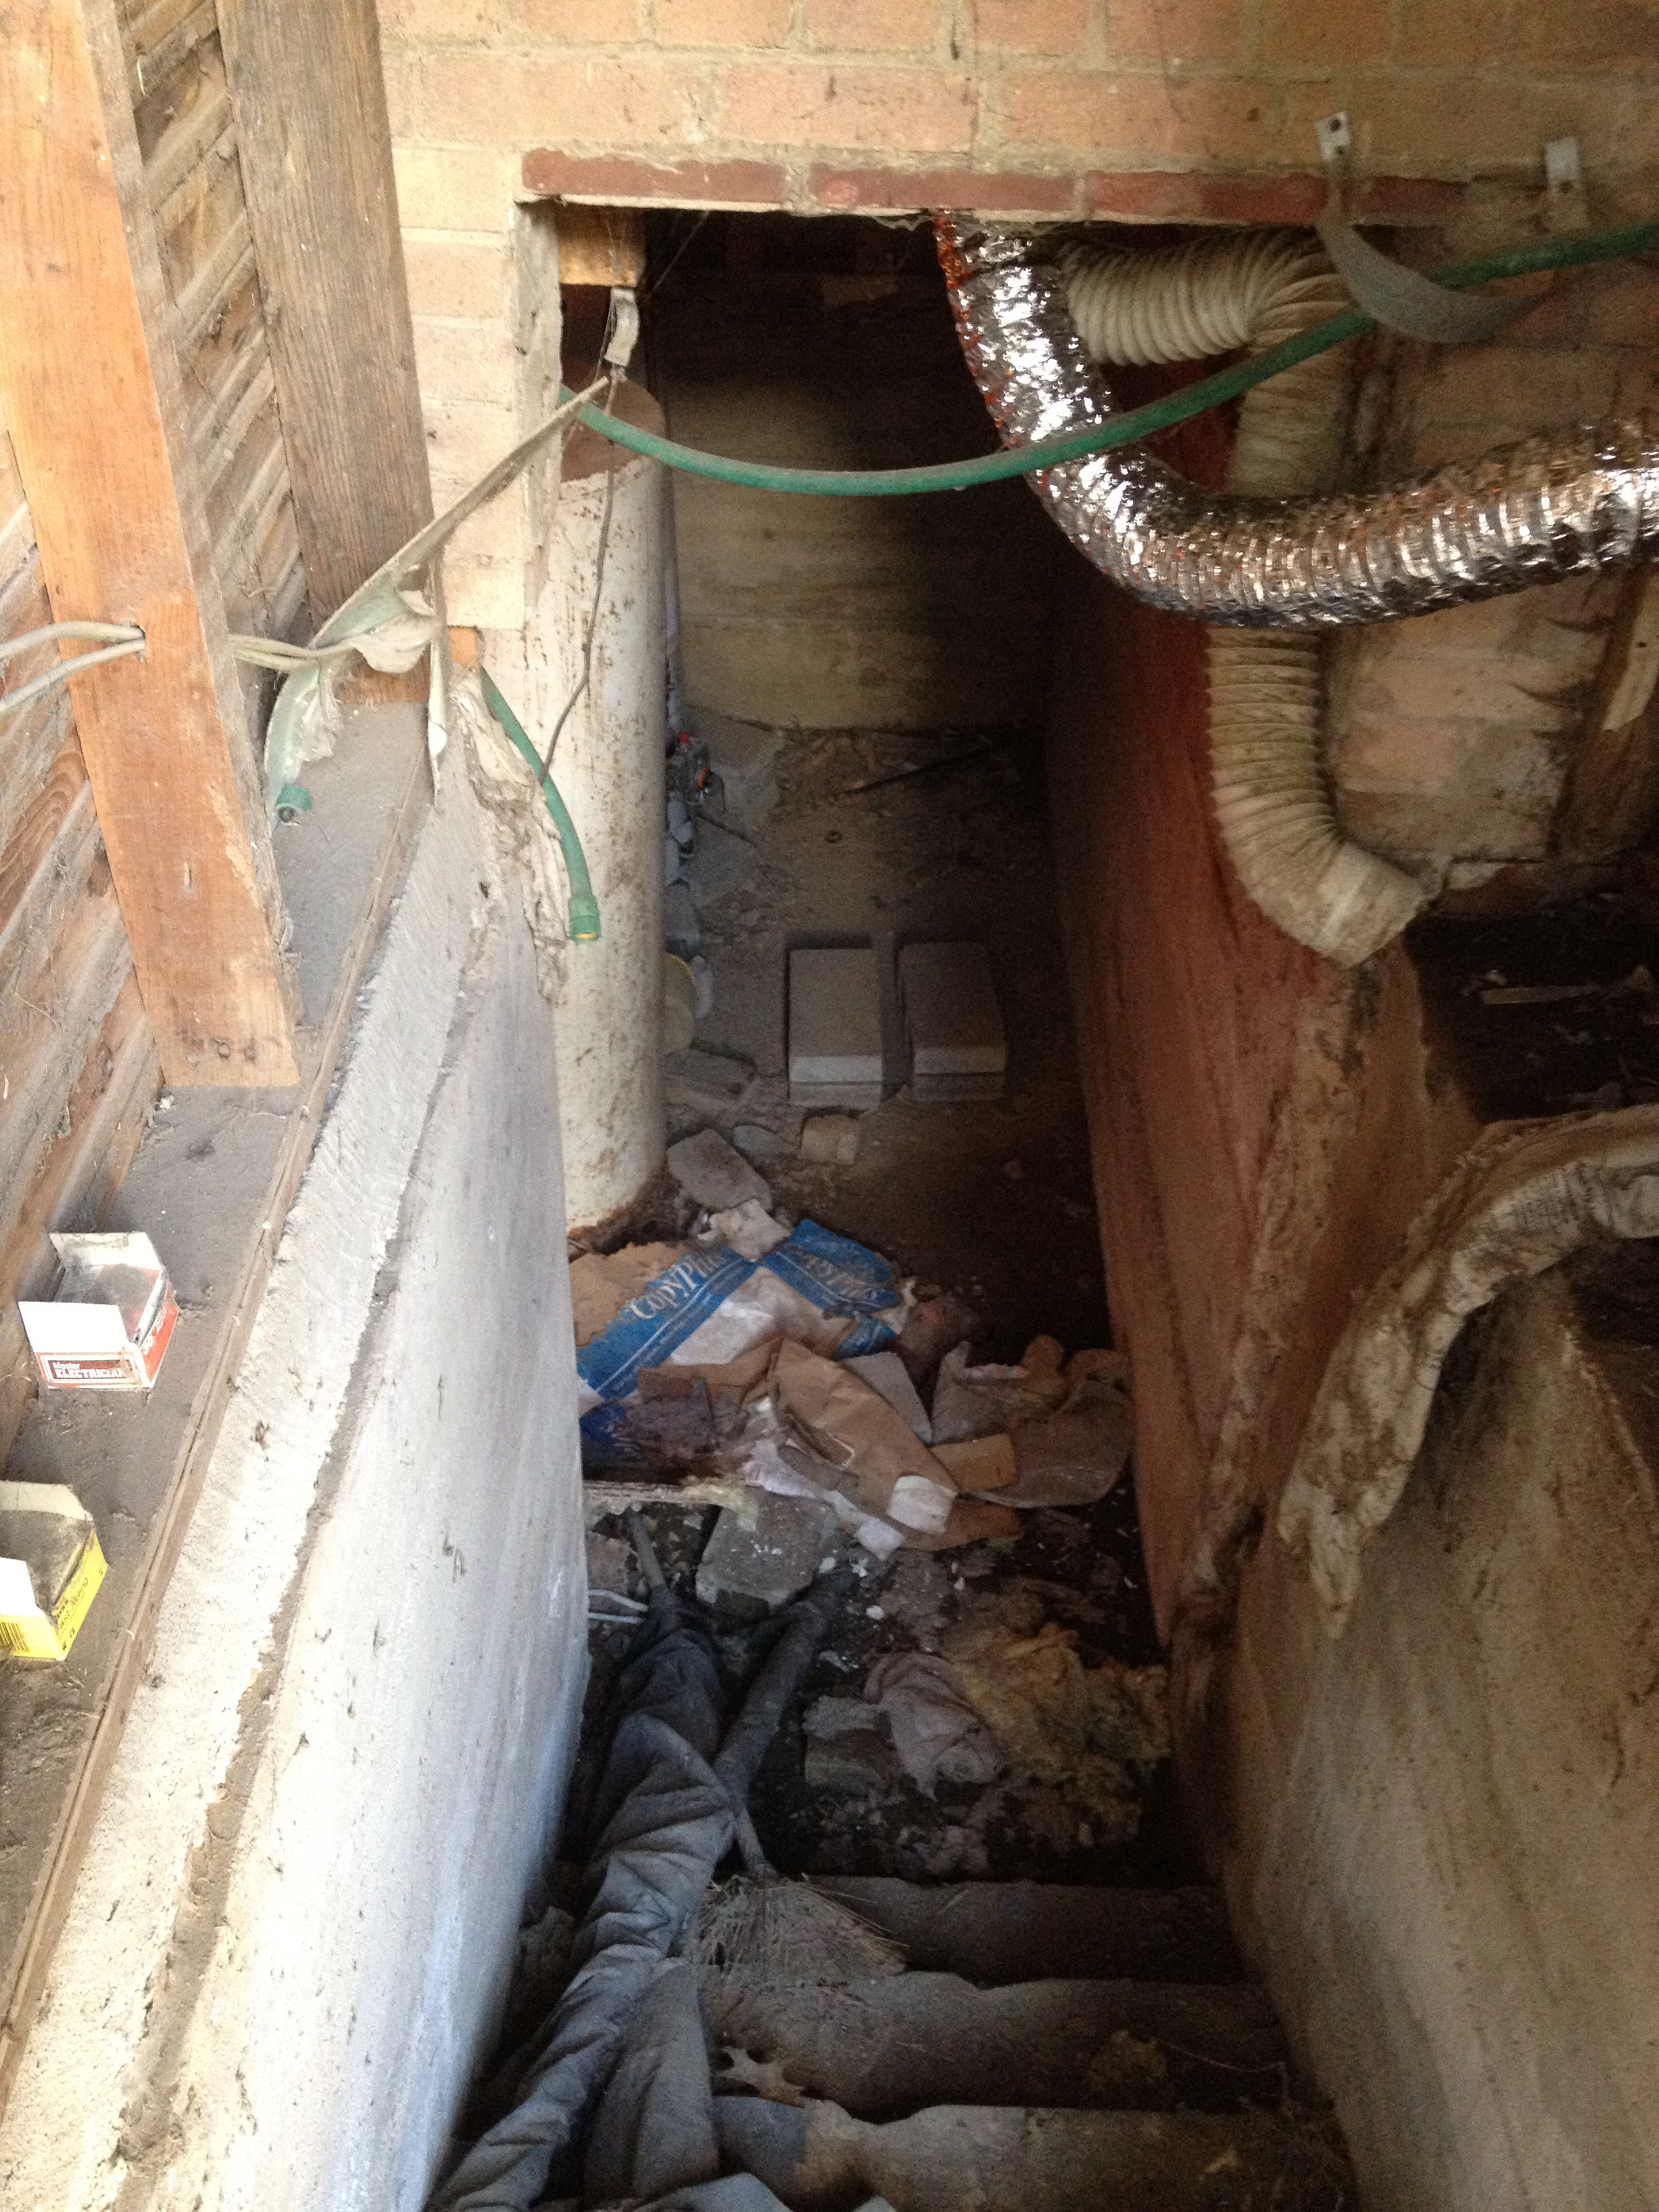
The original kitchen structure was one of the most dubious parts of our entire project.  We always knew we wanted to save/rehab as much of the original summer kitchen structure as we could, but our contractor knew the team would have to evaluate what (if anything) could be saved once they got into the thick of things.  Thus, during demo, we were left with:

IMG_2639

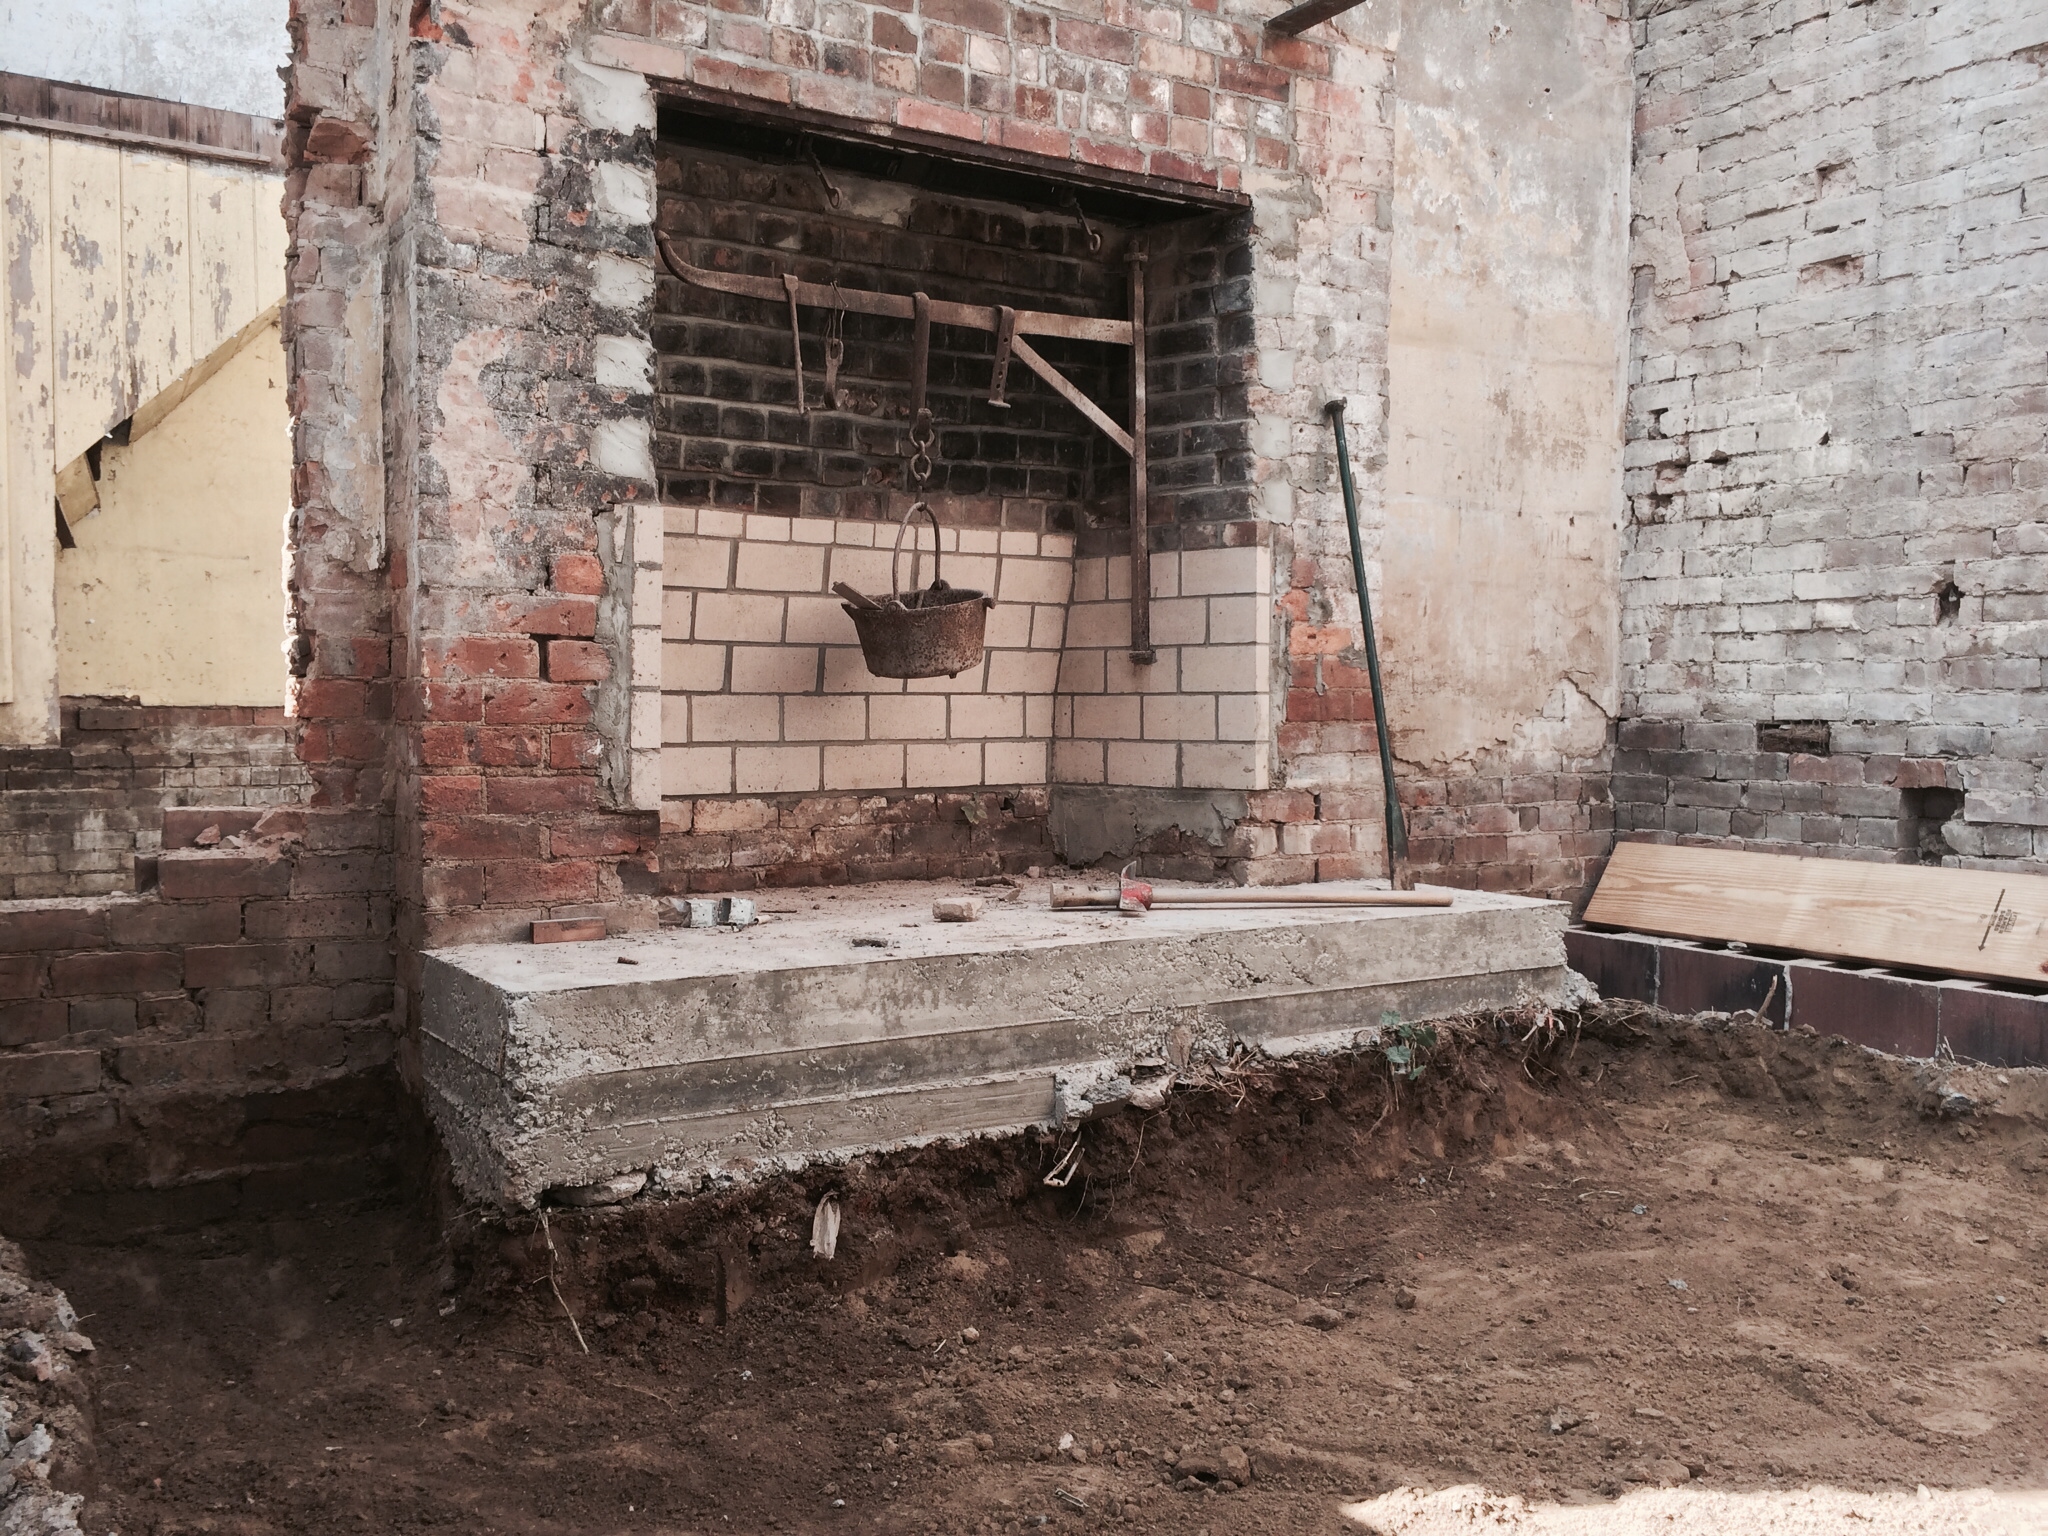
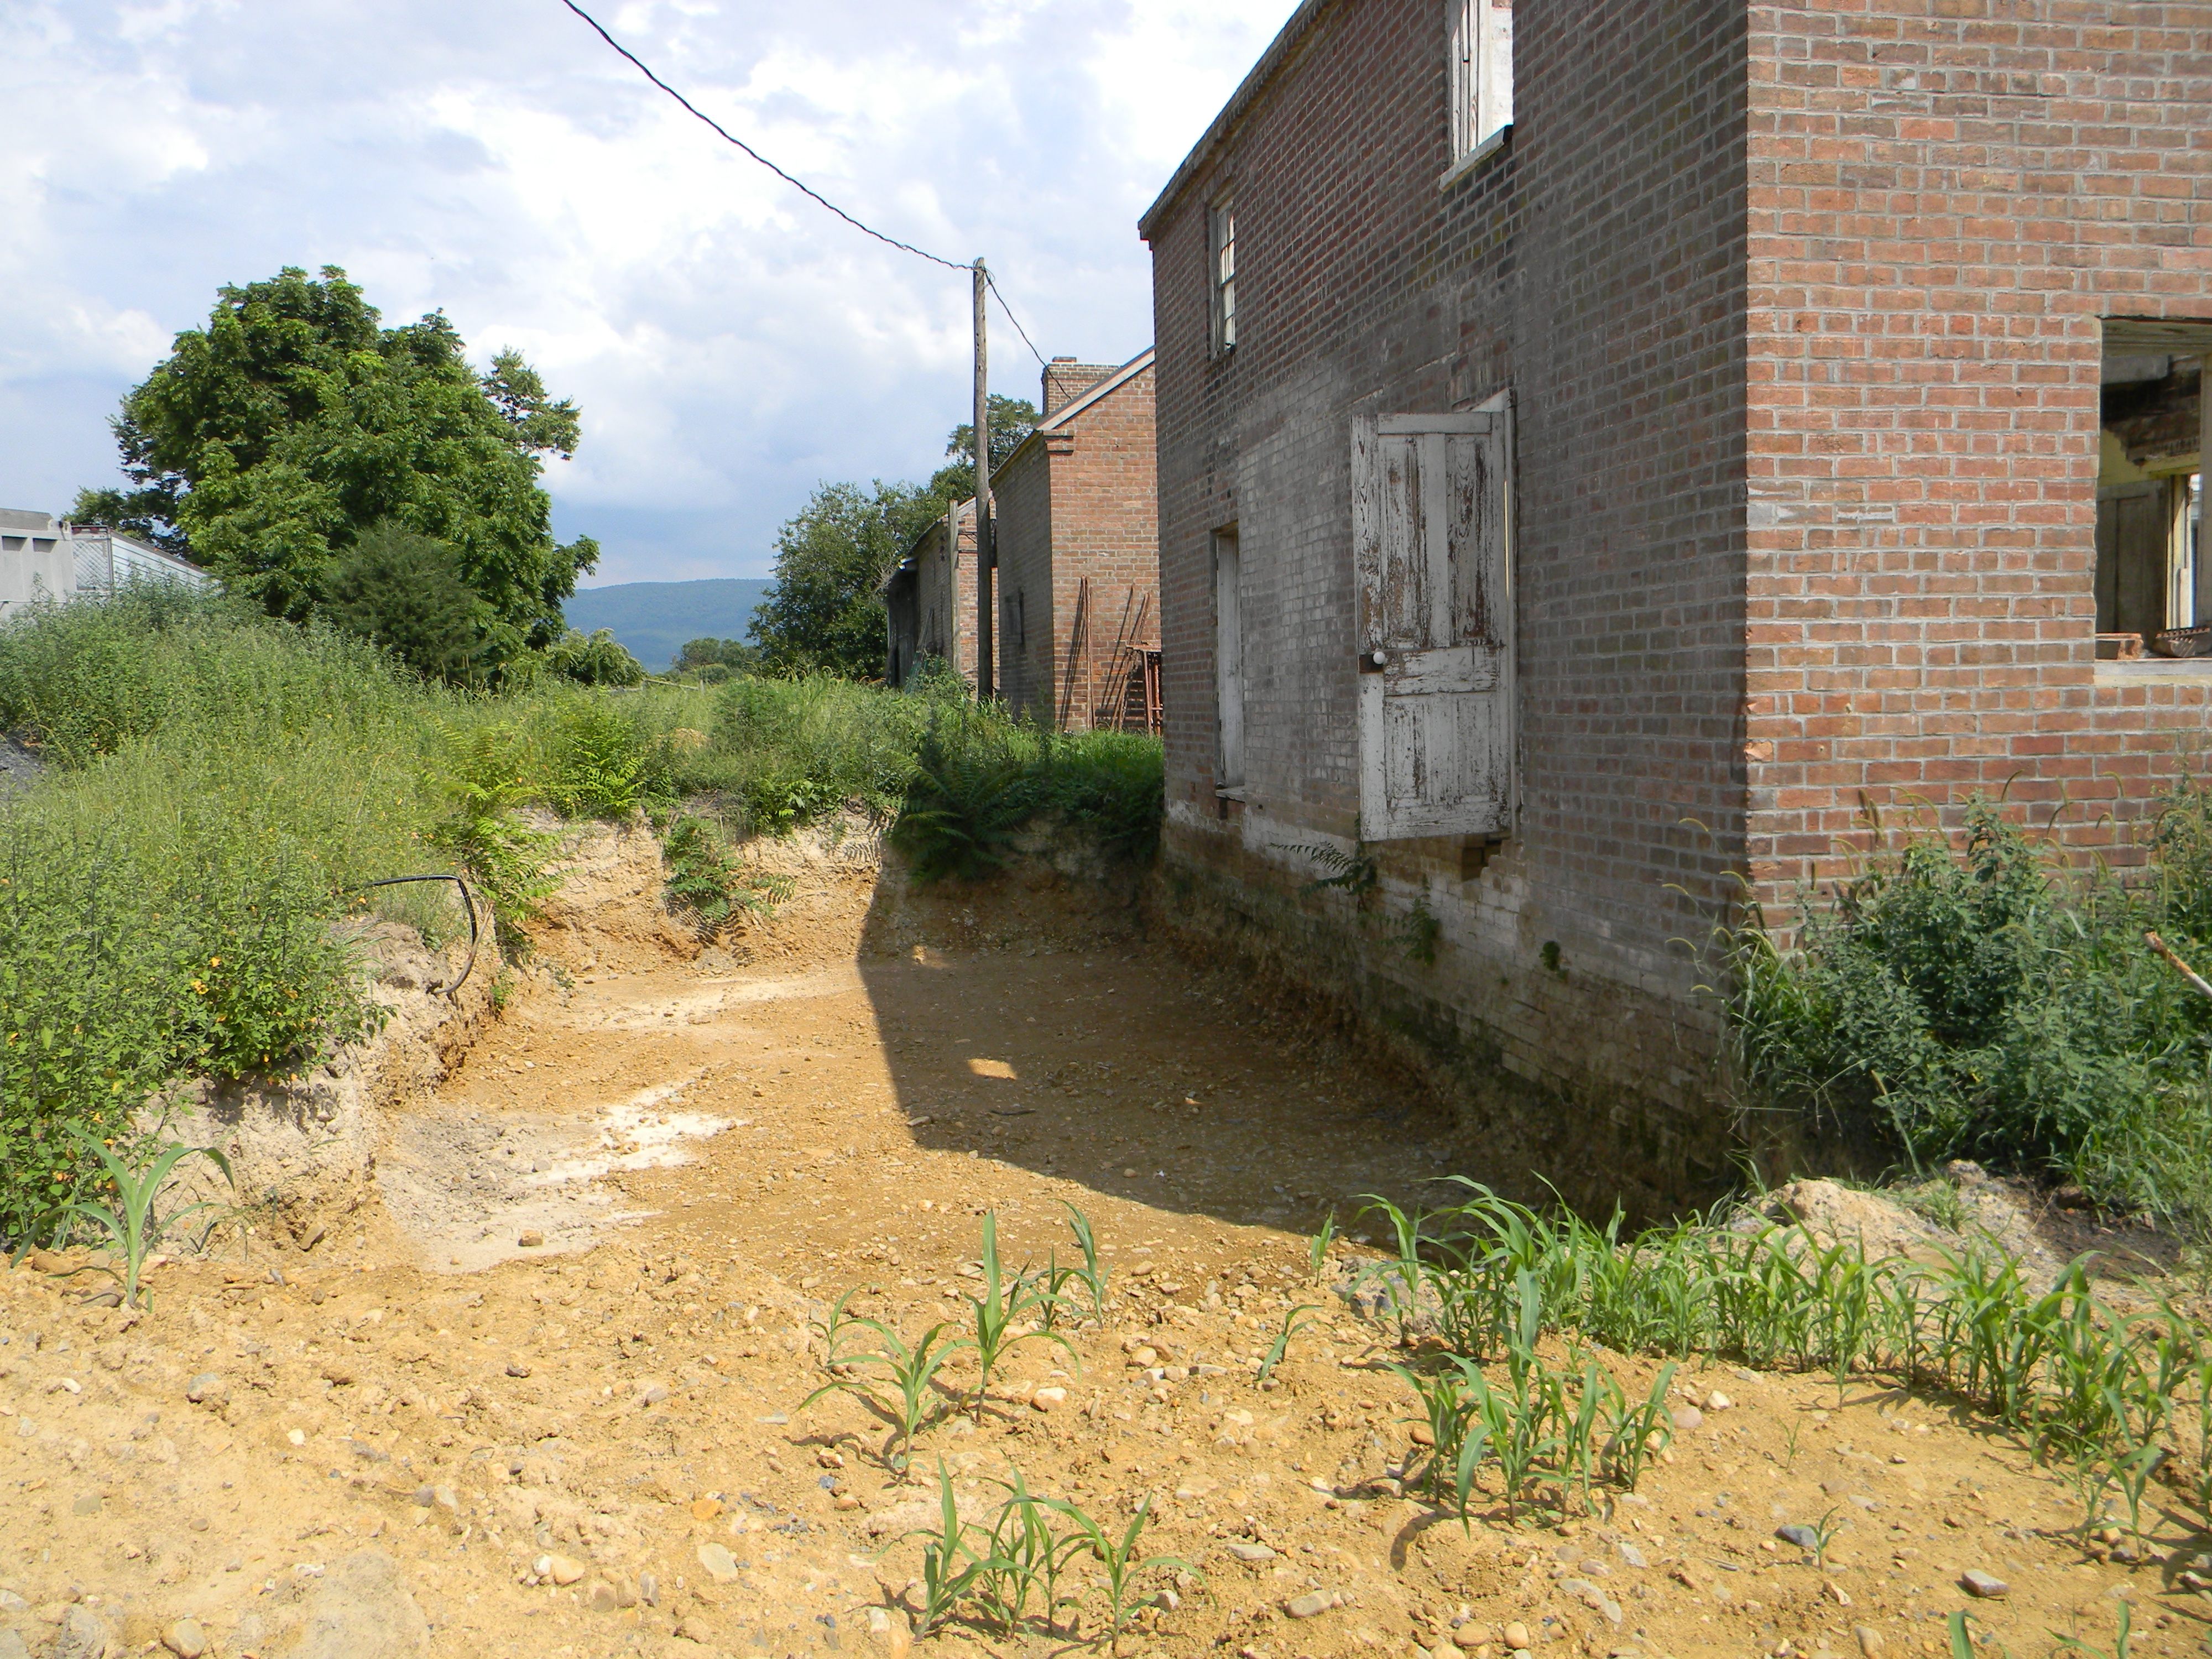
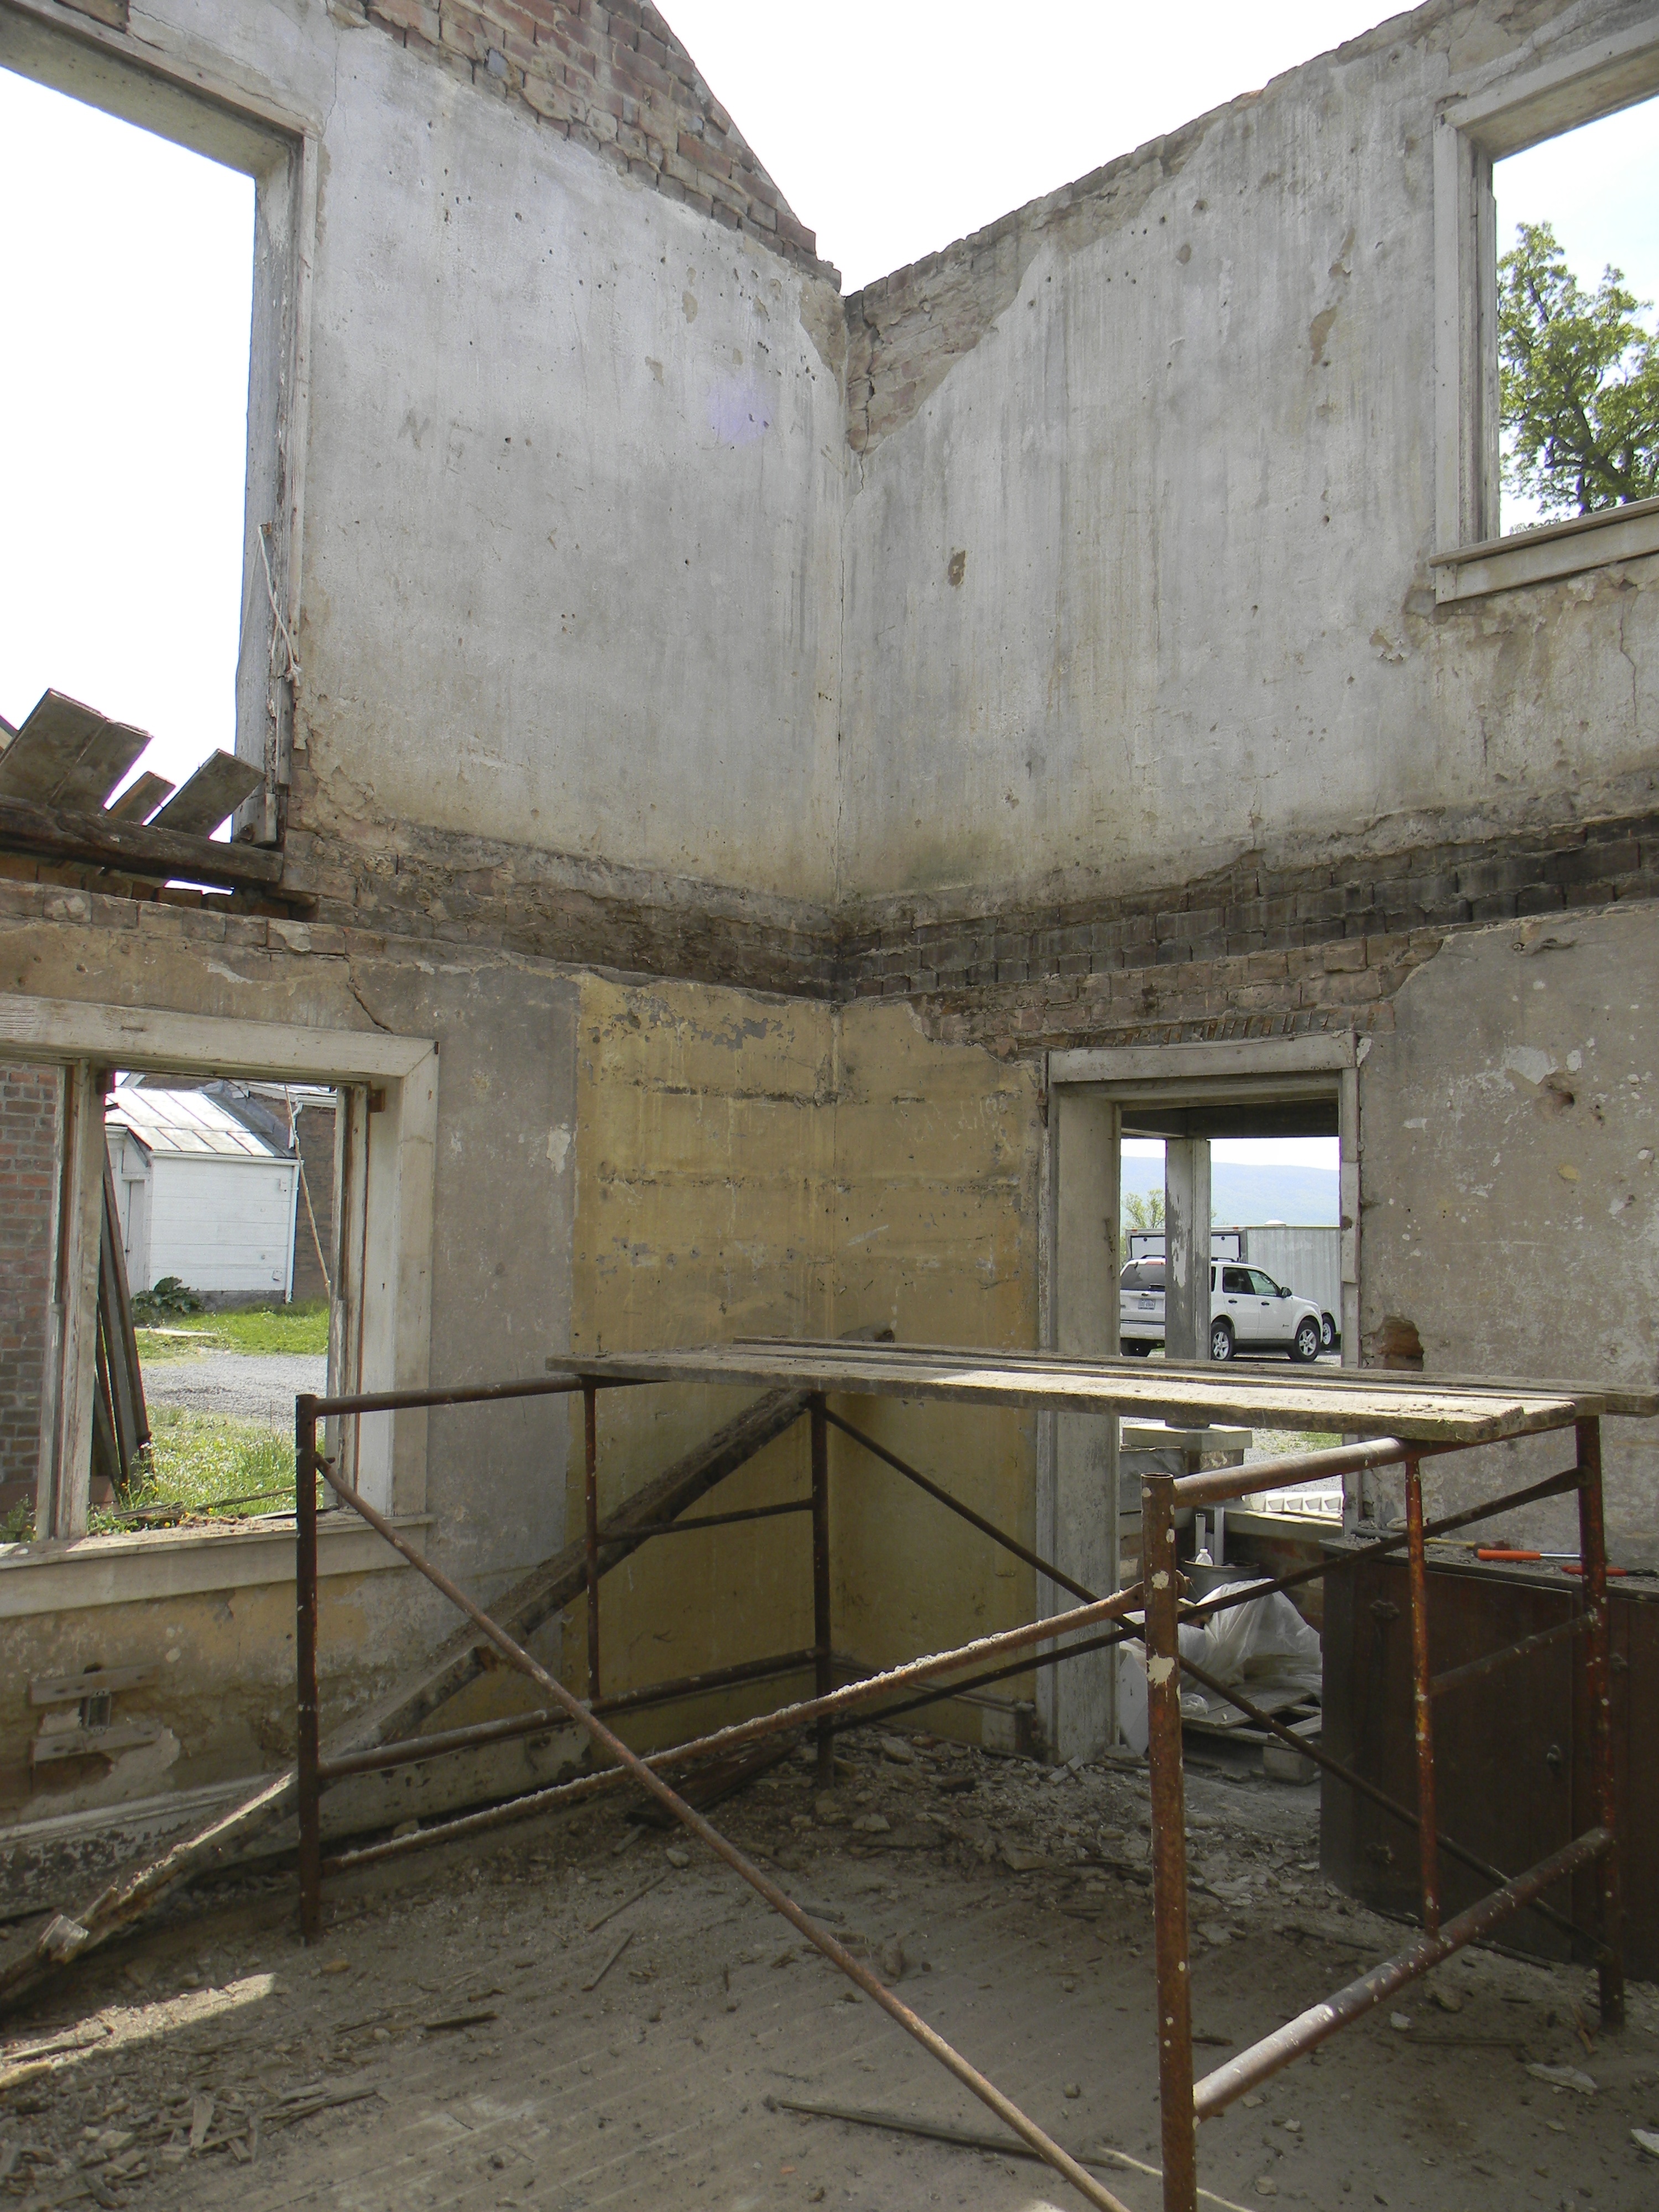
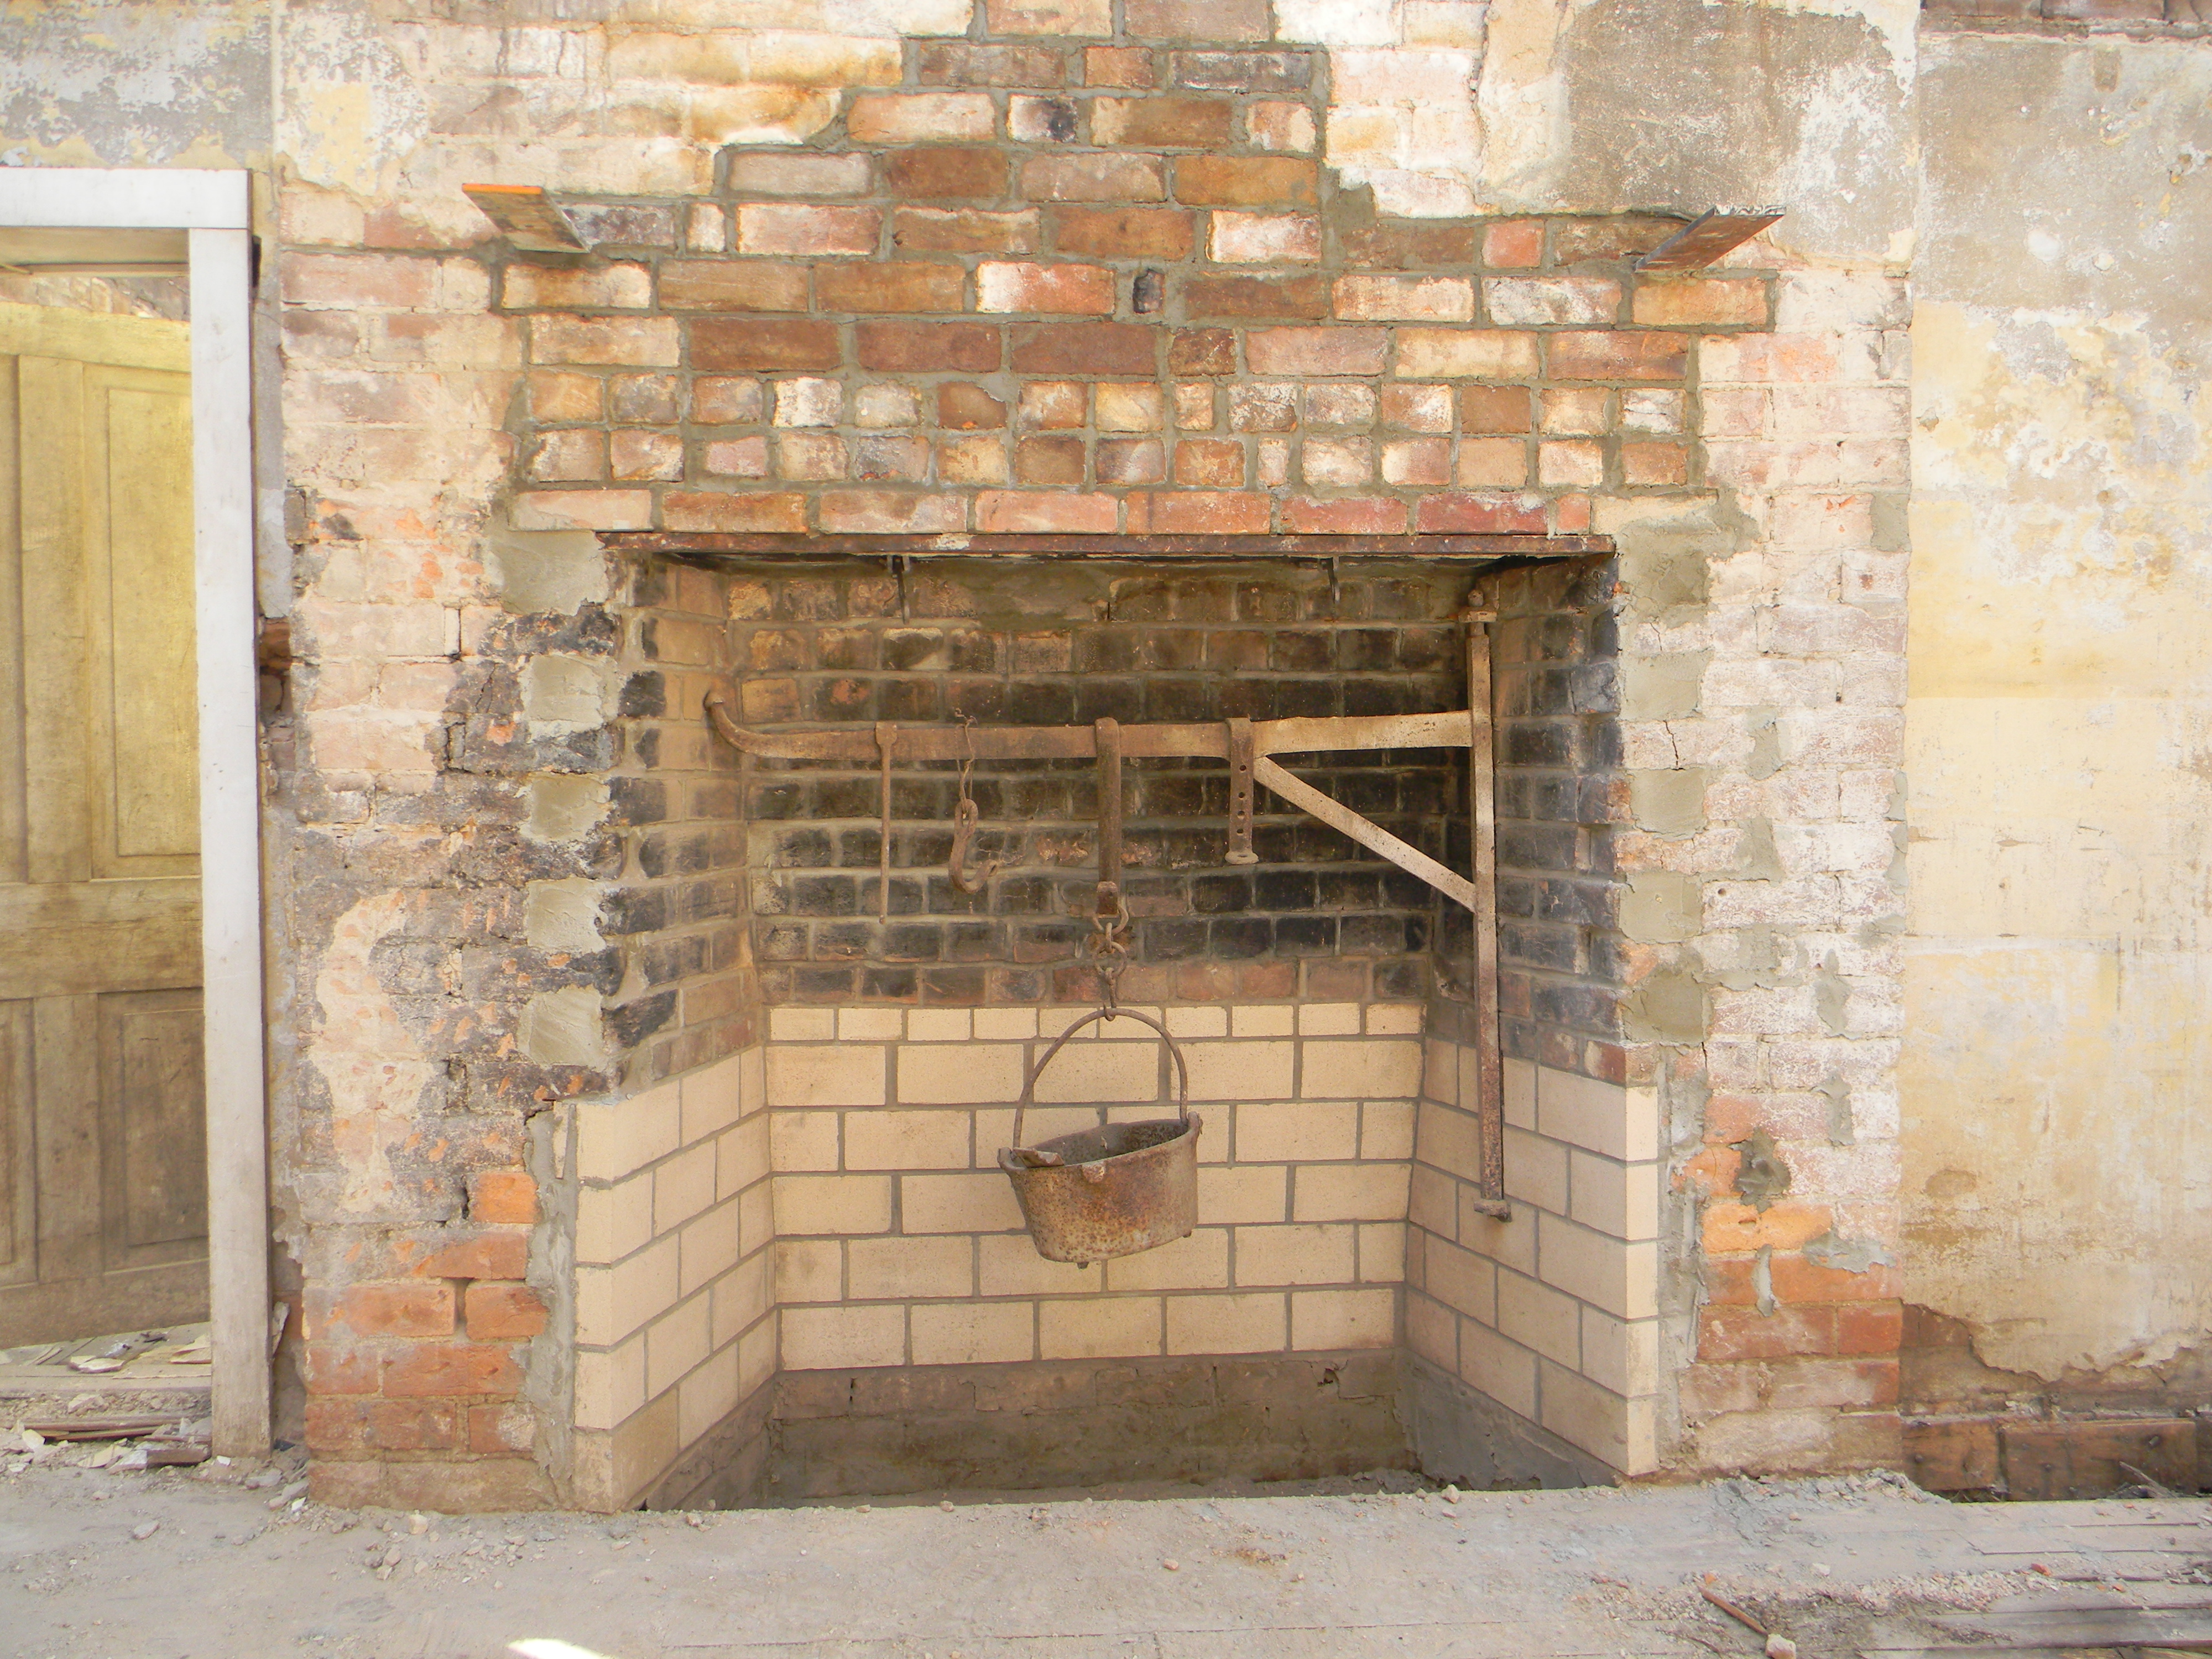
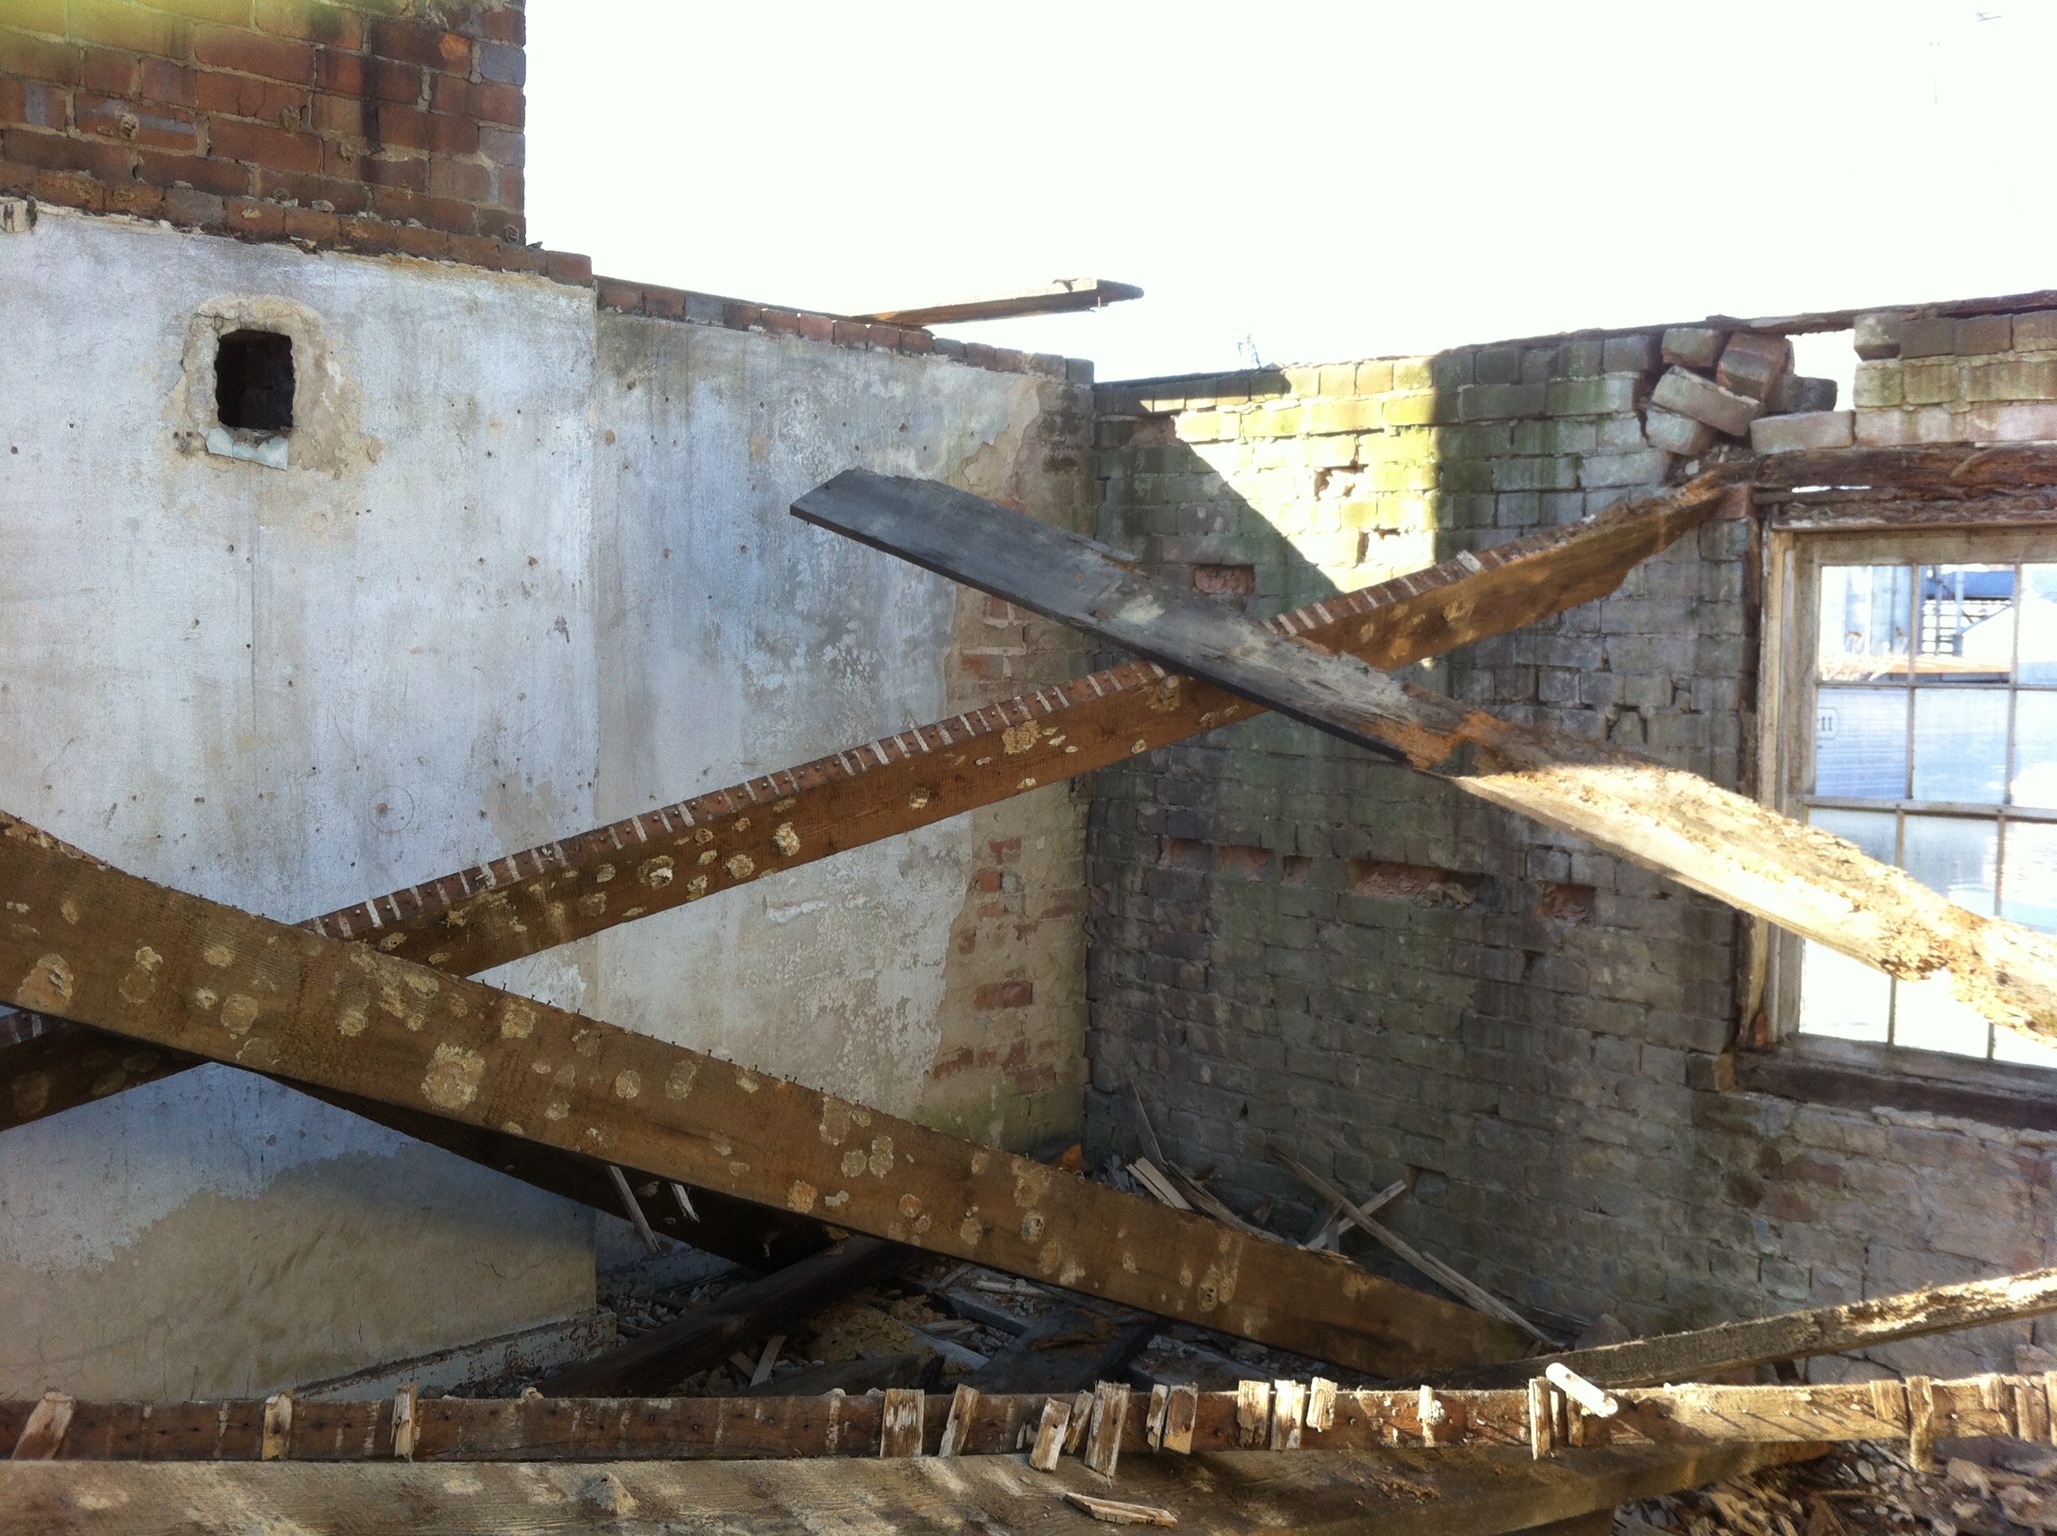
Sort of like a boxer with one tooth left . . . but still fighting!  The two walls not pictured in the photo above had already been re-pointed and stabilized, but the wall facing us had SERIOUS issues.  It has been bowing inward for years – even a lay person could notice that it was curved, at some point deflecting in about 5 inches:

IMG_2415

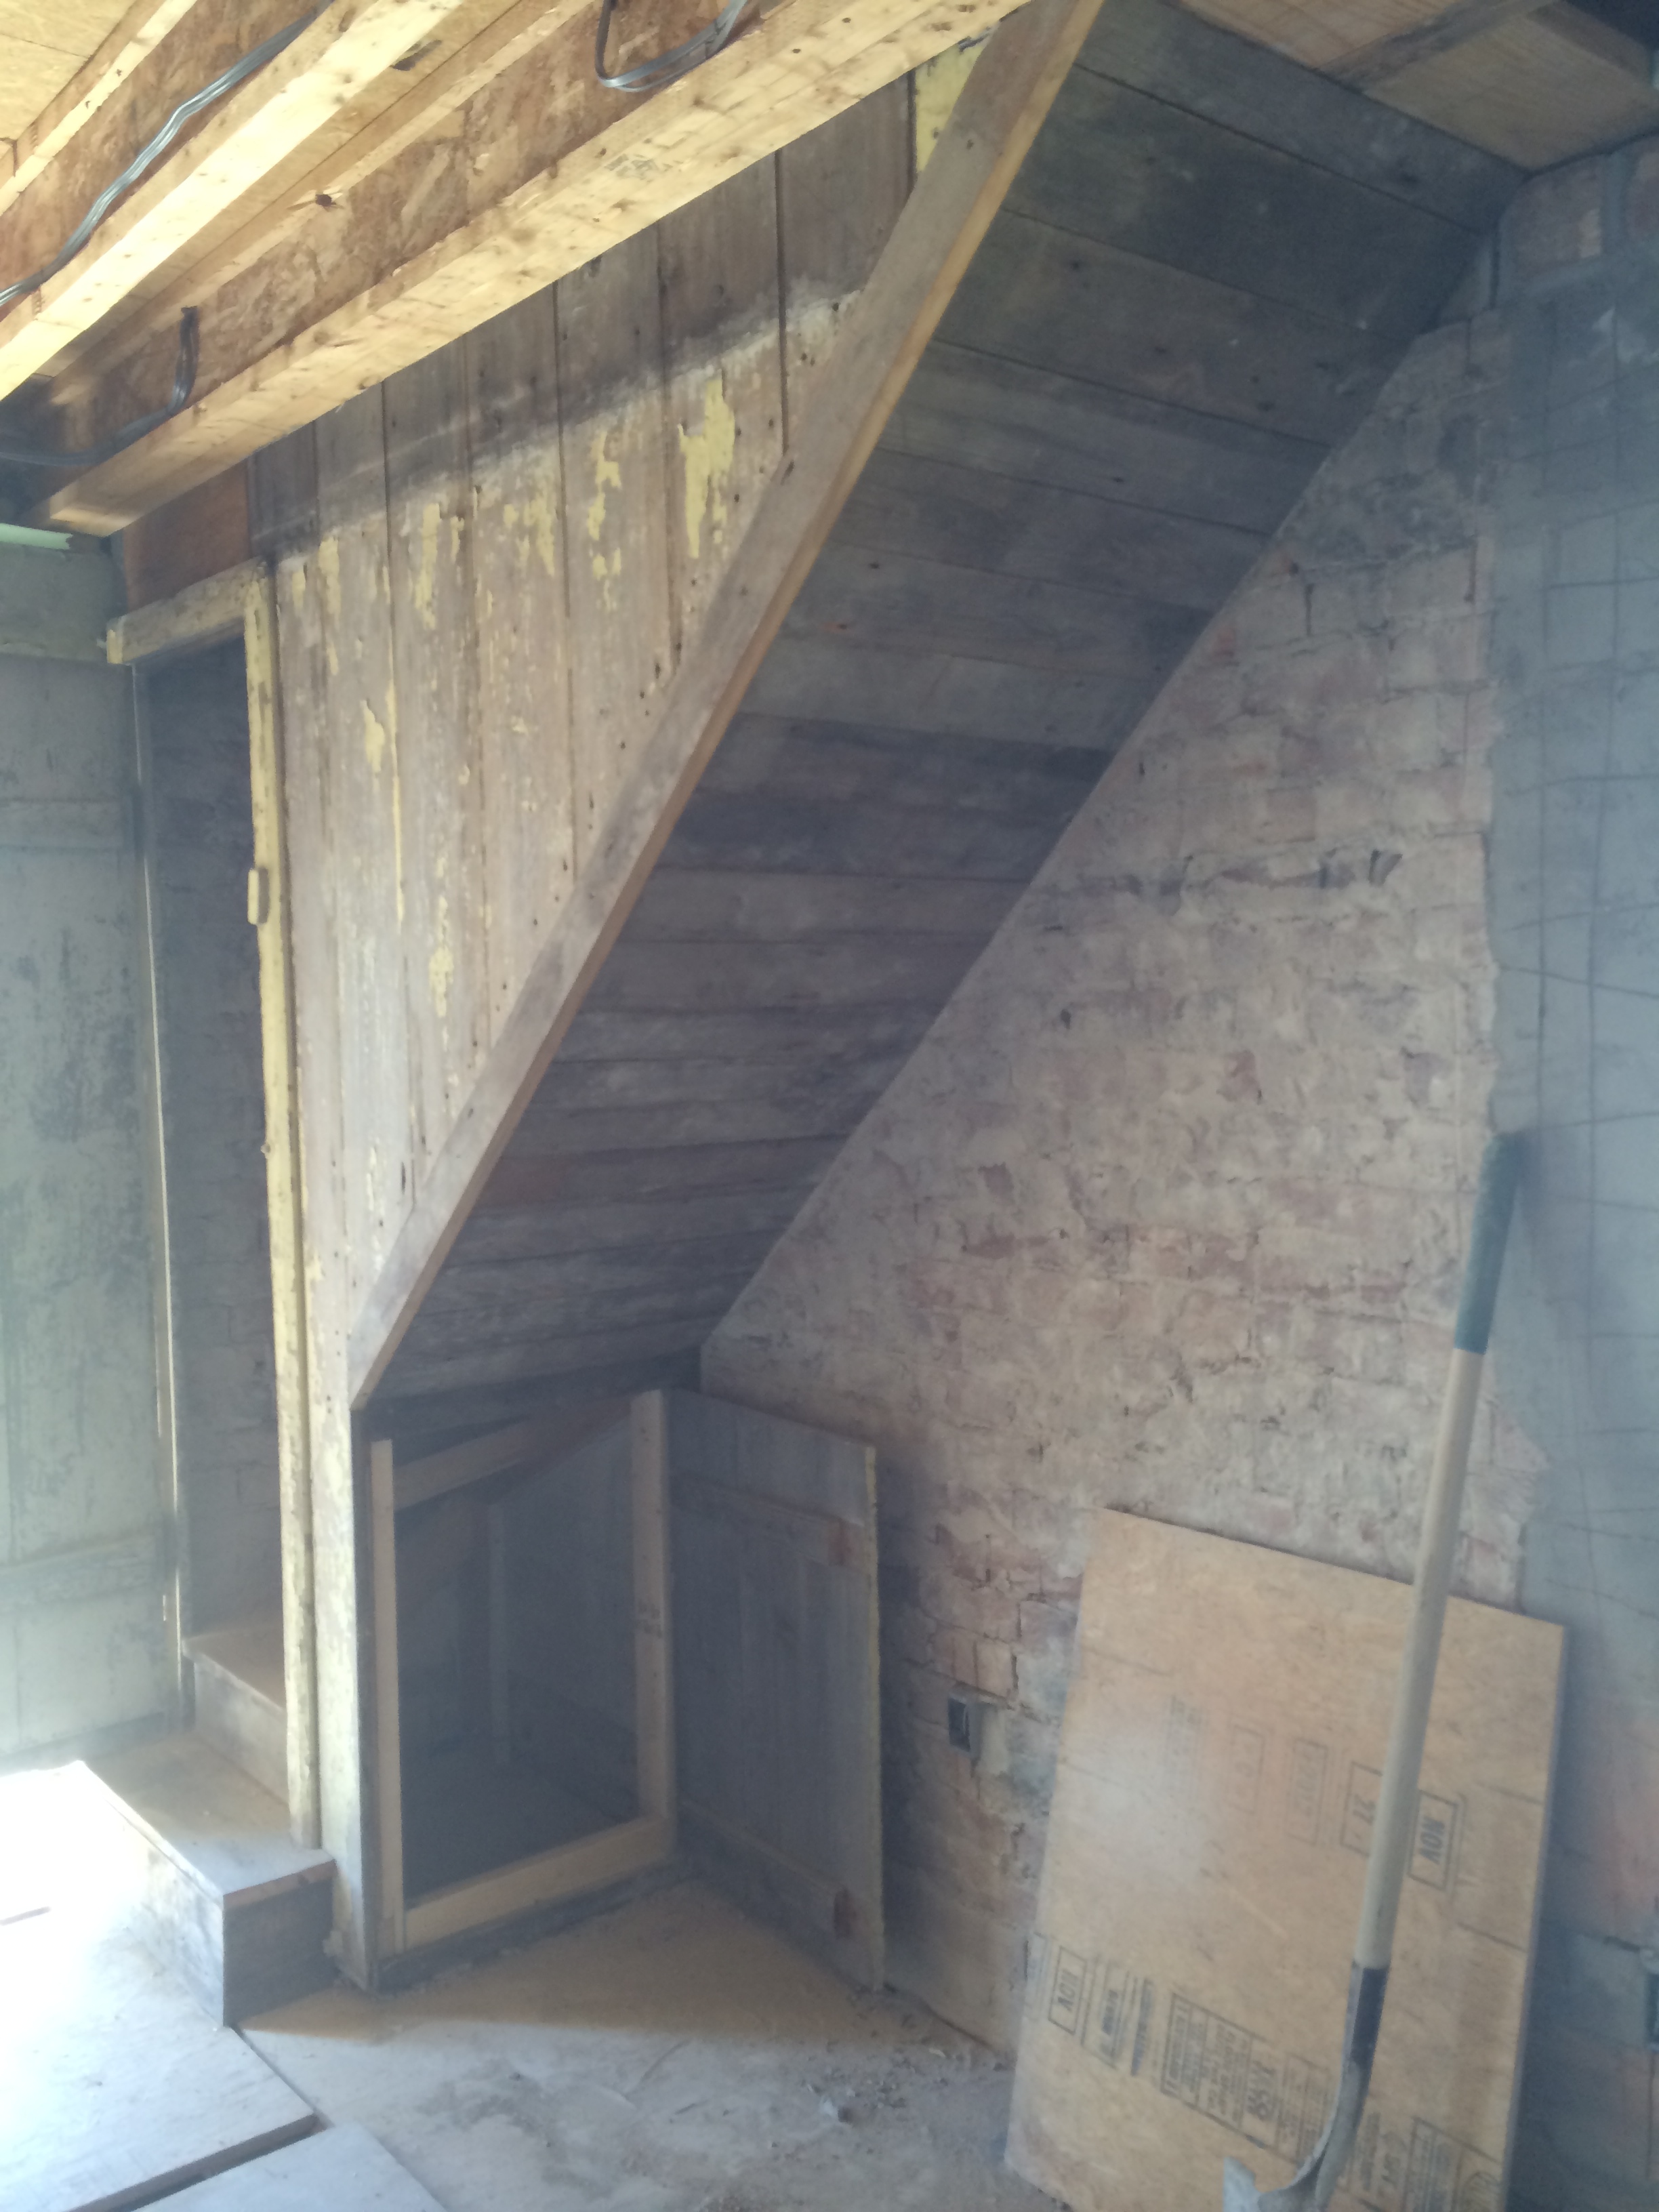
It was basically like someone had taken a huge swing at the center of that wall, and the whole structure was at the point of cave-in.  Our motto was: “don’t sneeze near the wall.”

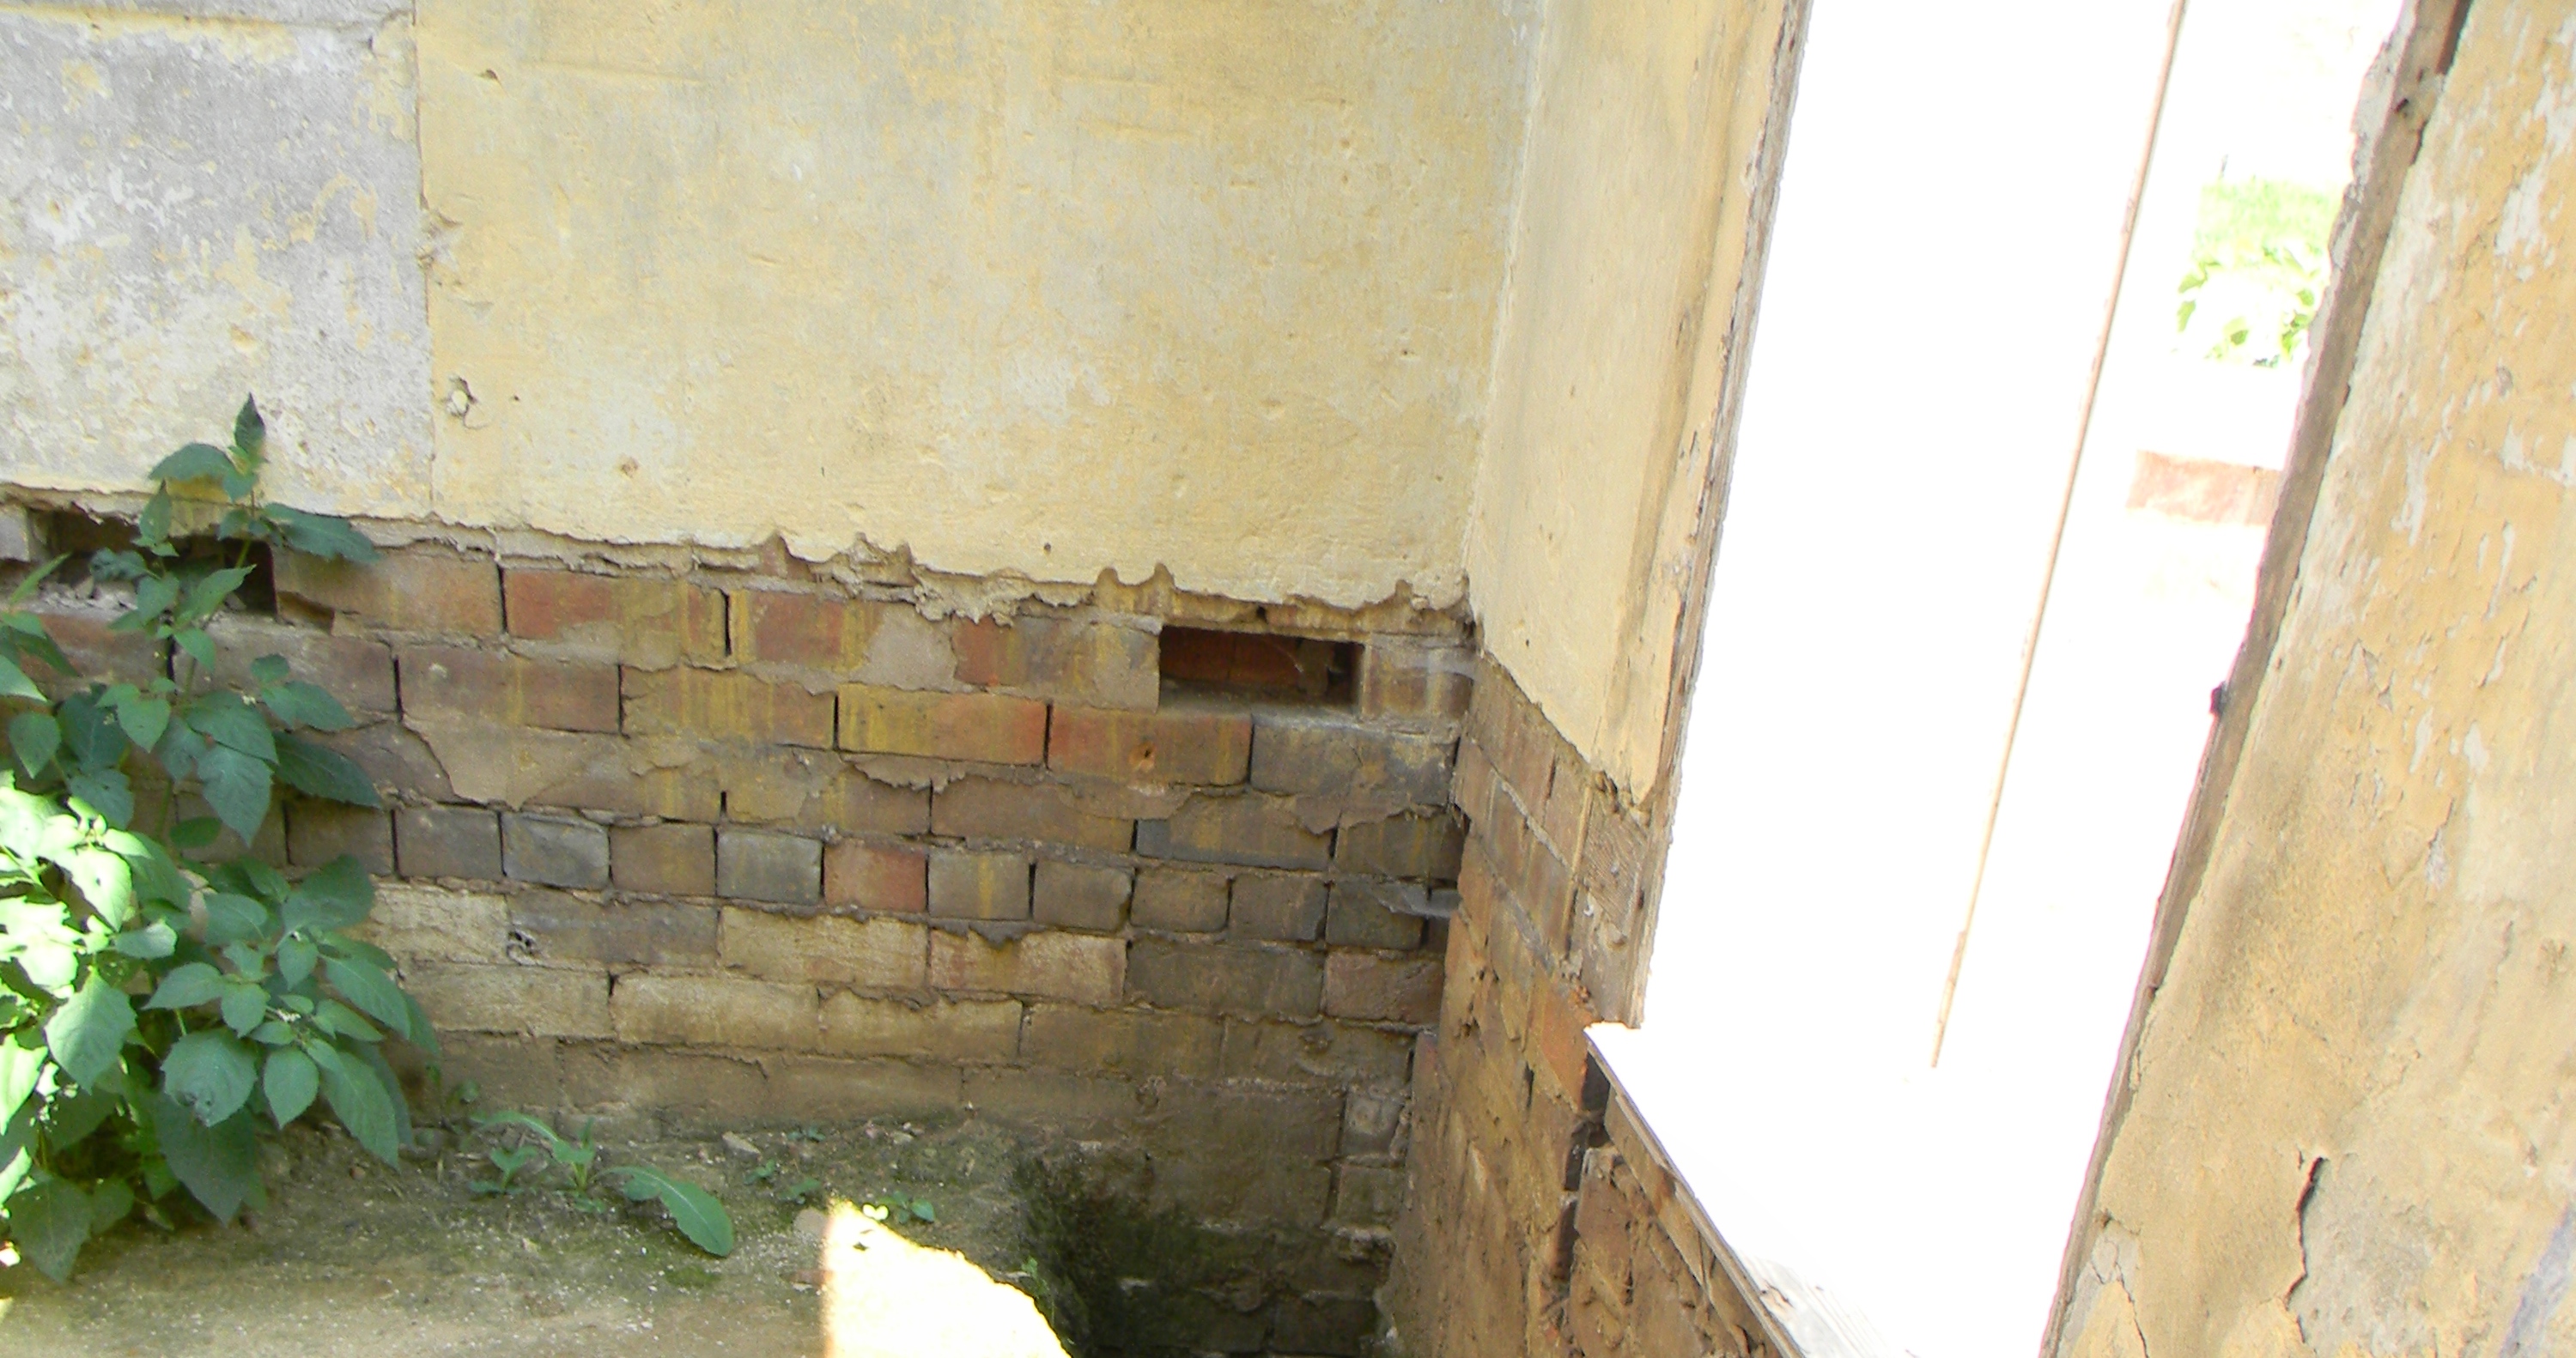
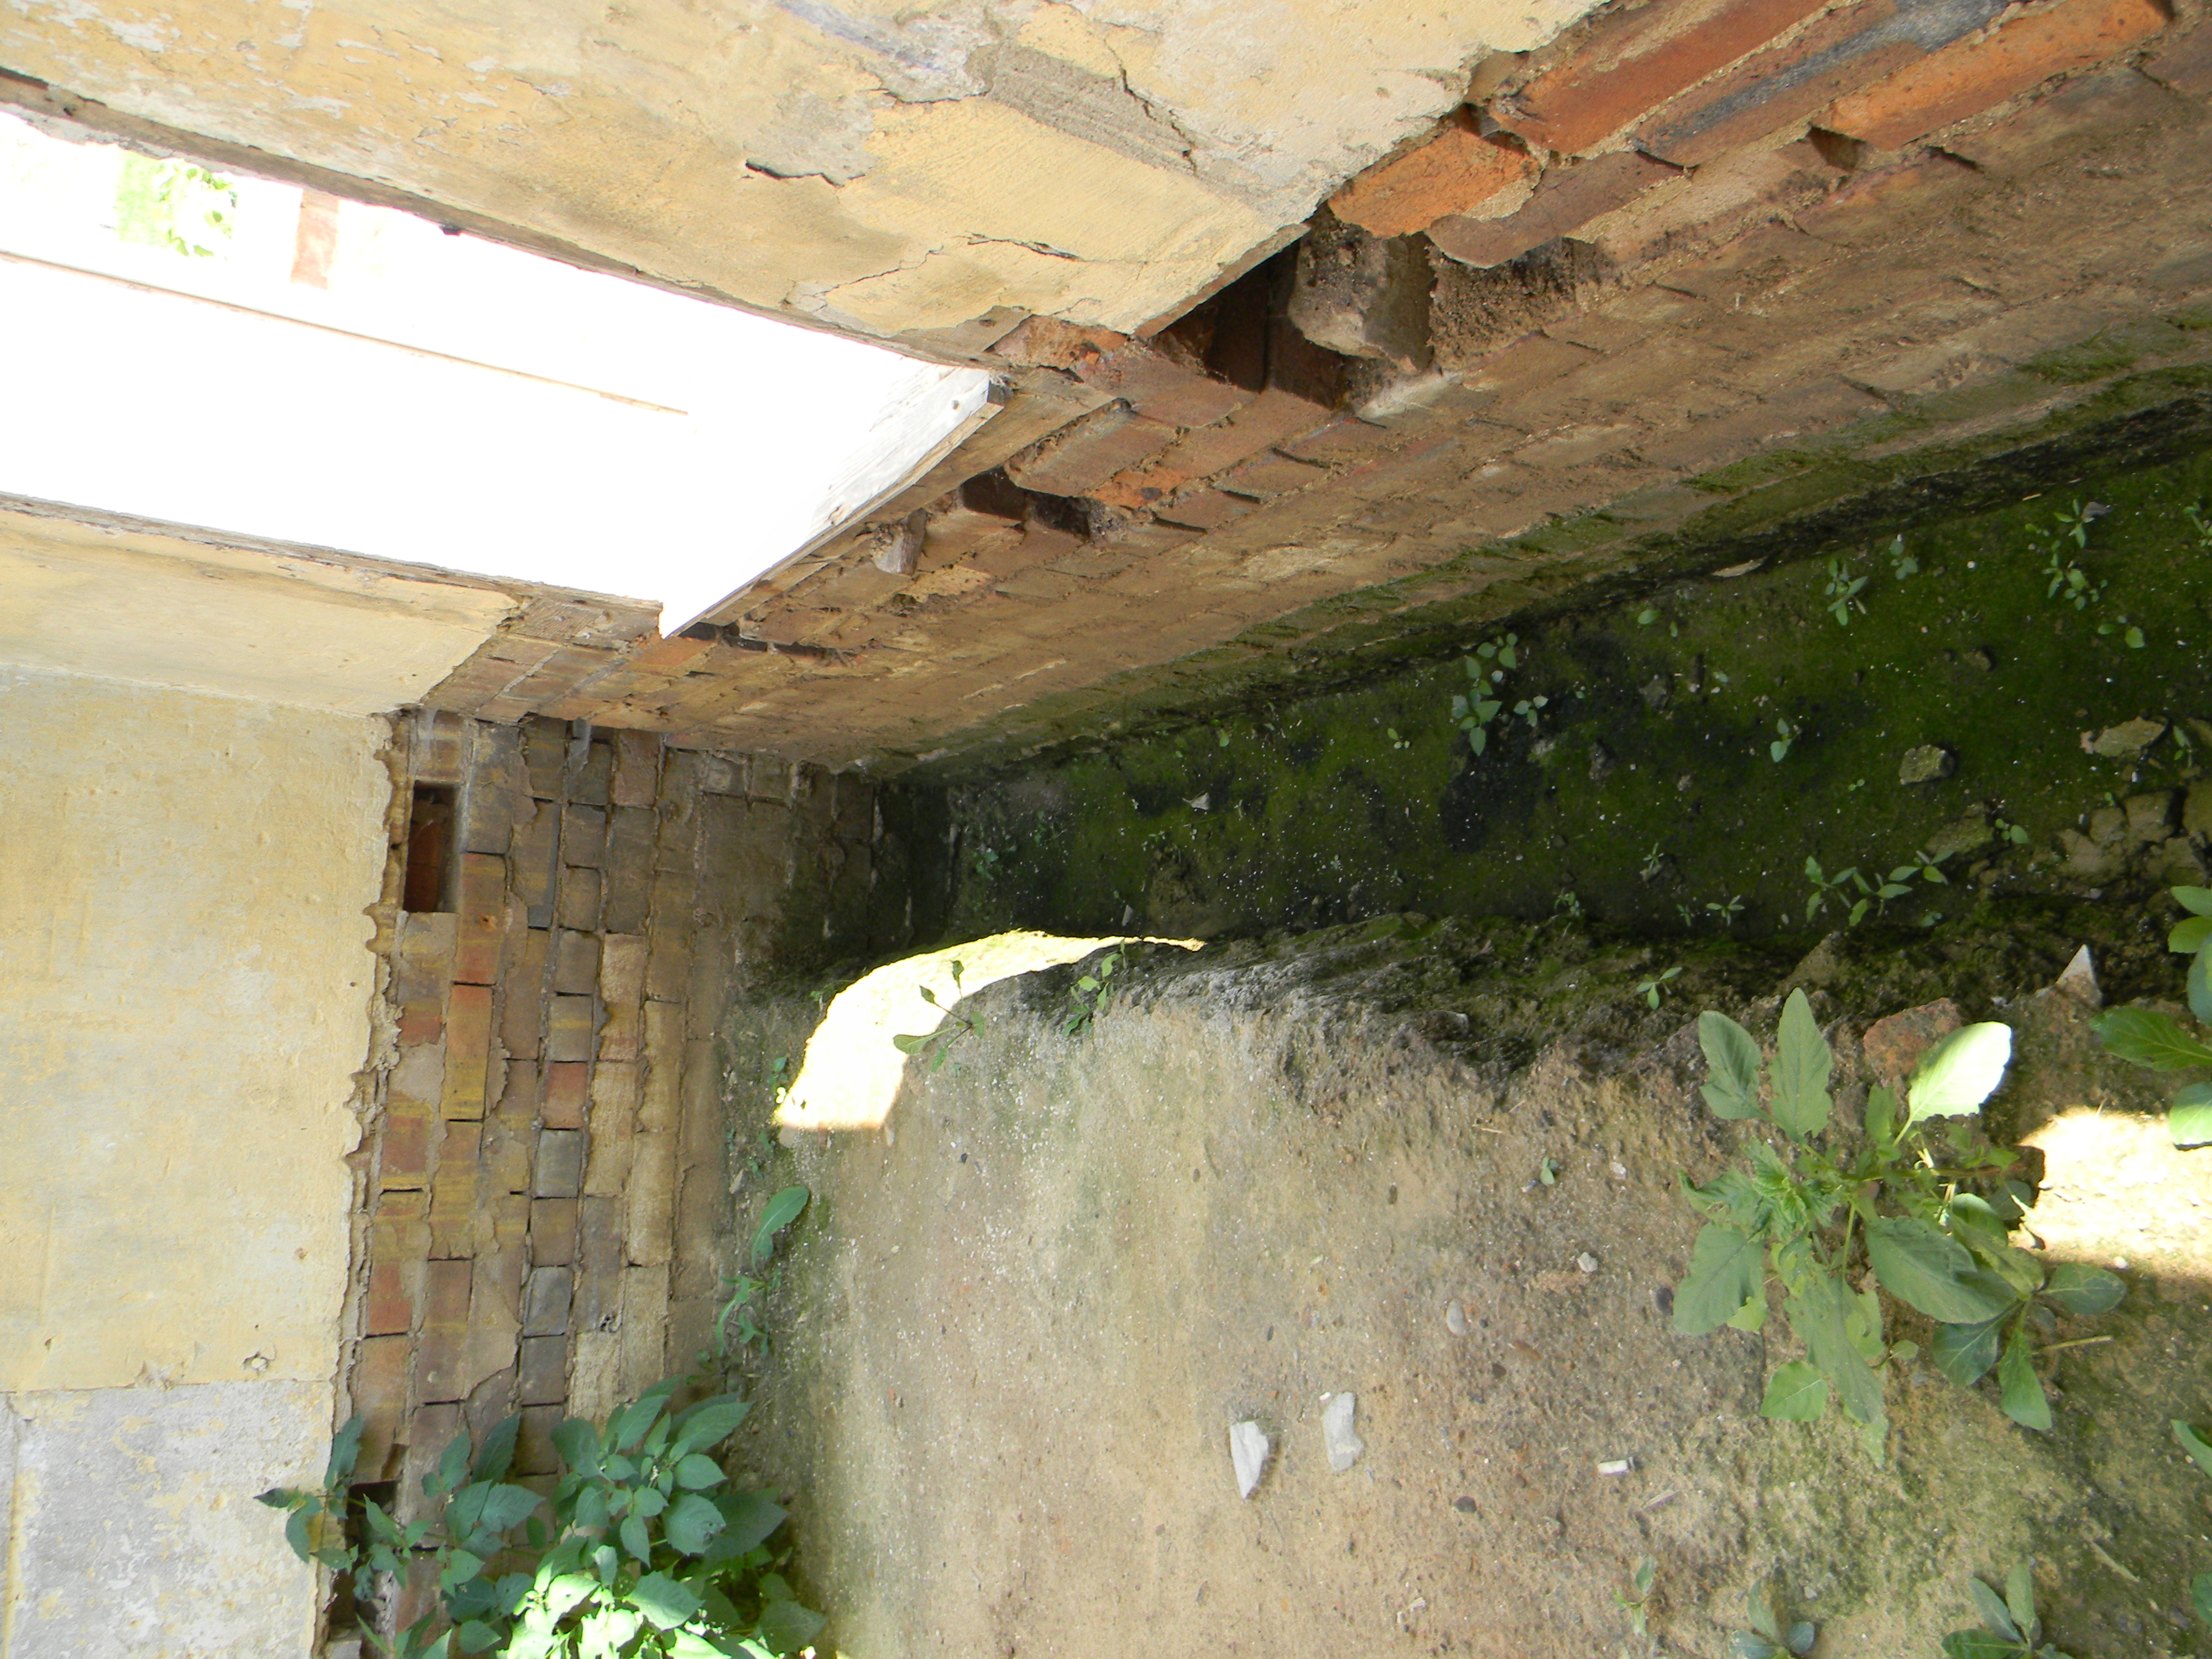
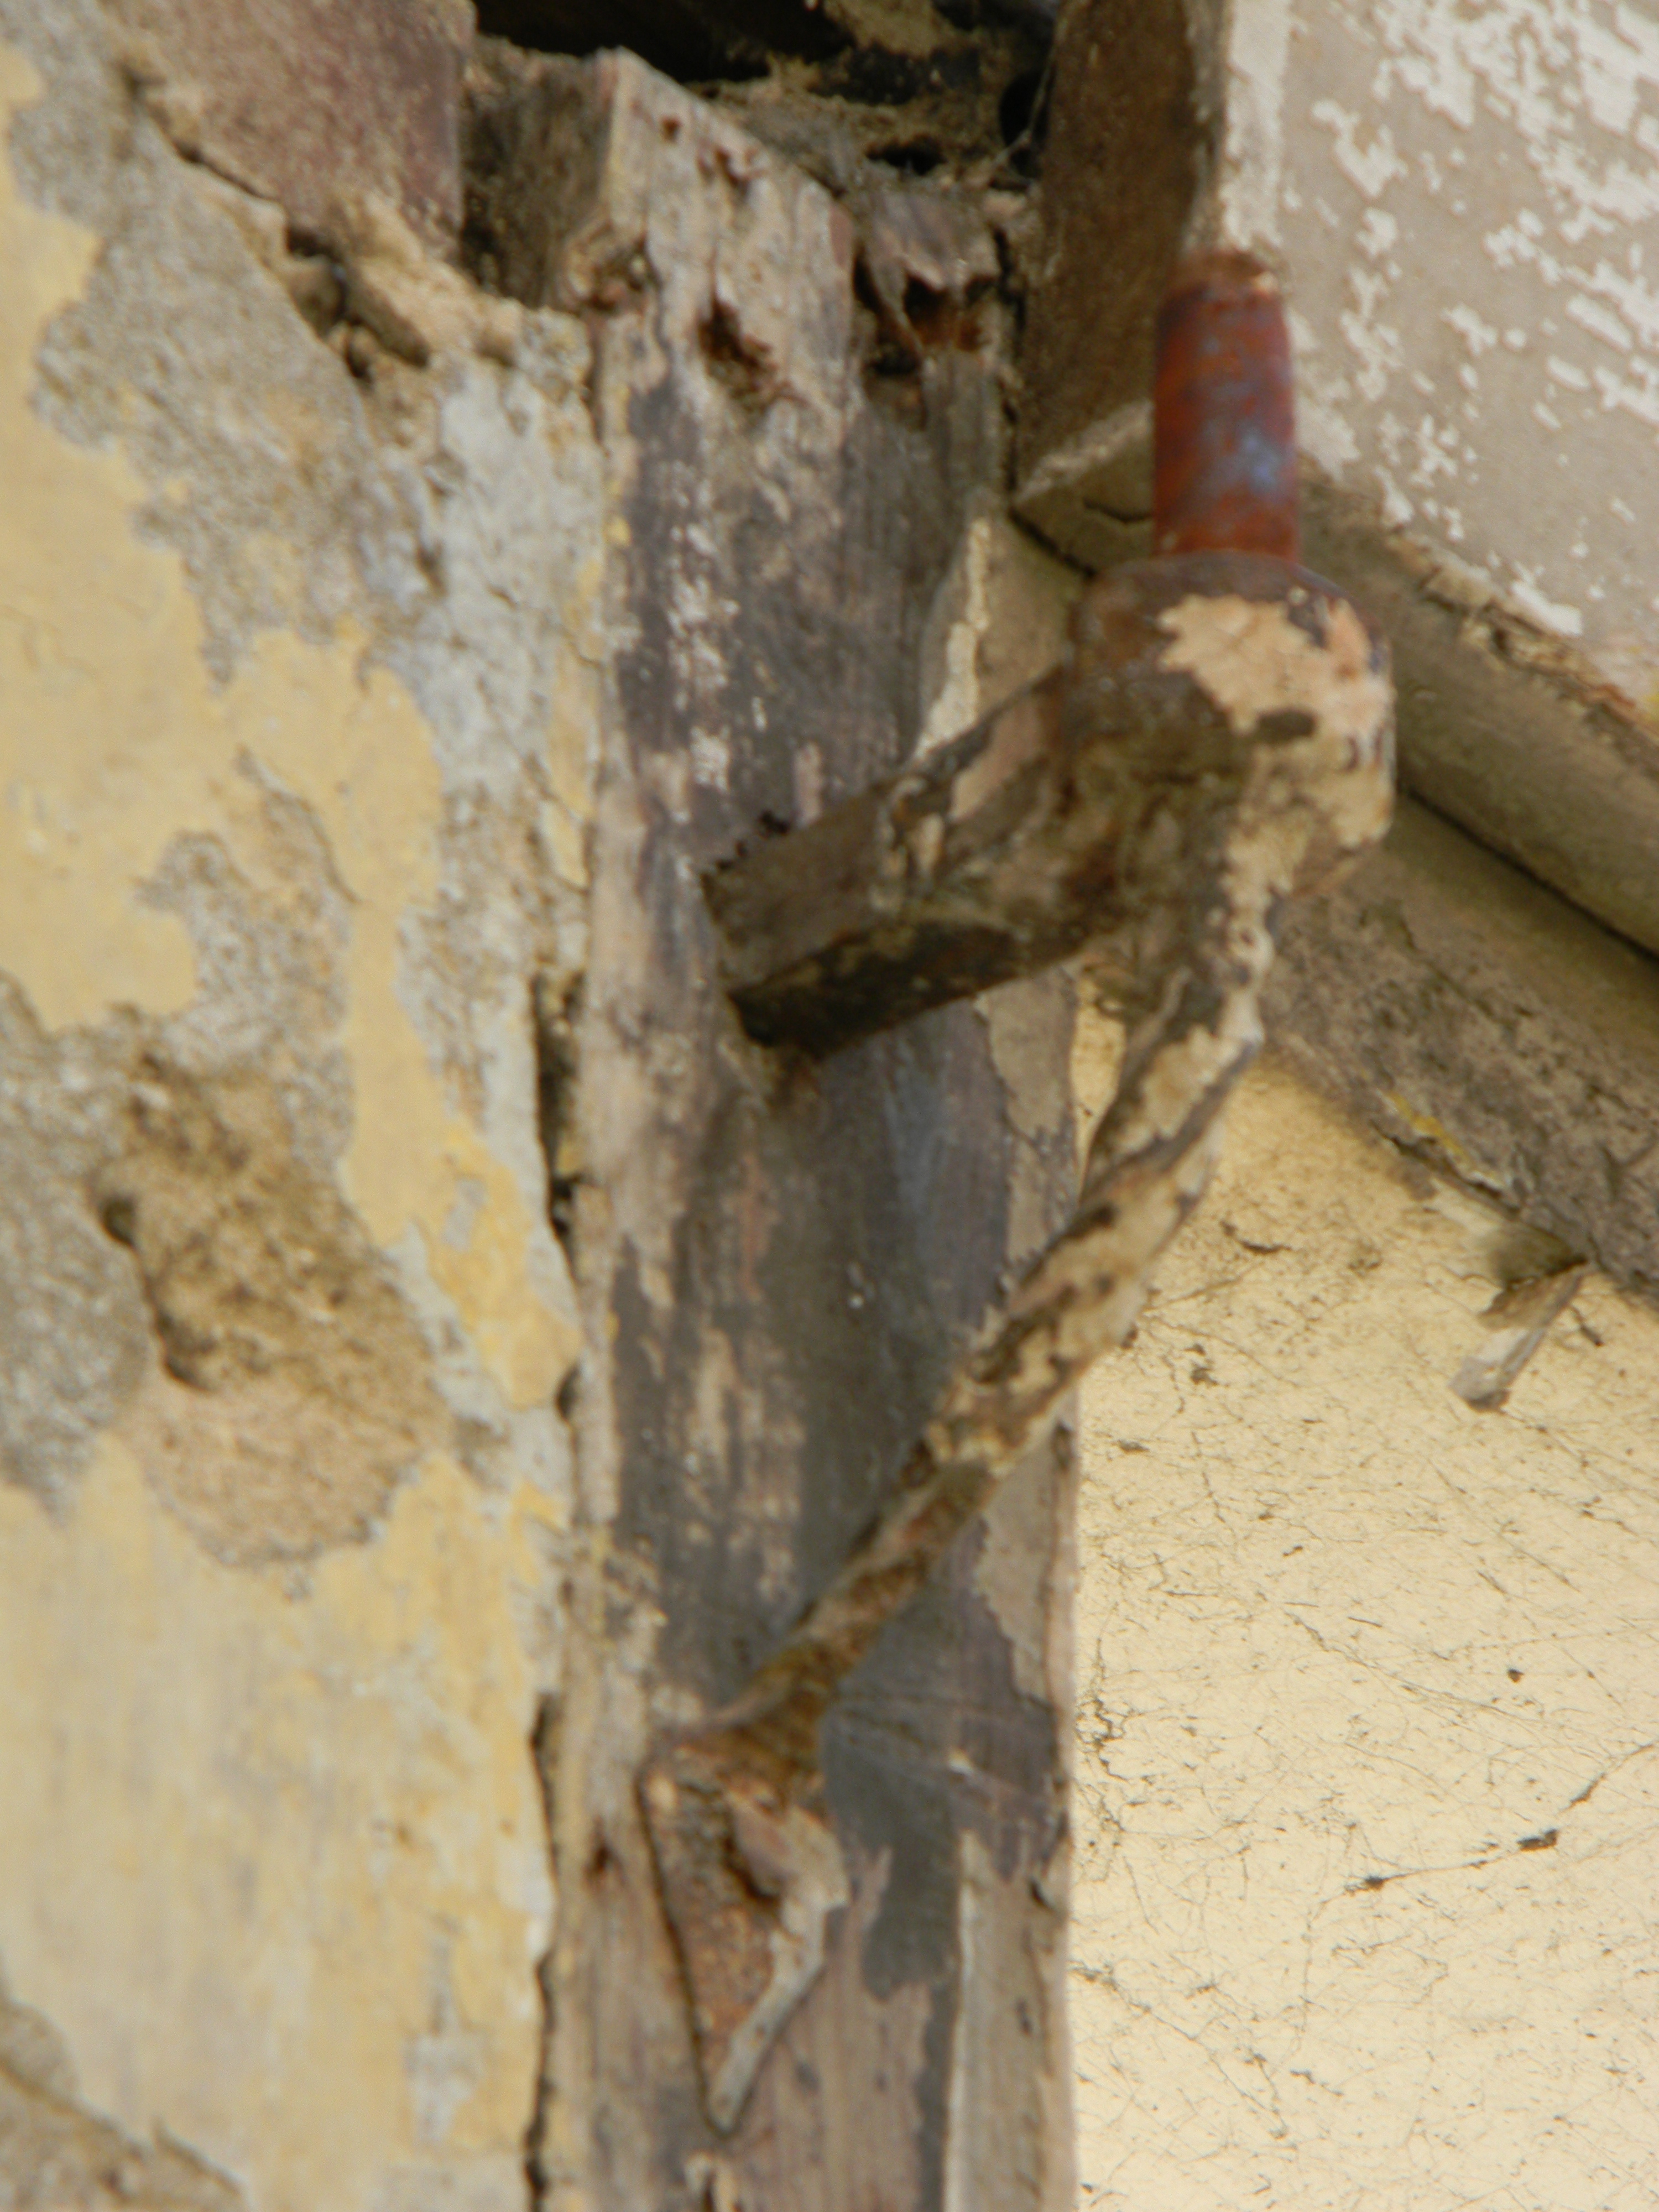
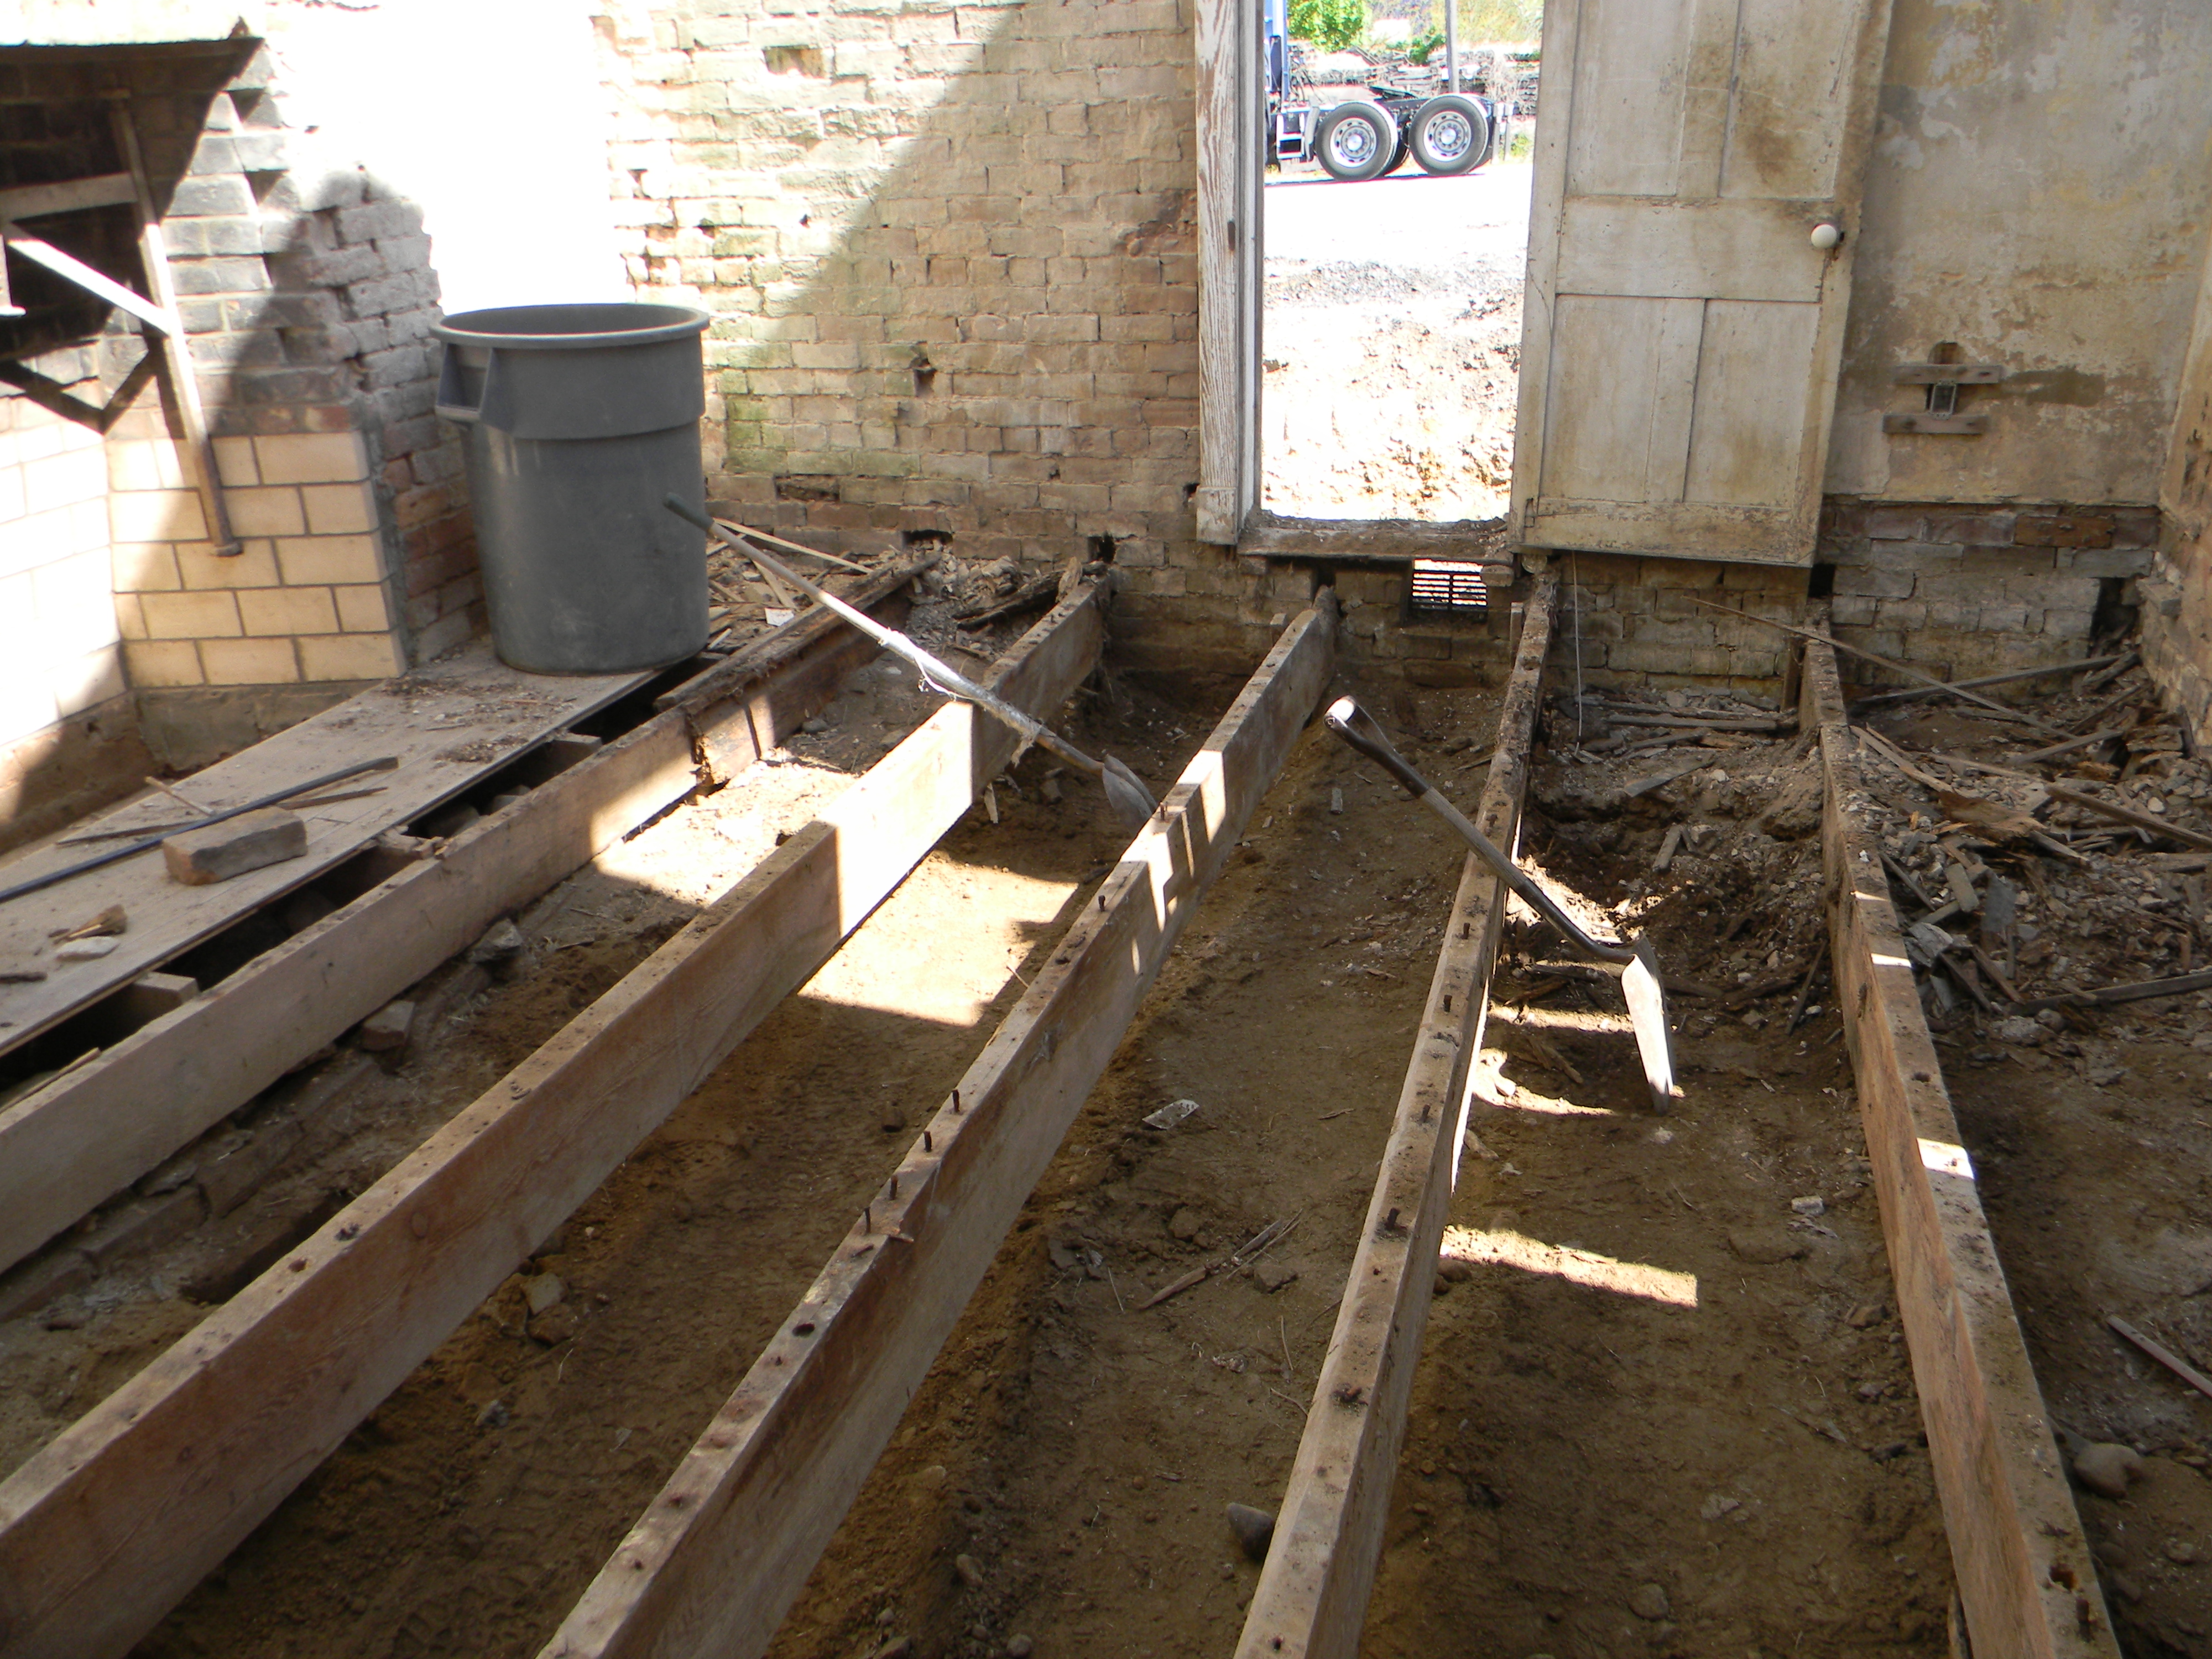
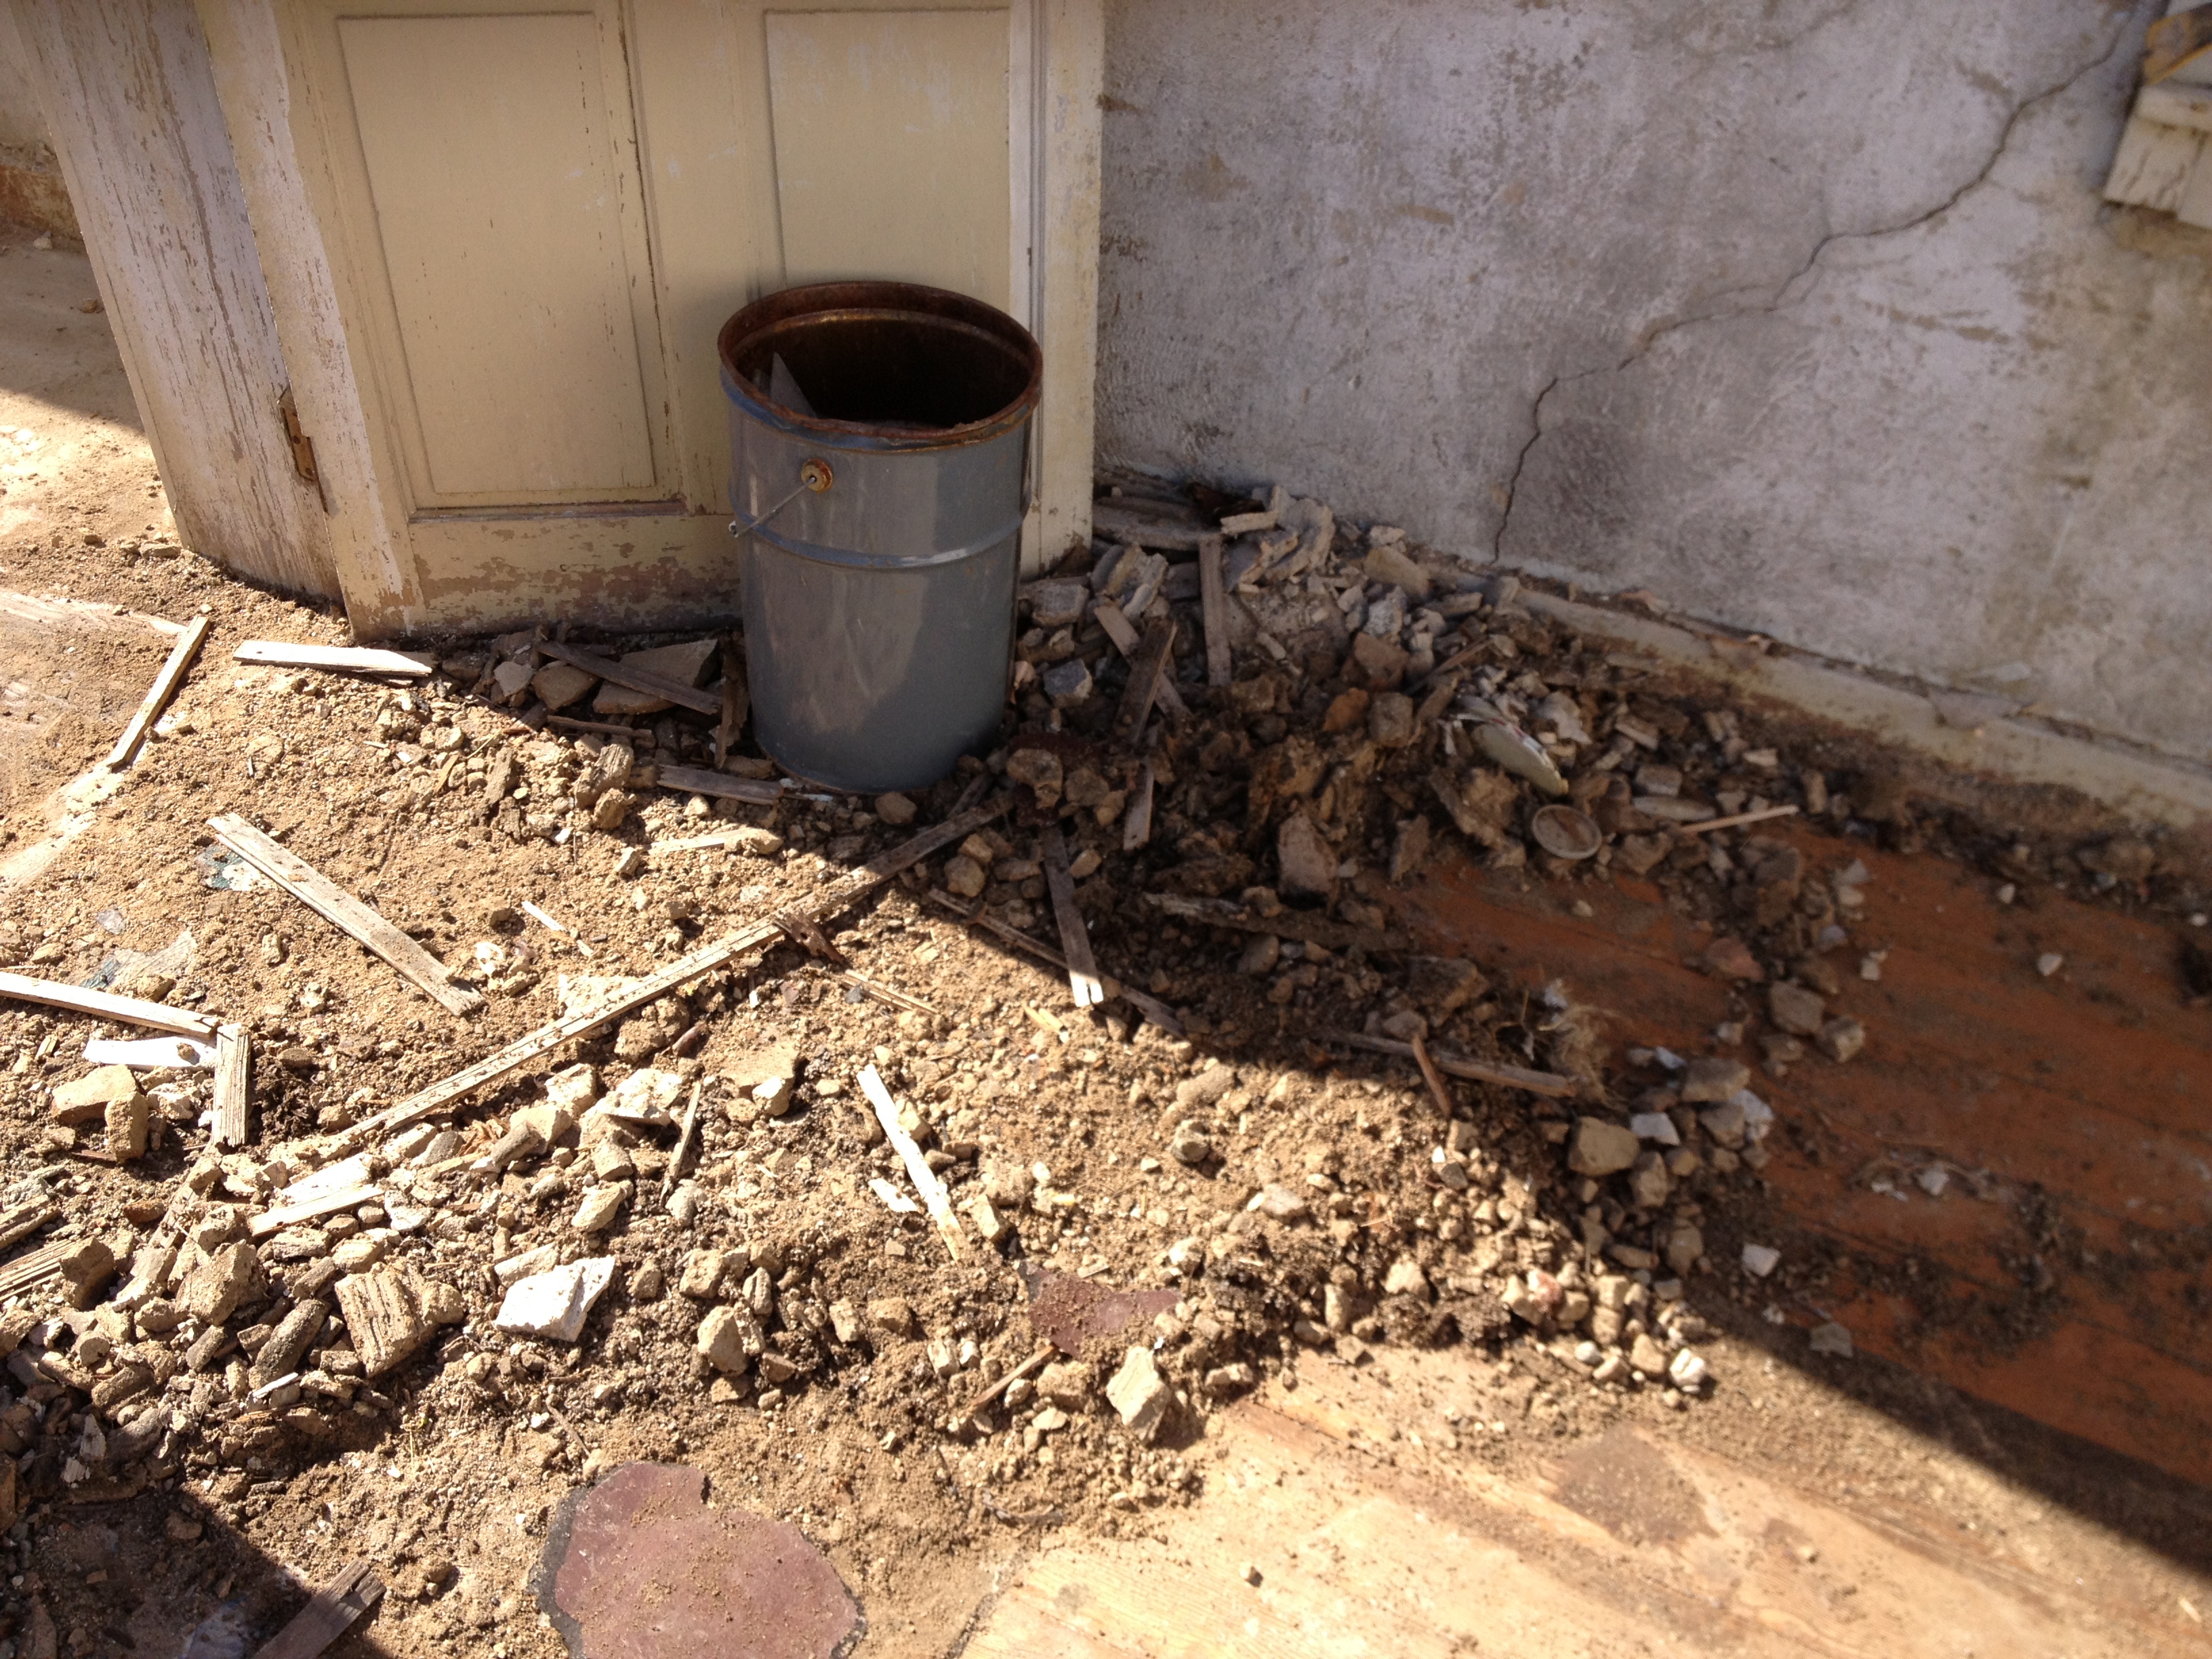
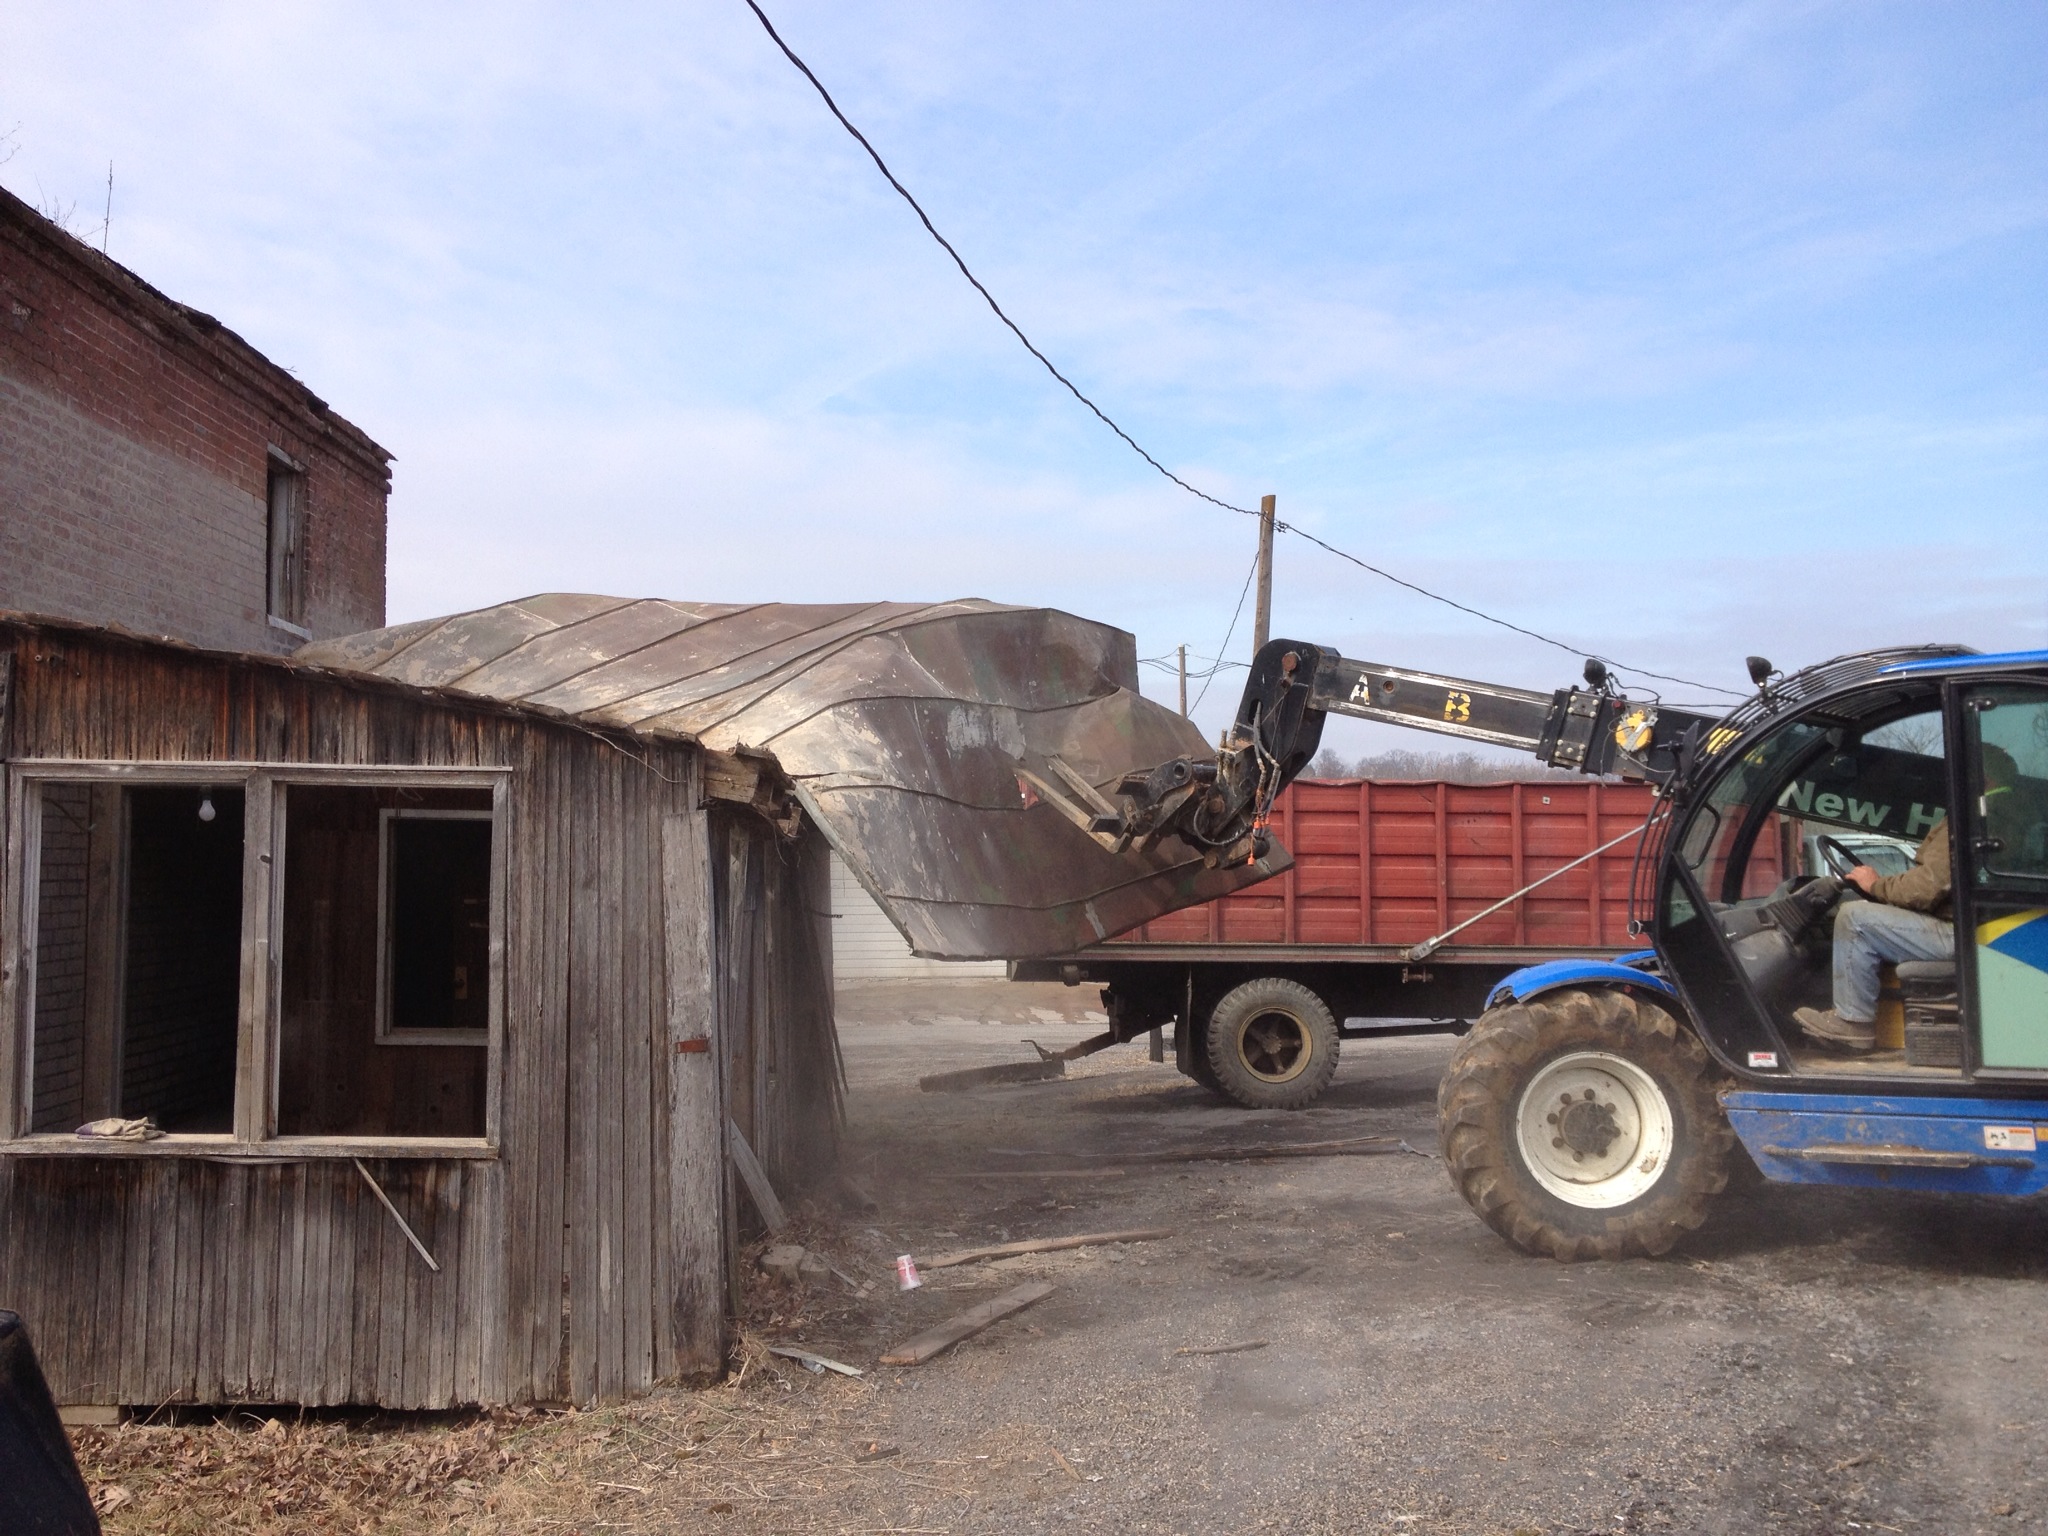
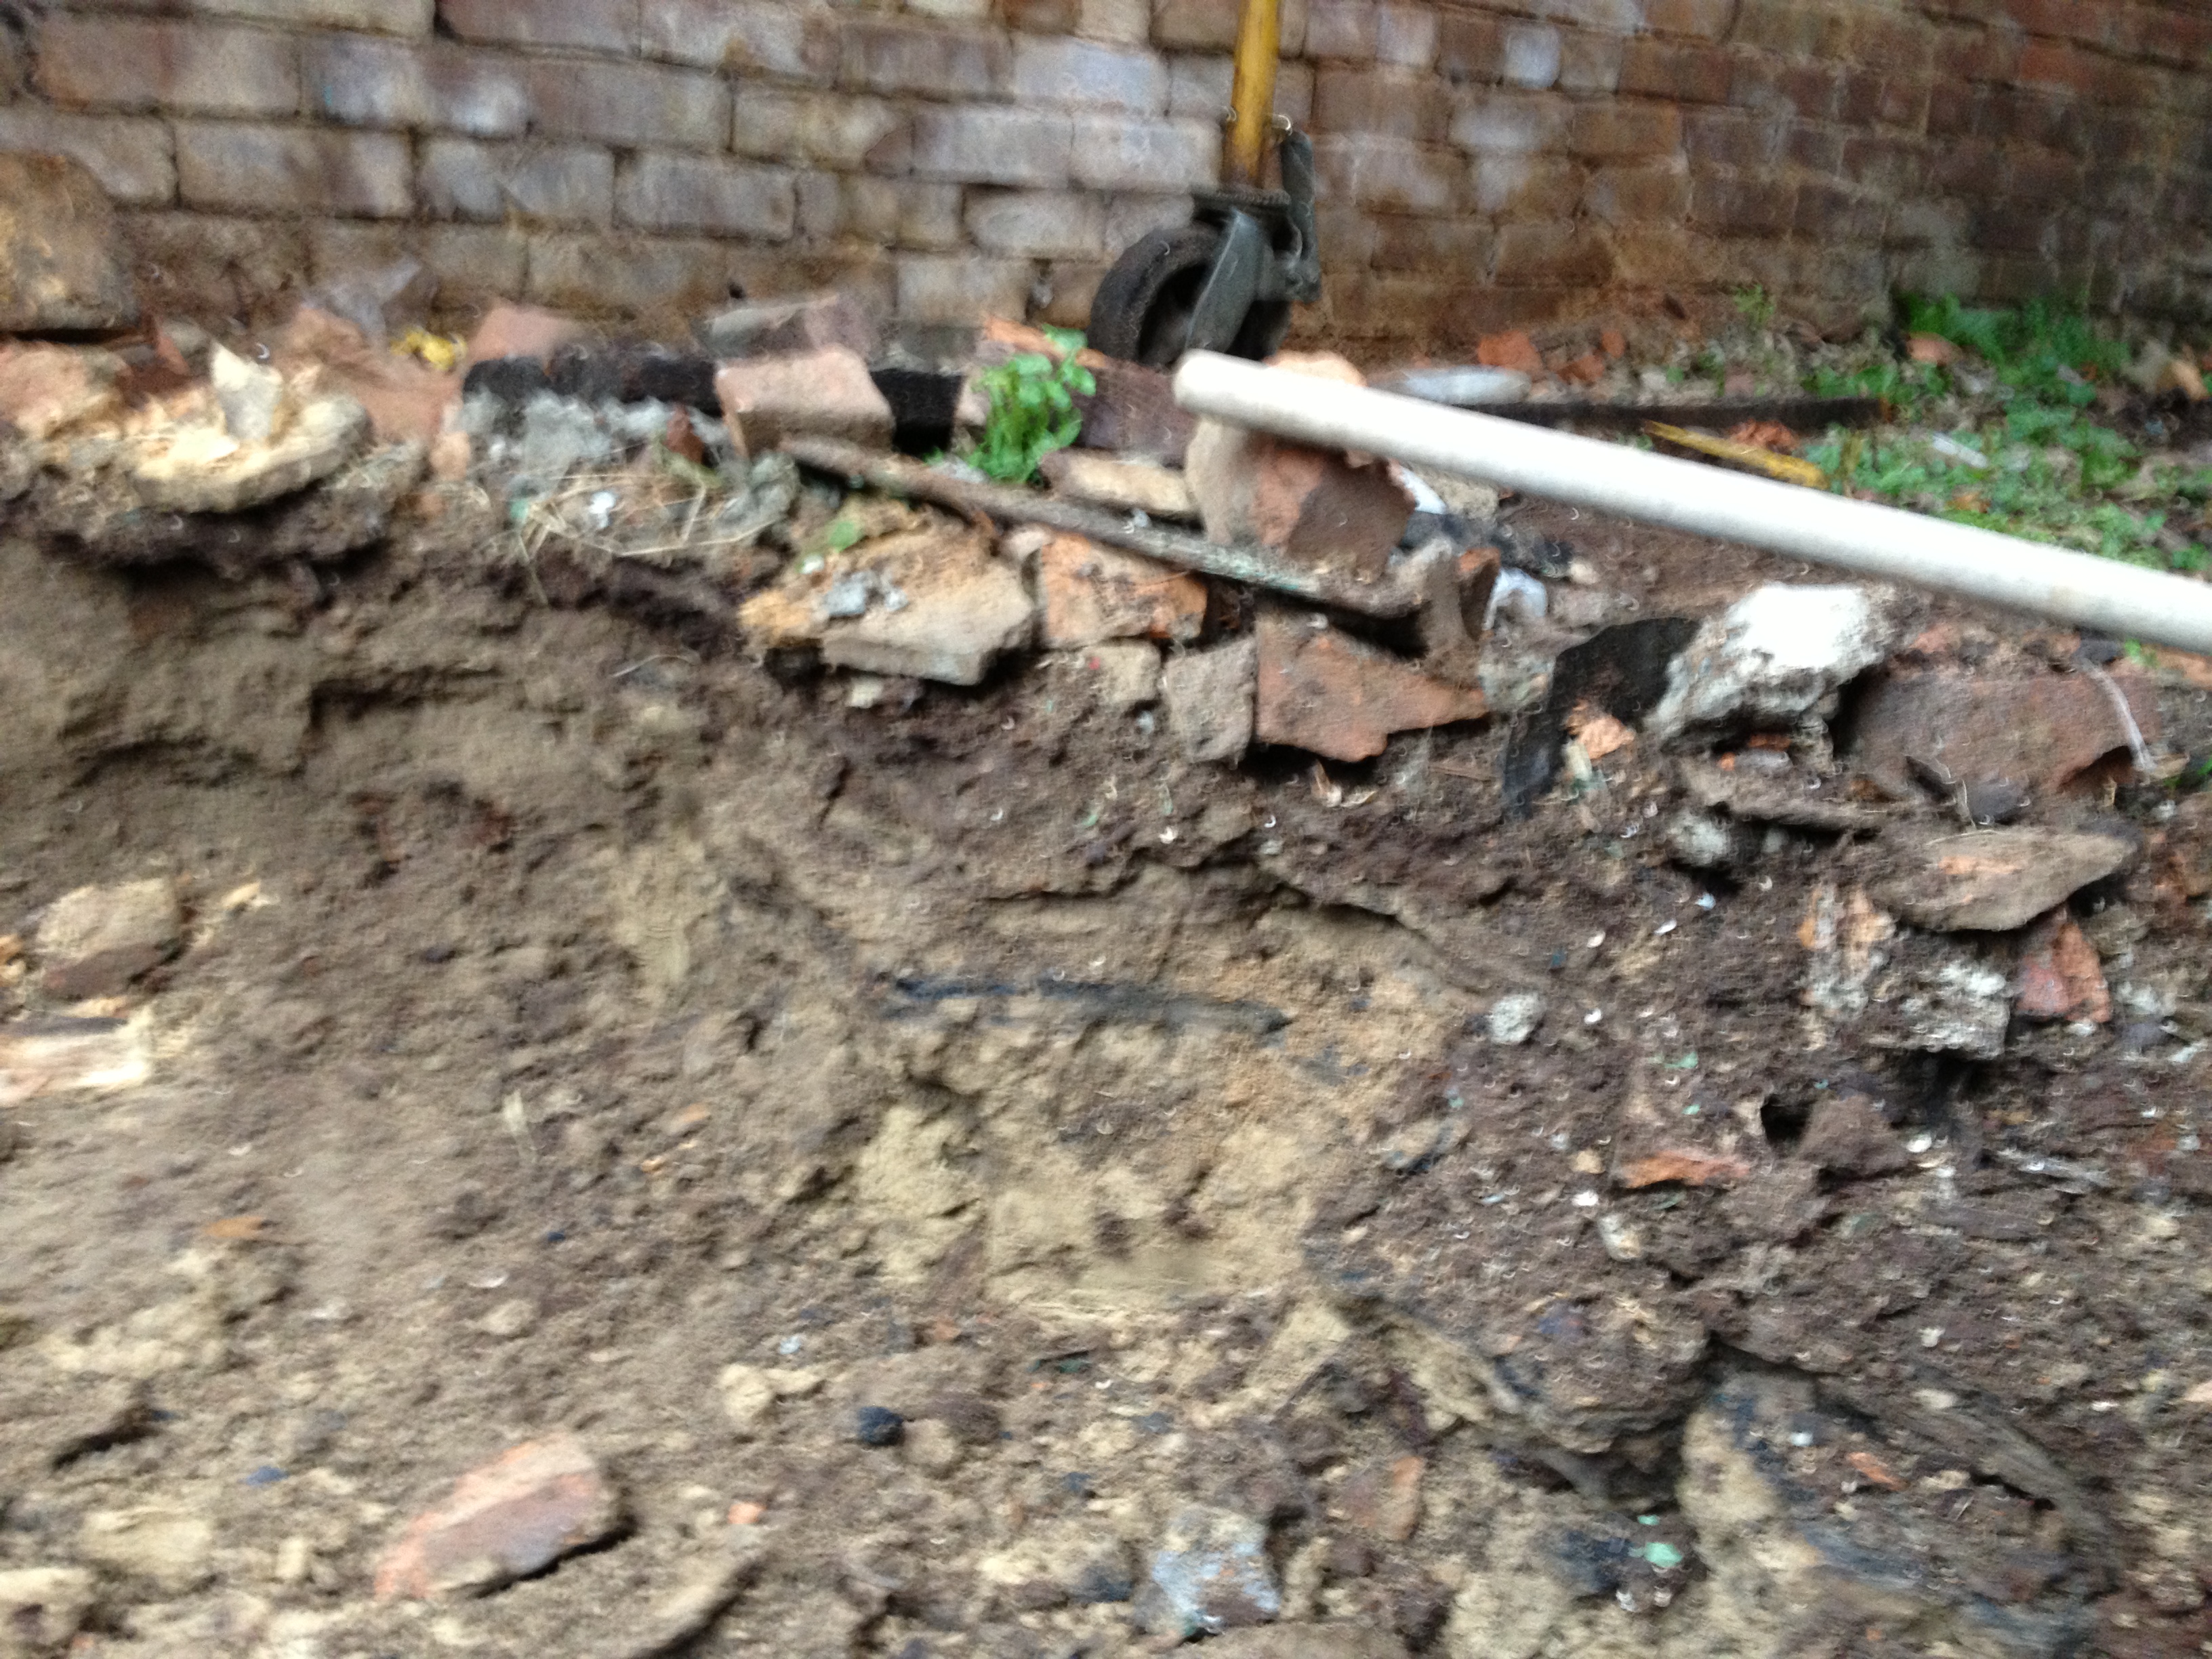
Part of the problem was a prior renovation had removed the rear wall to the building, which had been providing lateral stabilization.  Another part of the problem was that the gutter downspout, as you can see above, was channeling all of the water directly into the foundation of the of the building.   It was a disaster waiting to happen.

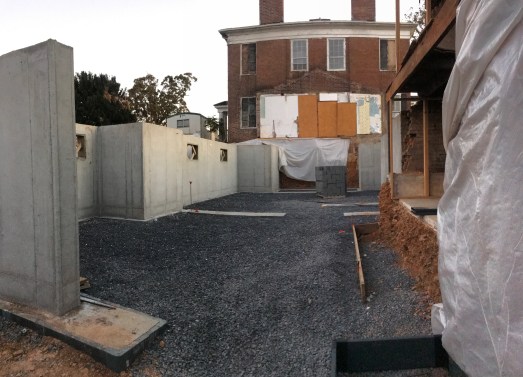
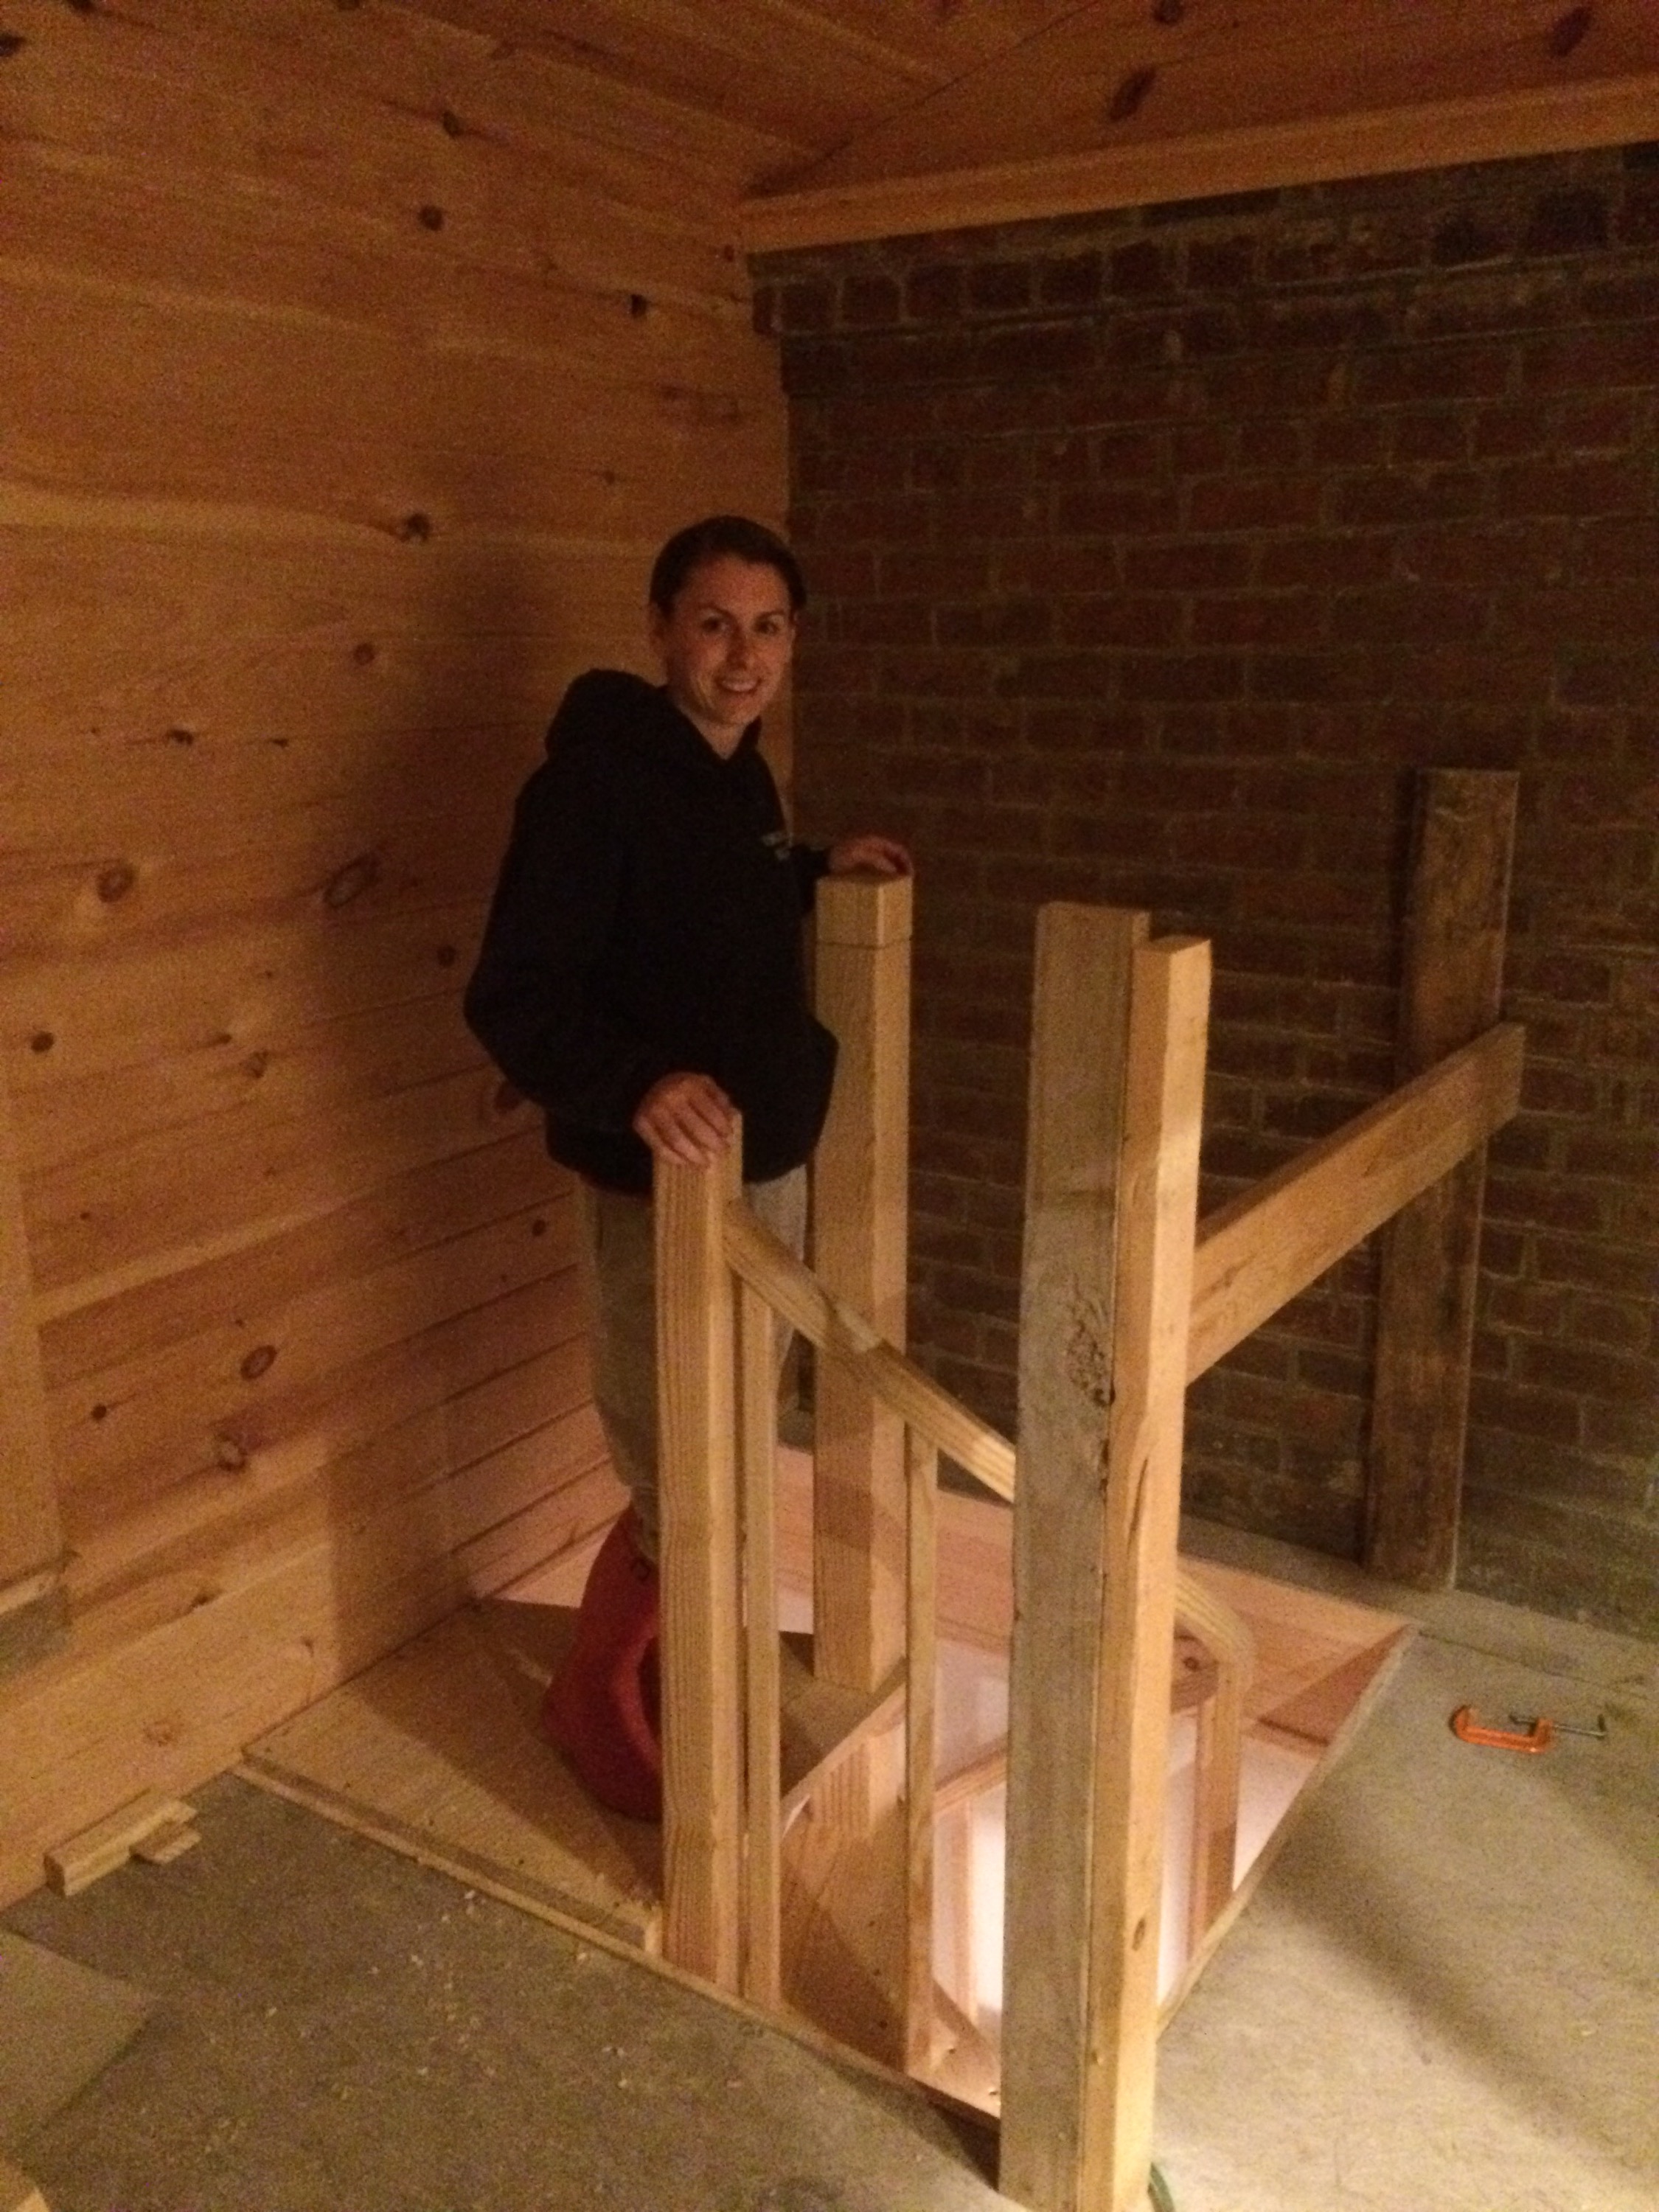
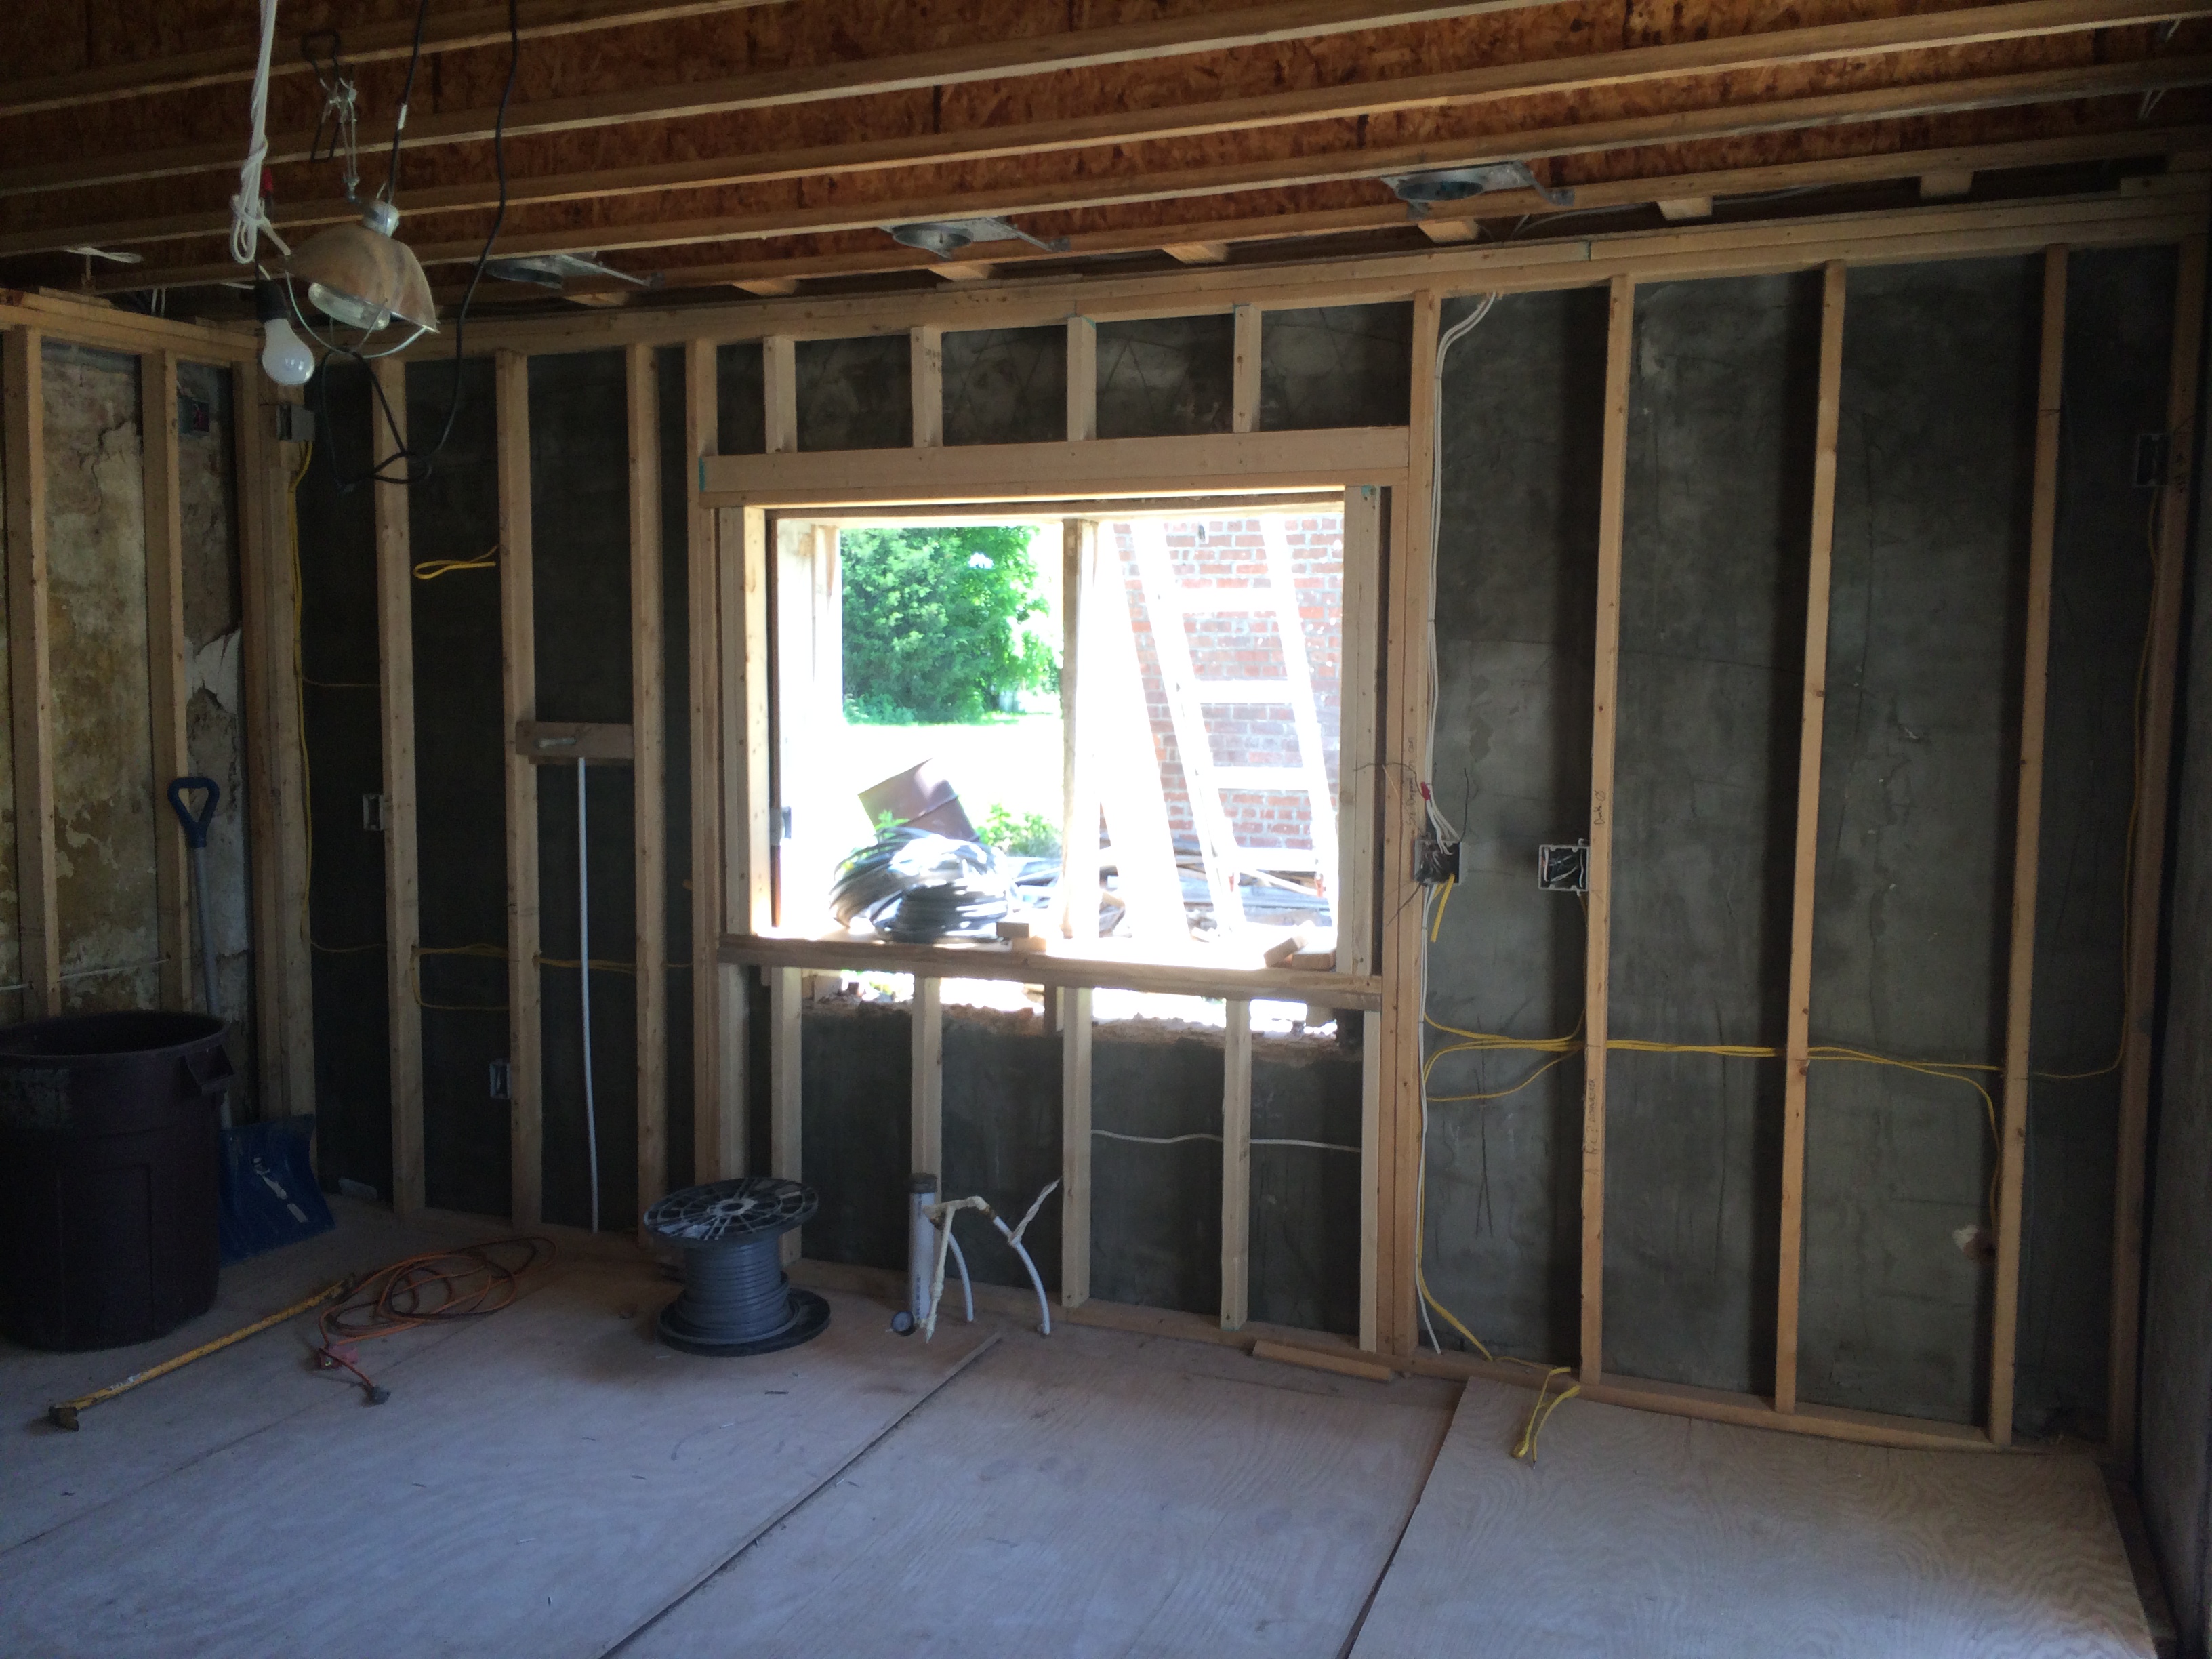
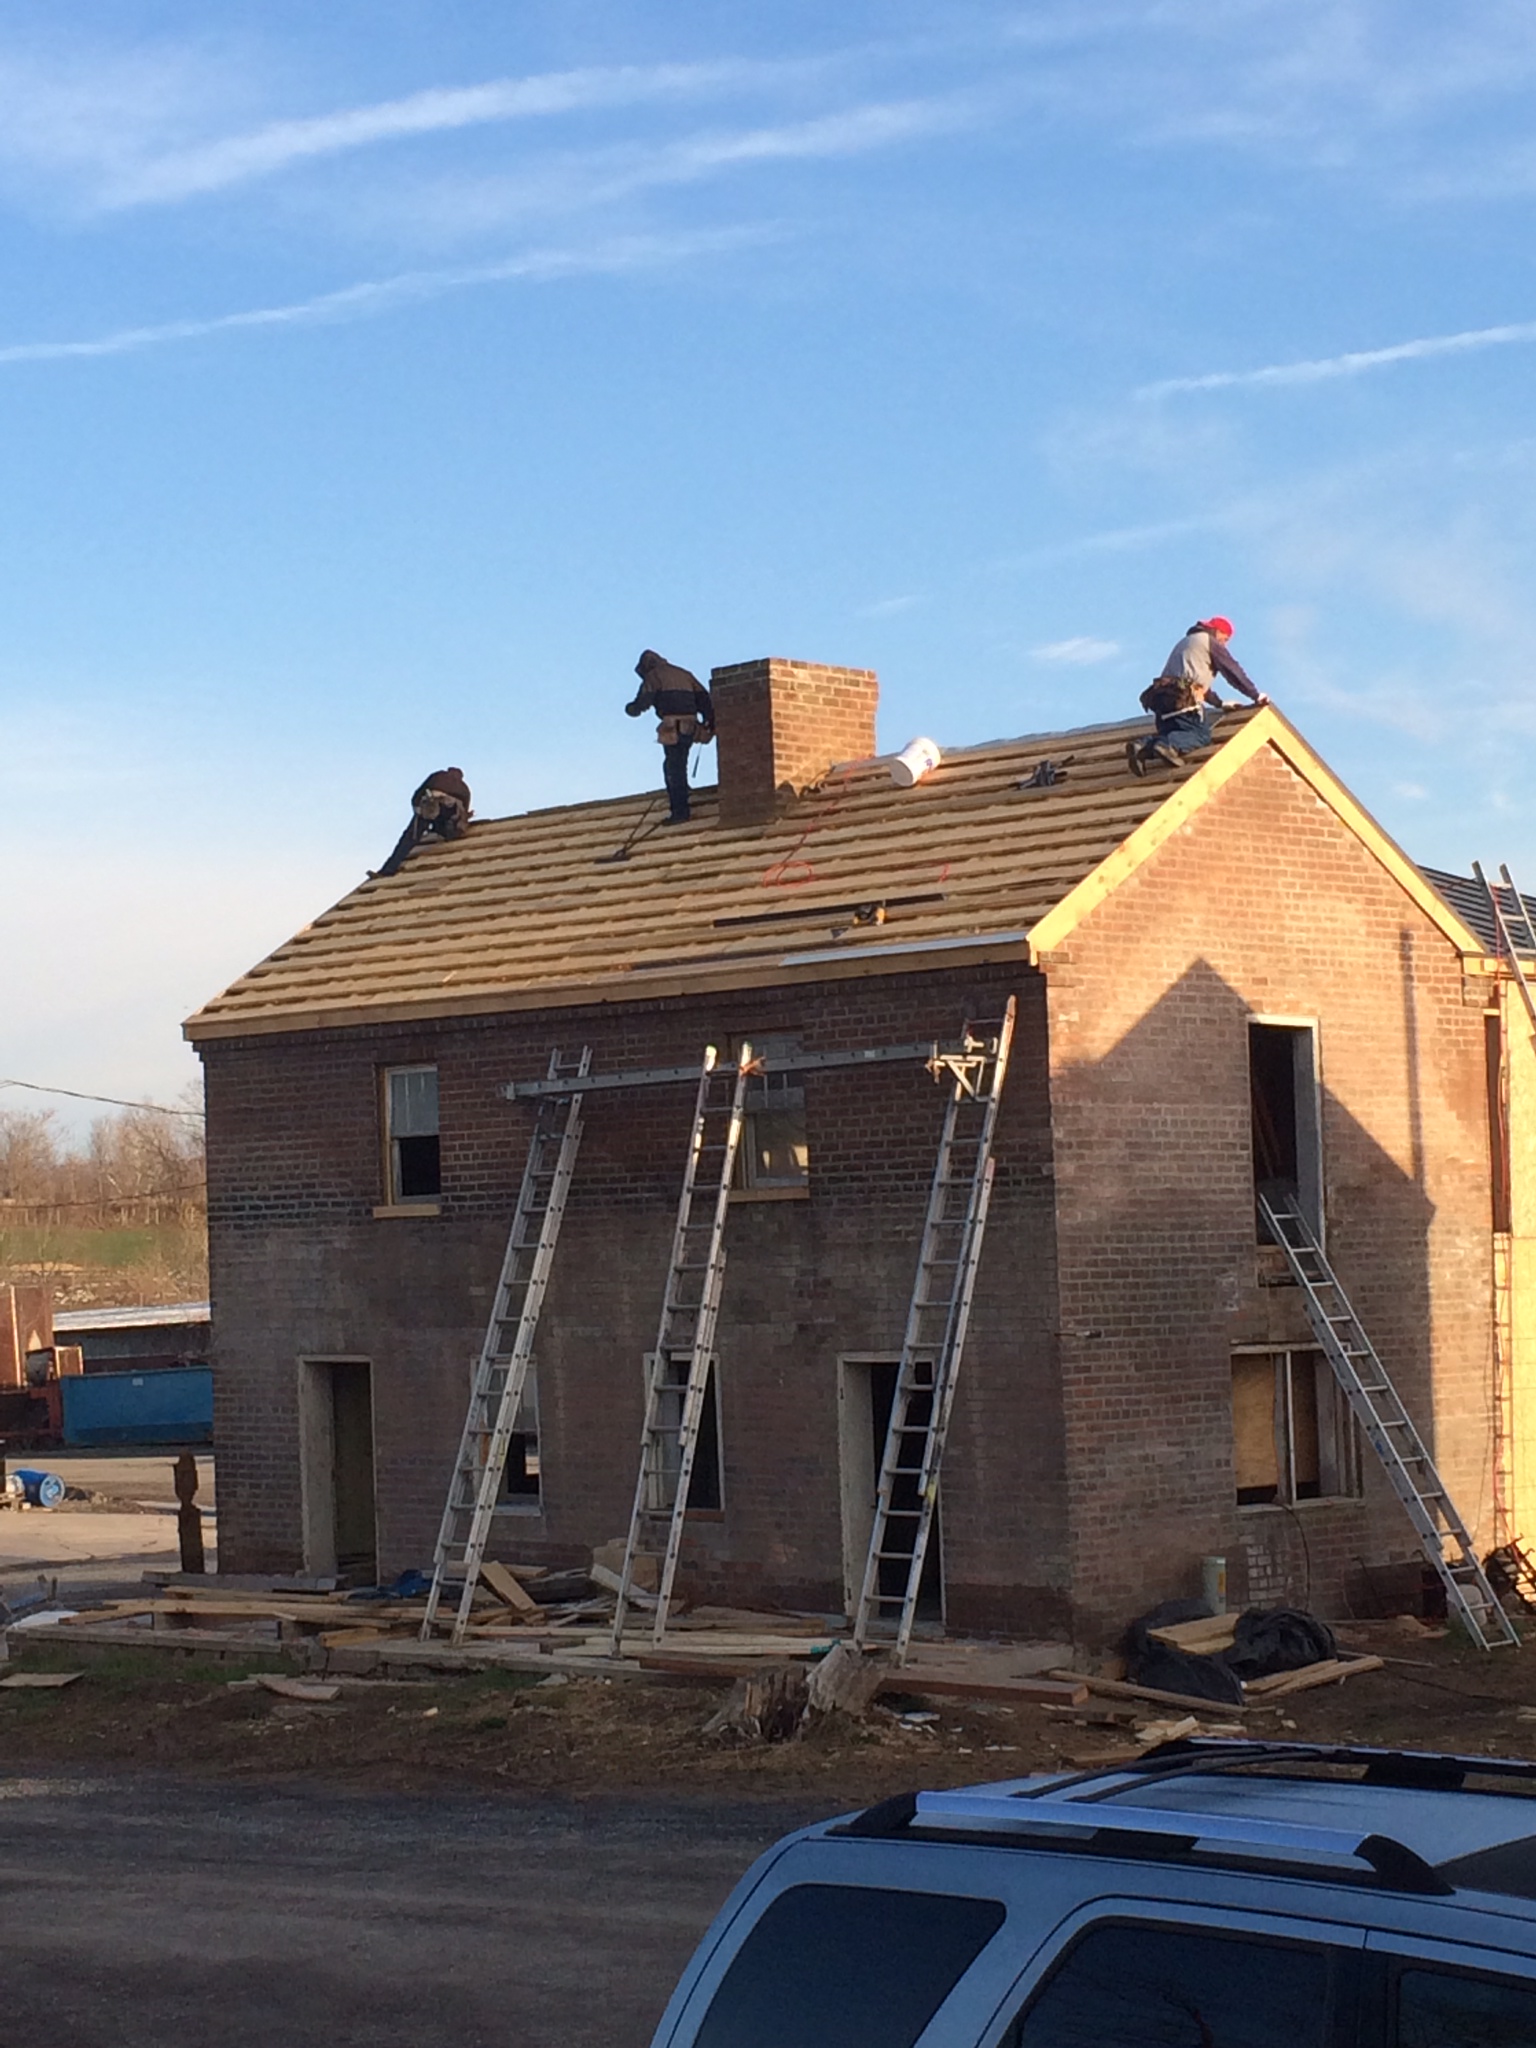
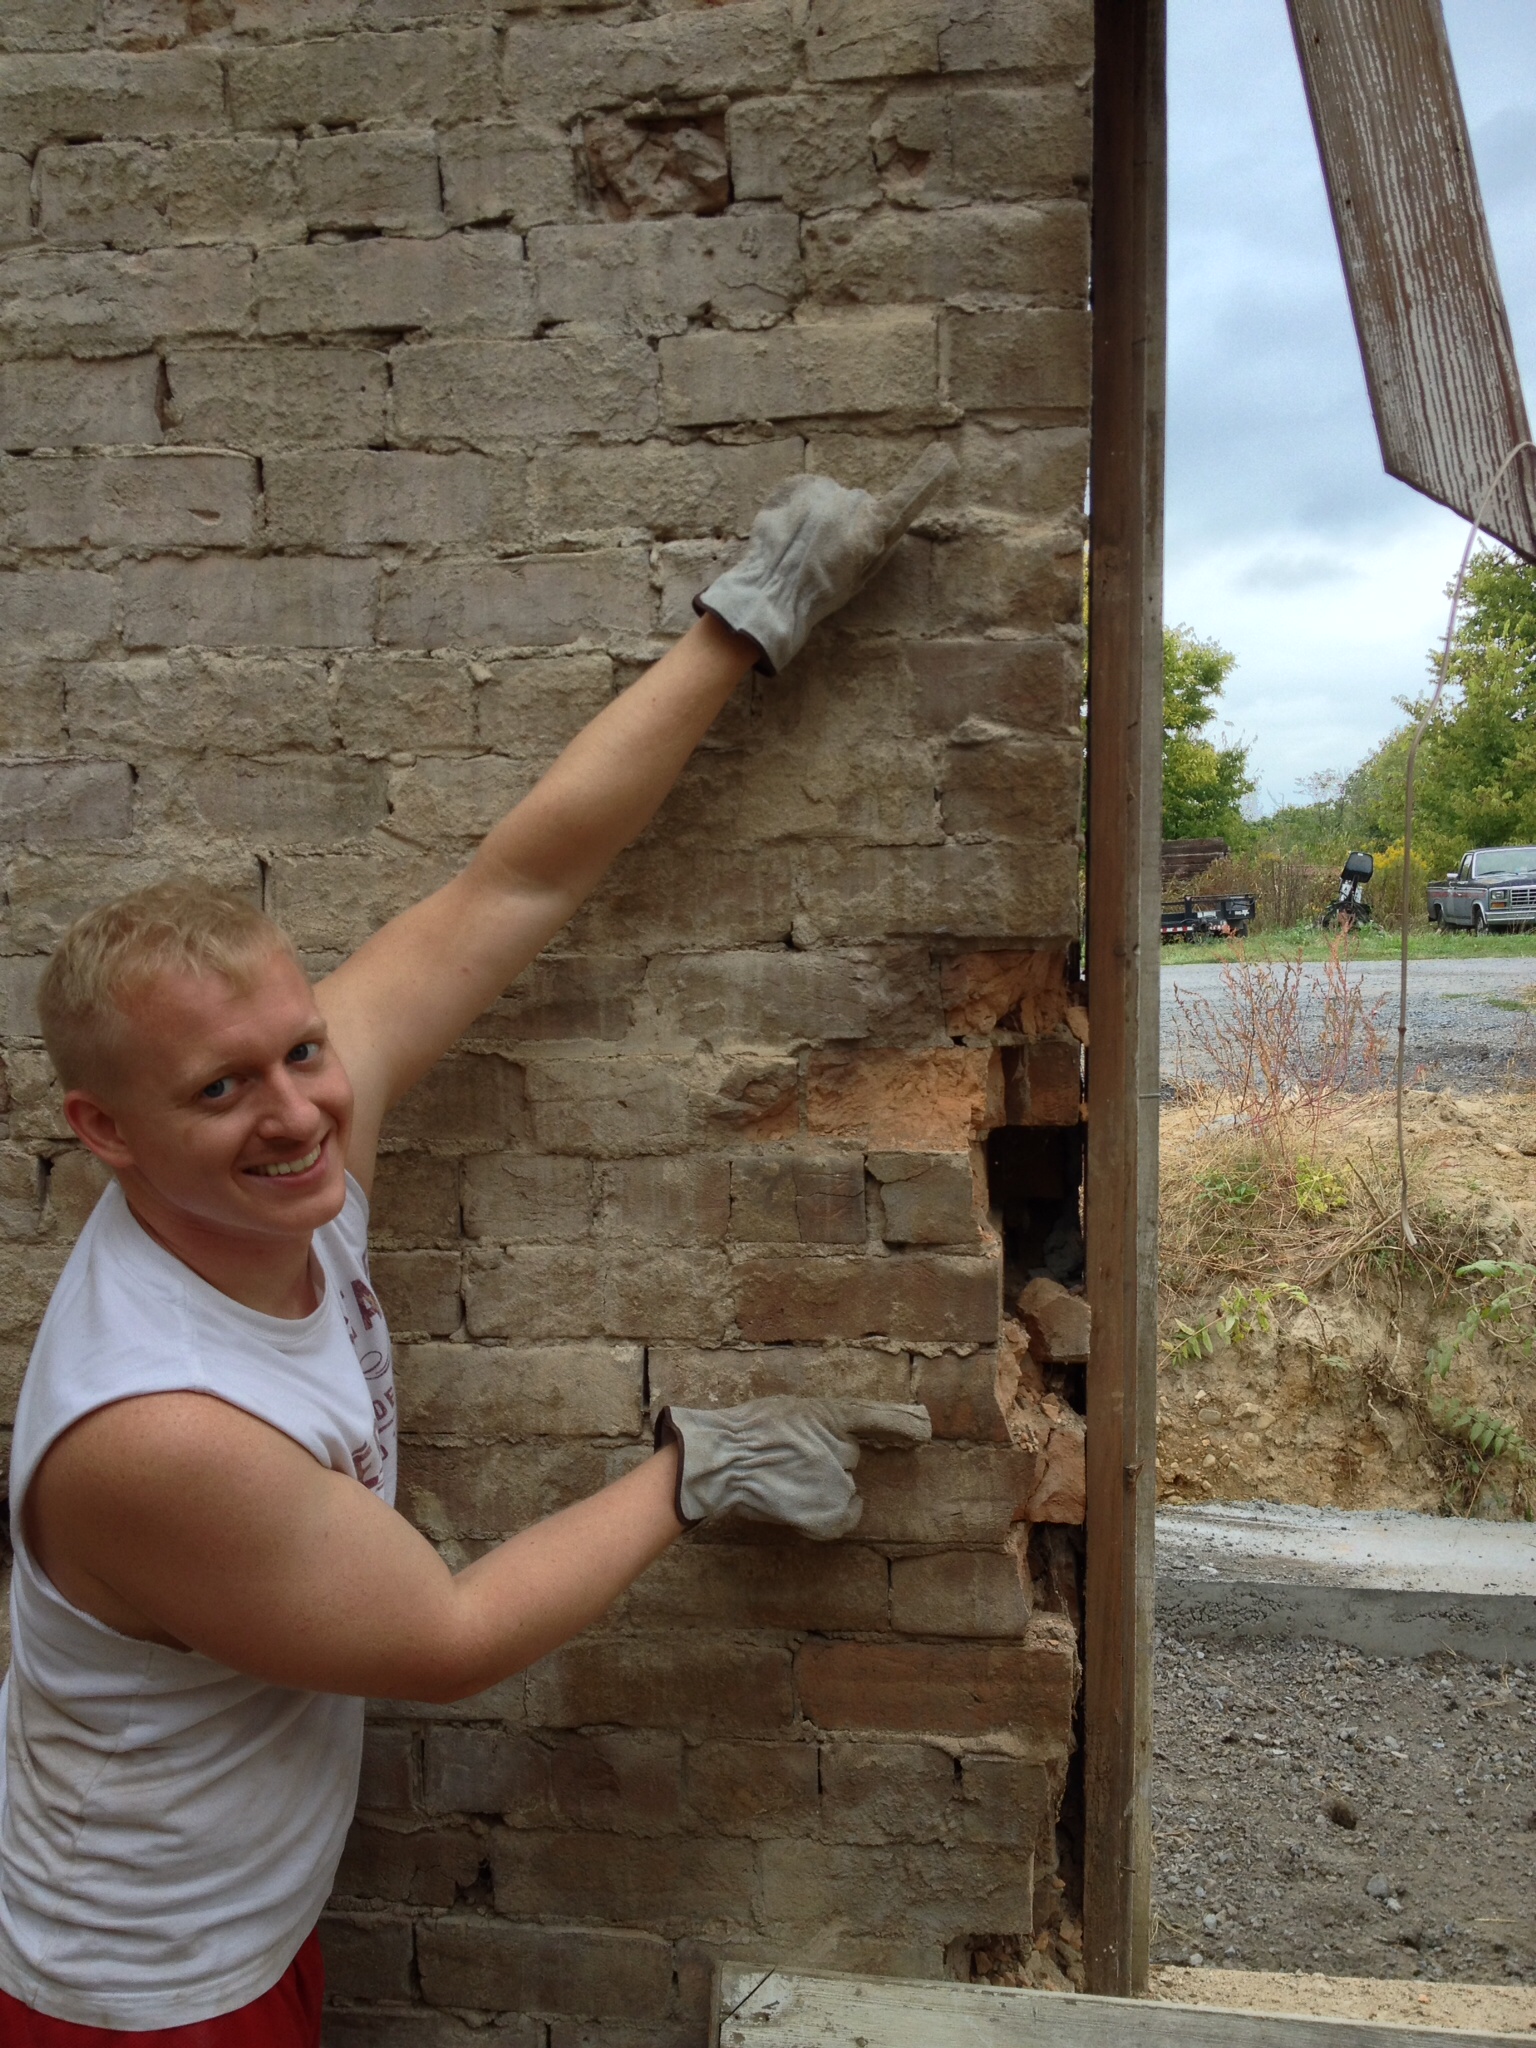
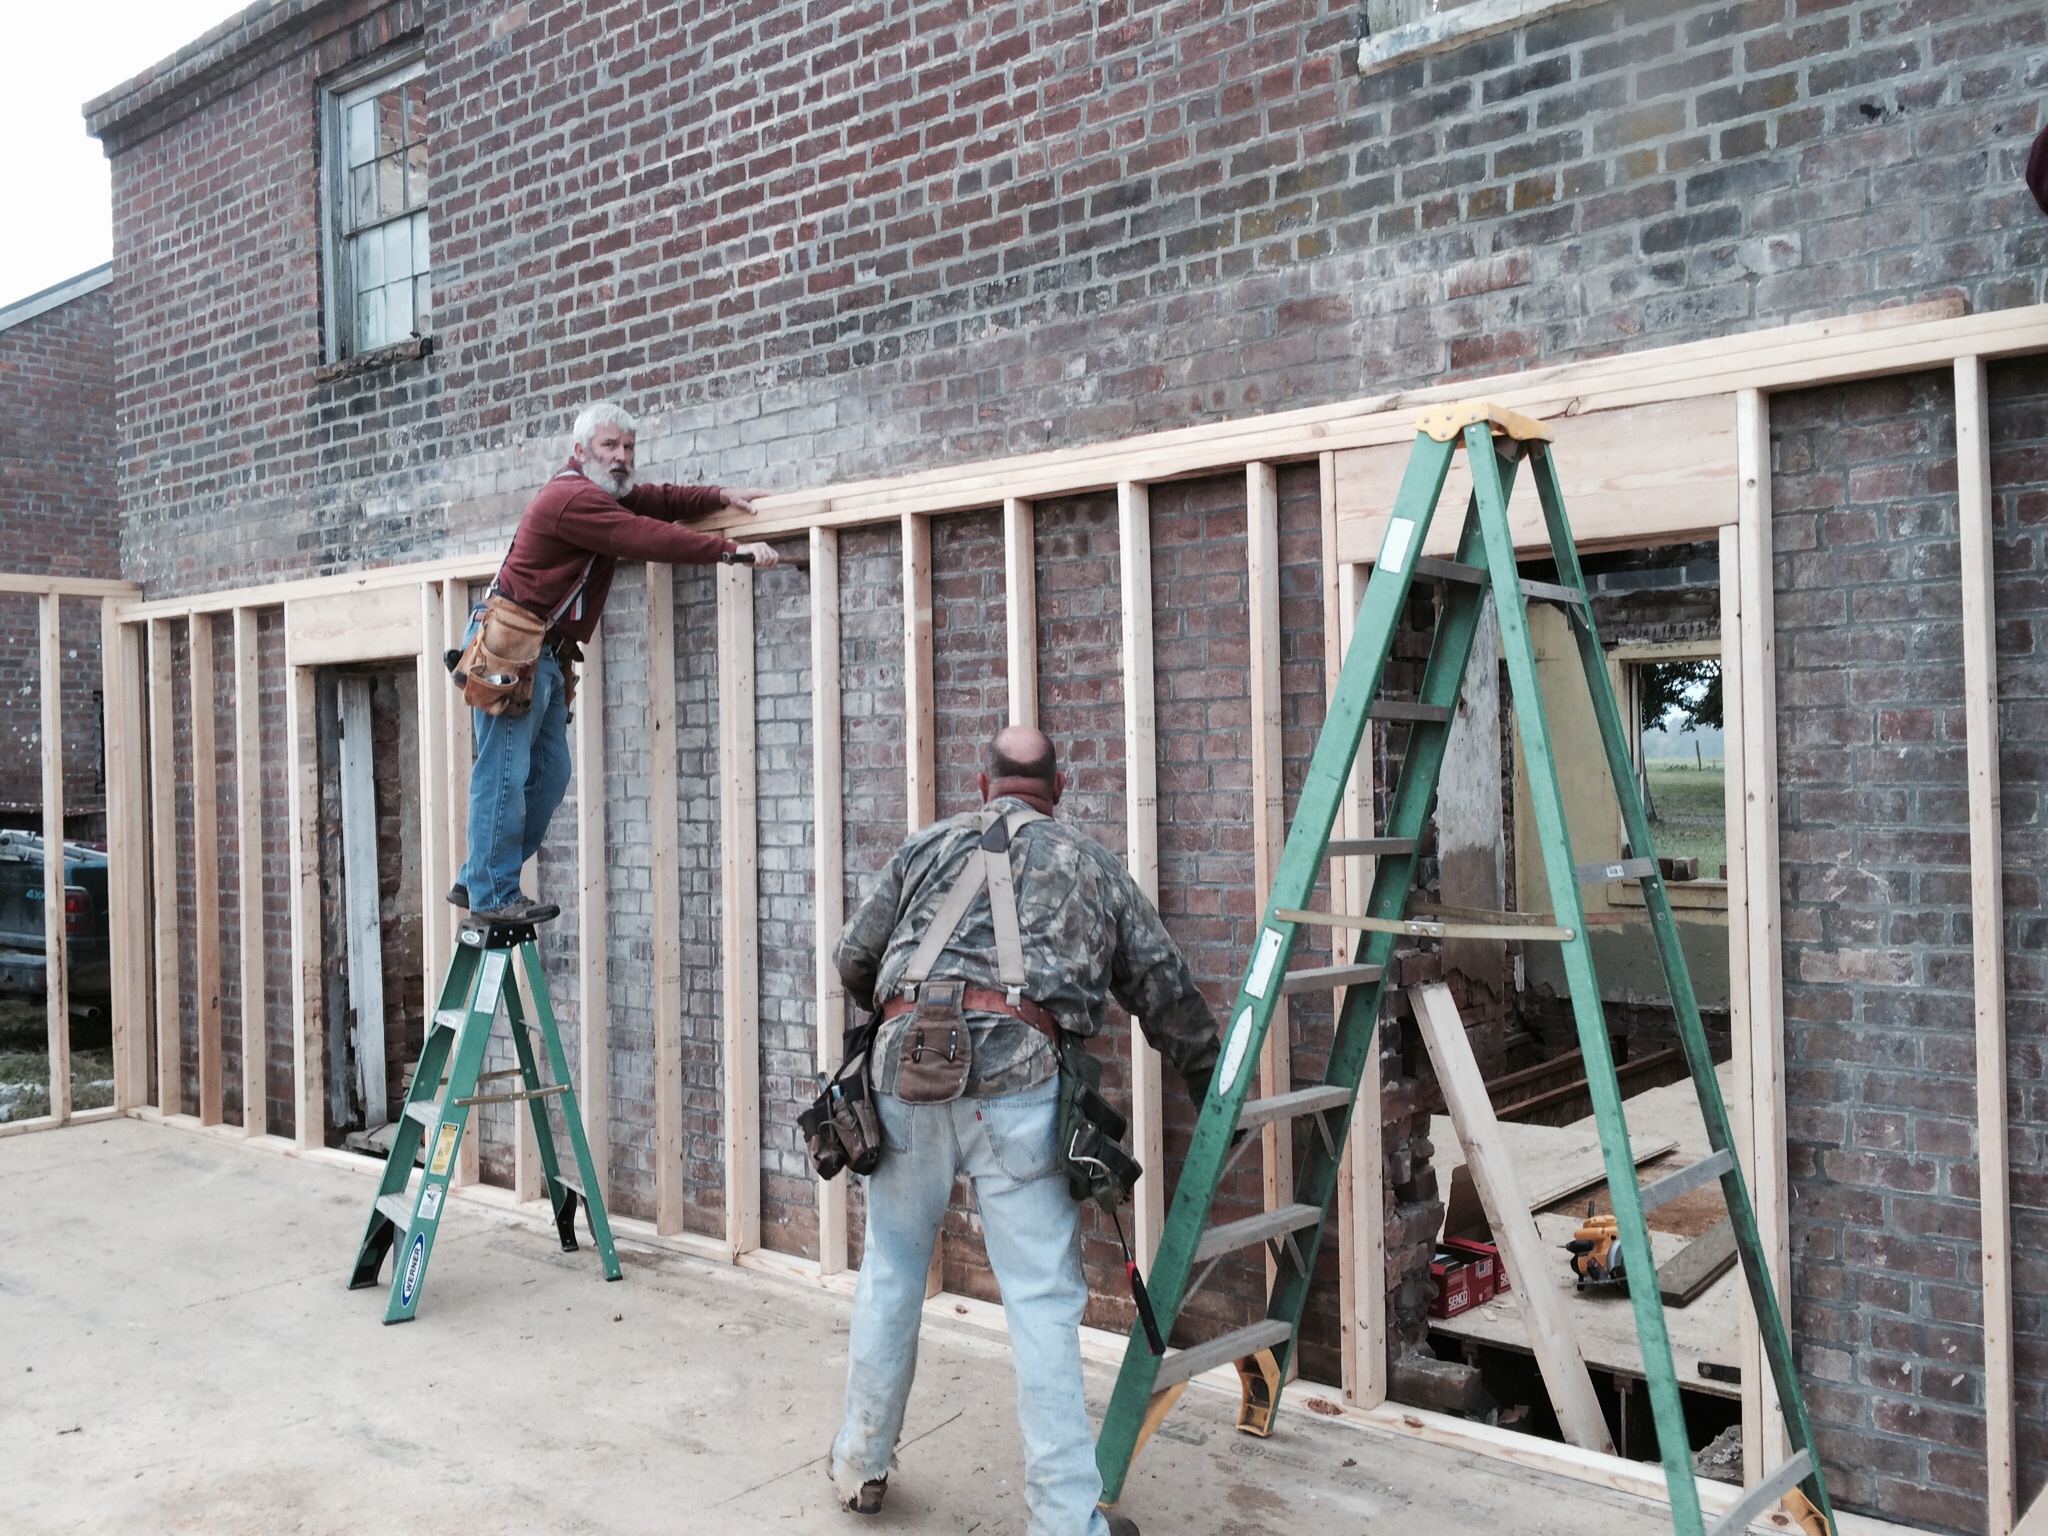
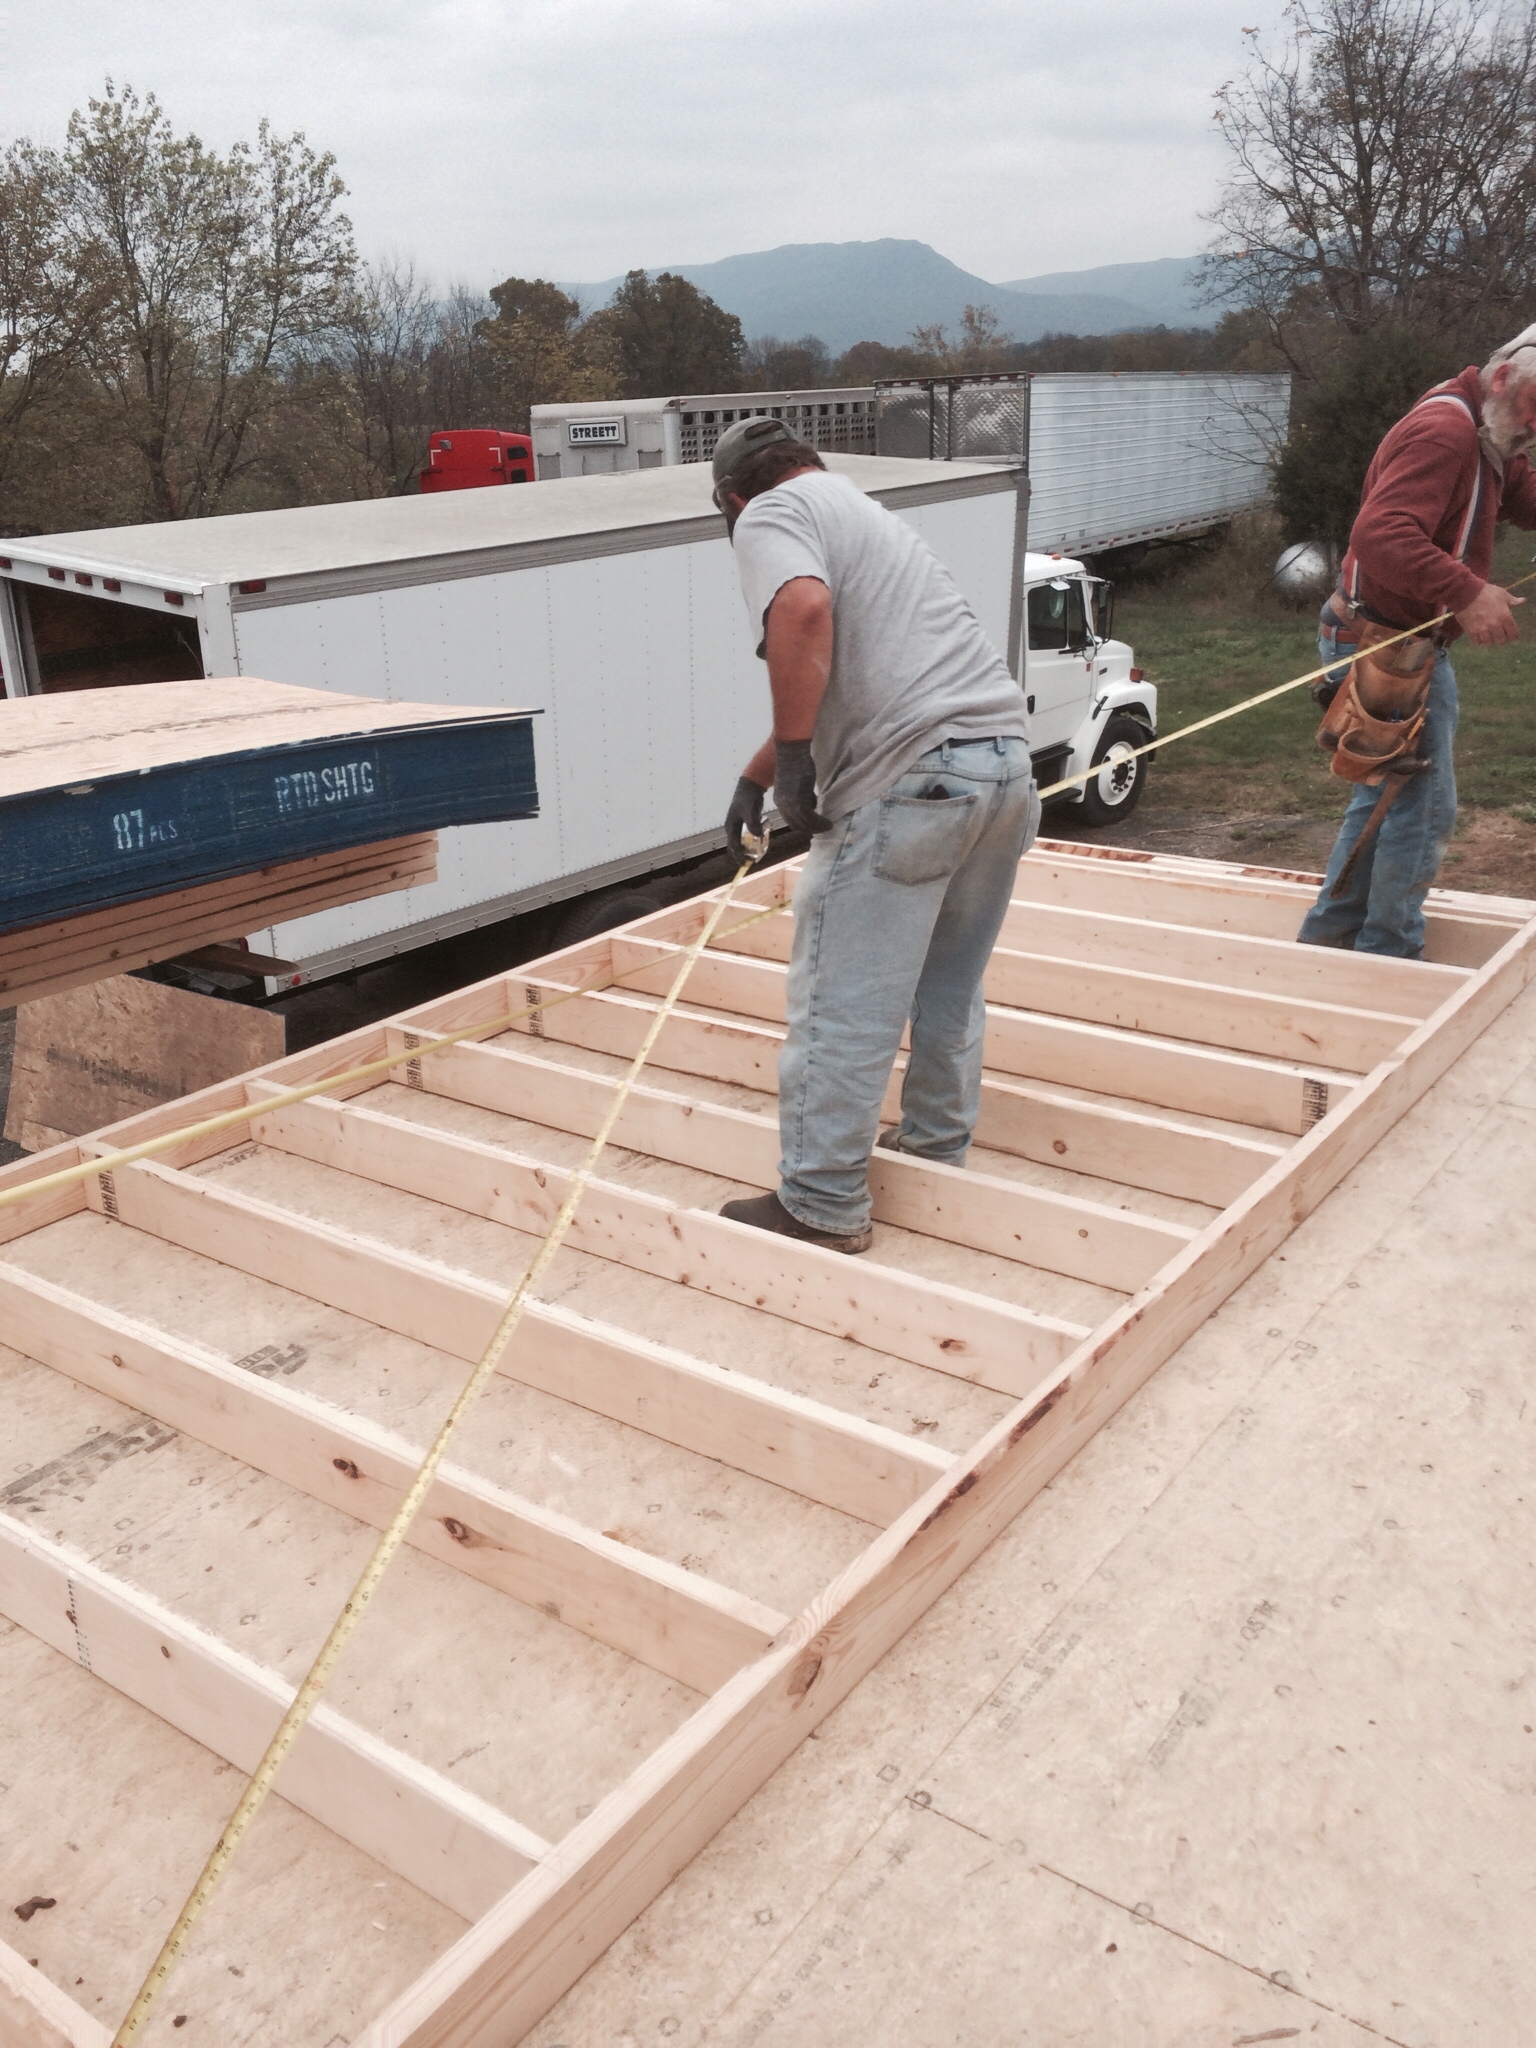
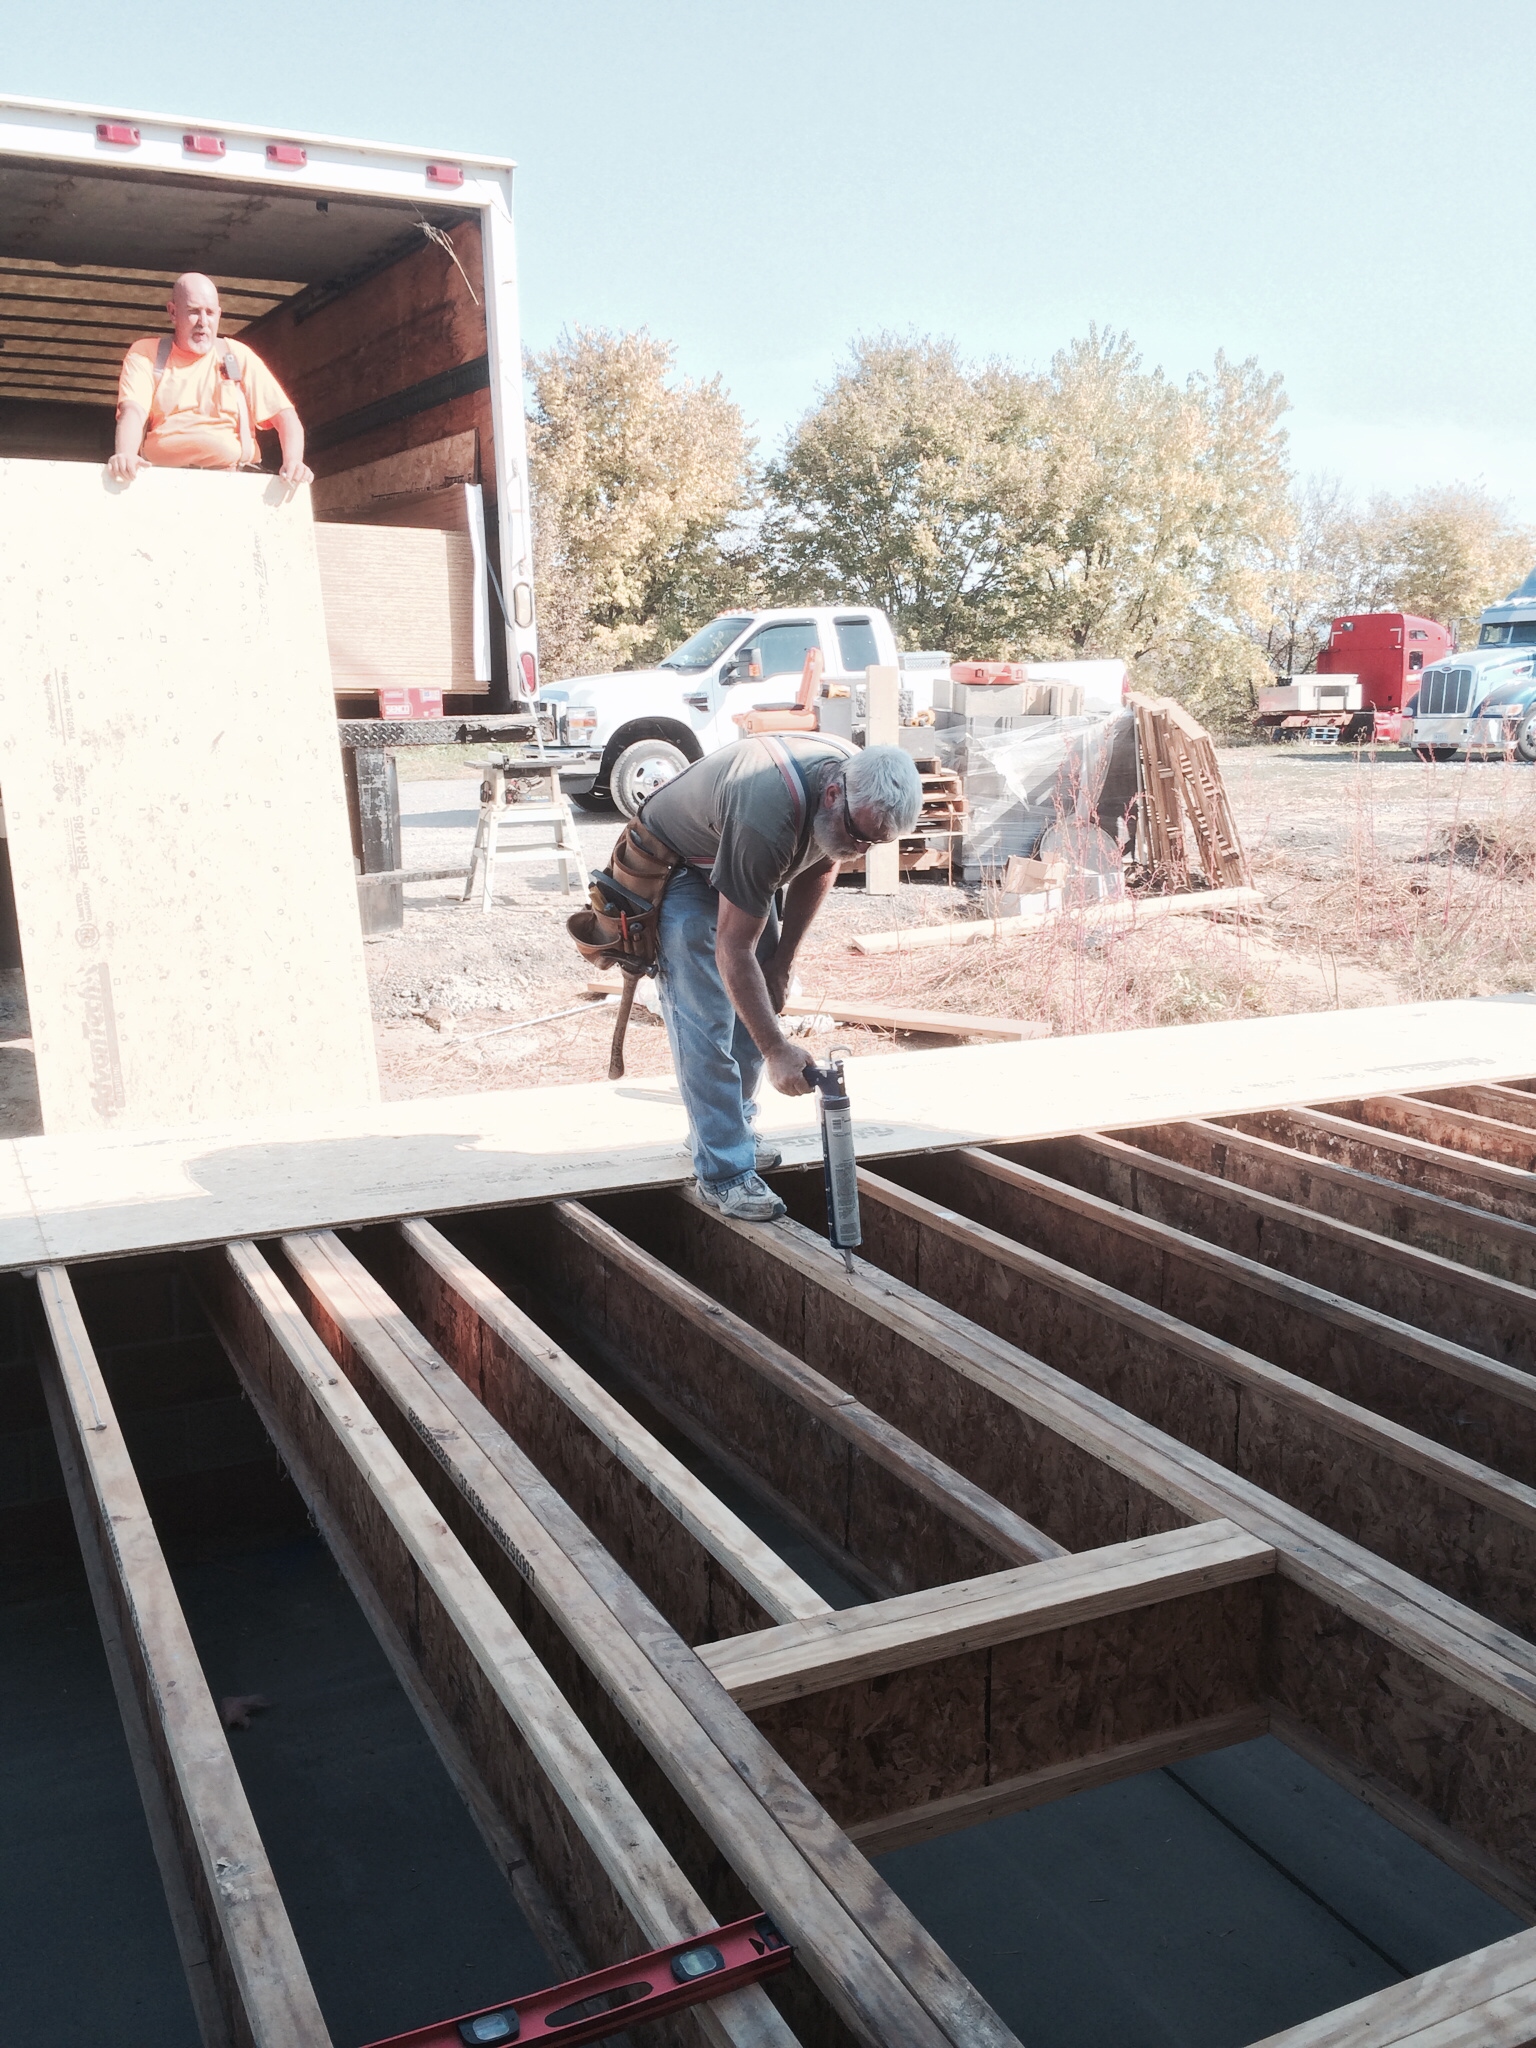
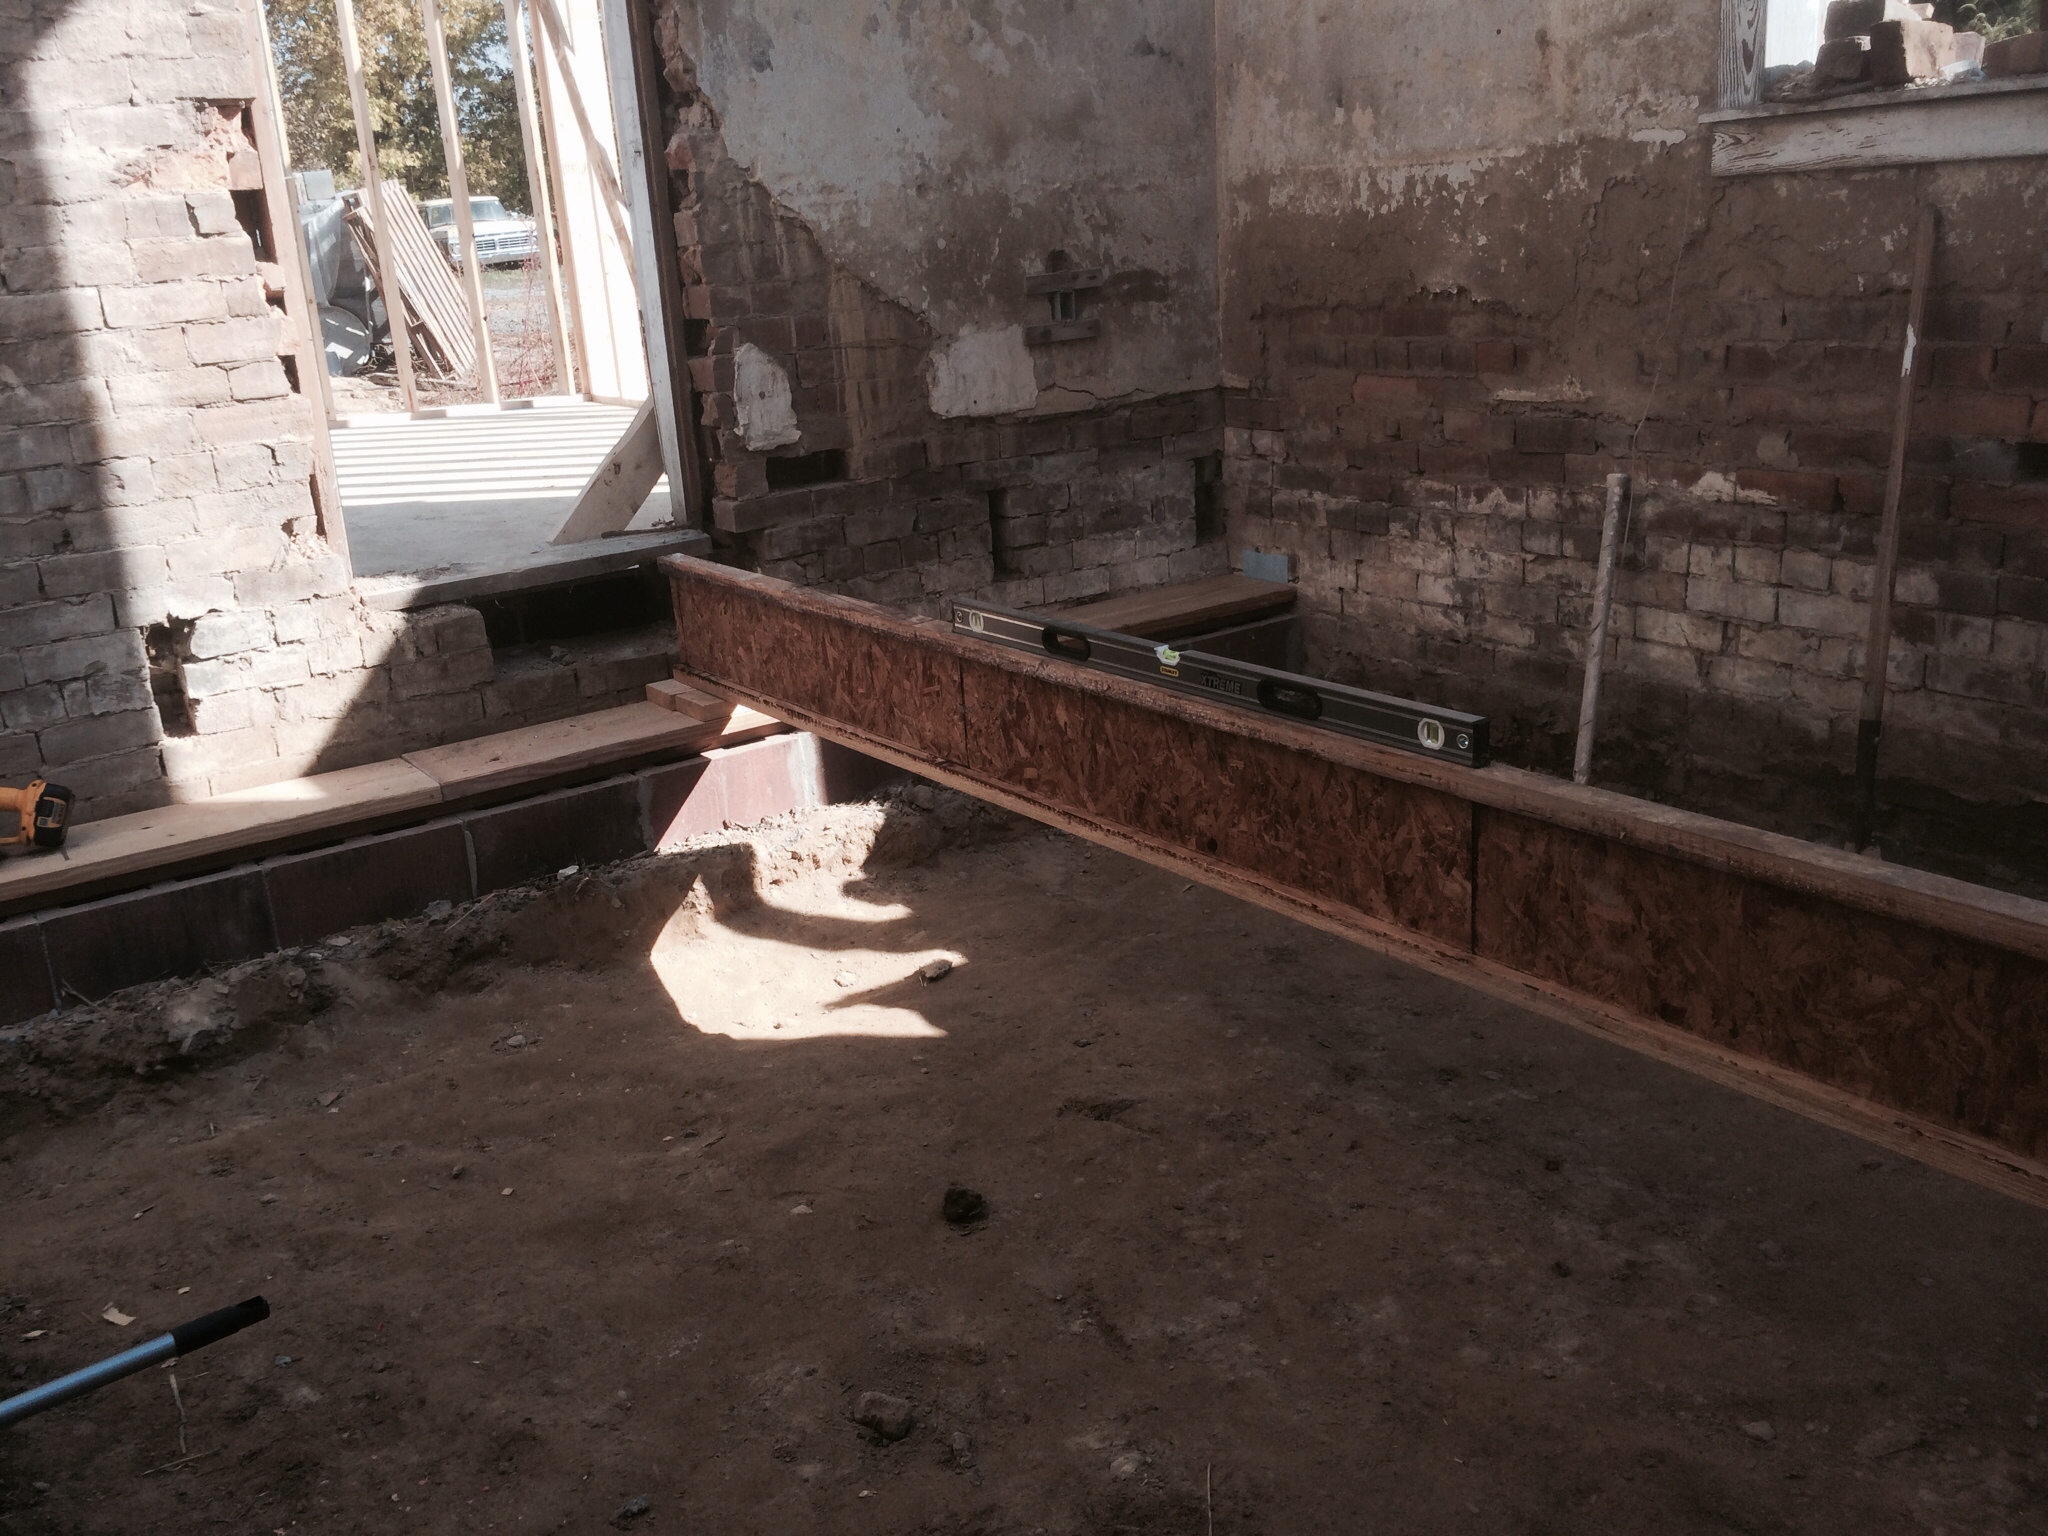
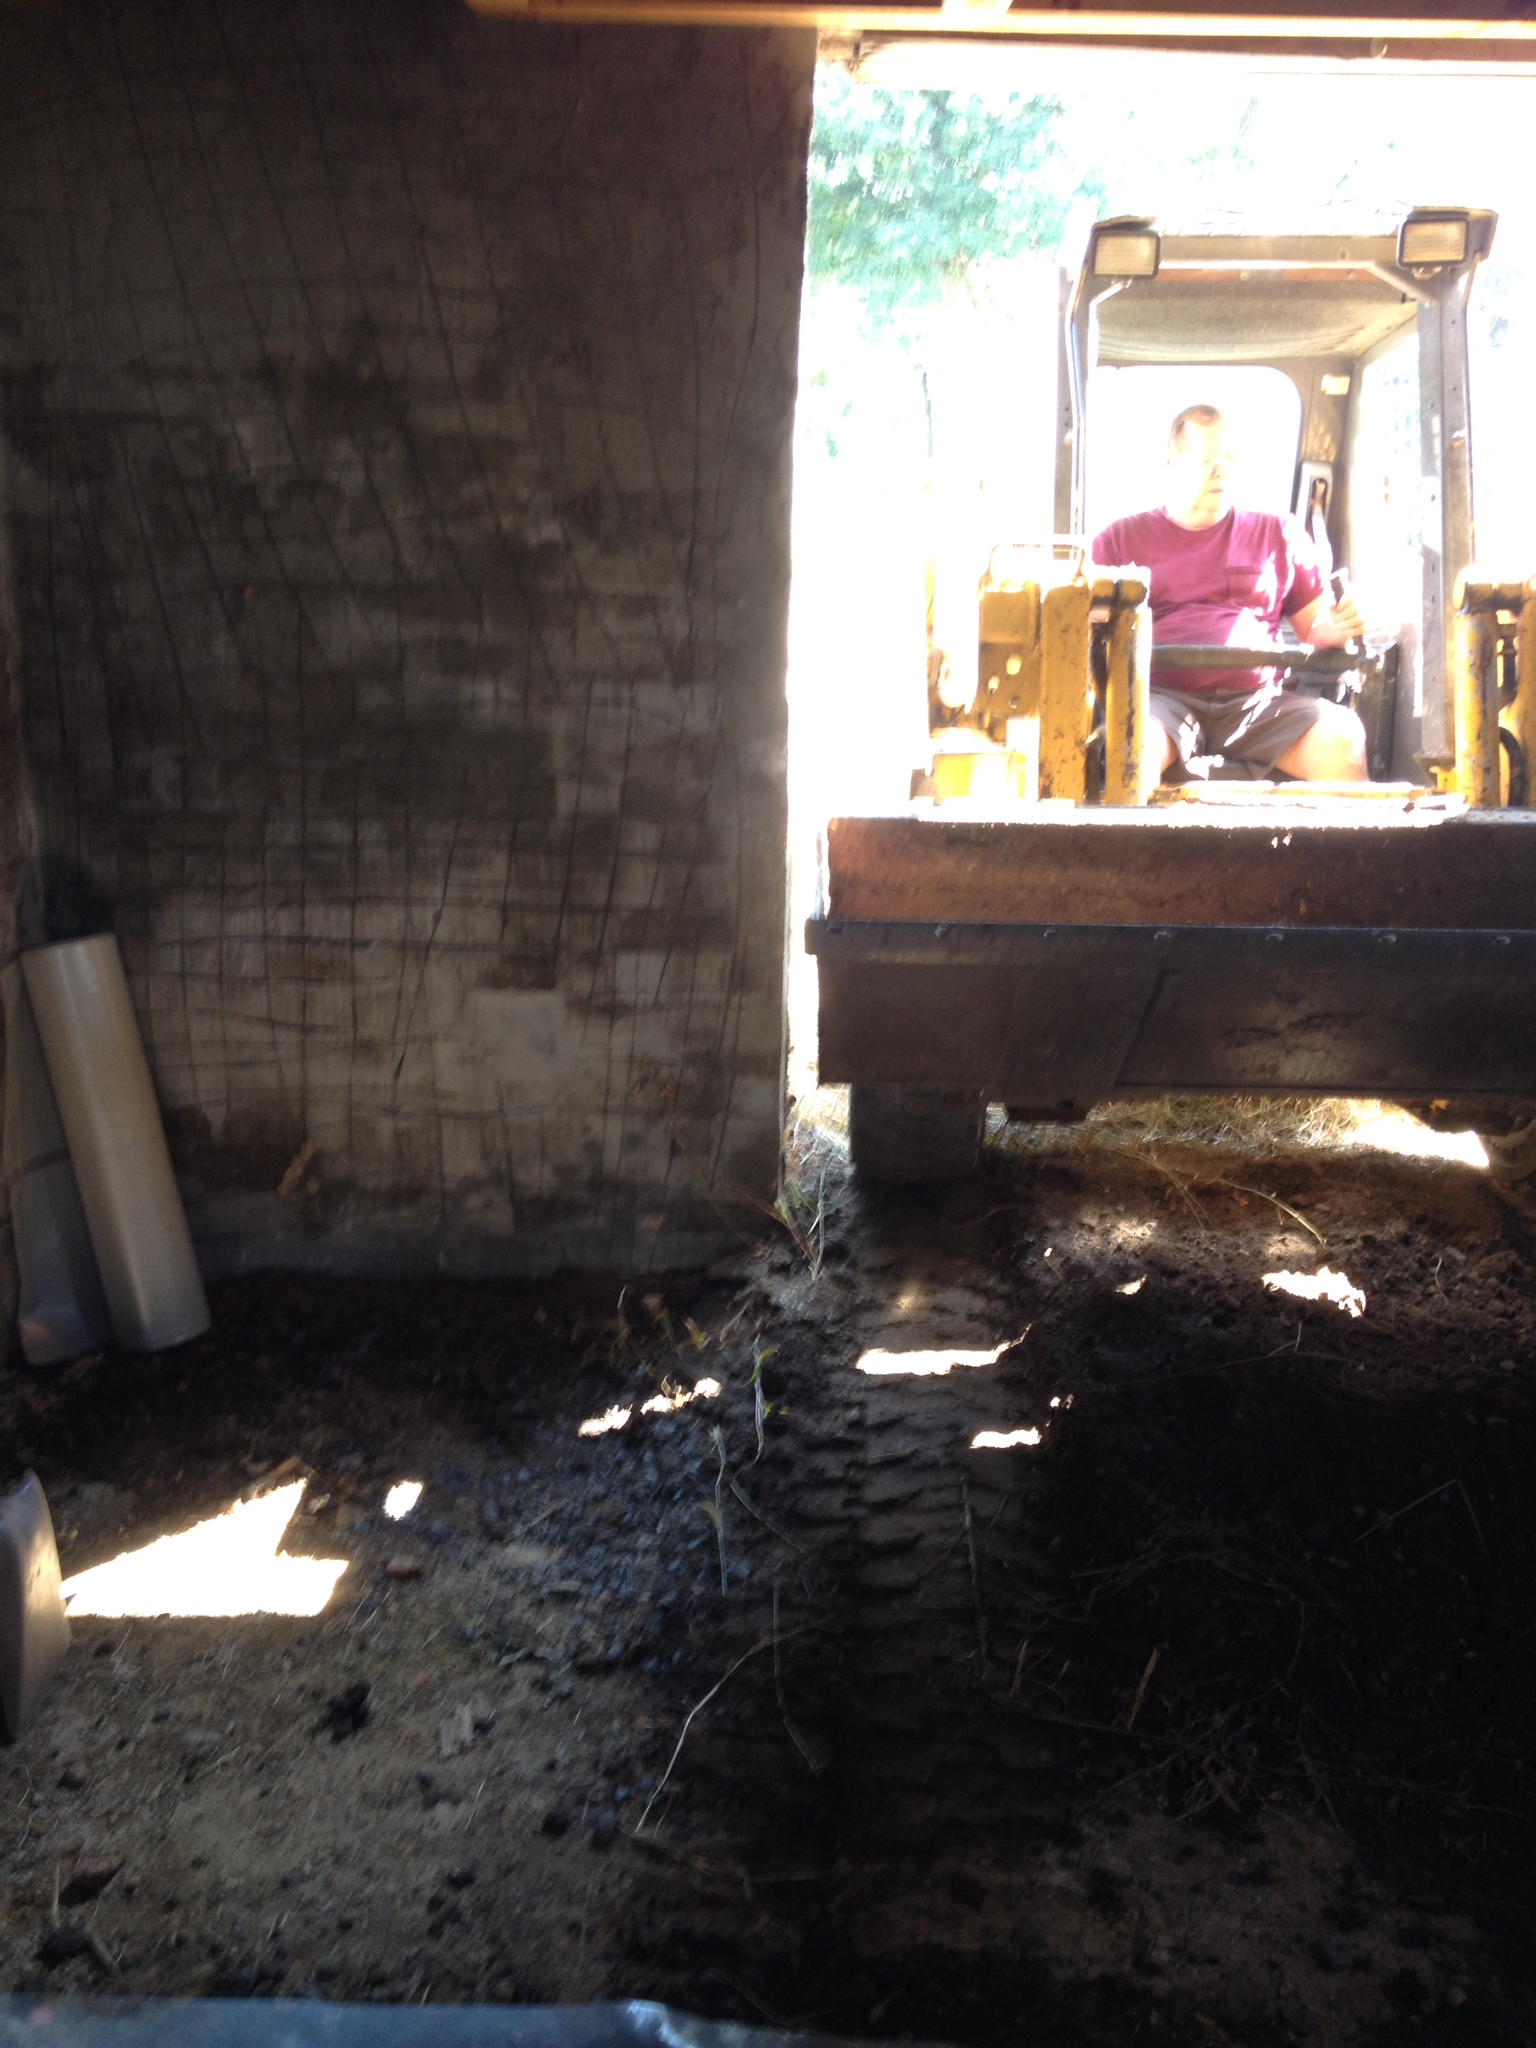
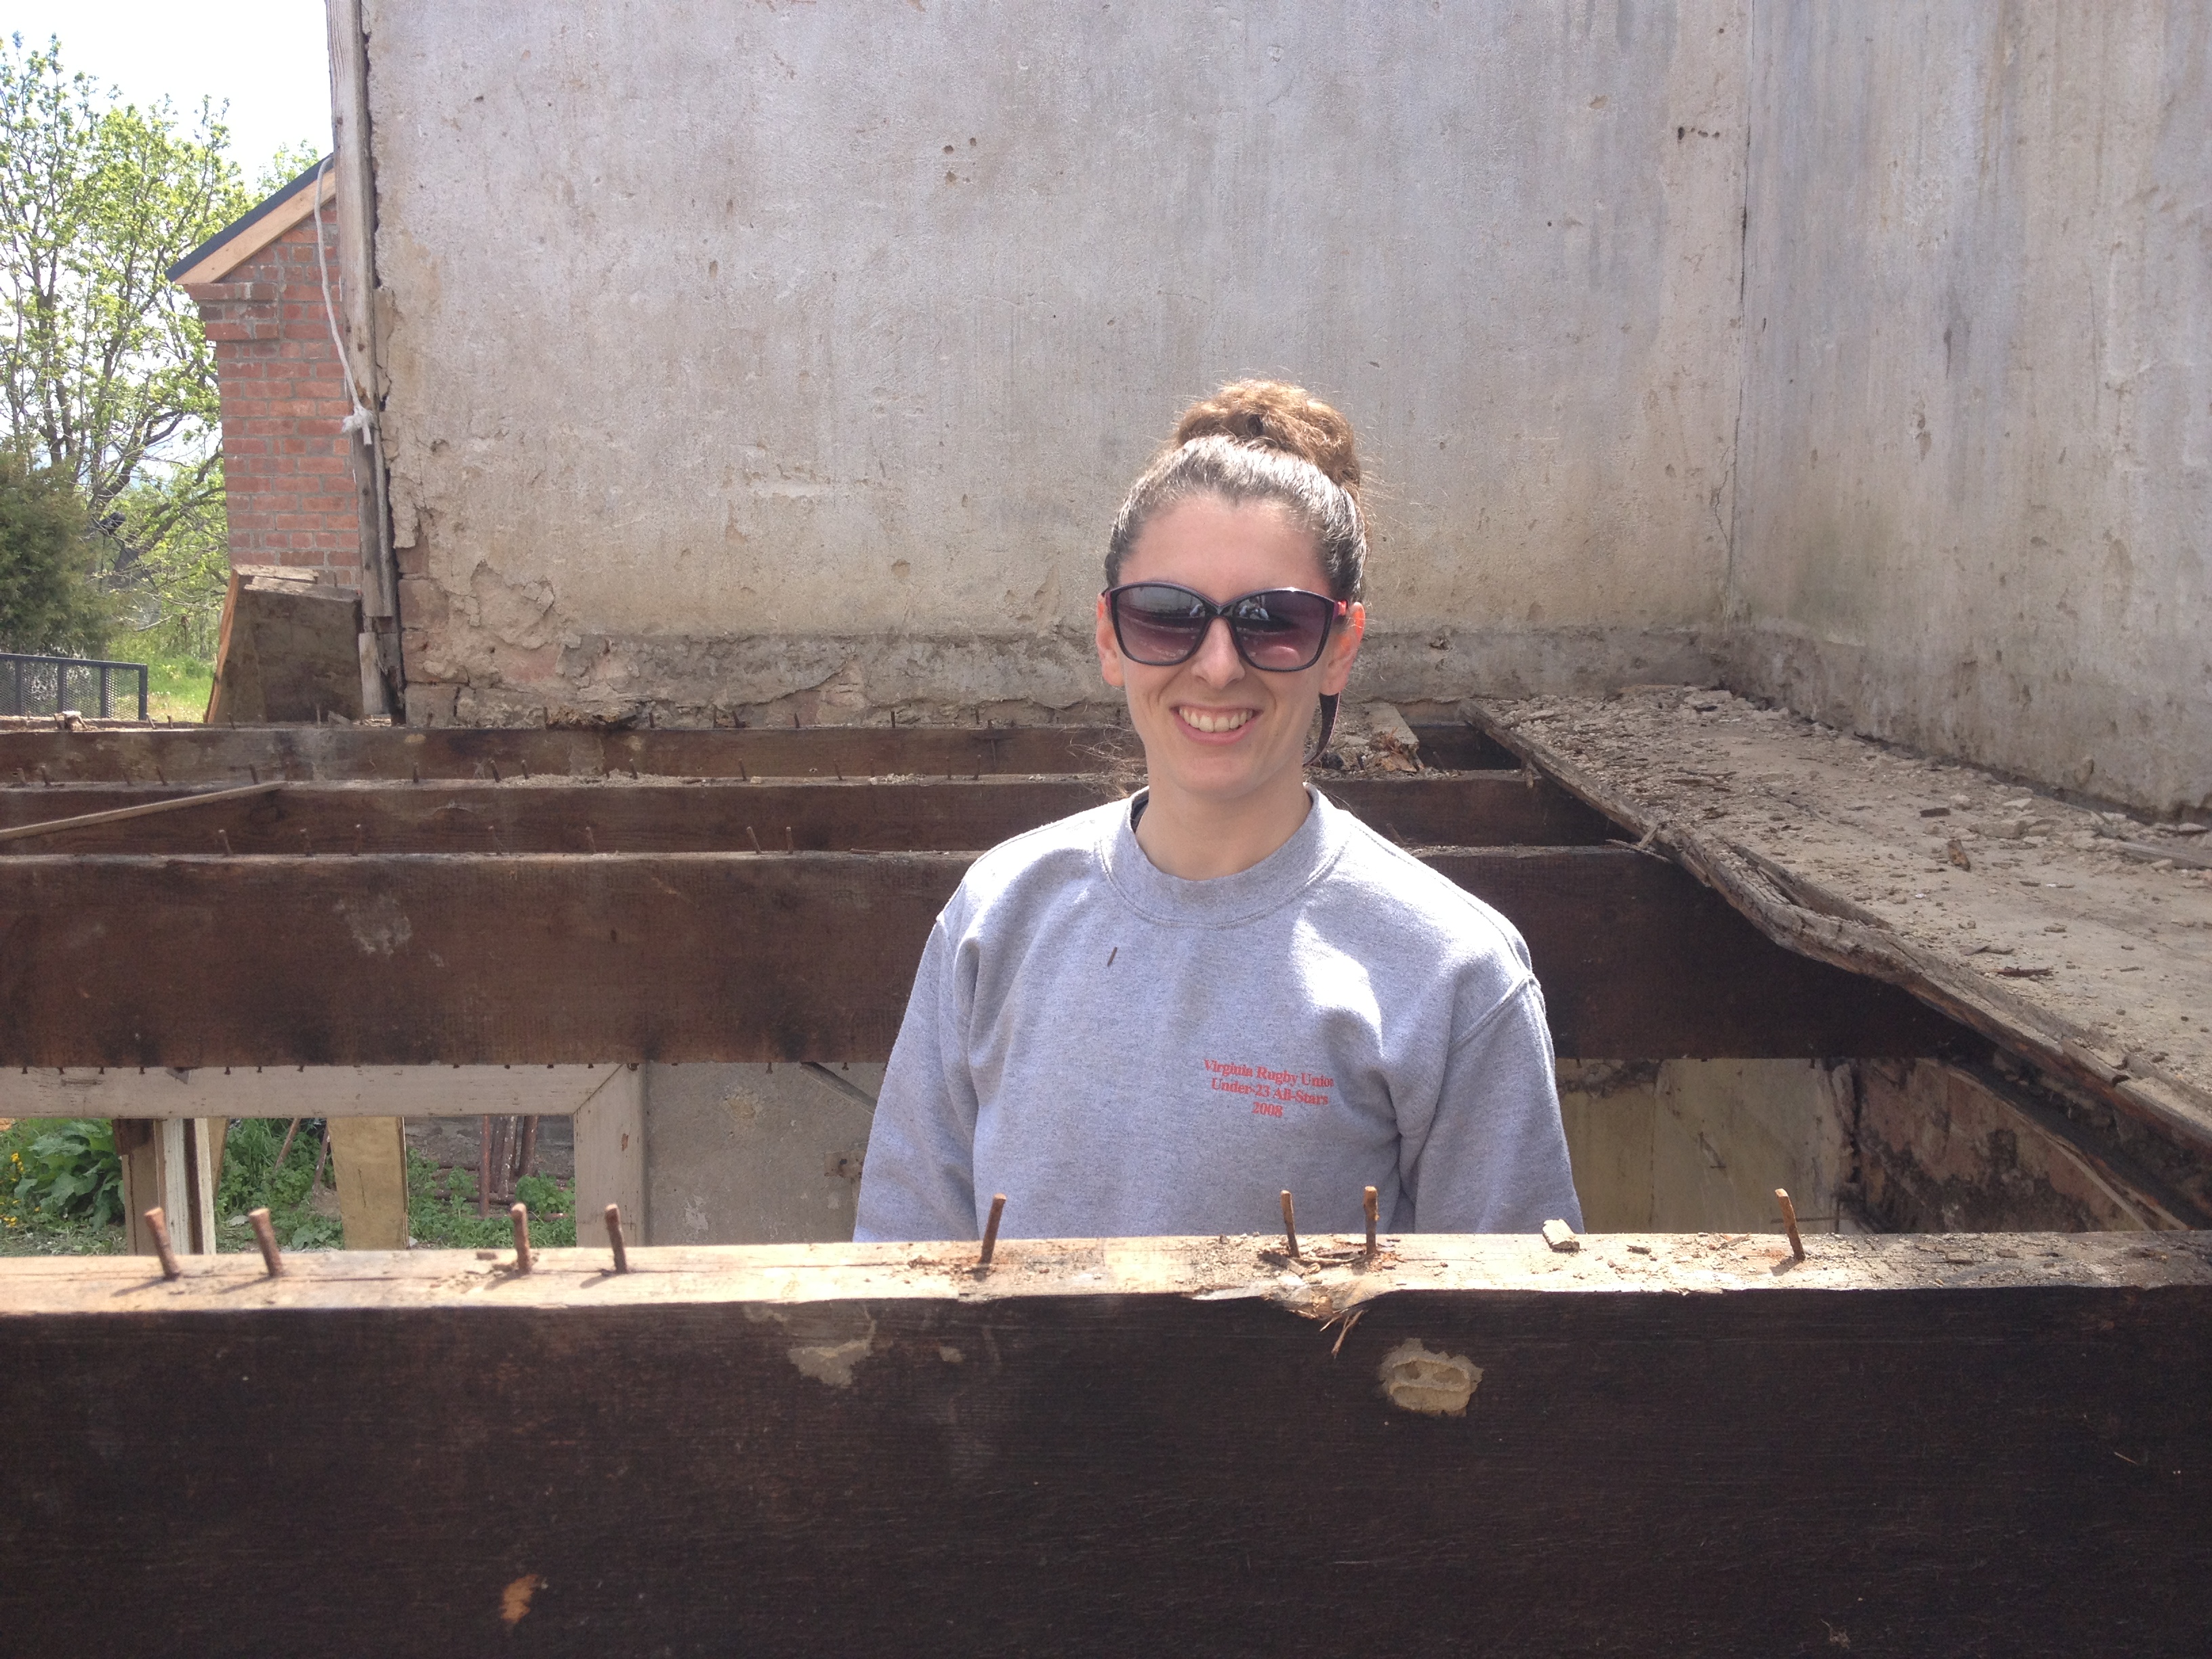
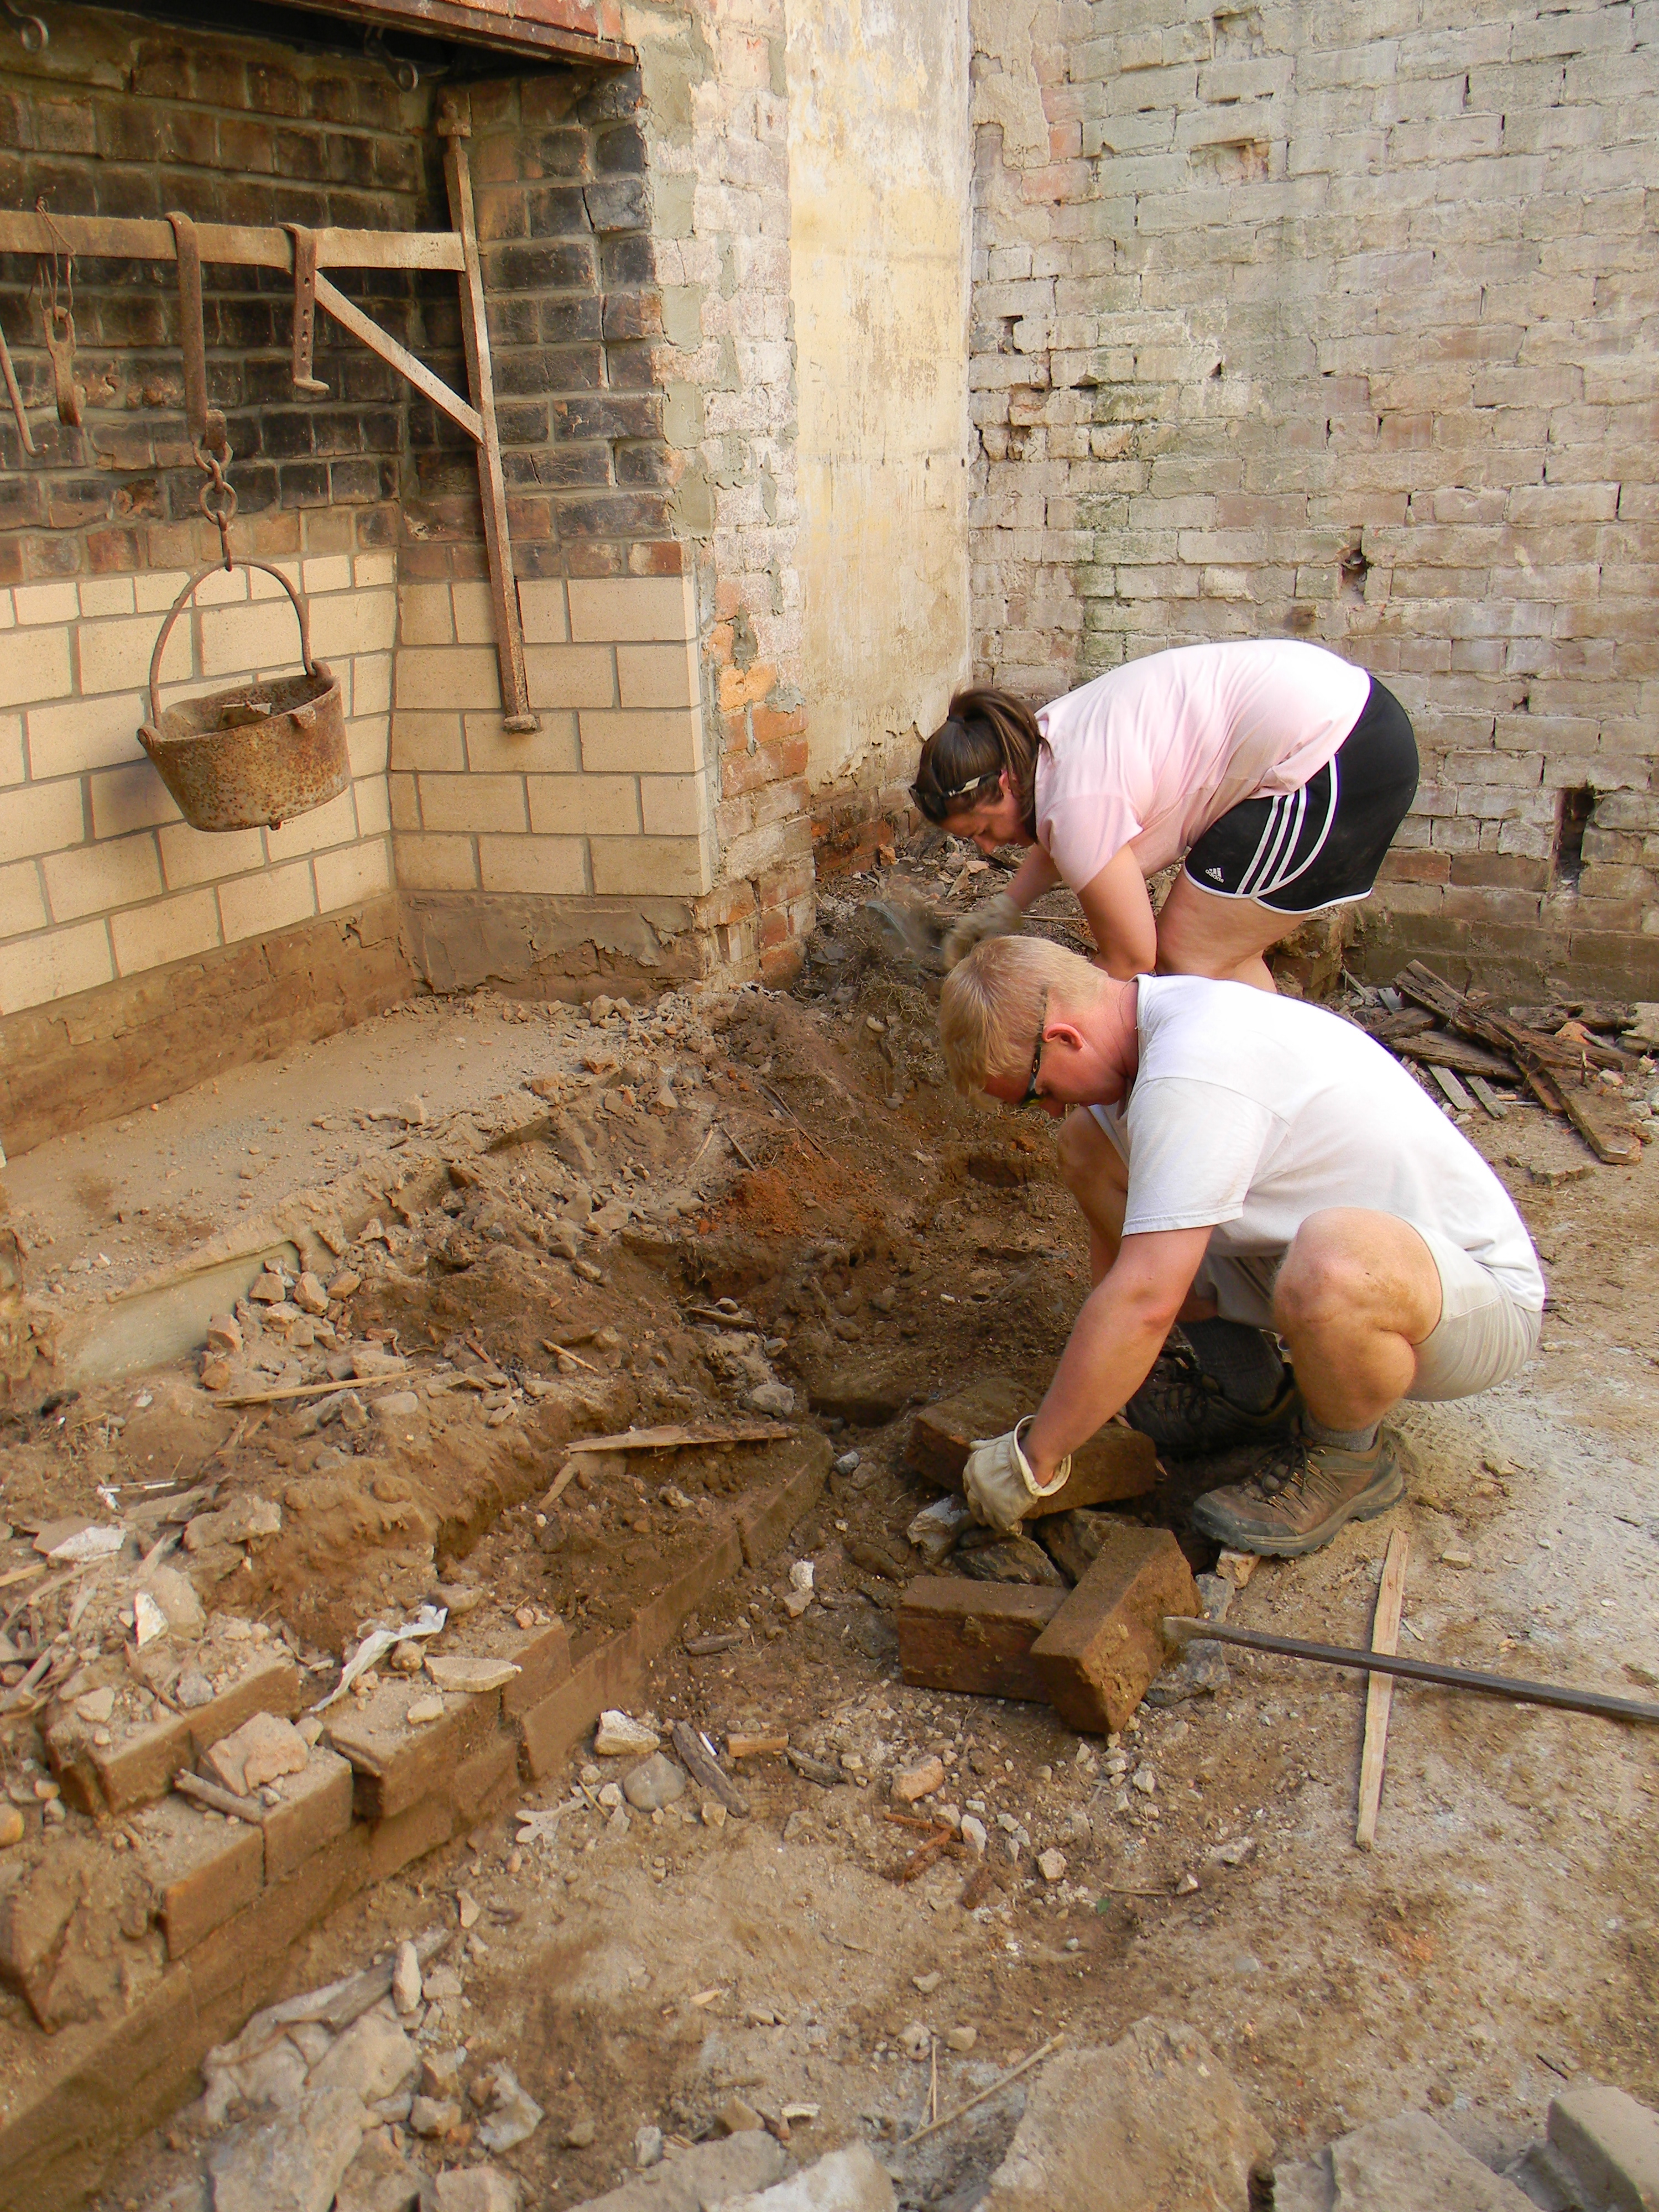
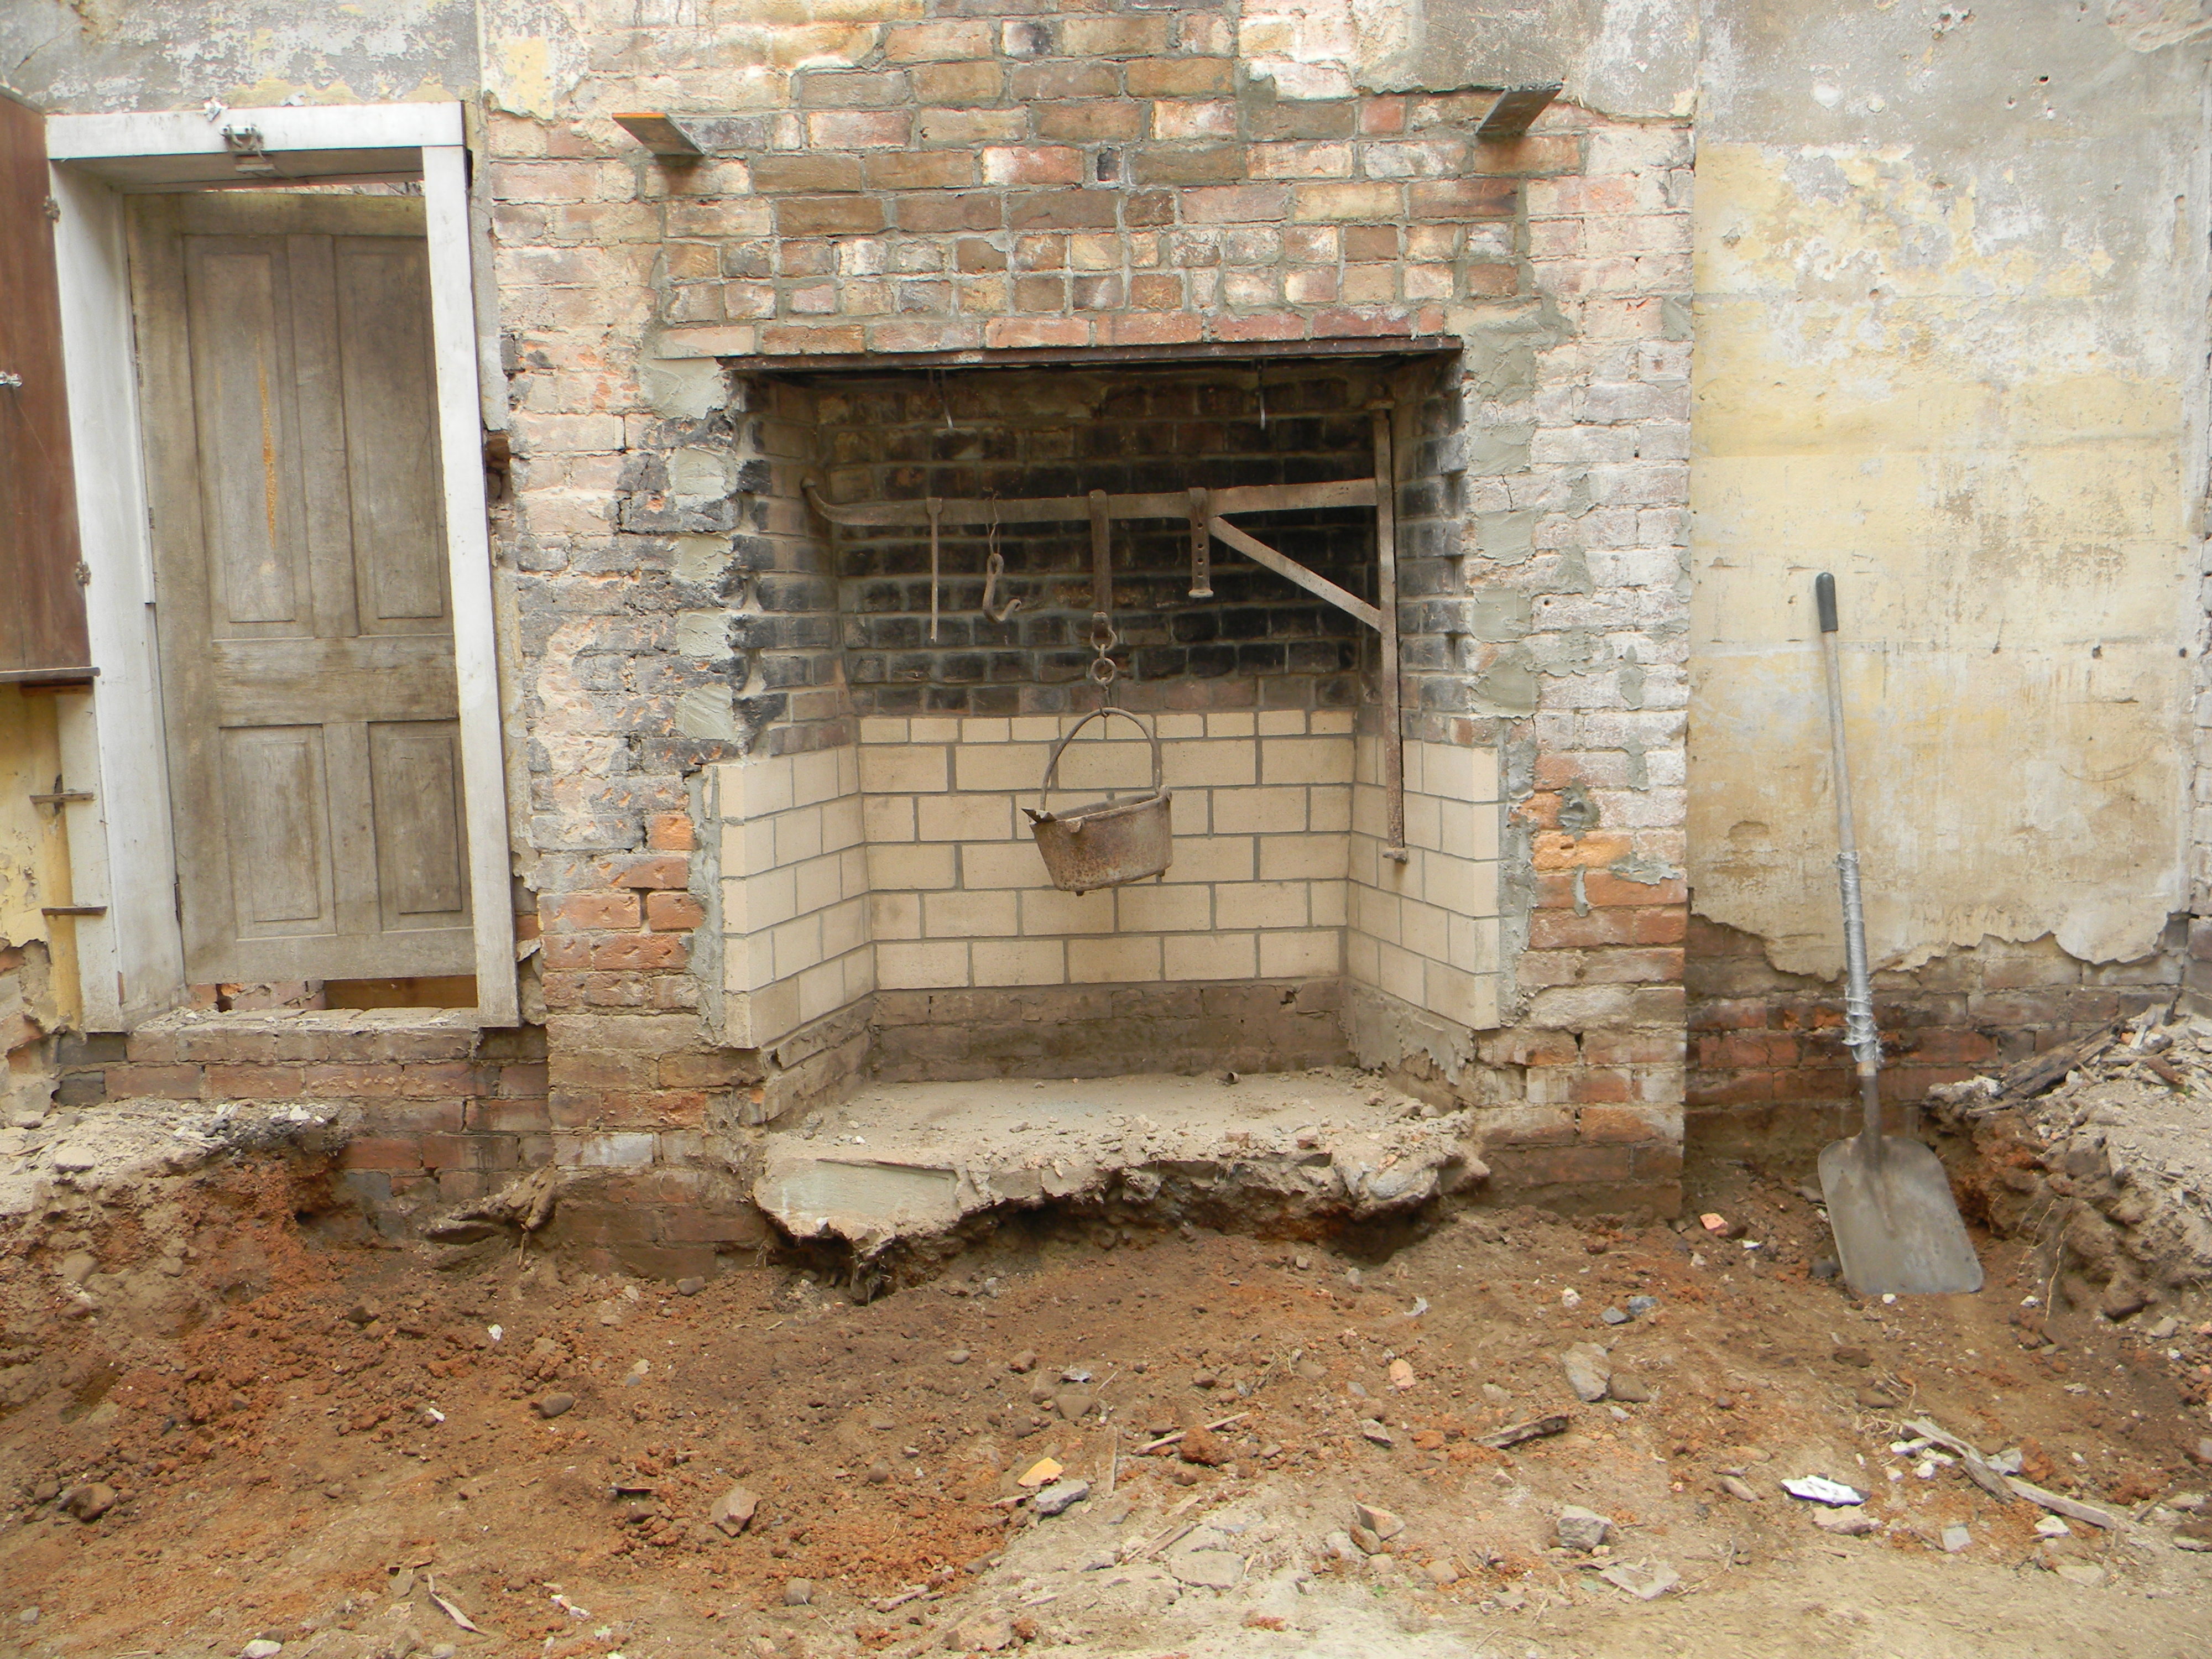
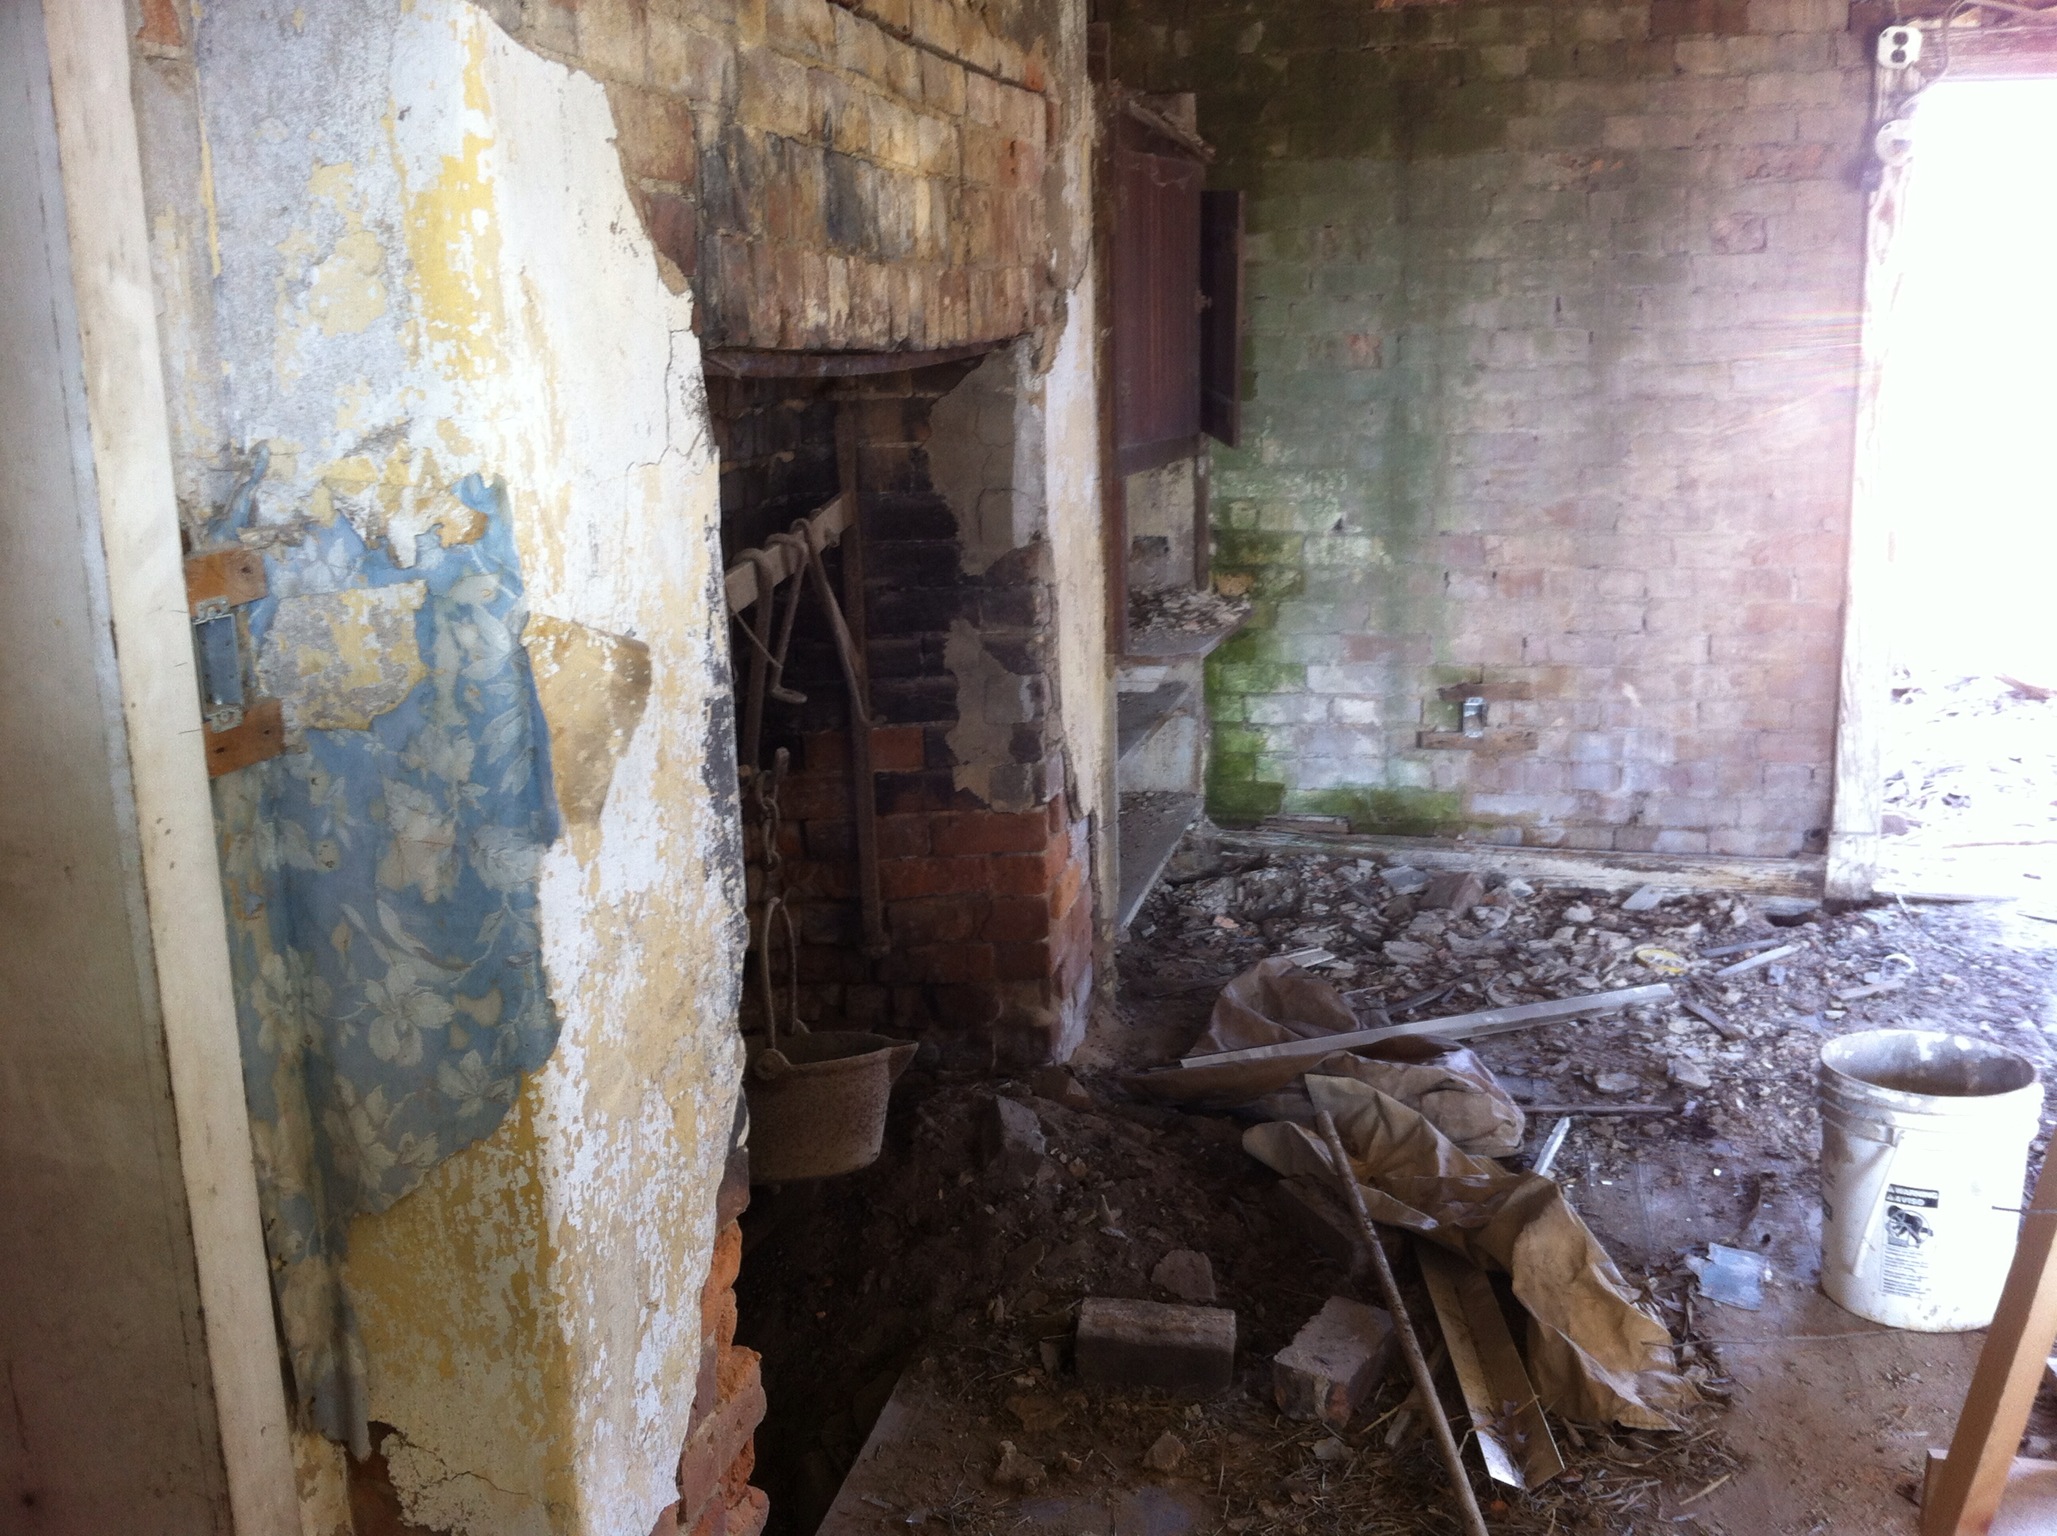
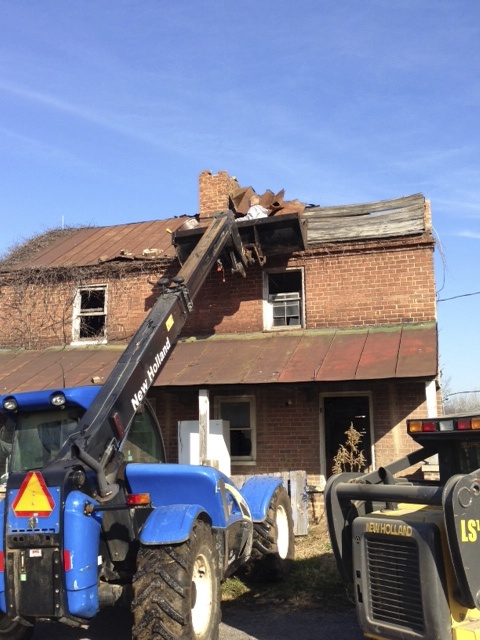
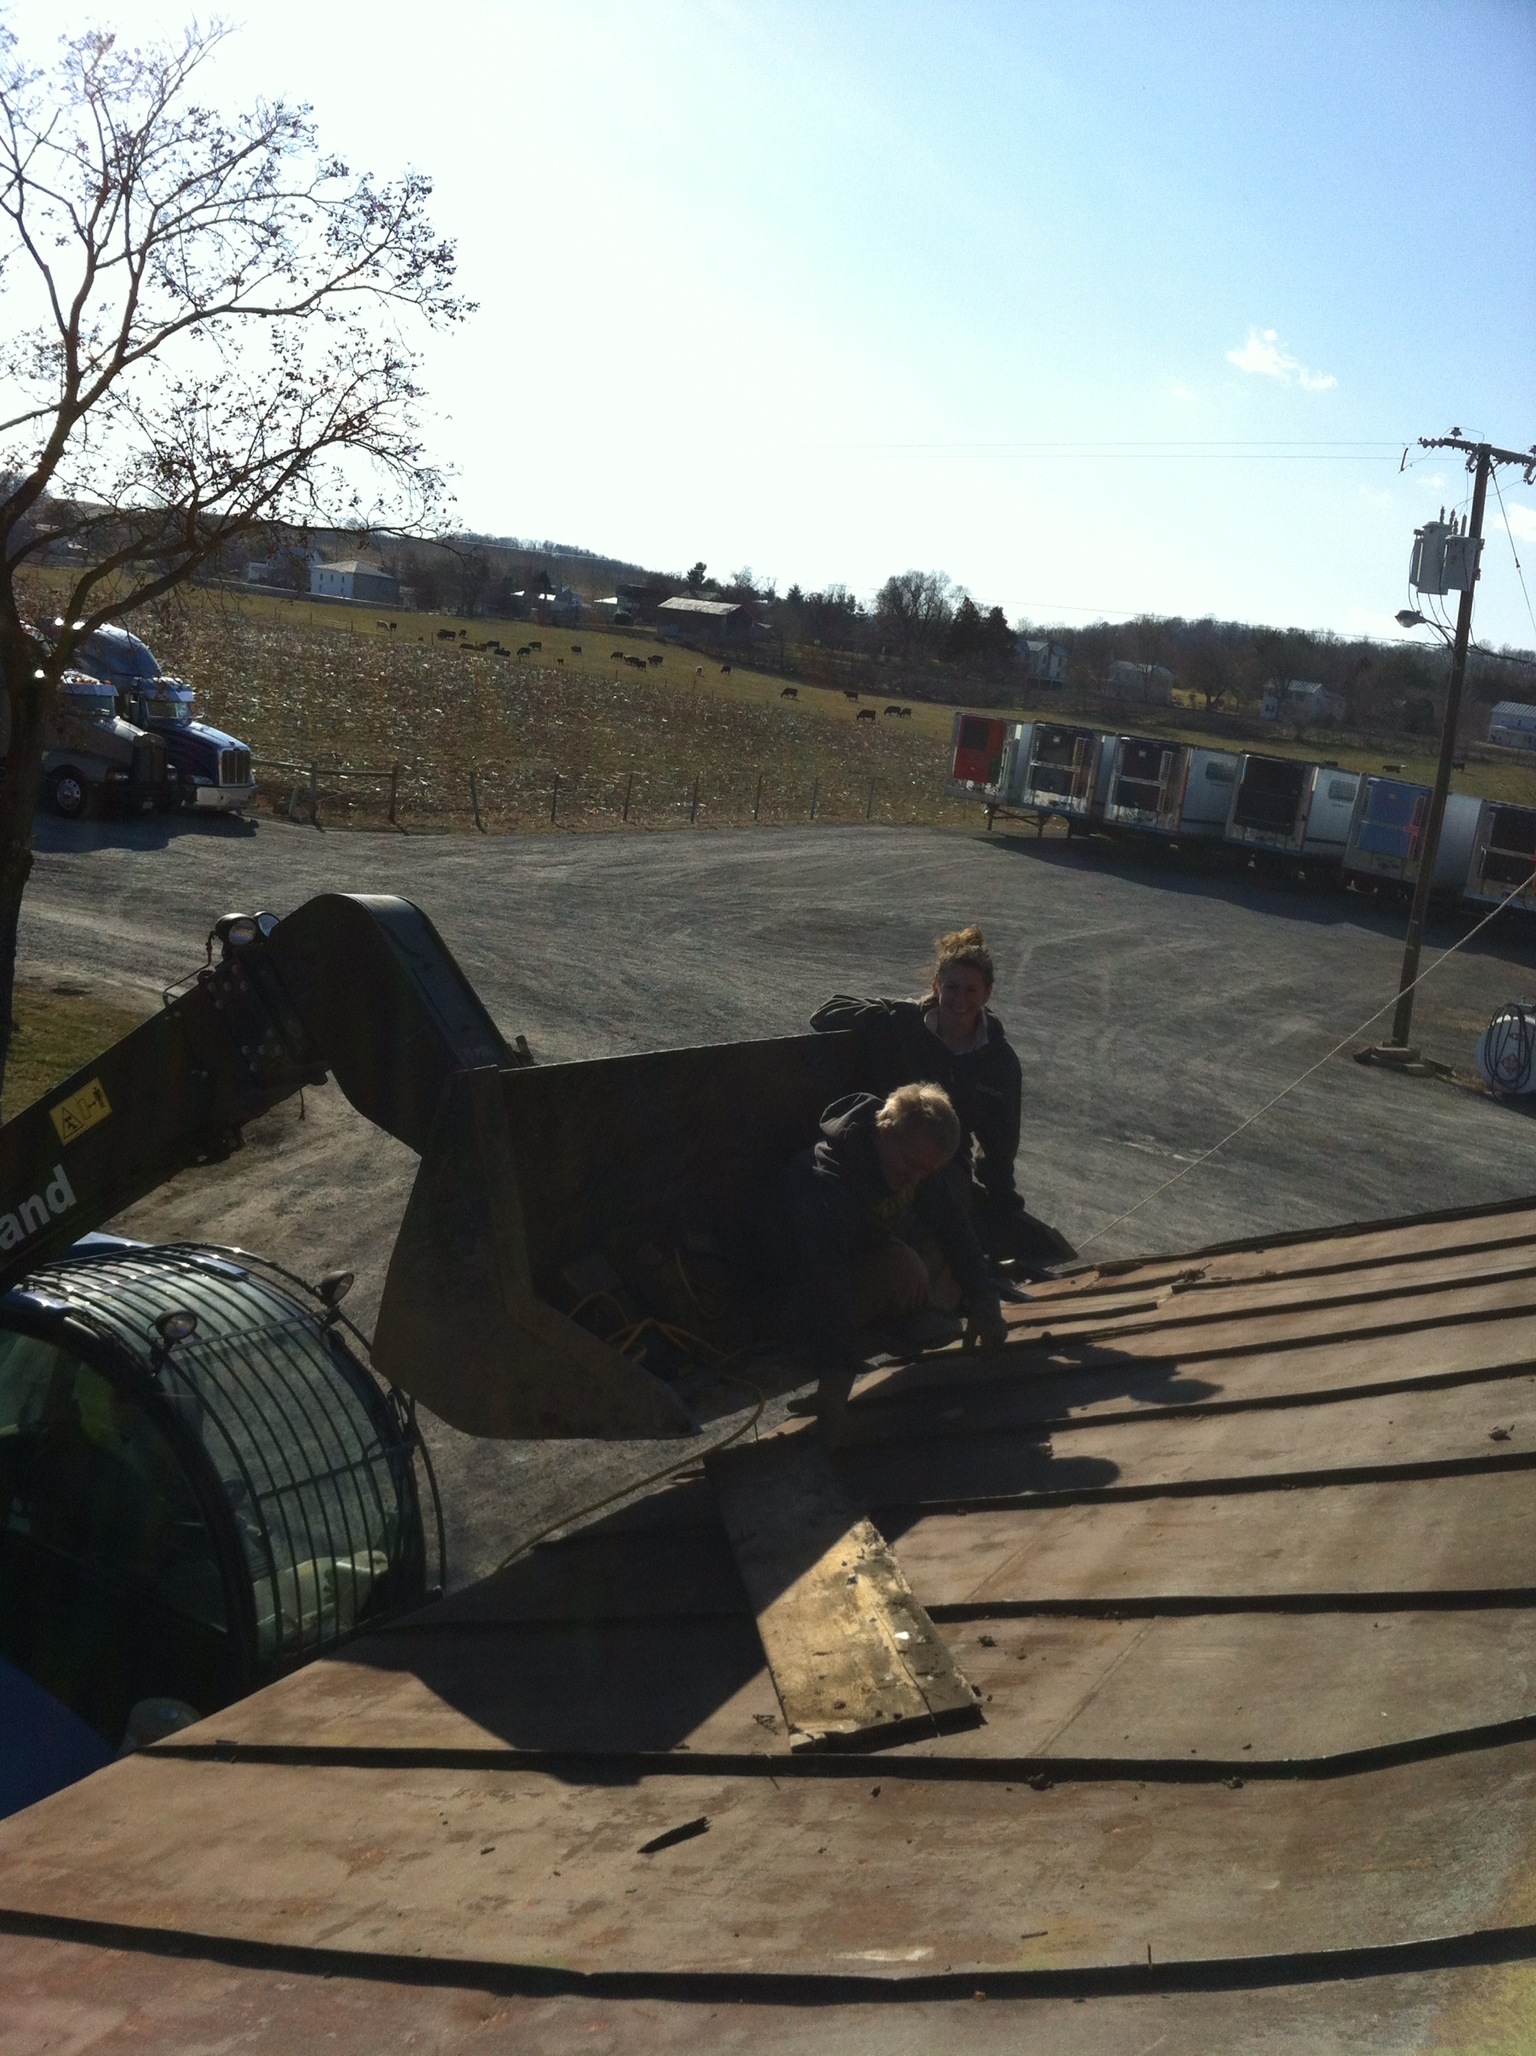
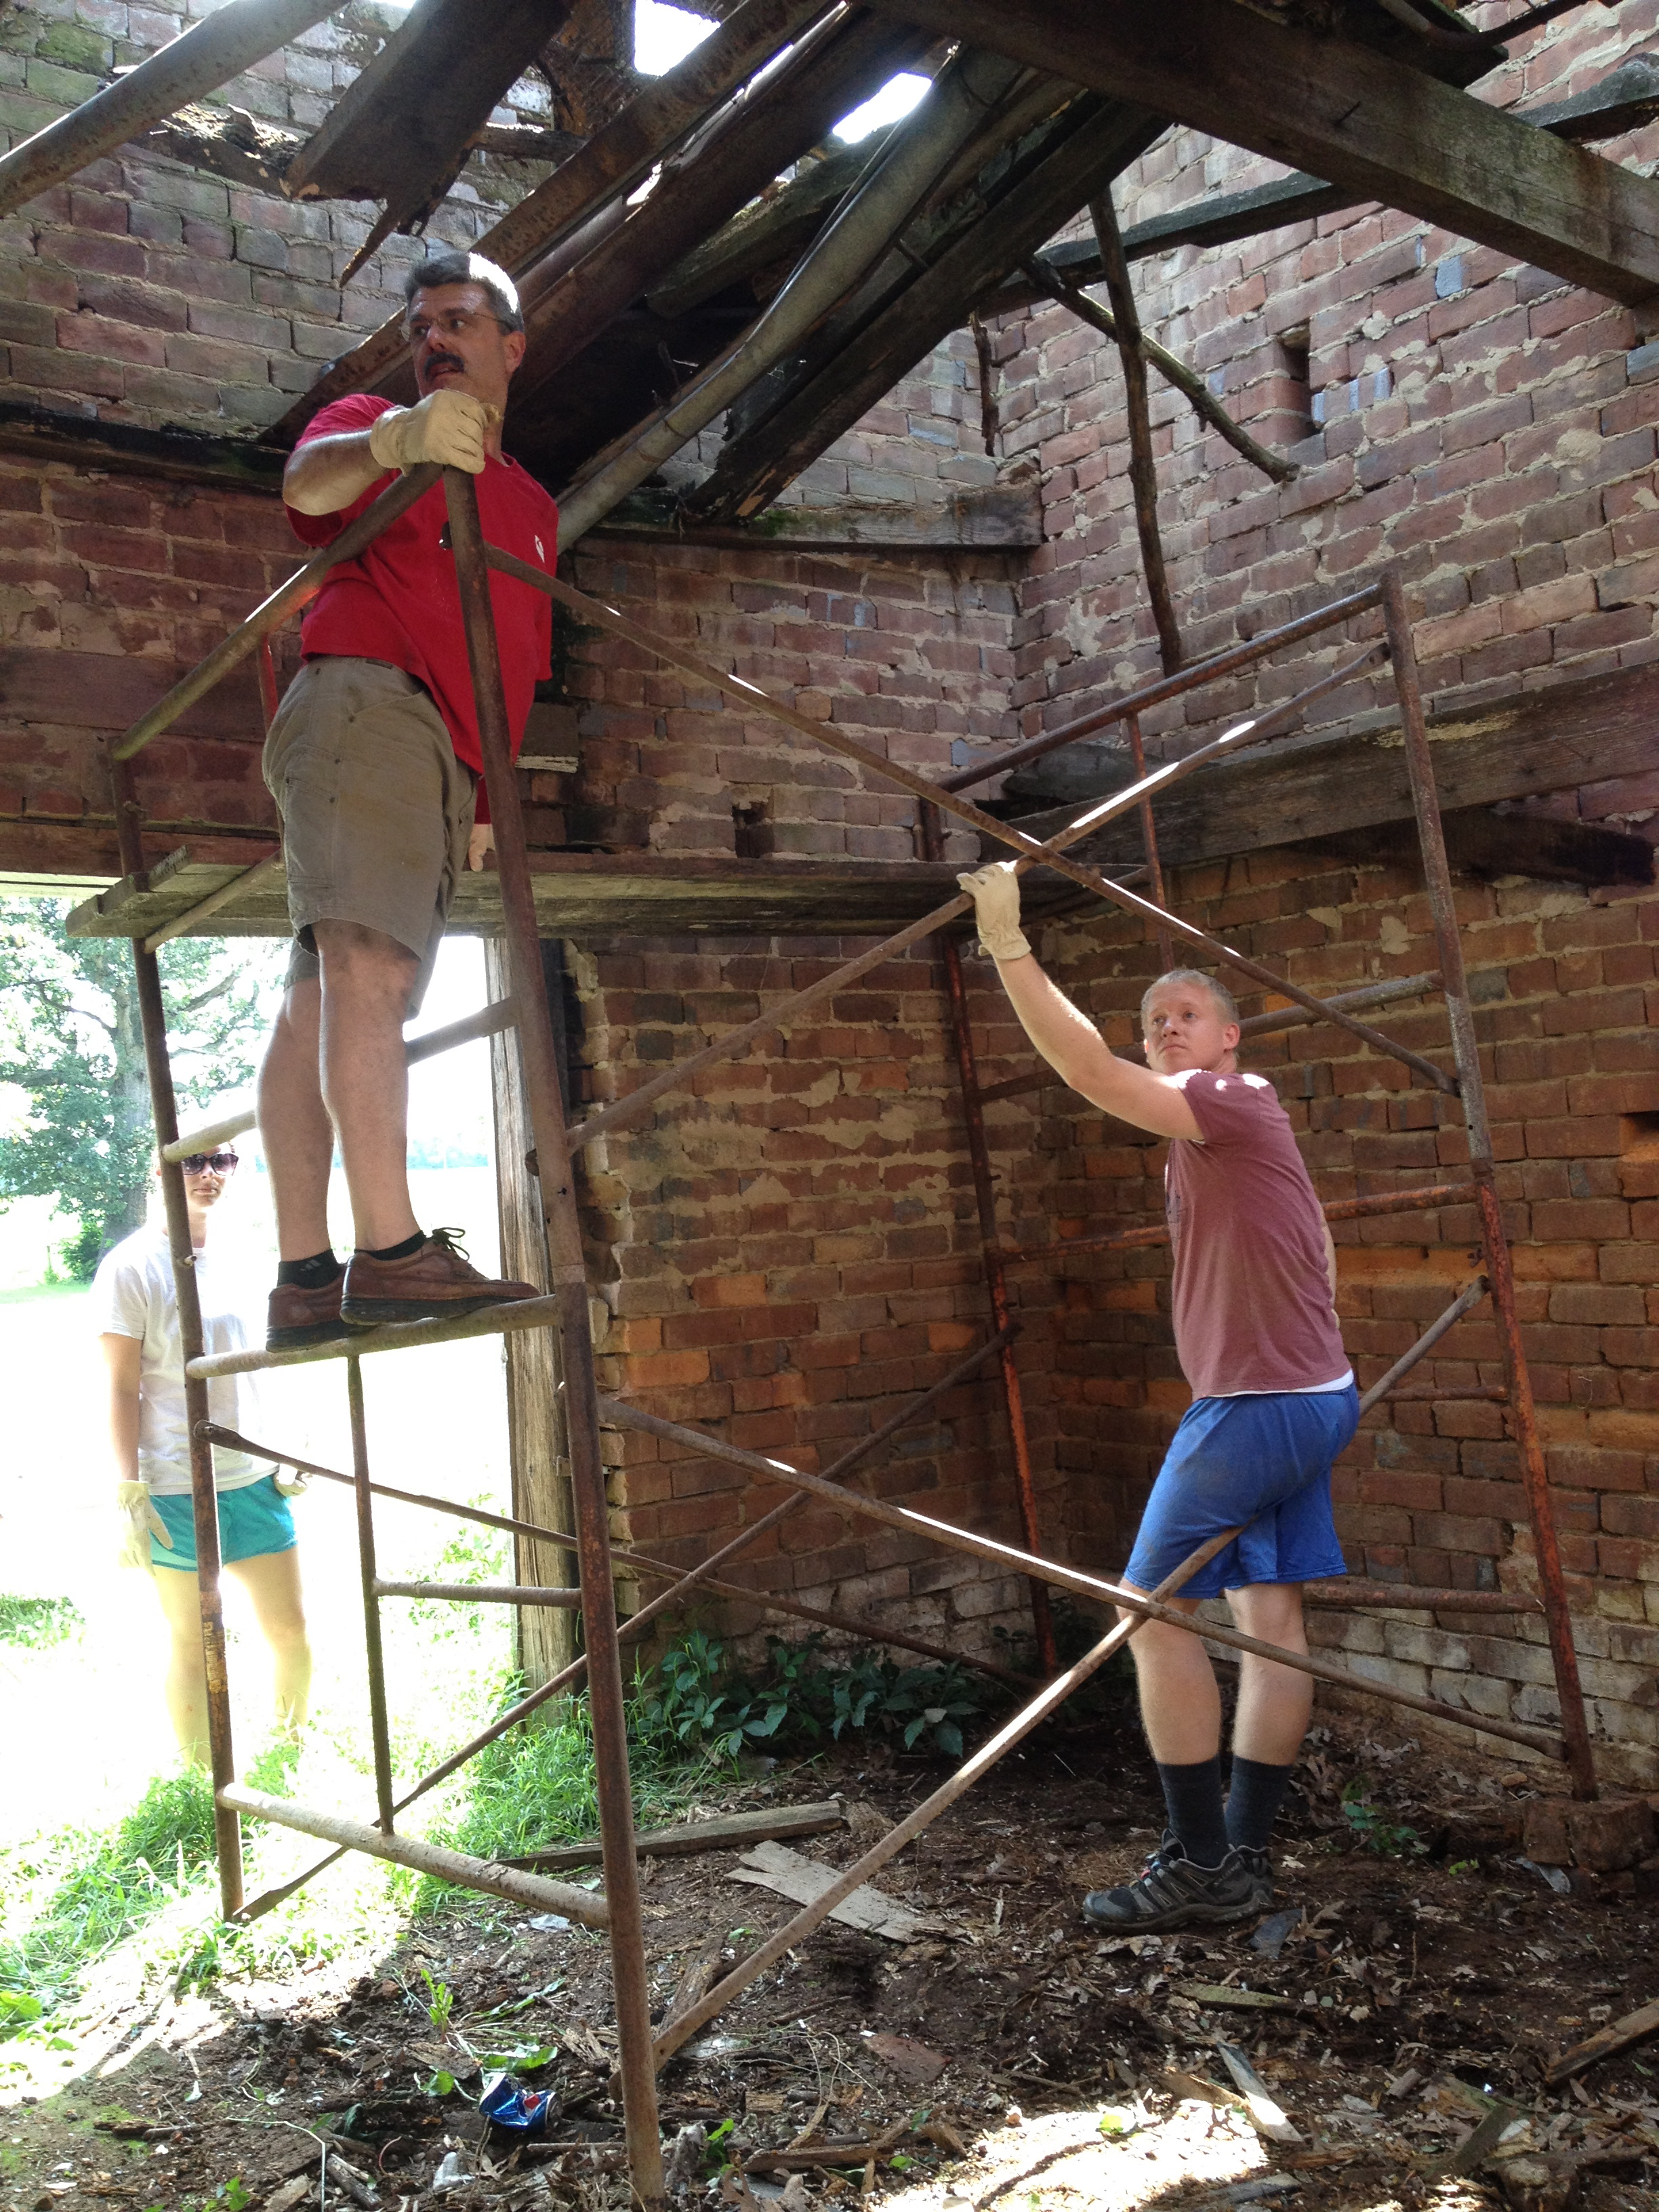
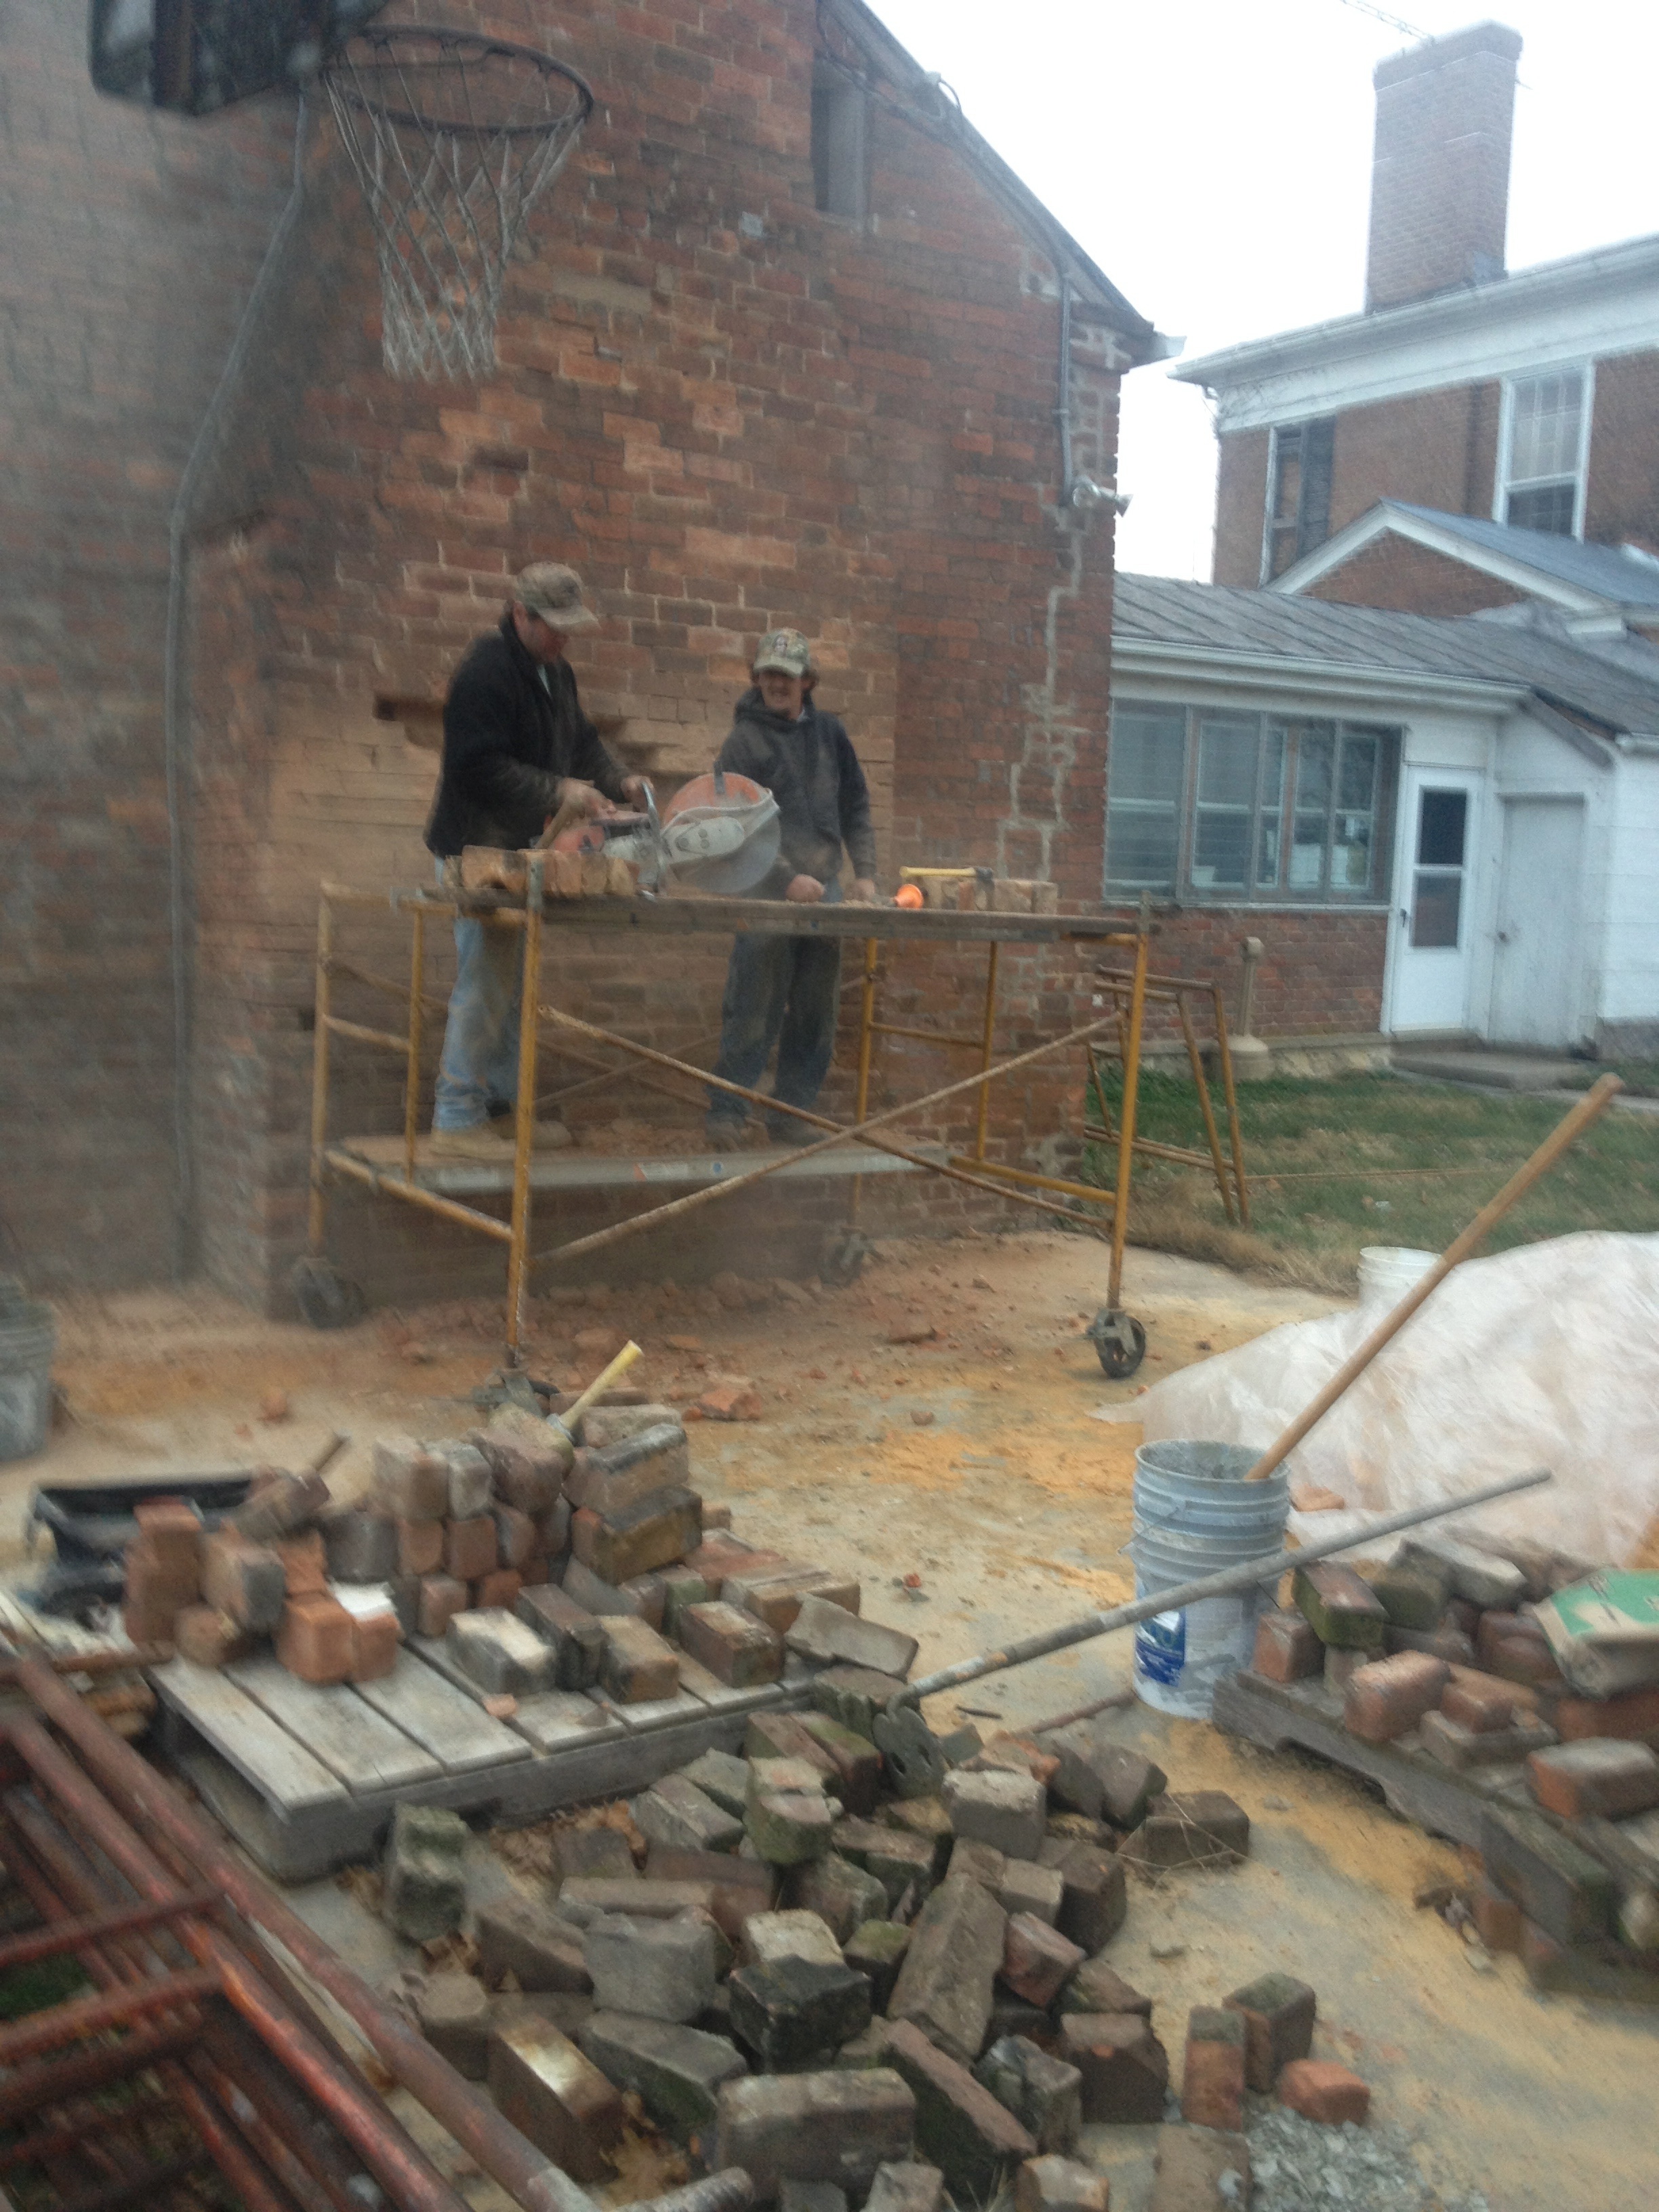
Enter the Herr & Co. rehab team, who first built temporary walls to make sure the remaining structure was not further compromised by our repair, and who then began to take the wall out, brick by brick:

IMG_0719

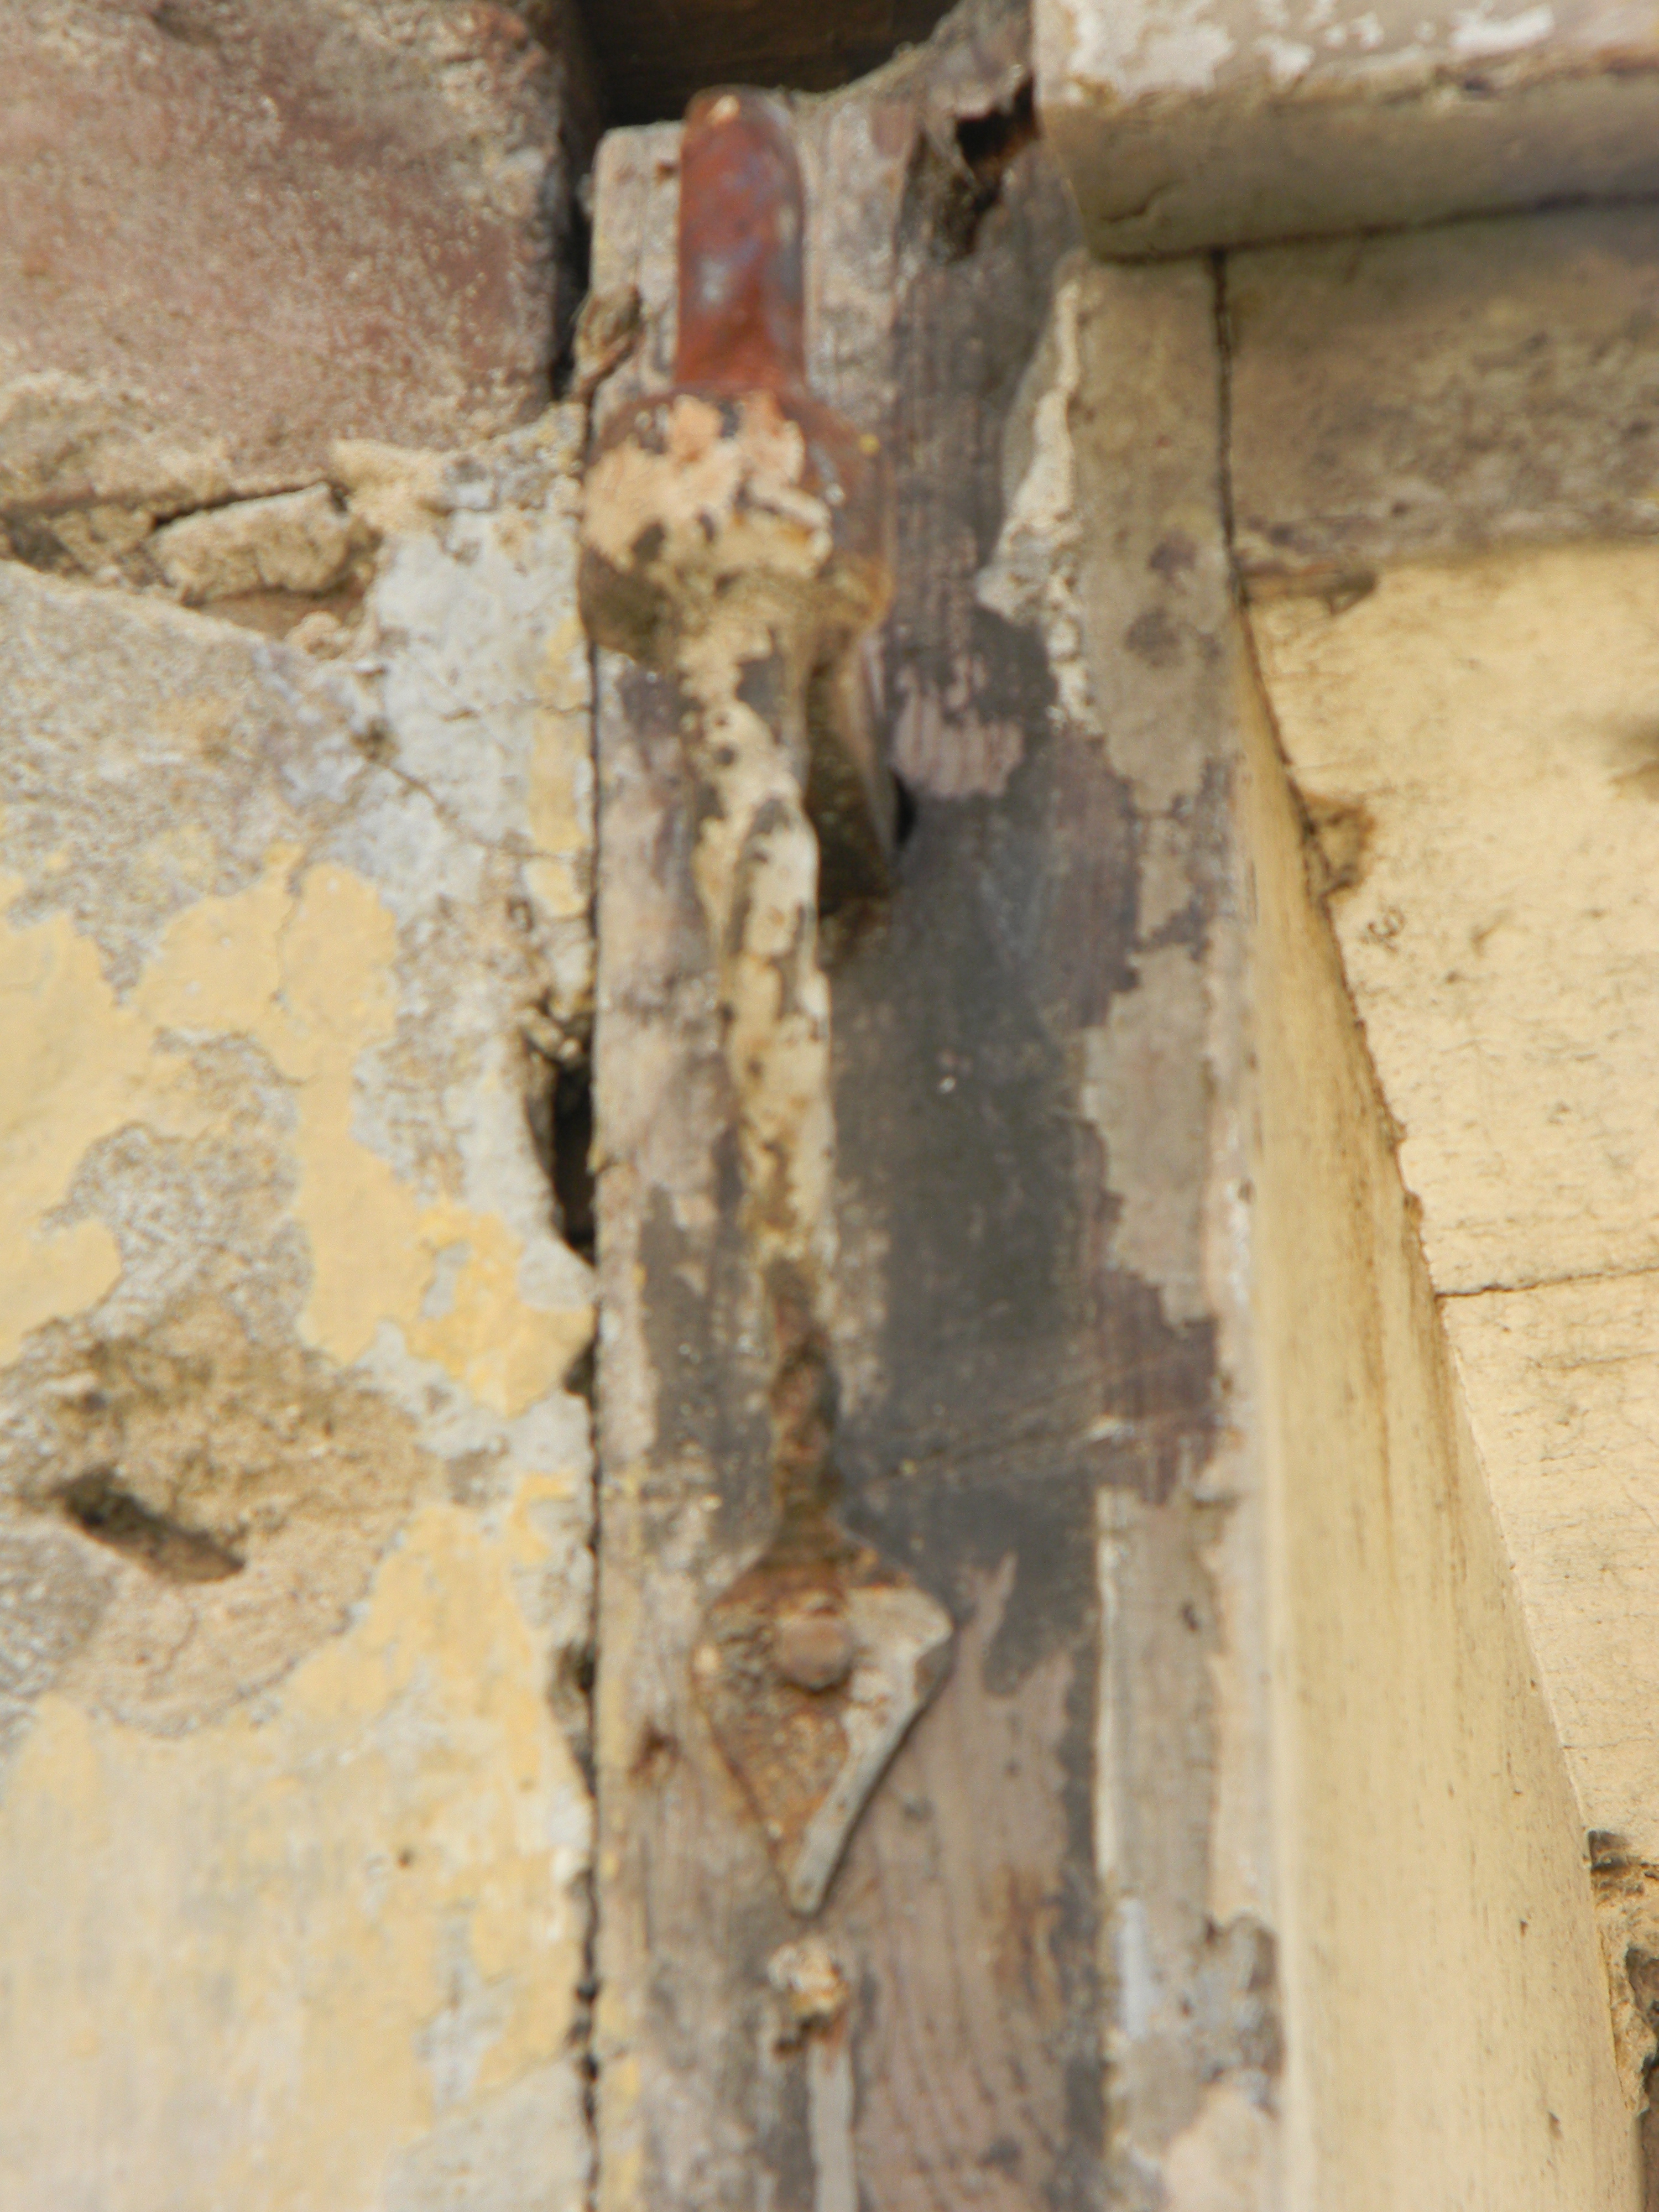
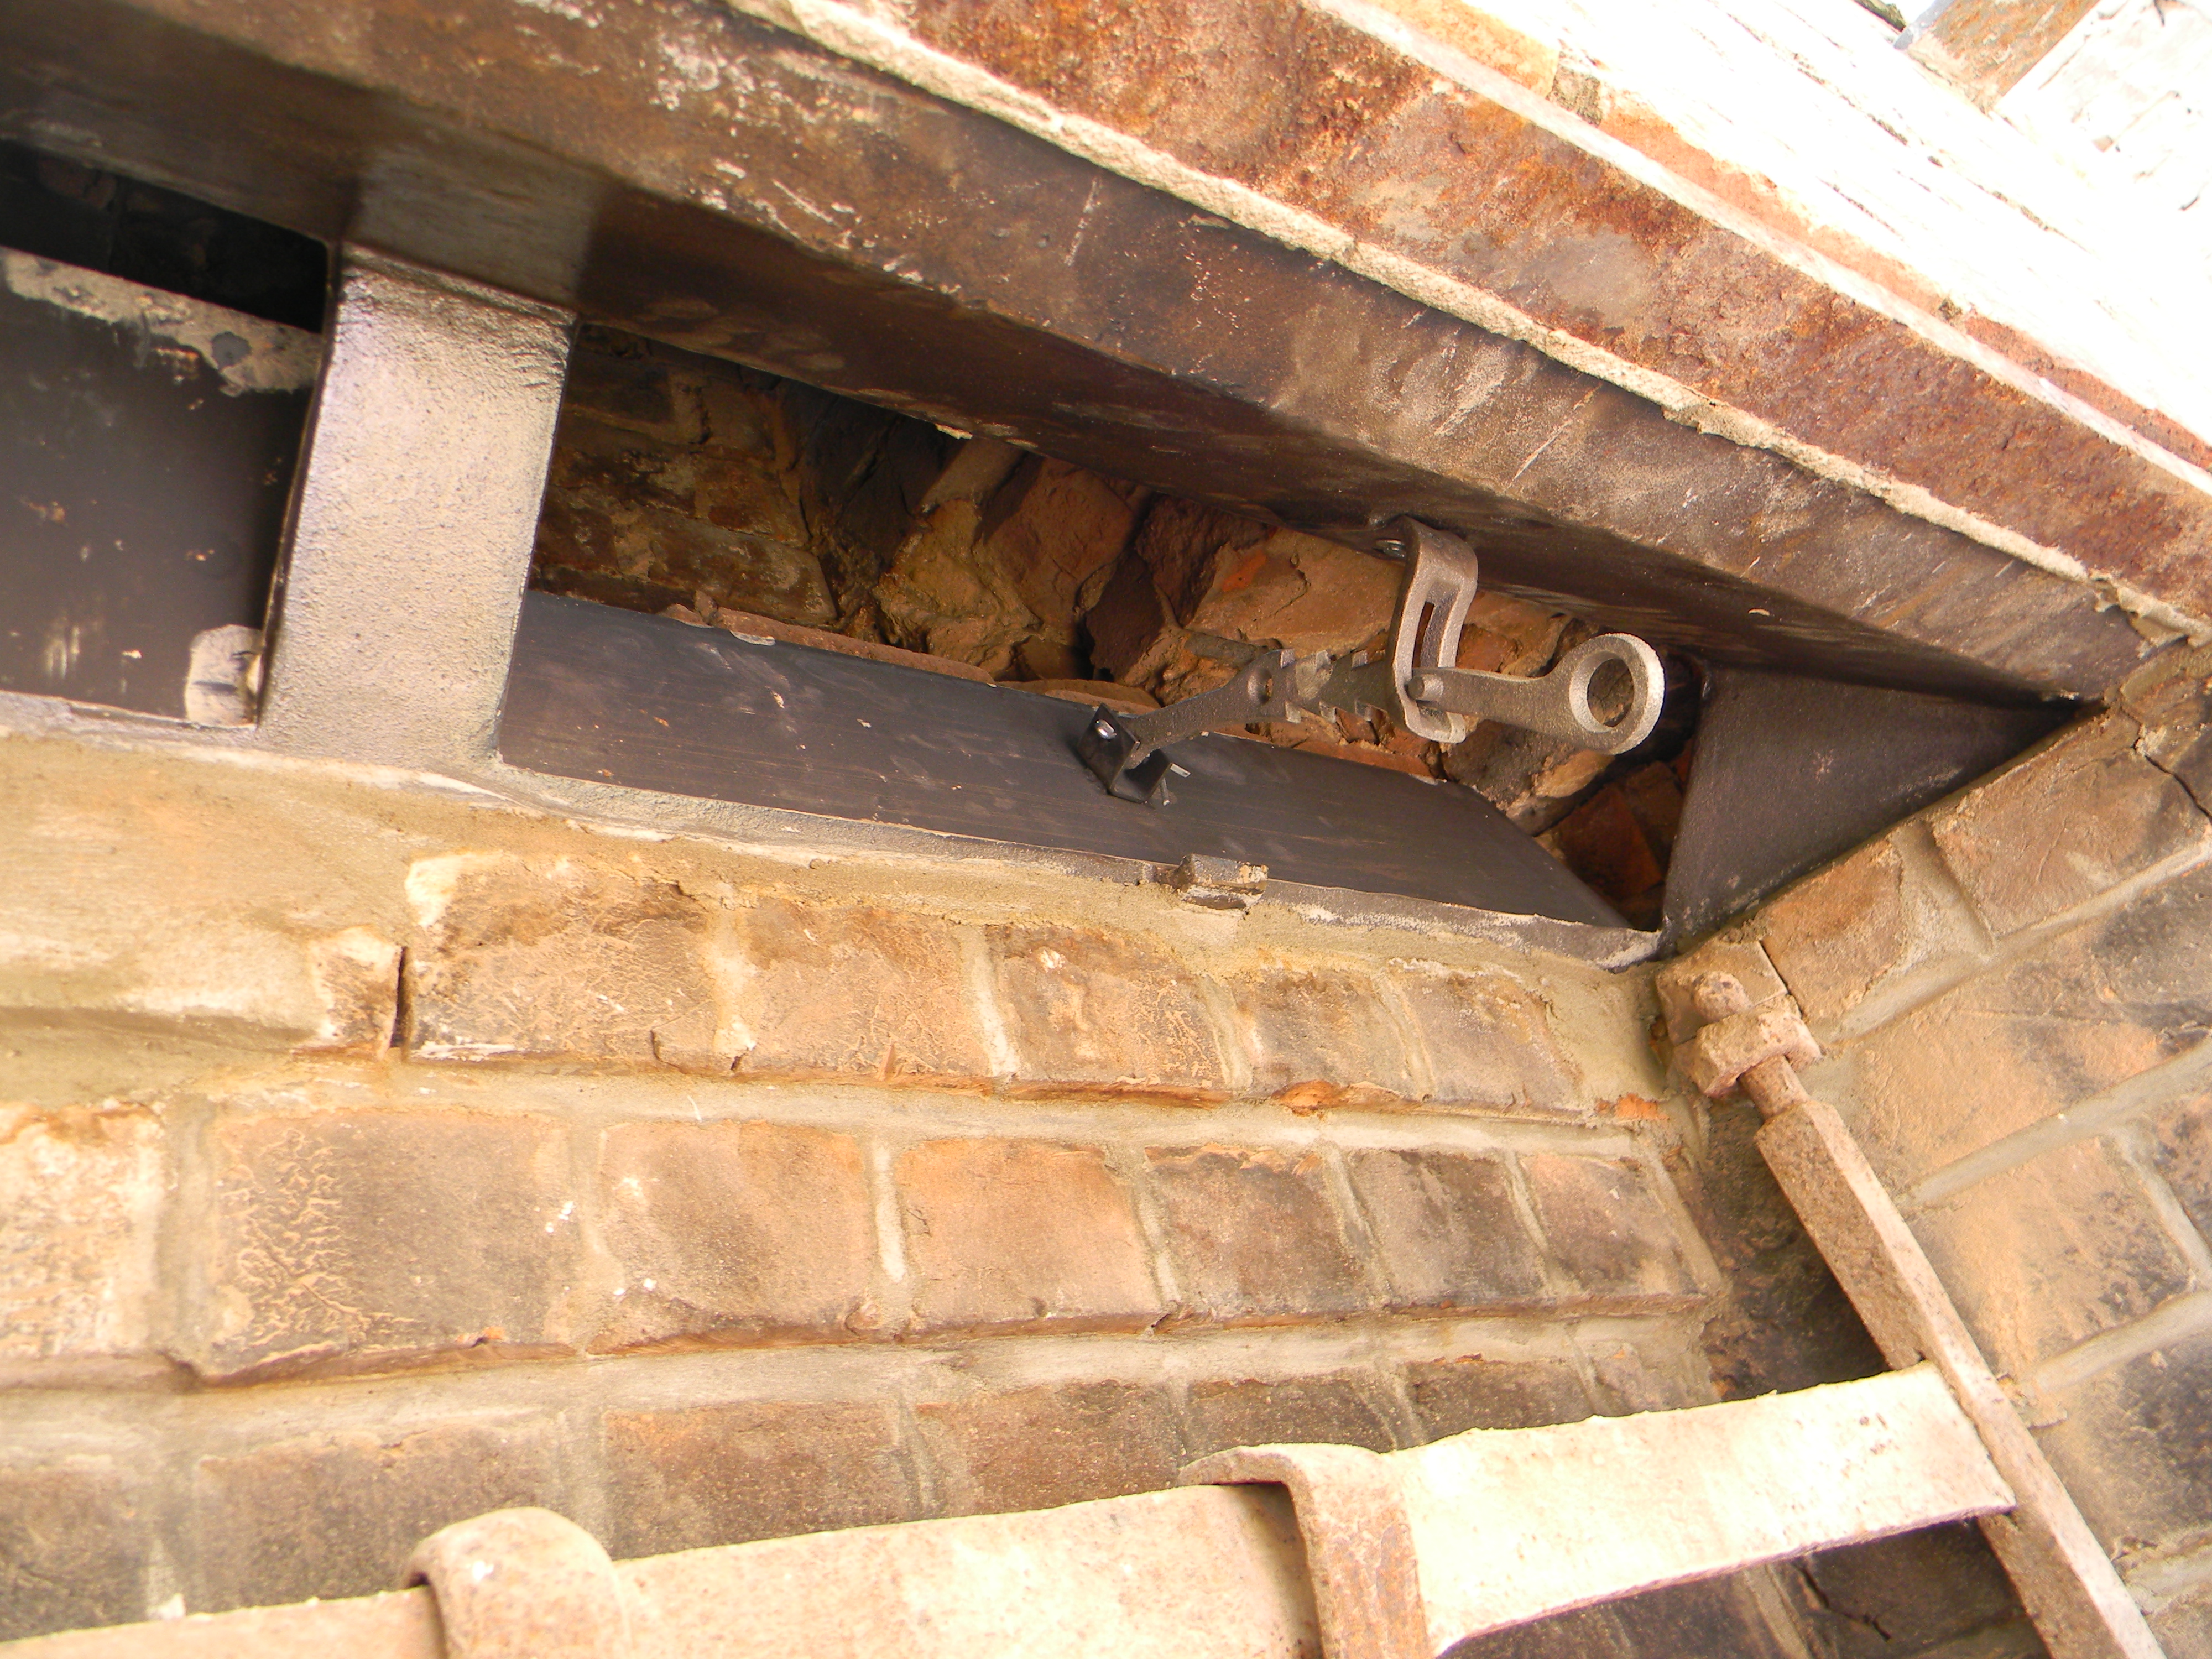
As you can see in the picture above about halfway down, at some point someone had tried to repair the wall by simply applying new mortar, but that mortar was too hard (and our bricks are super soft), which caused the bricks in the center of the wall to begin to disintegrate.  Normally,  we’ve learned, you want your mortar to be softer than your bricks so that if there is a weak point being damaged by water, your mortar is the first to go.  This gives the homeowner a red flag about the problem and also a much easier to repair once the water problem is fixed.  Alas, a water problem and a poor repair spelled DOOM for our wall.

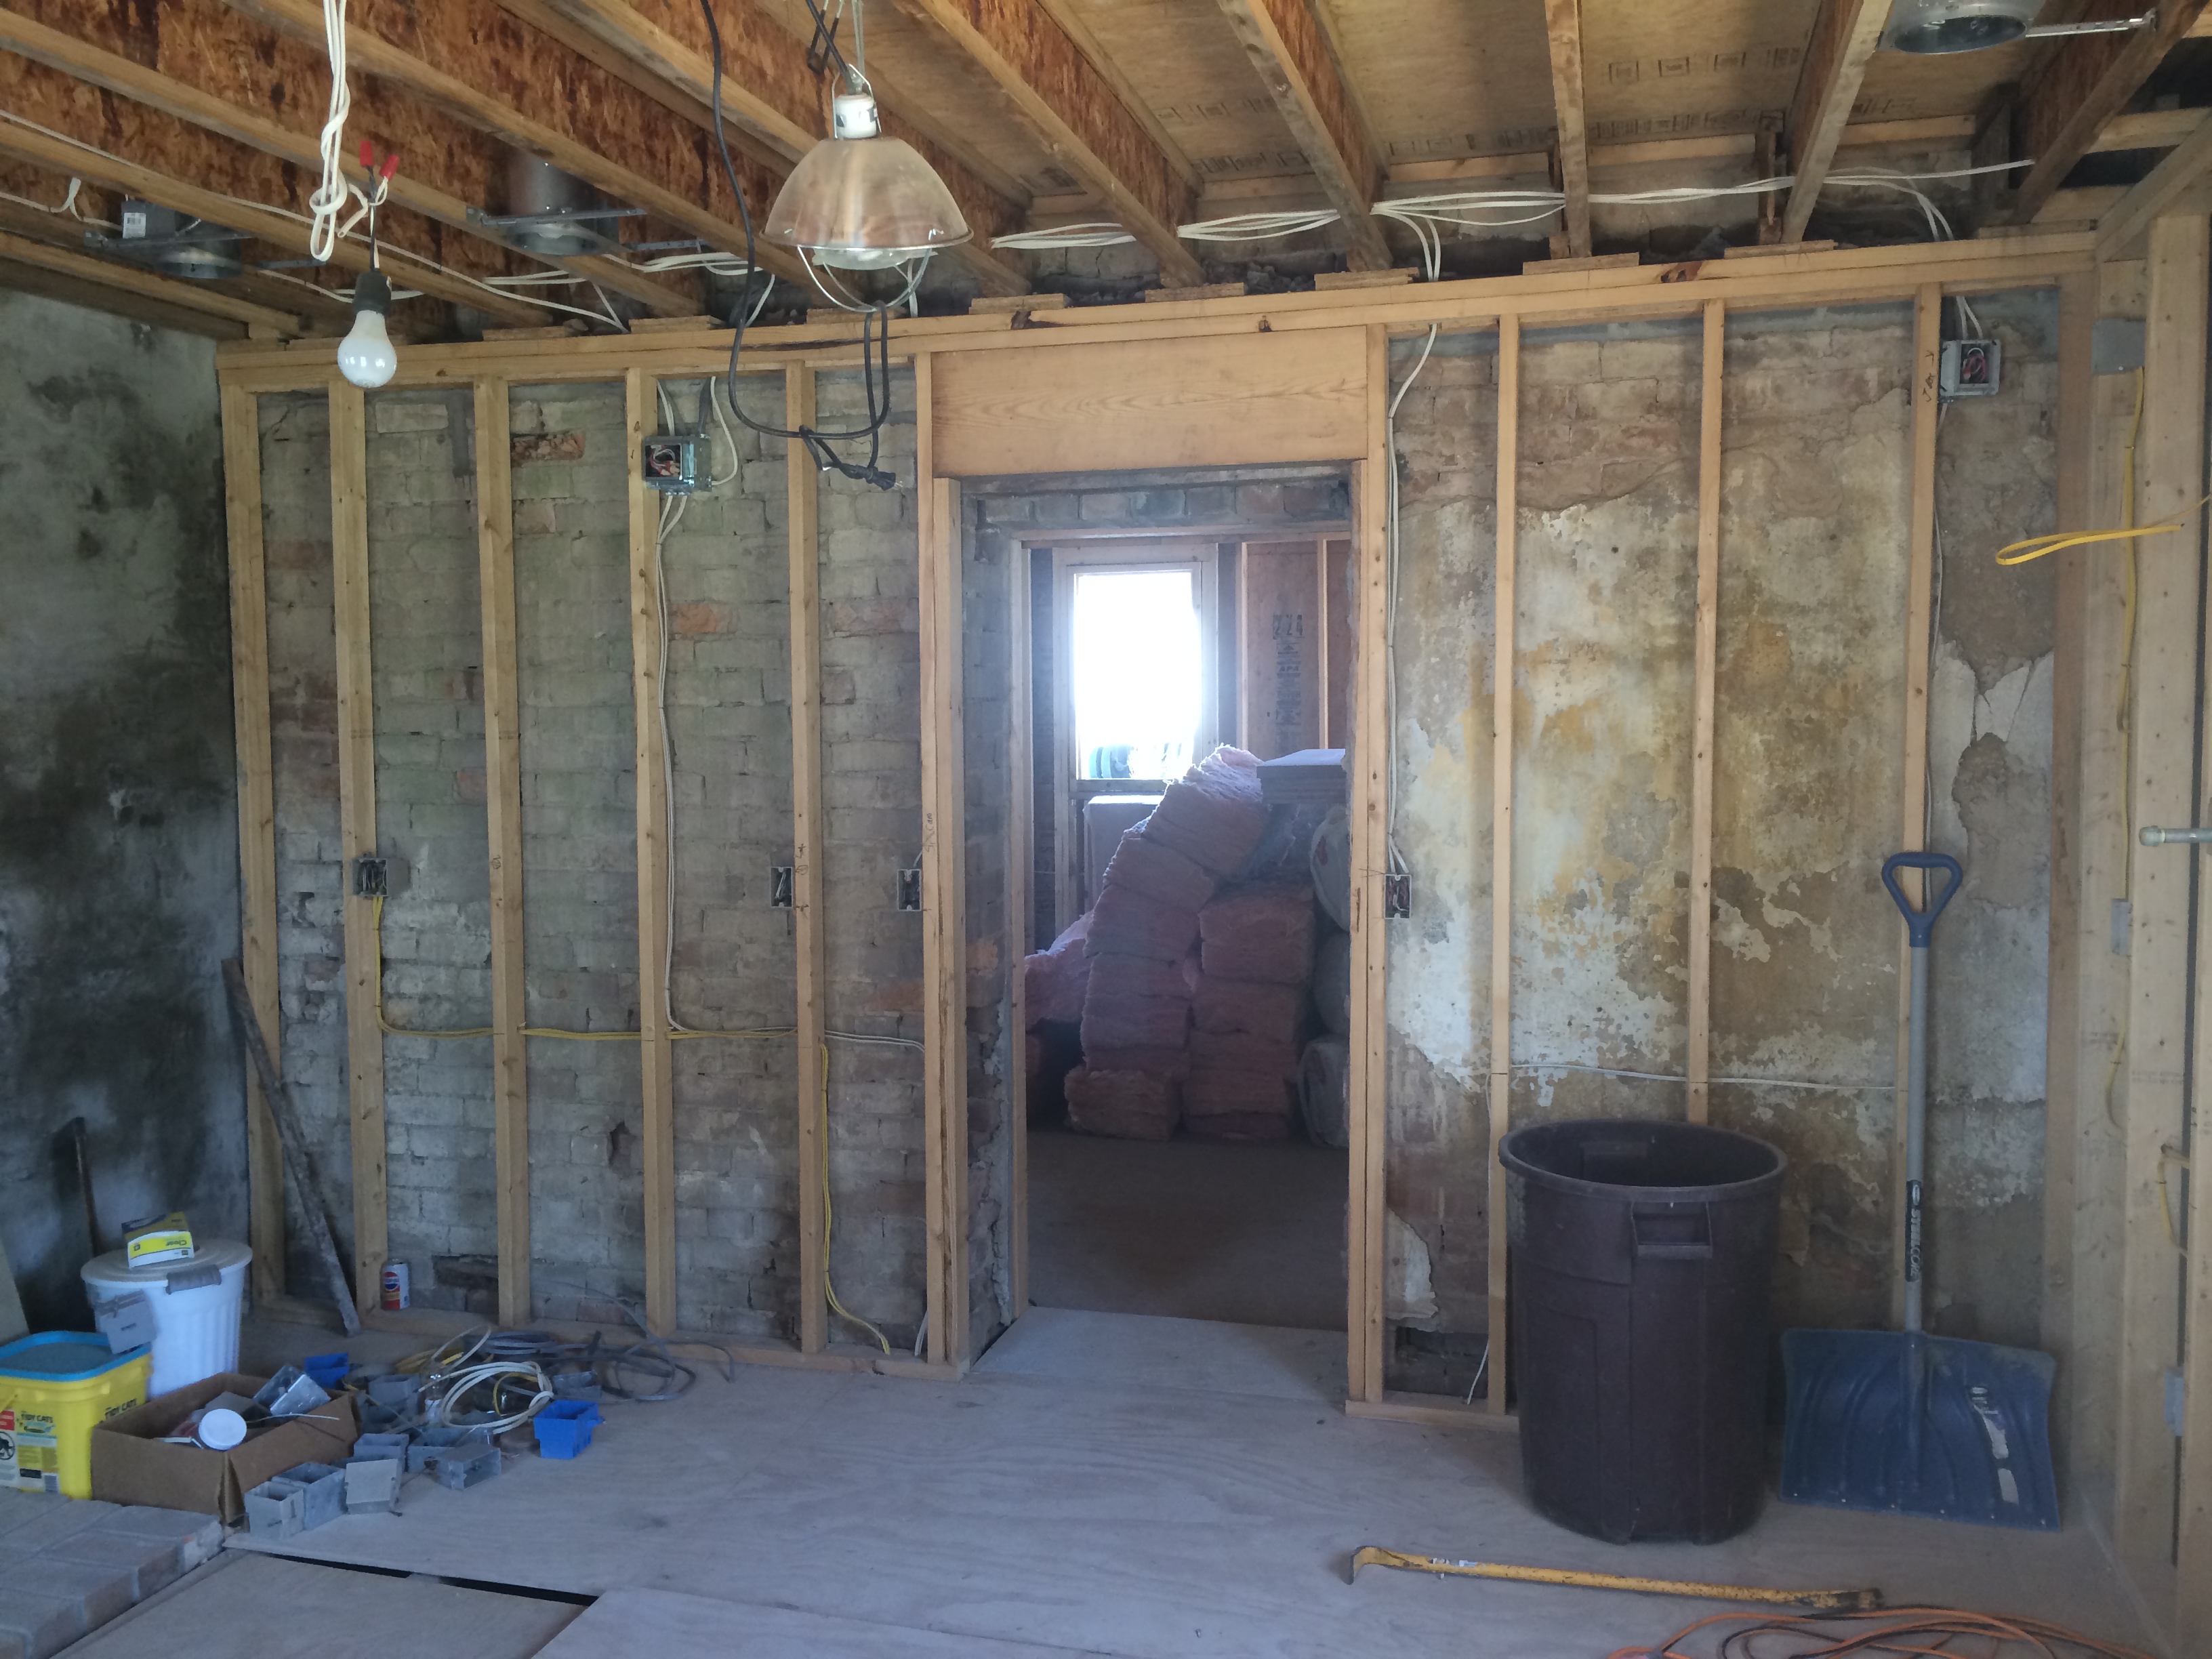
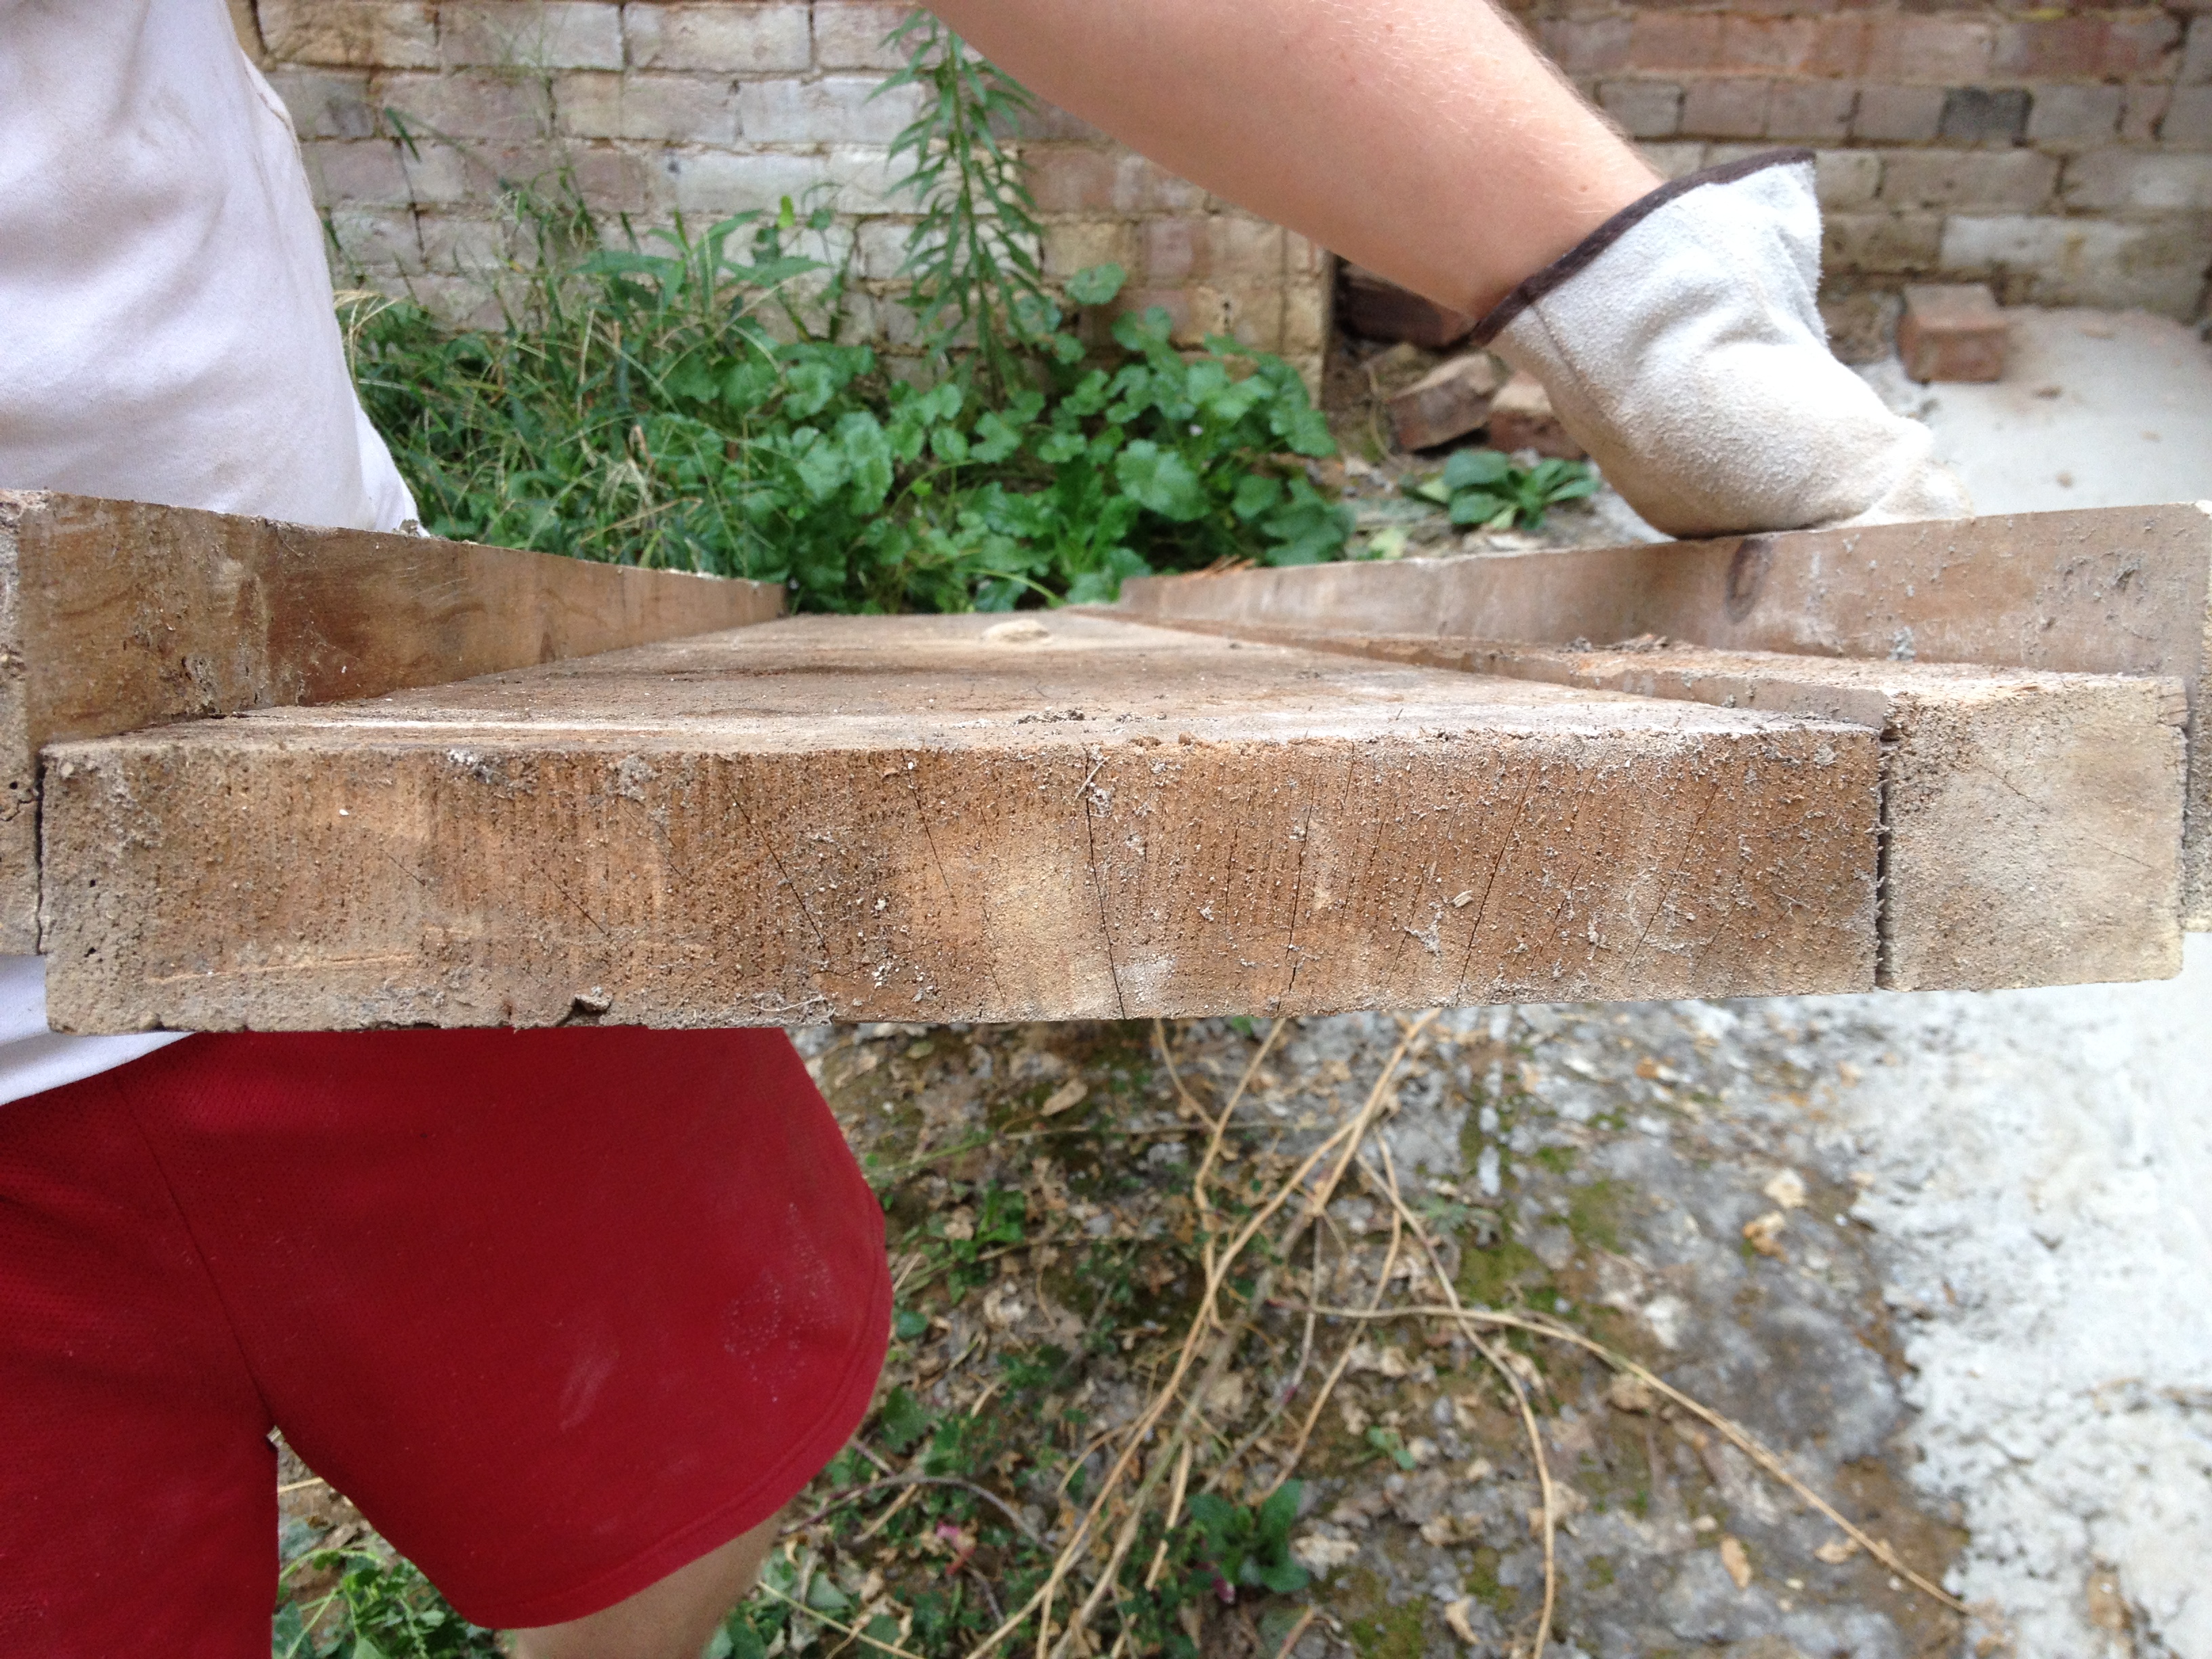
Our guys saved the good brick, but much of what was there was too compromised for re-use.

IMG_0728

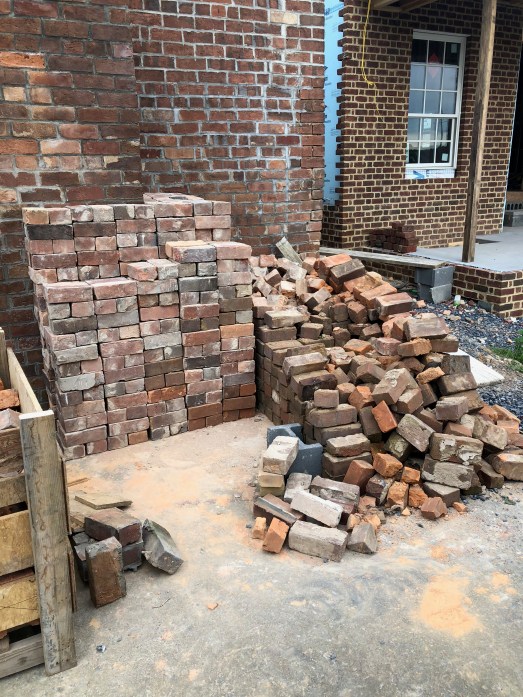
Finally, the wall was down!

IMG_0735

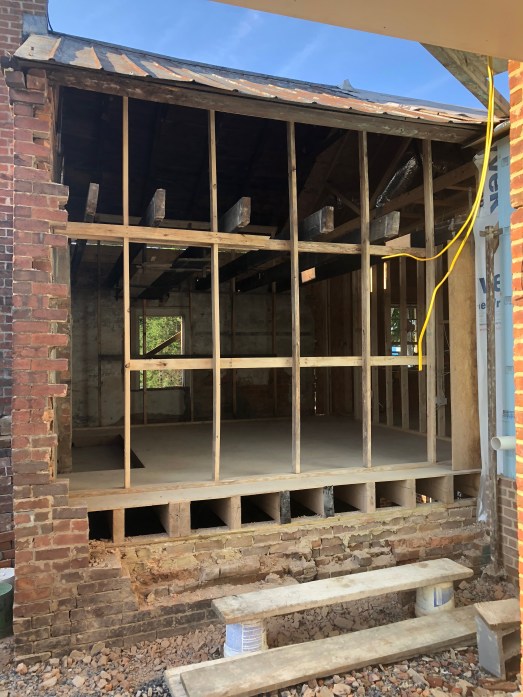
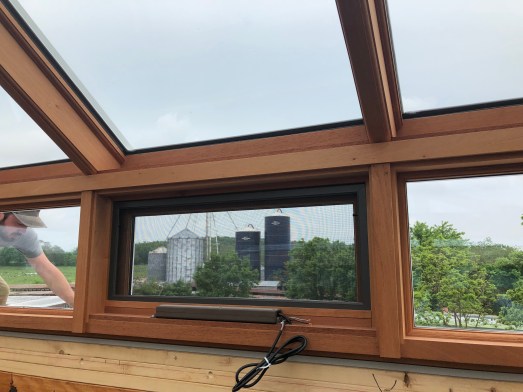
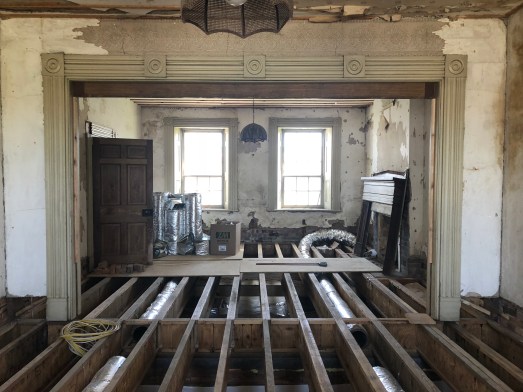
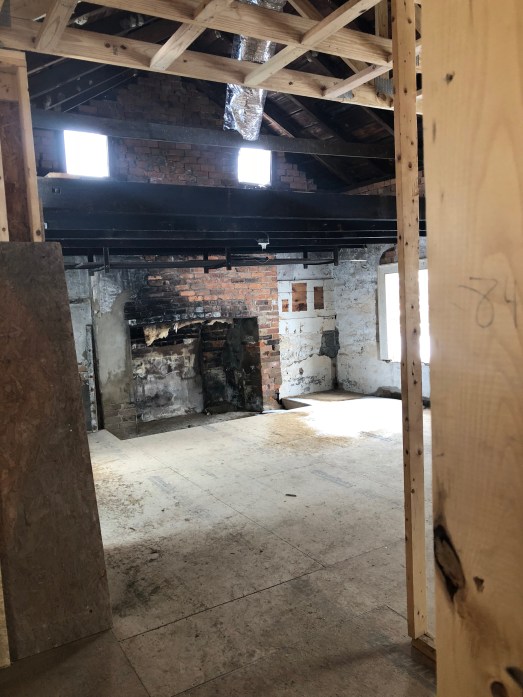
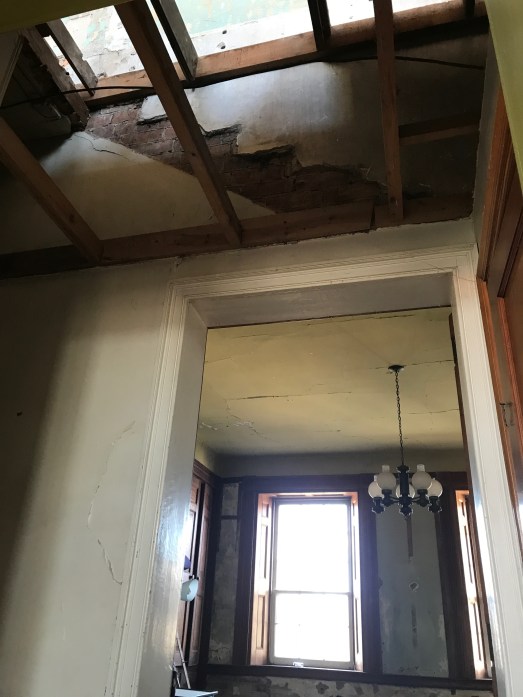
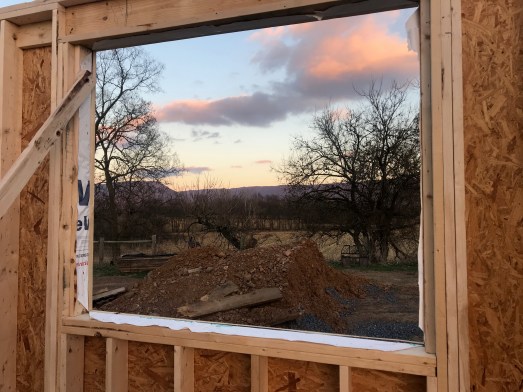
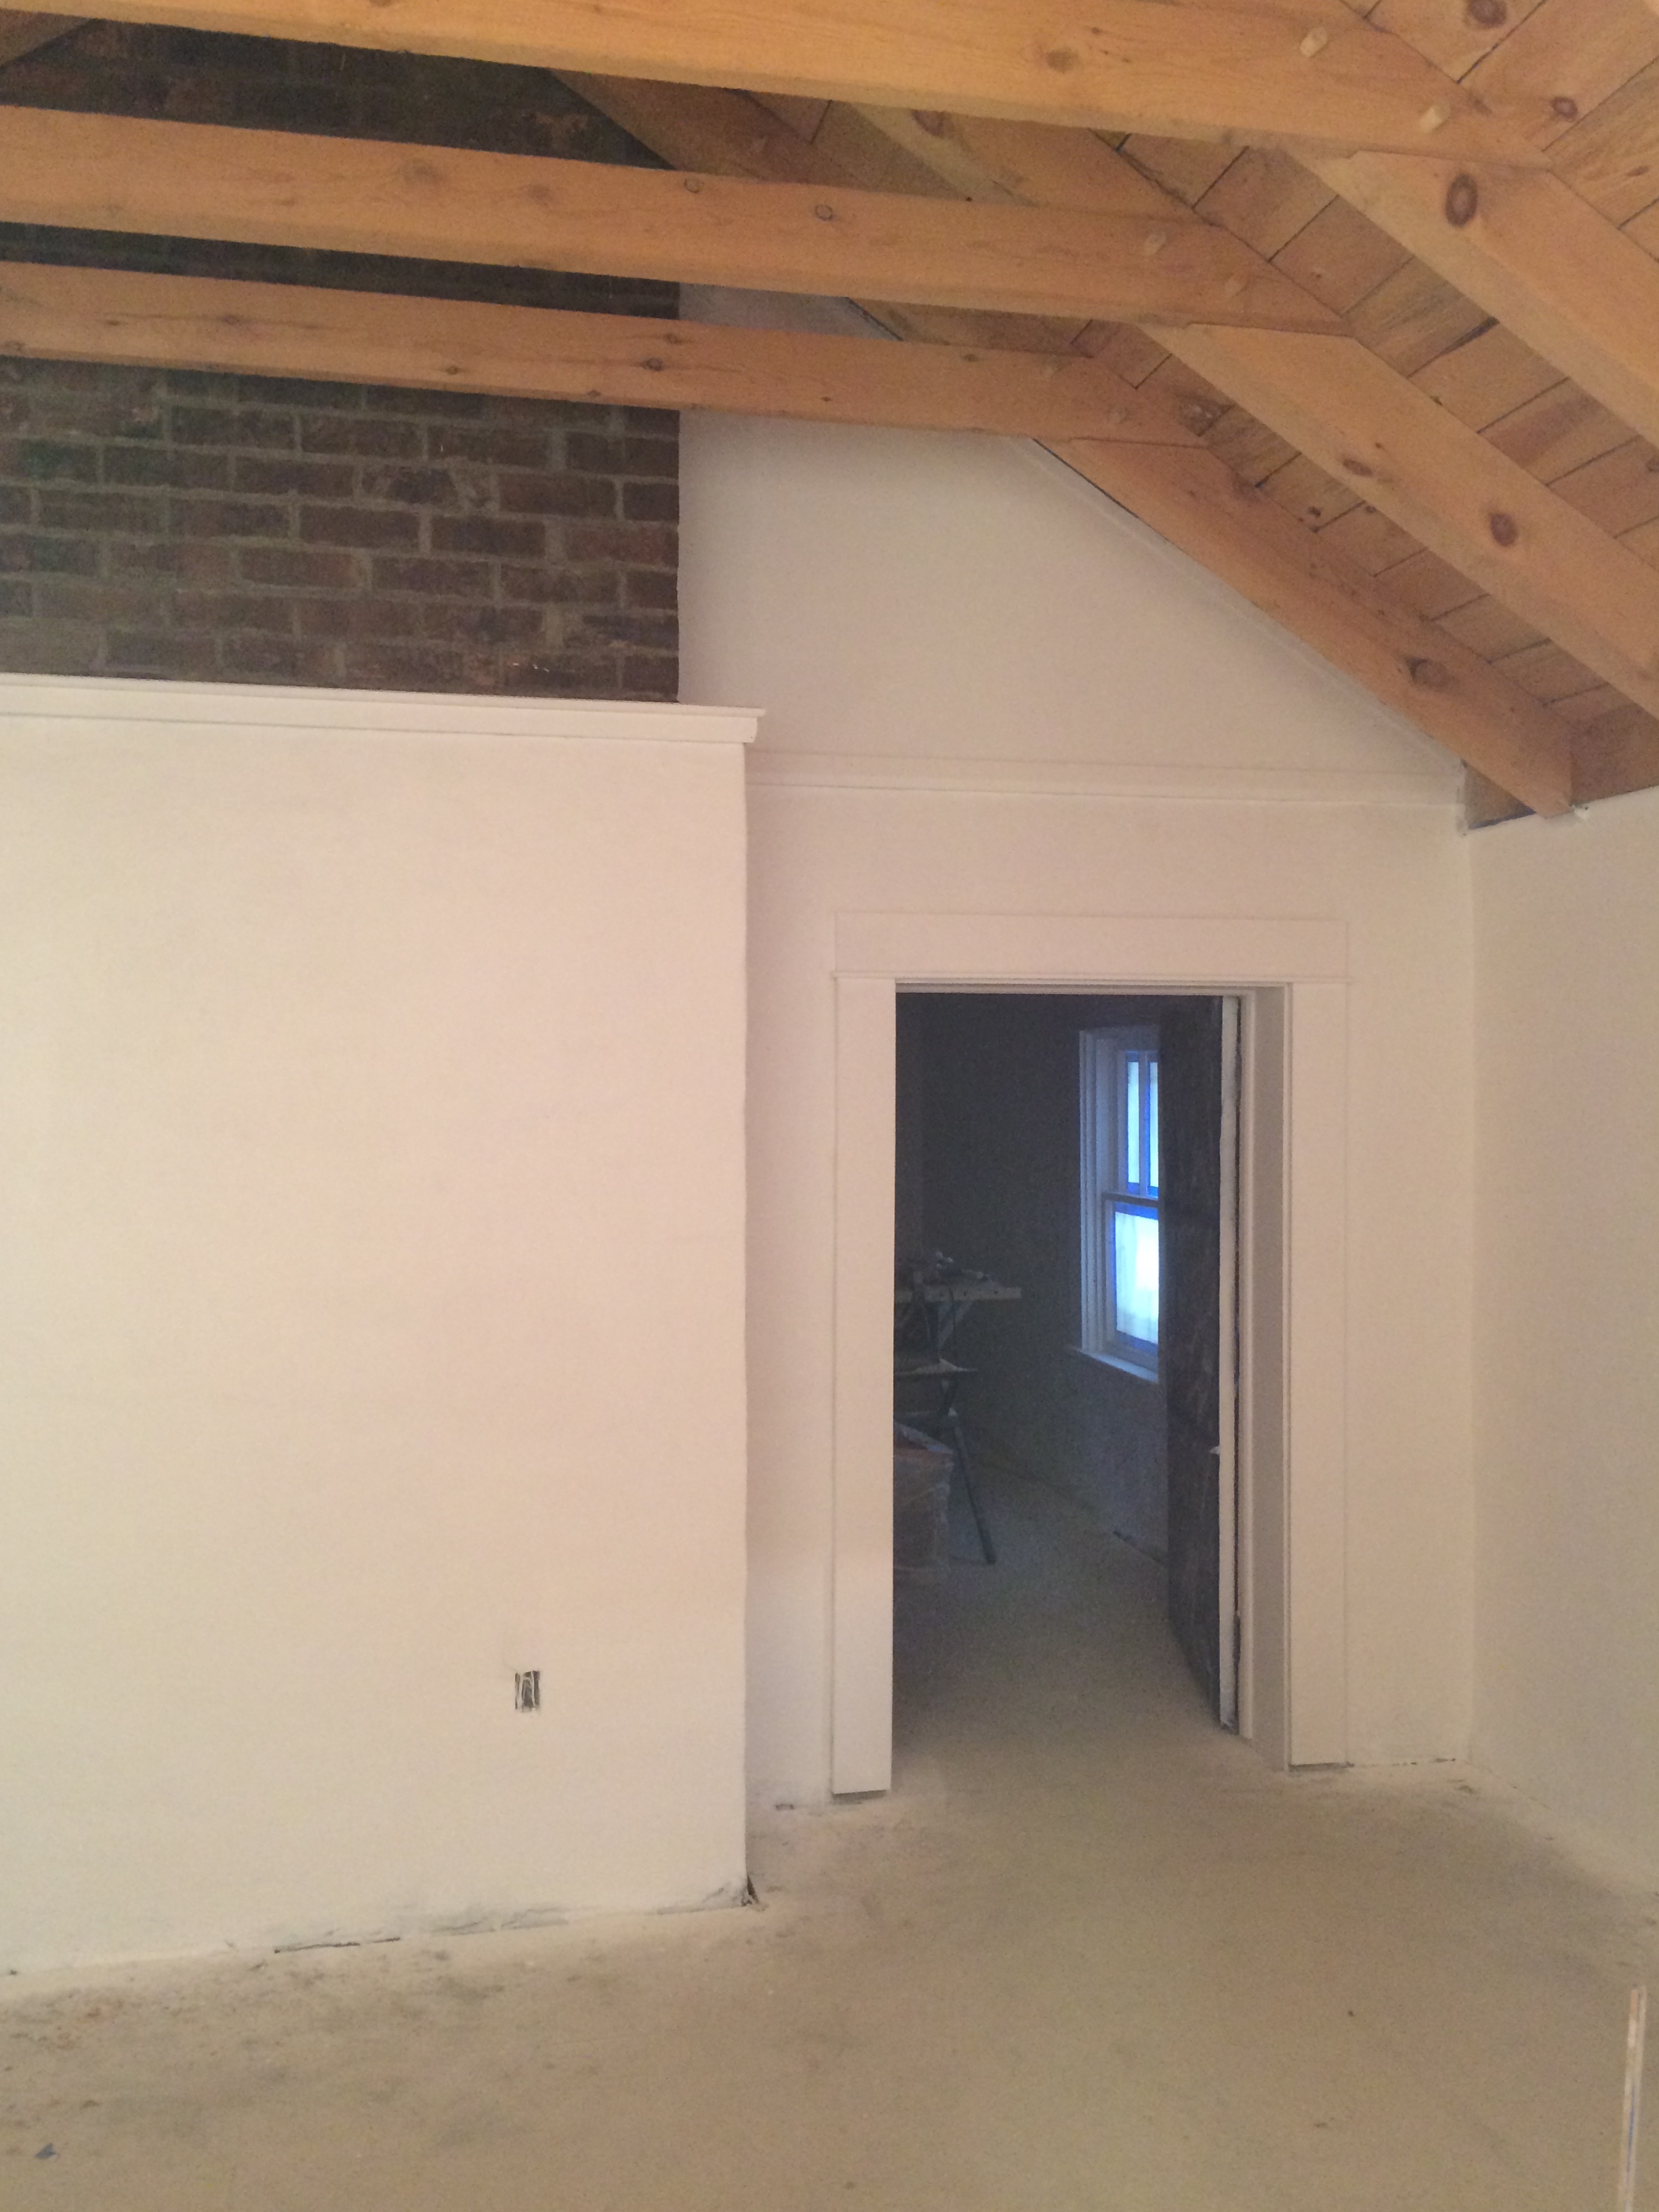
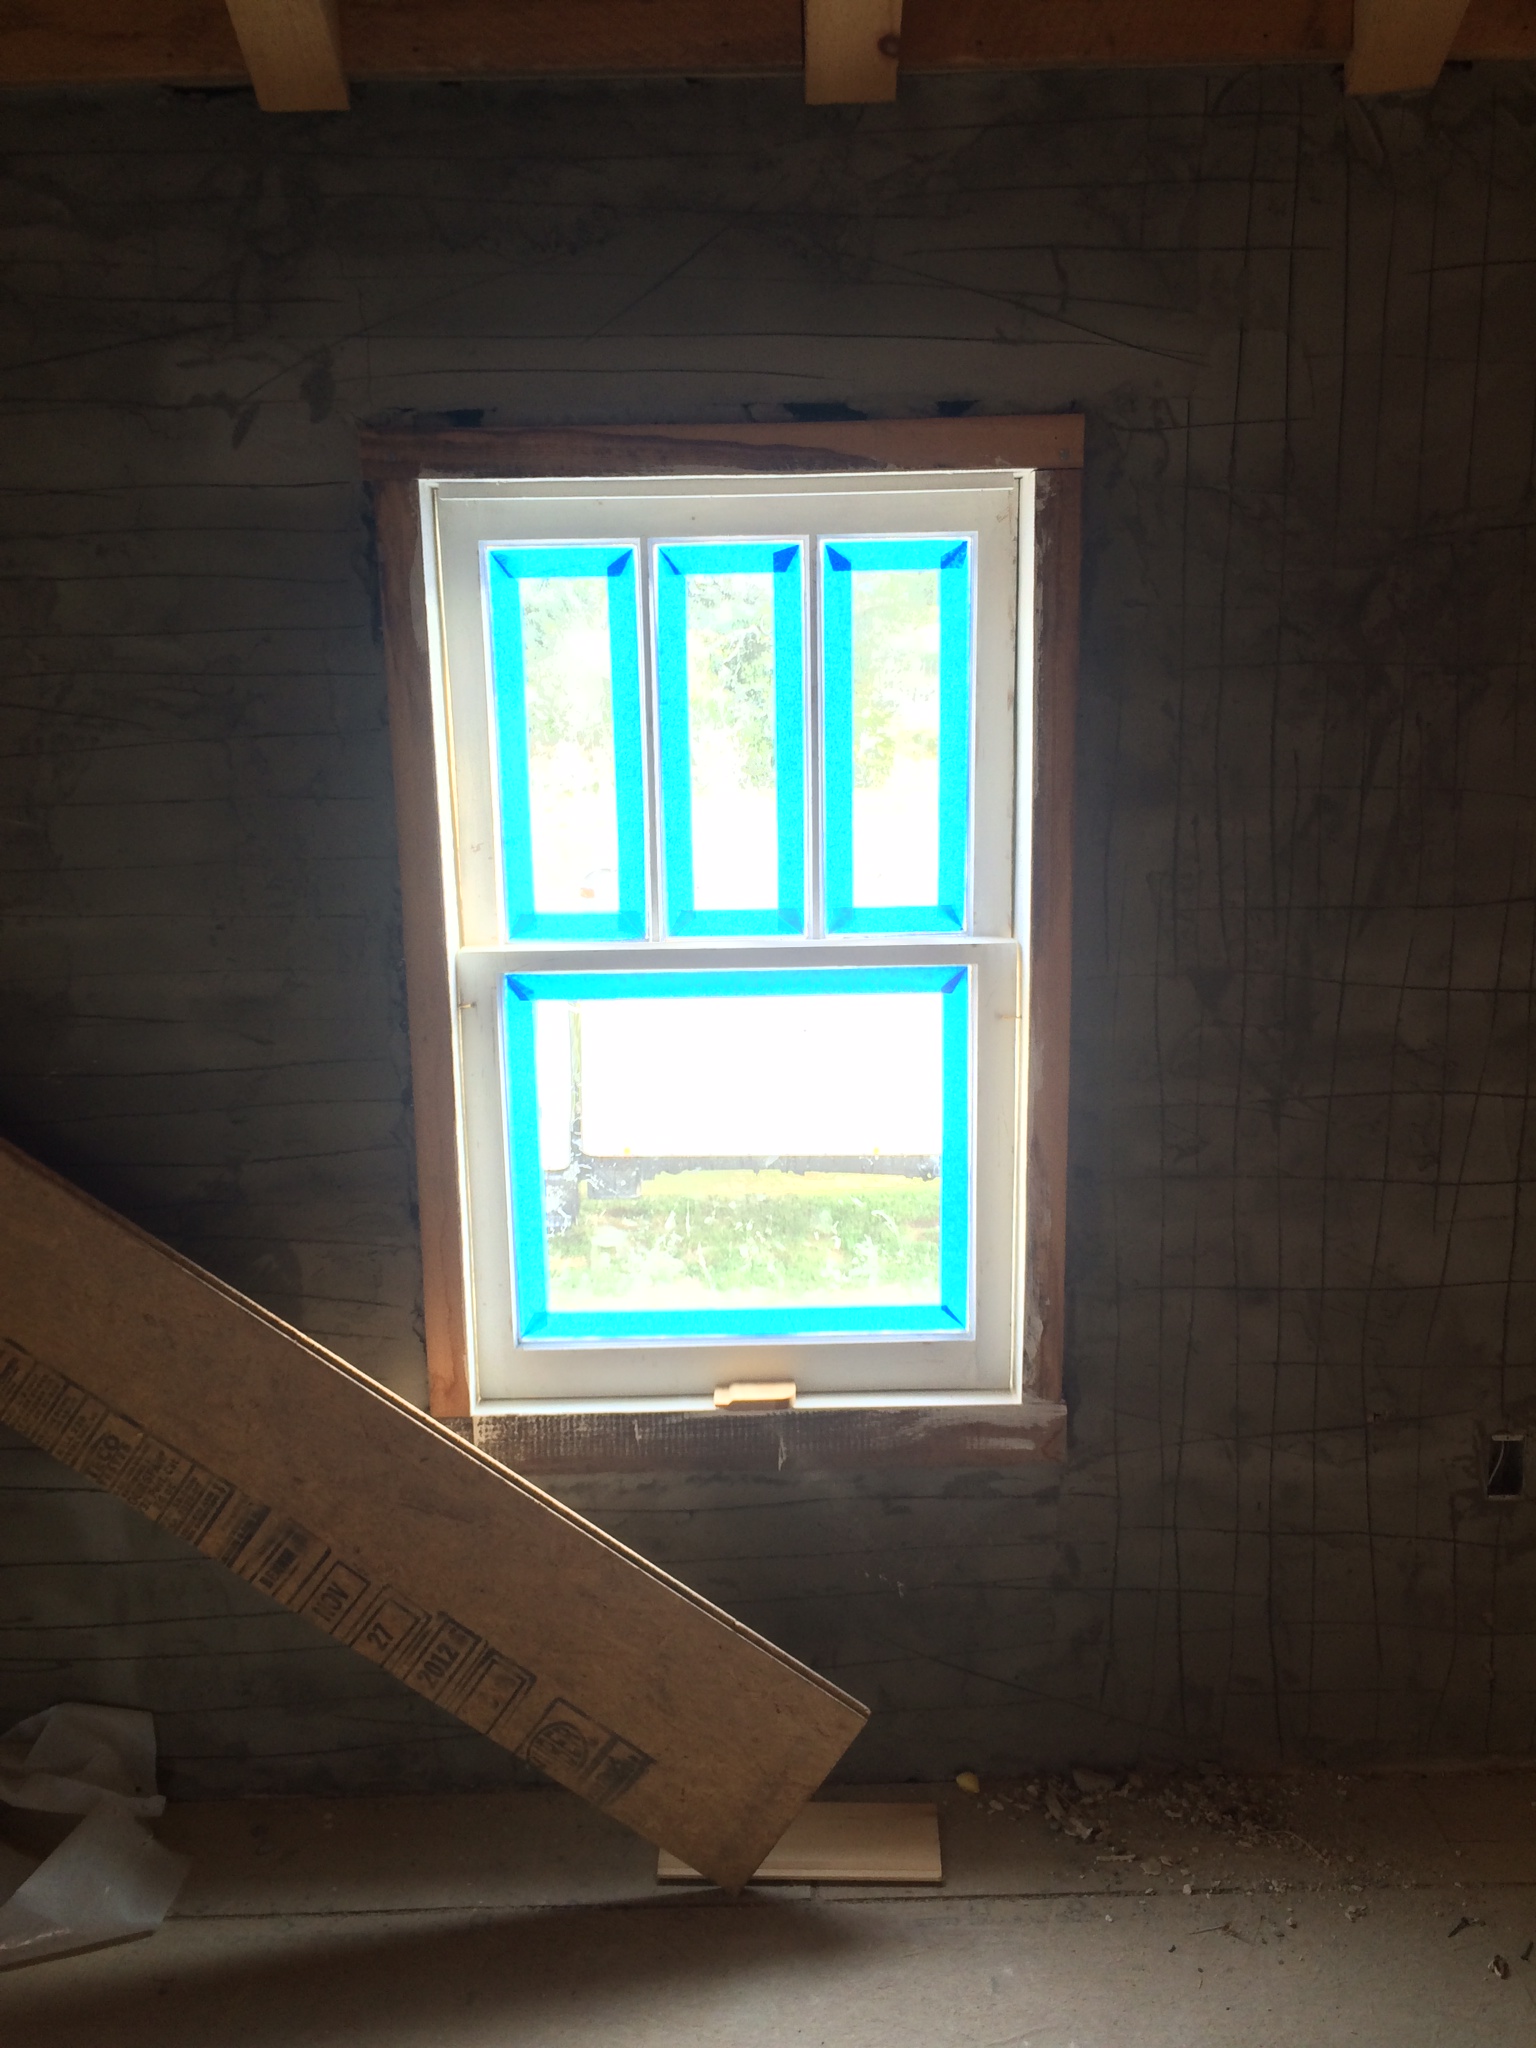
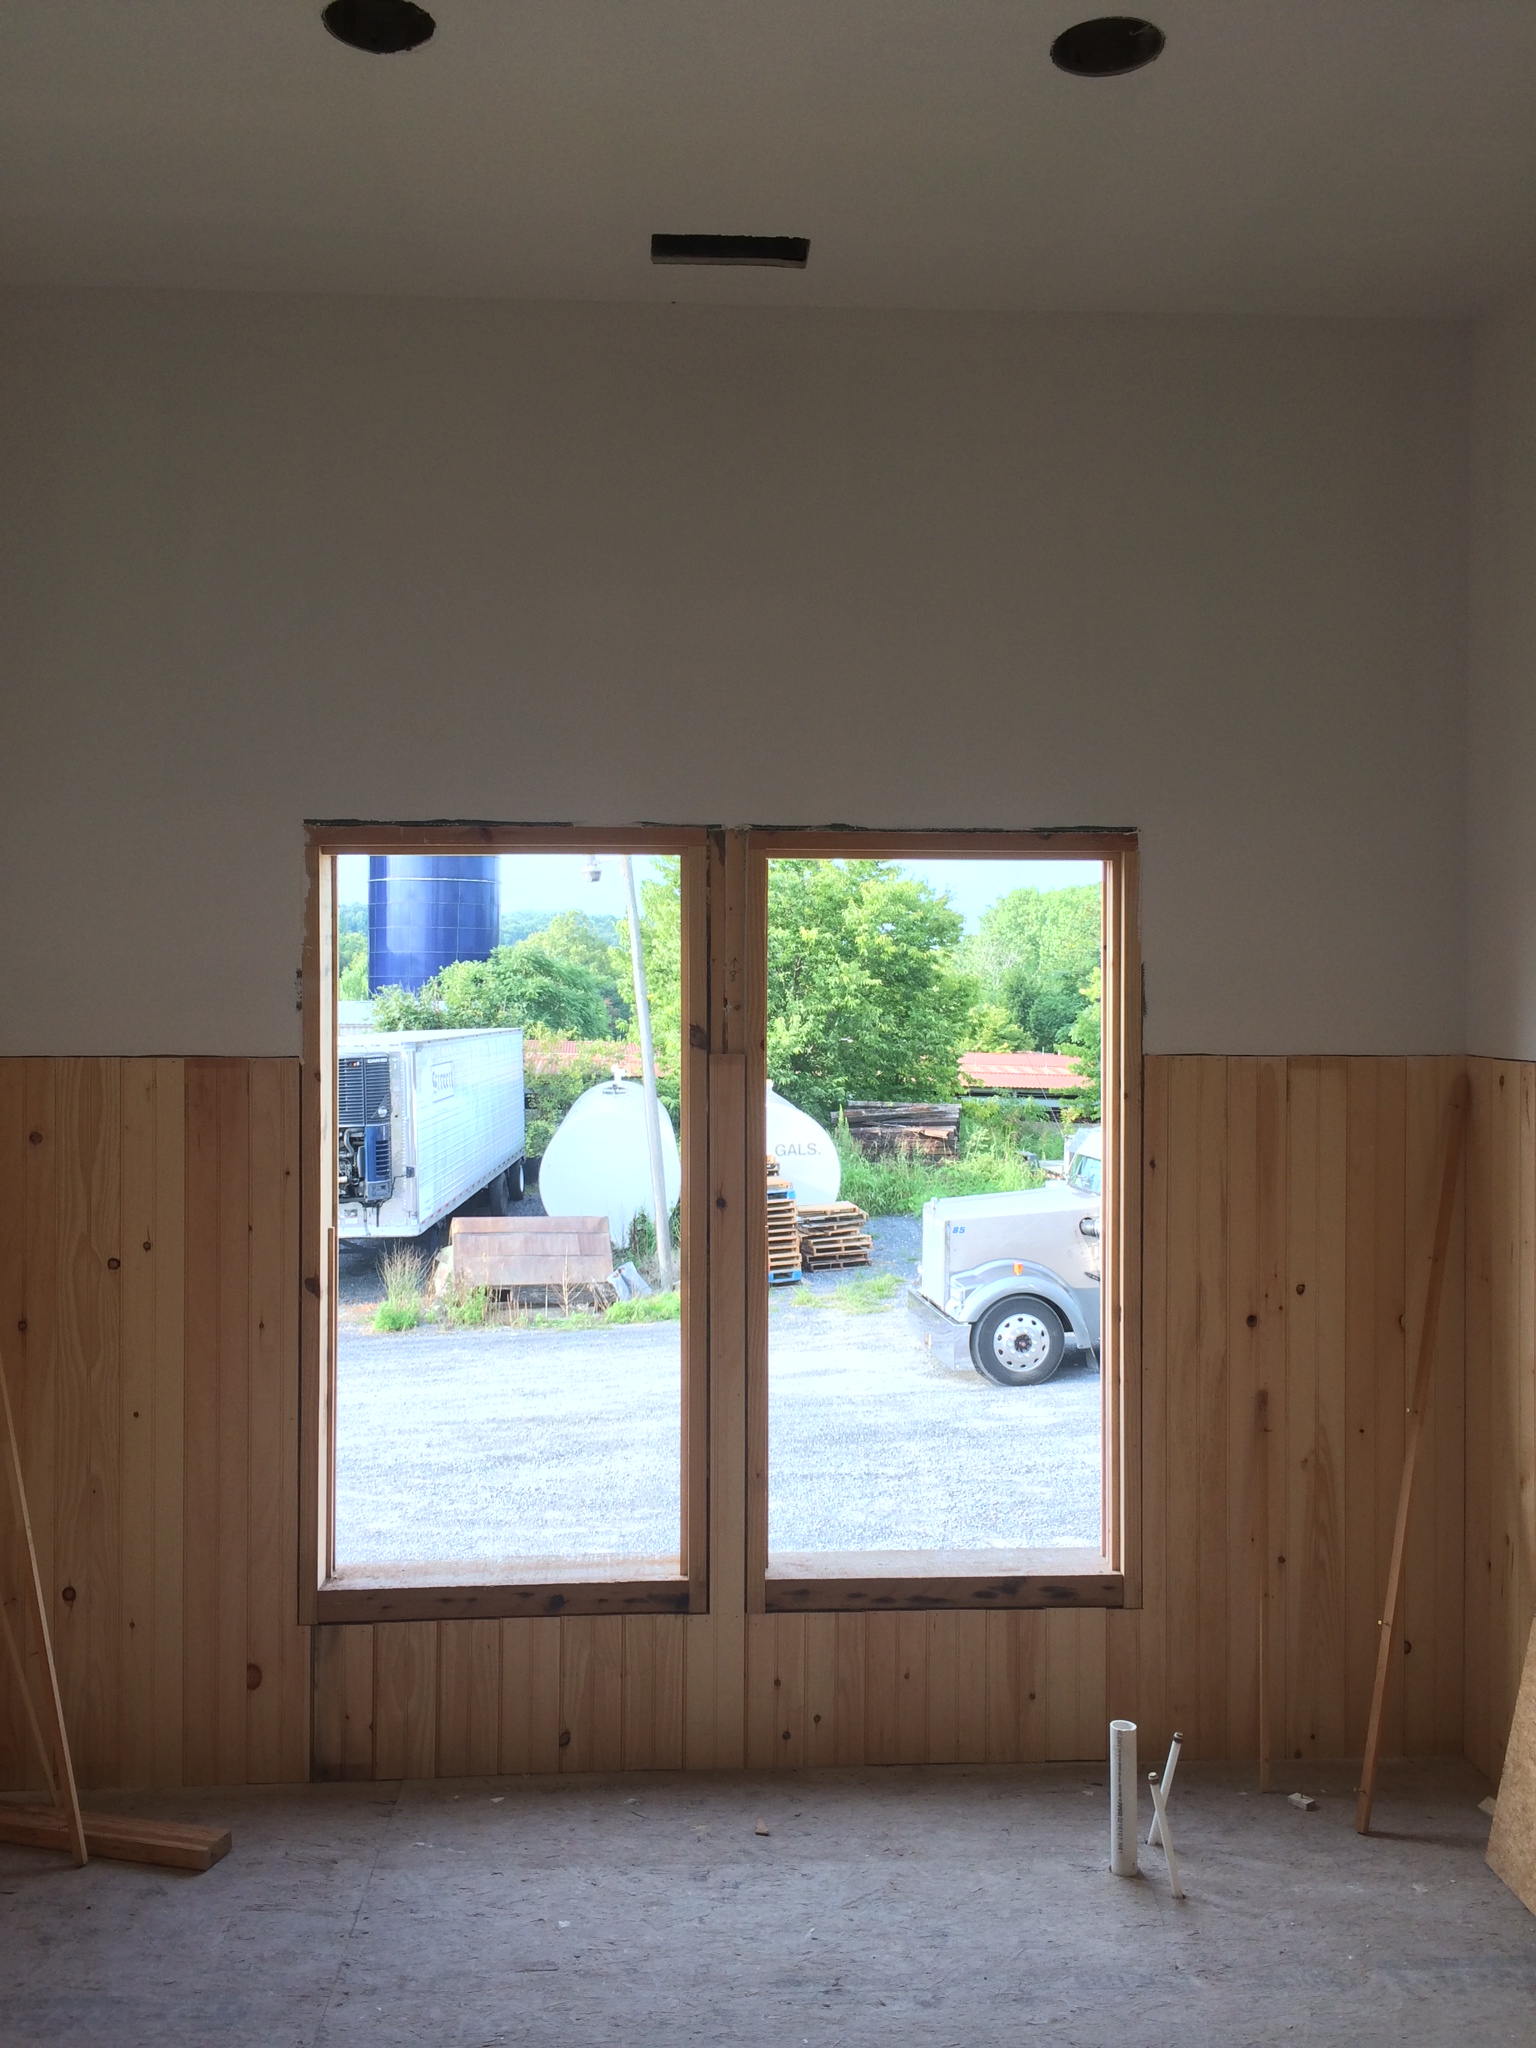
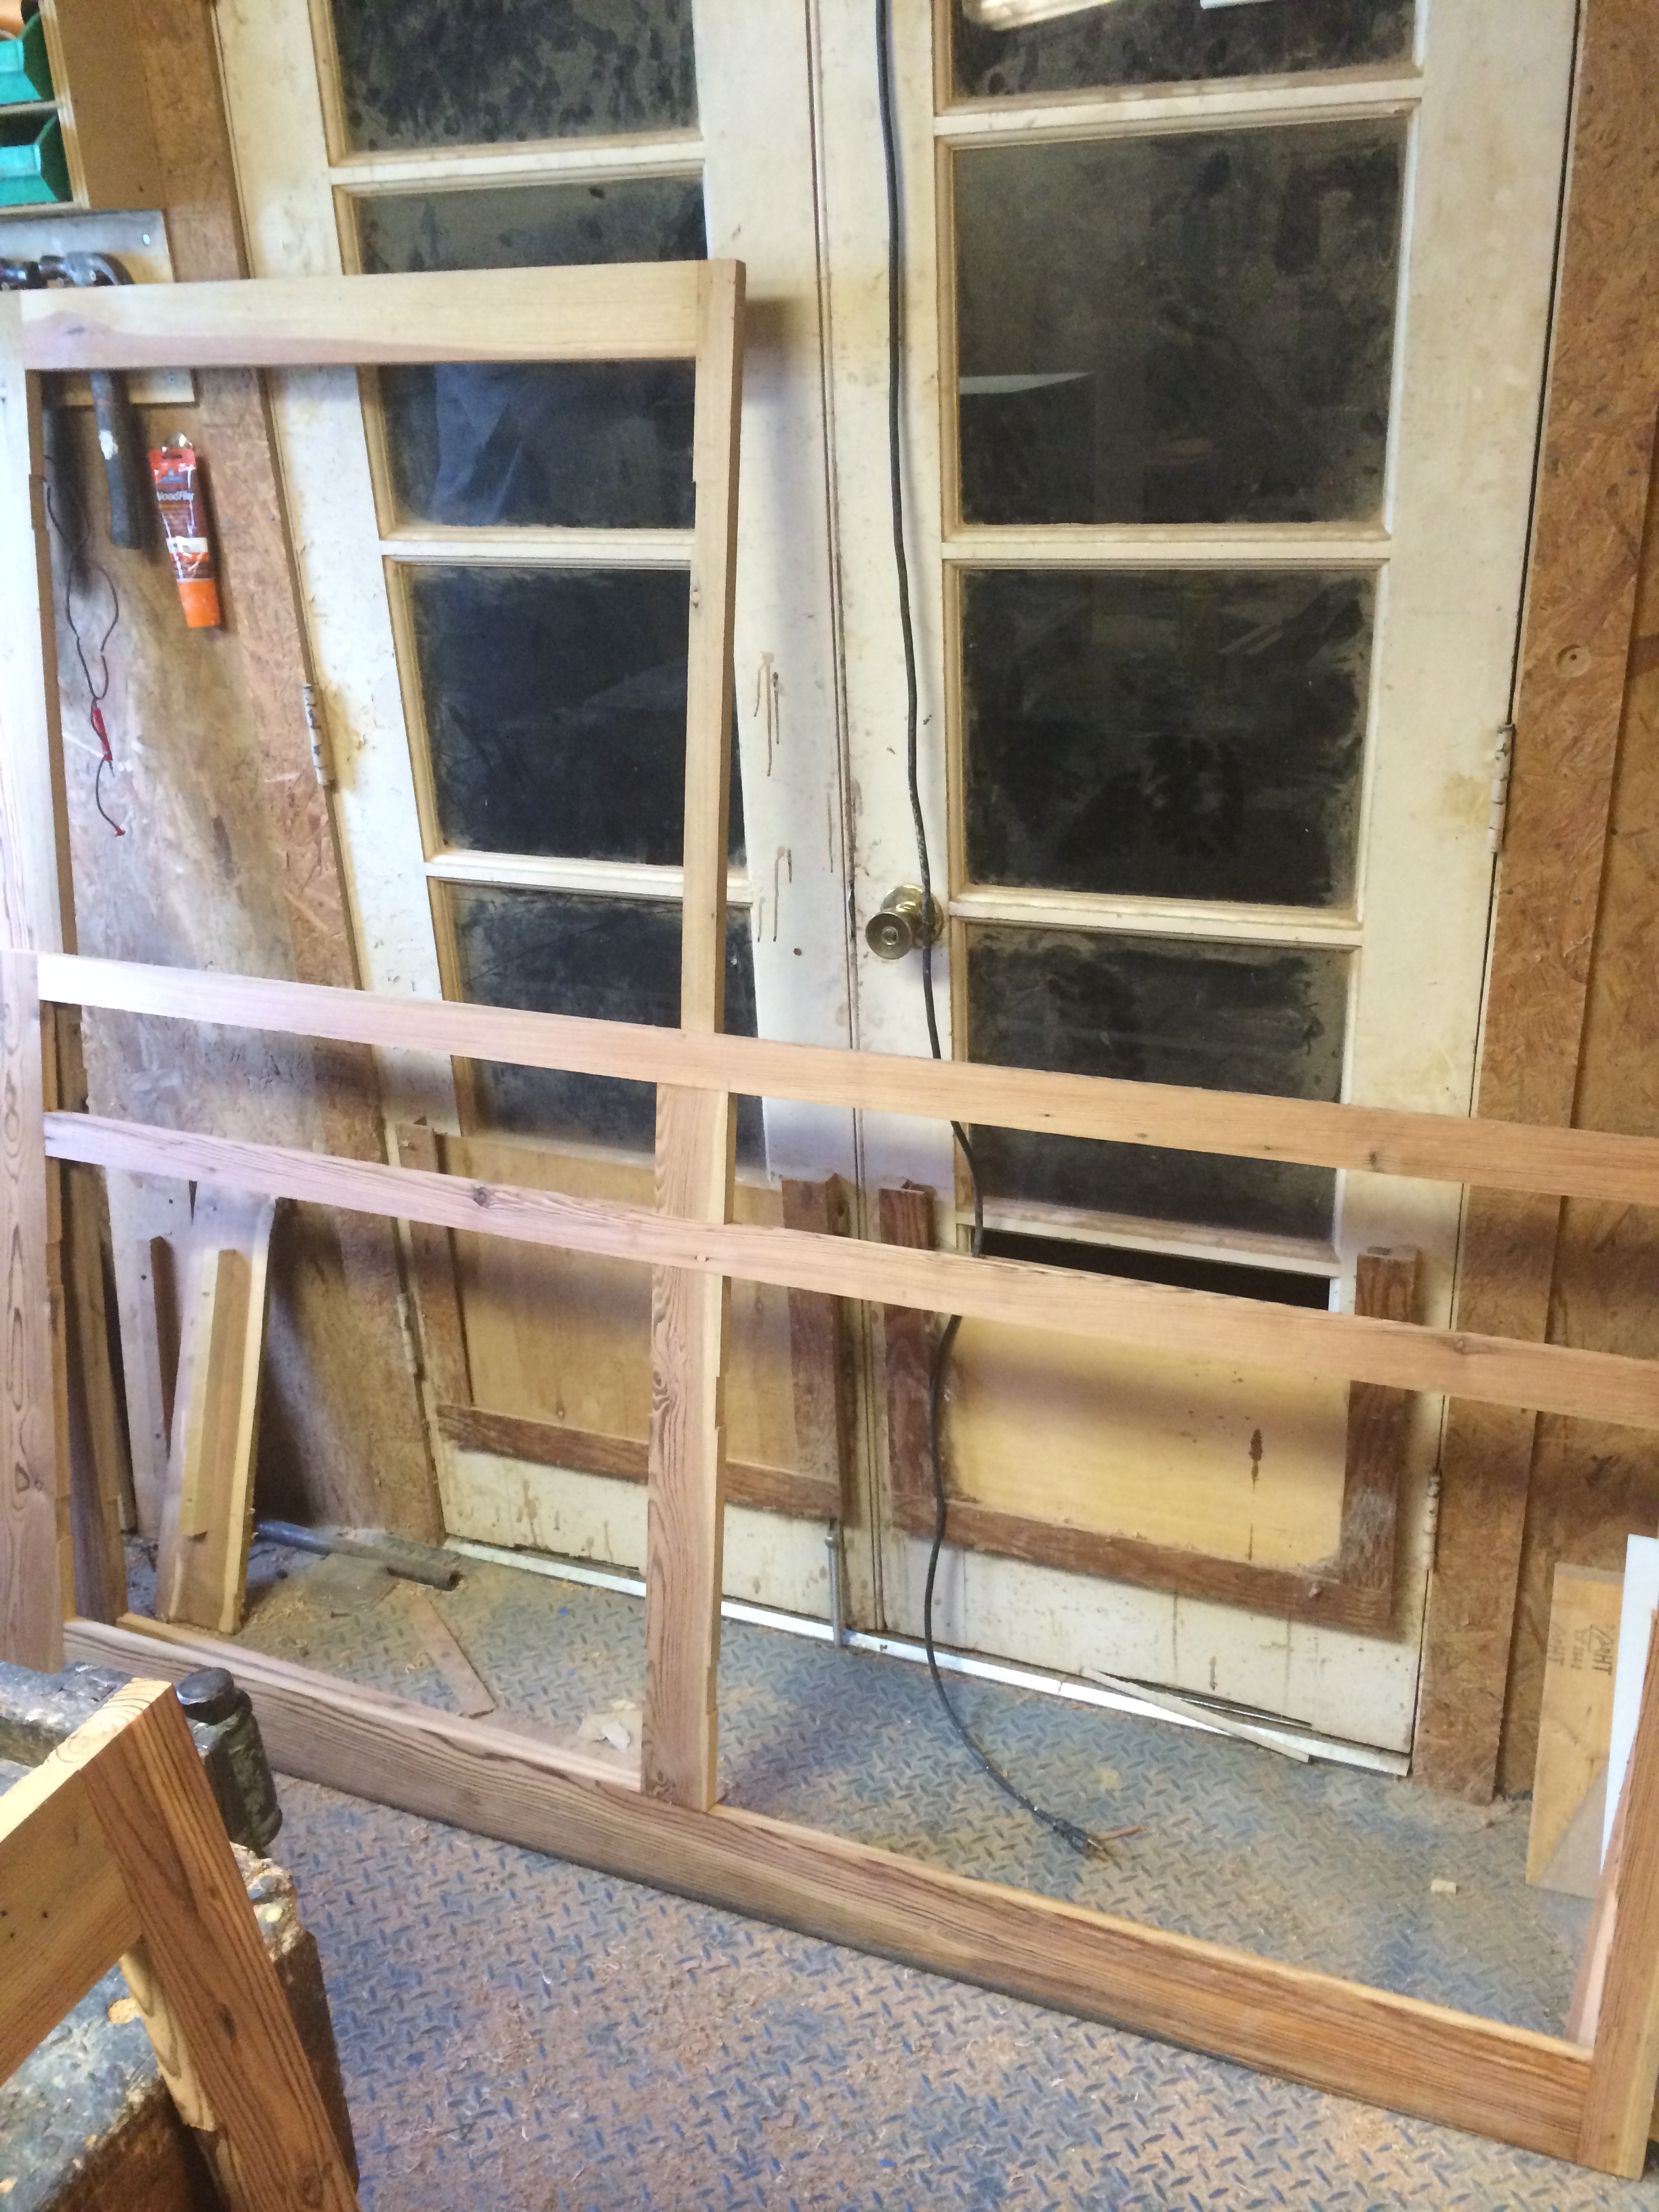
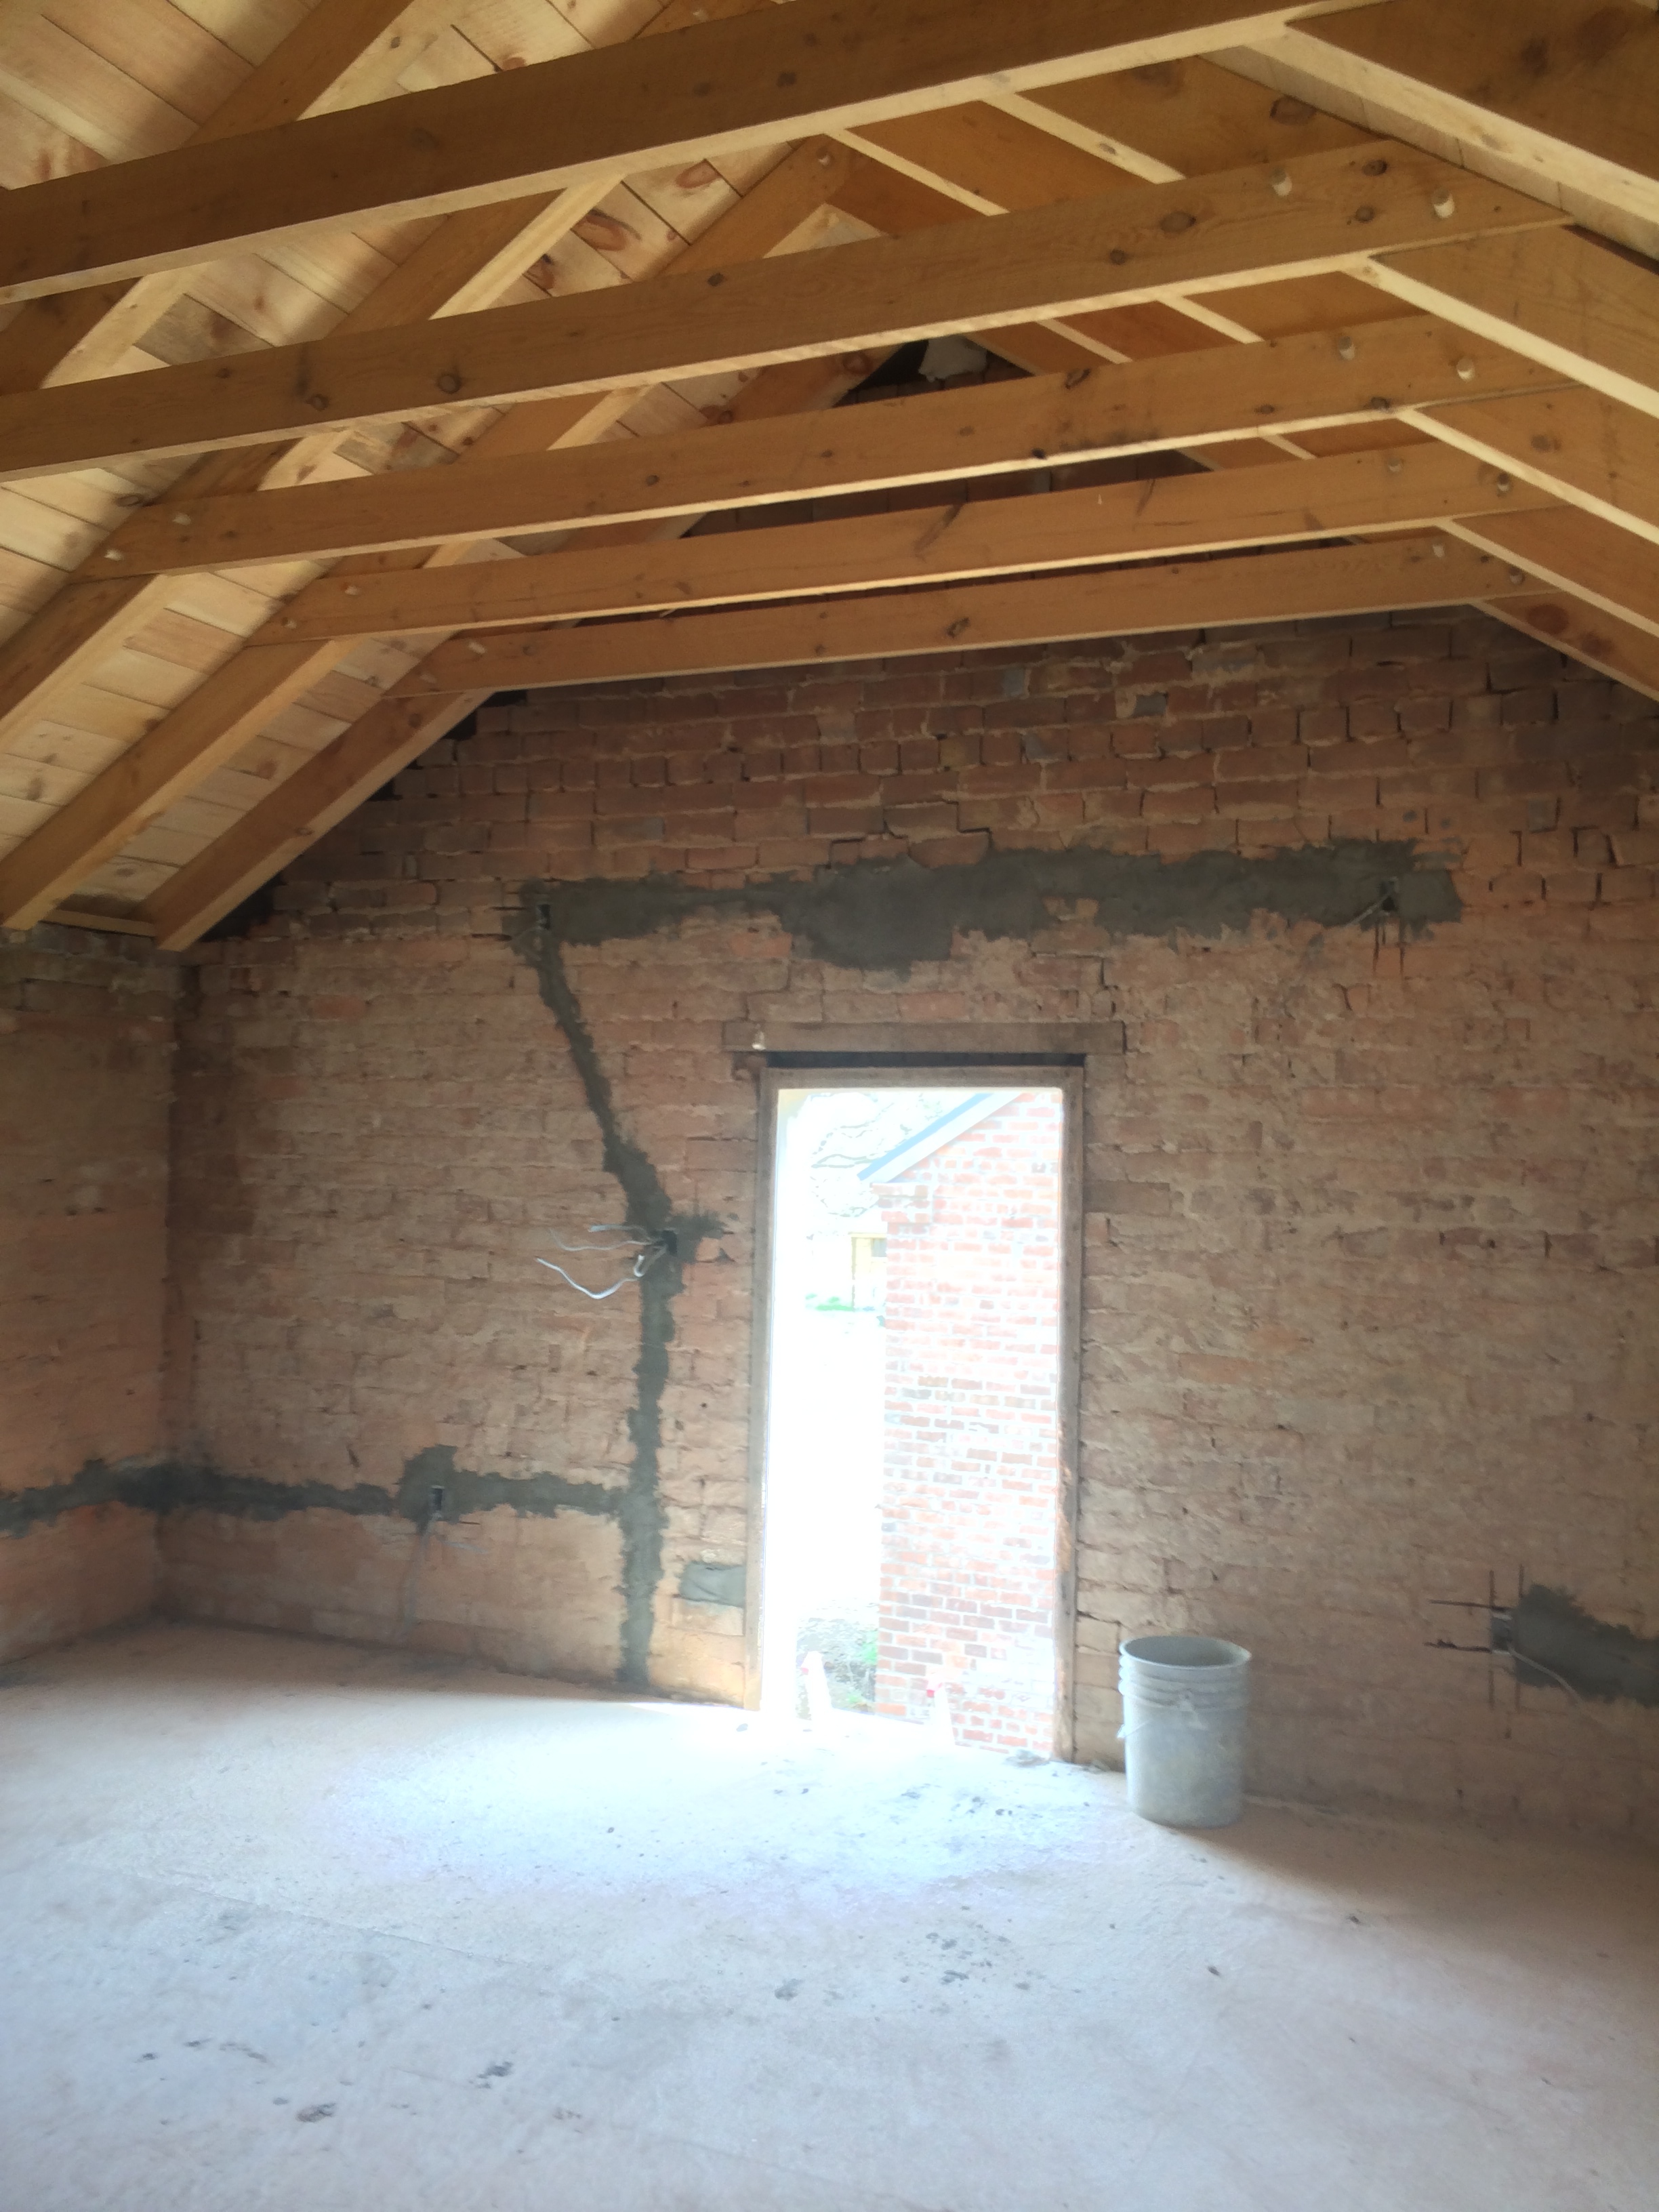
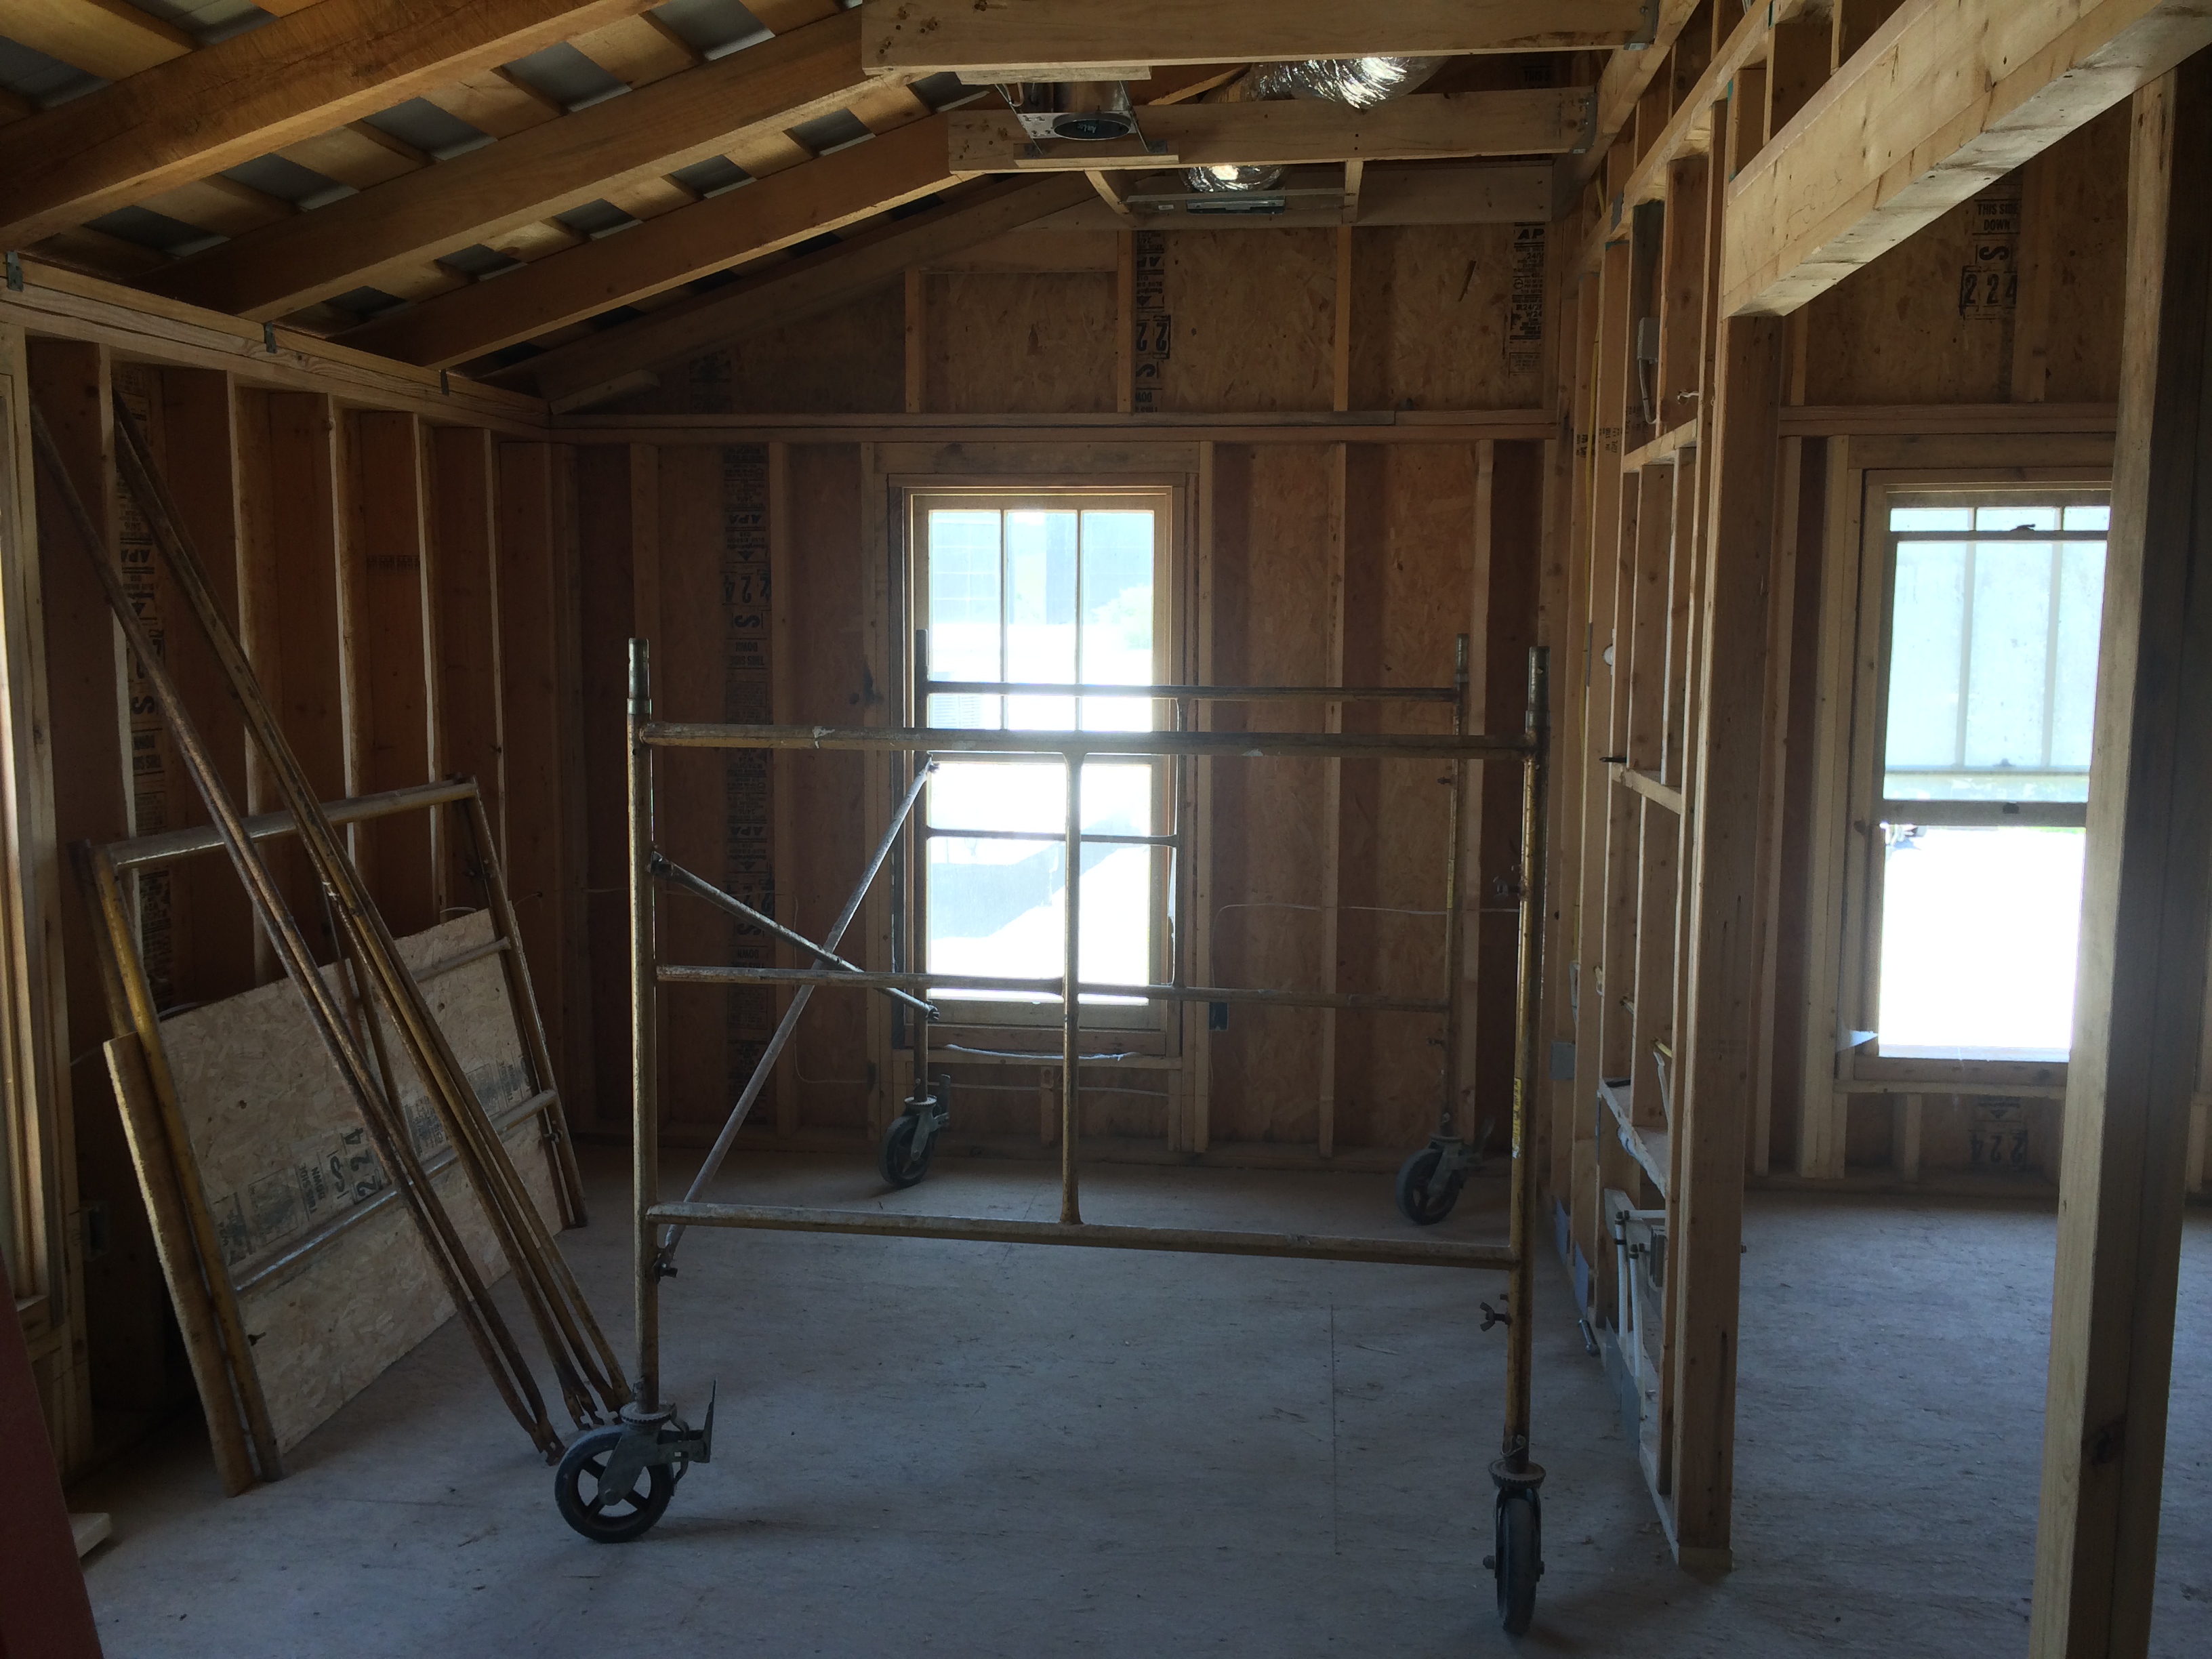
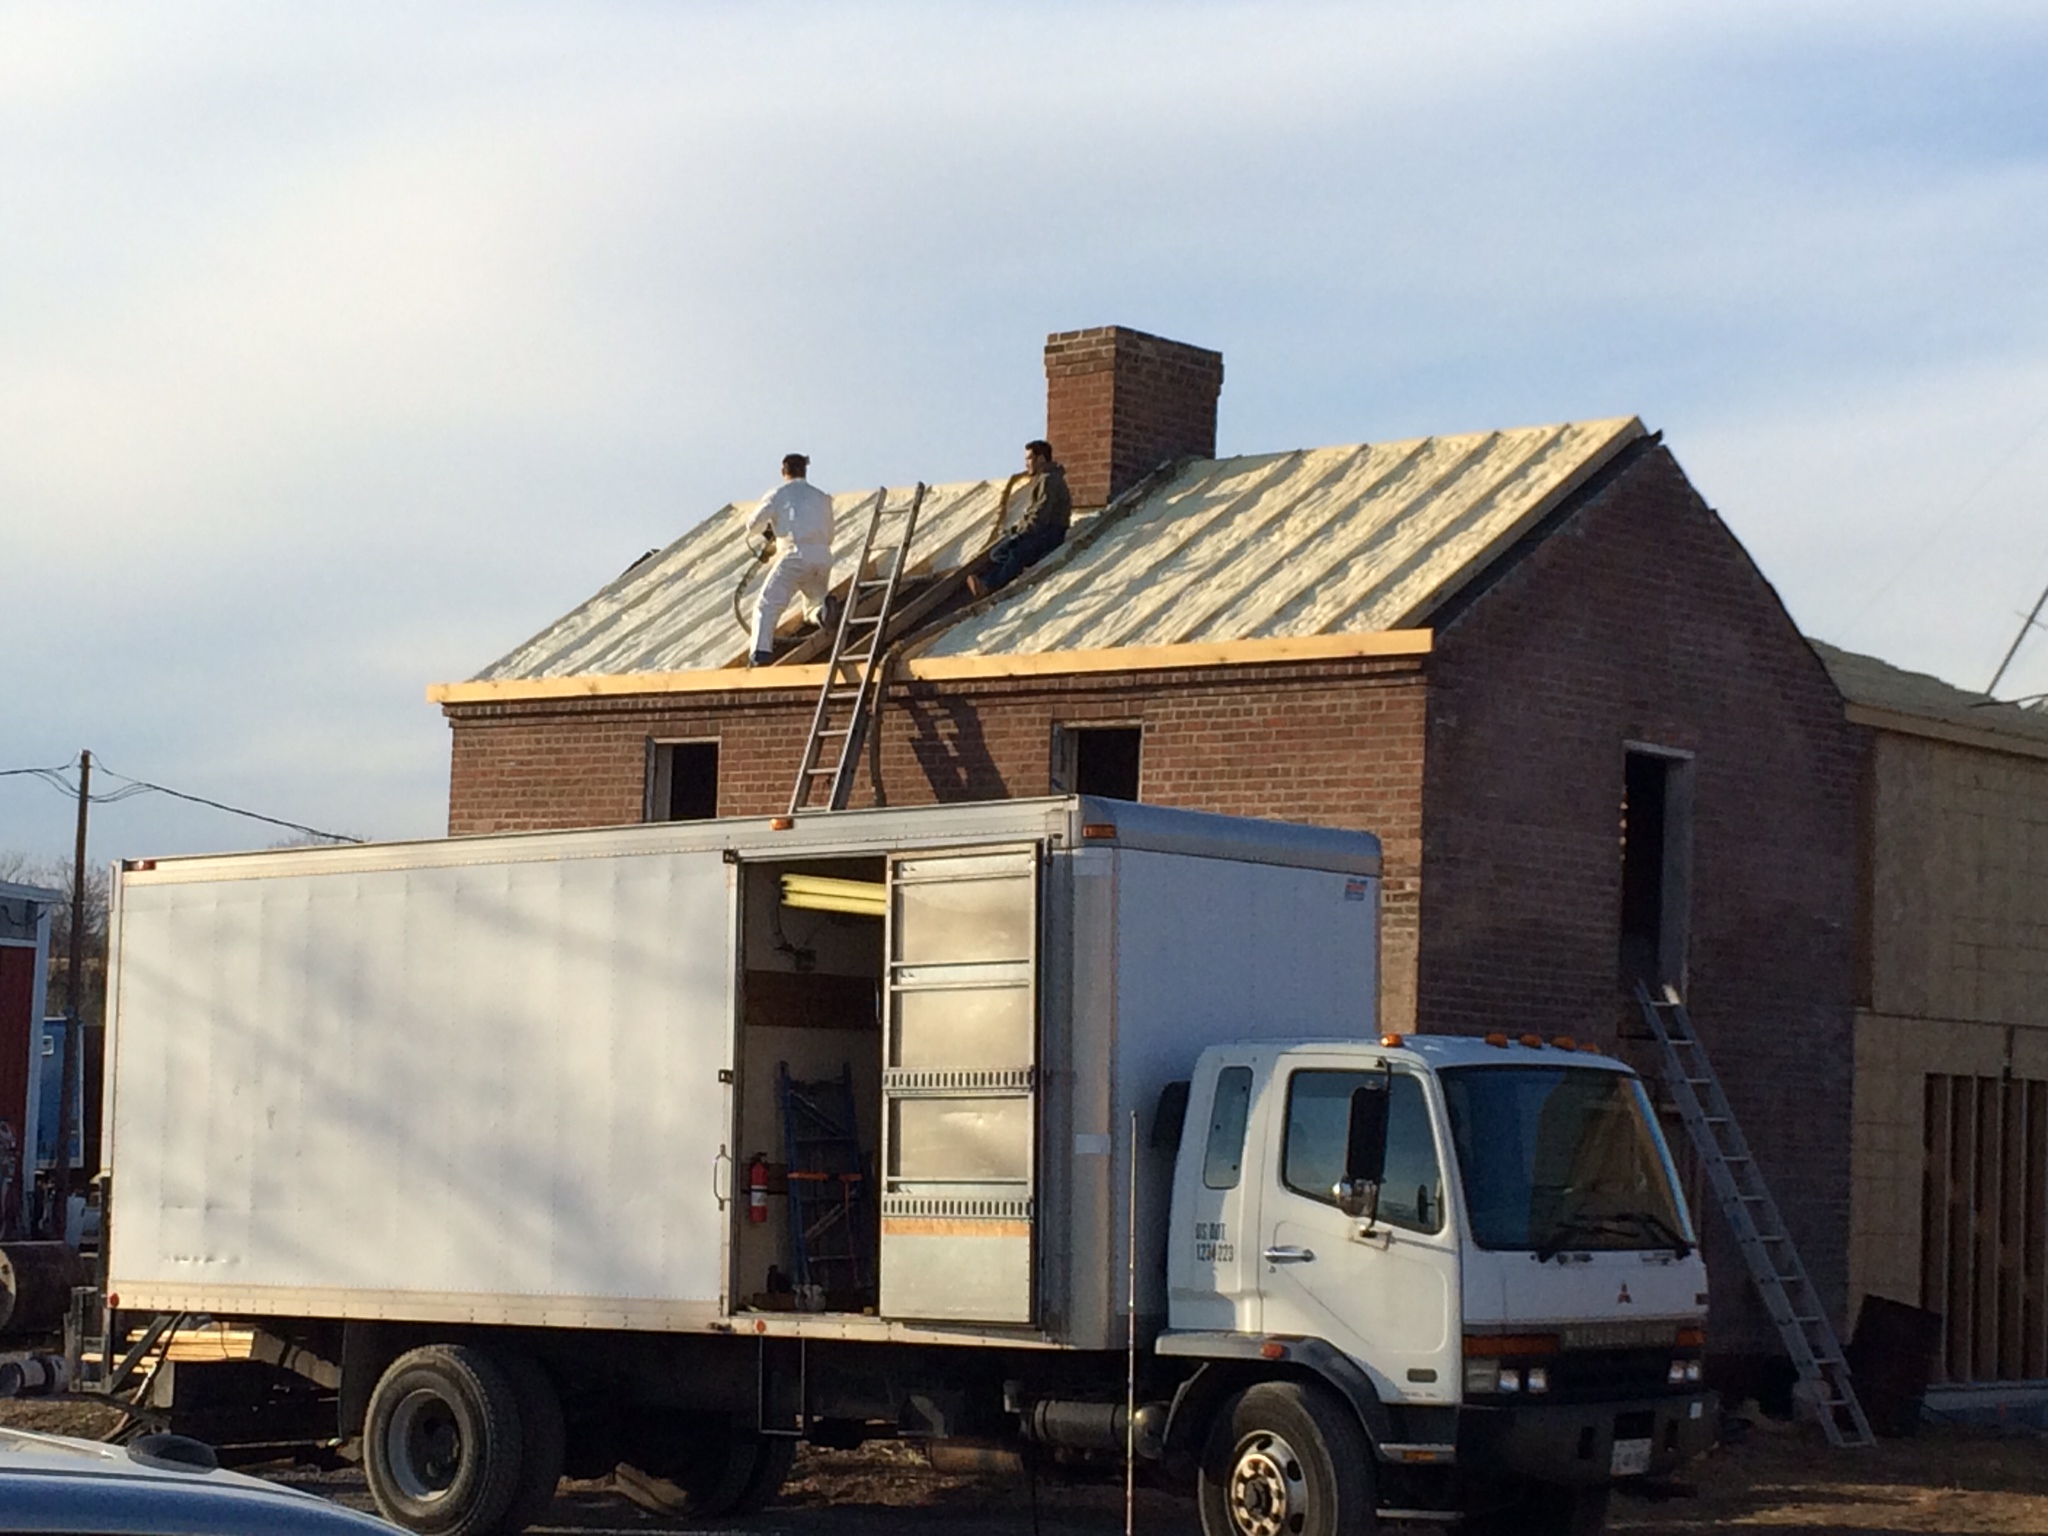
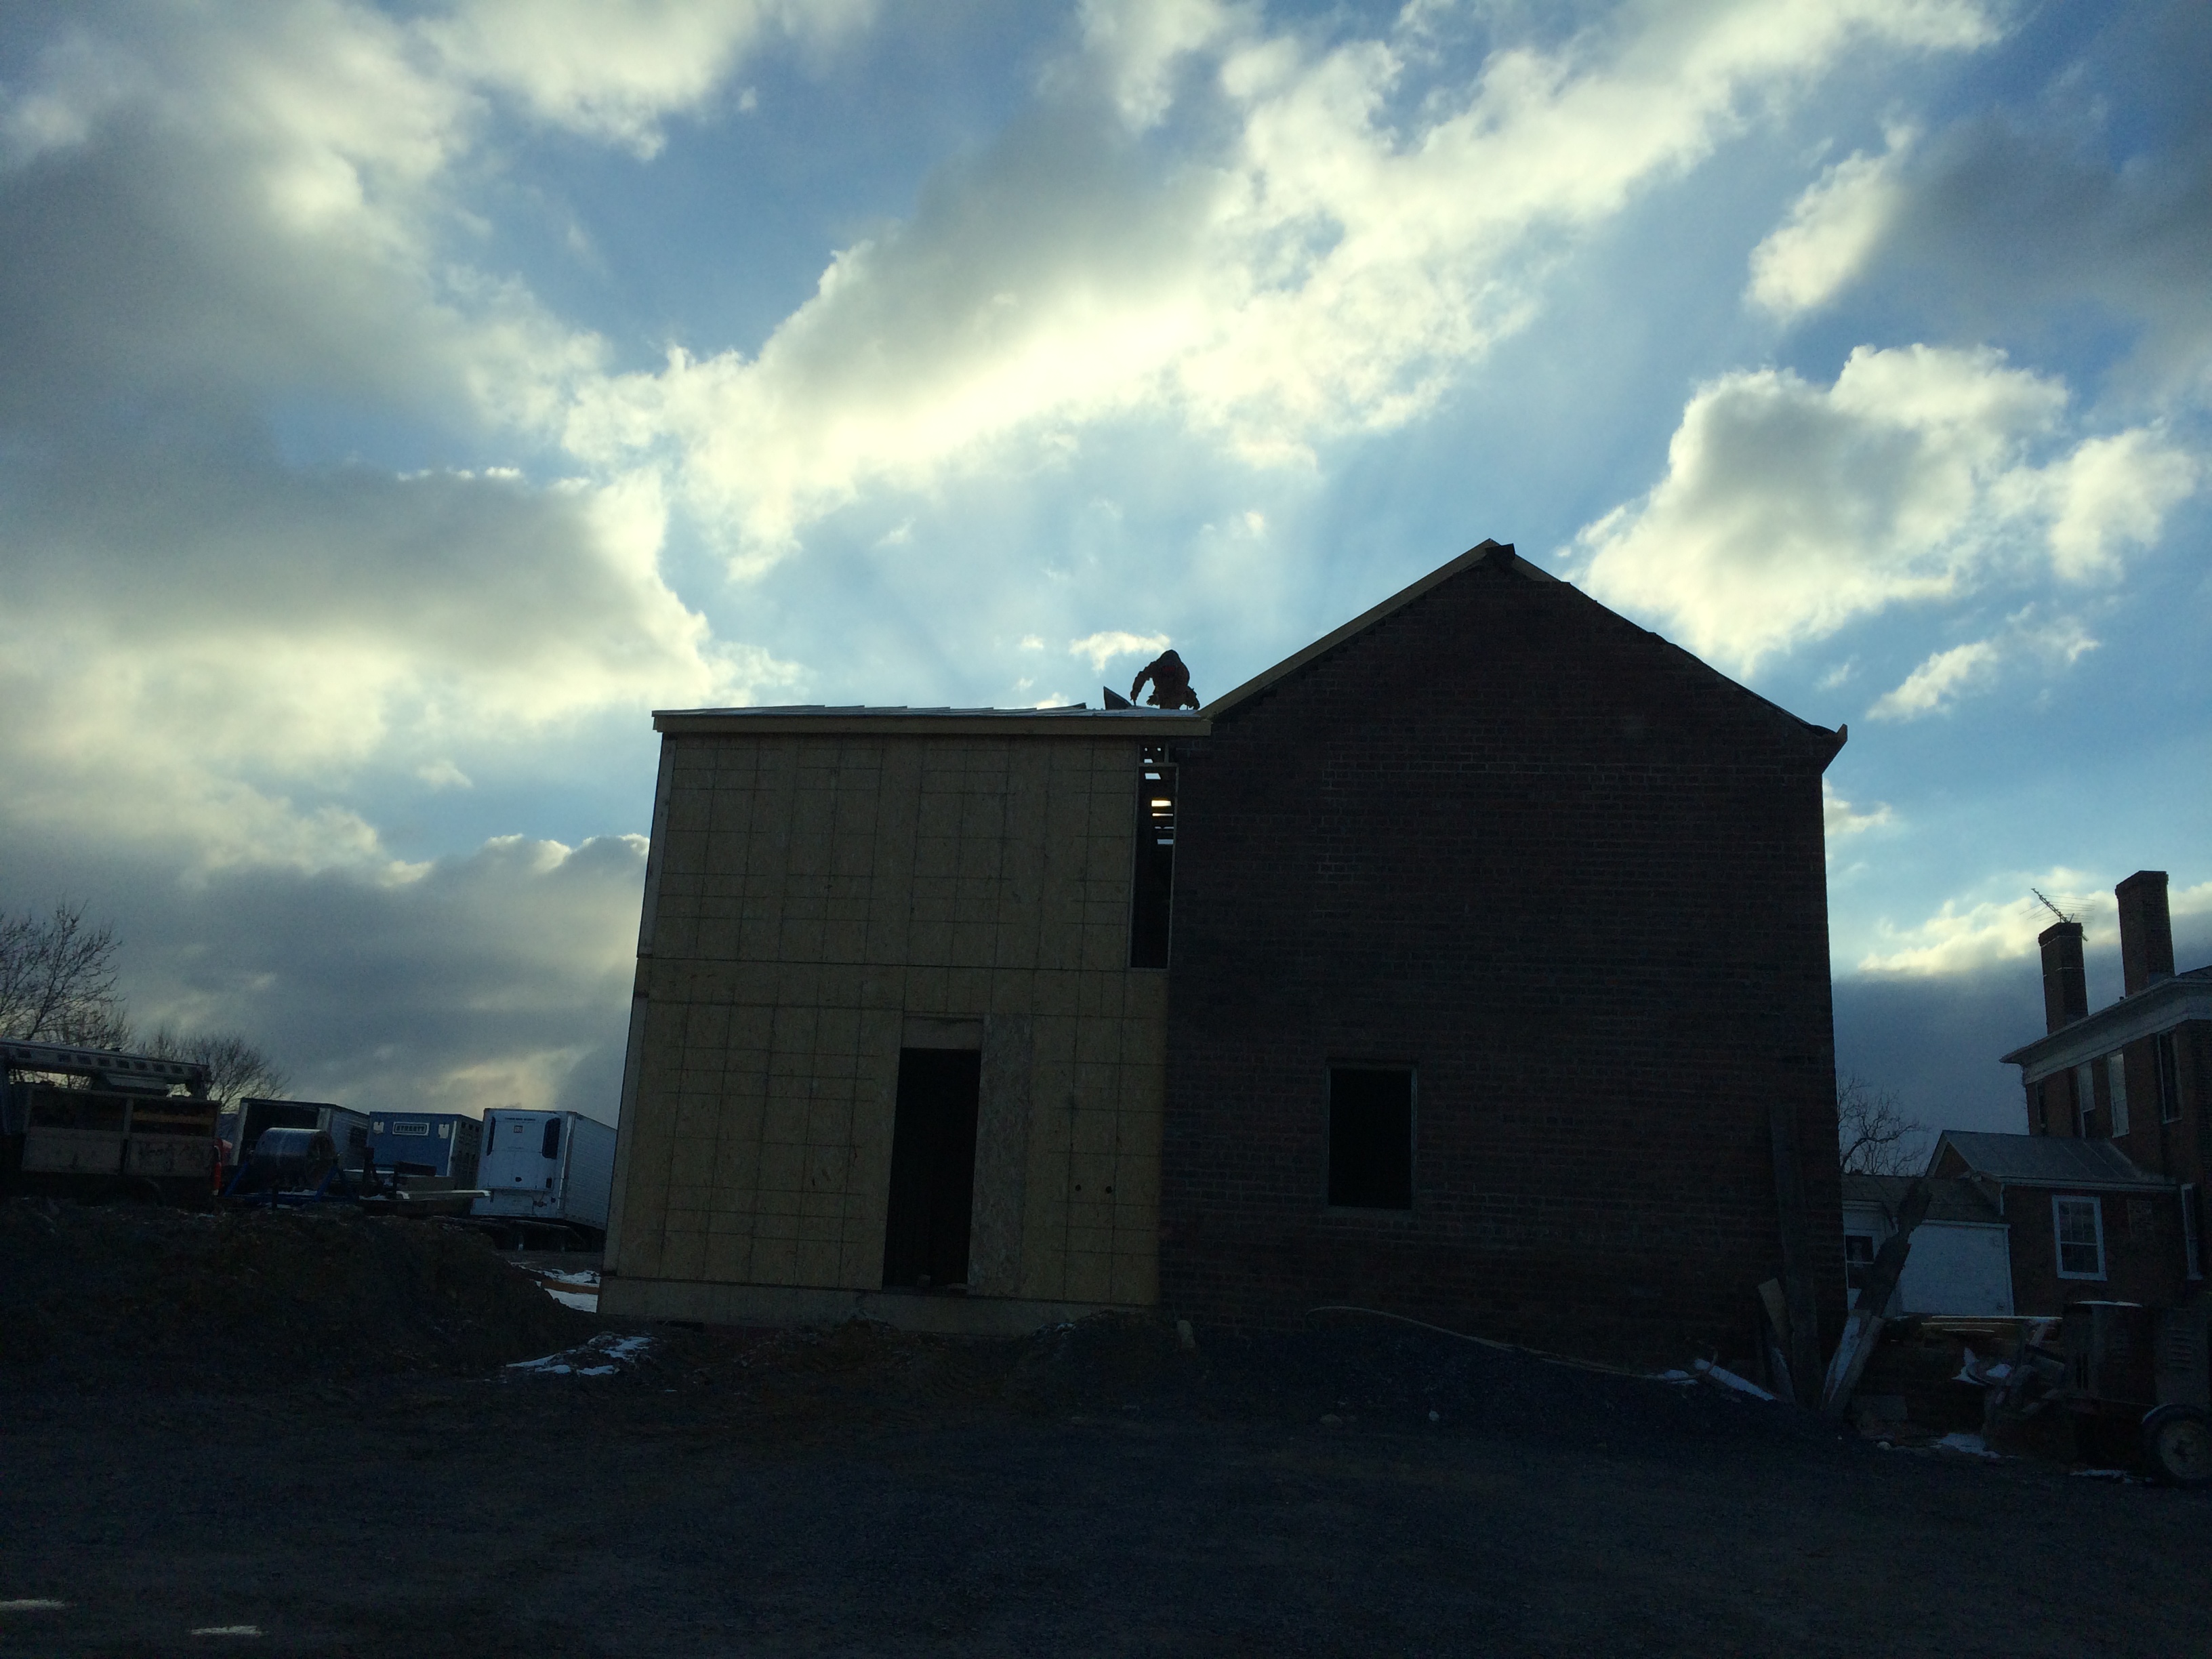
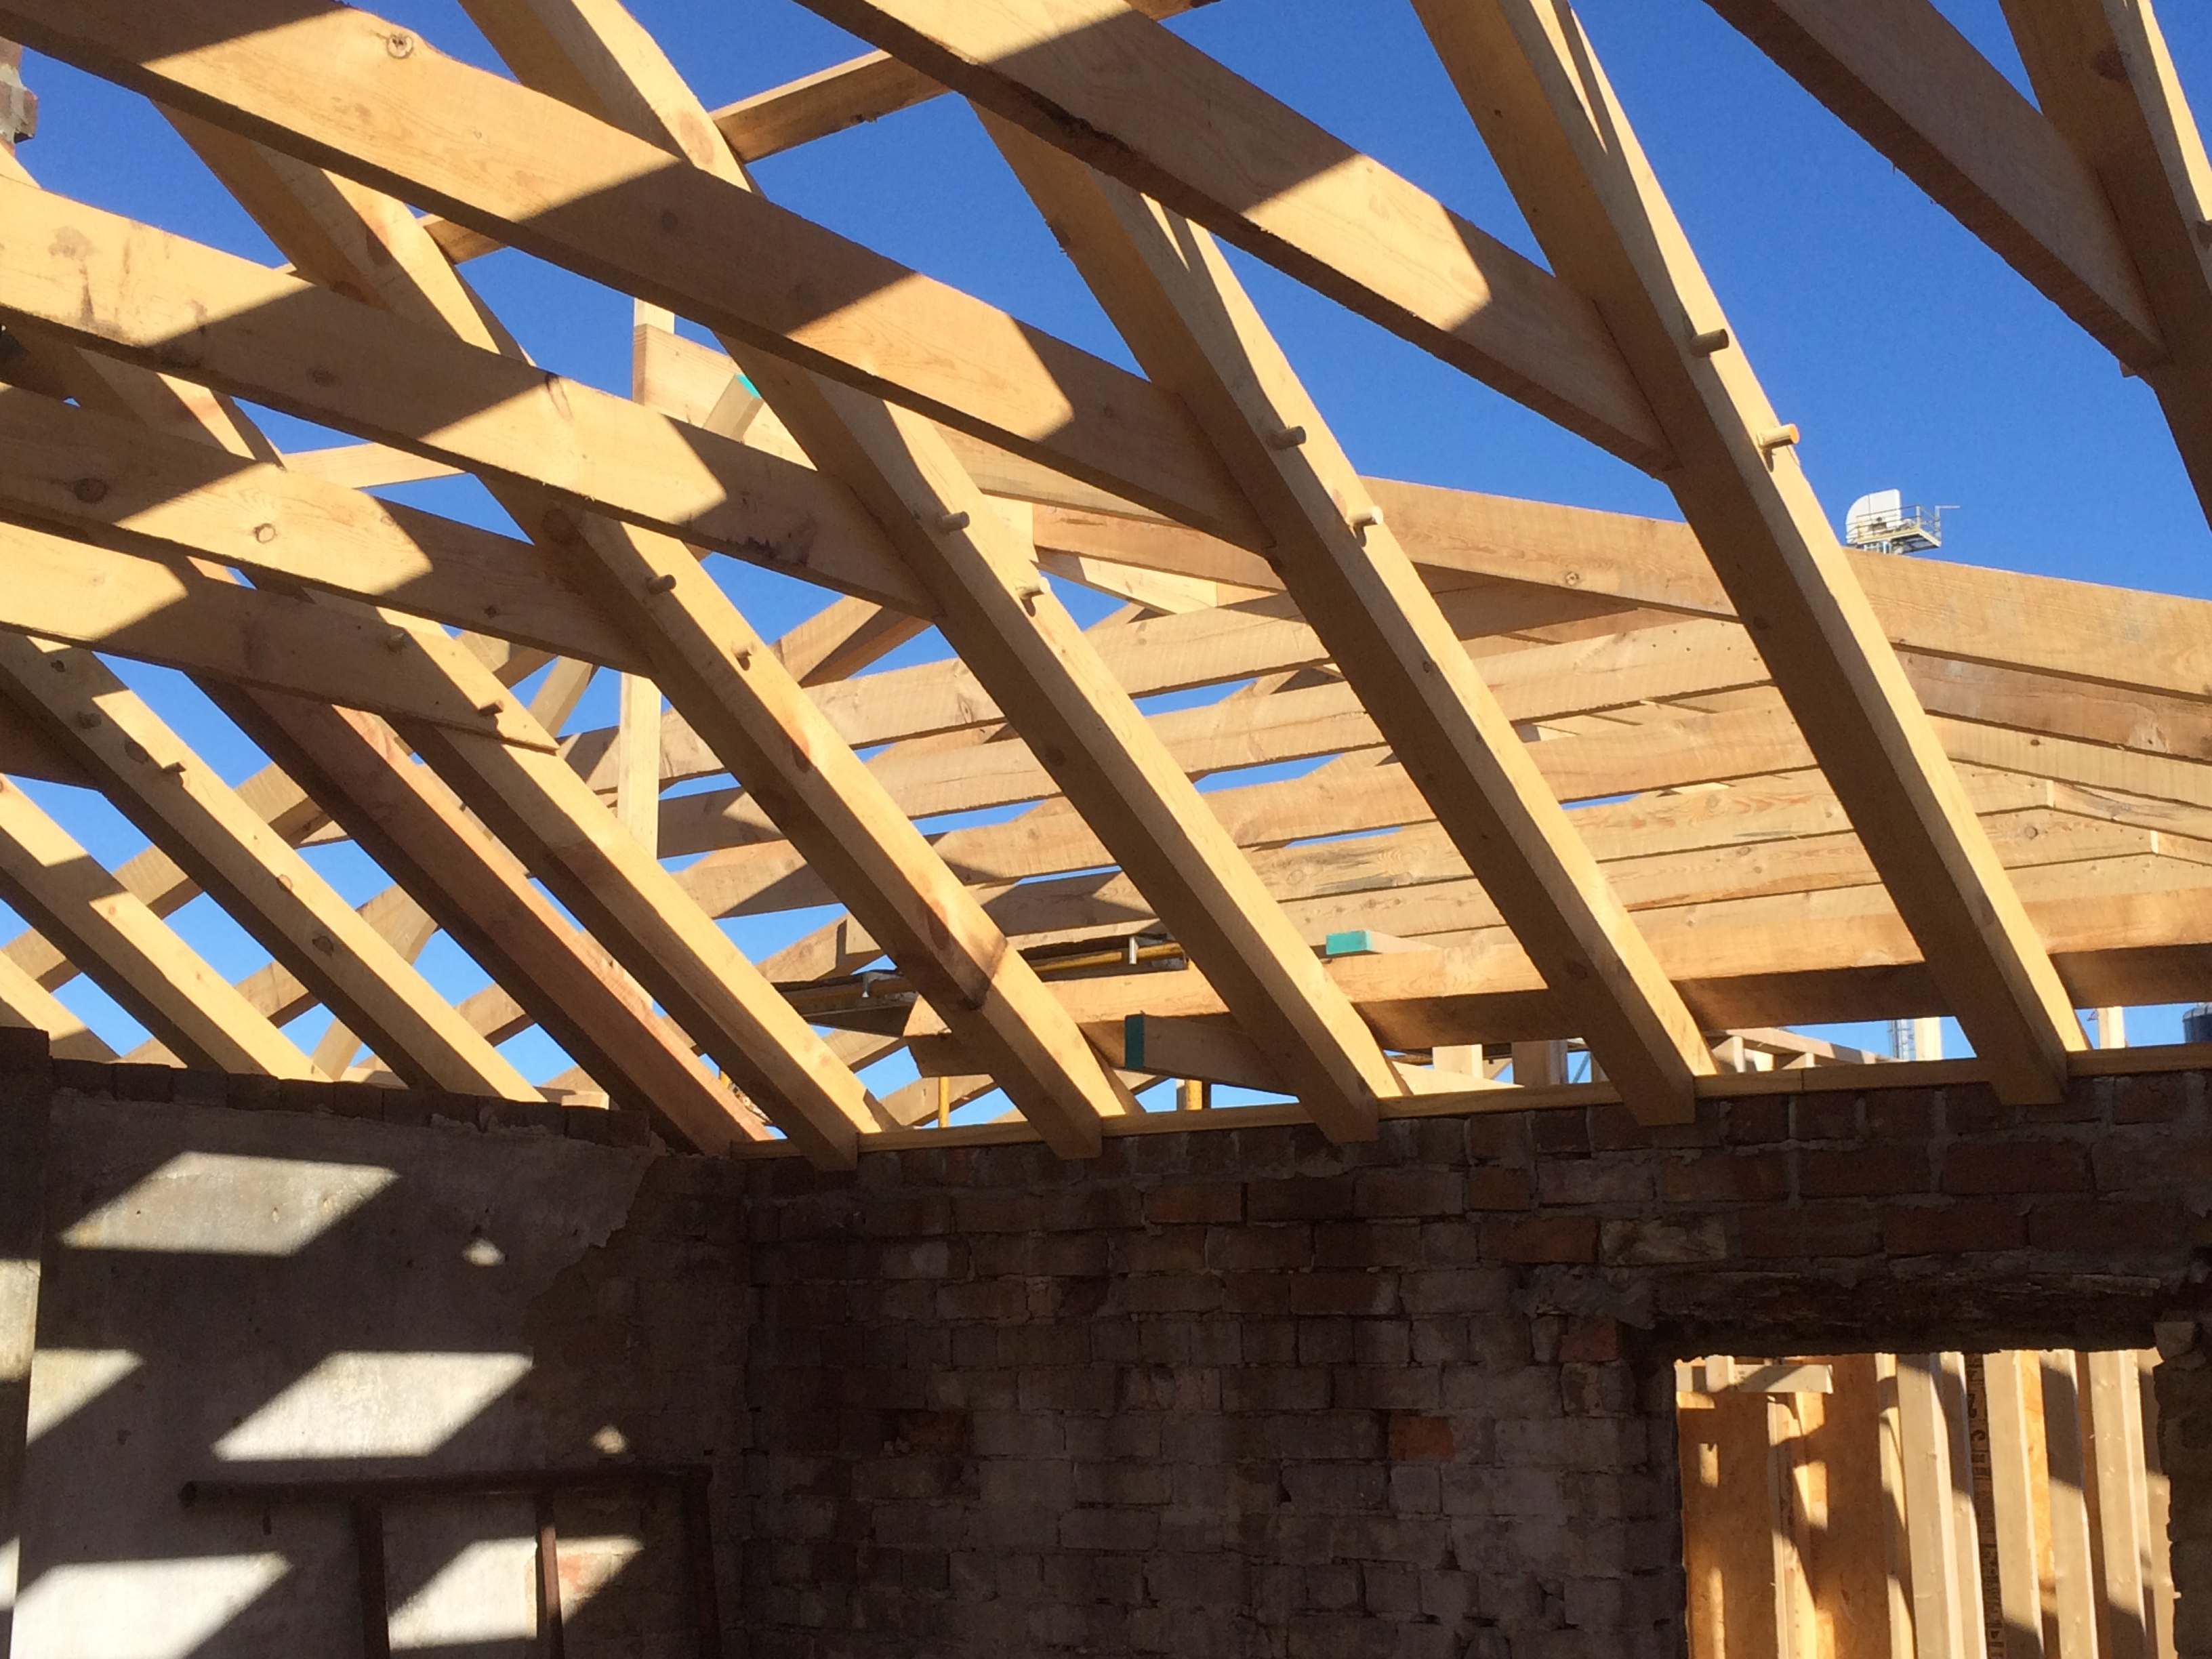
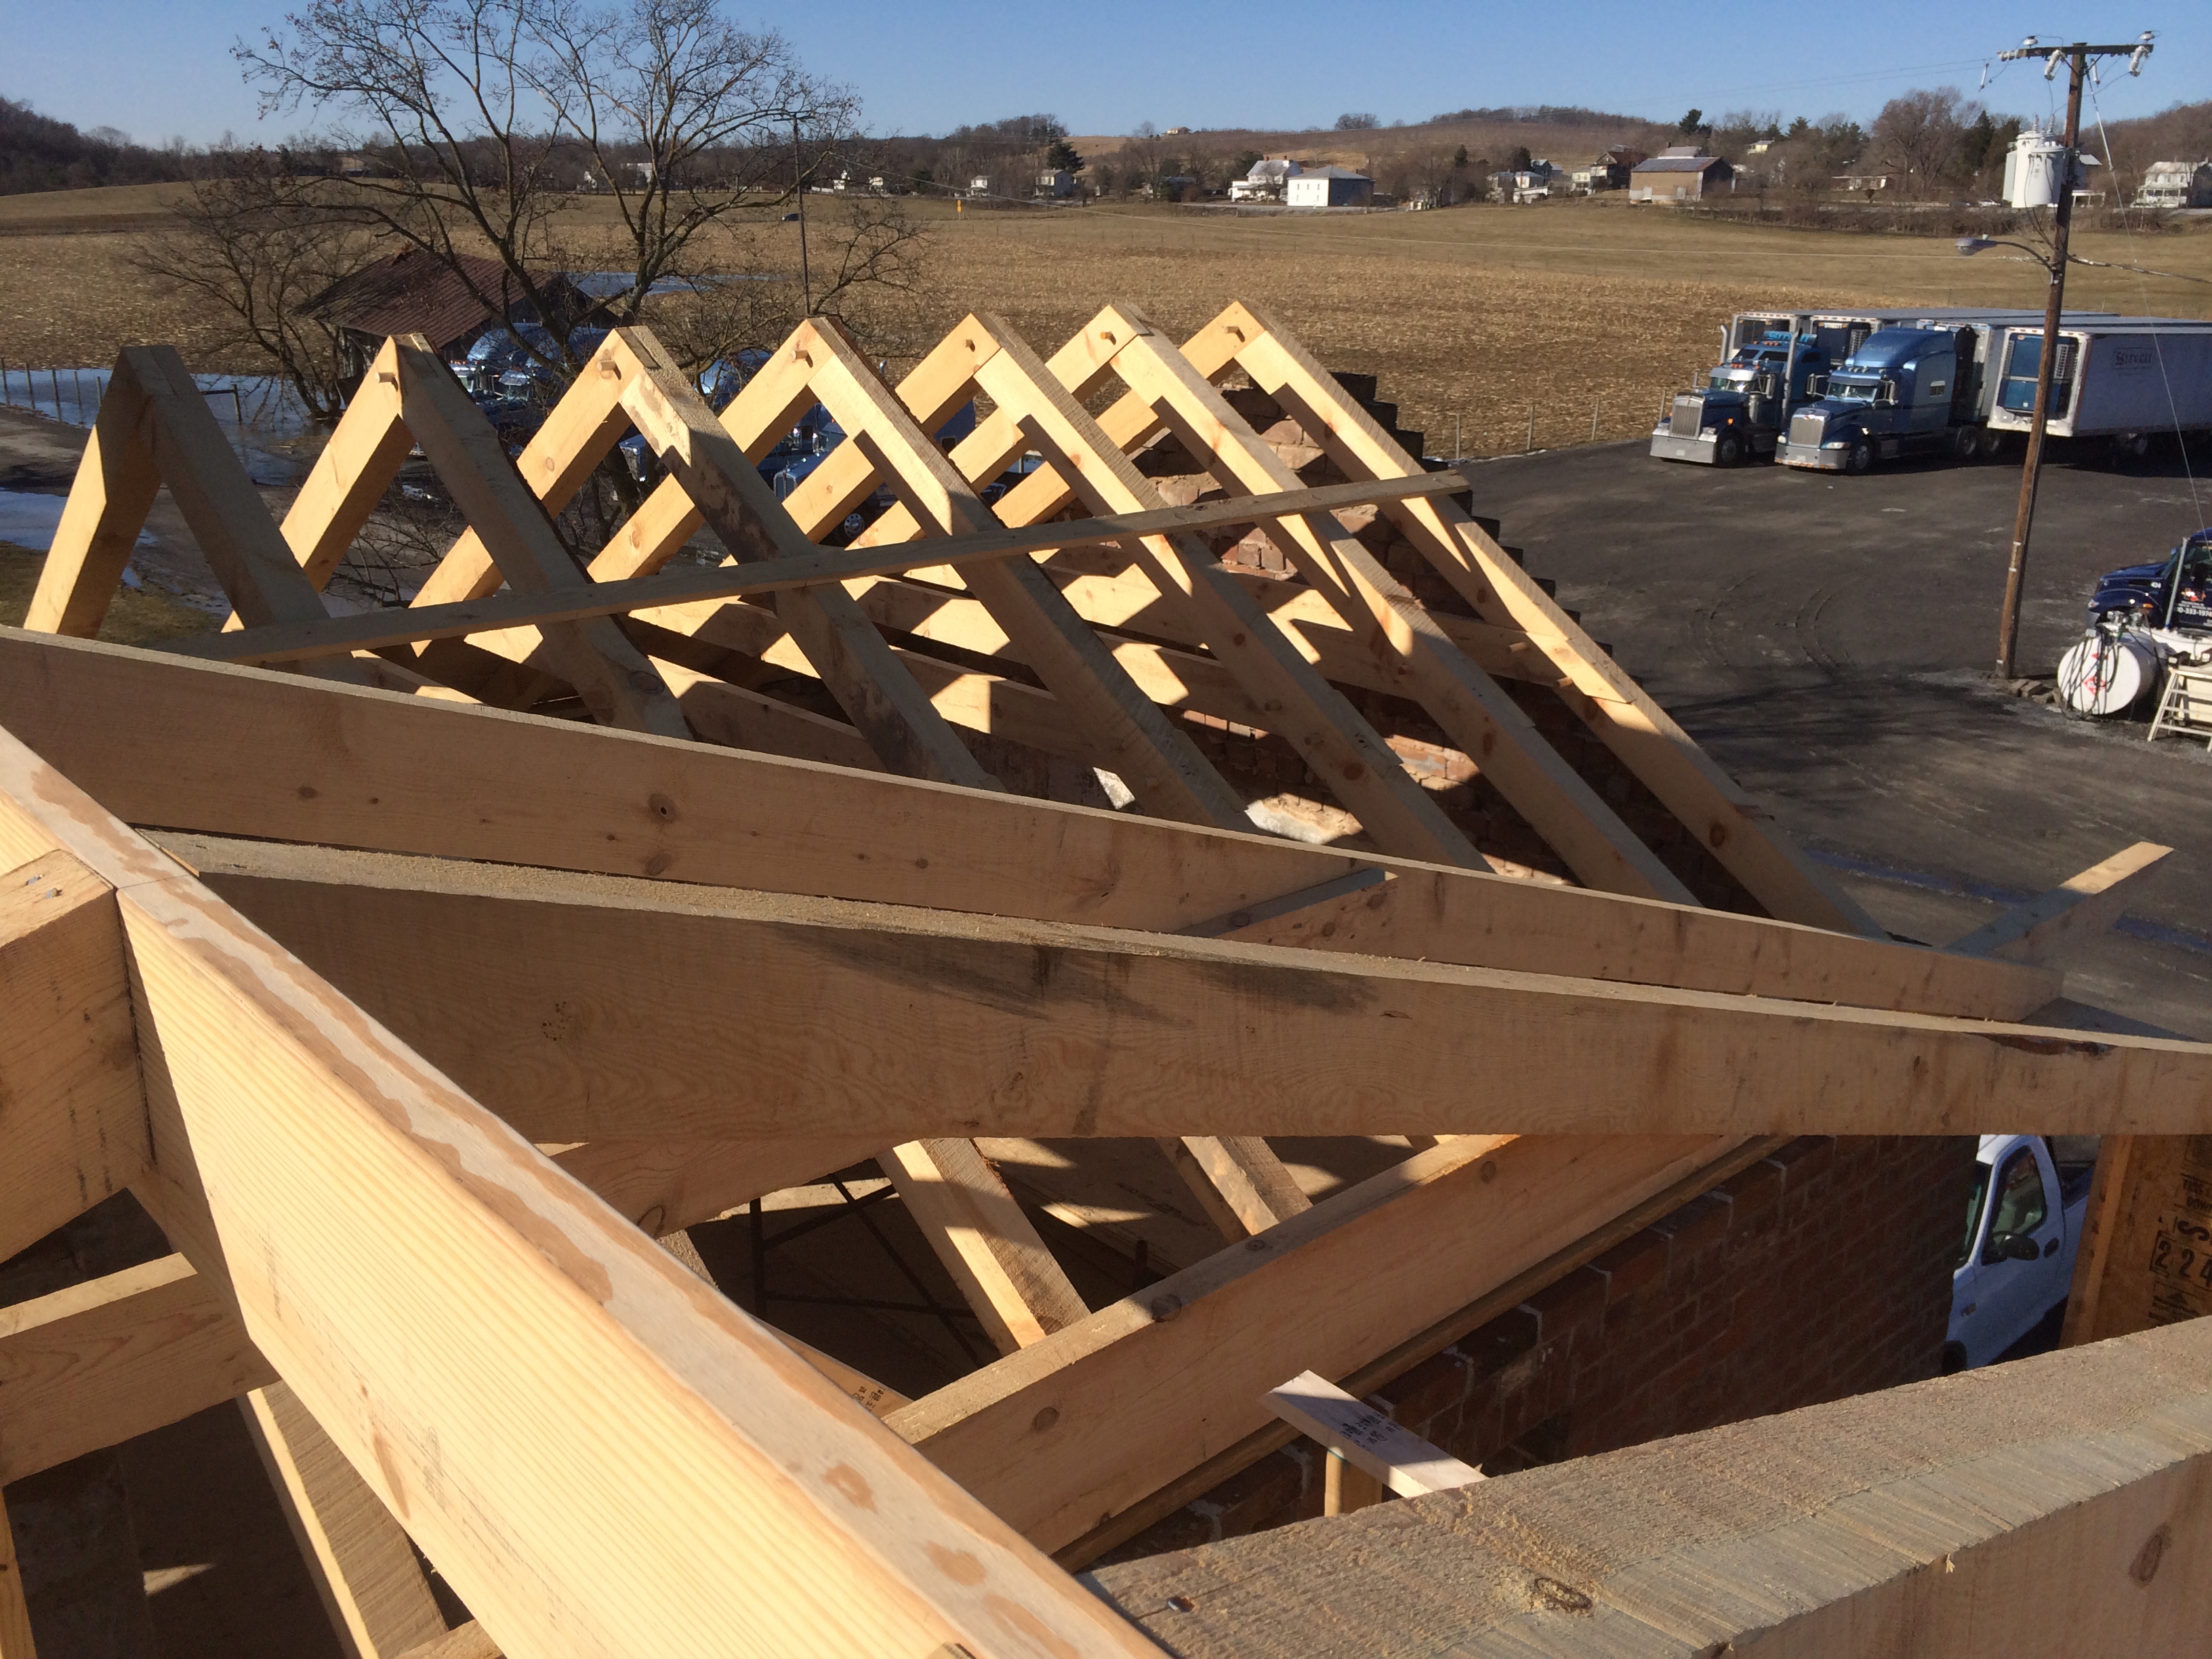
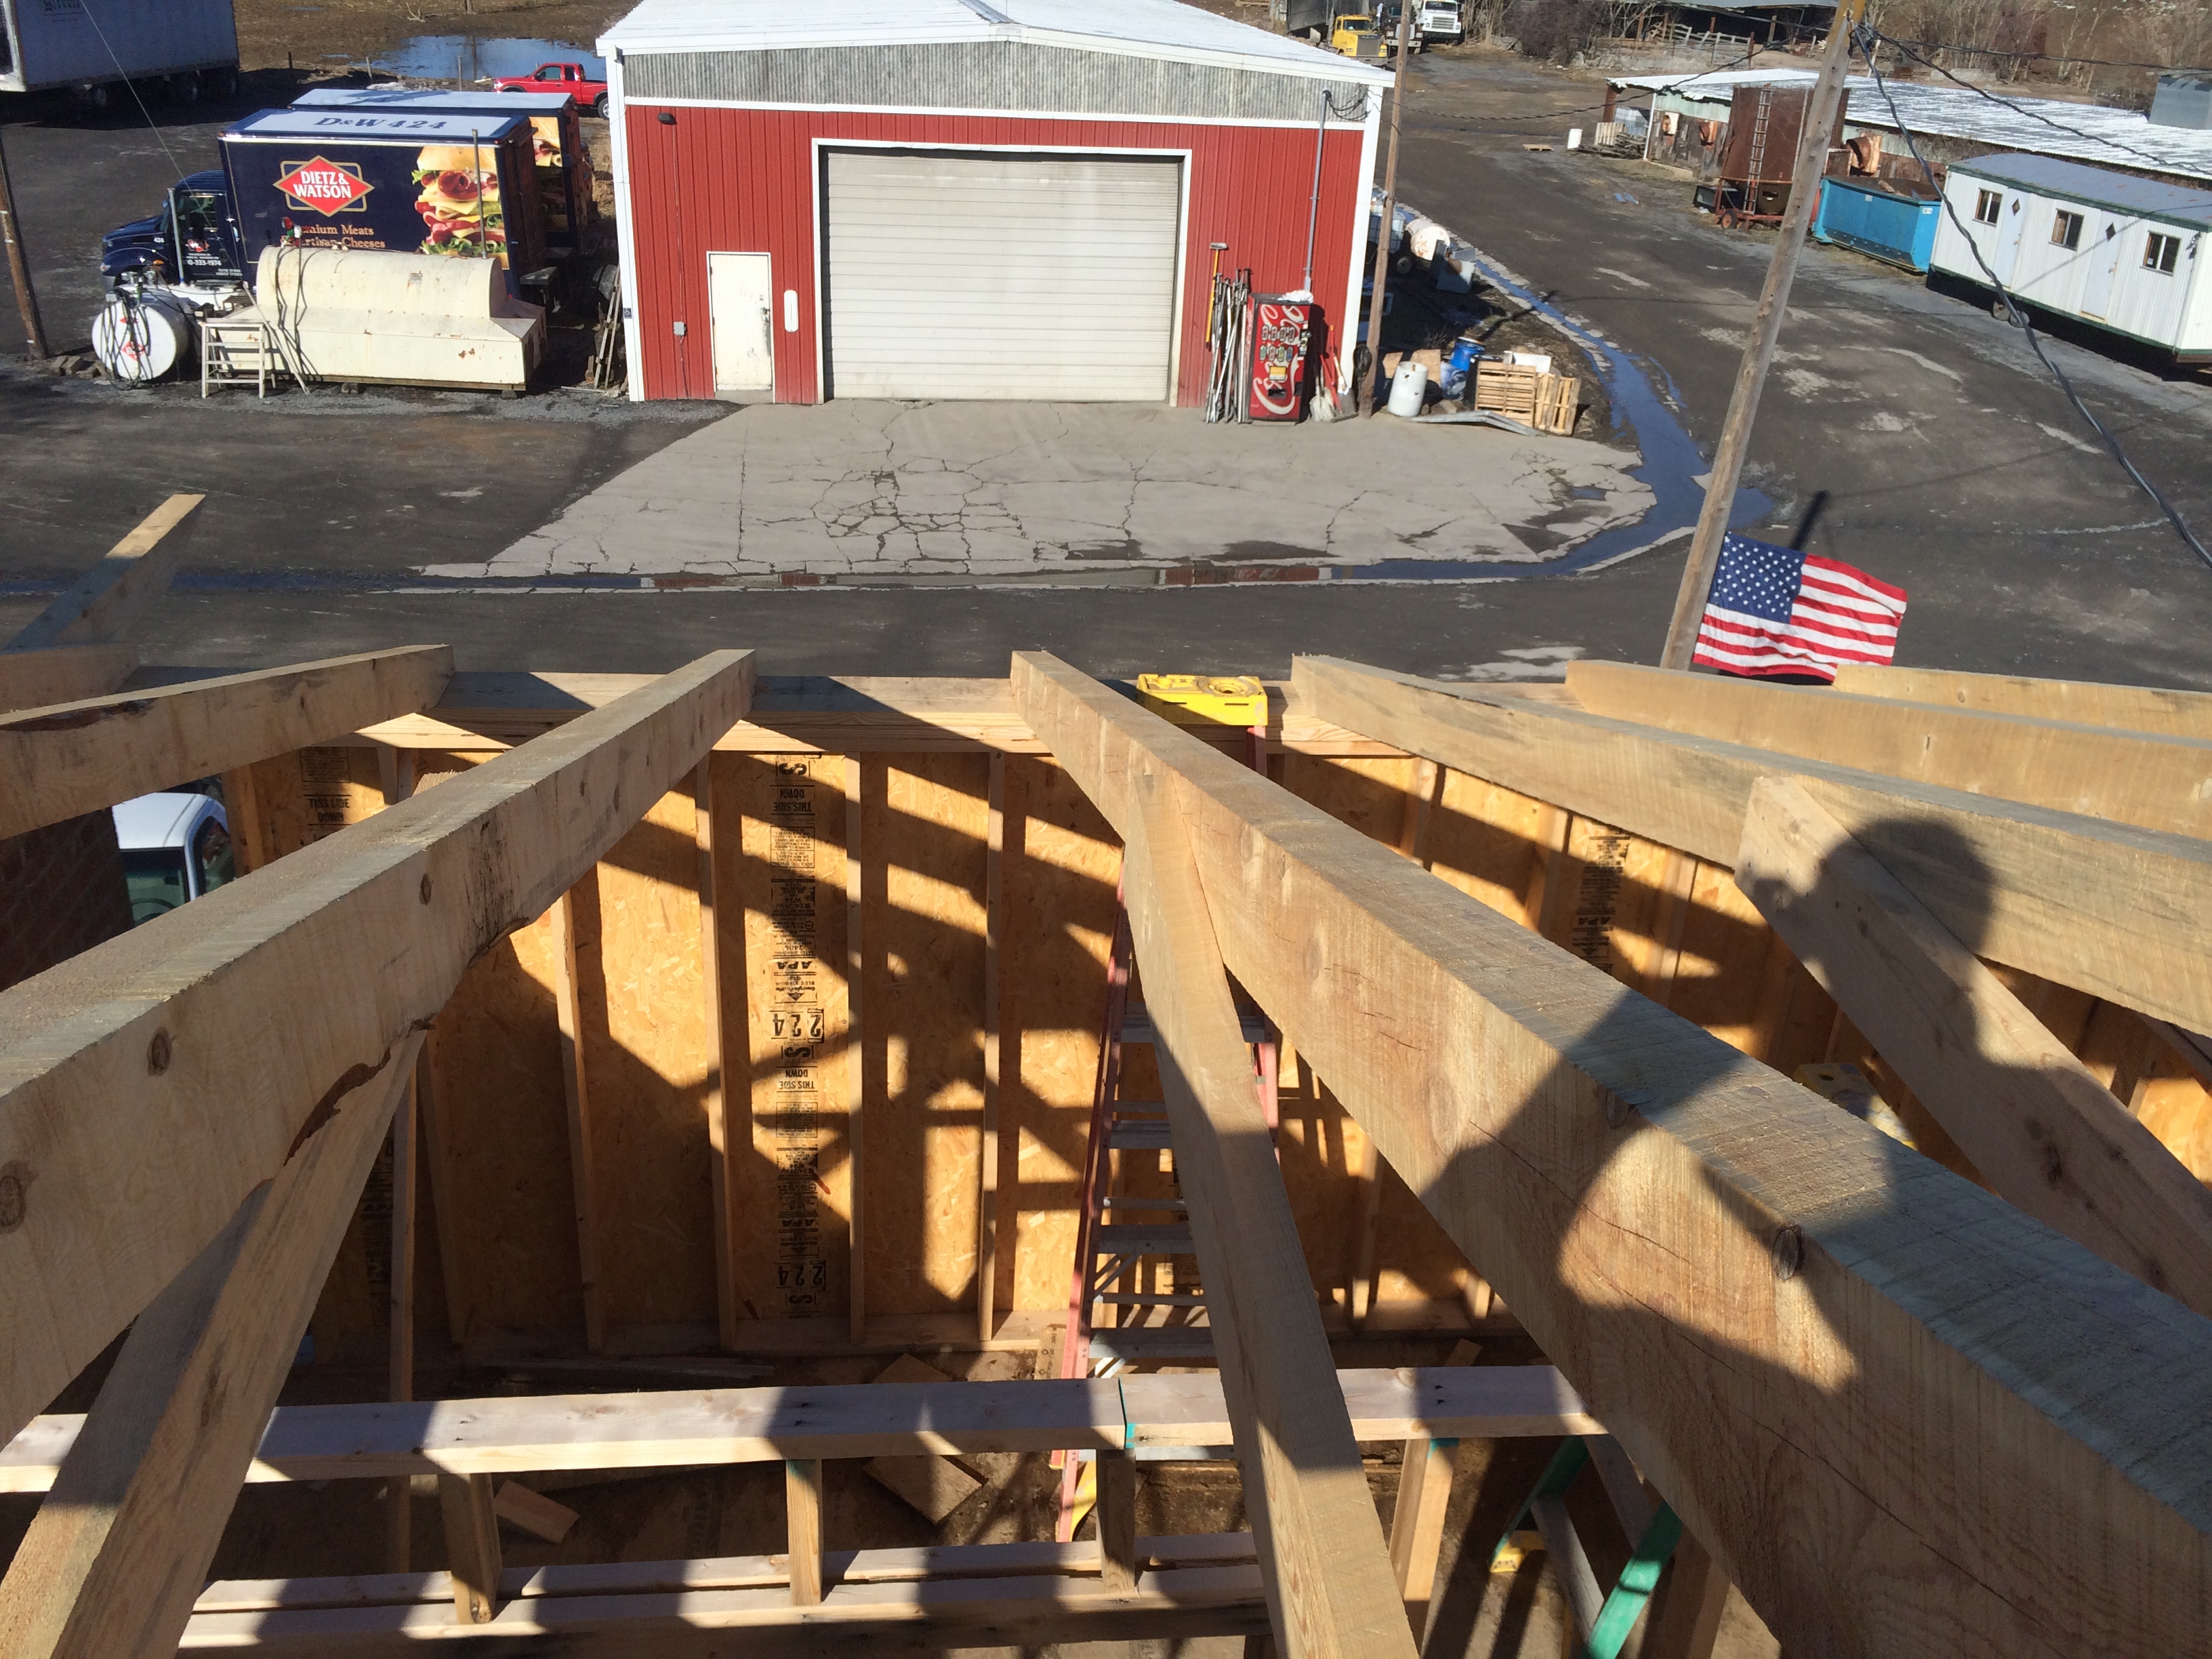
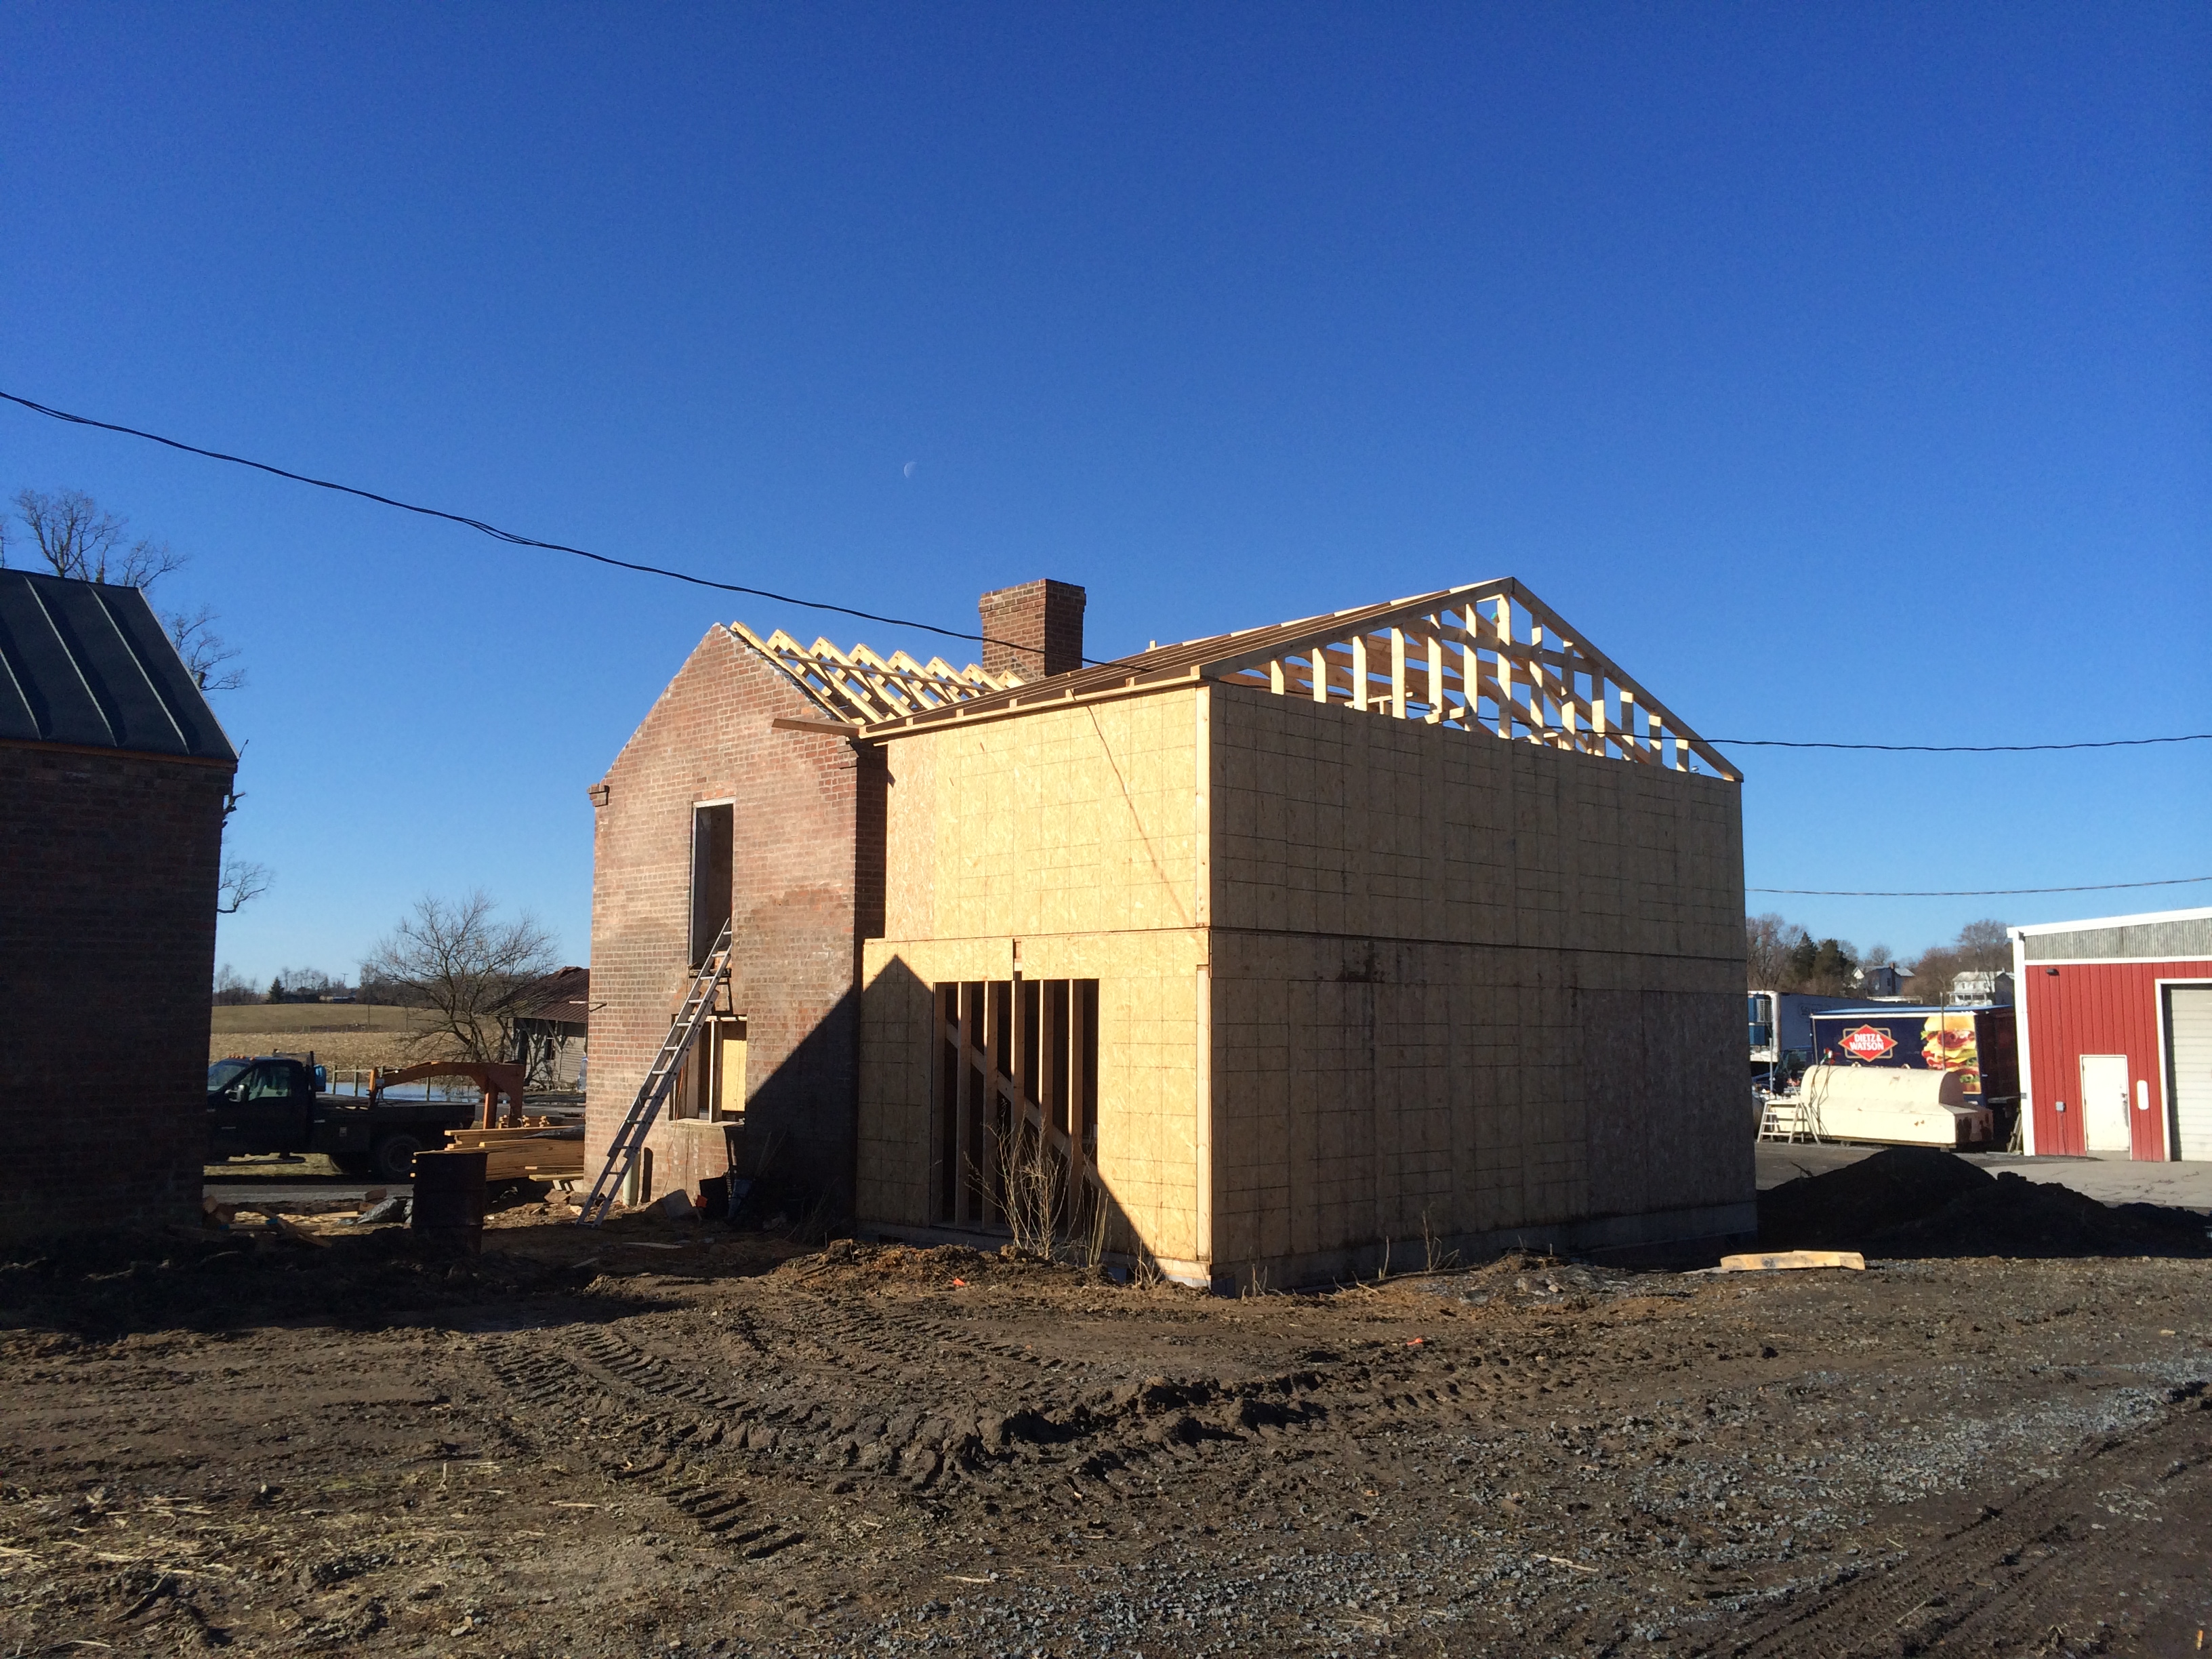
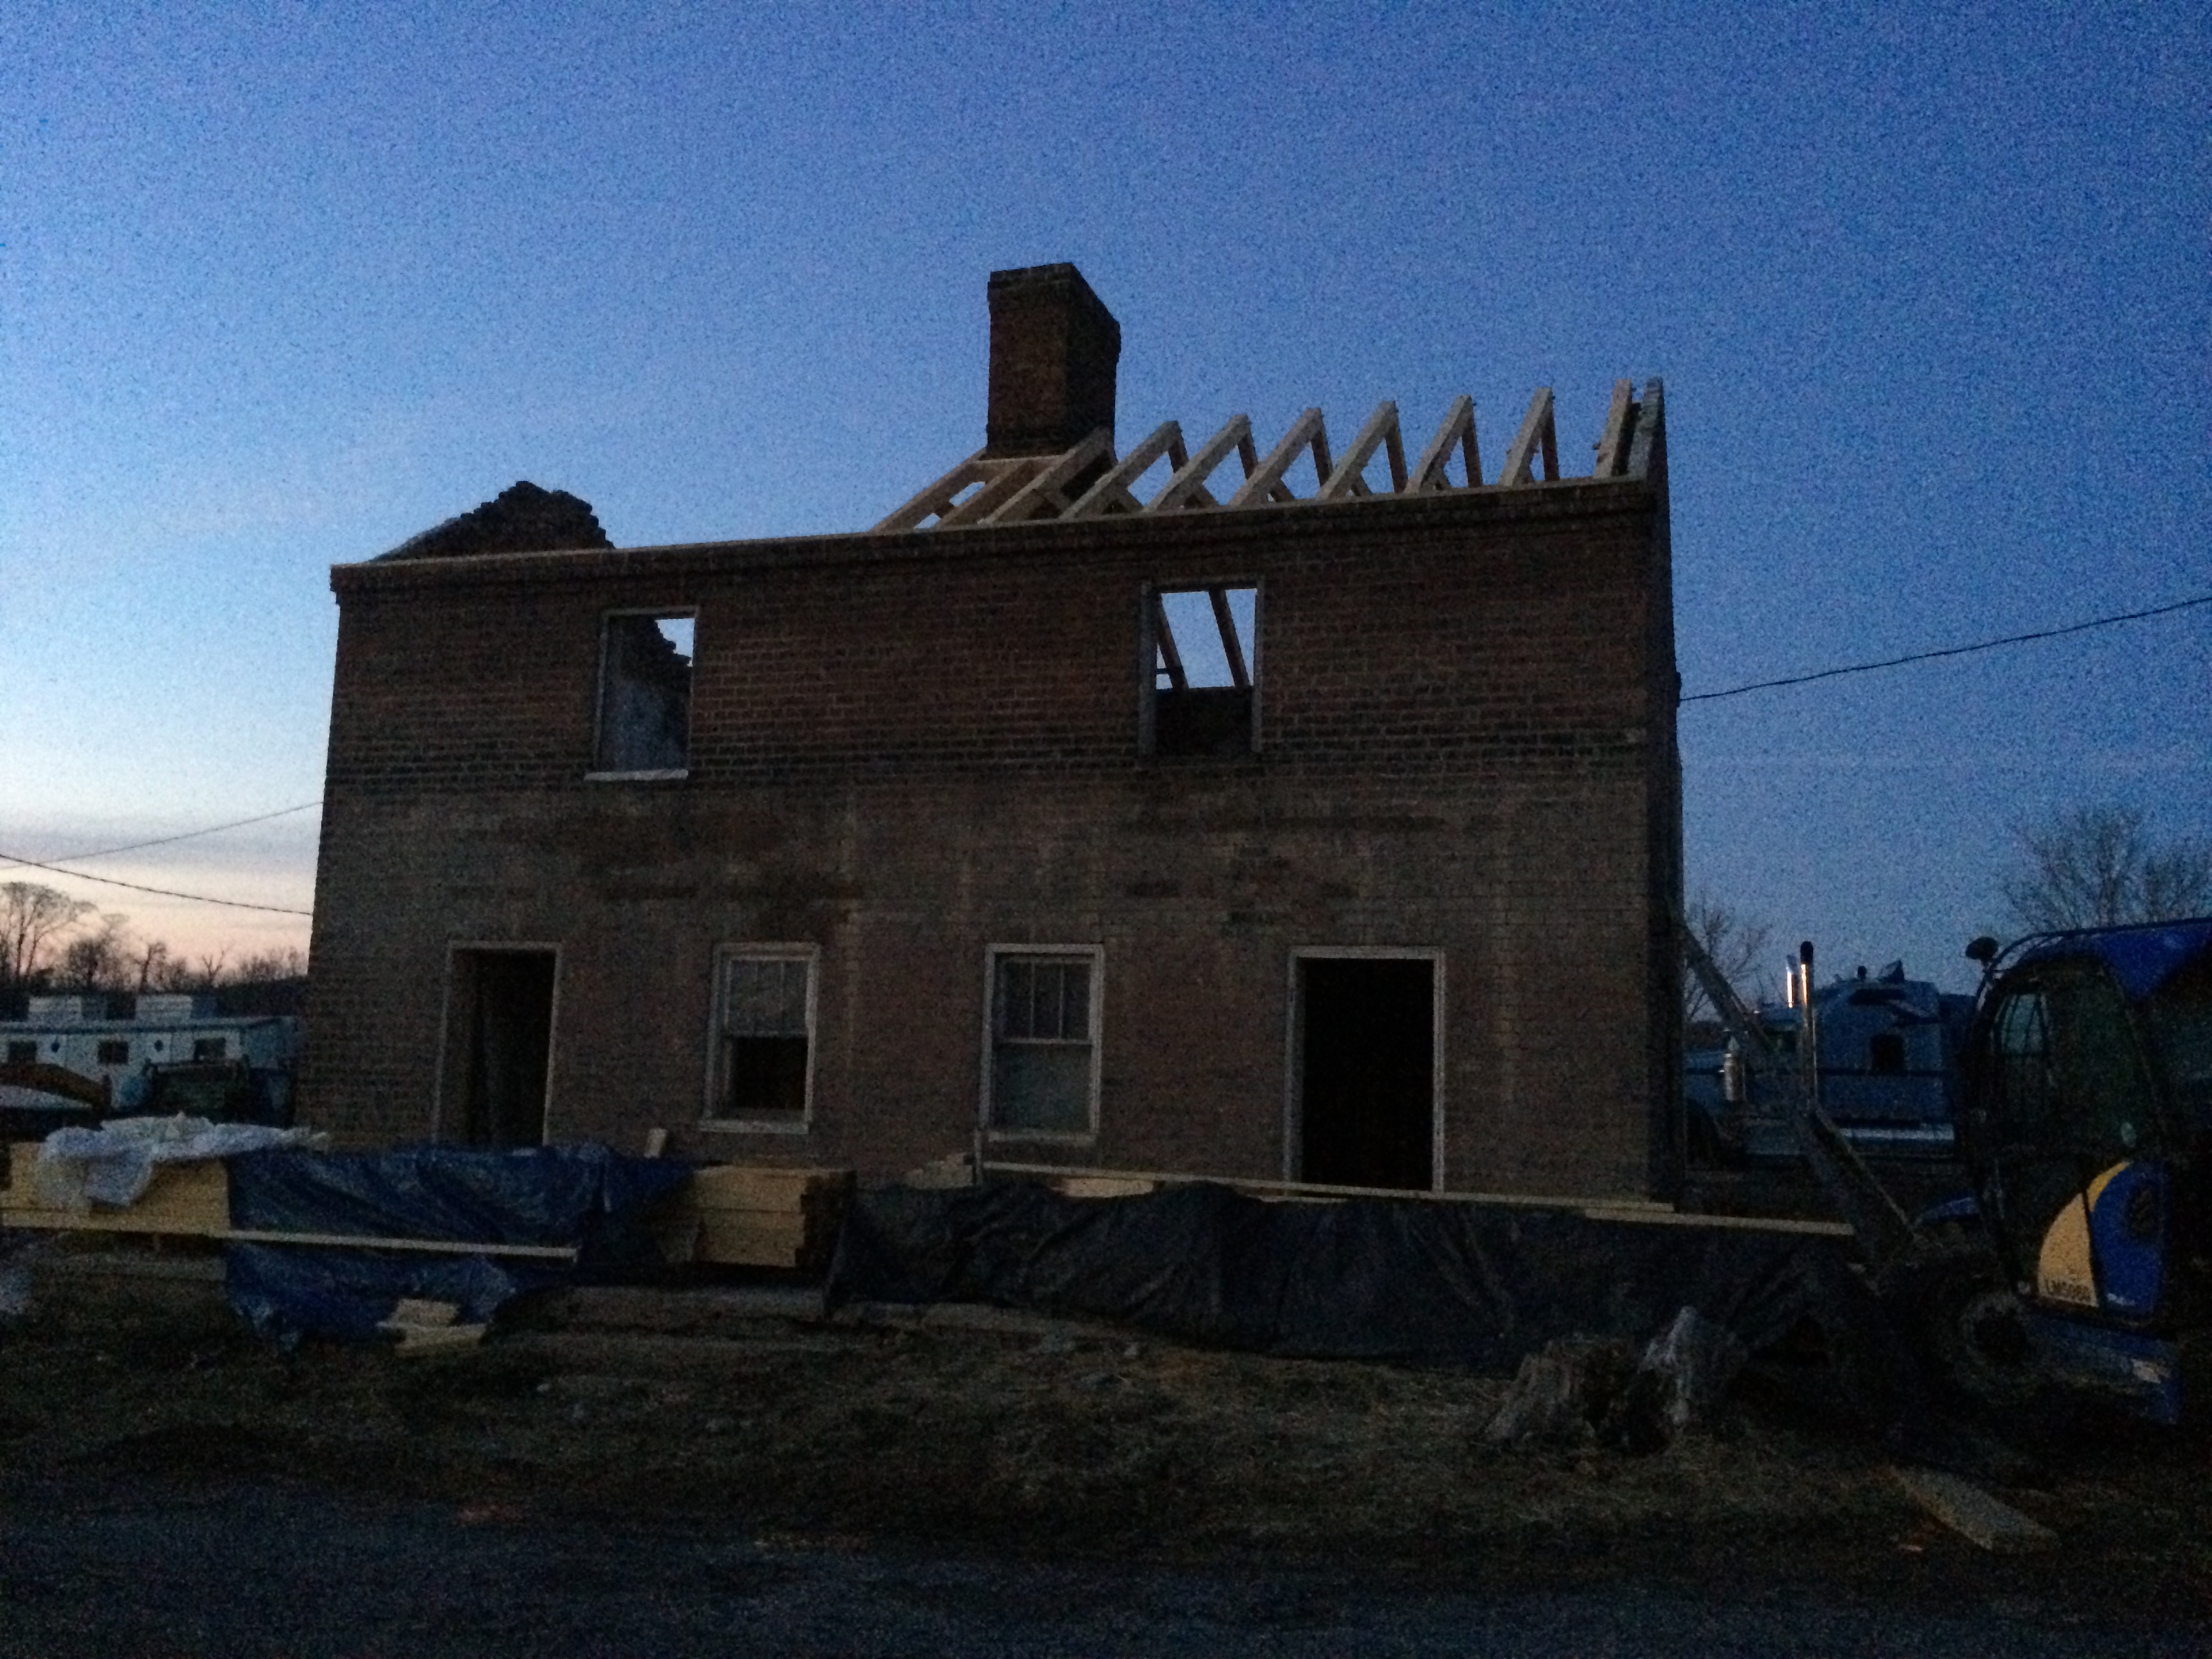
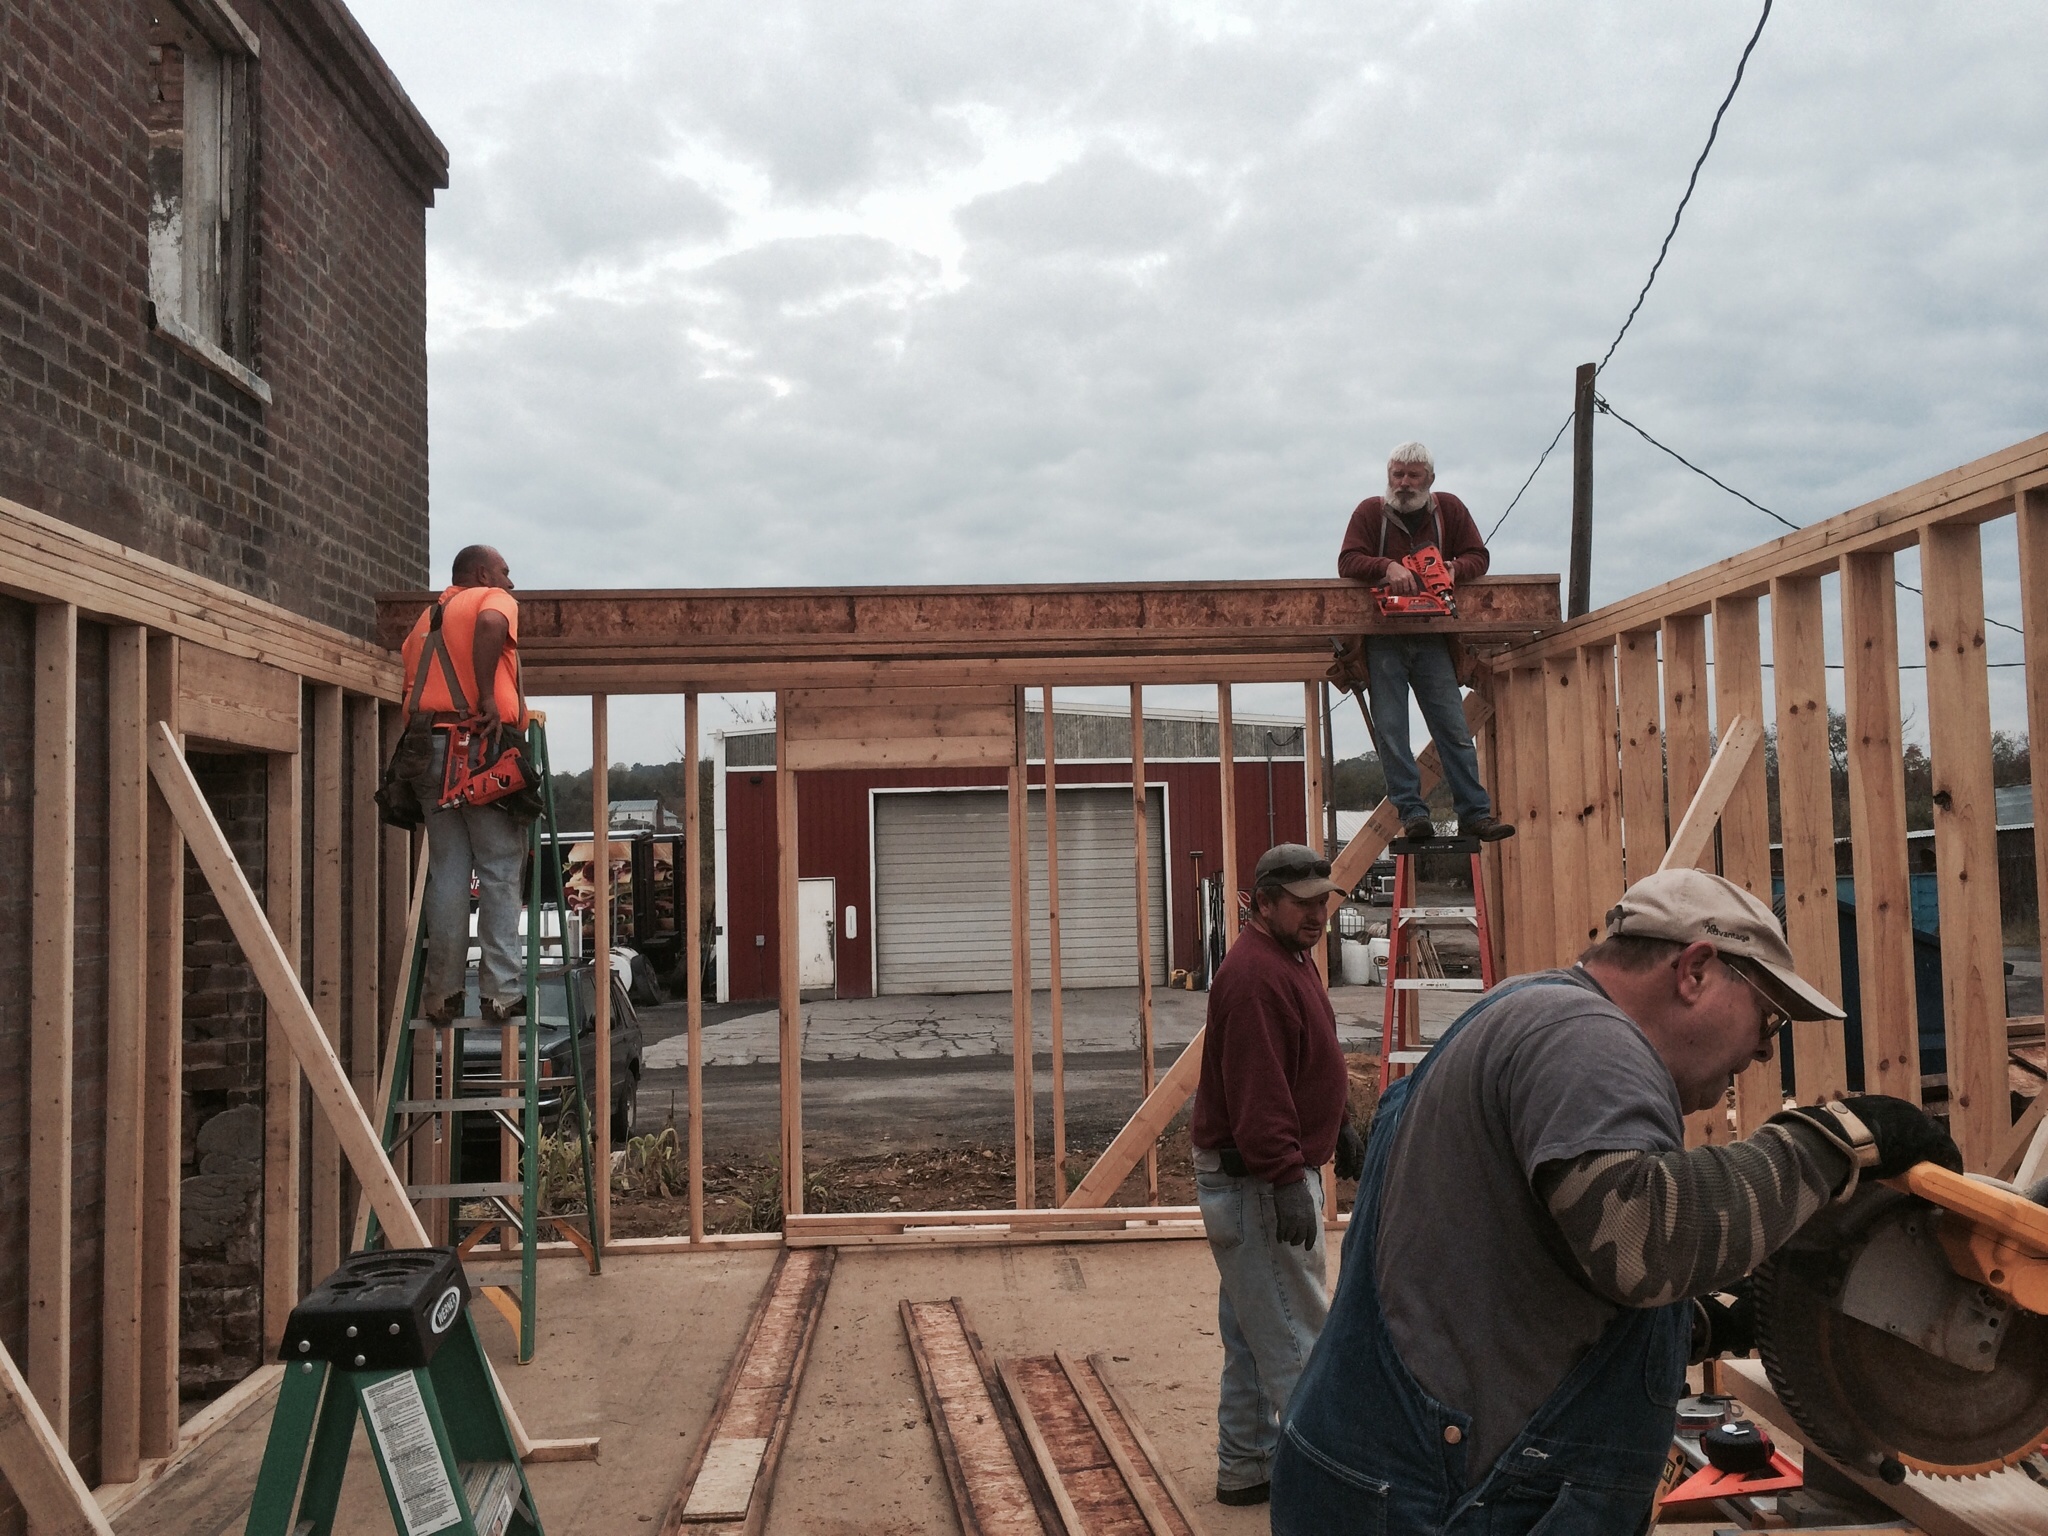
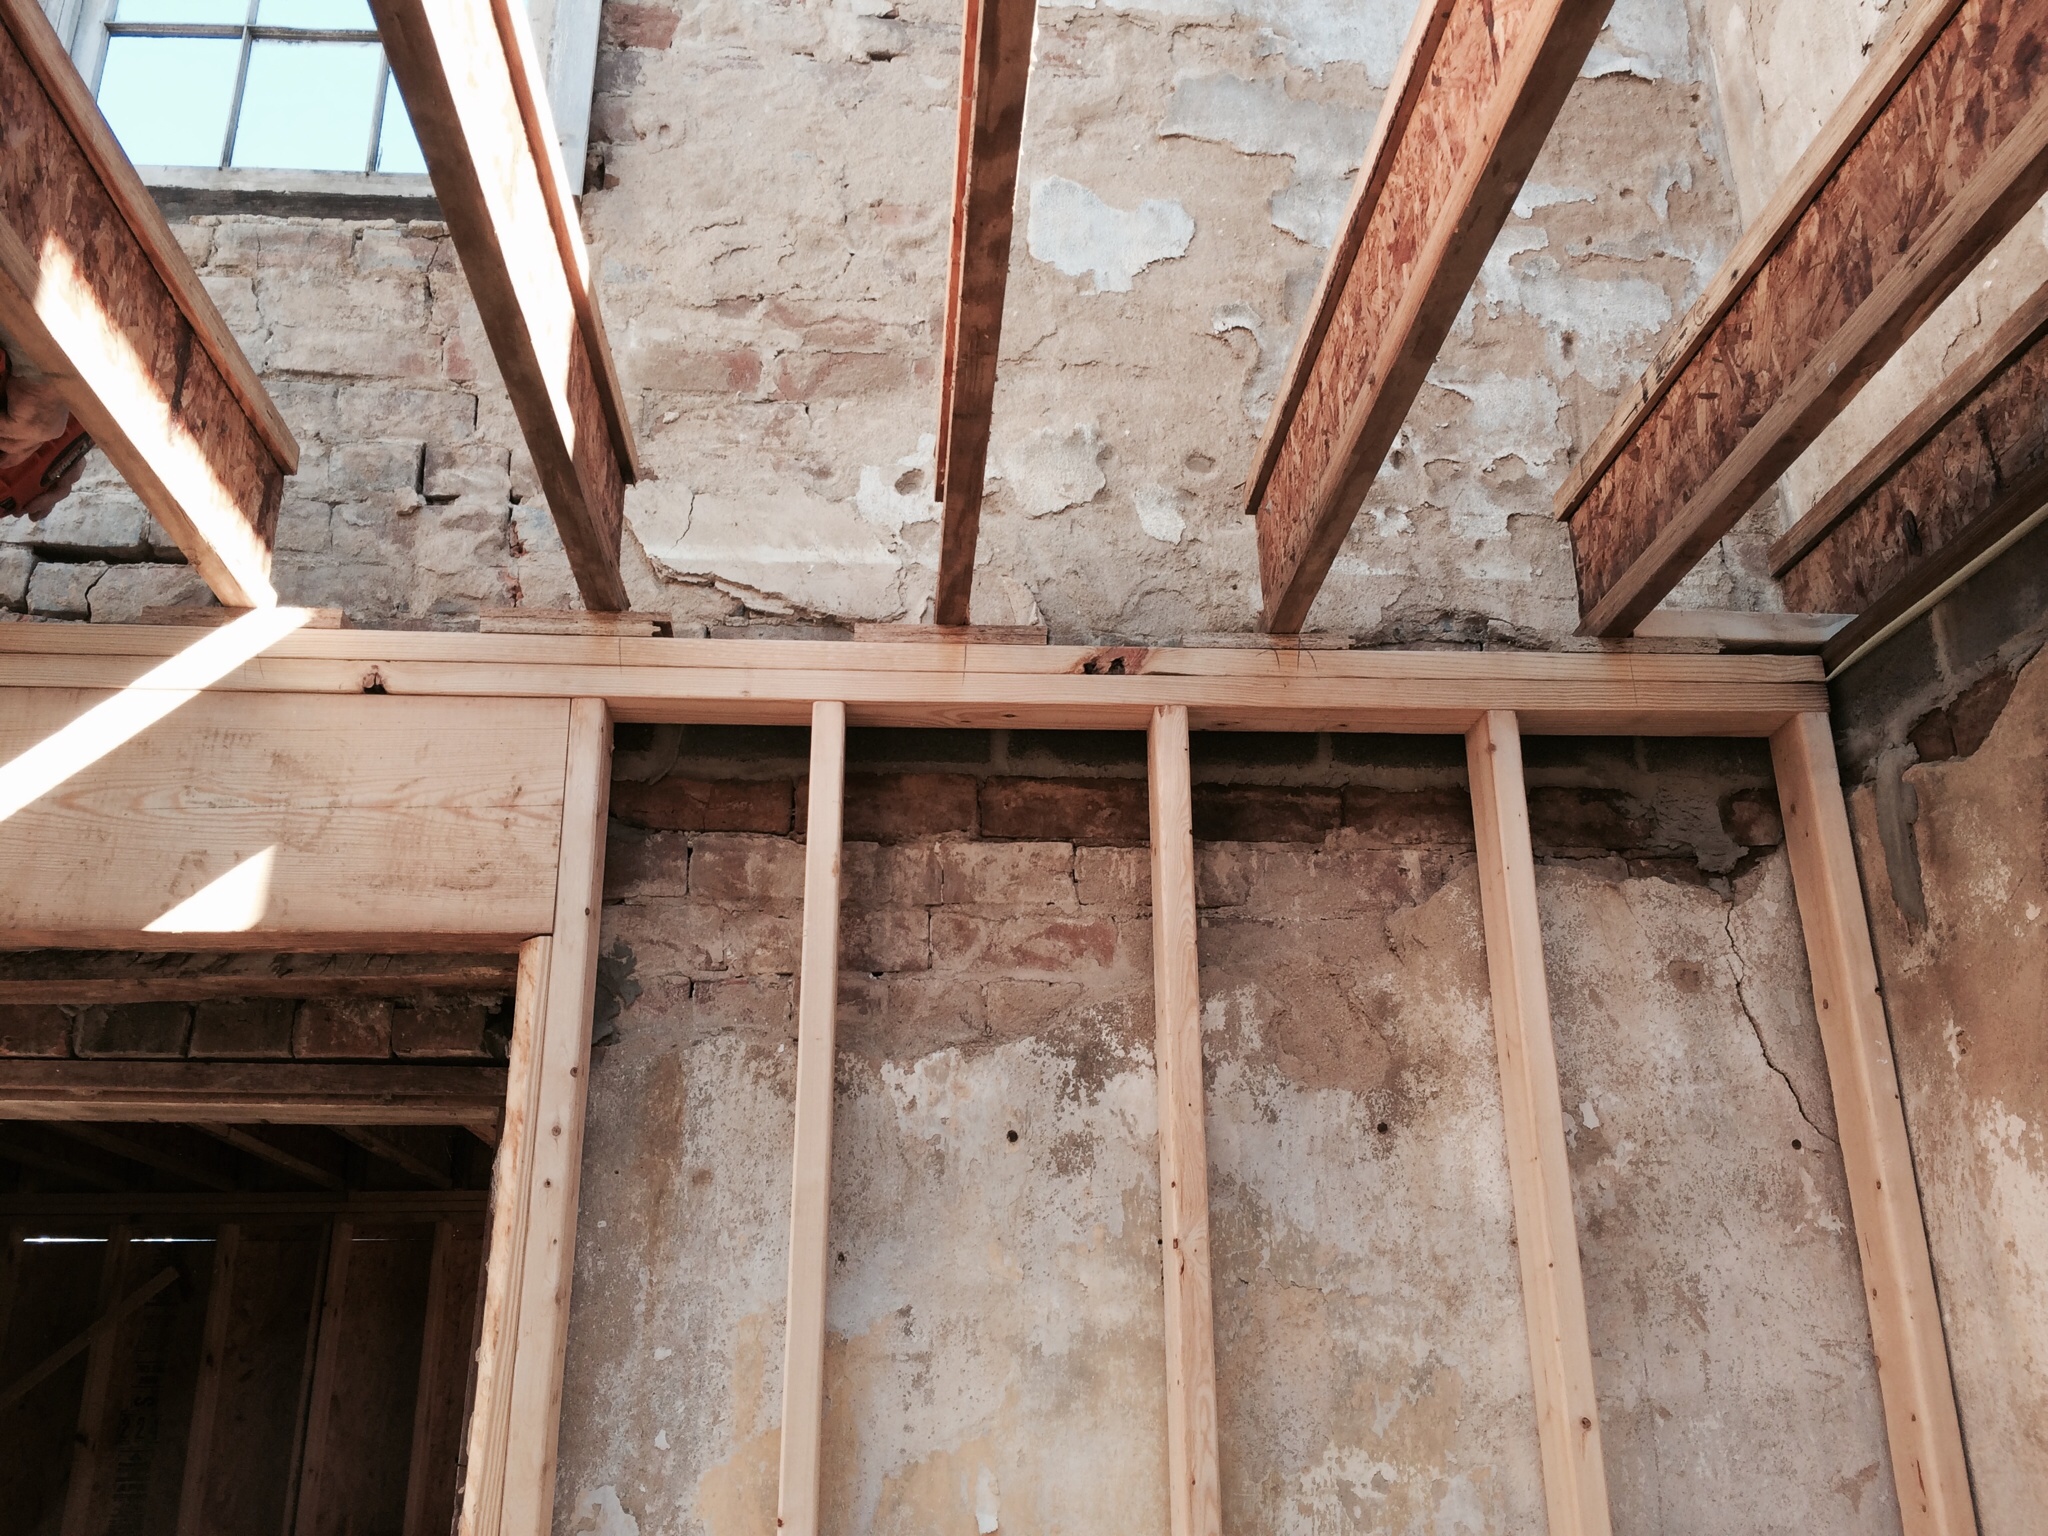
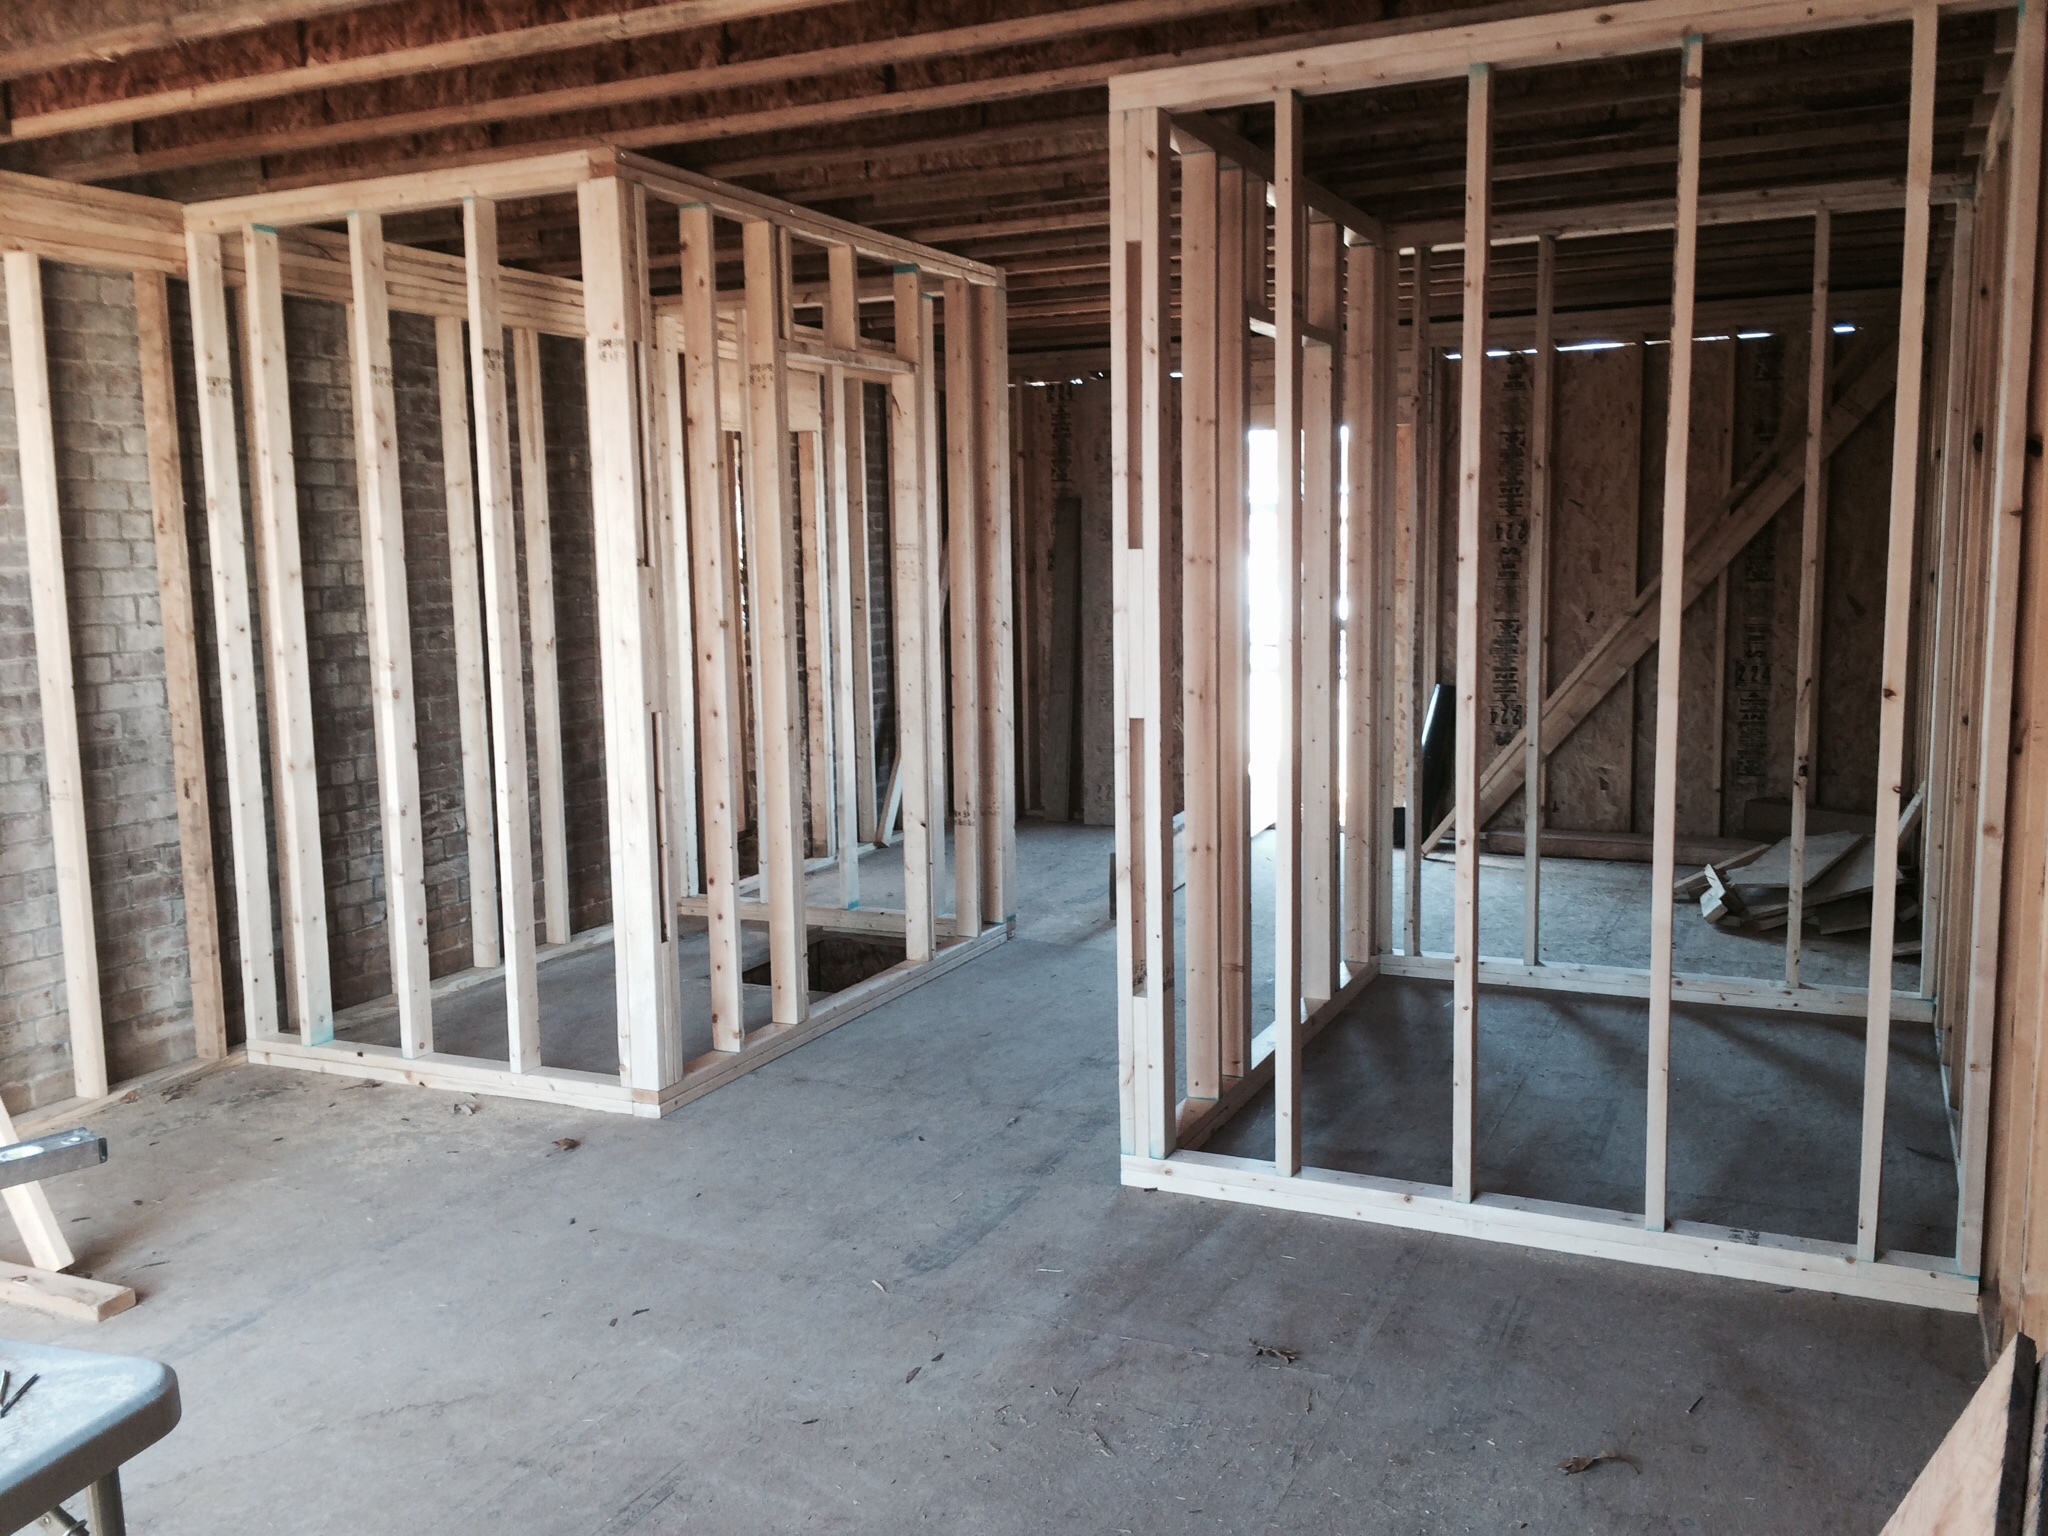
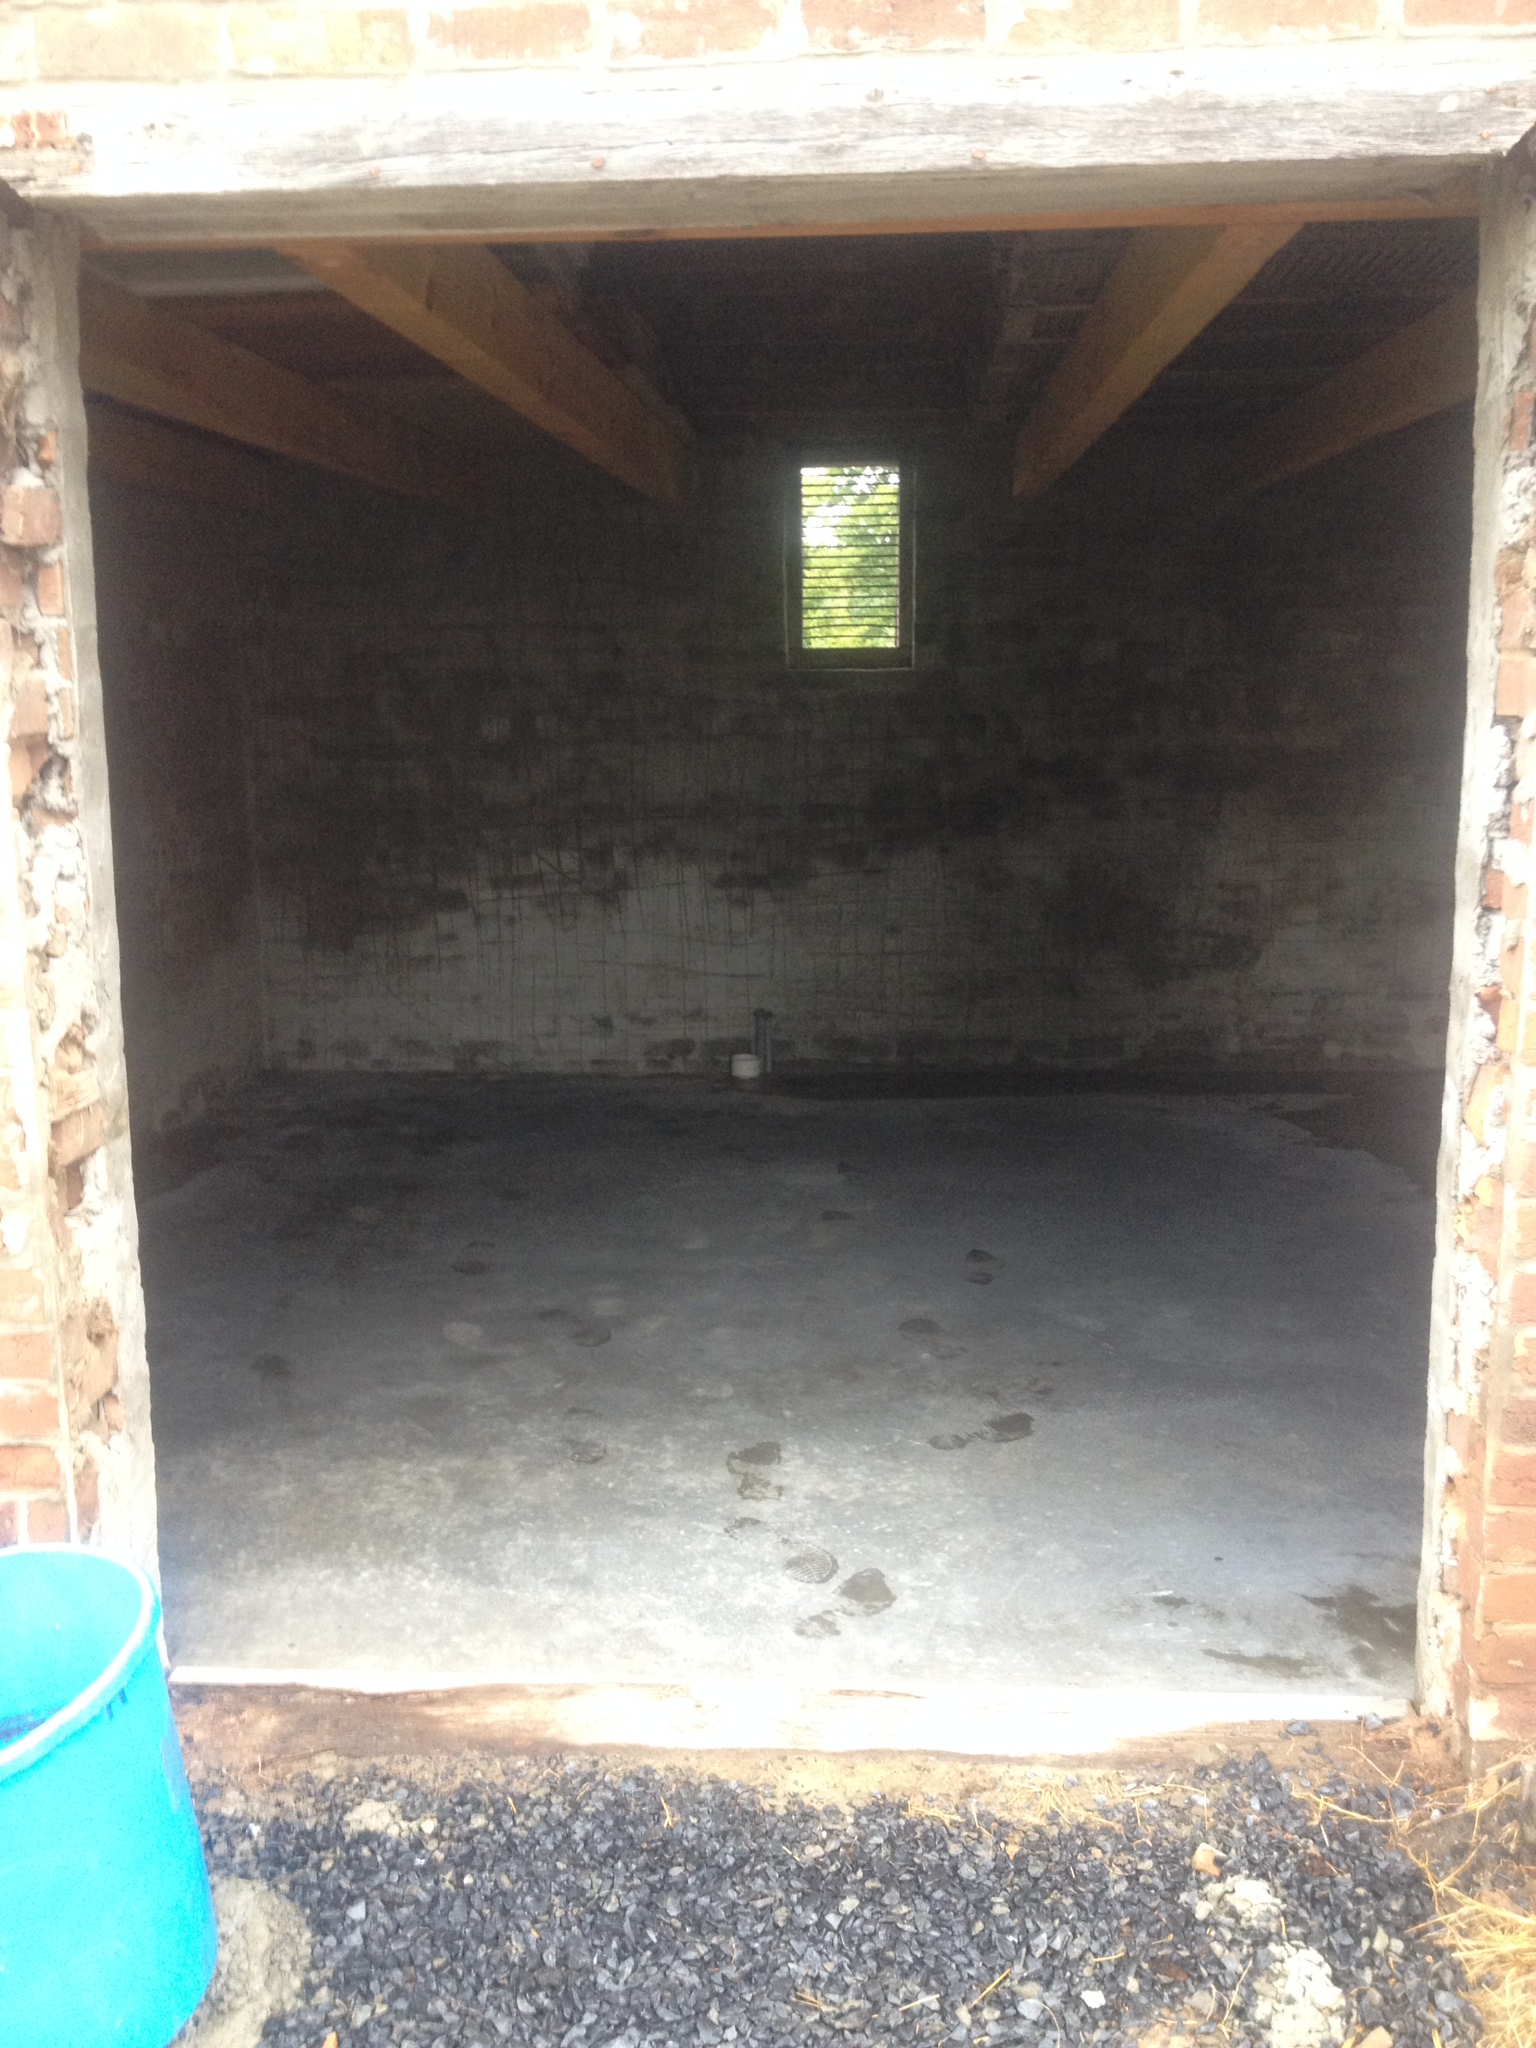
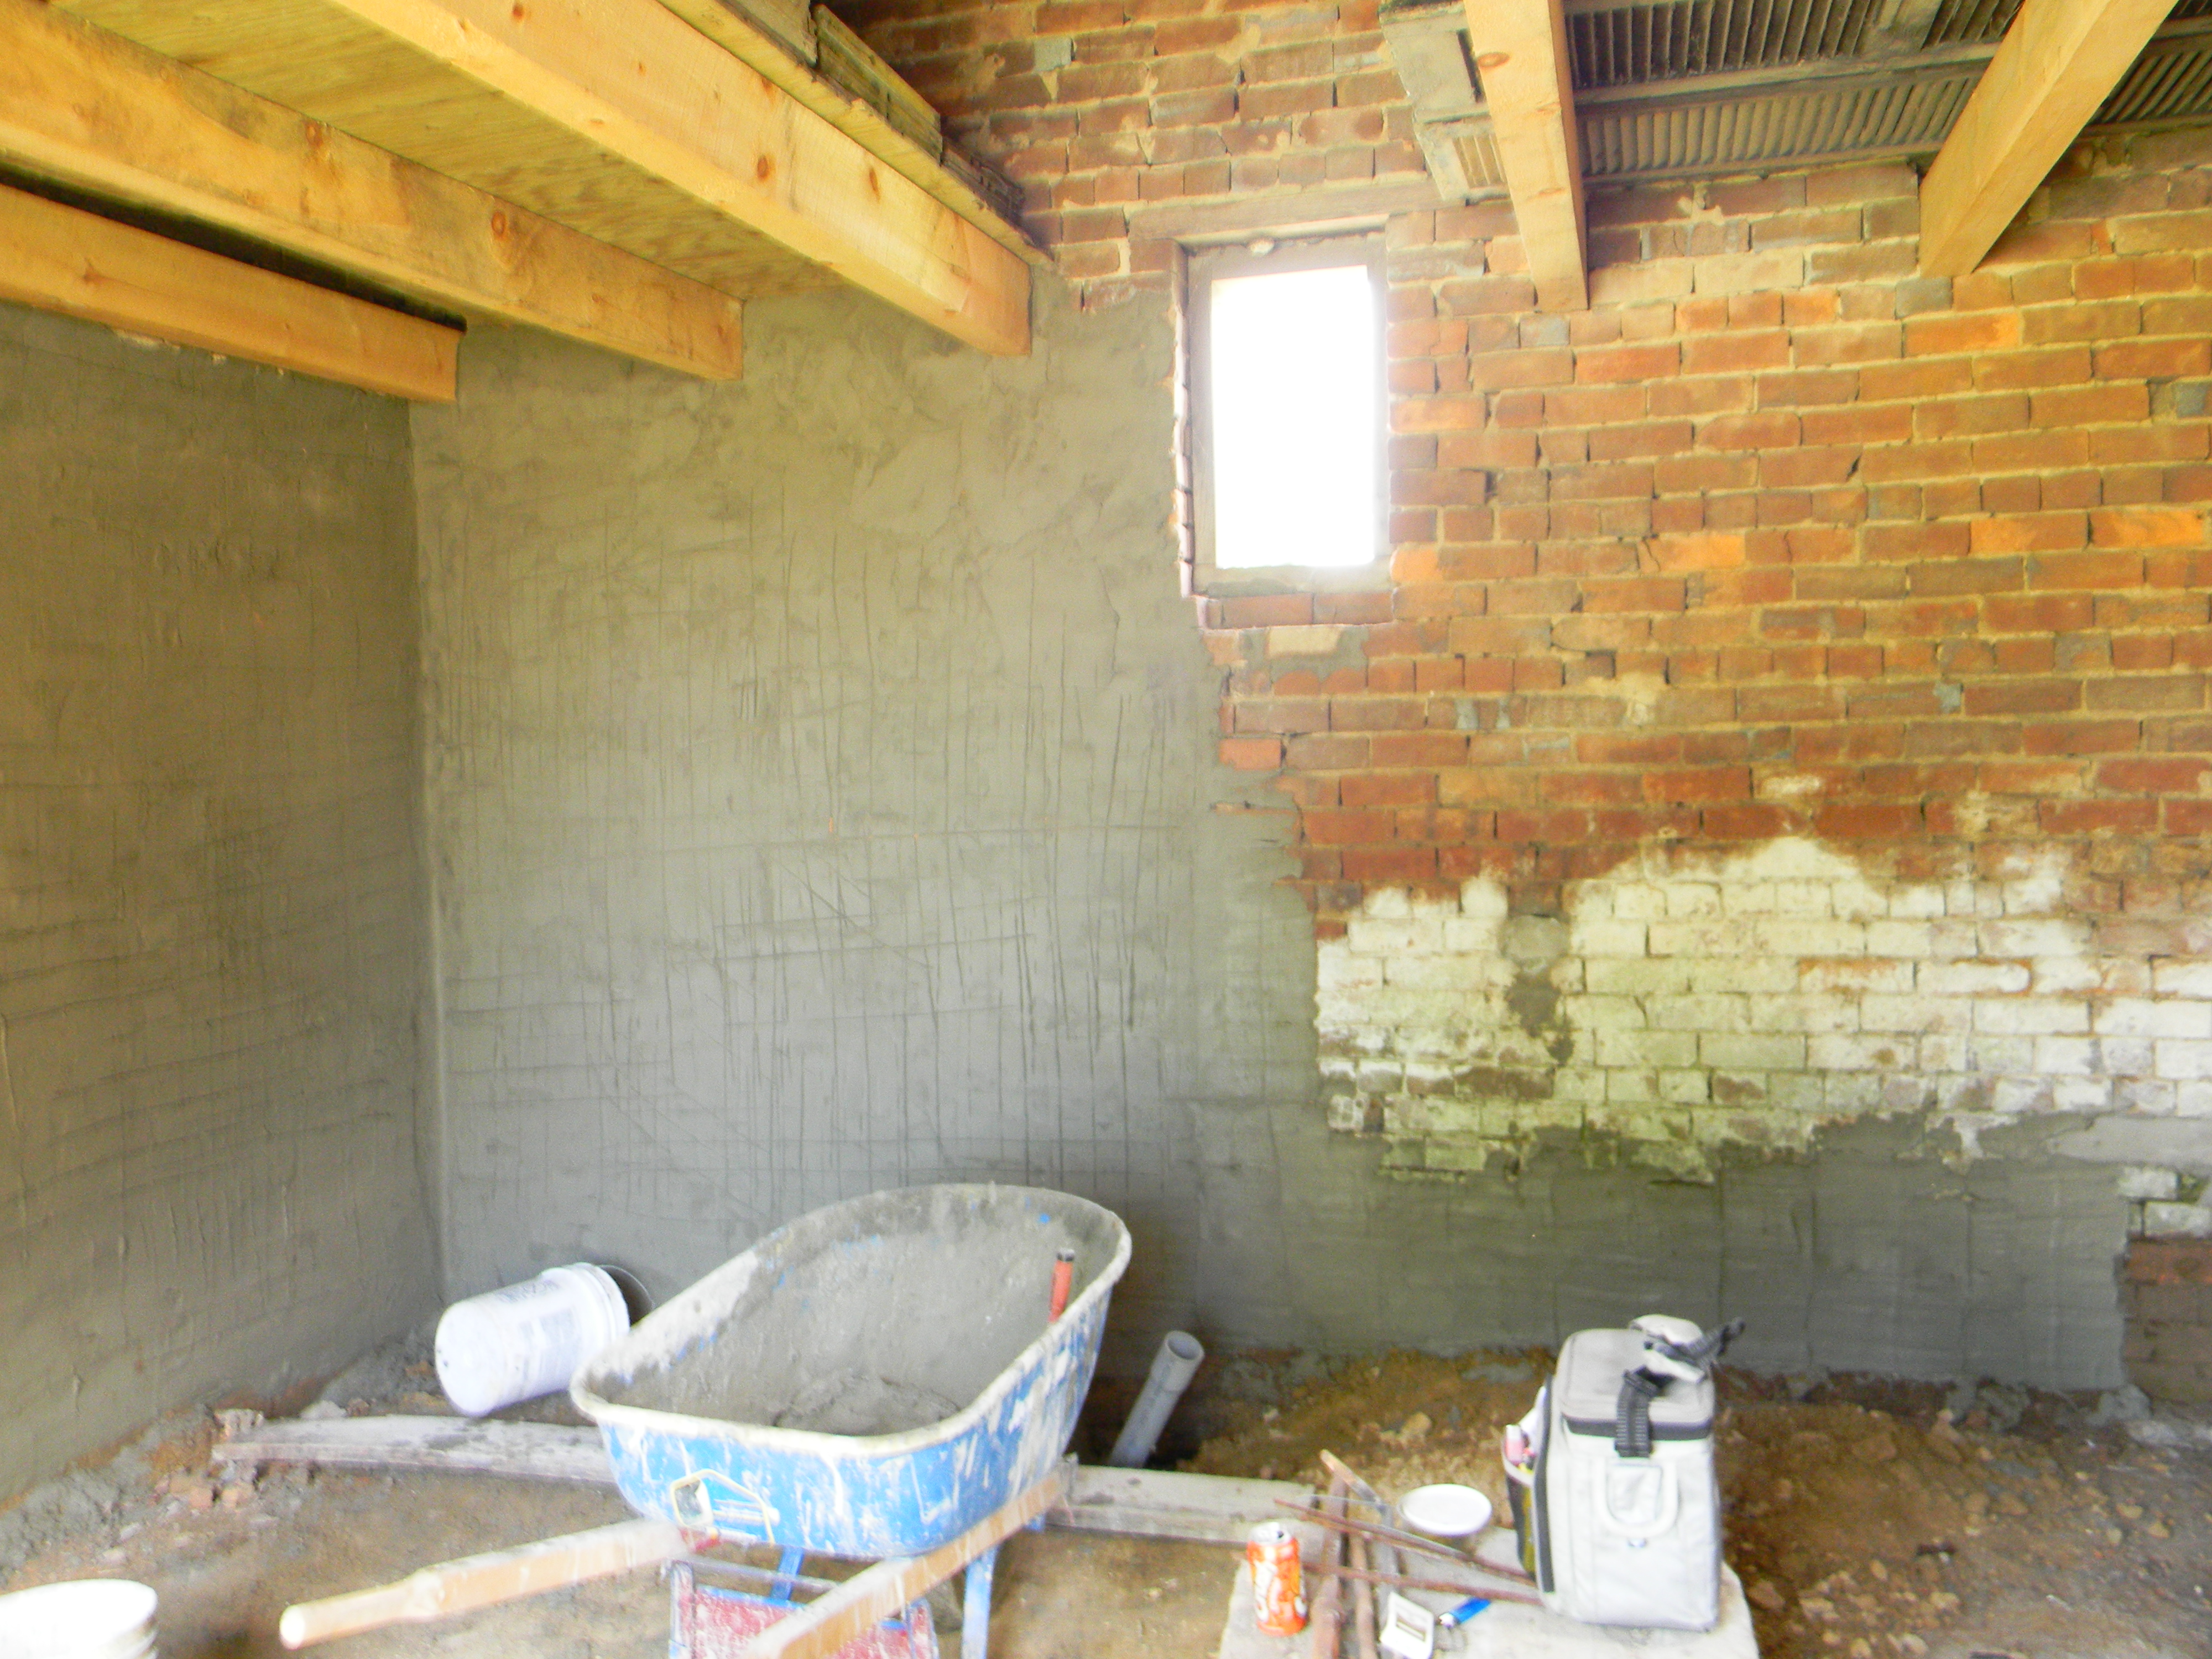
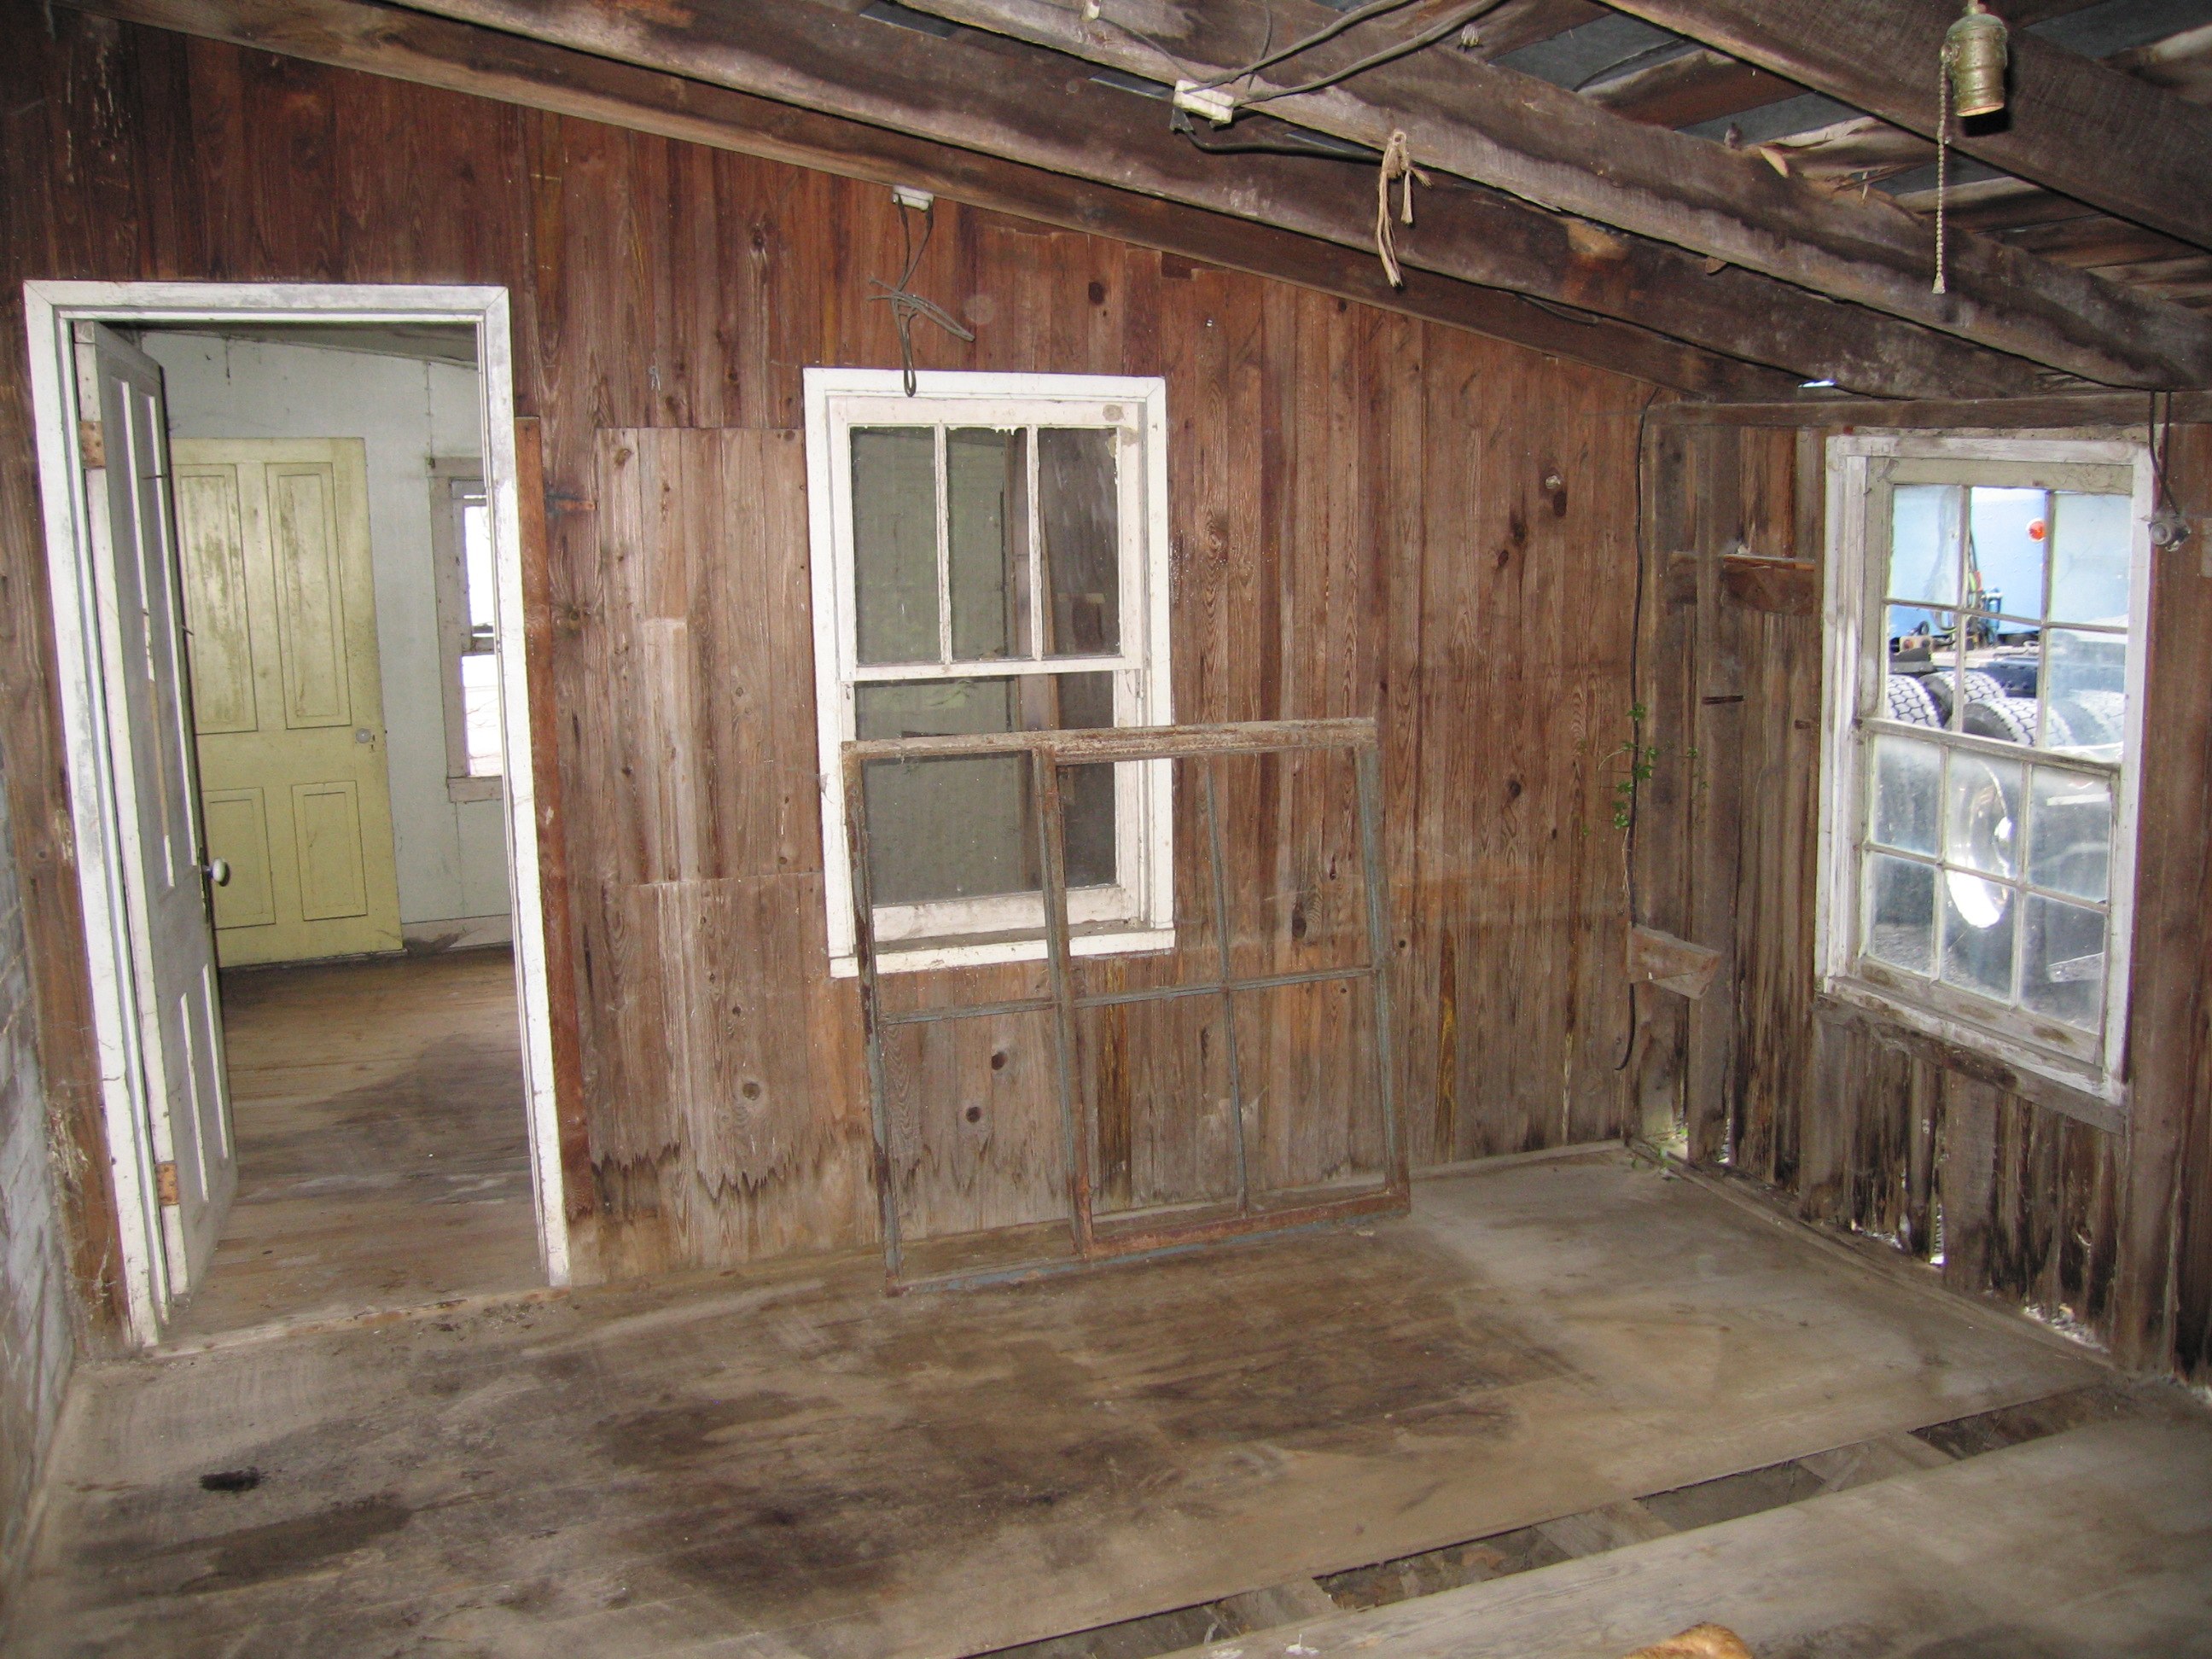
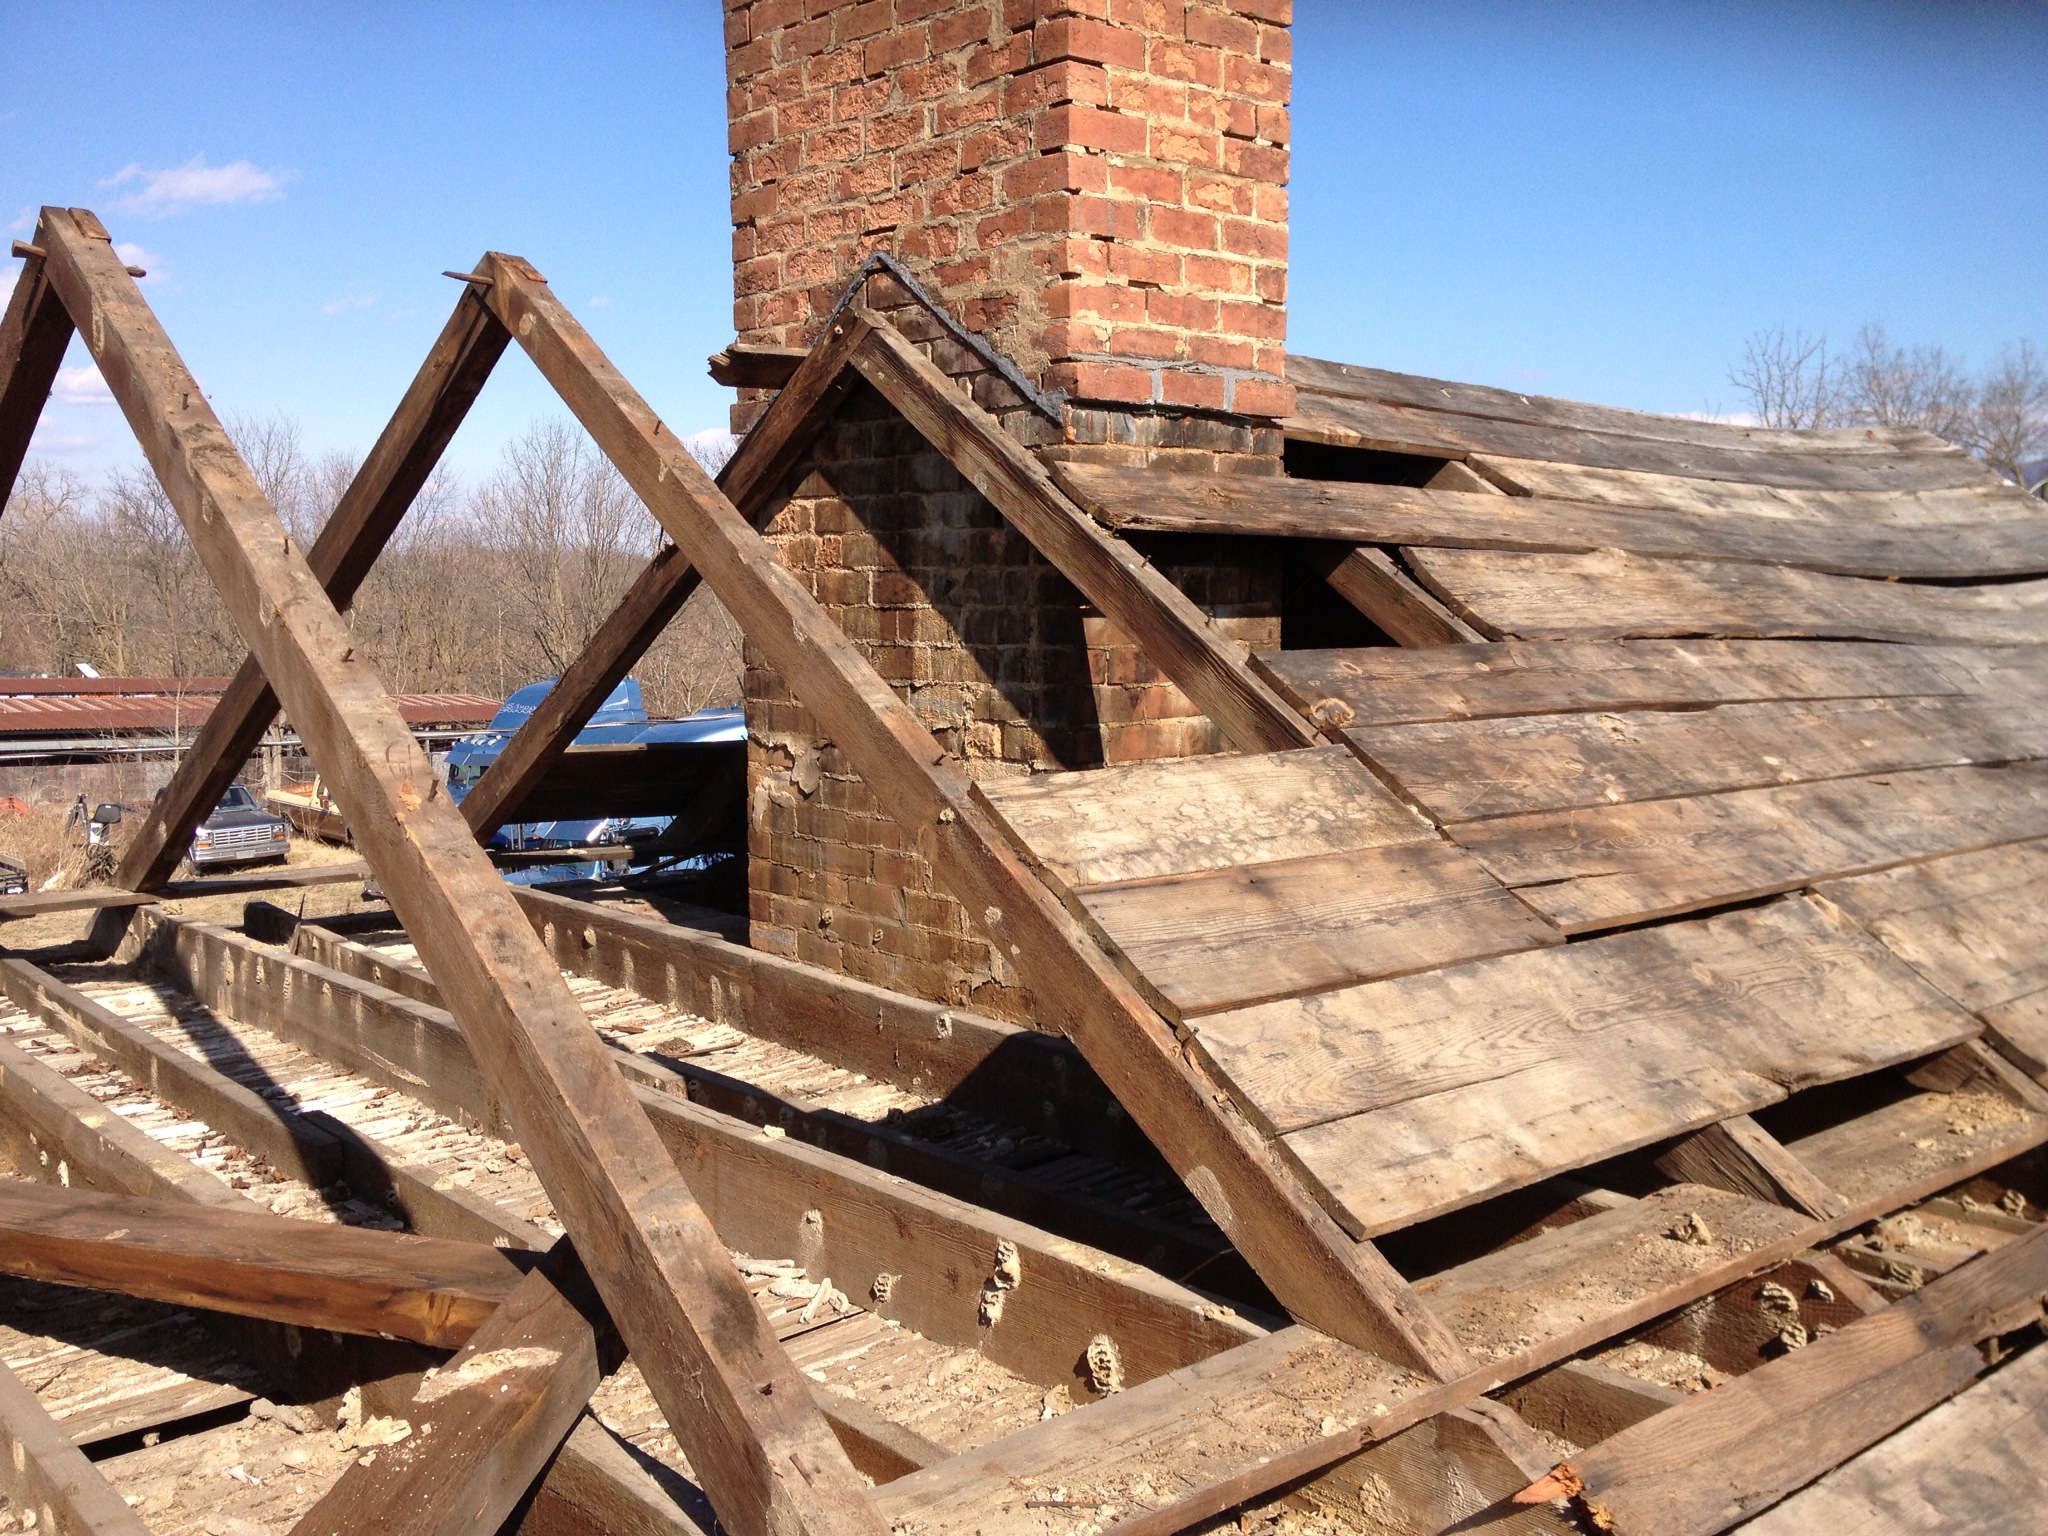
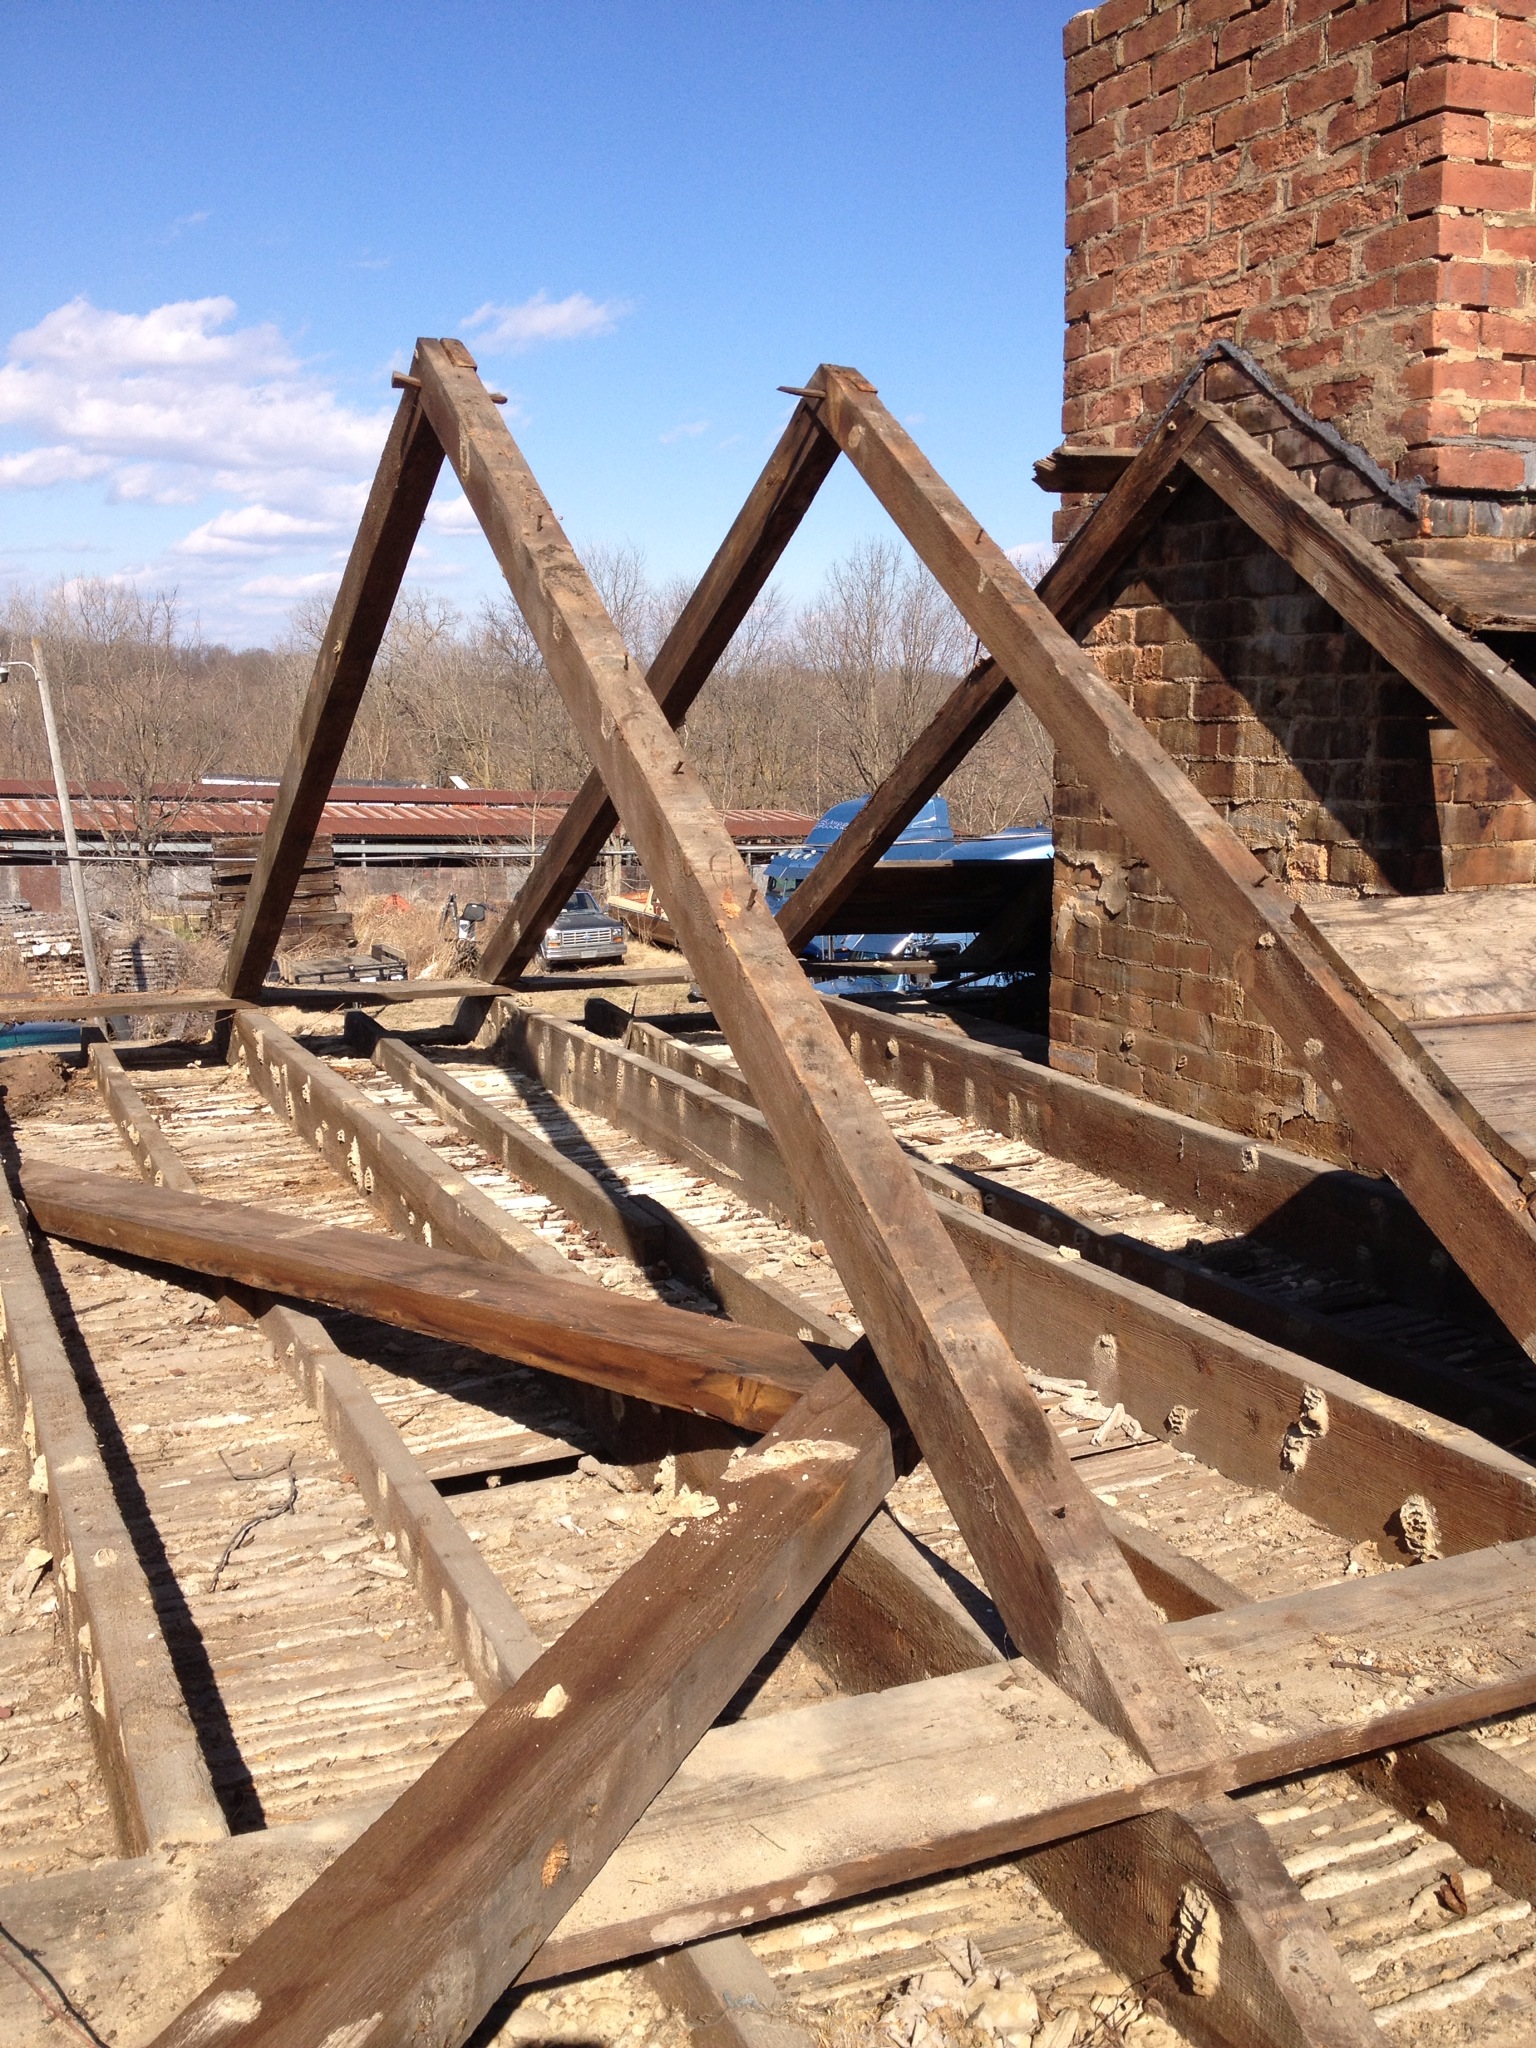
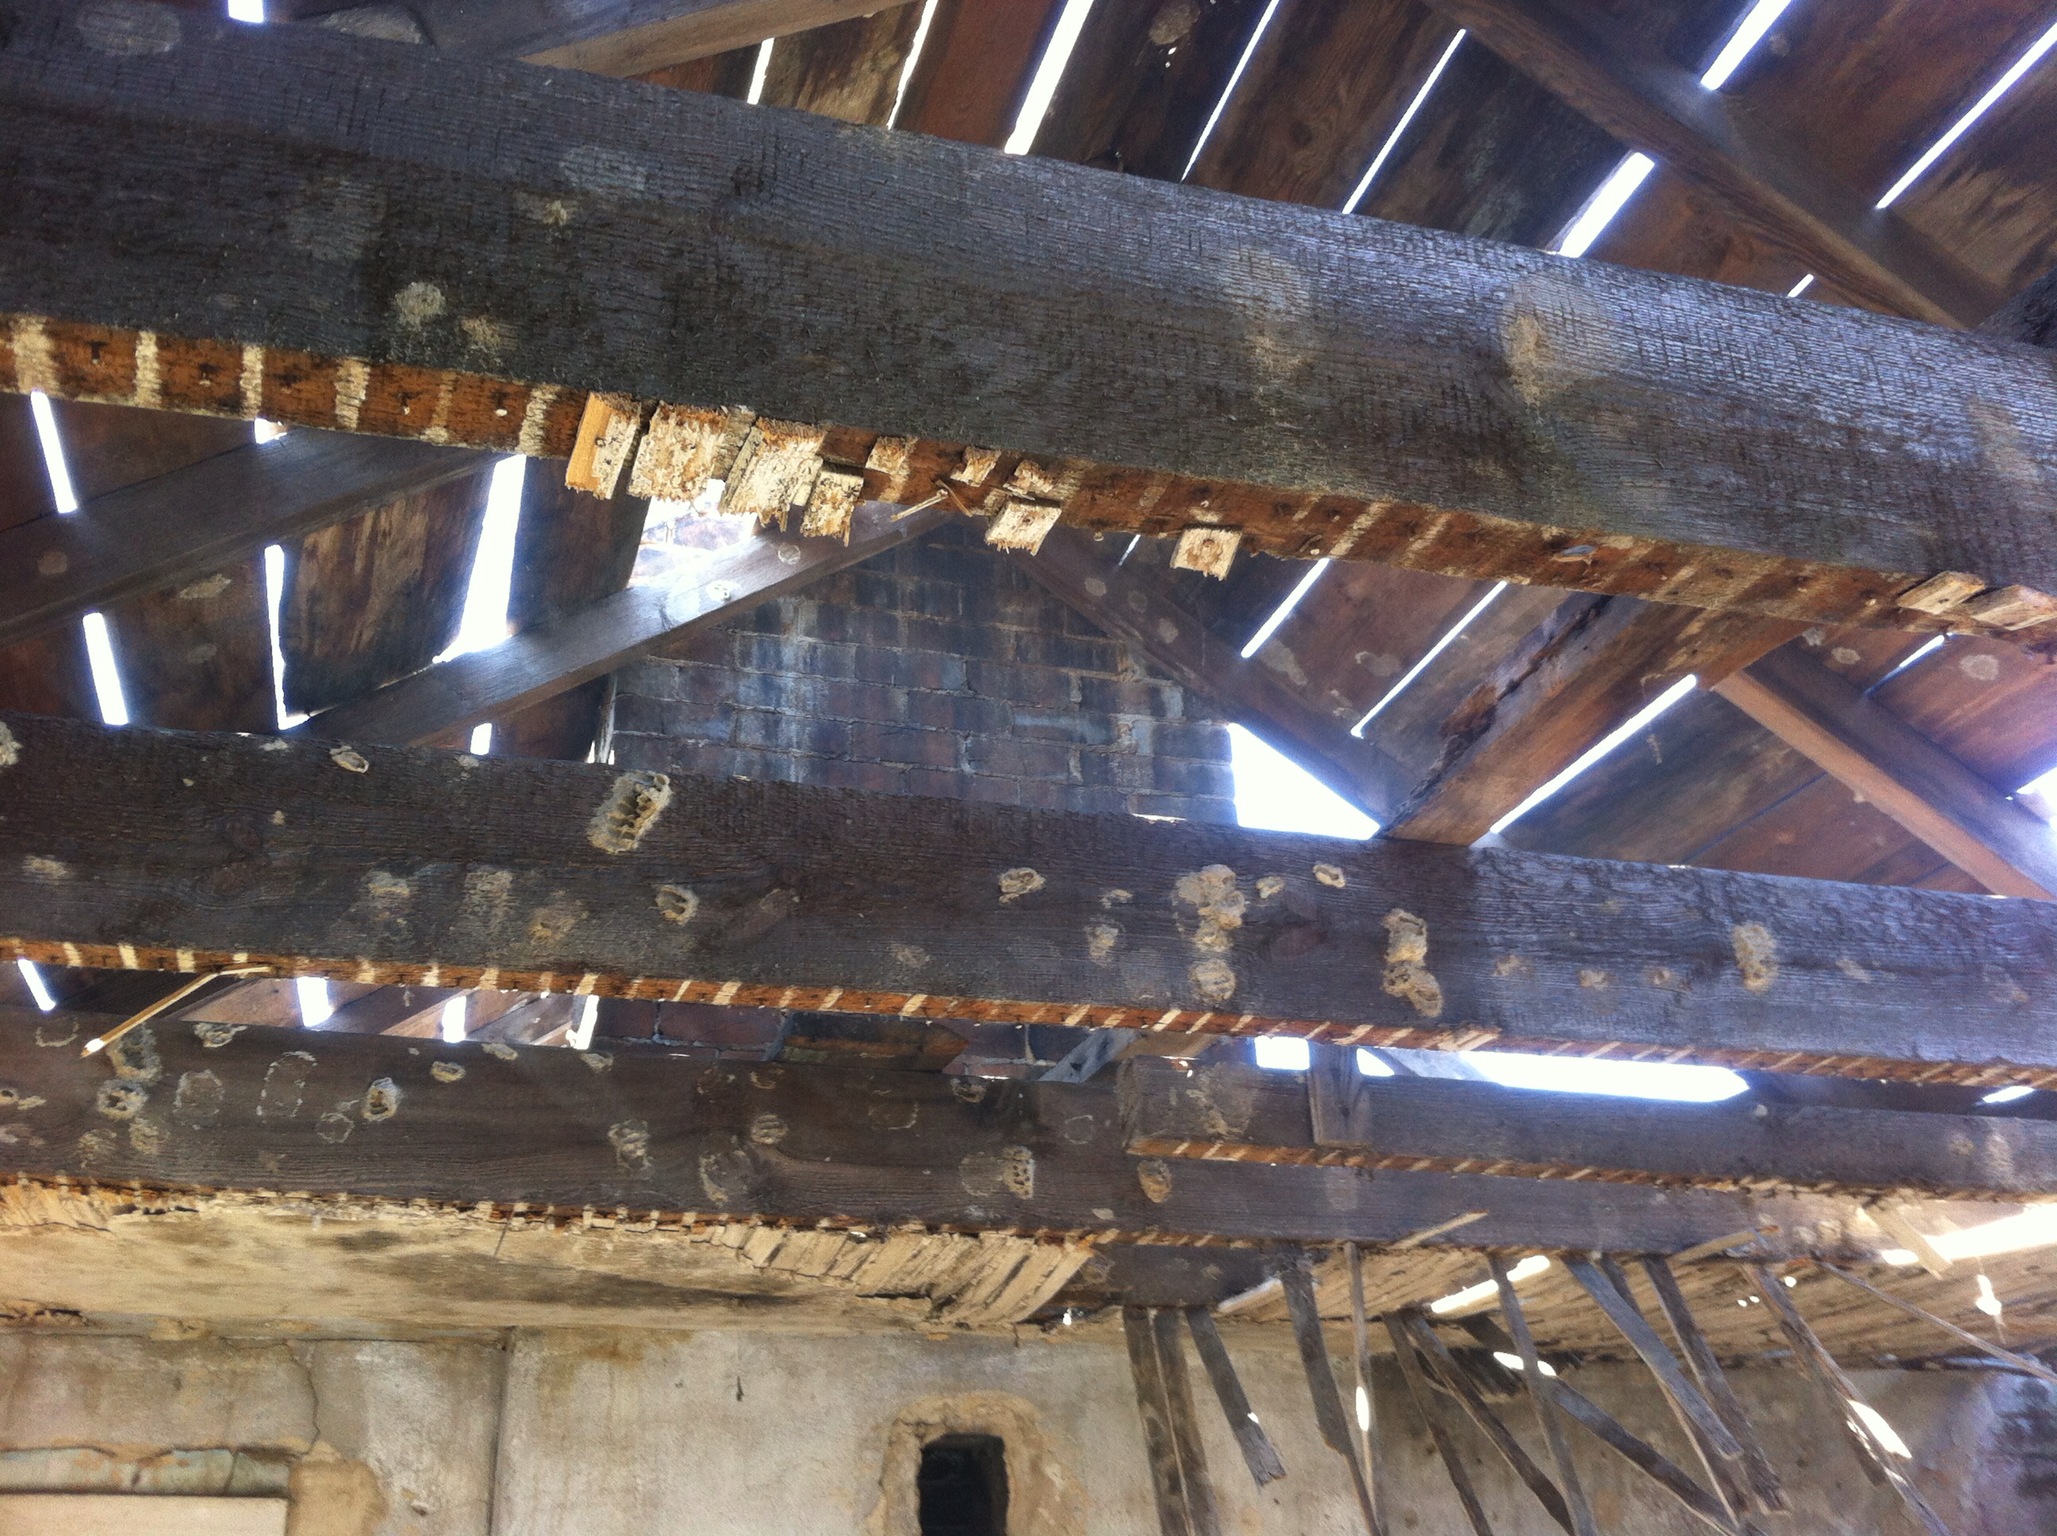
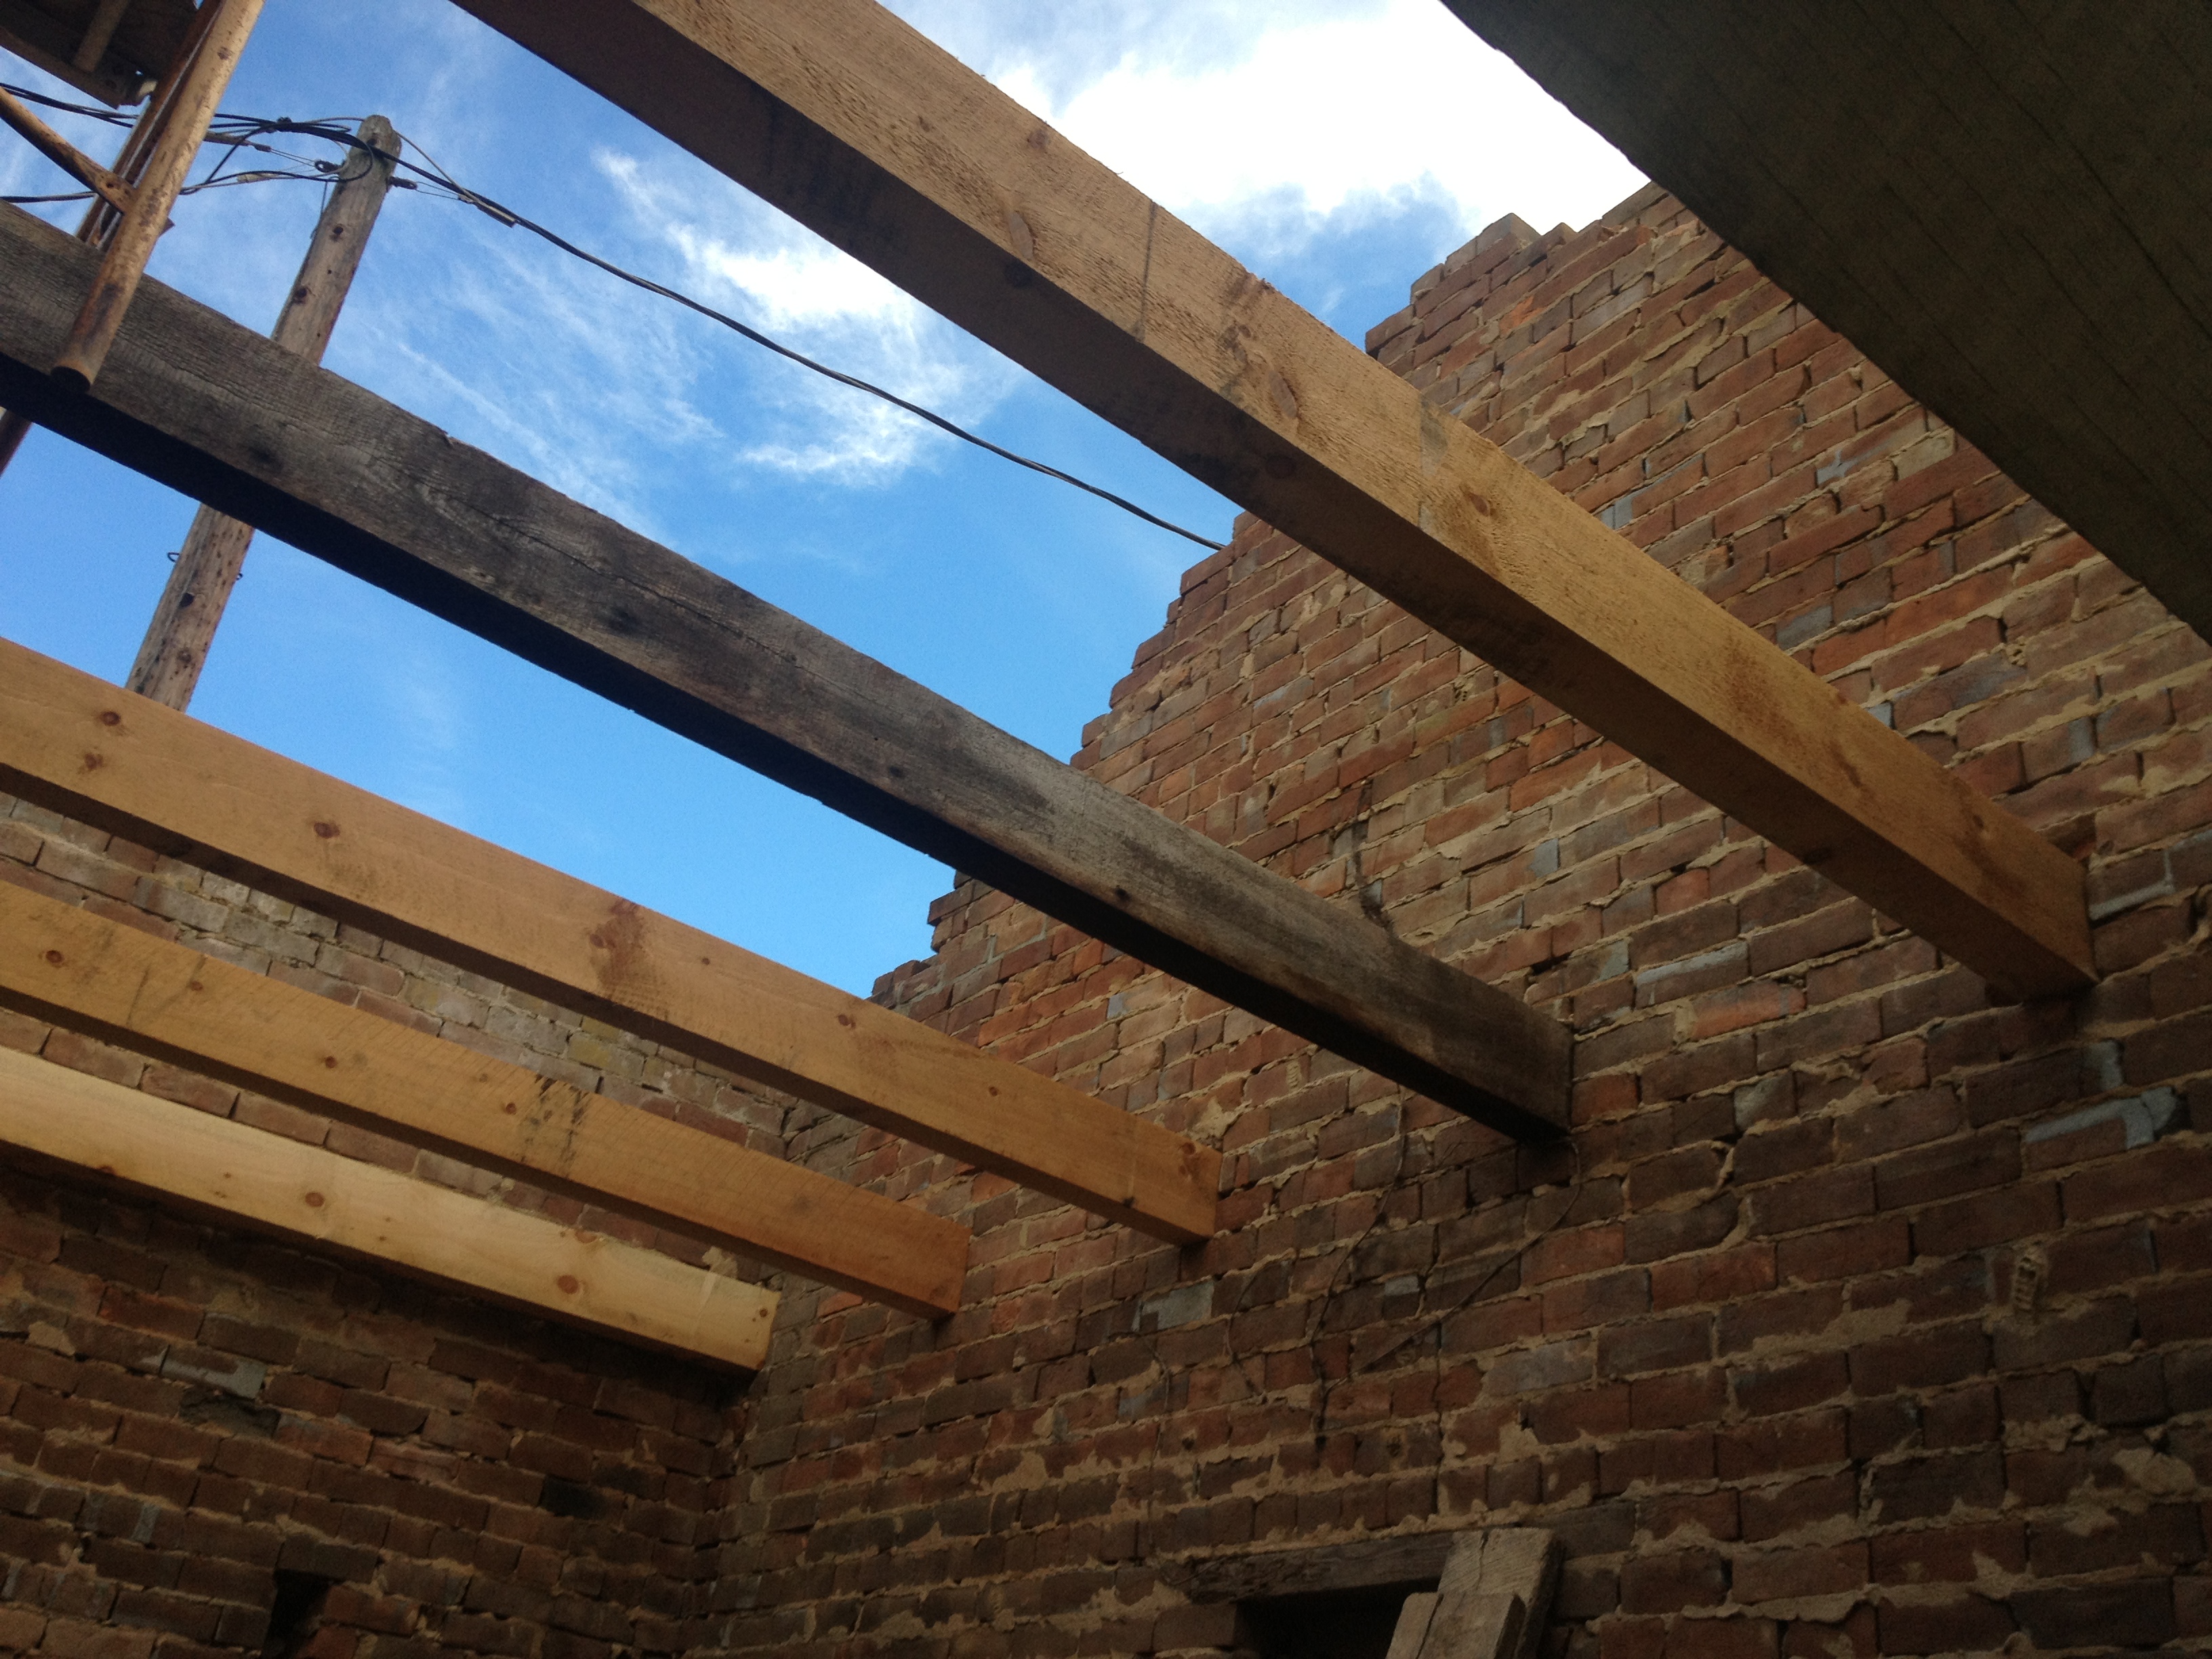
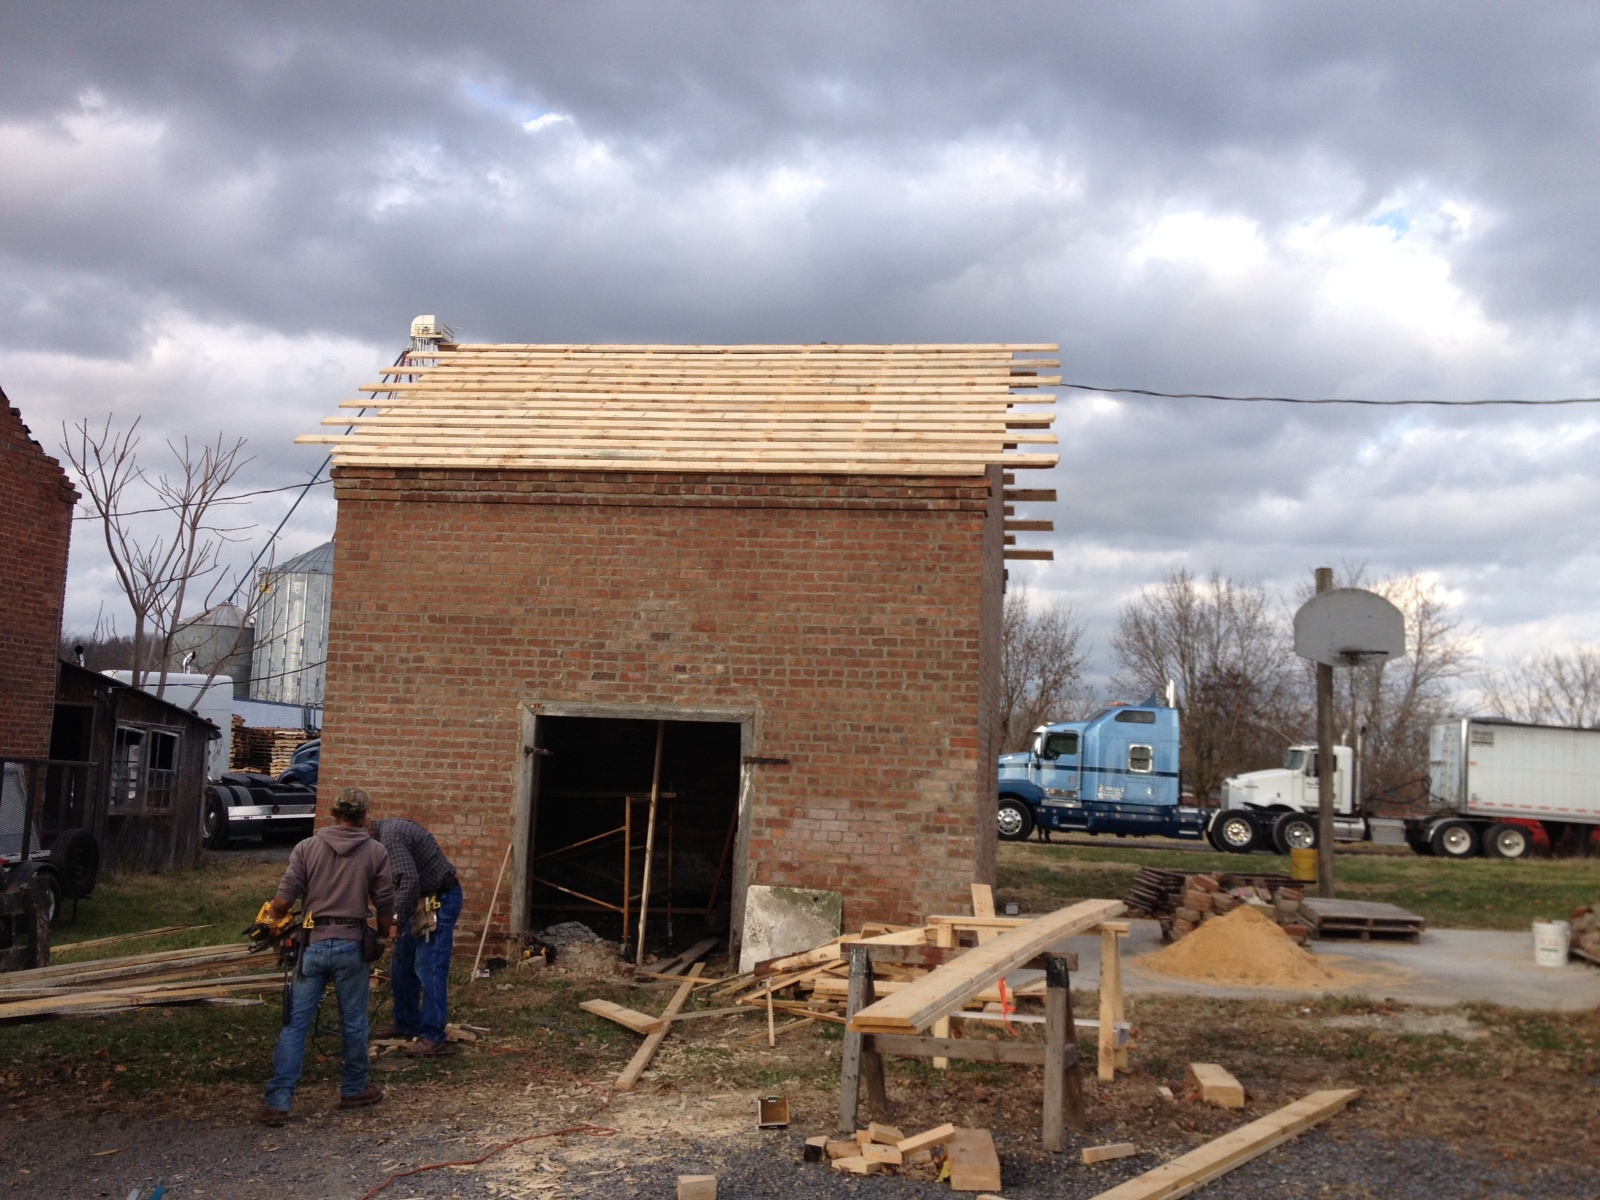
Then, it was time to start building it back up. First, the roof was removed.  This shot shows the original chimney breast windows, which had illuminated the loft in this building.  During de-construction we did not find any glazing in these windows, so the sashes had either been long removed, or the openings may have just been shuttered with no glass.

IMG_0896

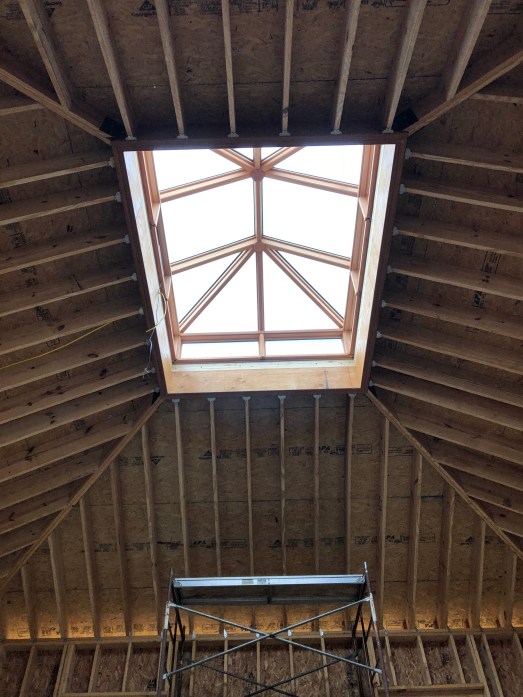
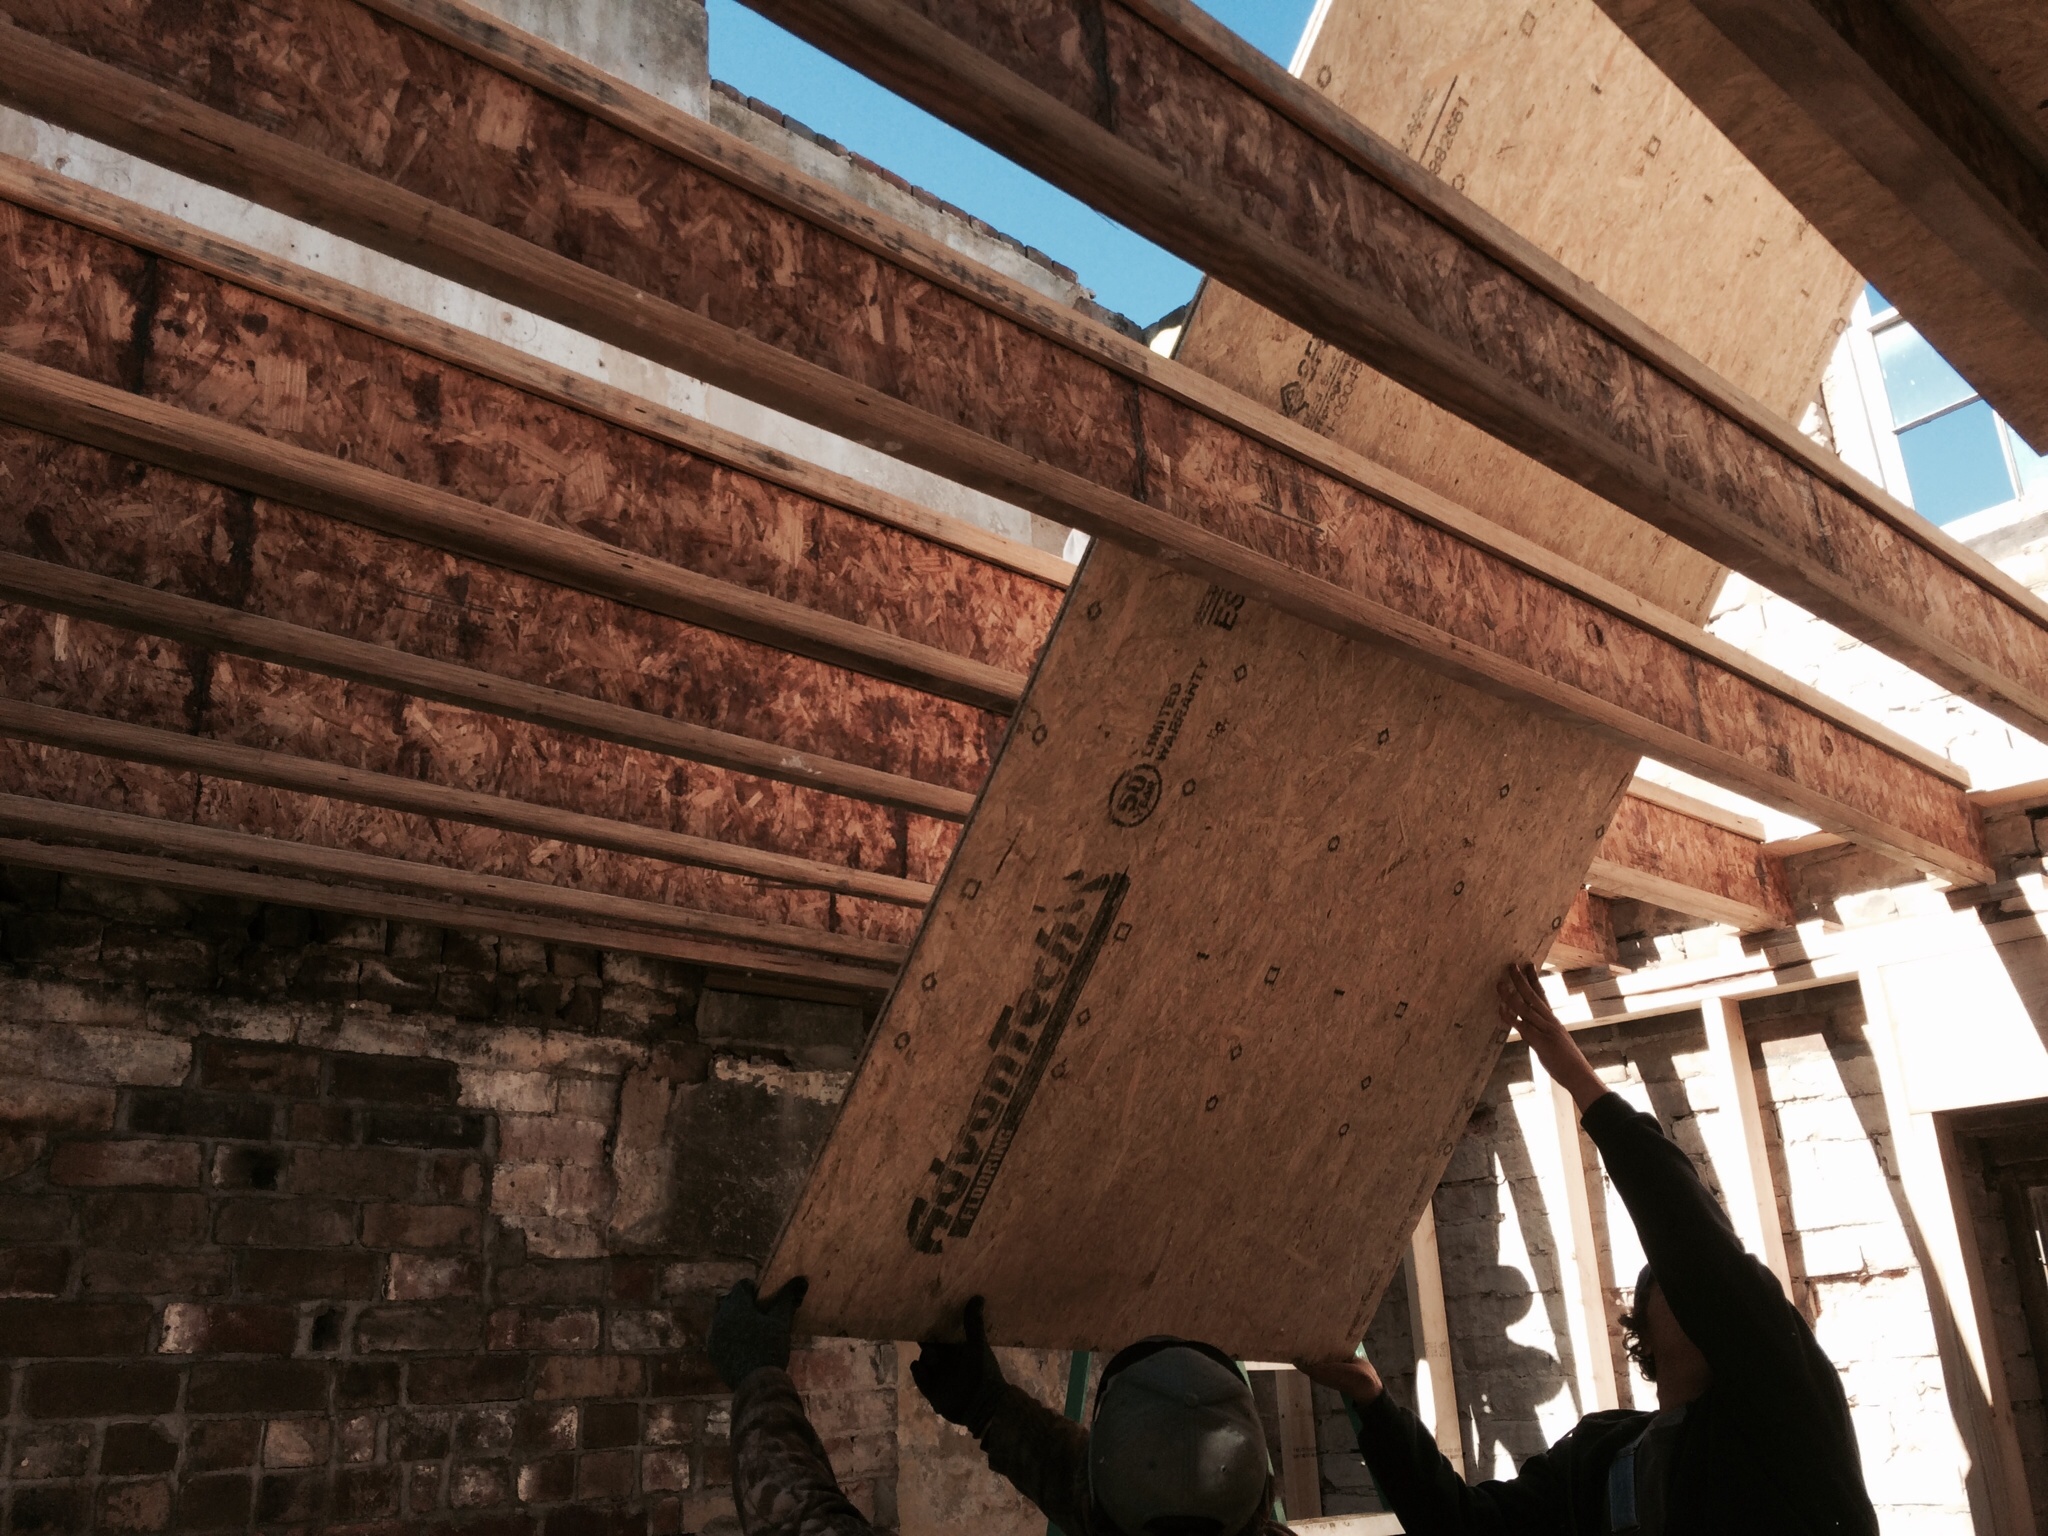
Many historic Shenandoah Valley homes have these small windows, and we knew immediately that we wanted them to shine light into the new space.  As a result, wse had the builder frame a vaulted roof for the space that would not obstruct the windows.

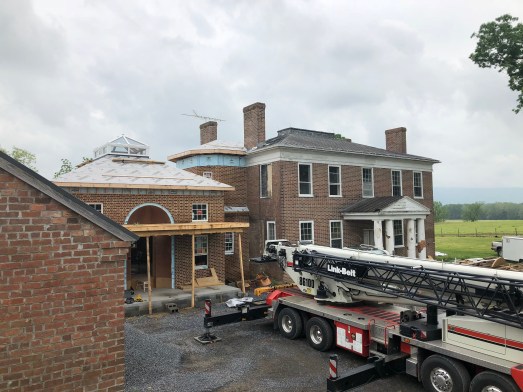
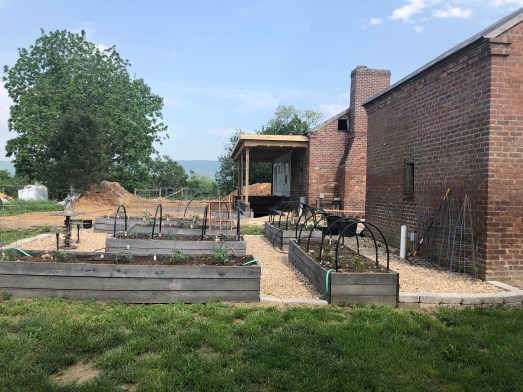
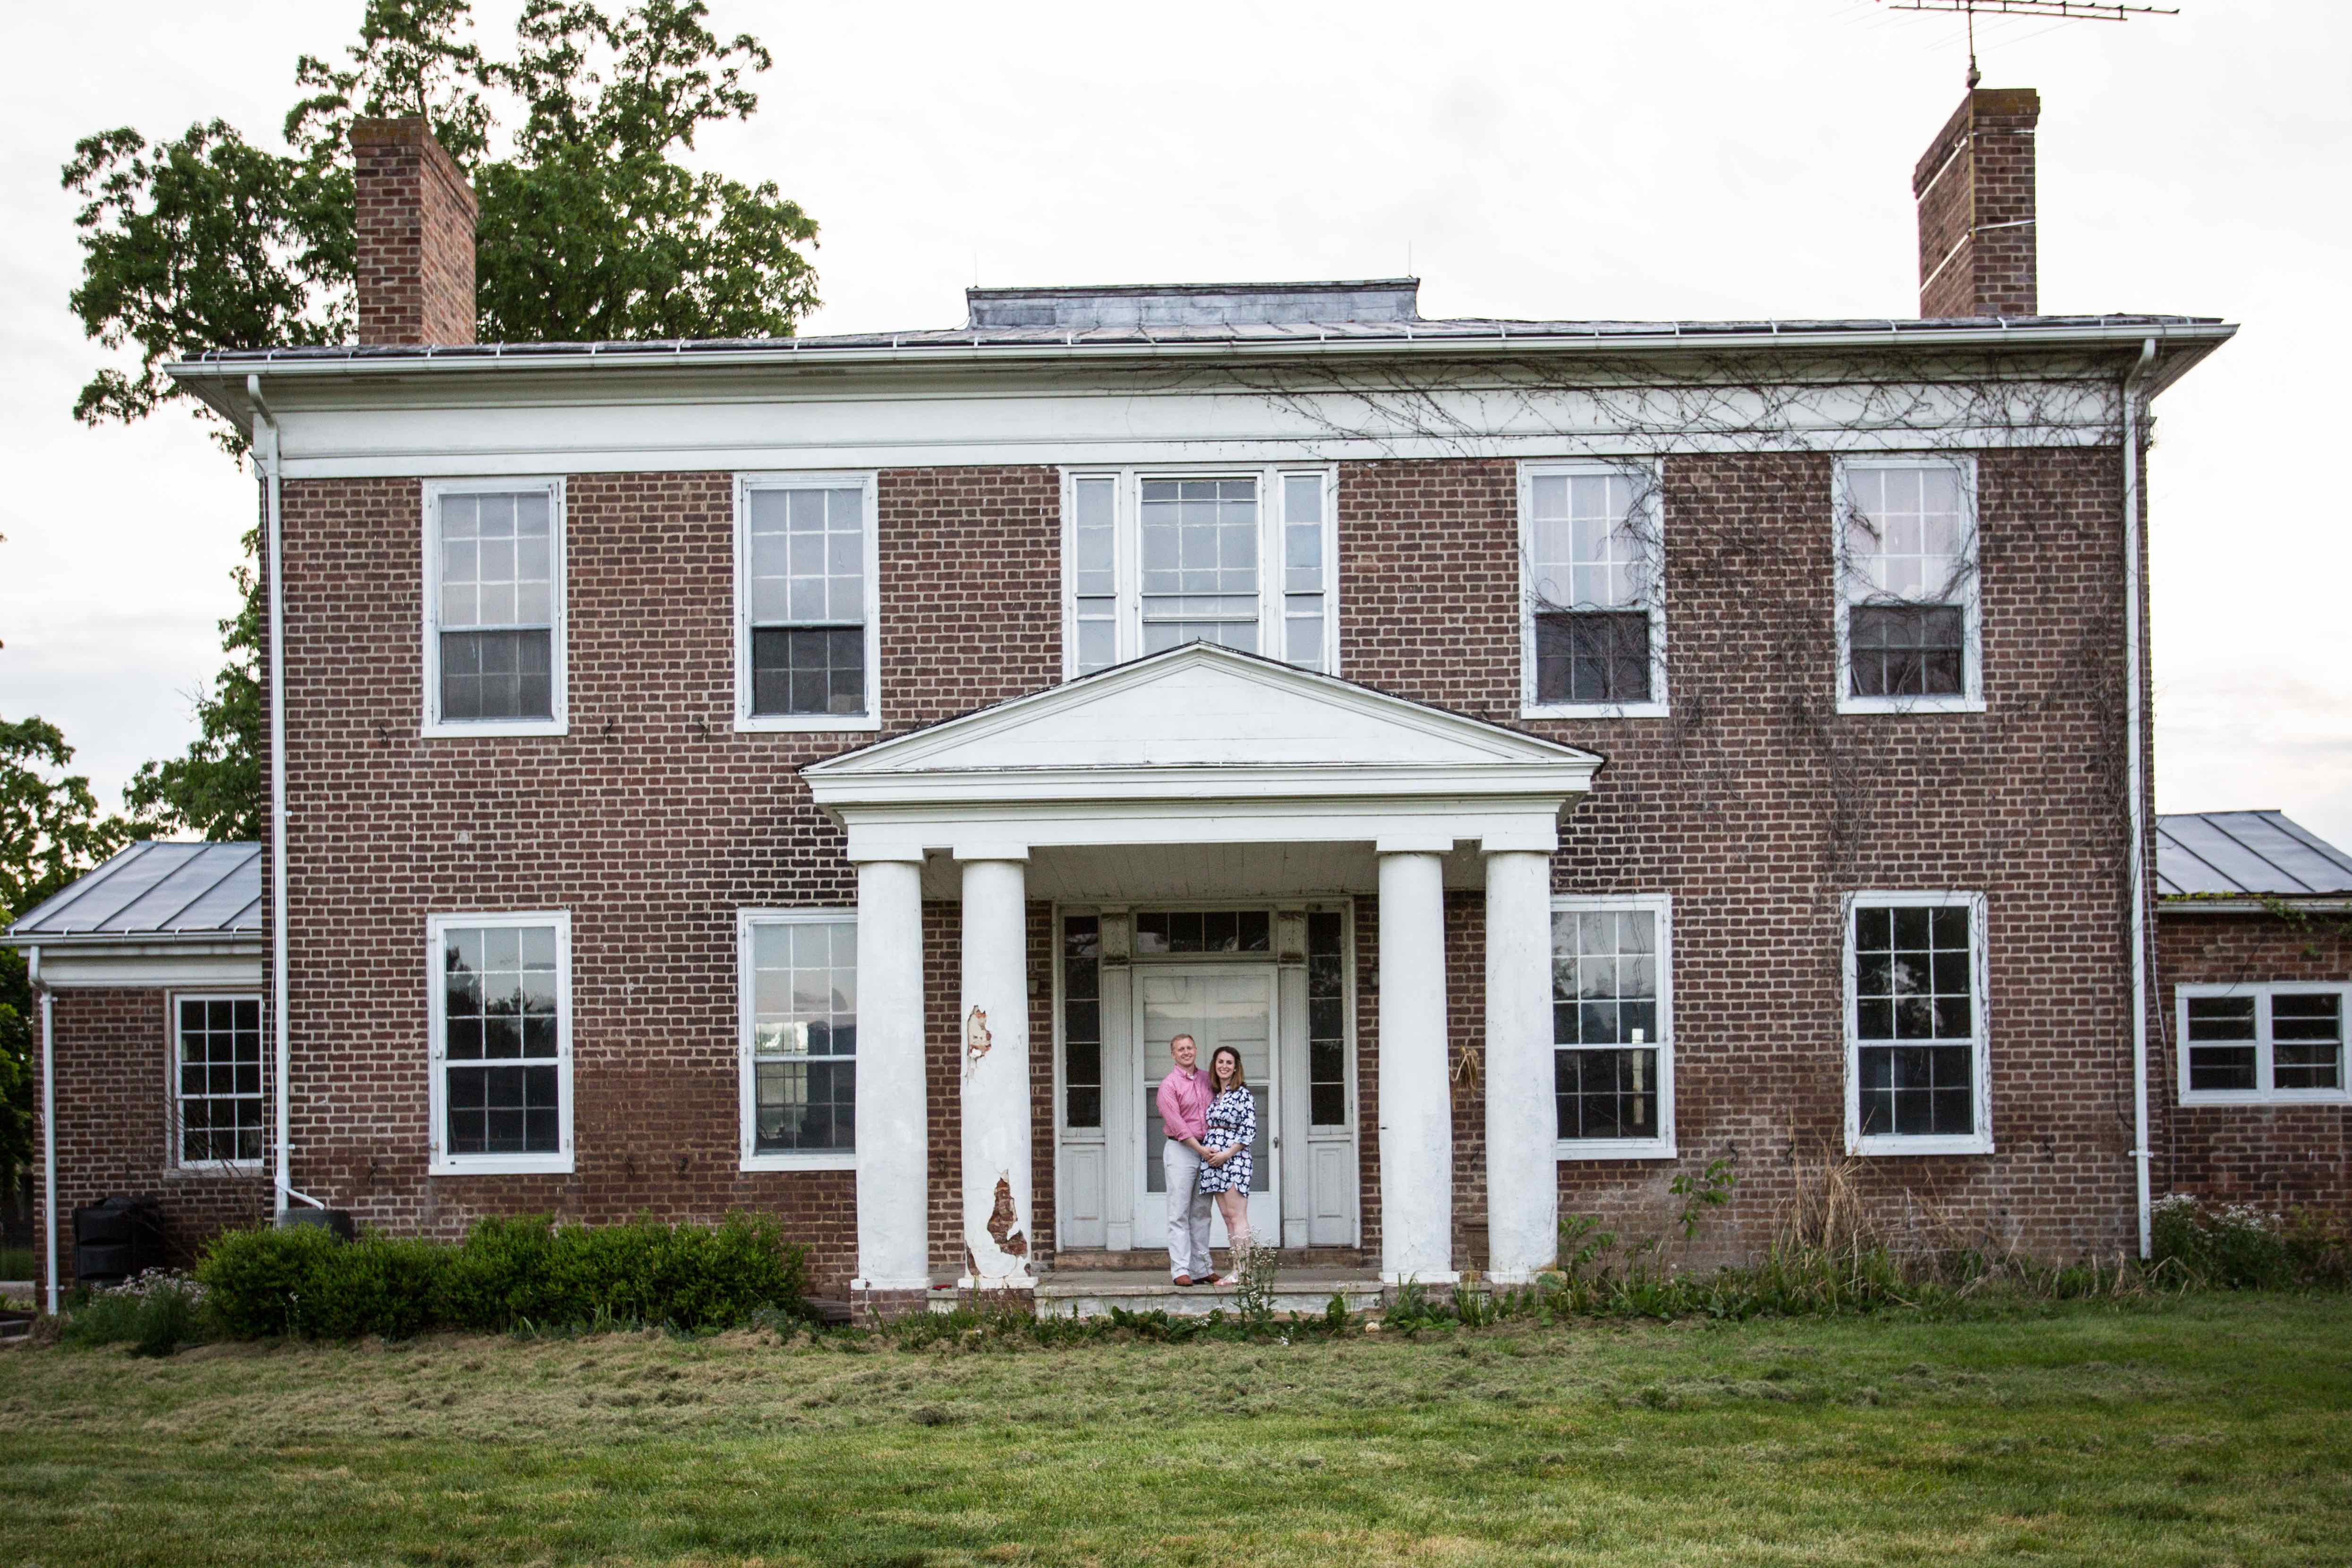
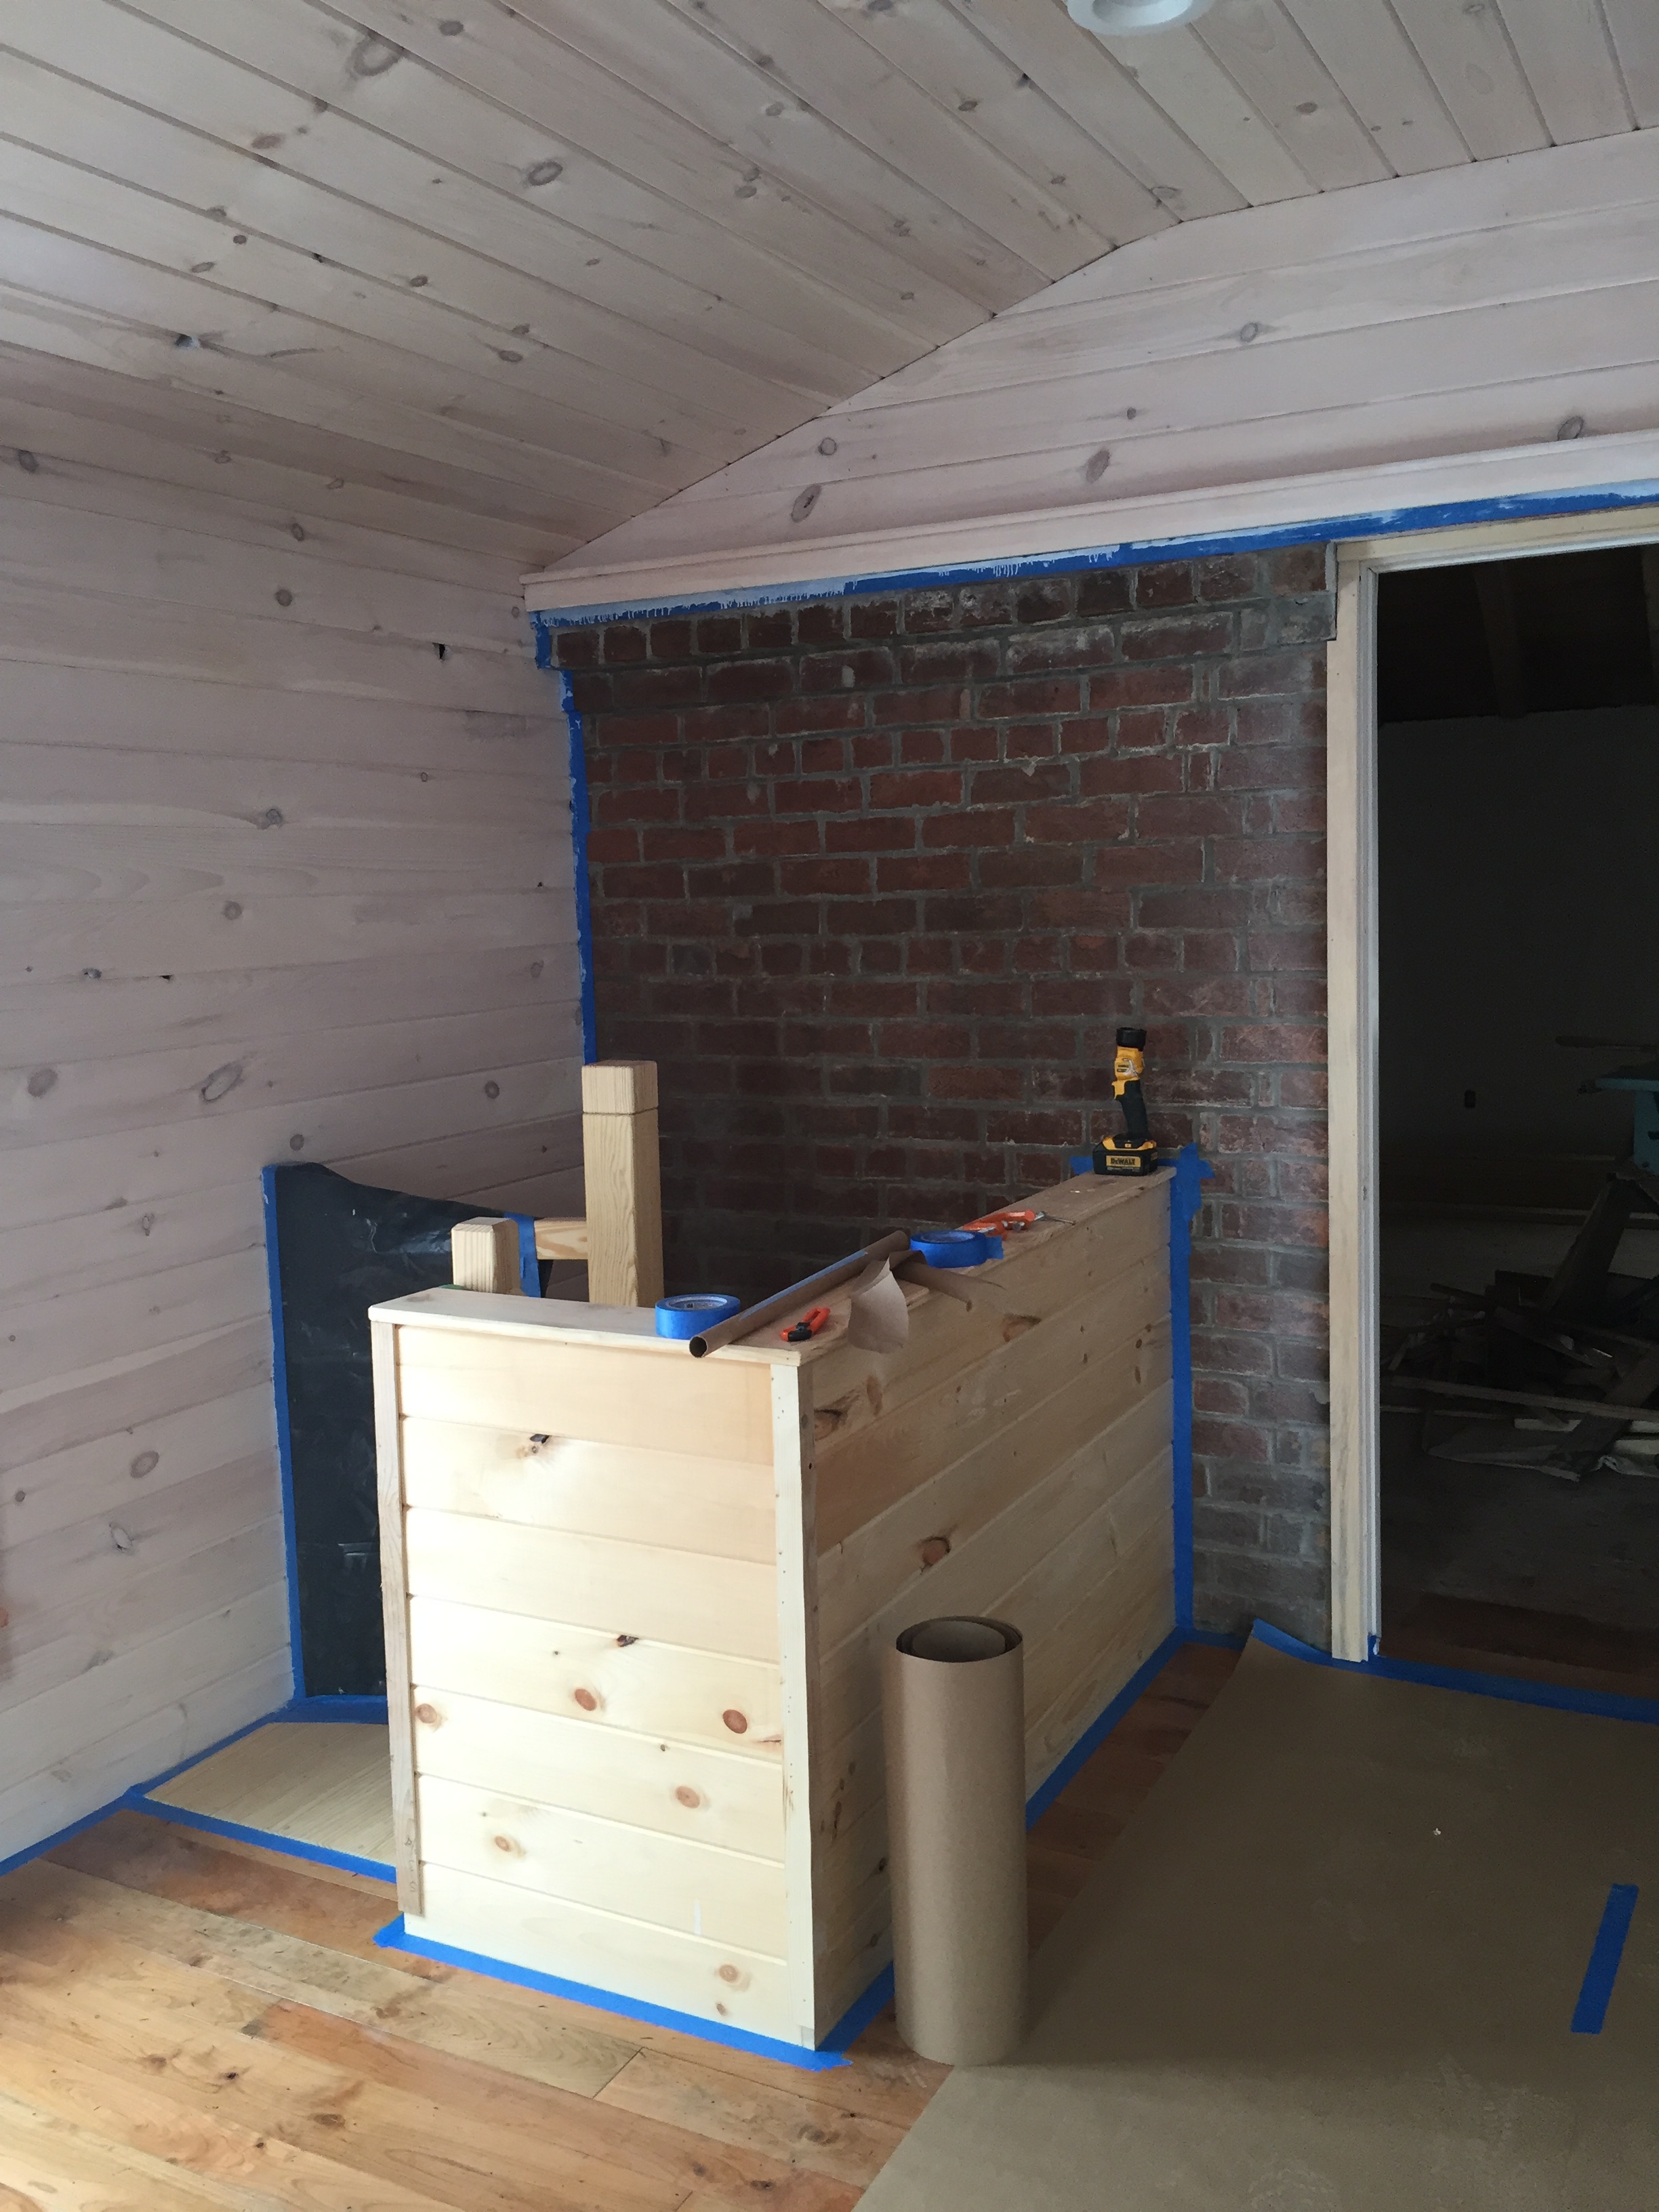
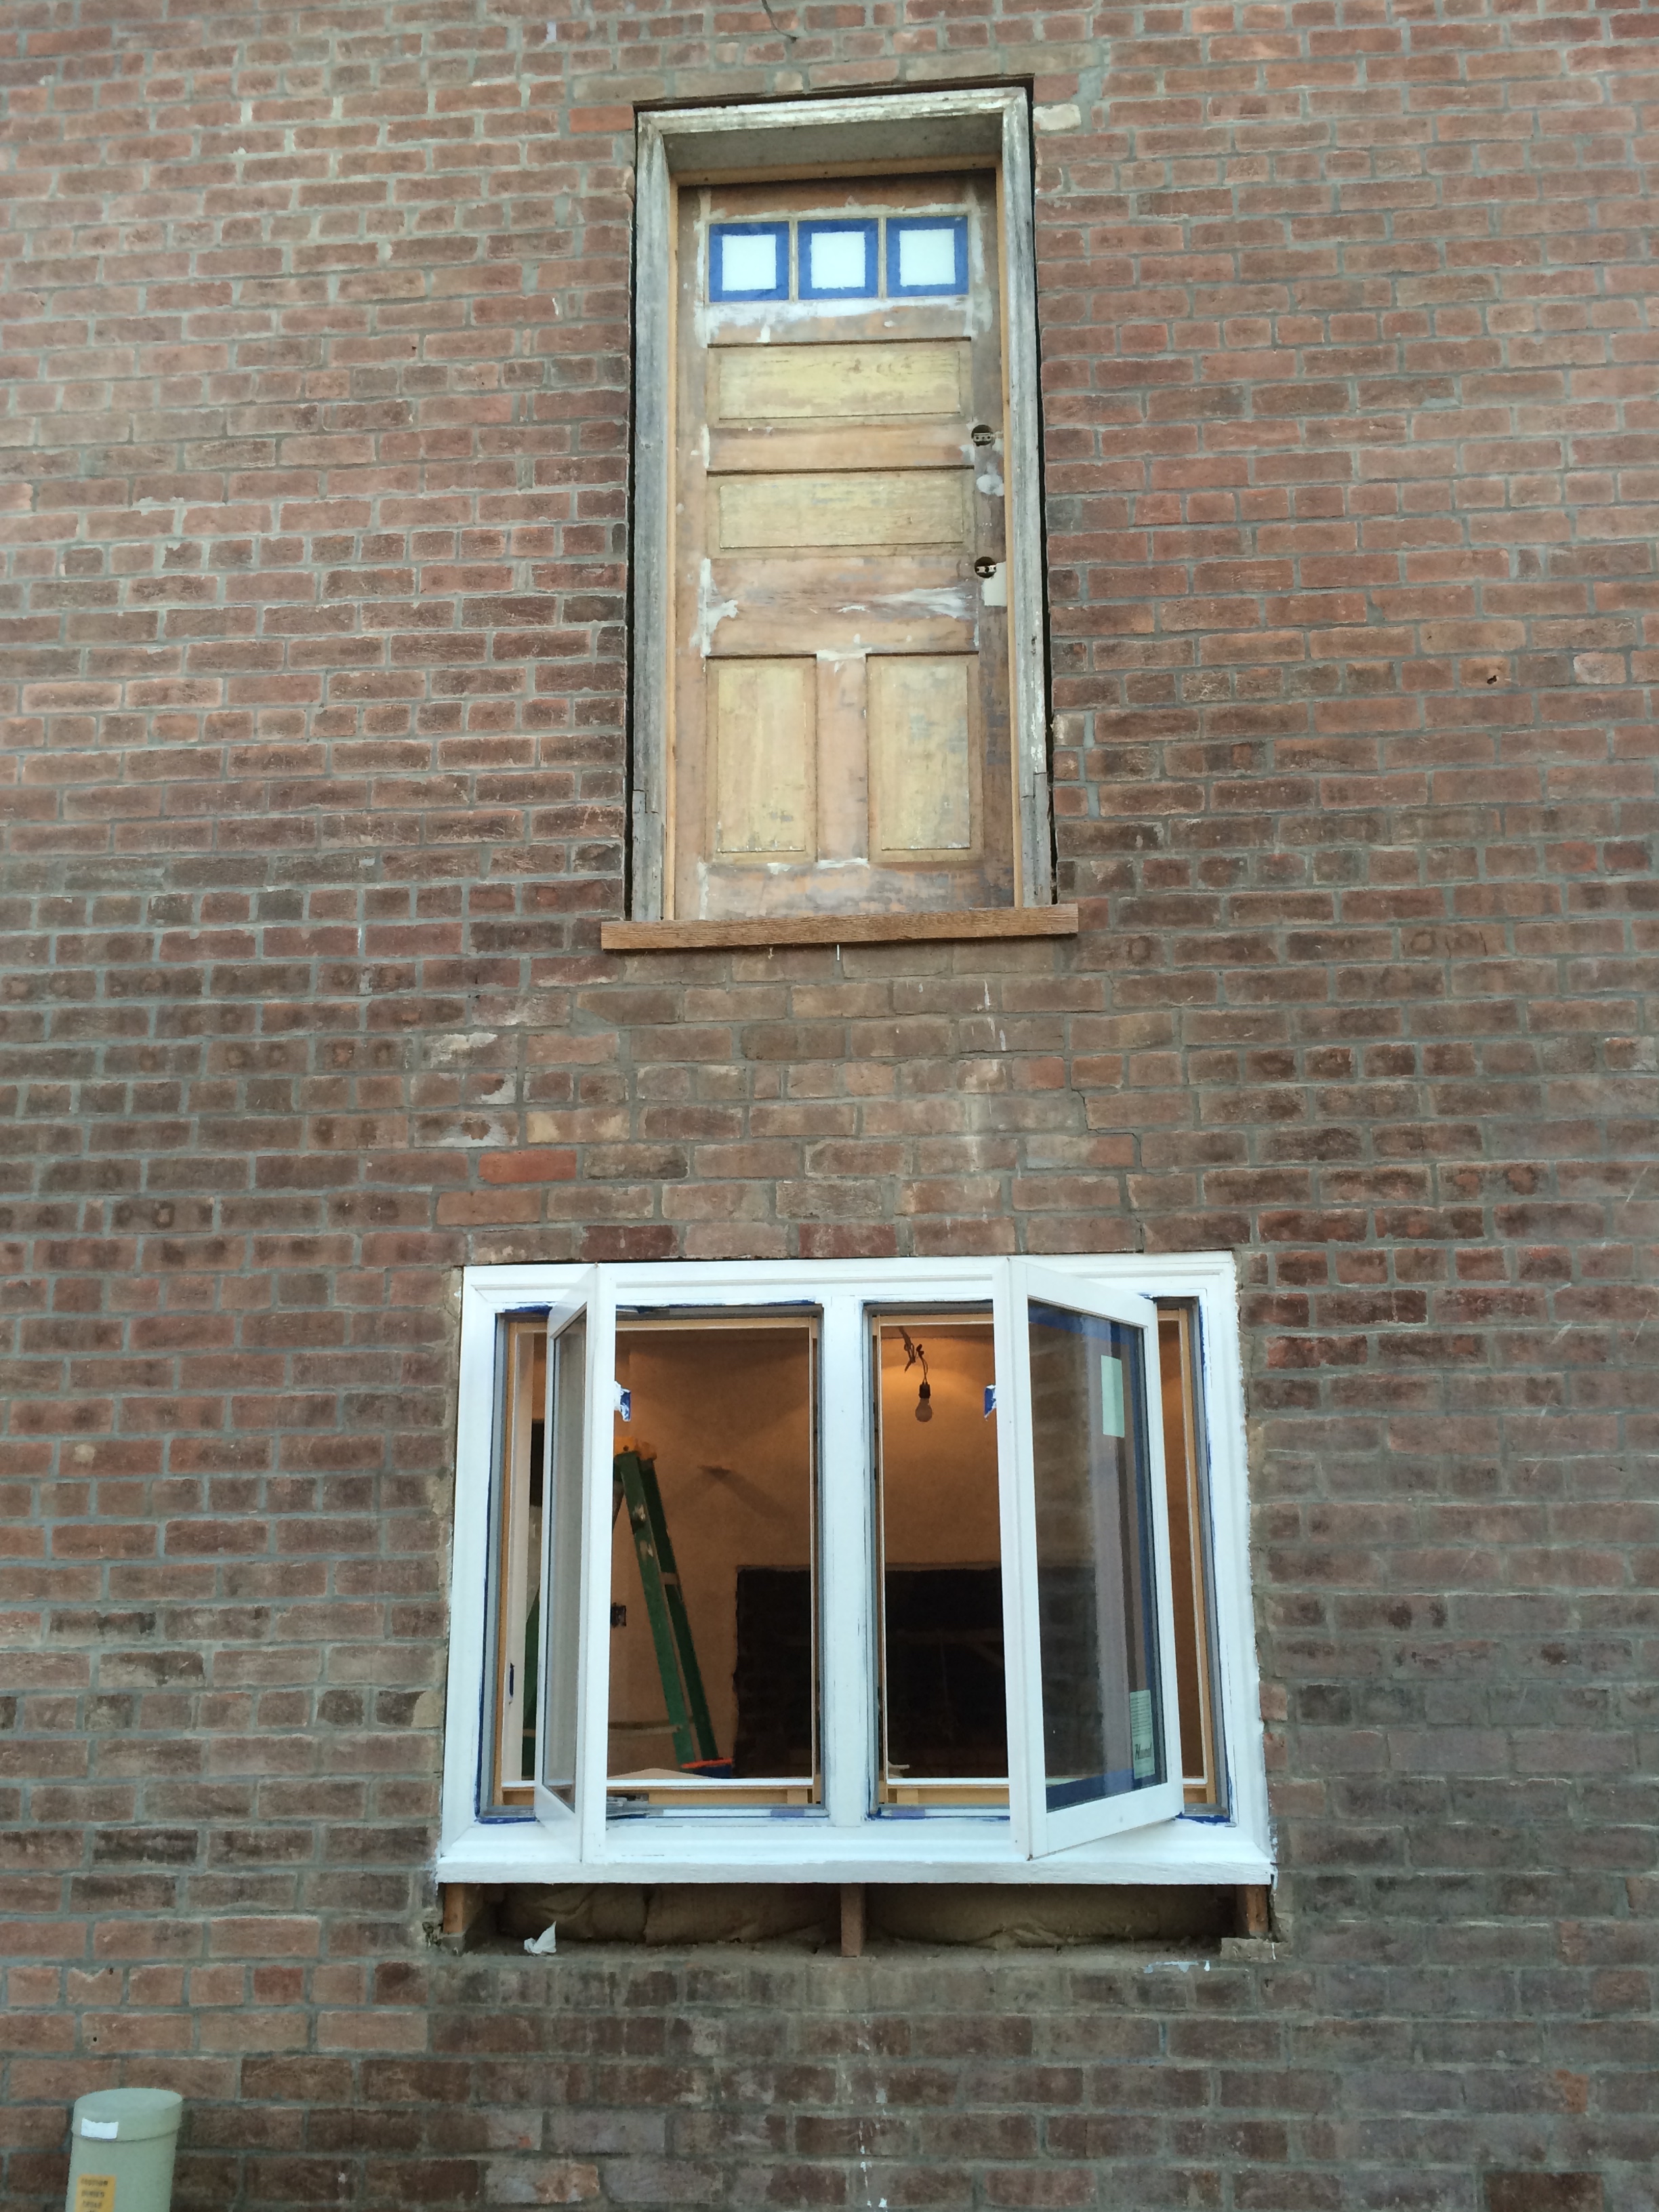
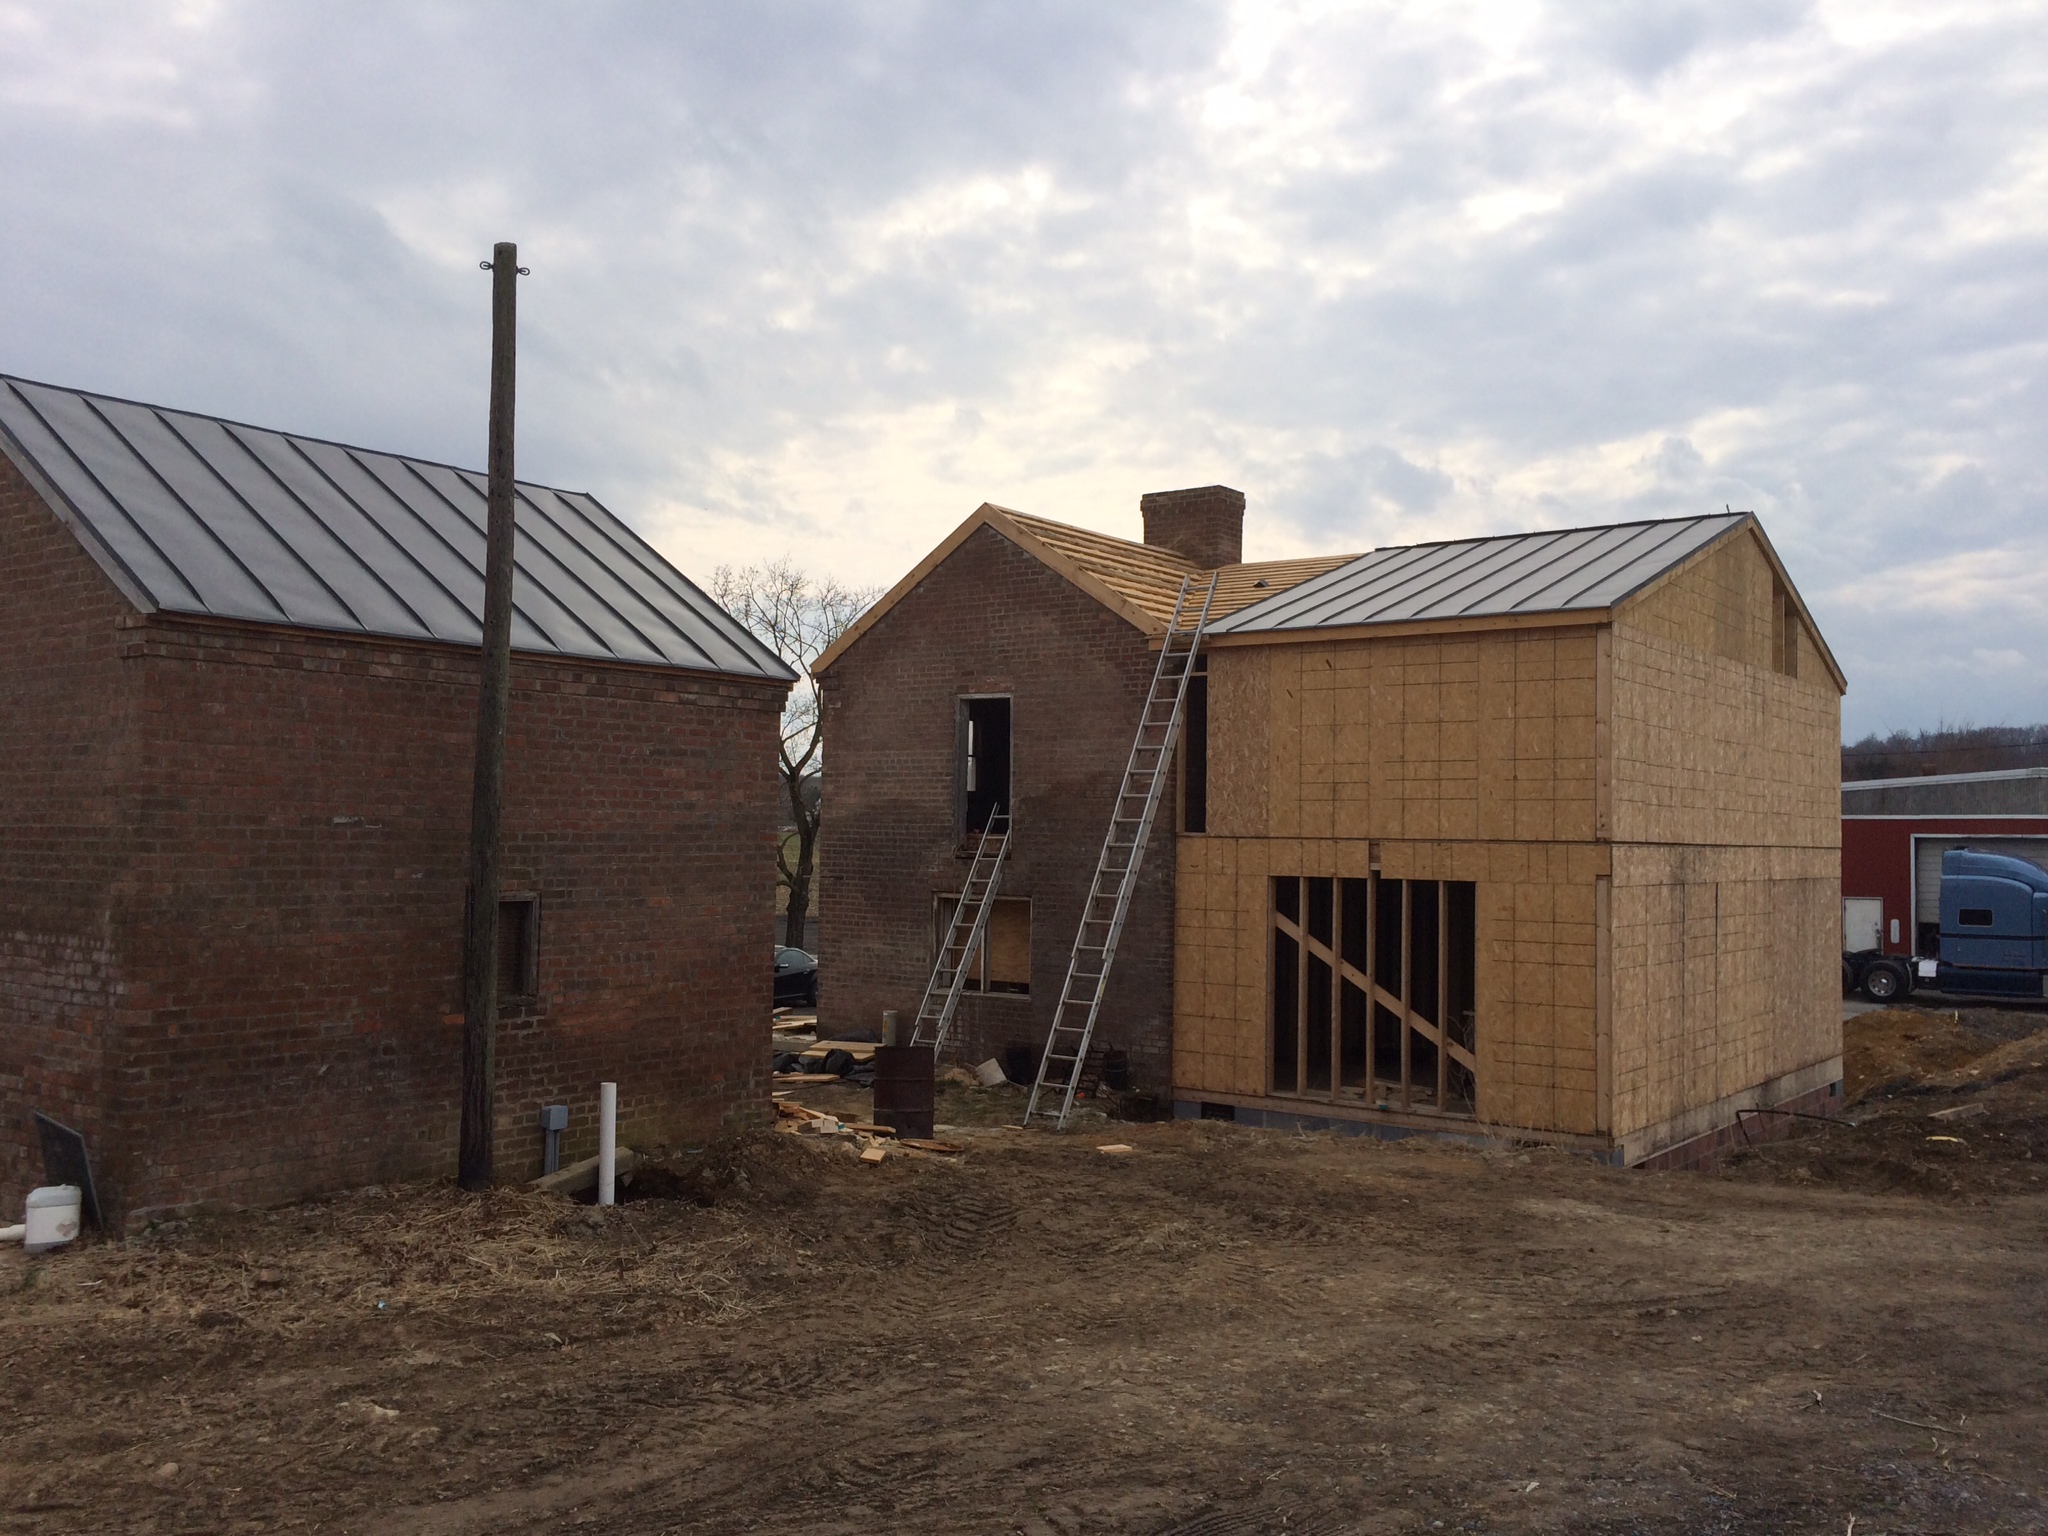
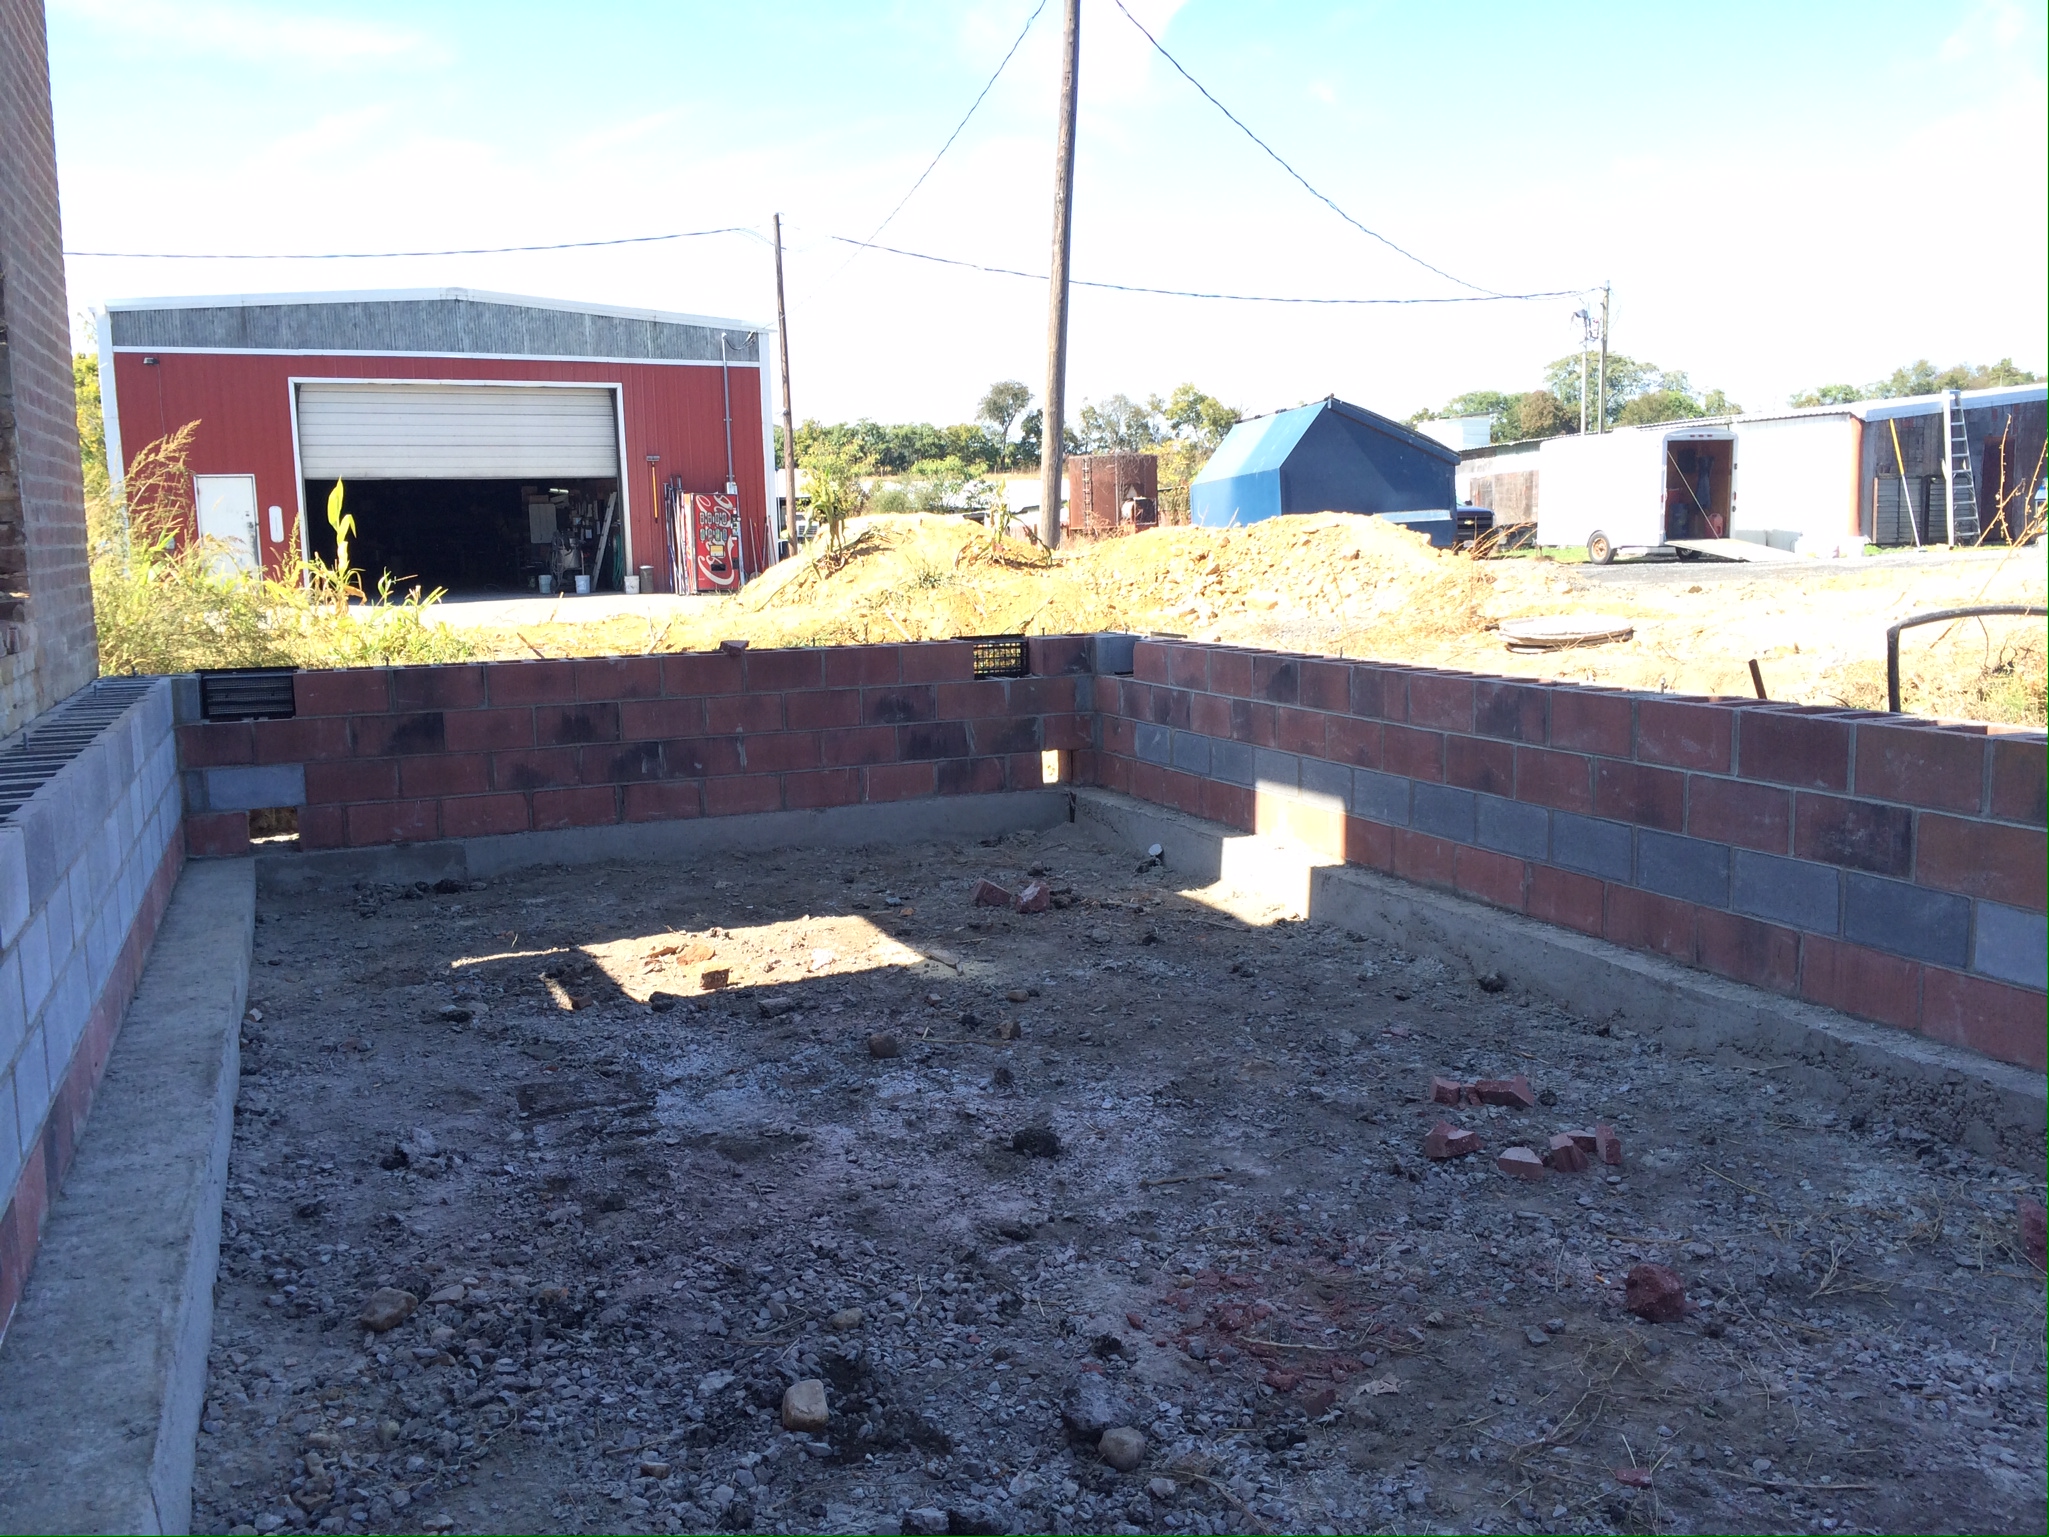
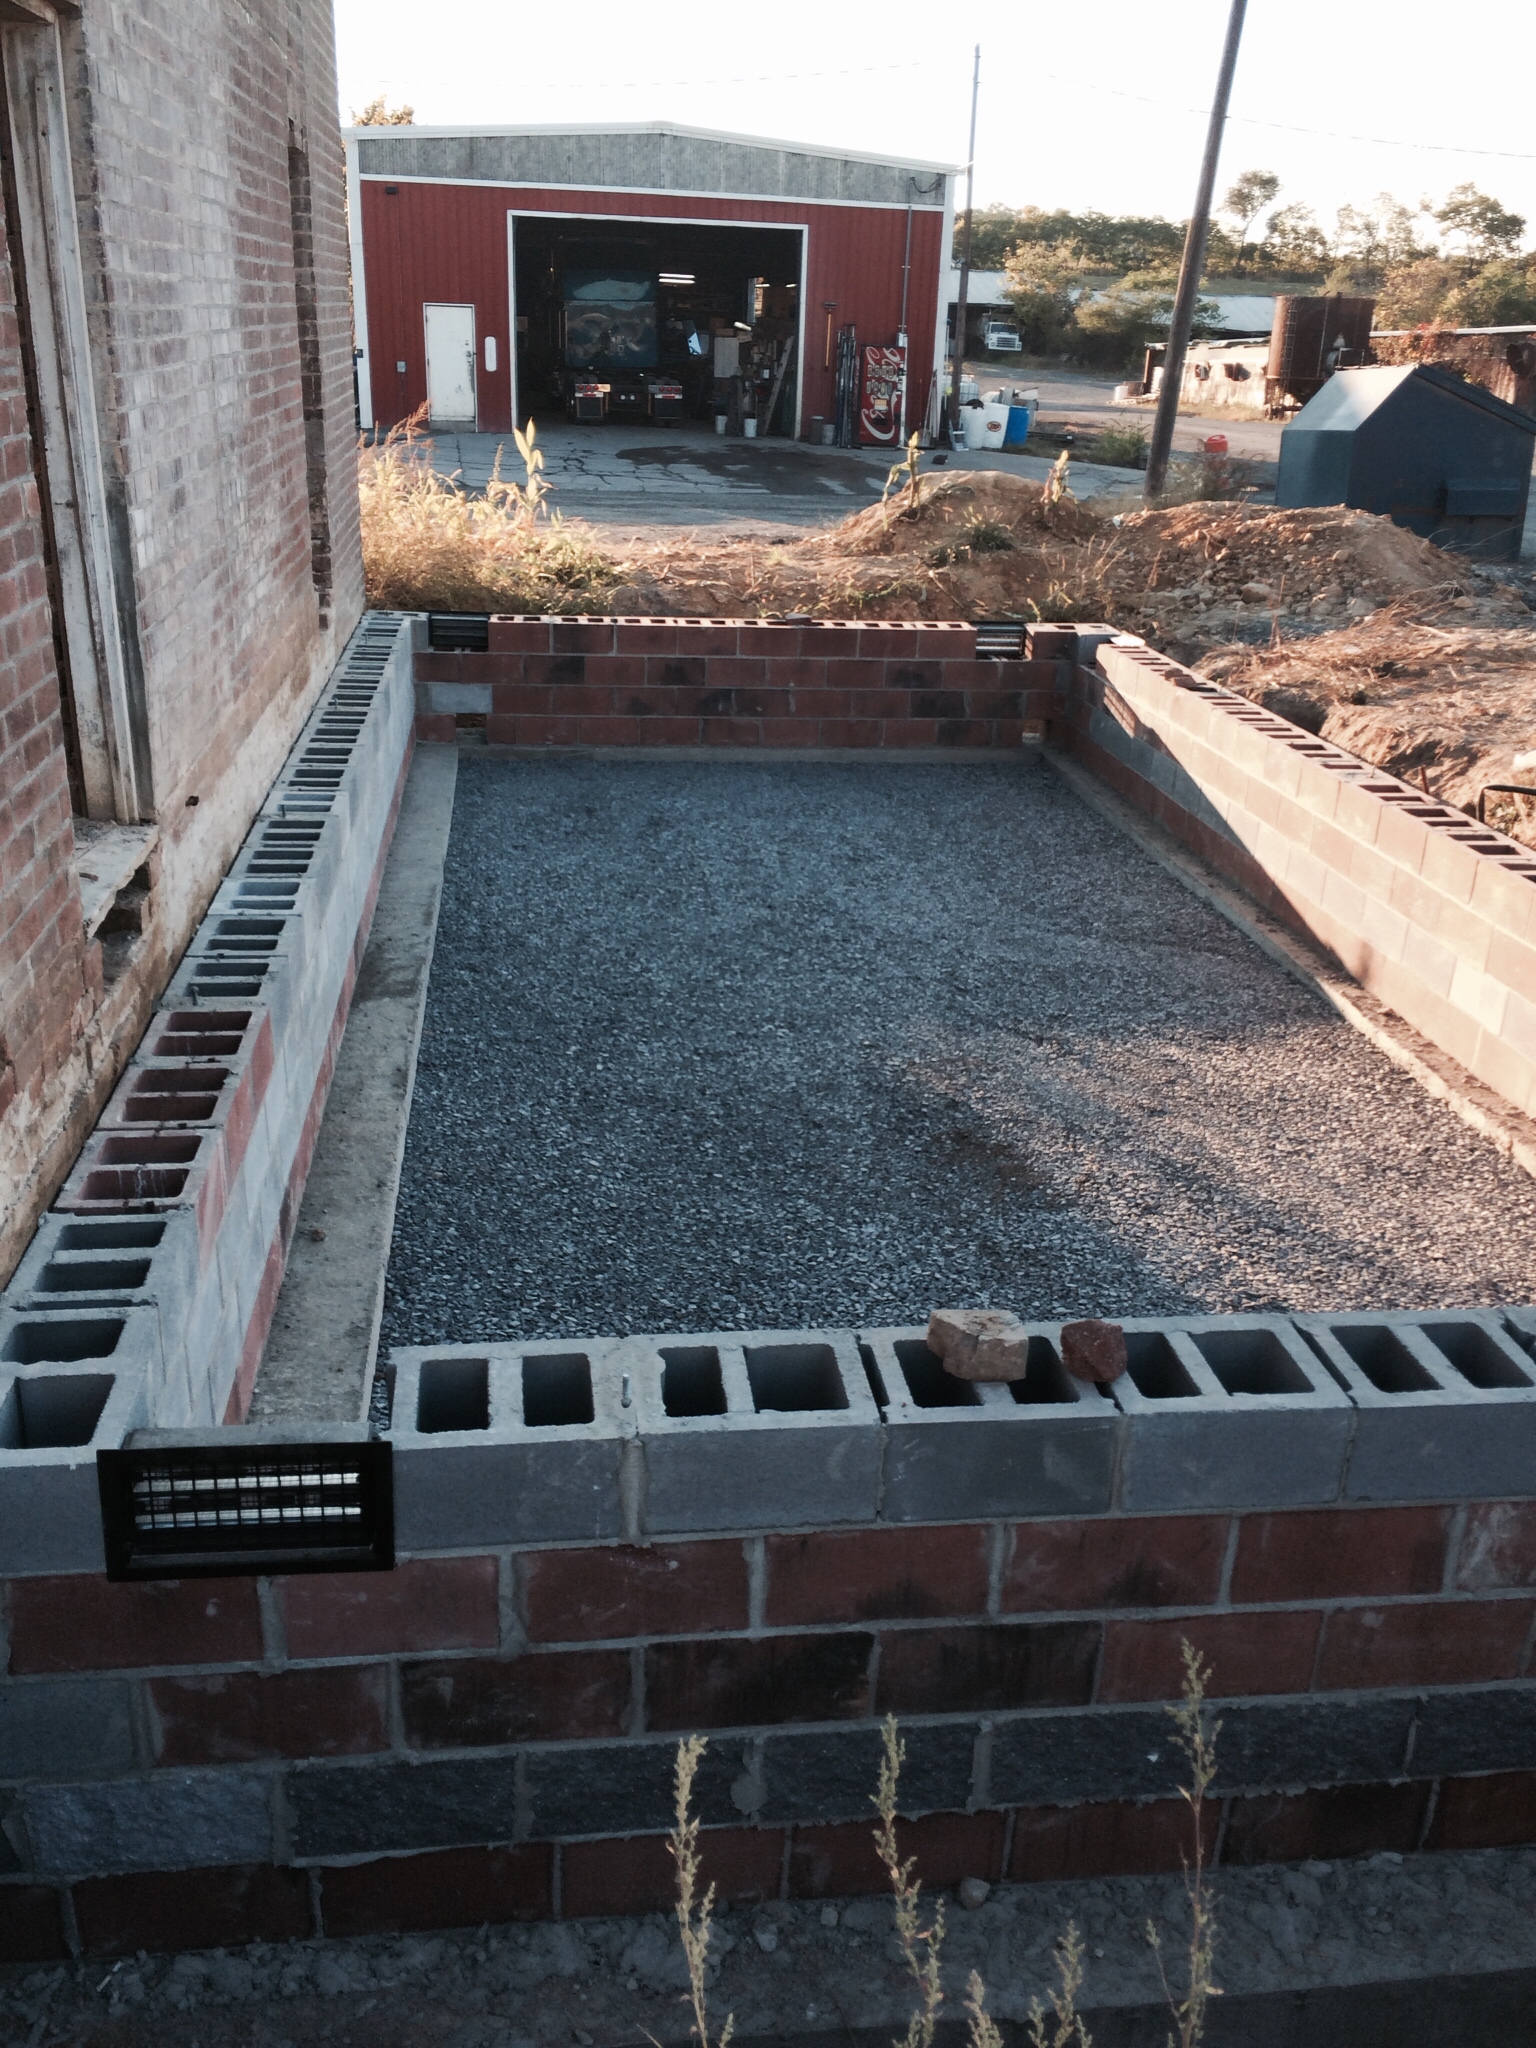
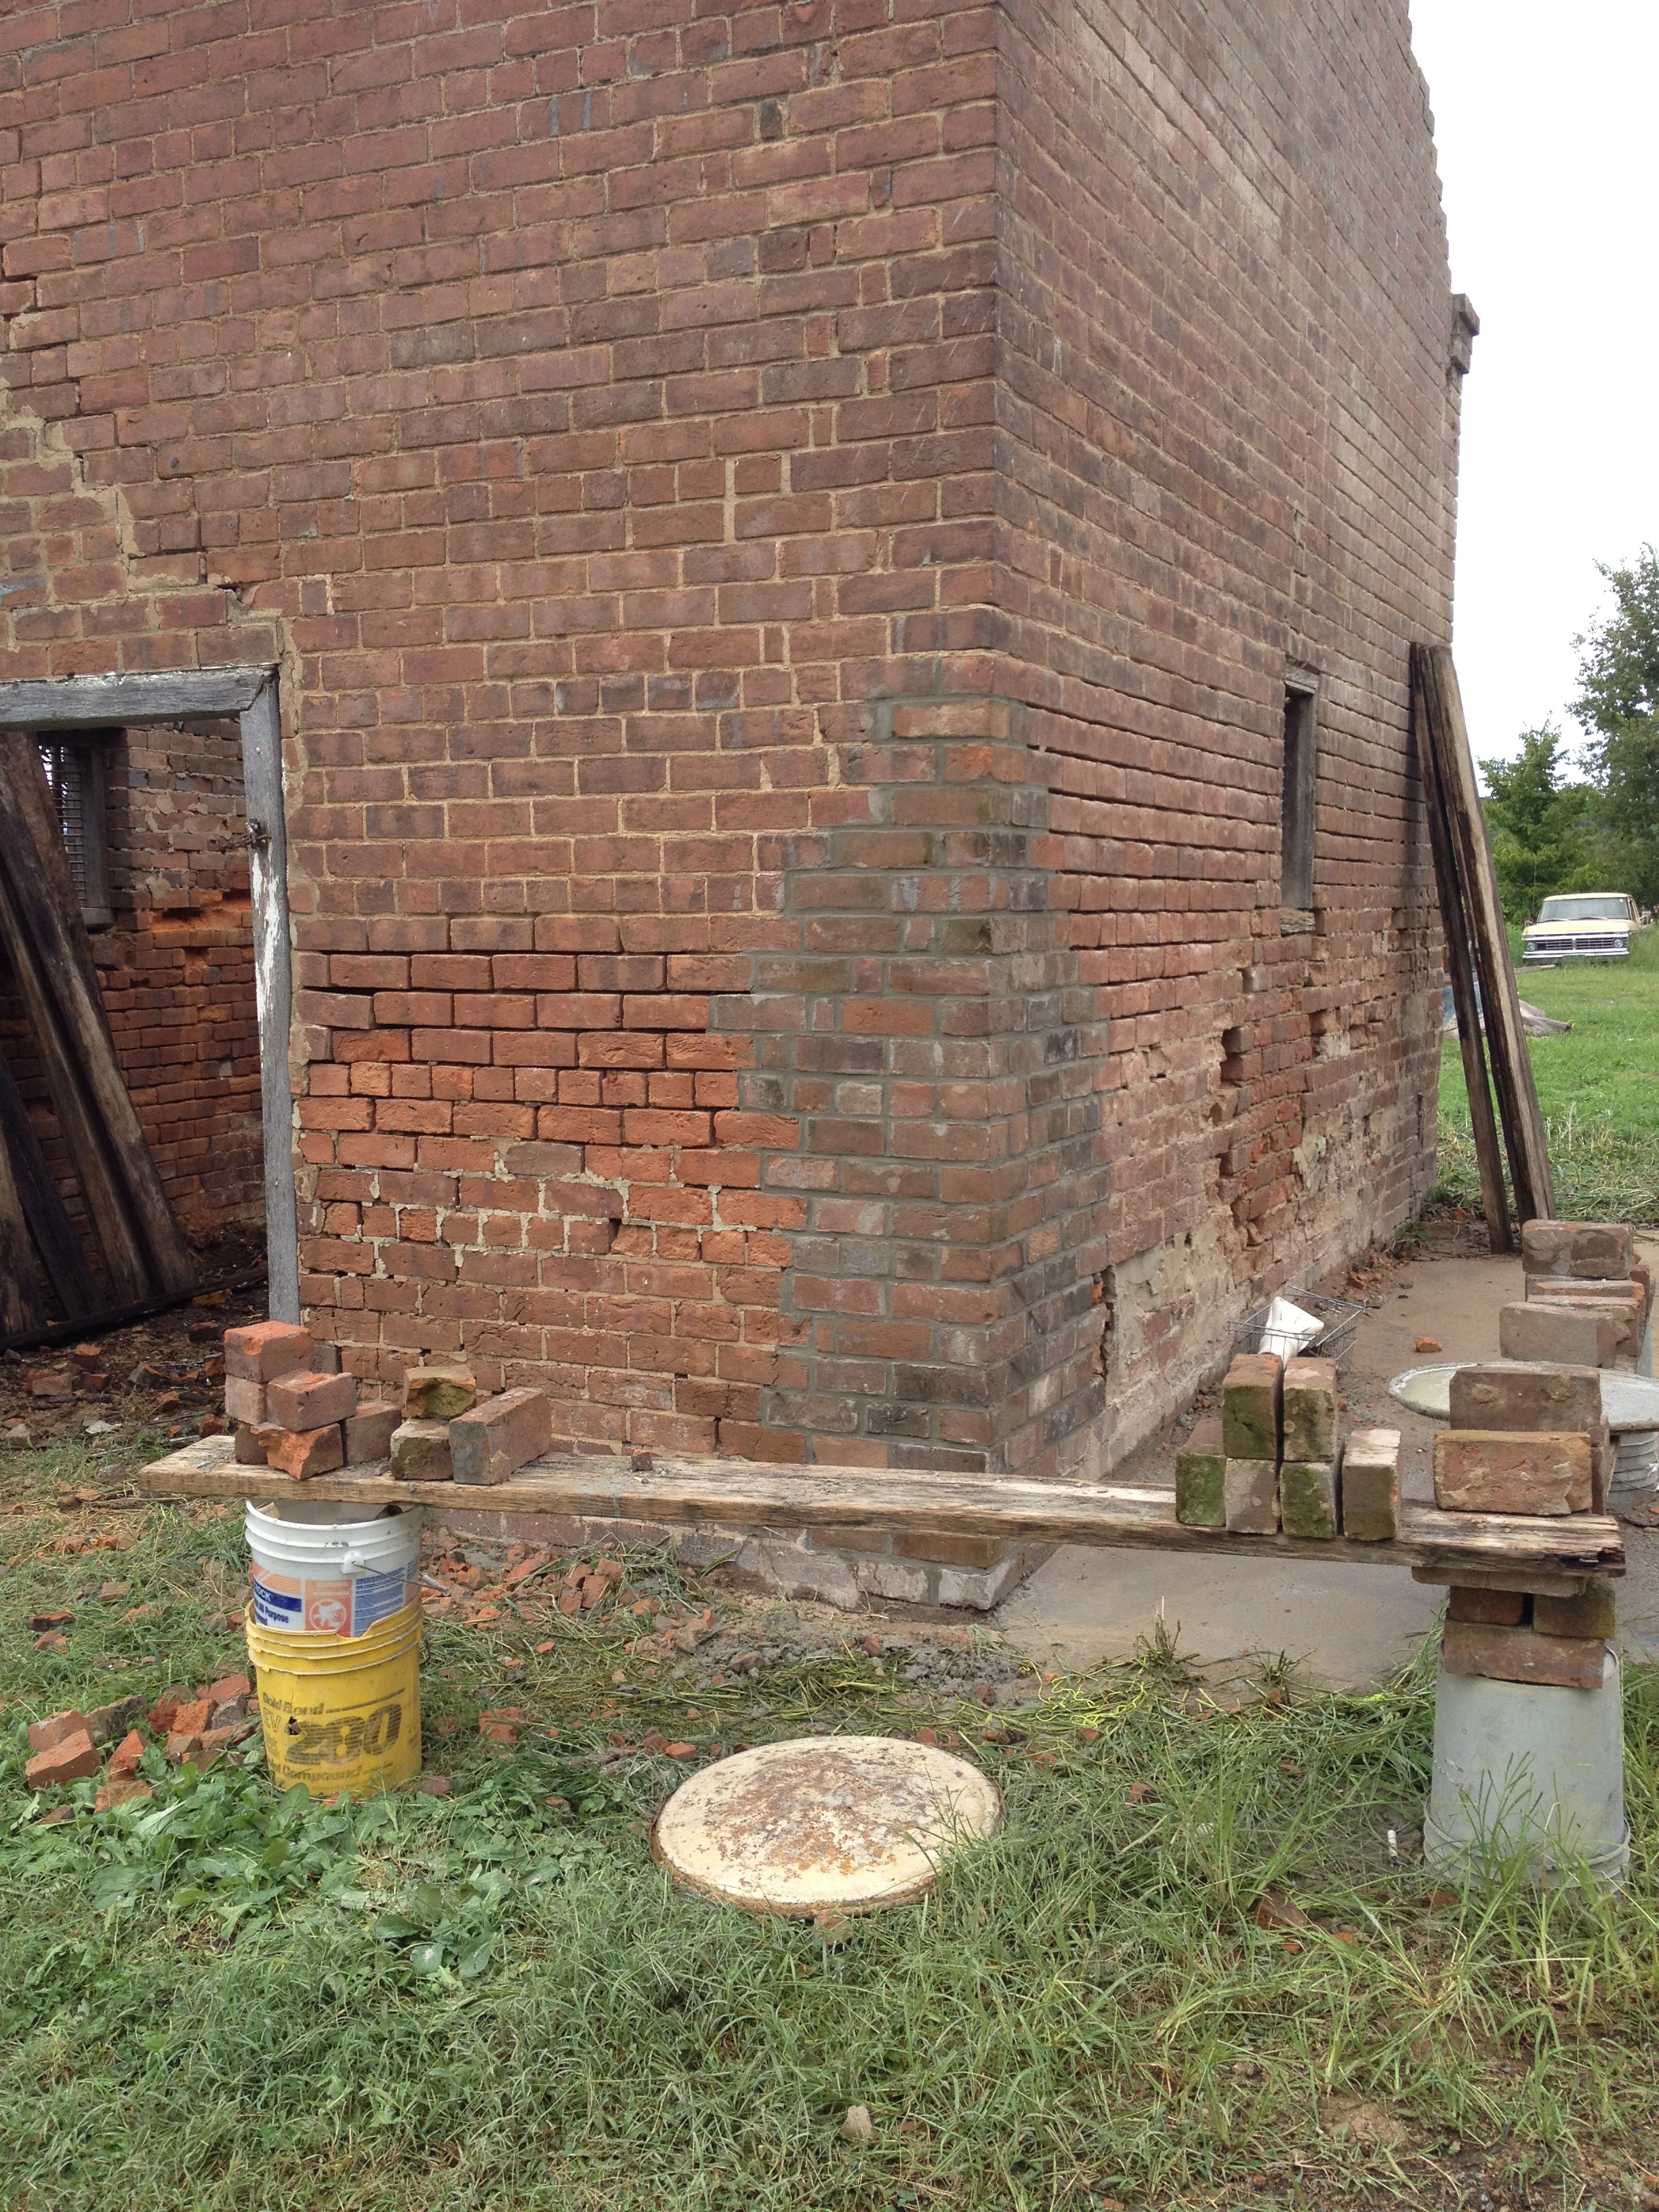
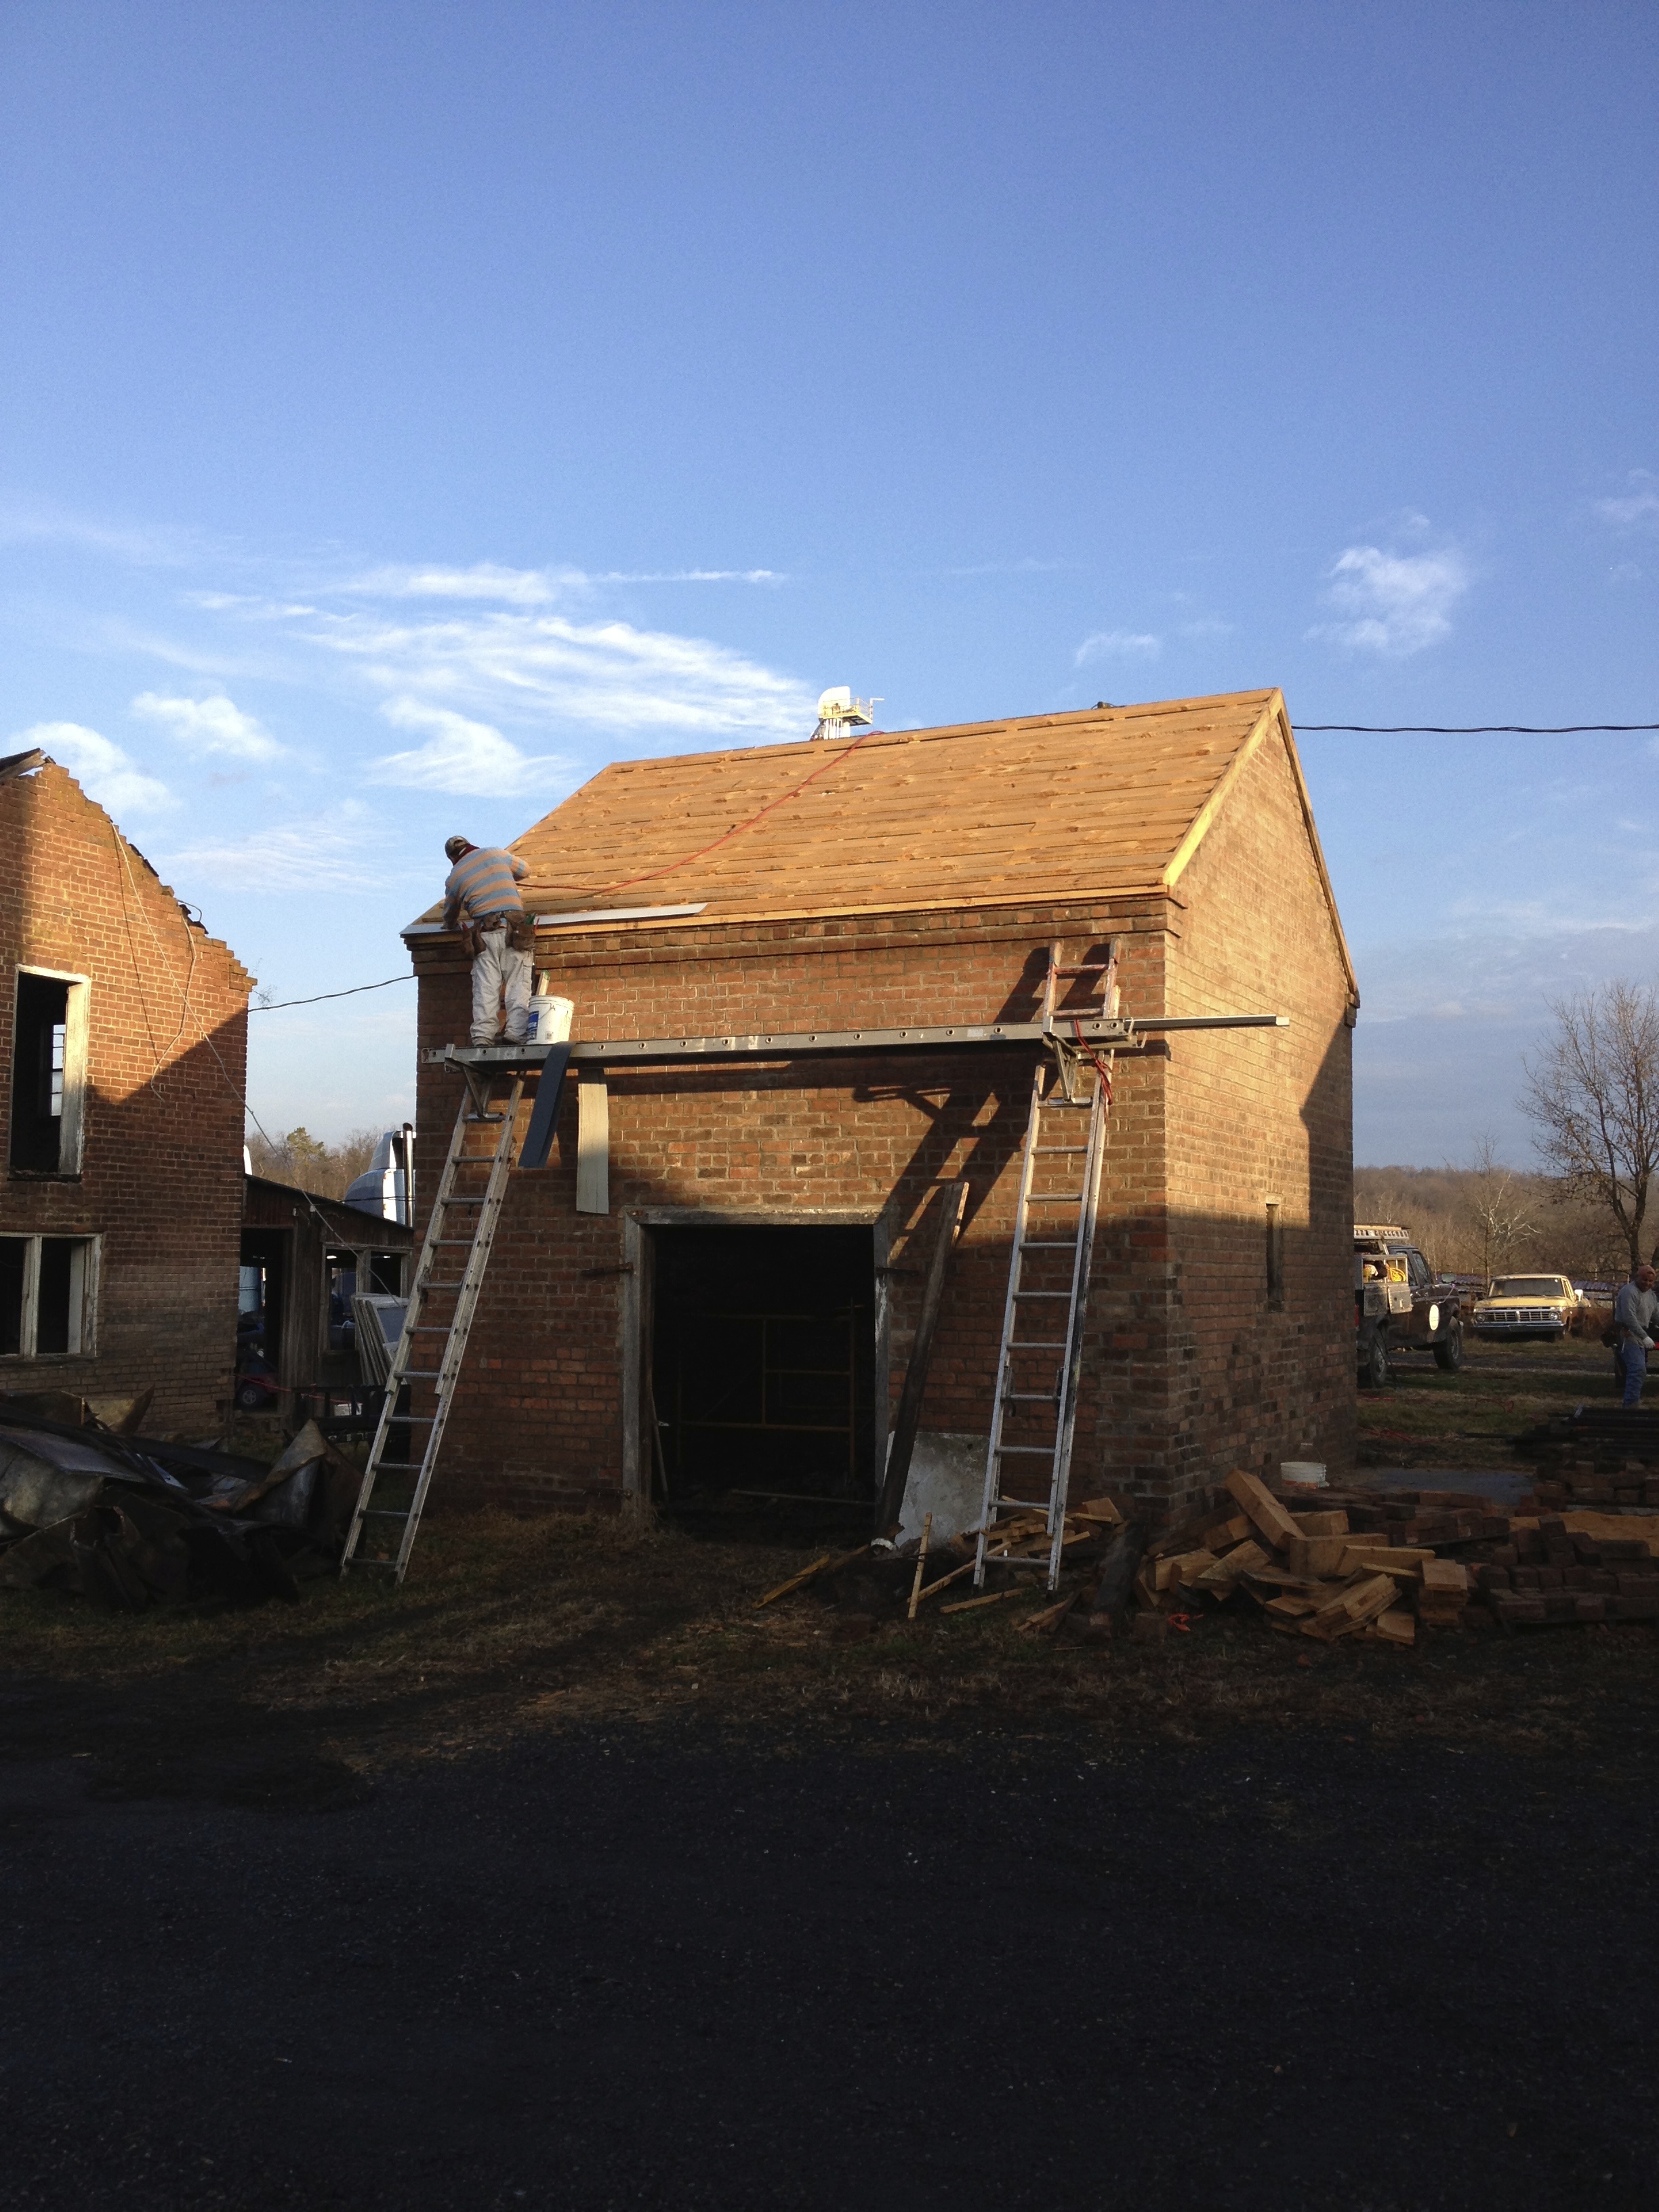
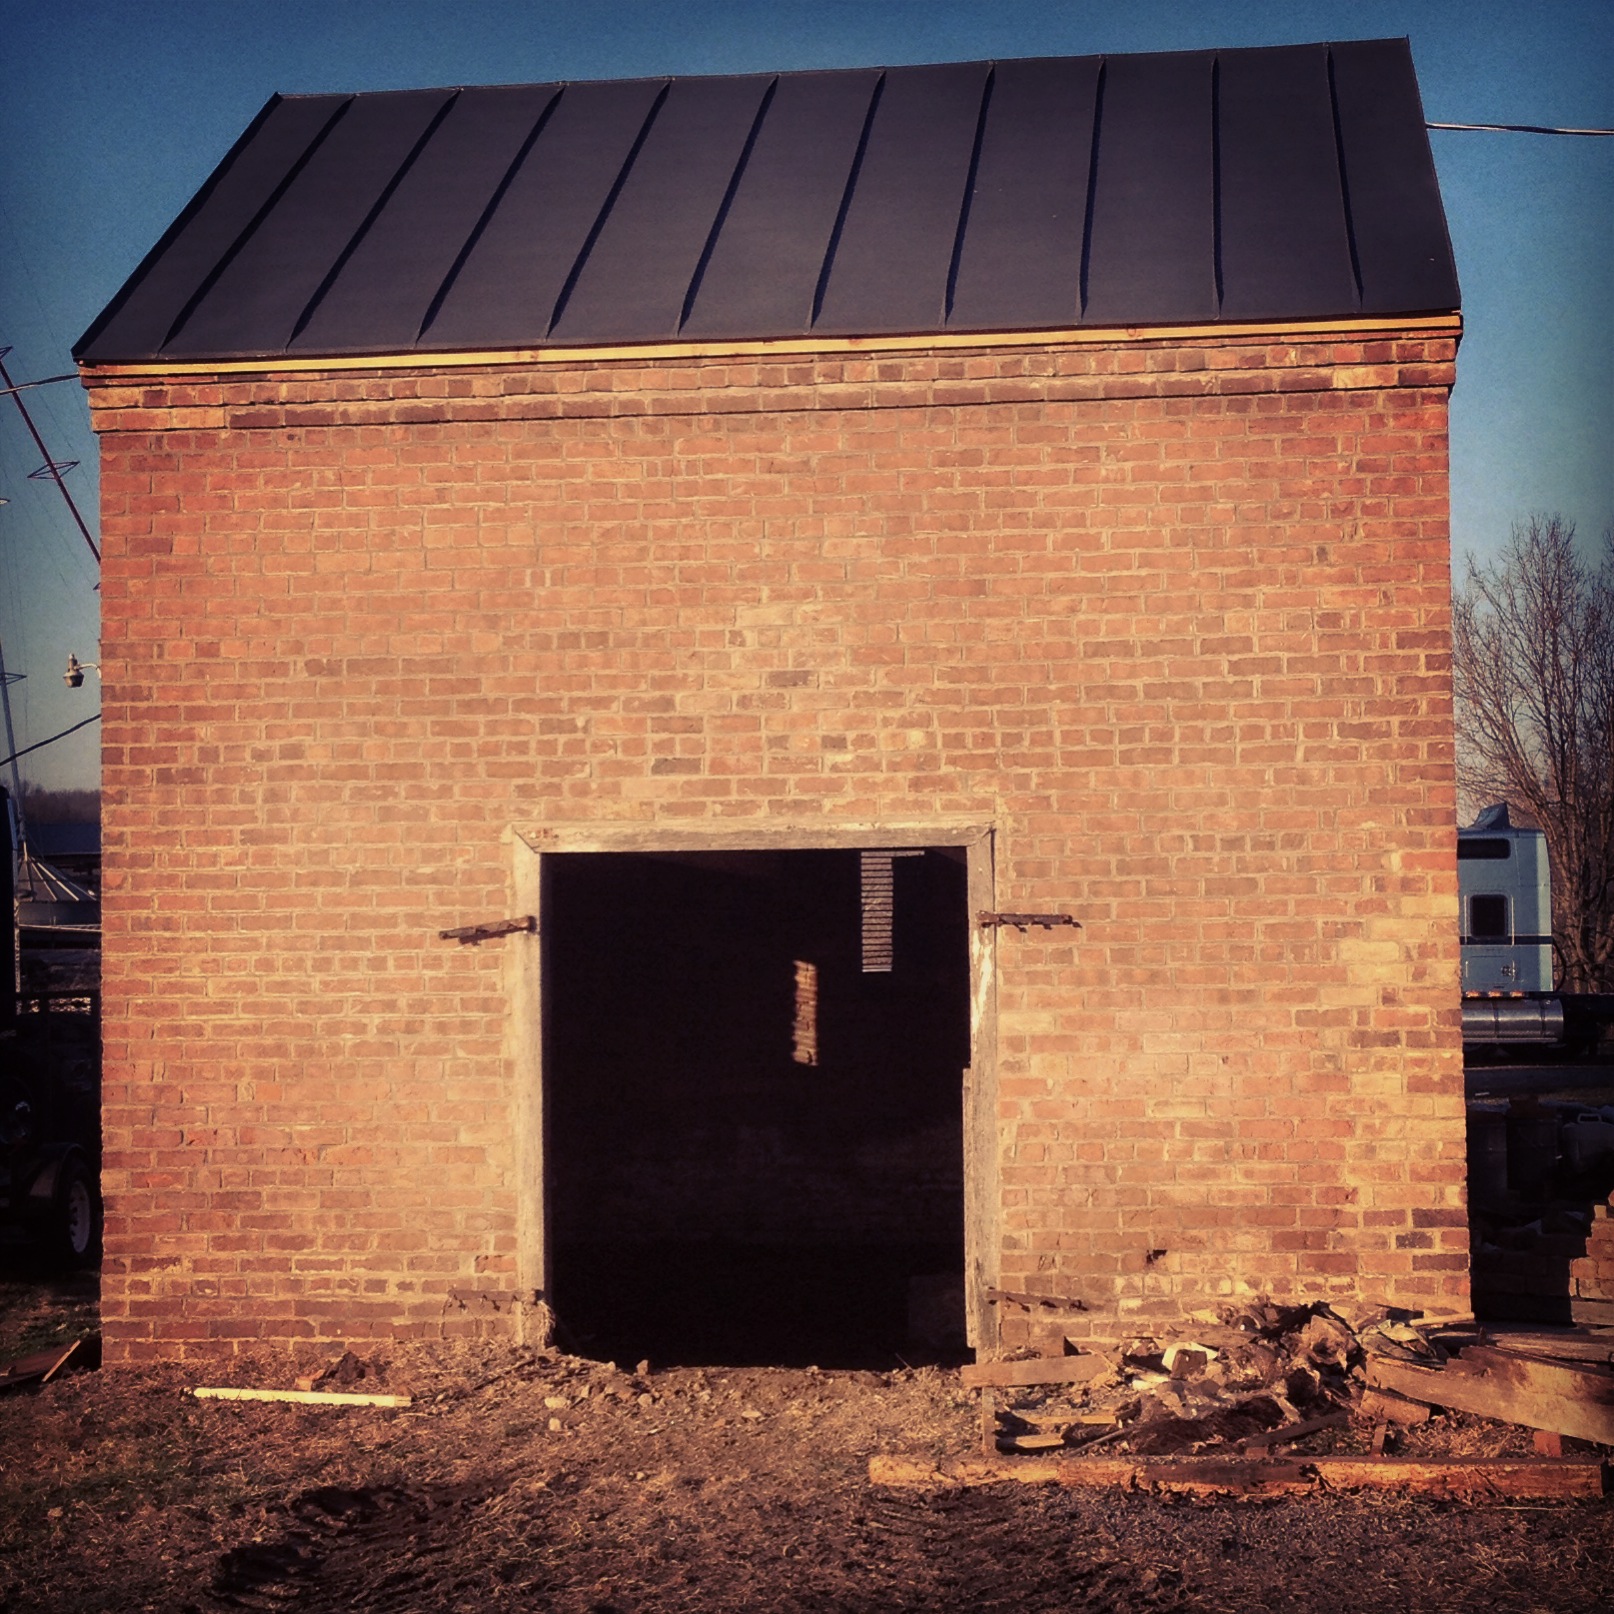
Then, the wall was rebuilt from our salvaged brick!  The new brick will have a lighter mortar color as compared to old hard grey mortar, in line with what we used on the rest of the project. This building will always have a little “Frankenstein’s Monster” quality to it, closing in on two centuries of use and repair, but at the end of the day, we are so pleased with the final result!

IMG_4300
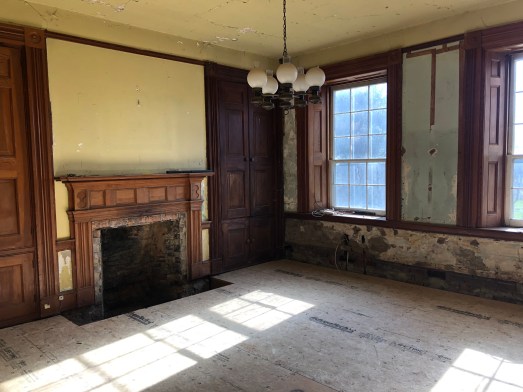
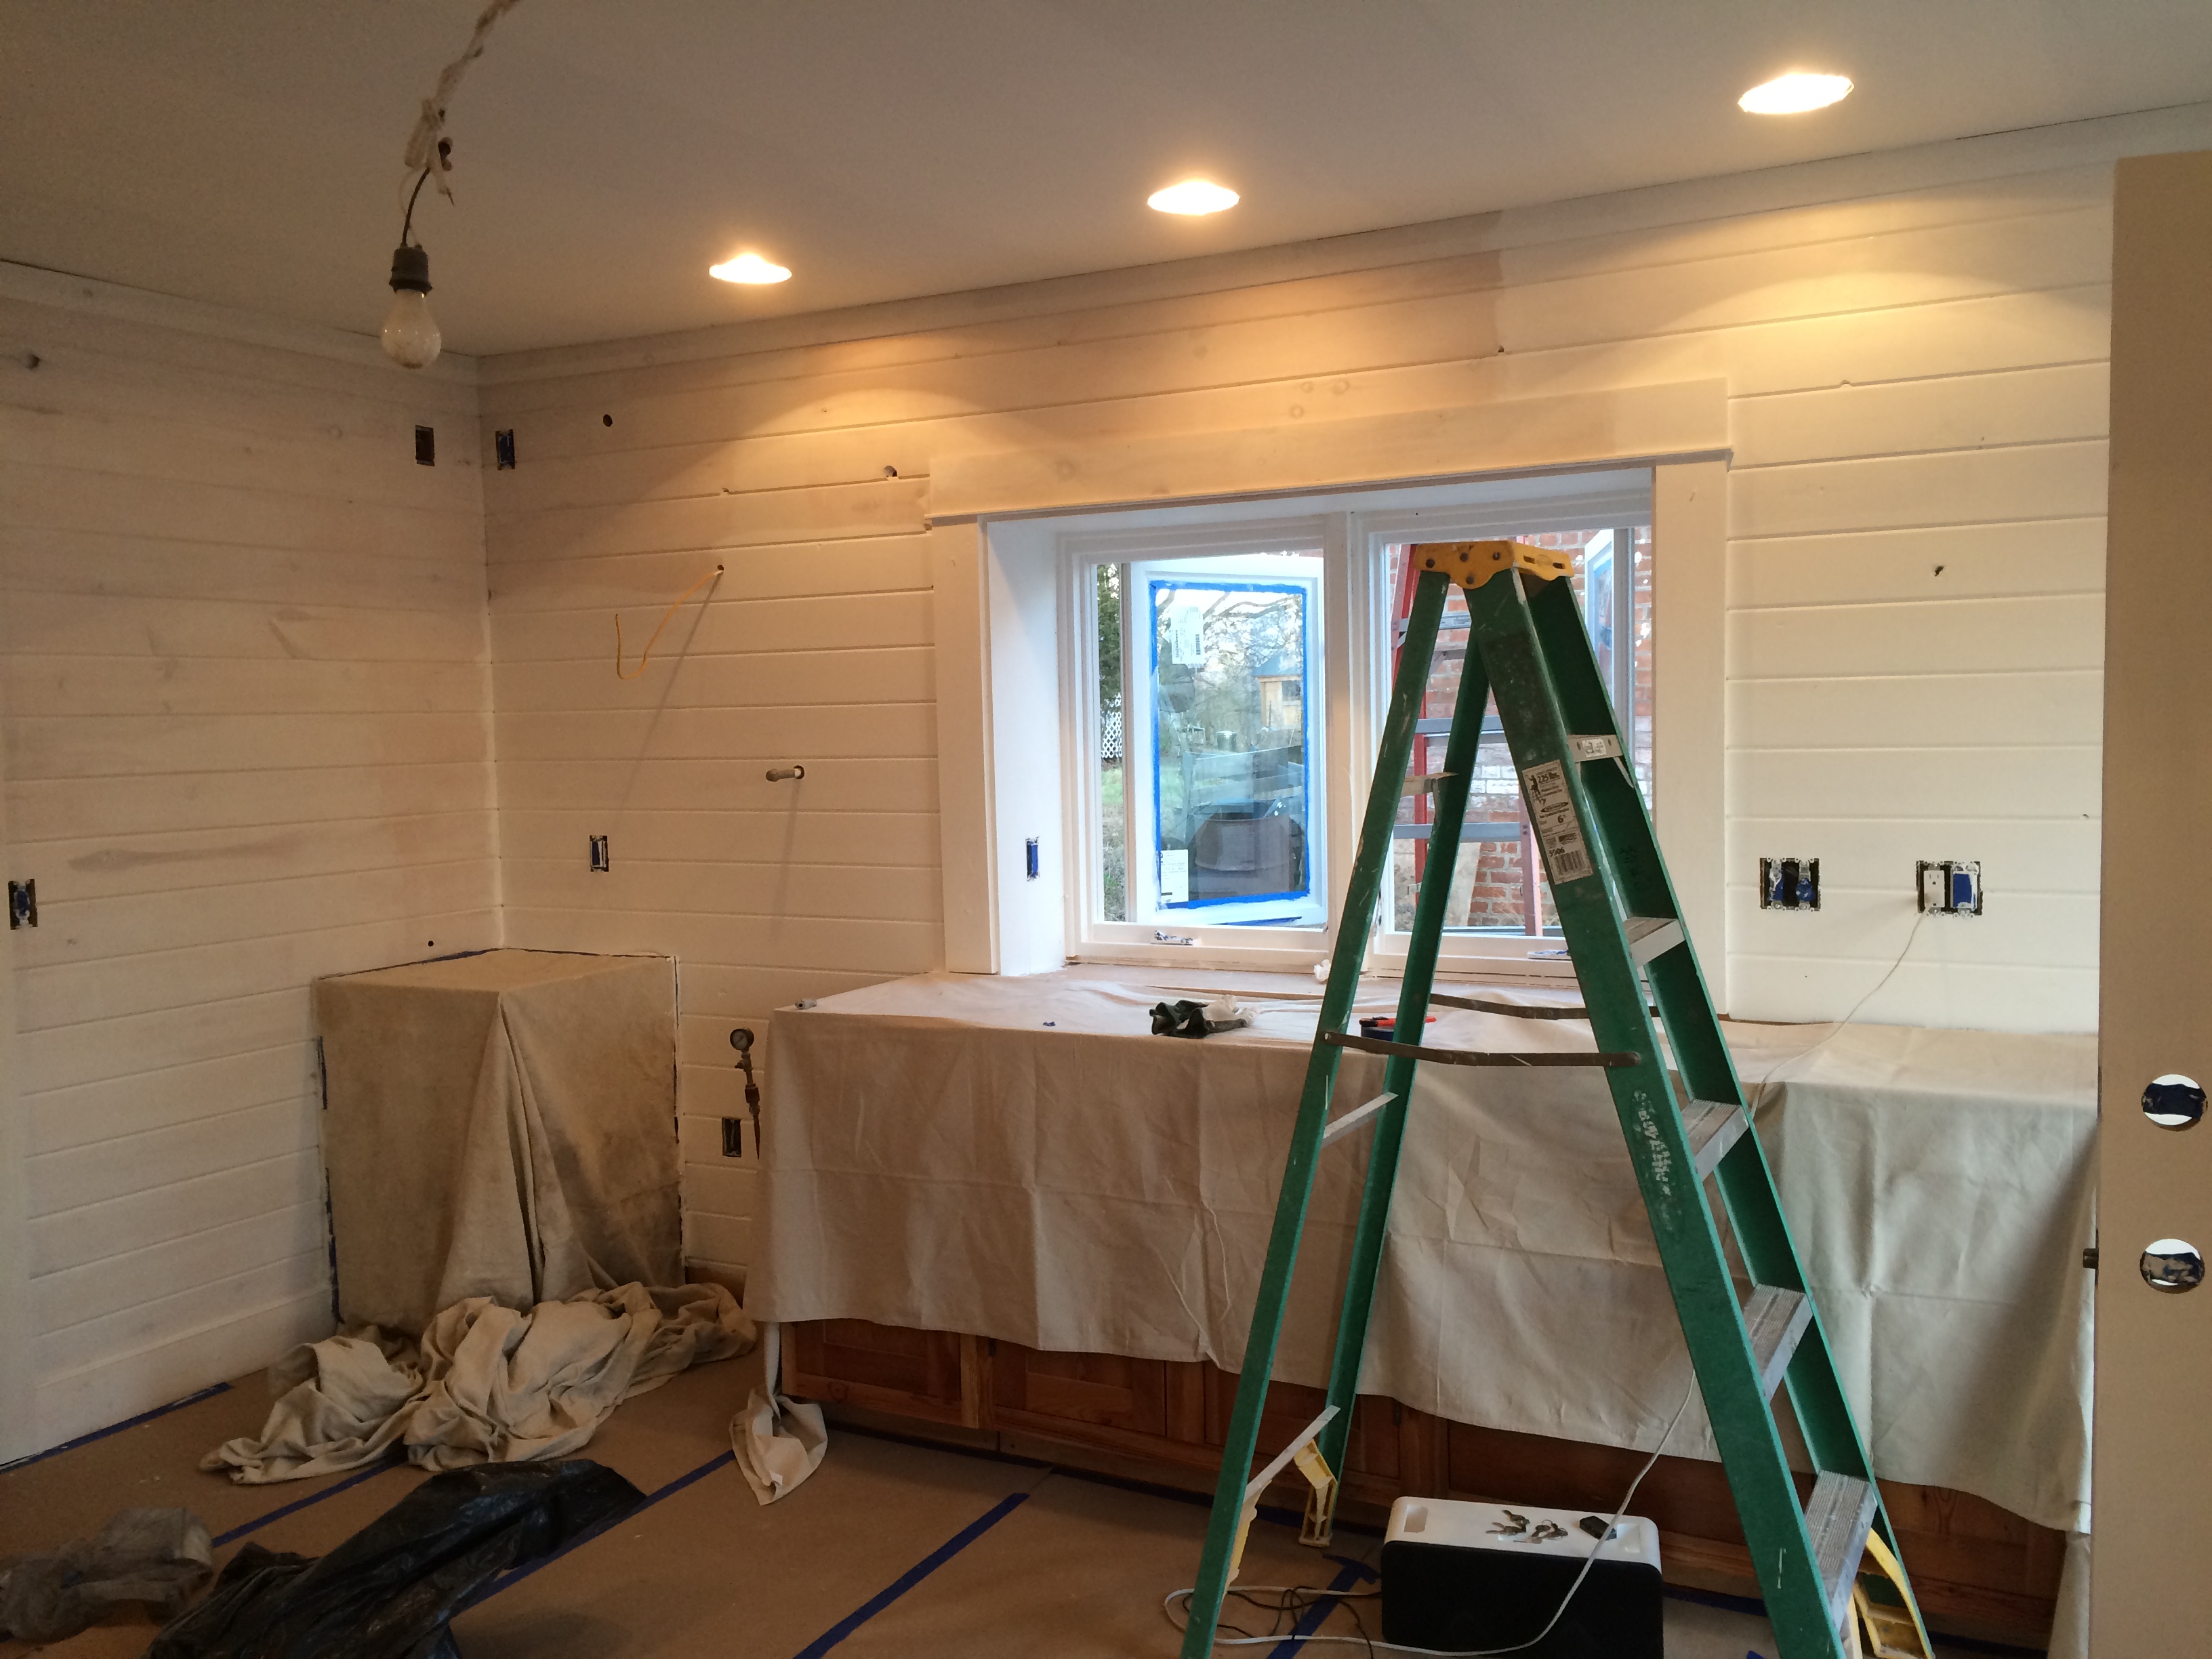
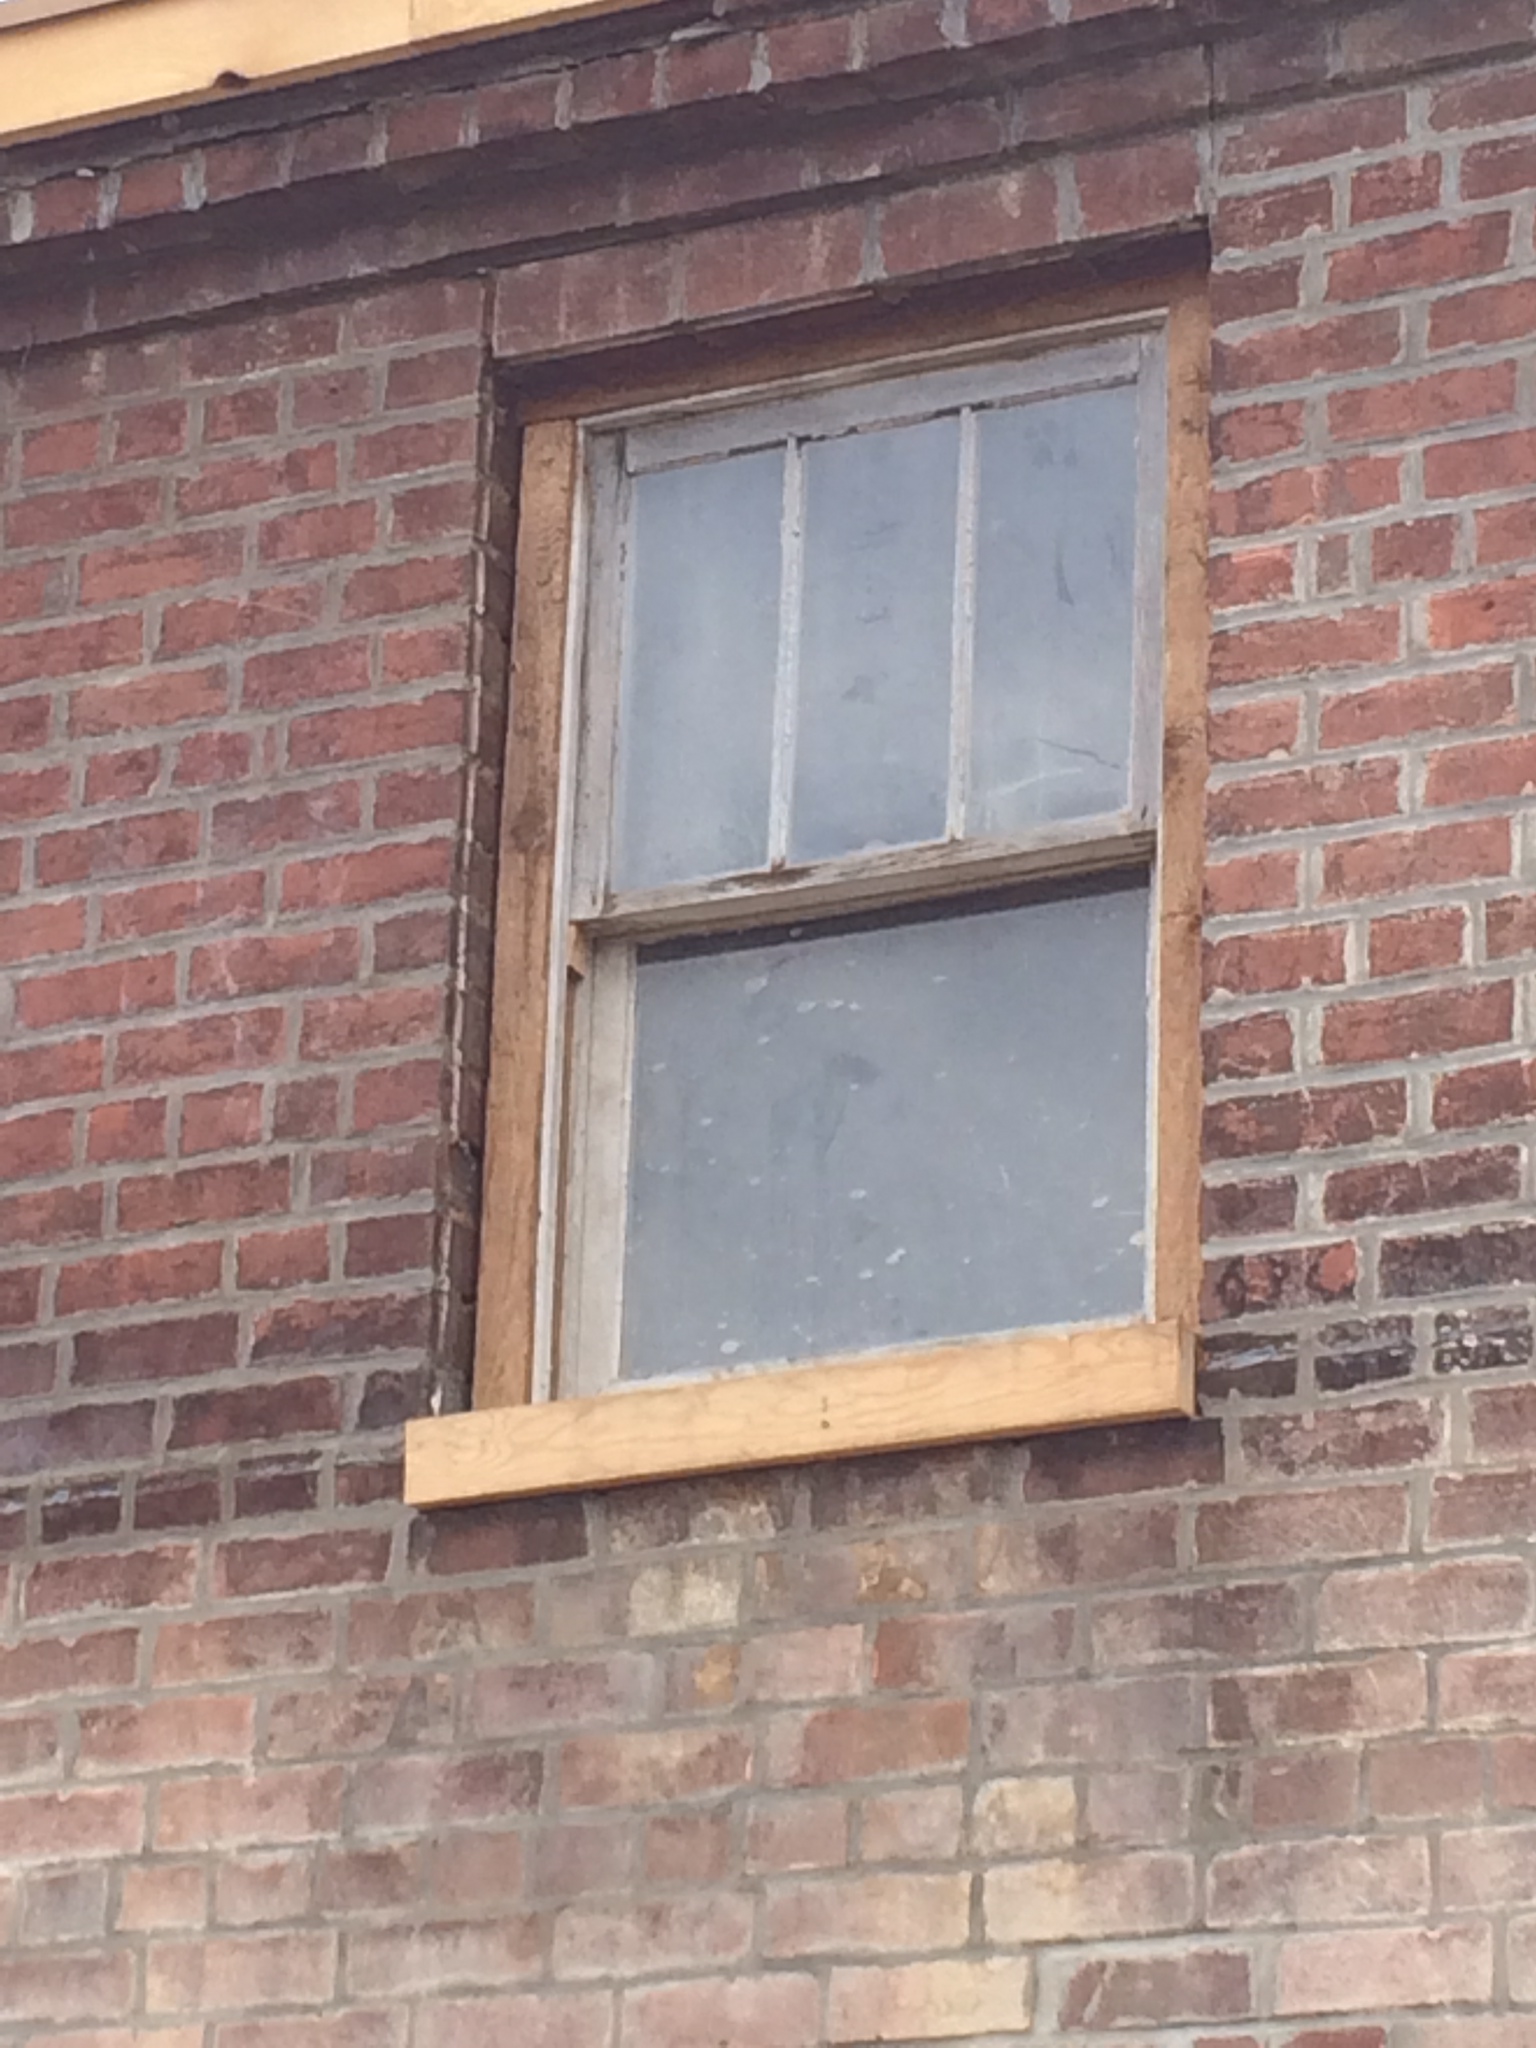
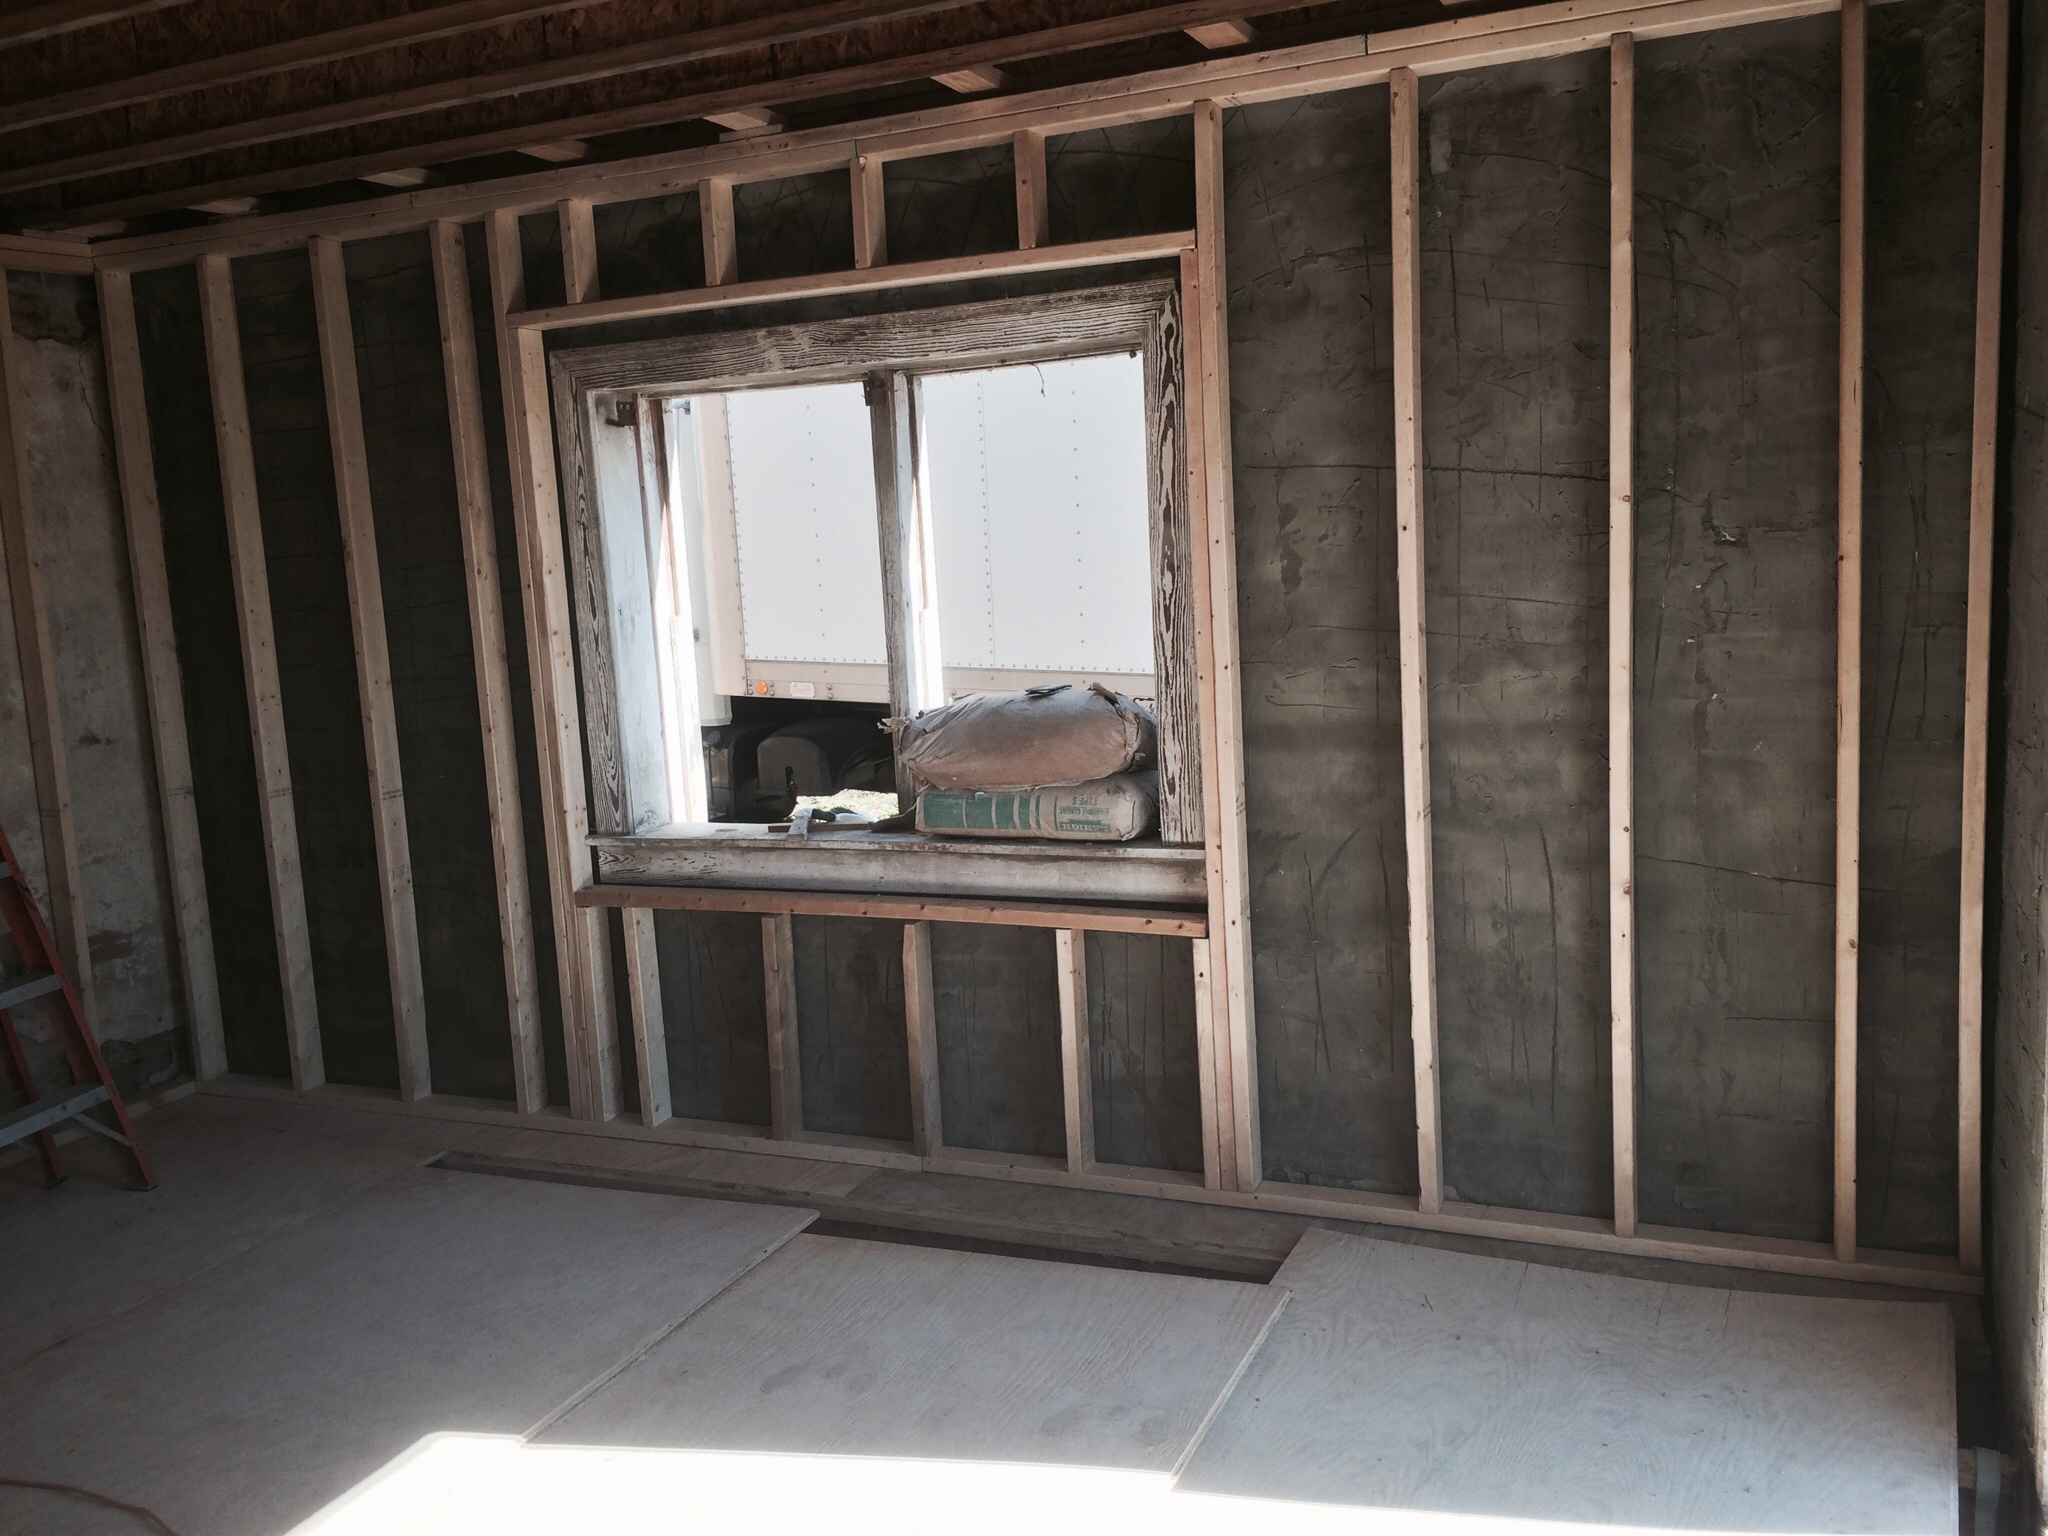
The large windows were left at their original hight, which will be a little lower than typical today, and you can see the mason did a running, or “American”, bond on this structure to match the original design.  We think those old bricks really cleaned up nice.

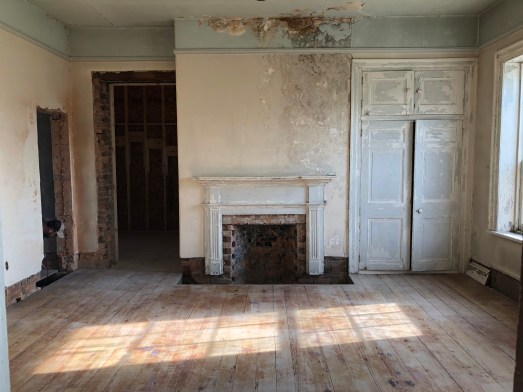
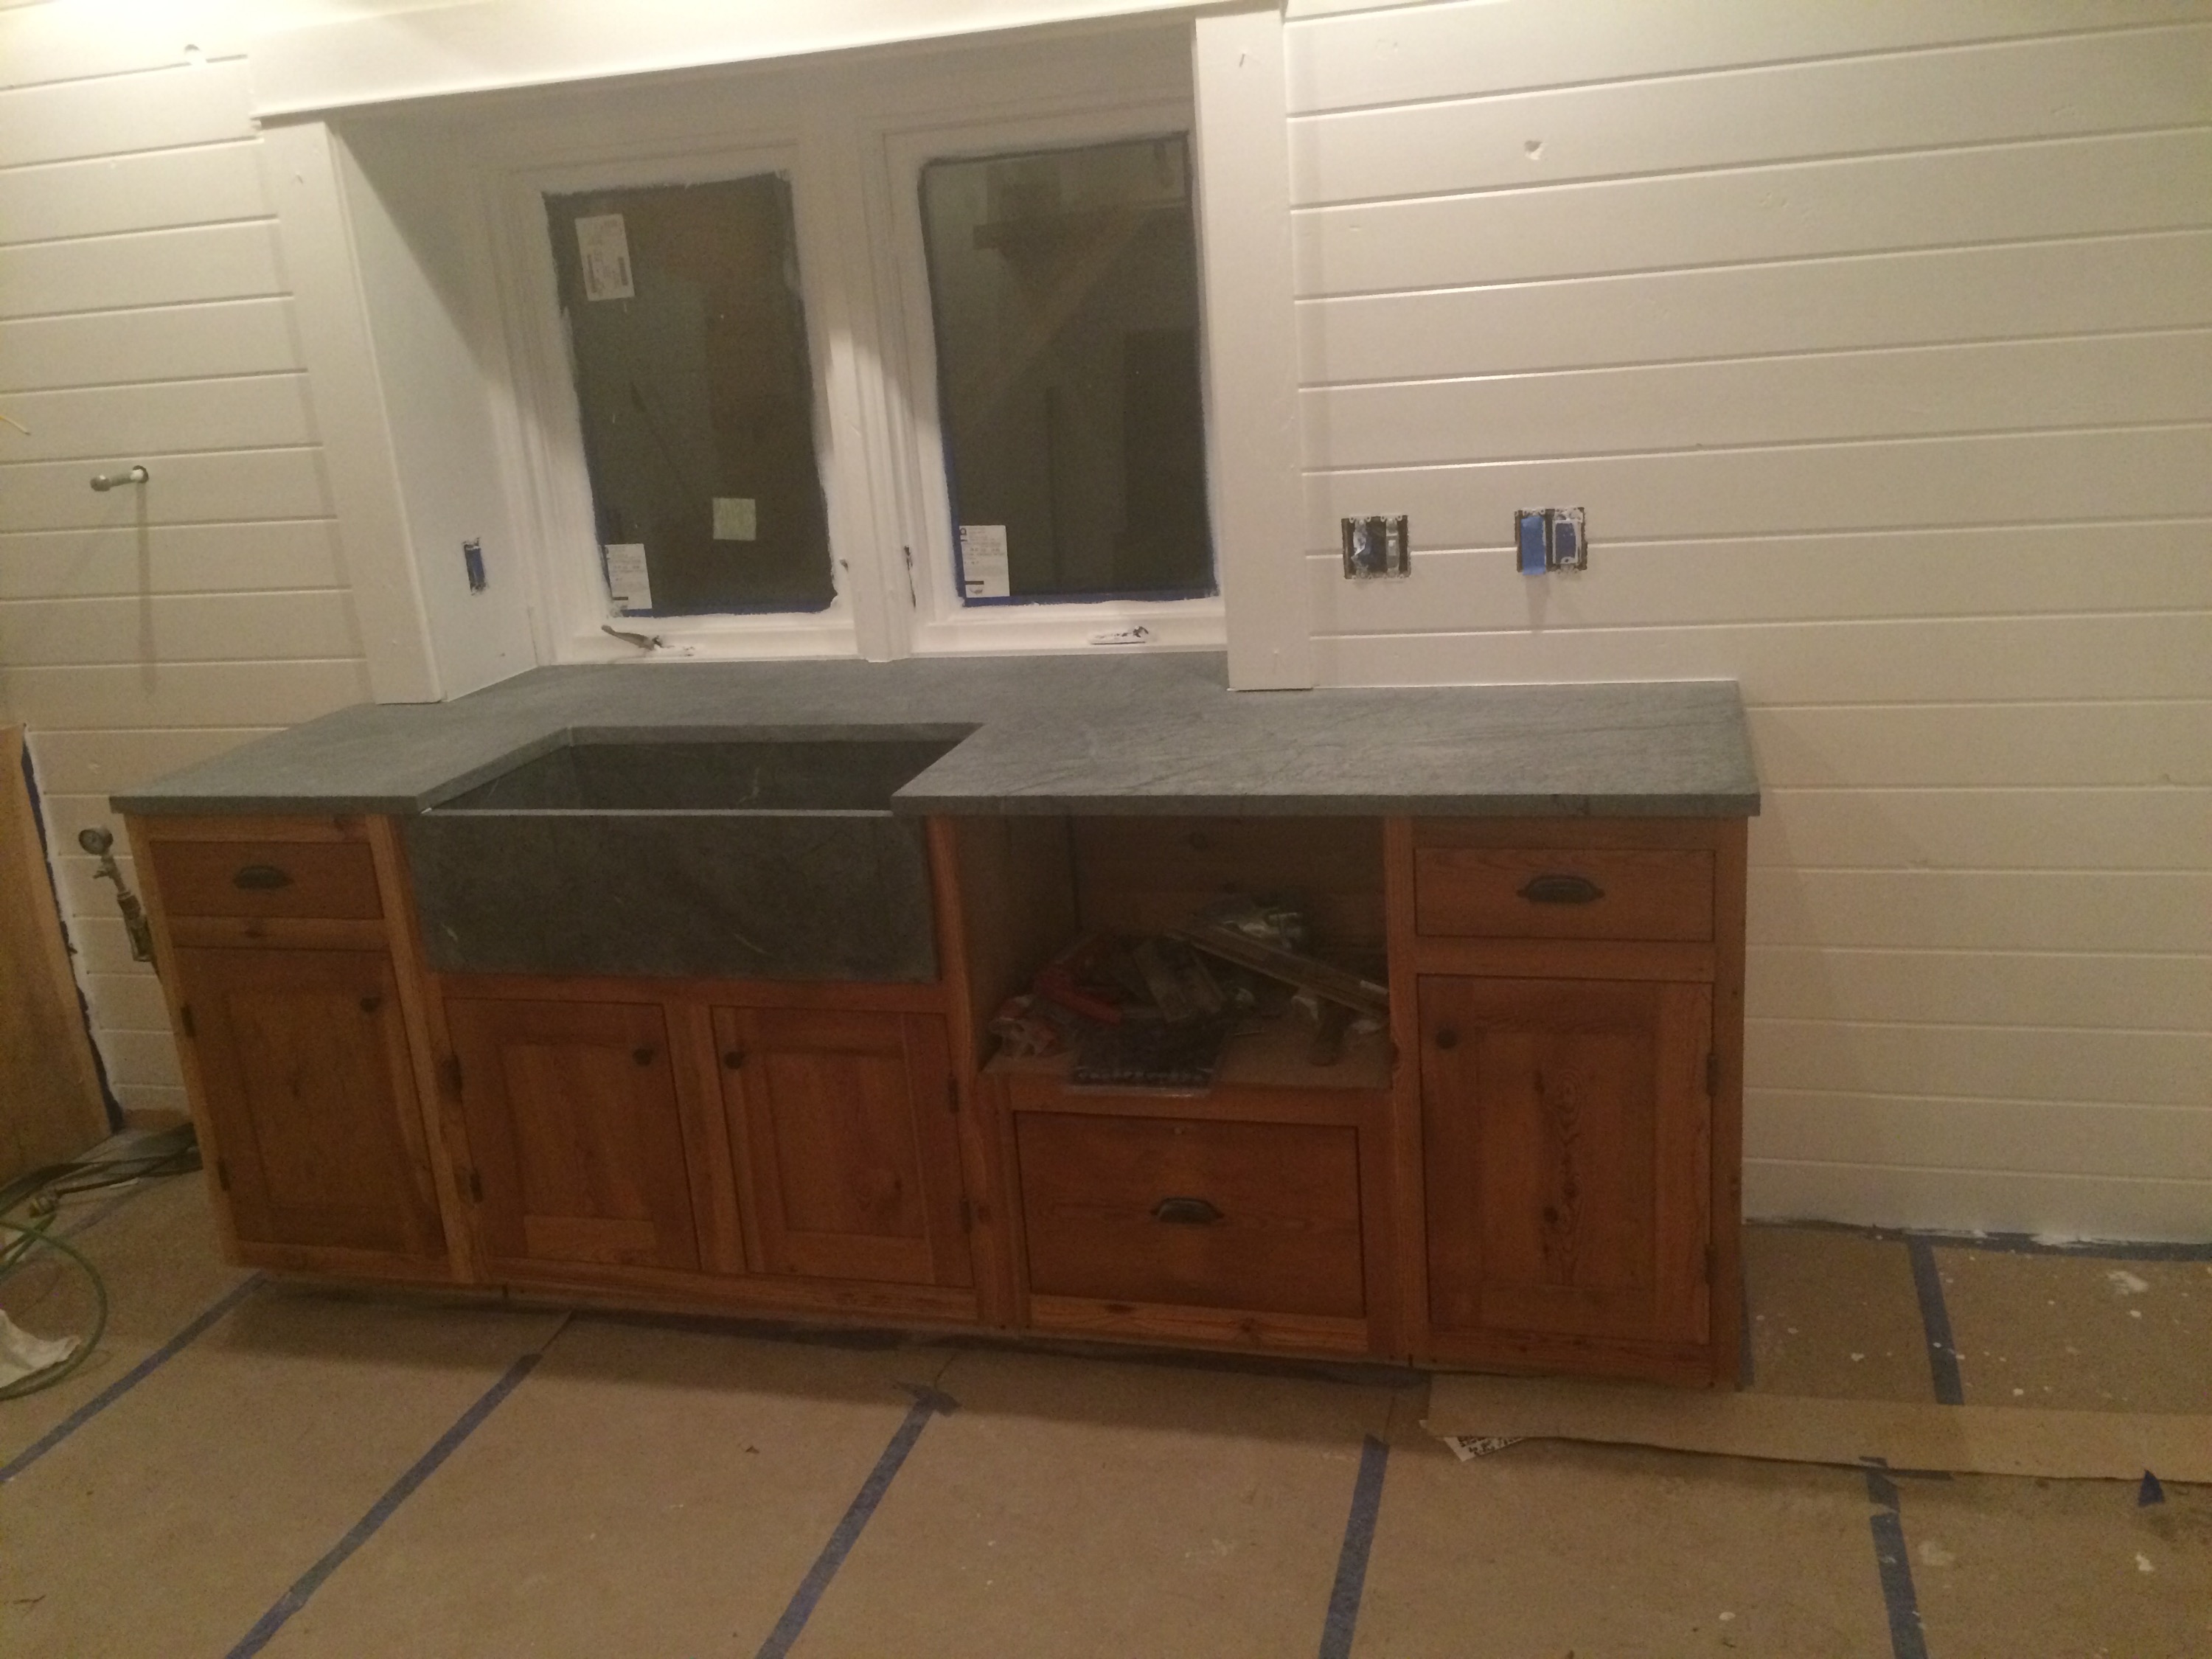
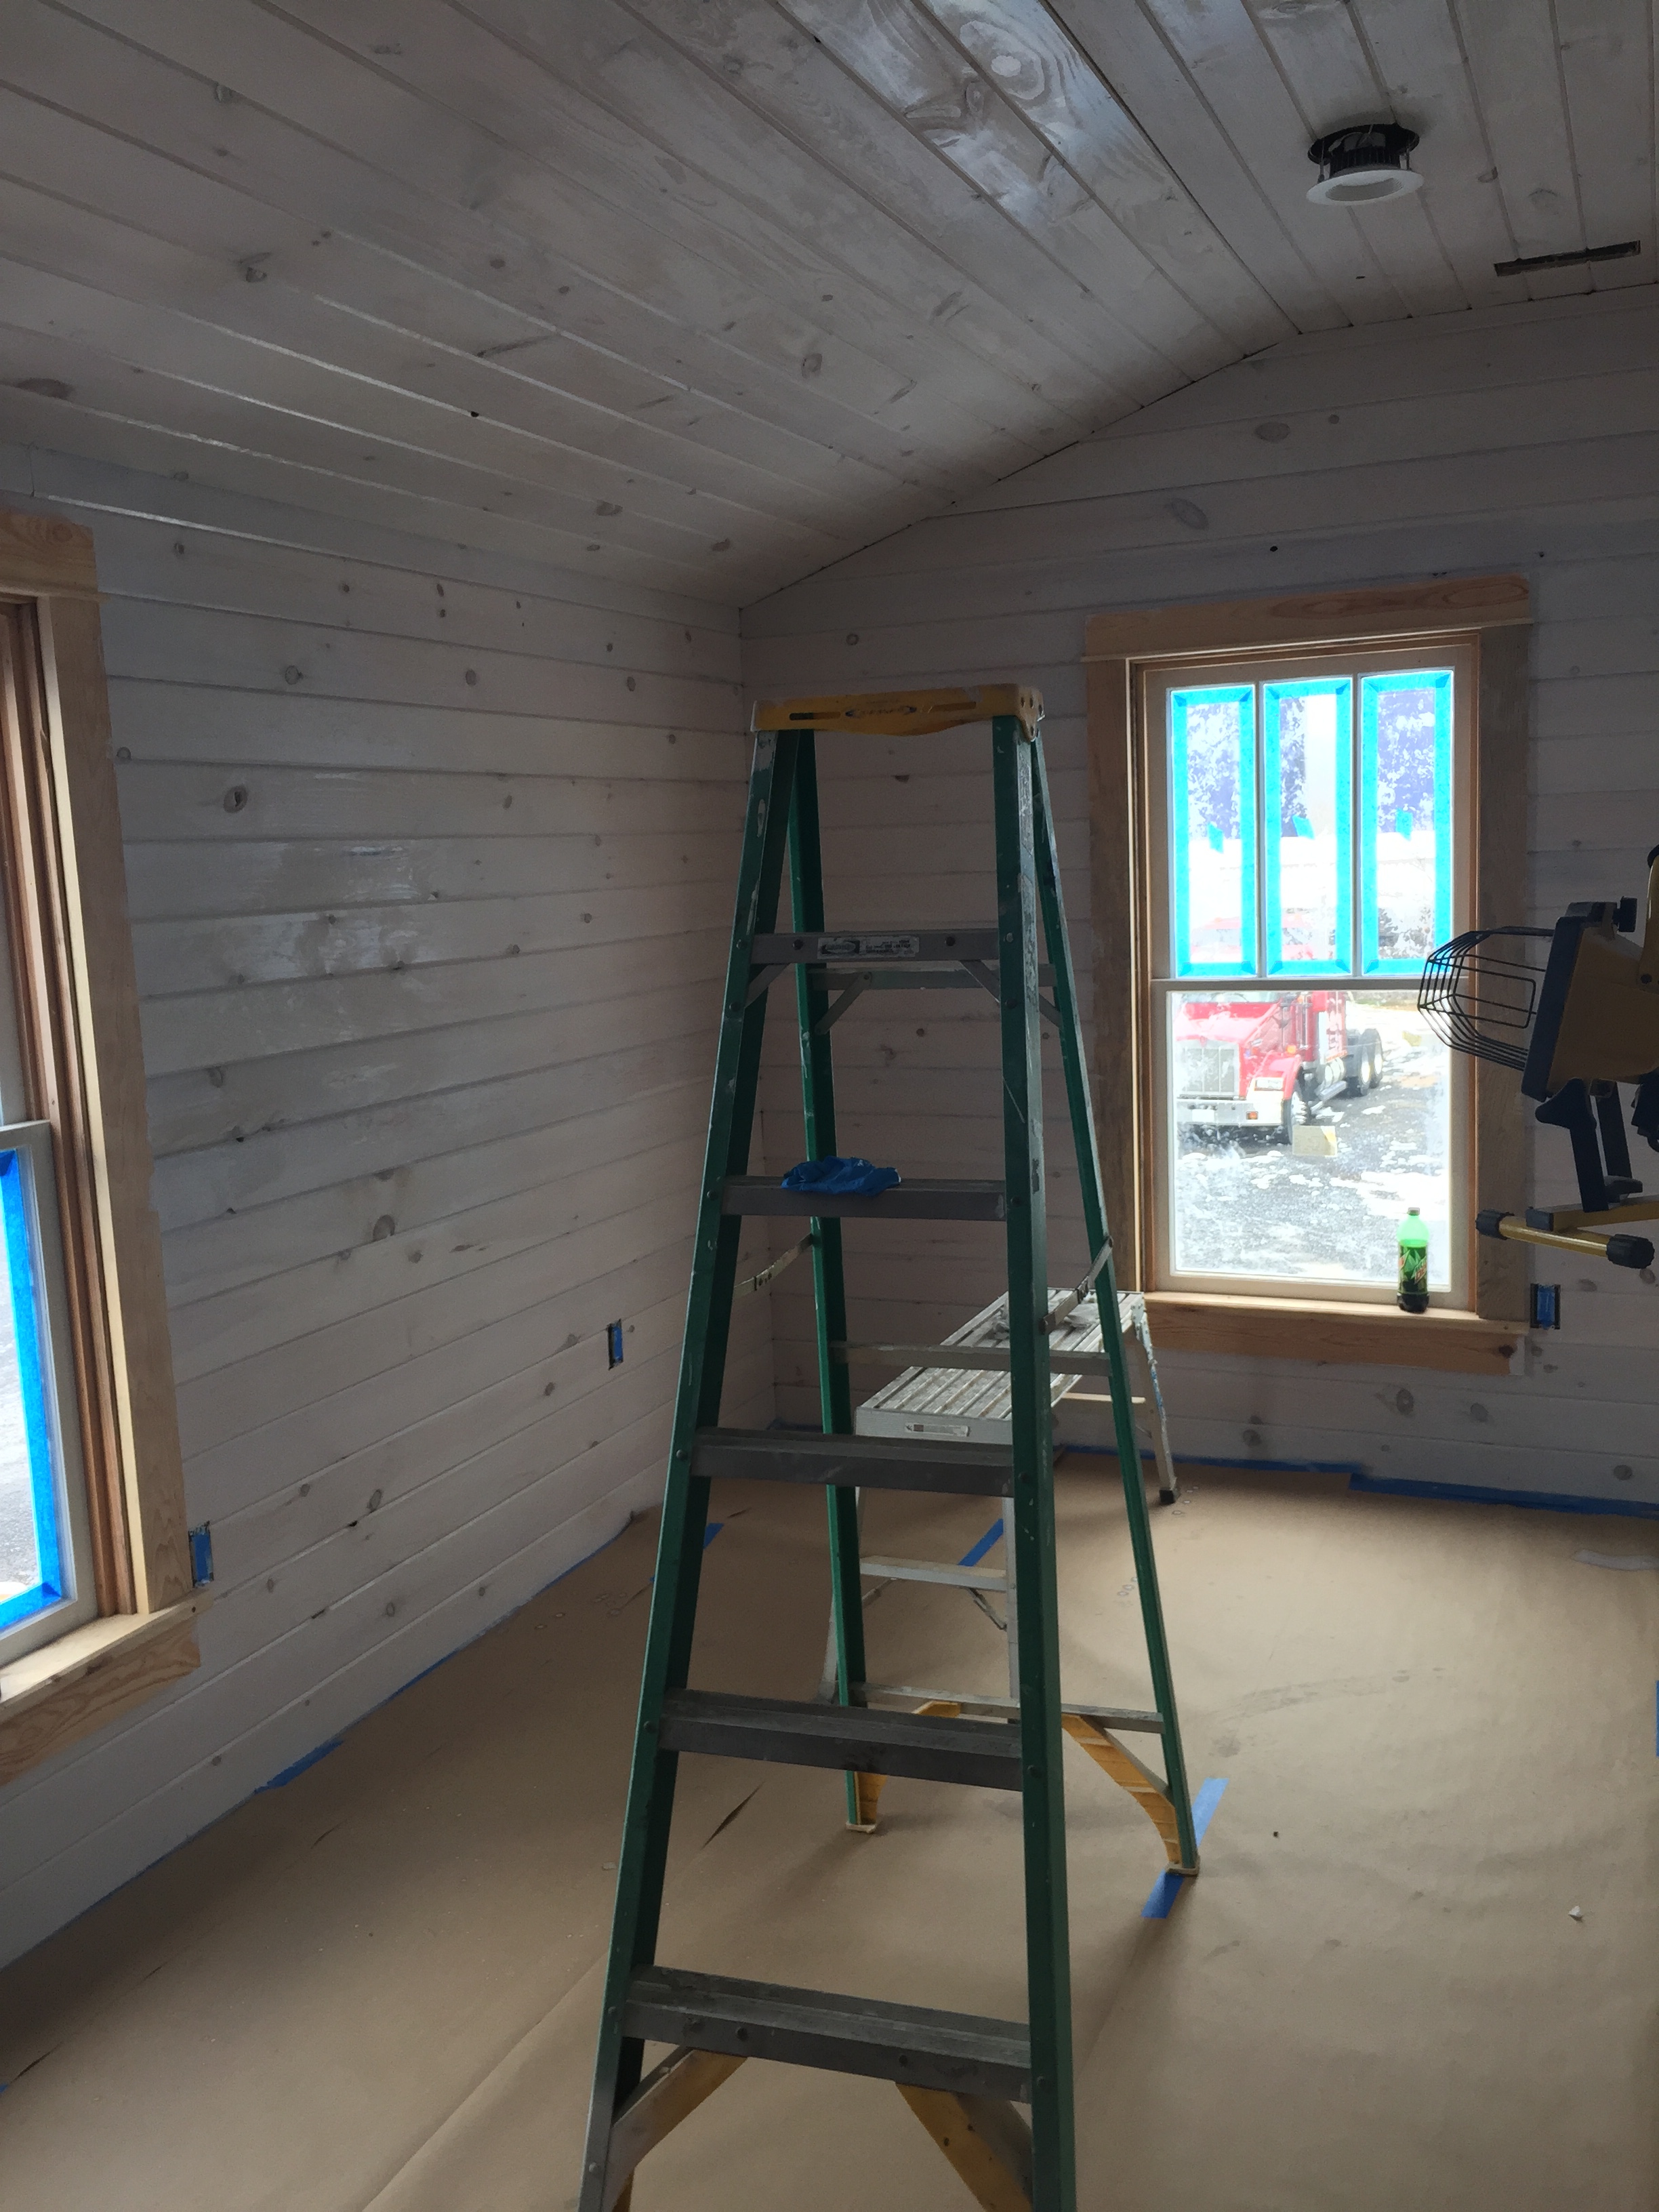
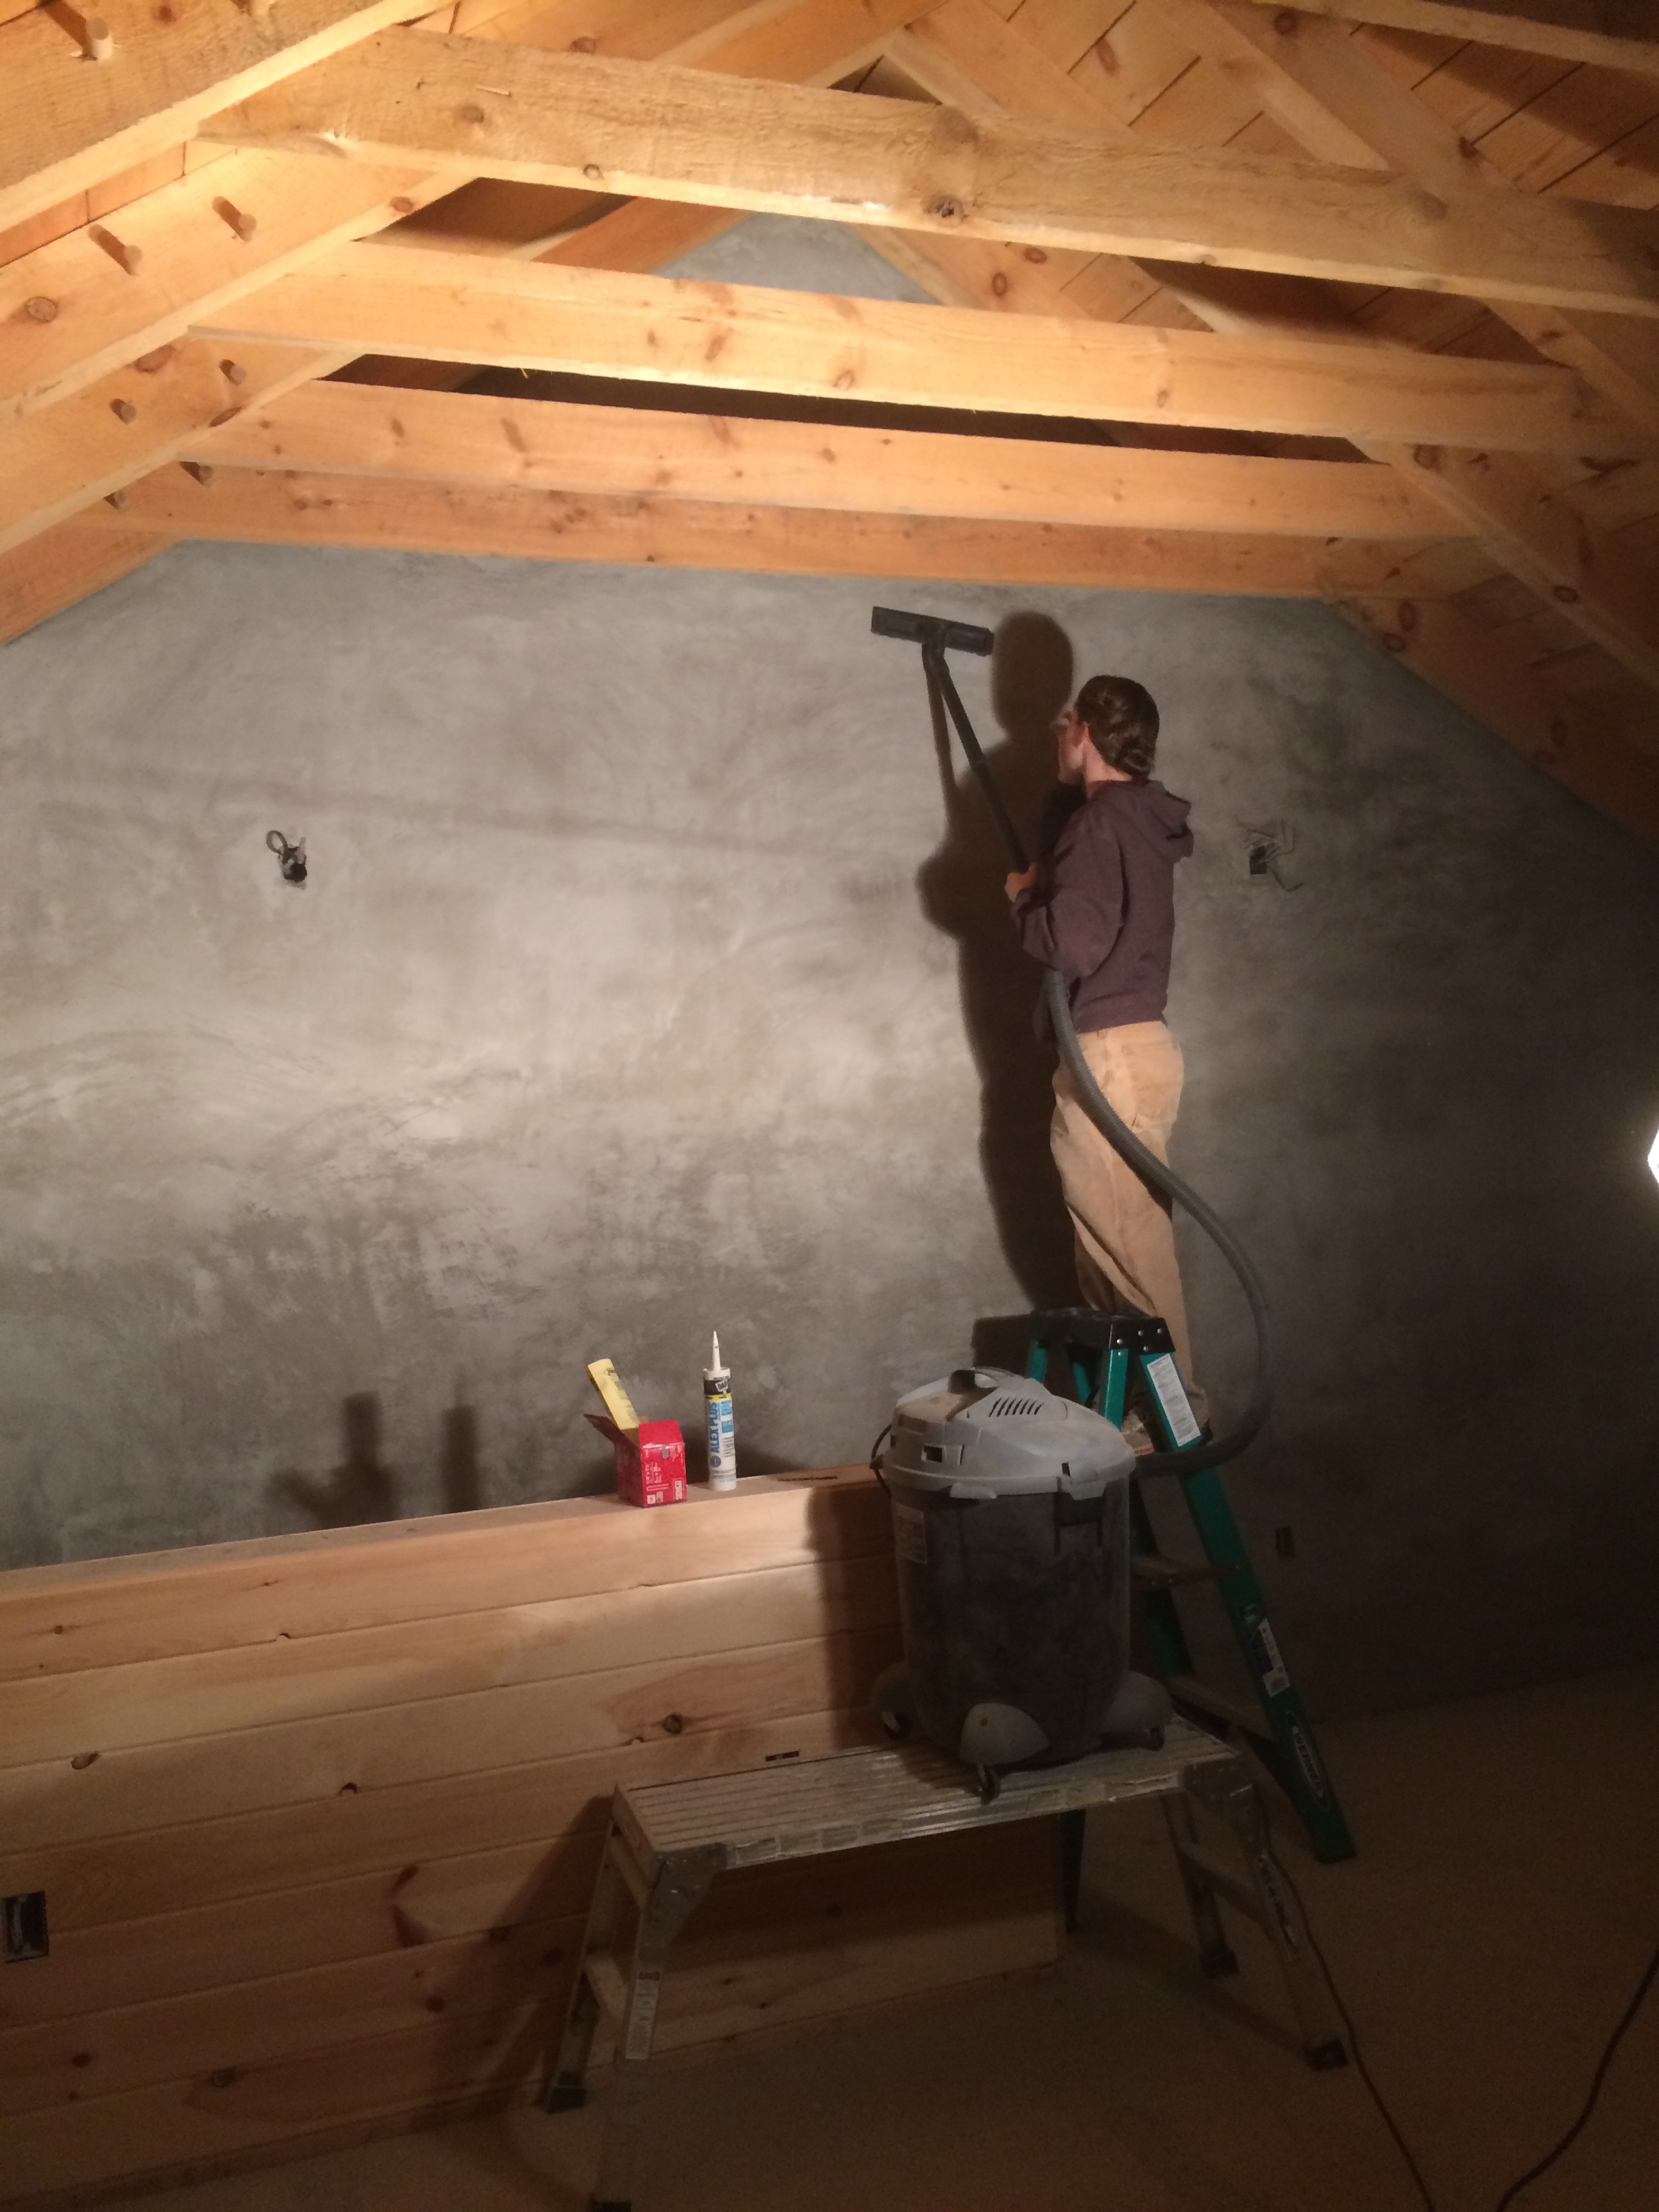
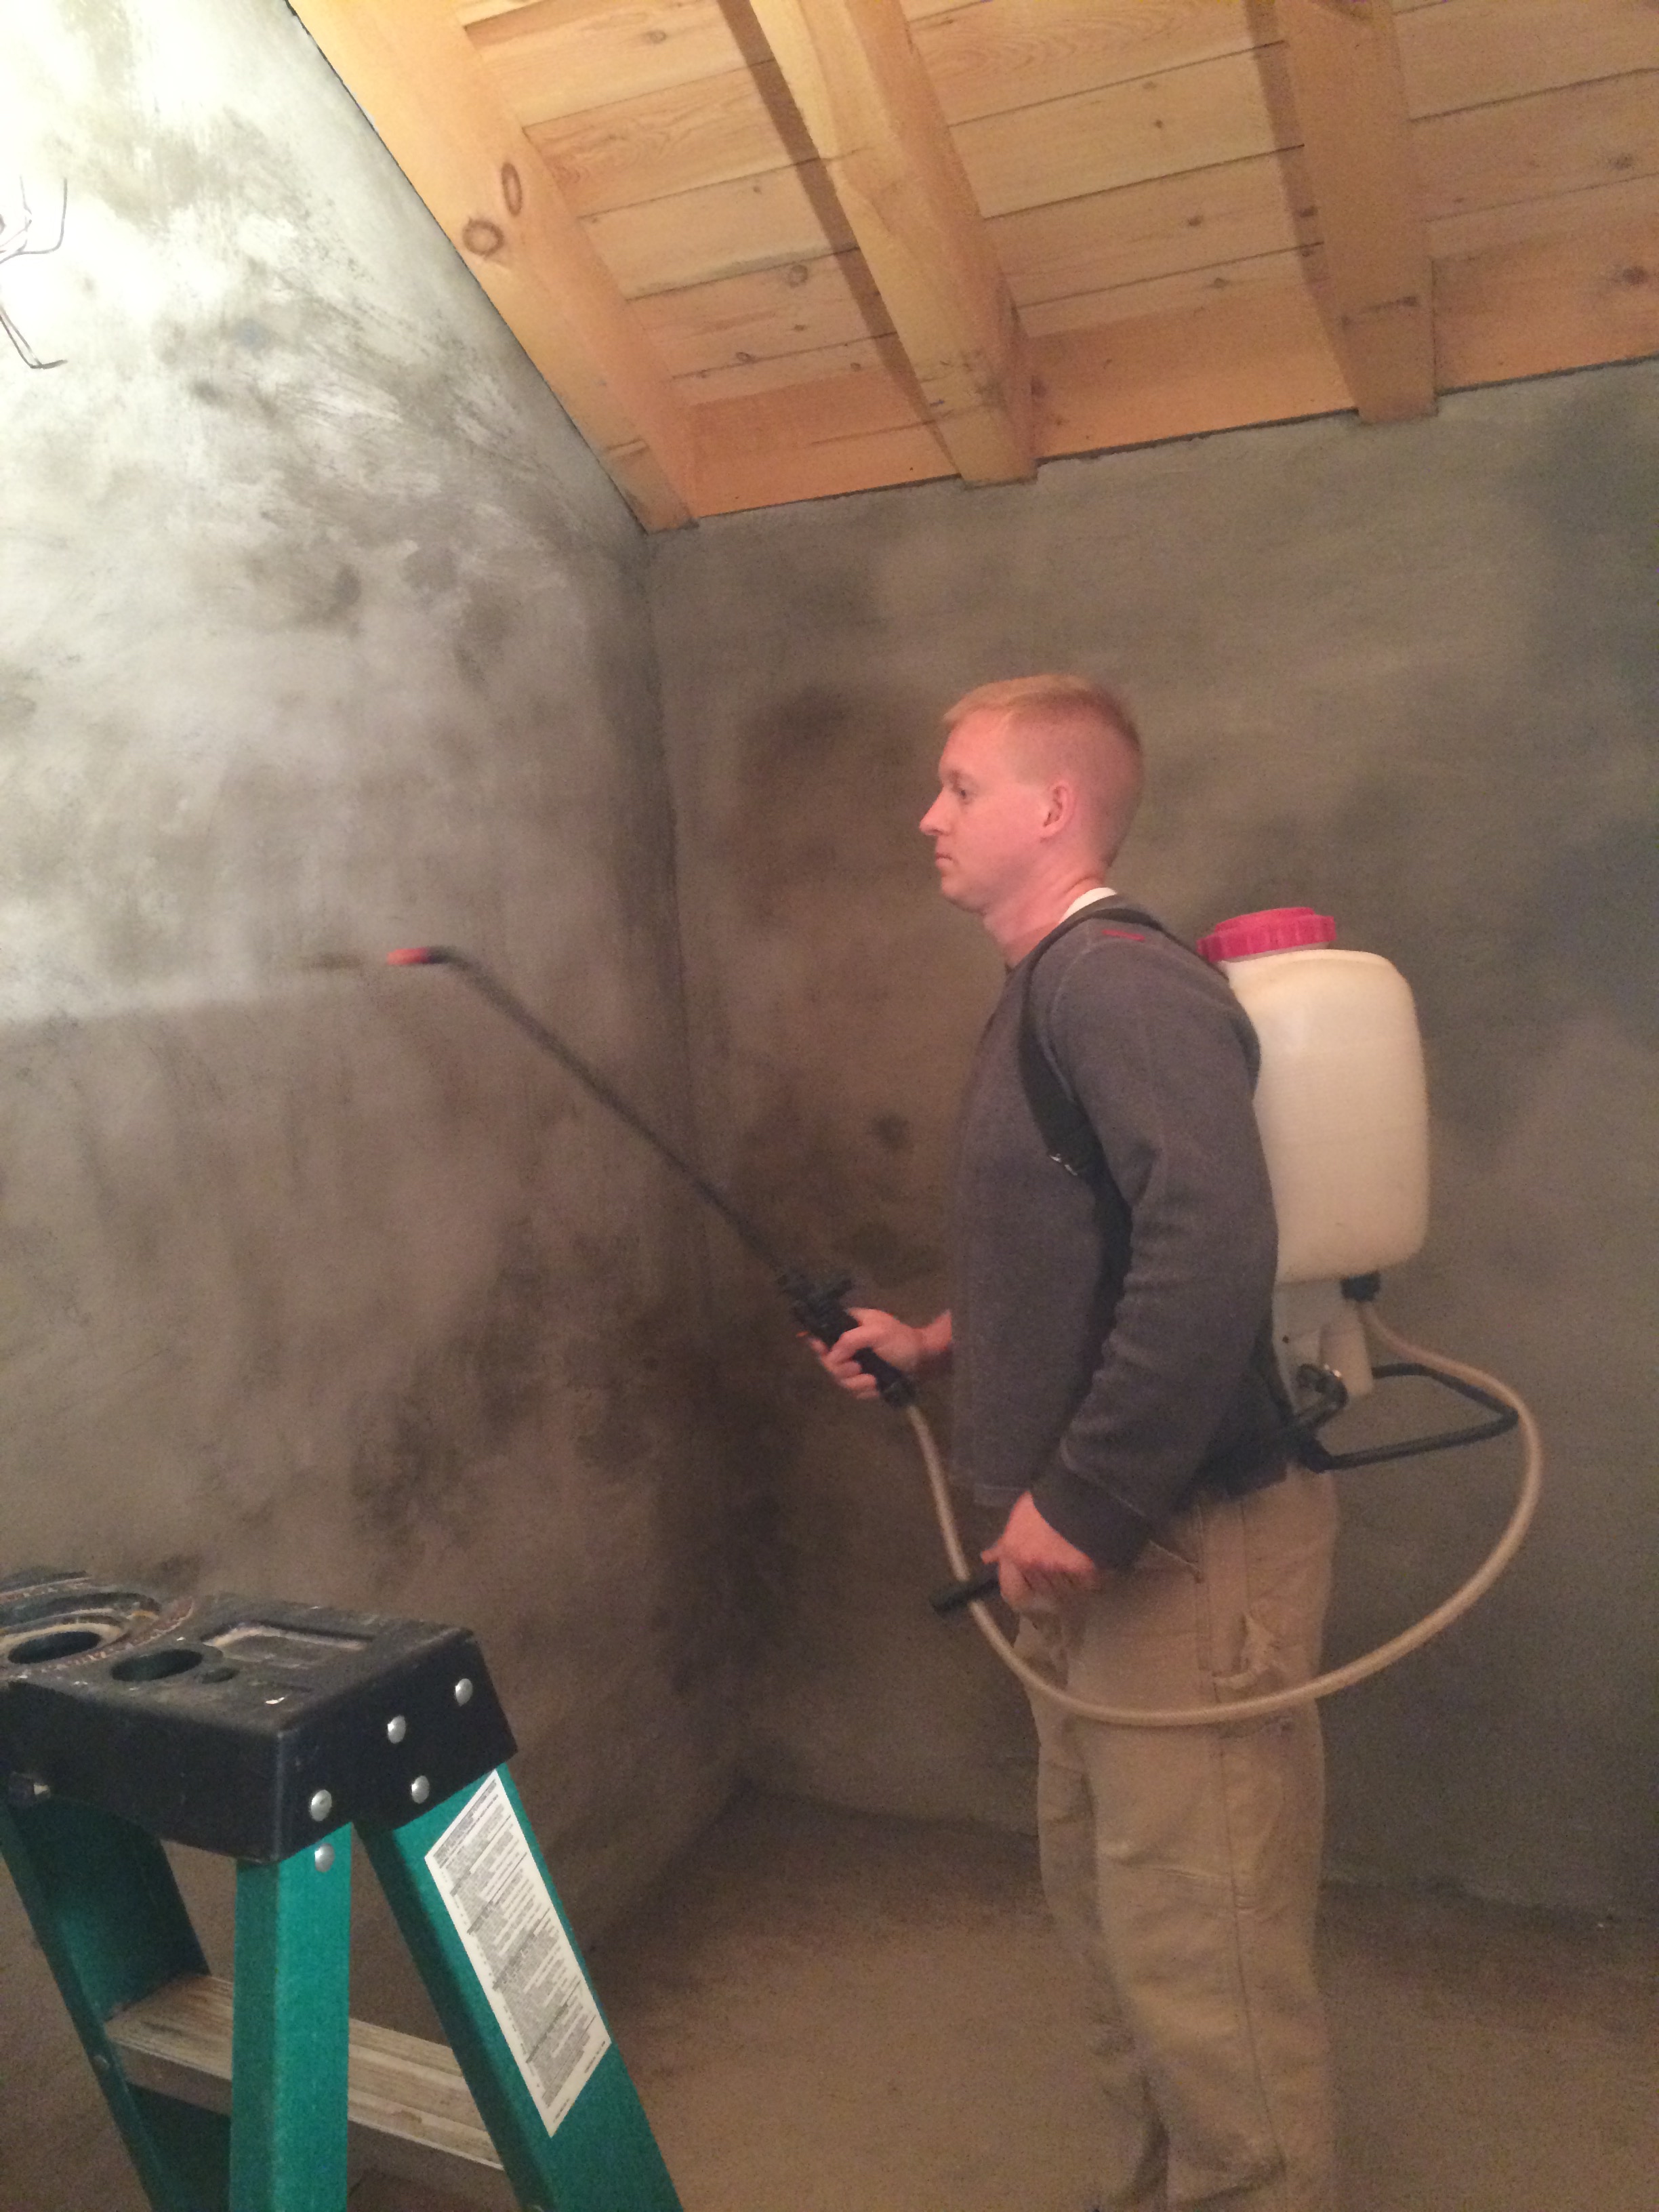
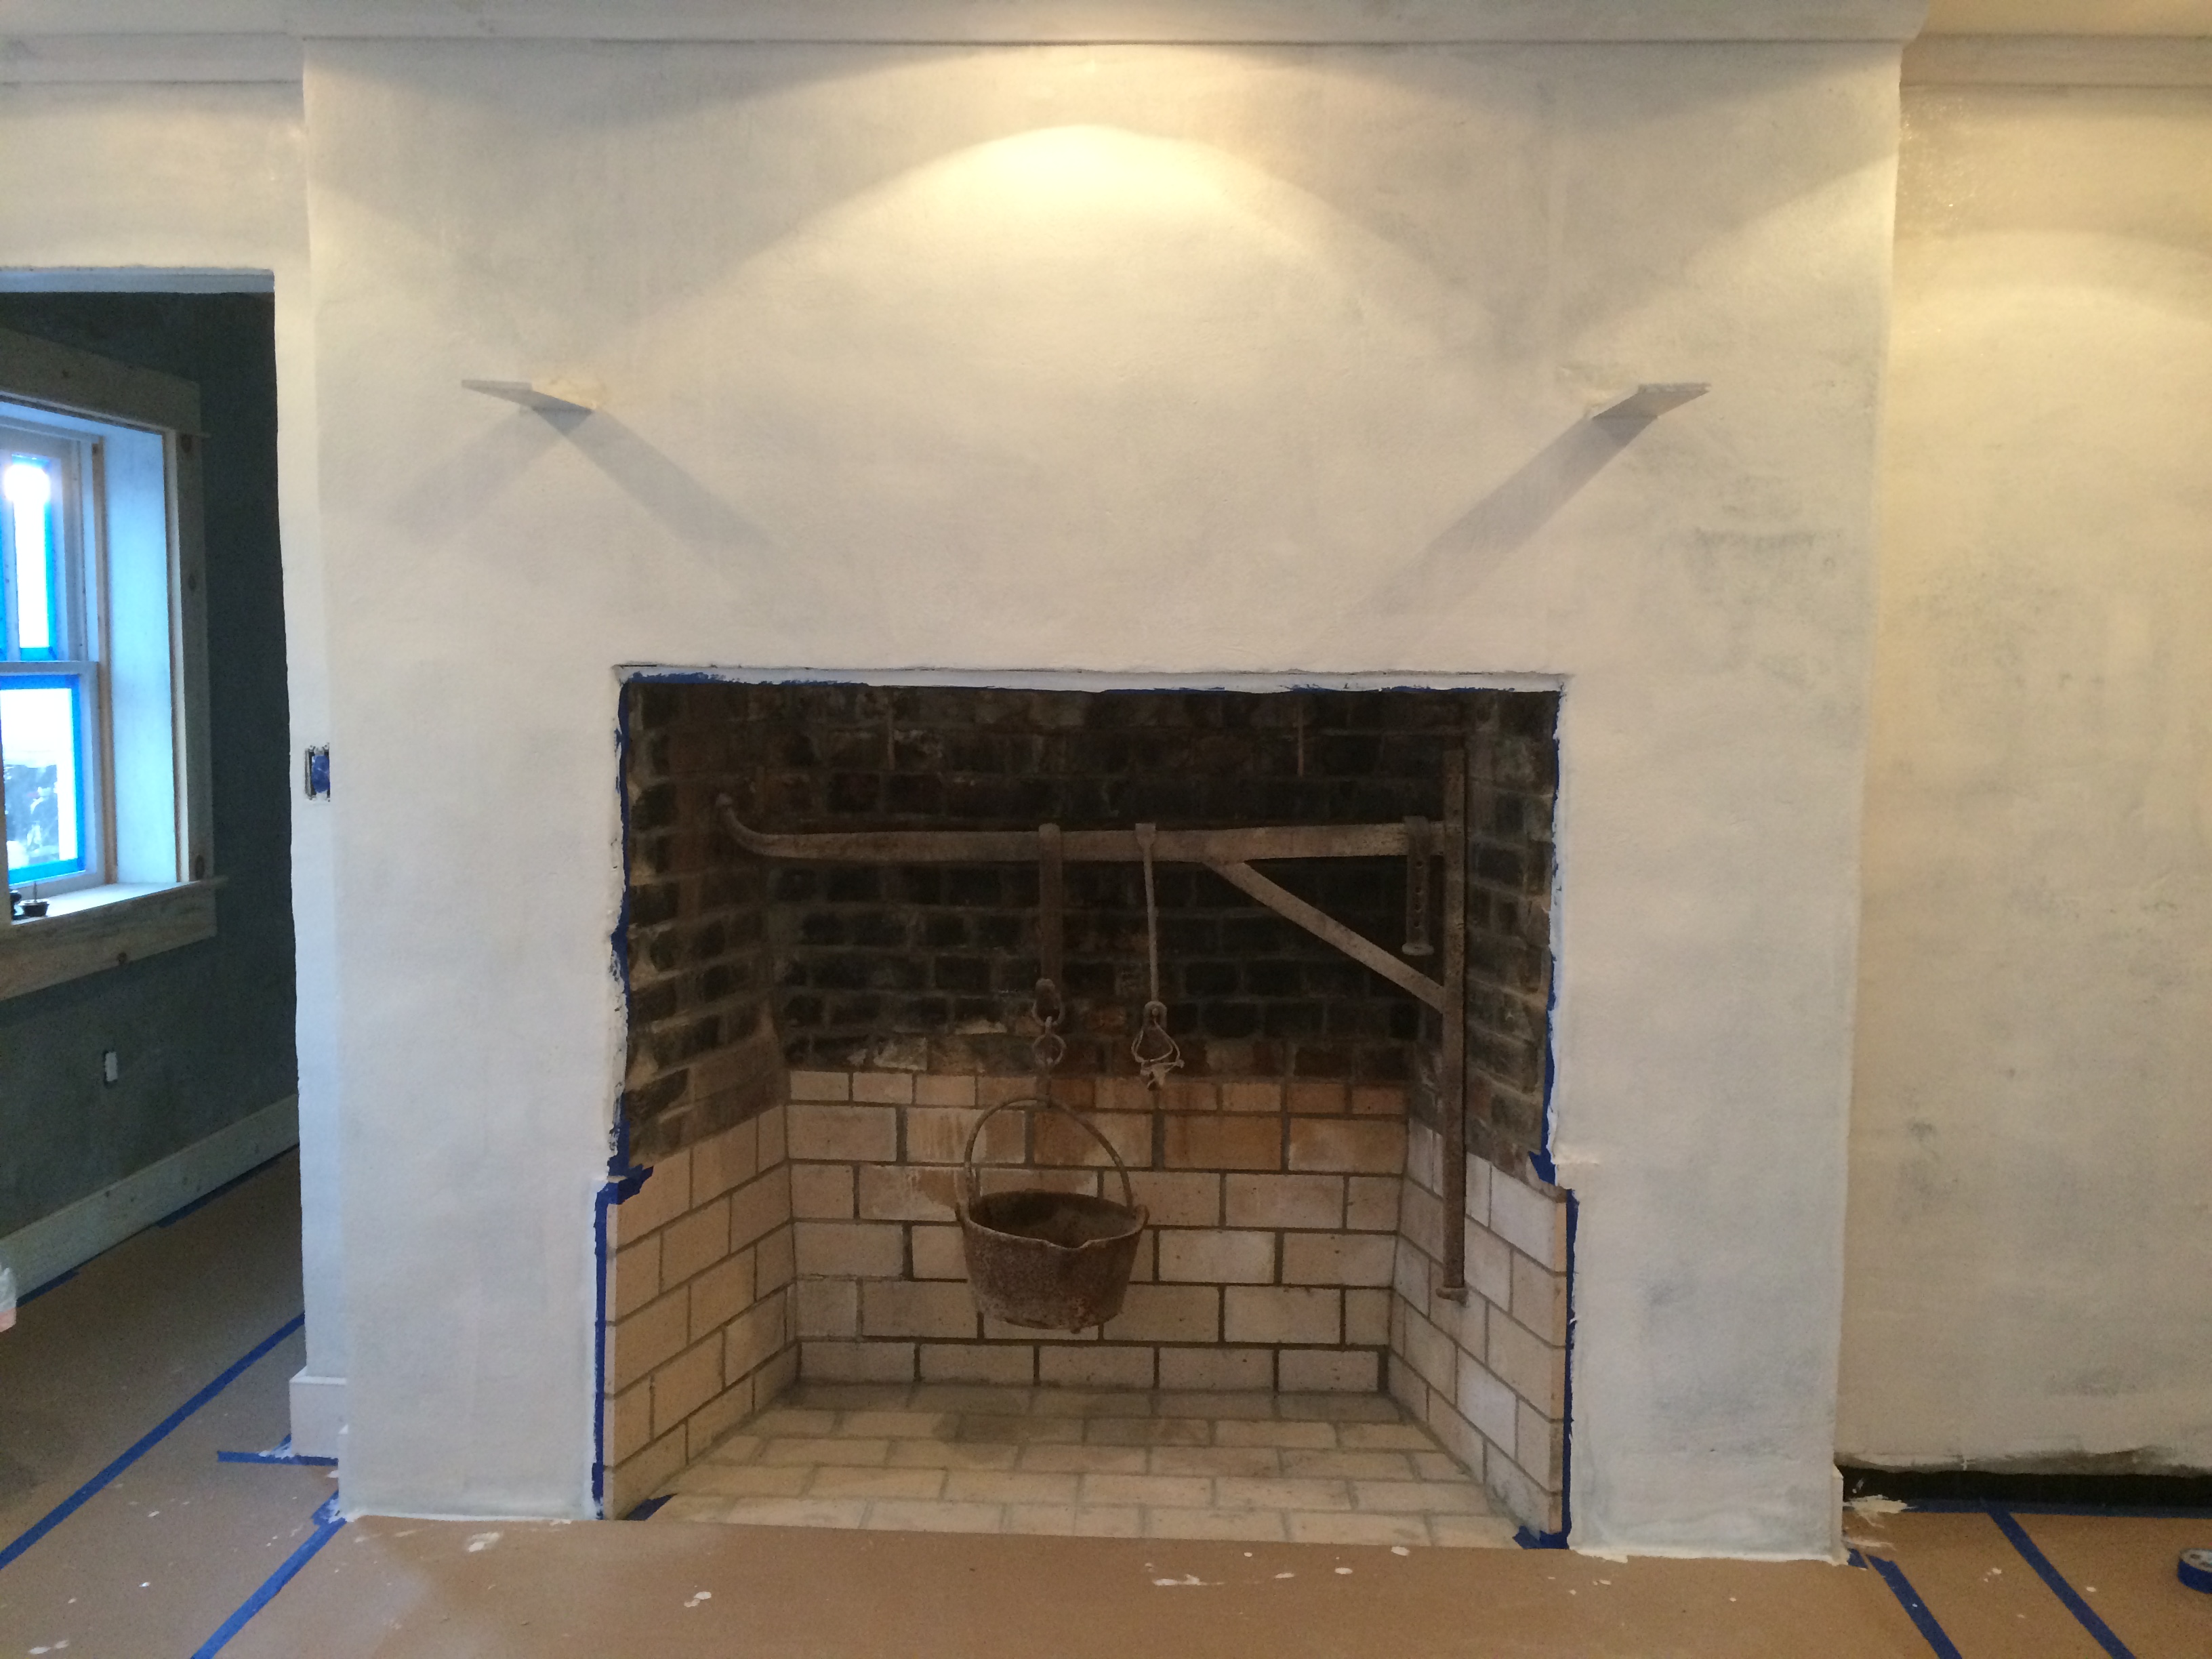
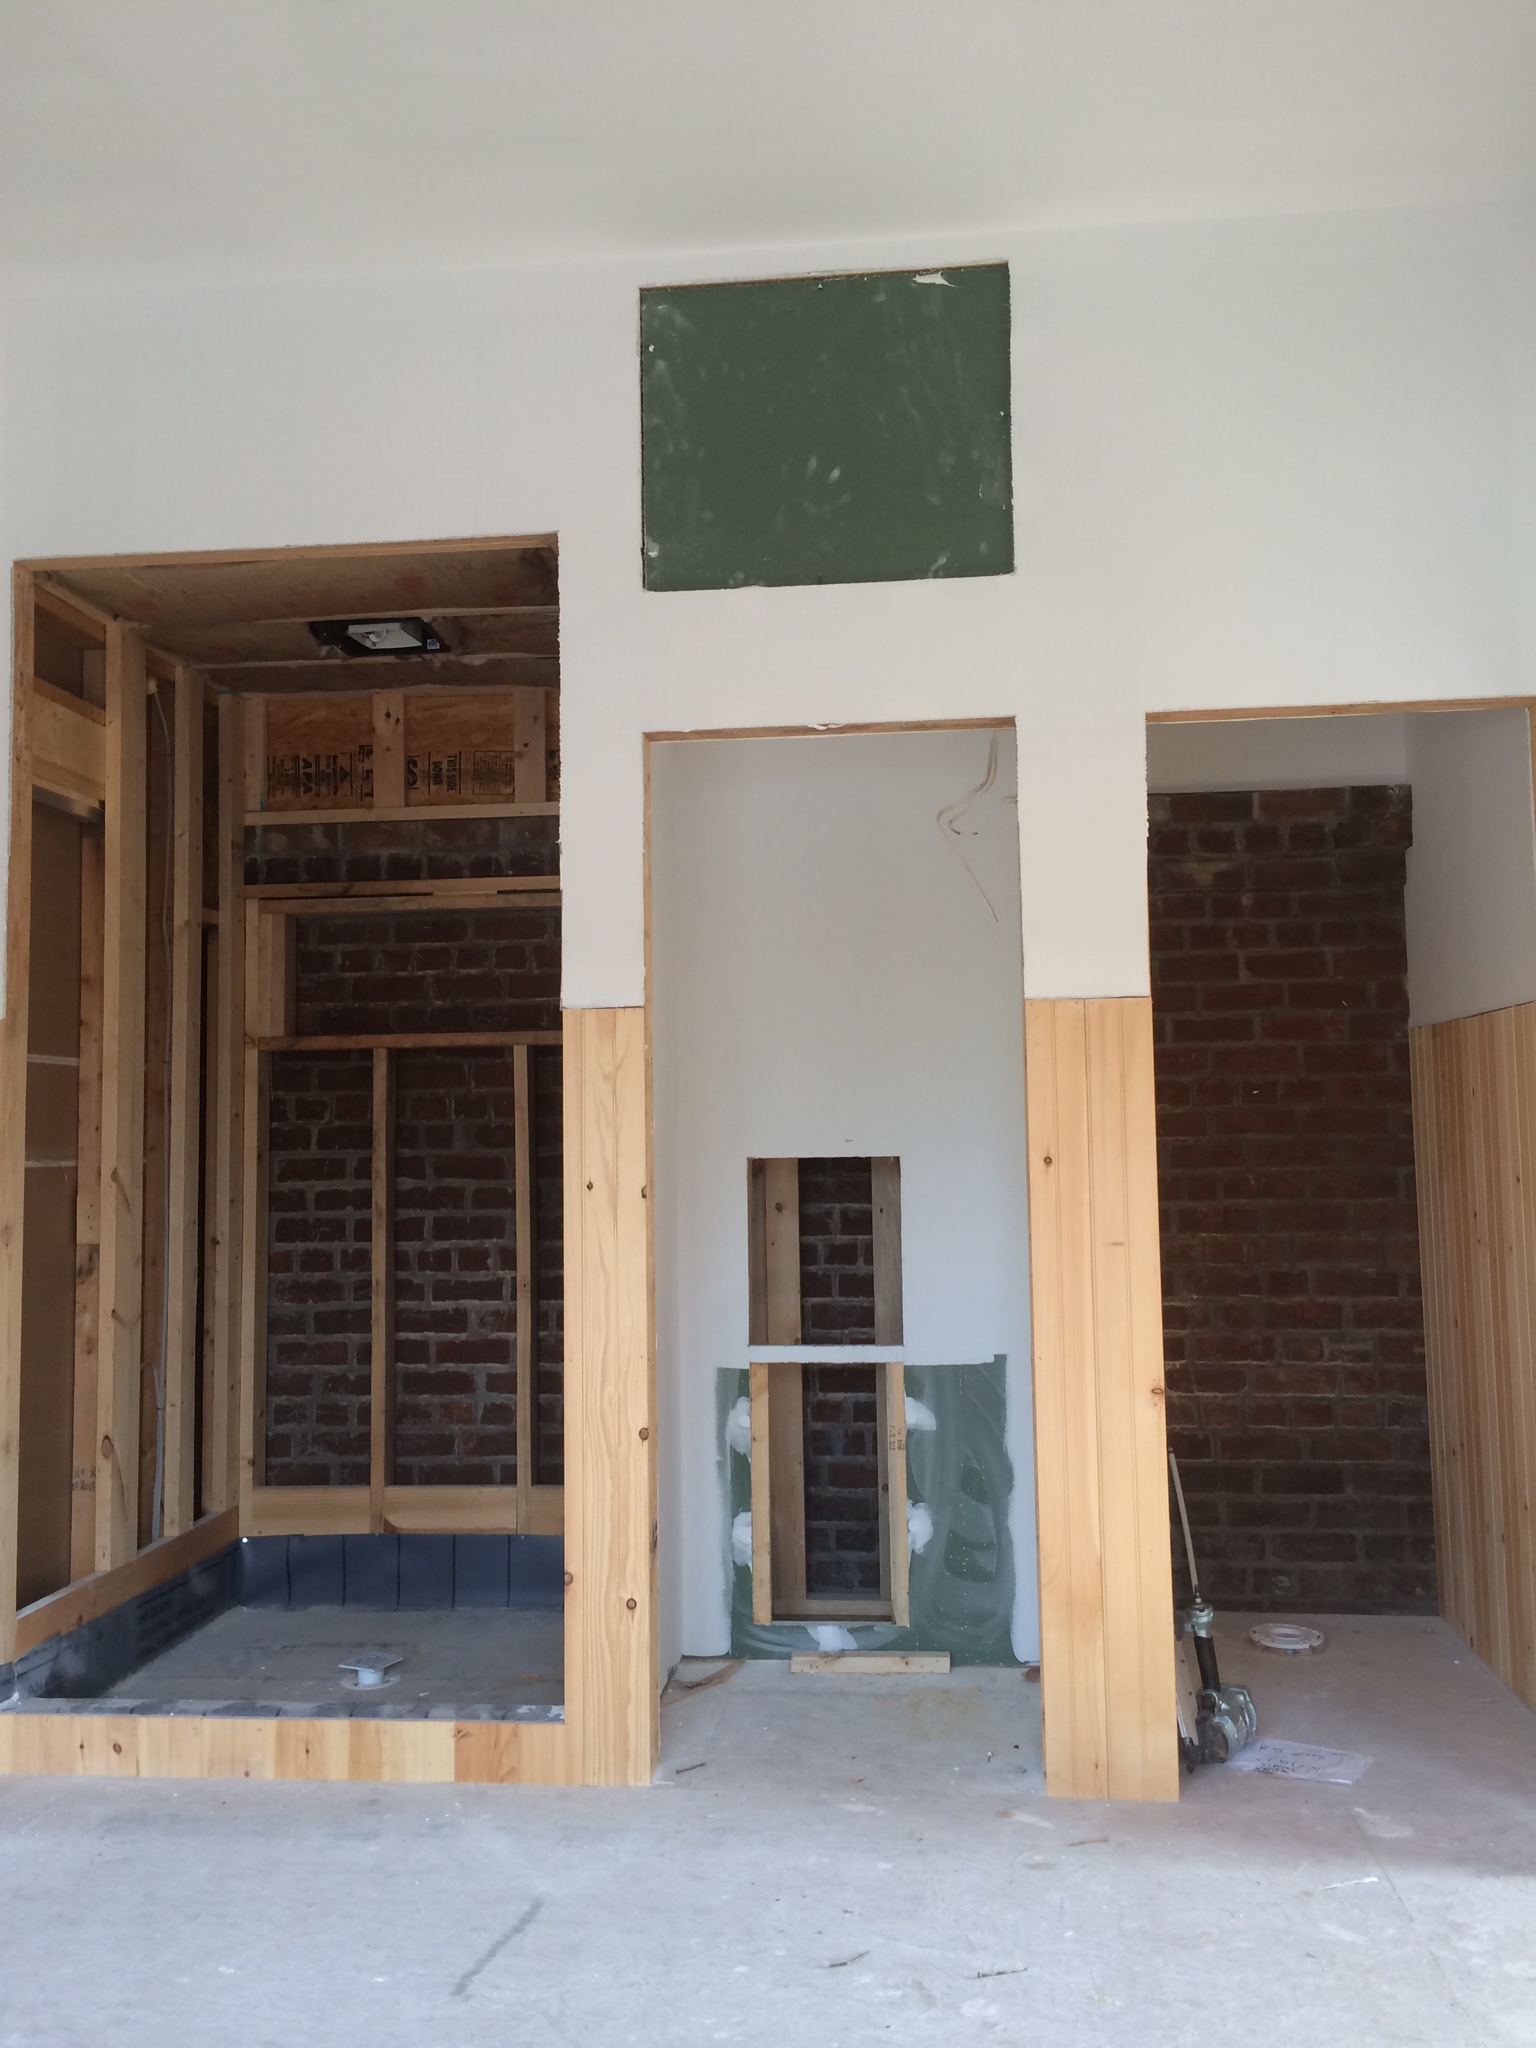
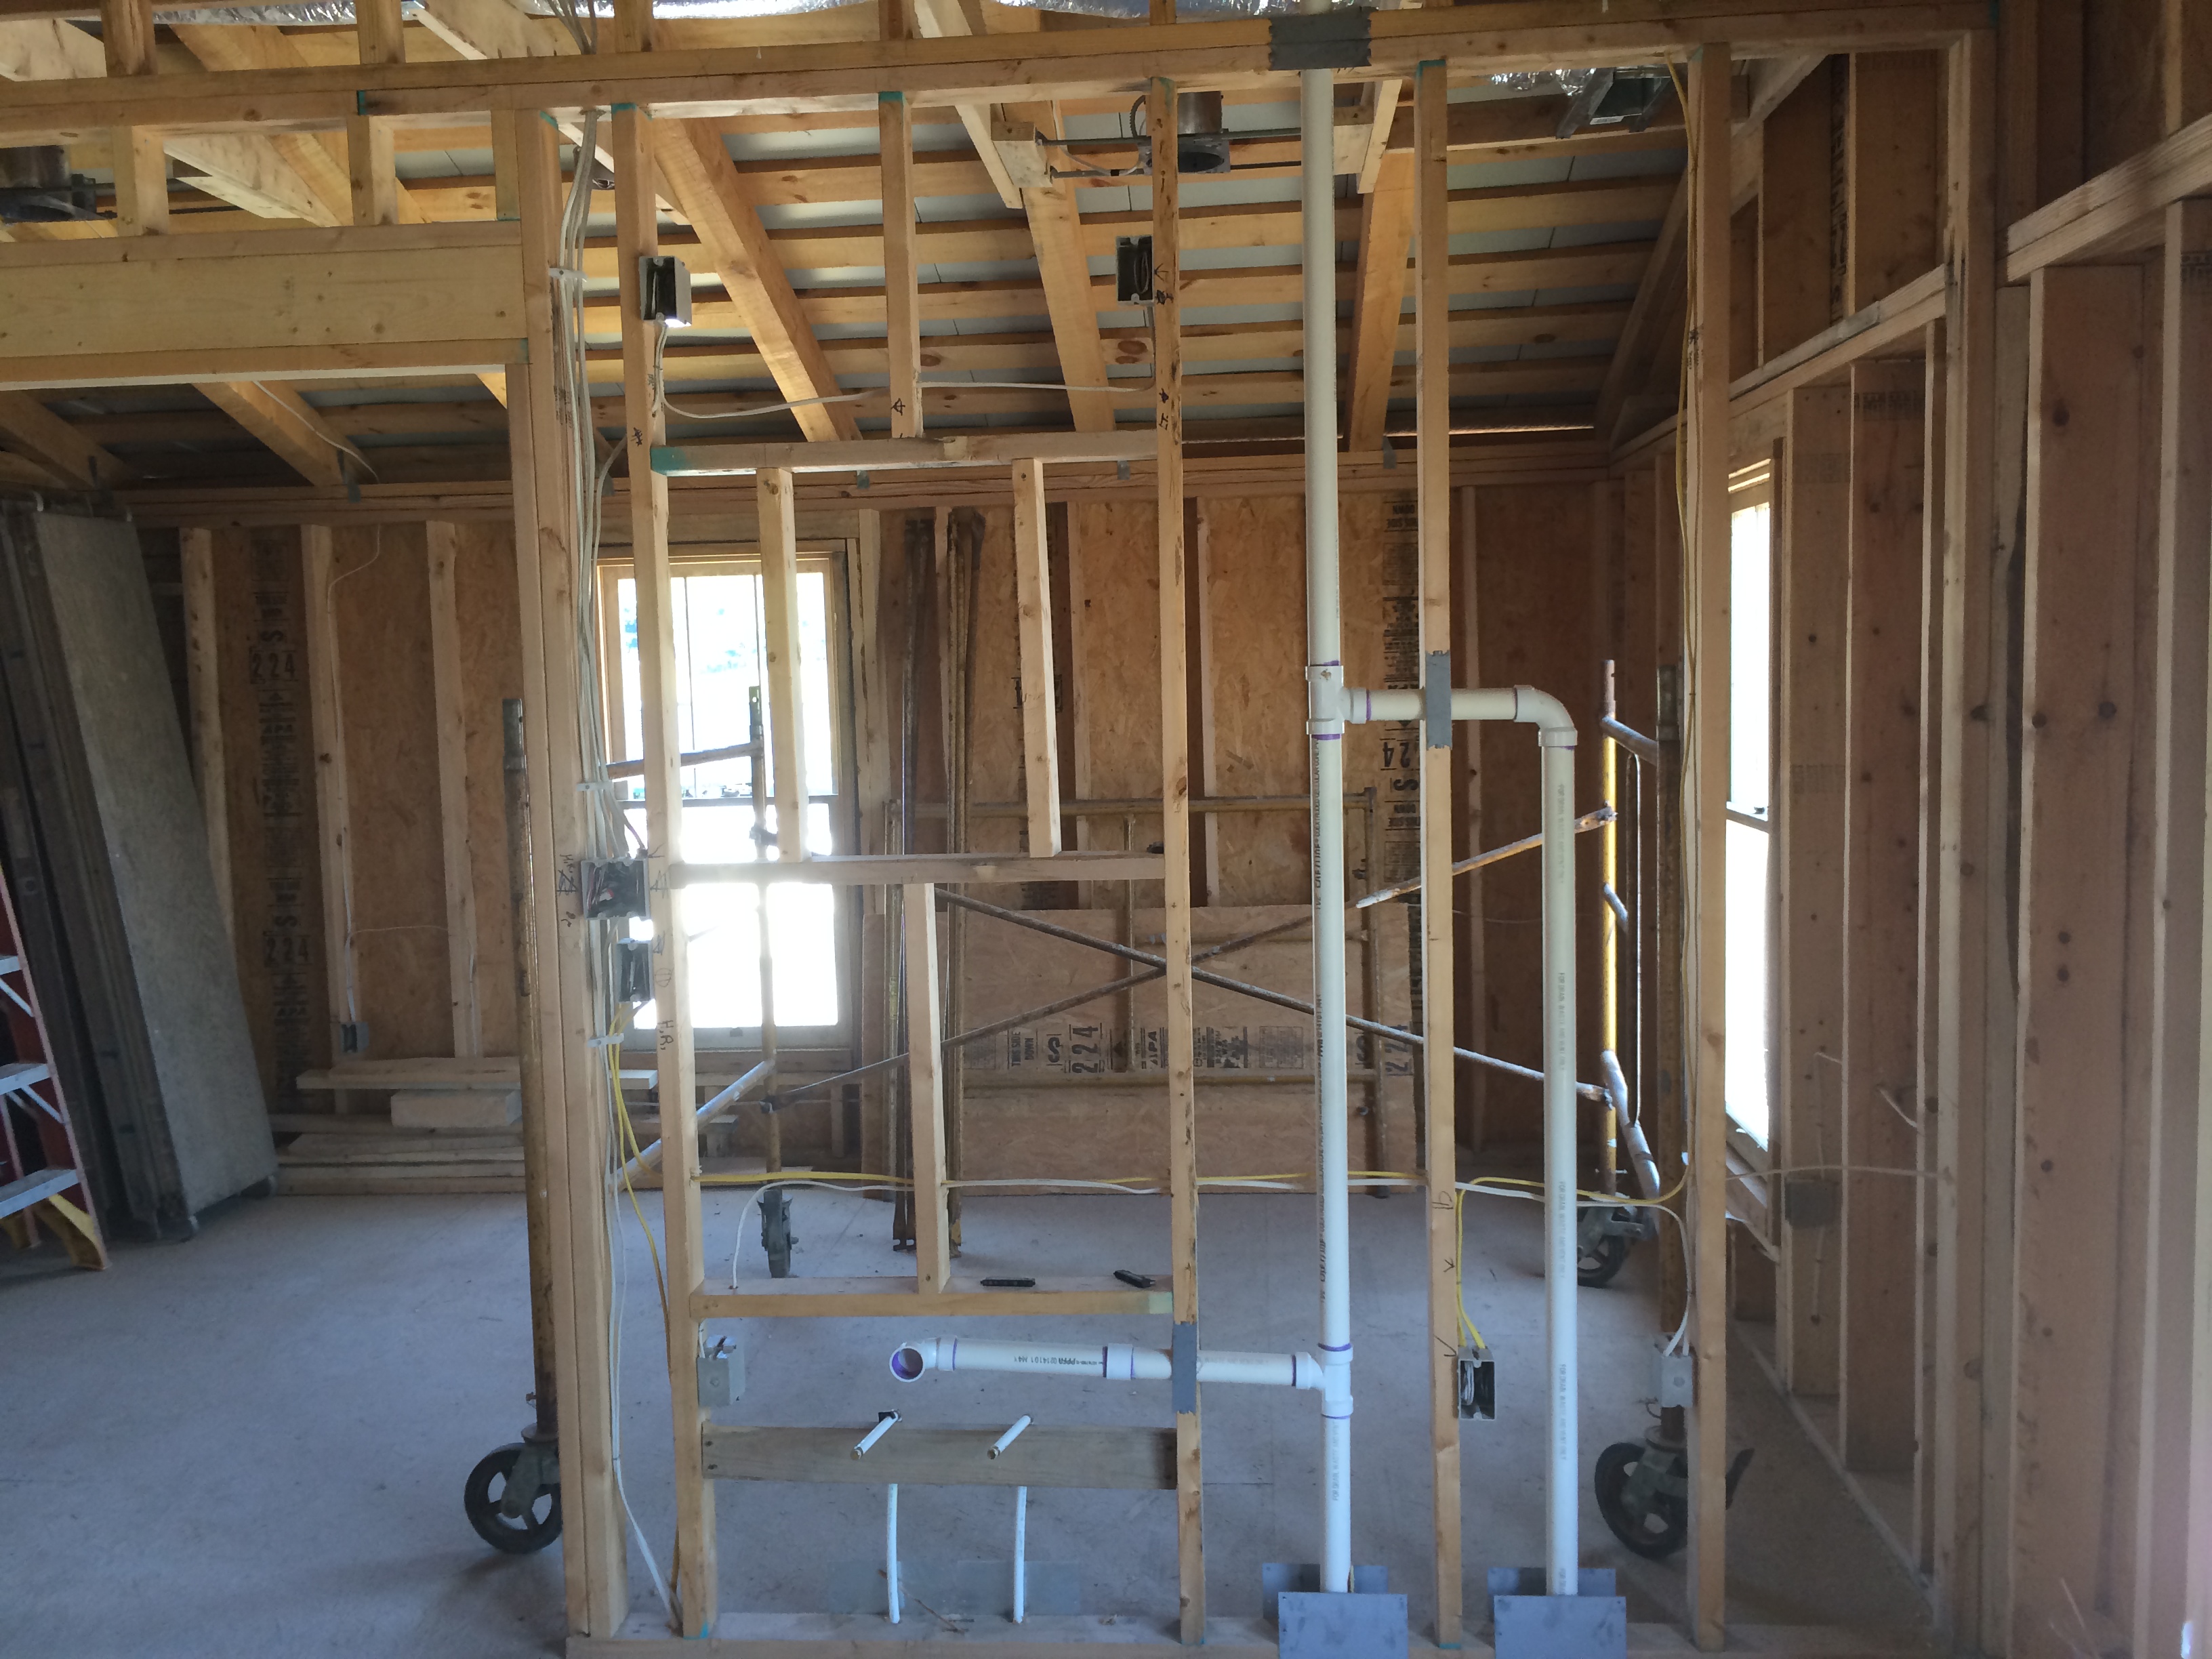
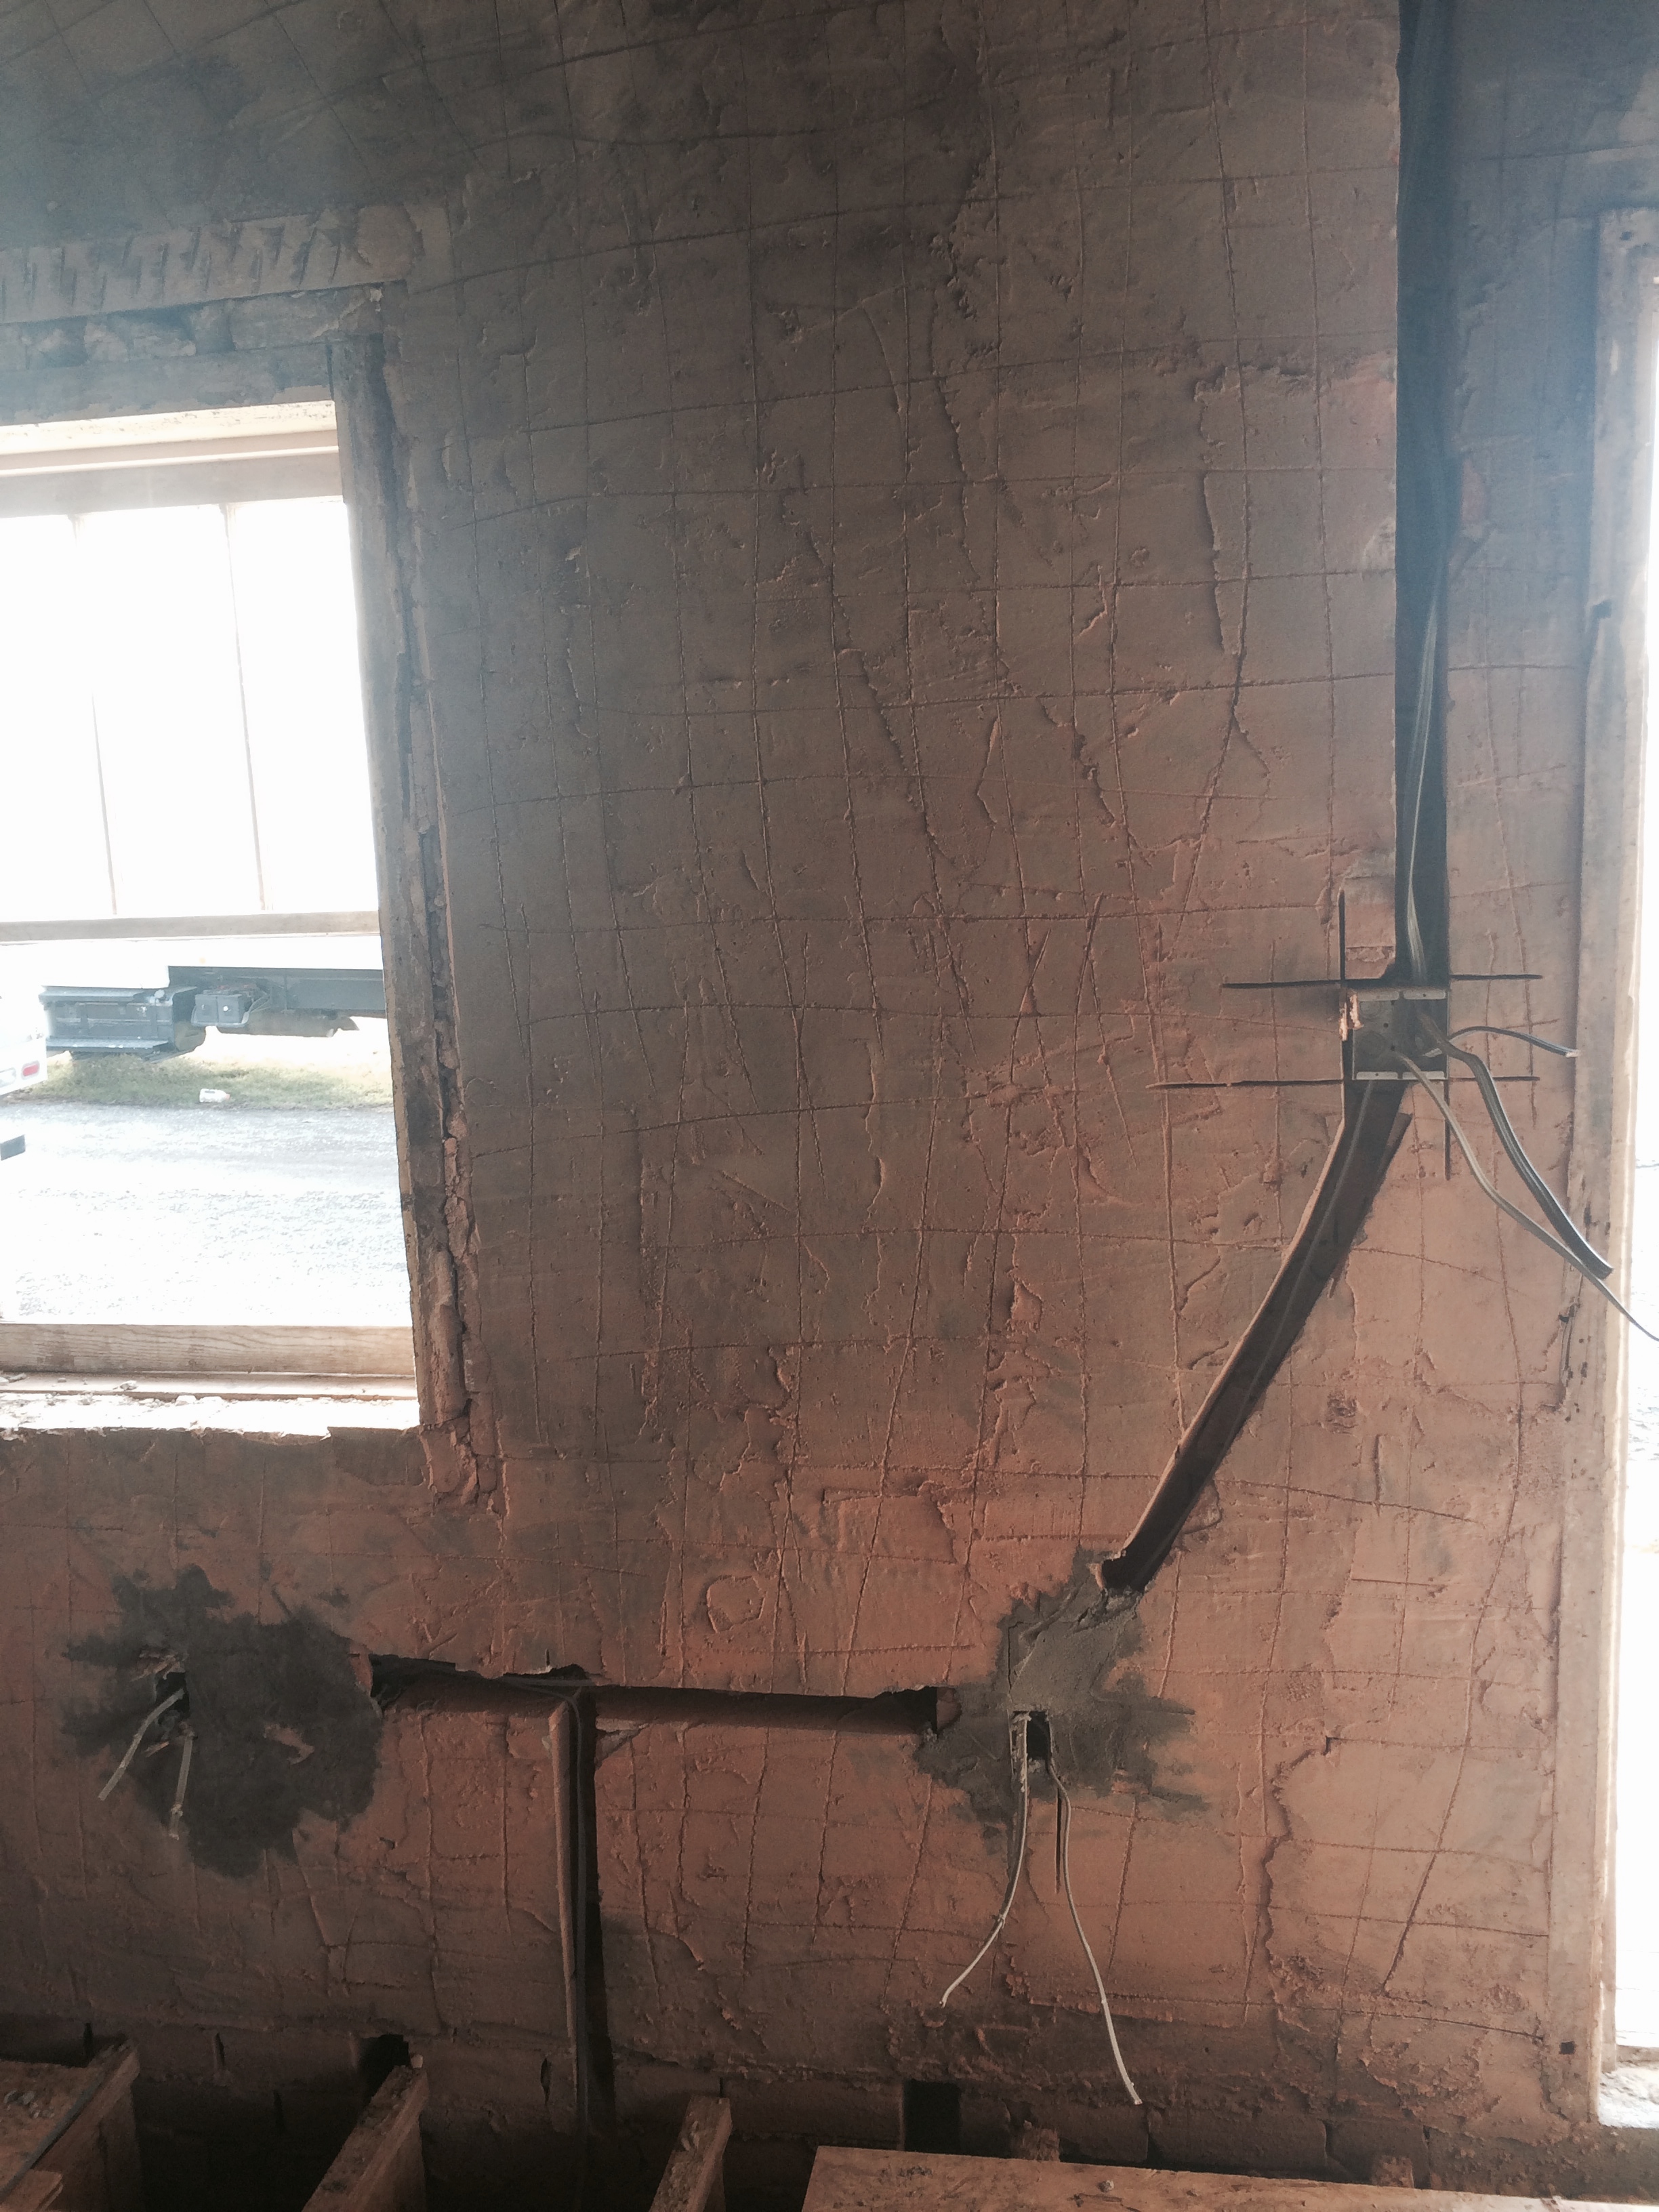
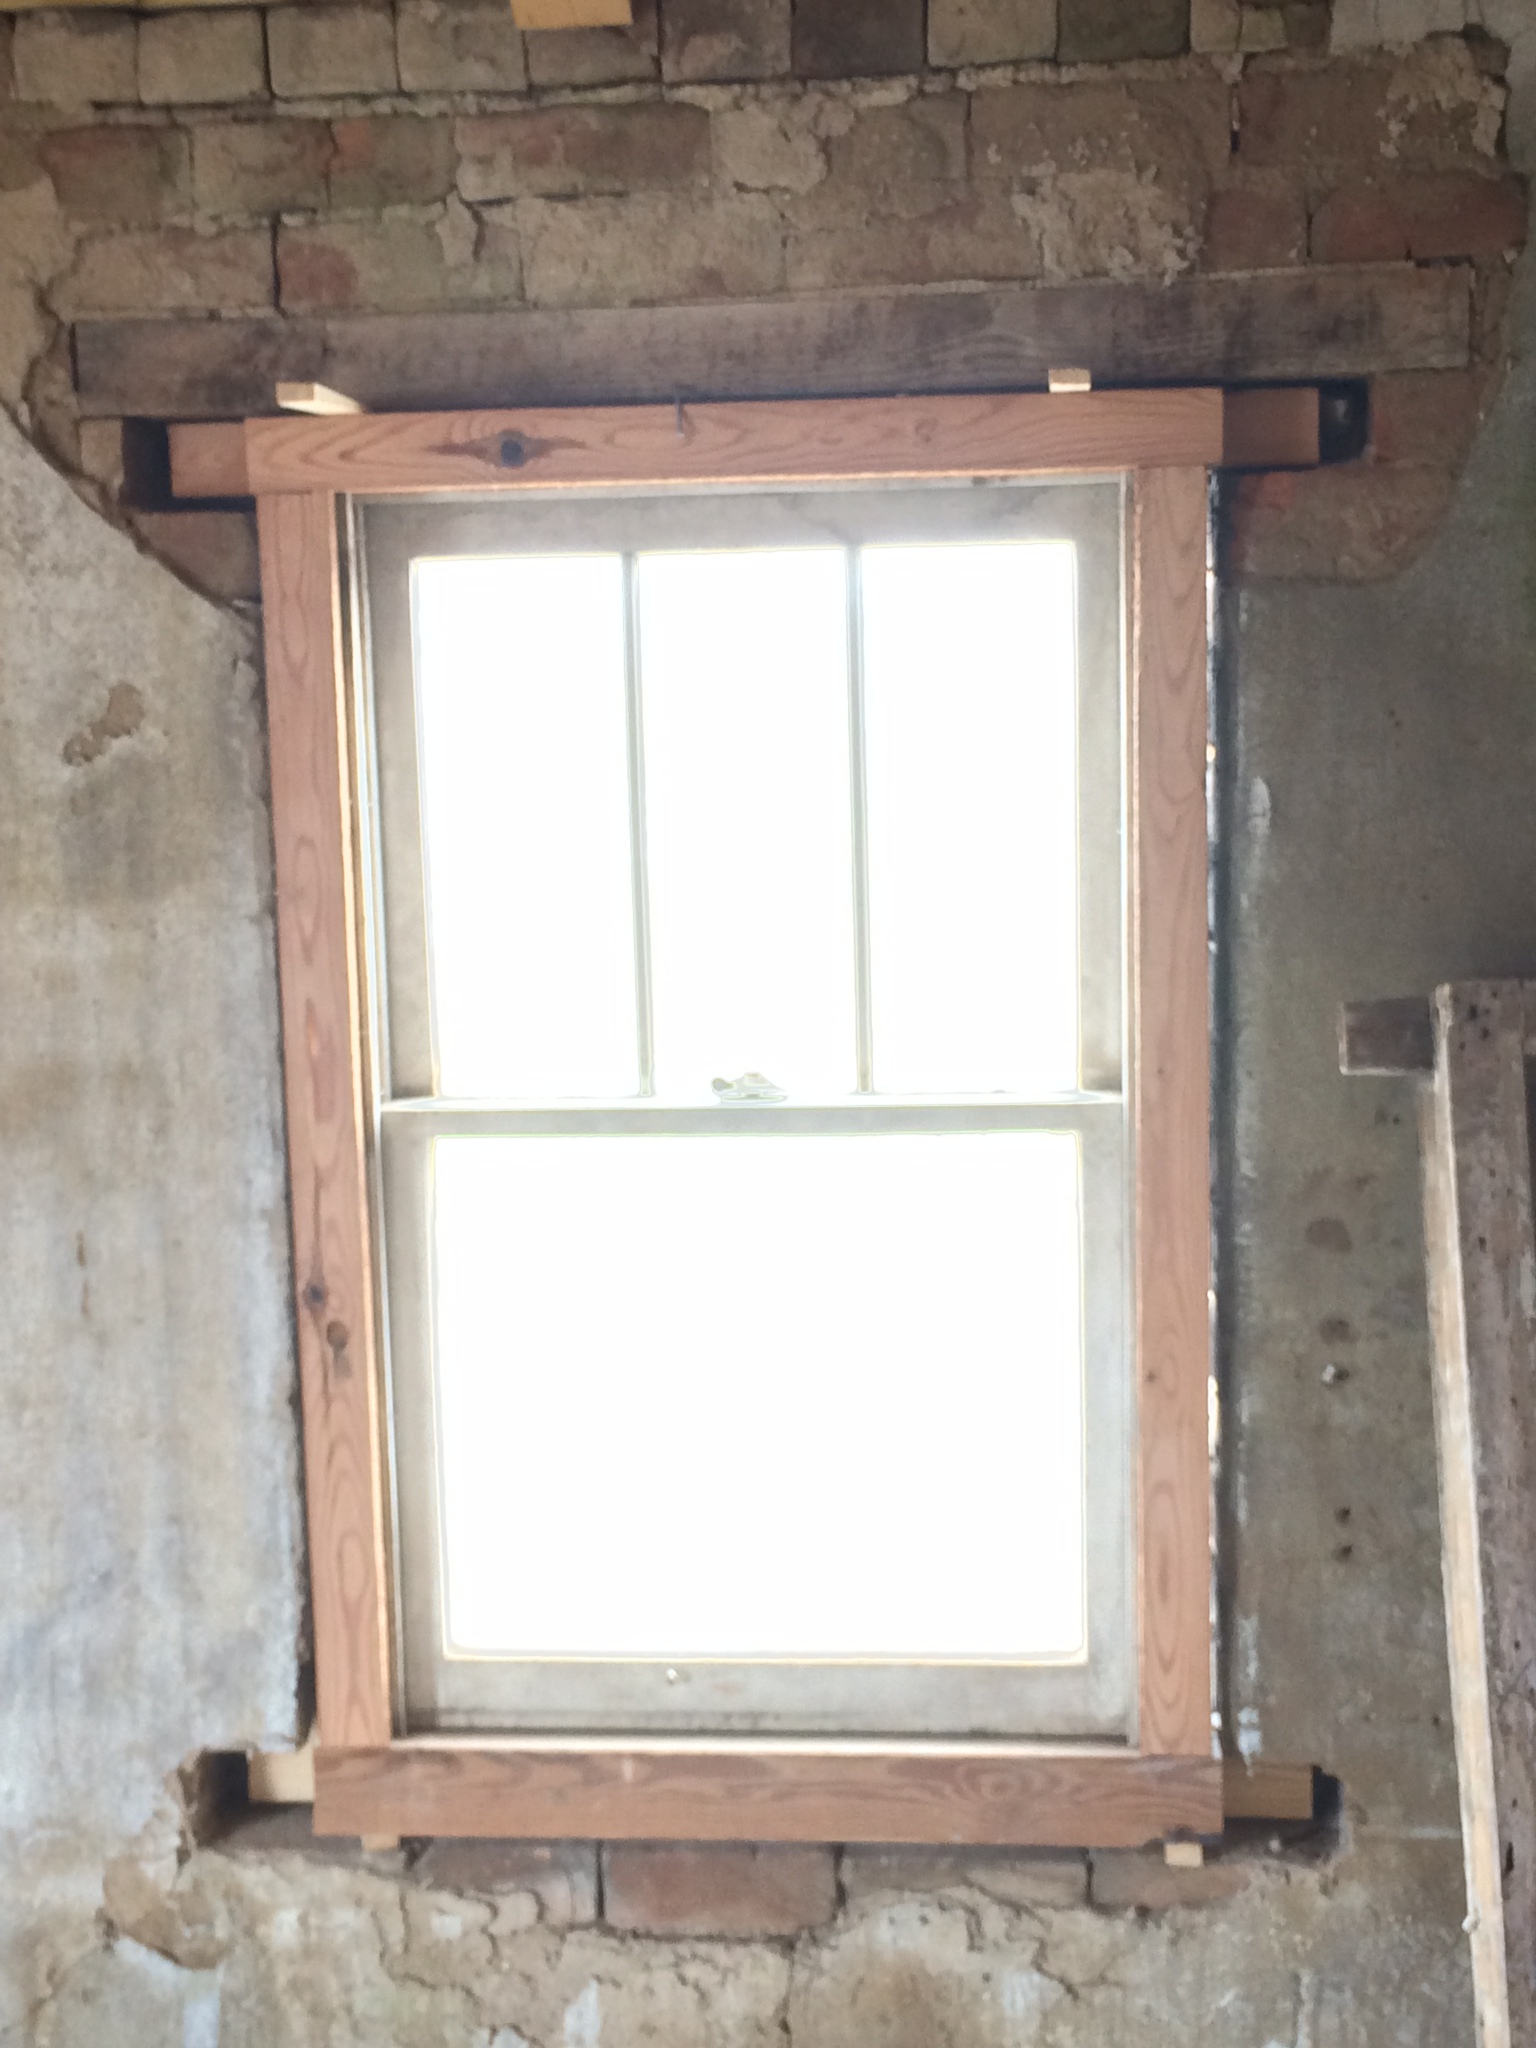
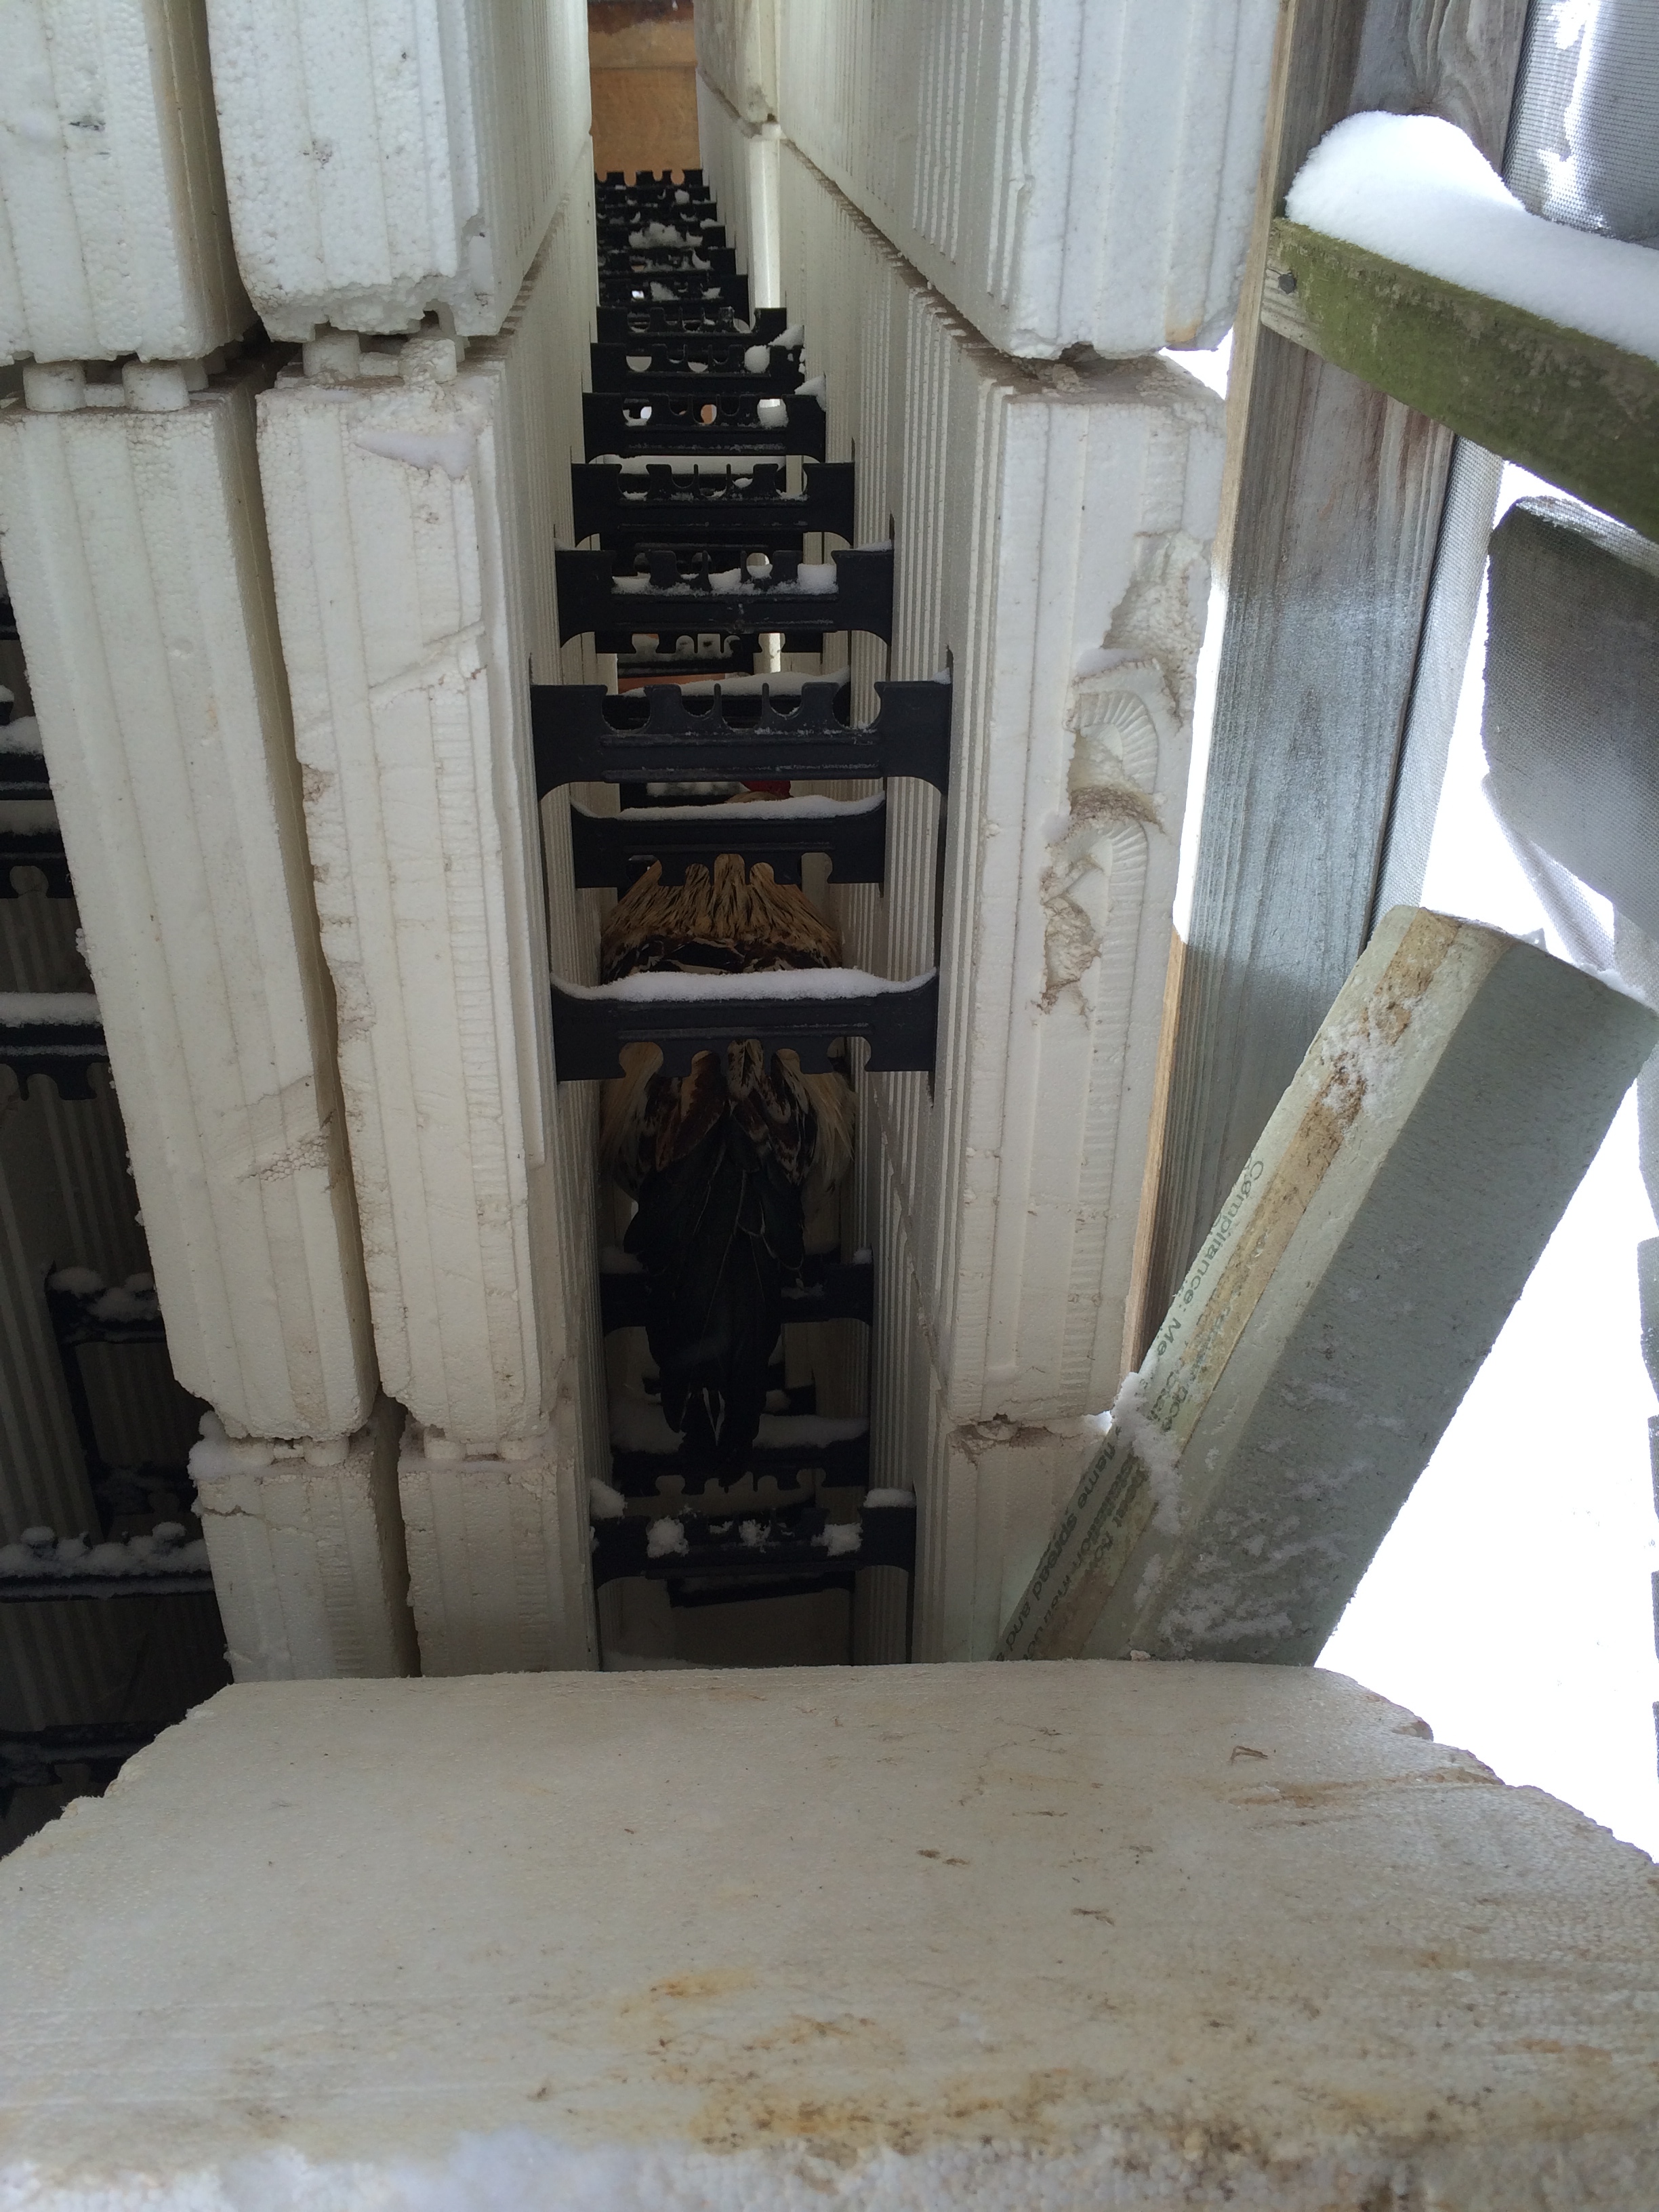
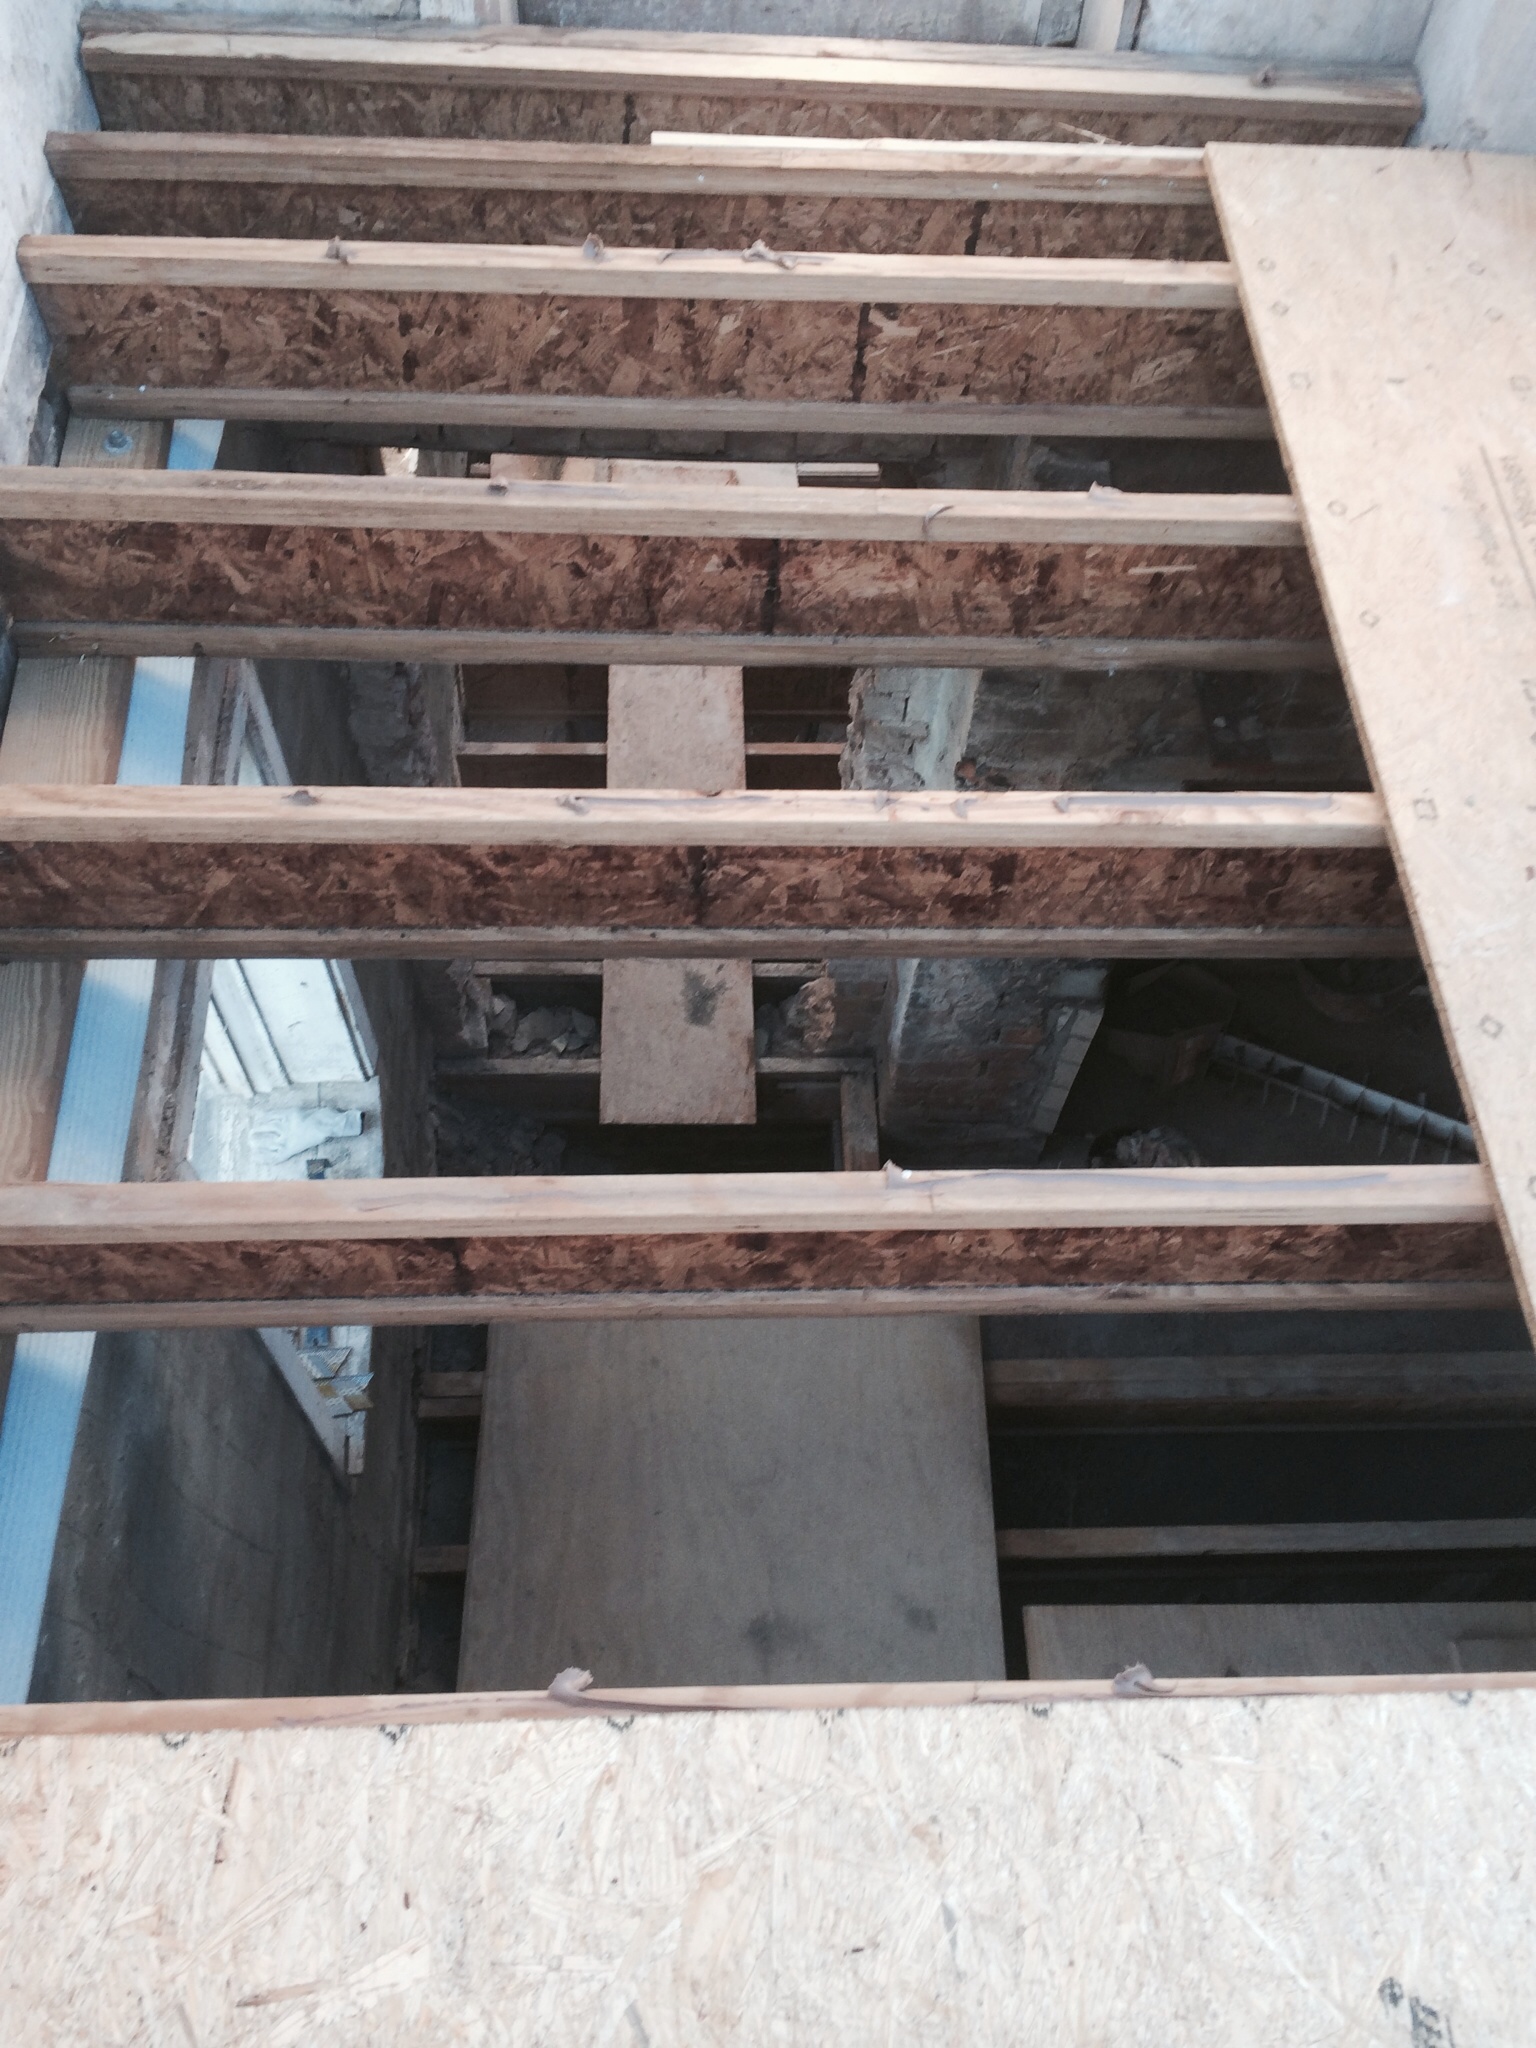
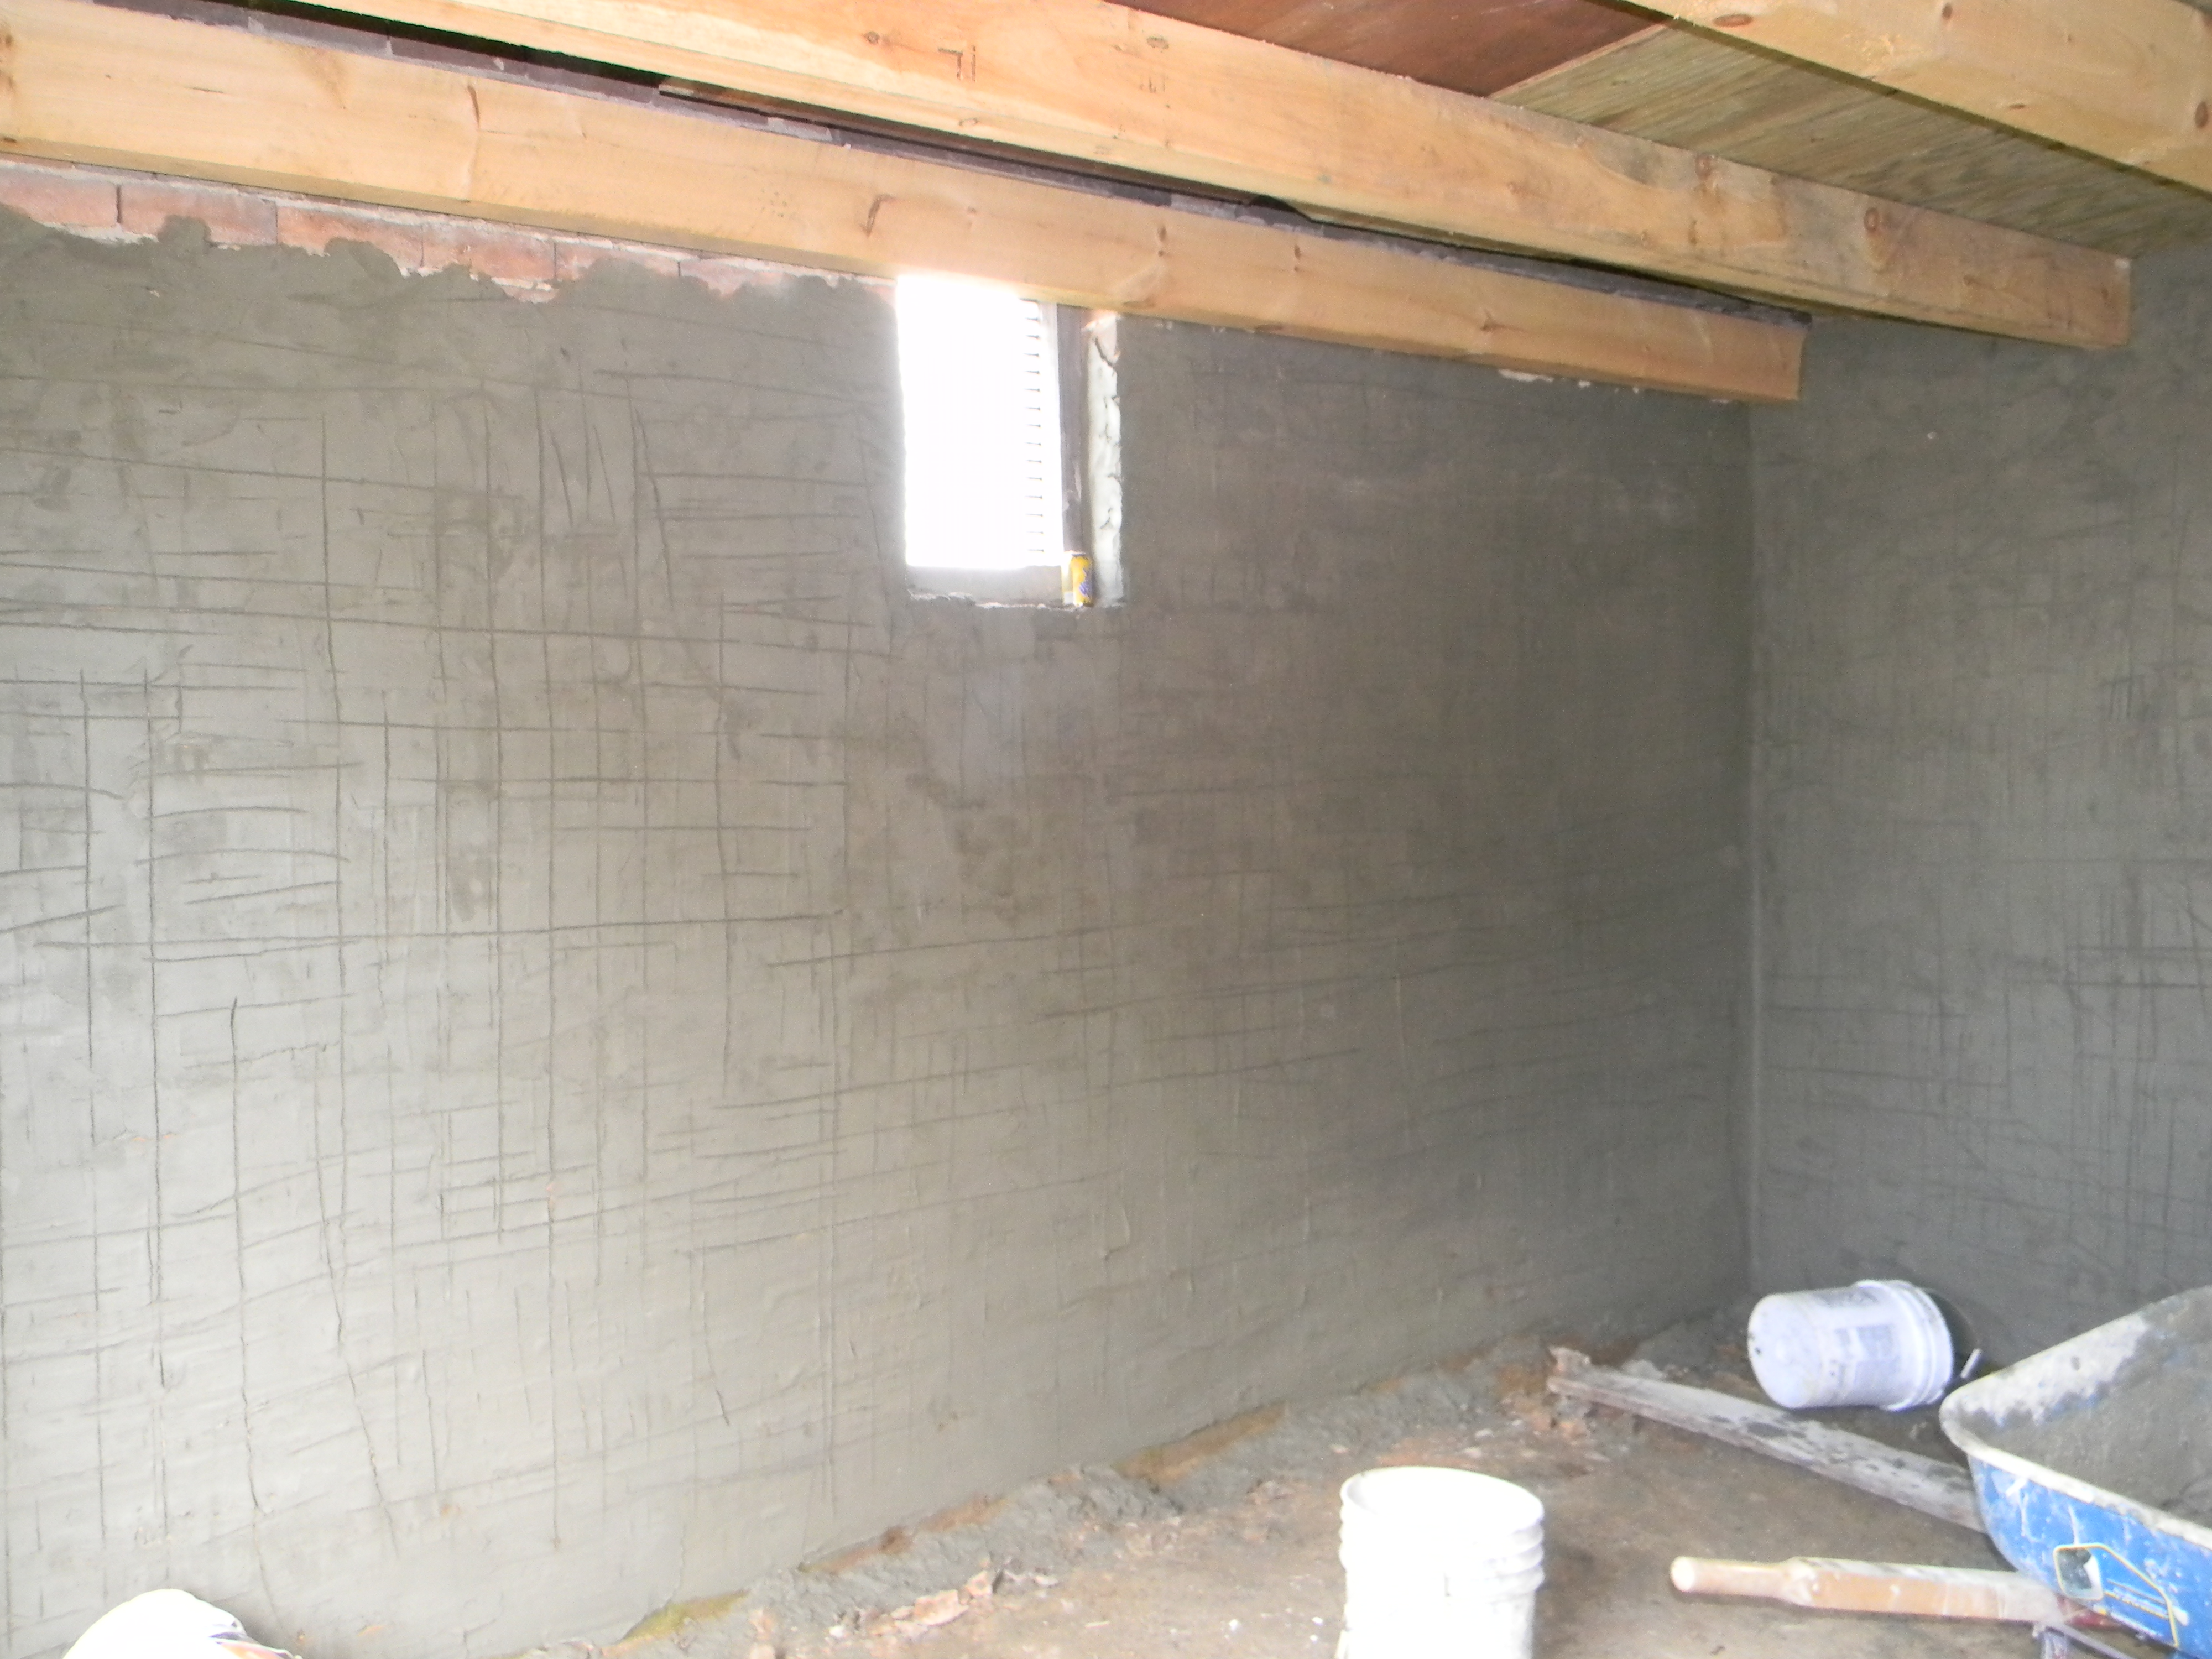
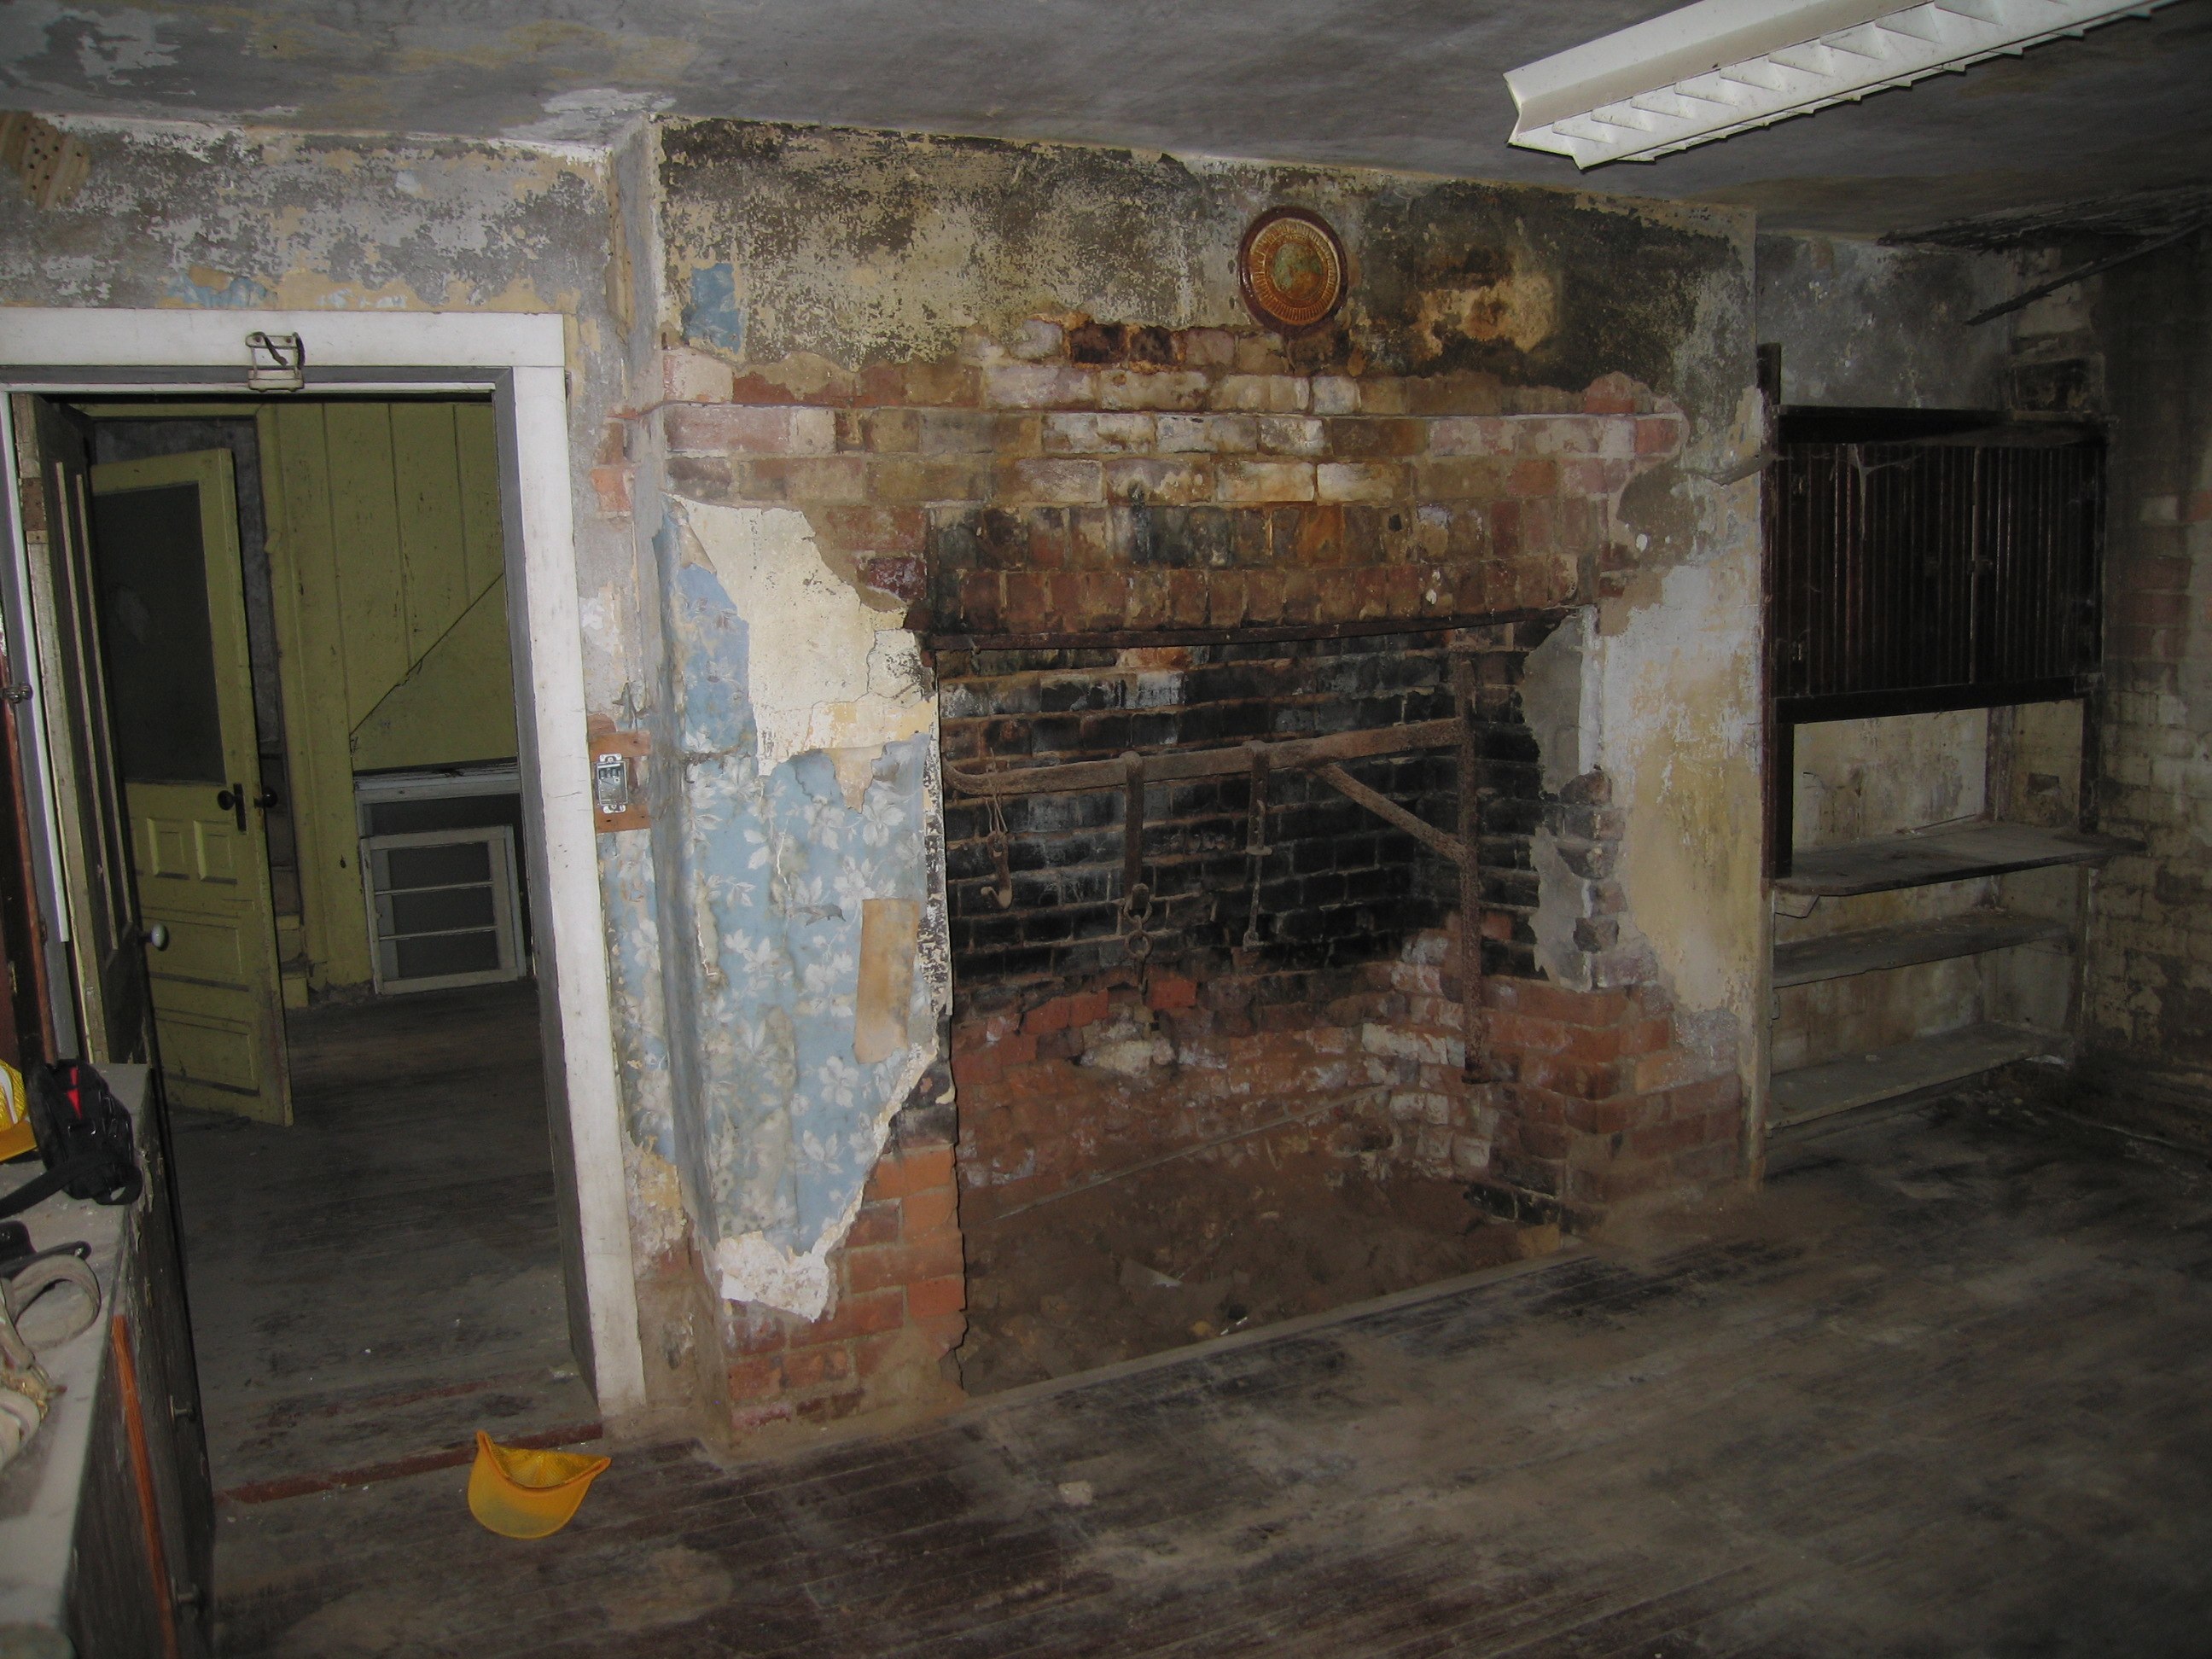
On the interior of the summer kitchen, we sprayed a layer of insulation and will keep some of the original beams and fireplace exposed (sorry for the sub-par lighting in these pictures):

IMG_1155.jpg .   IMG_7523.jpg

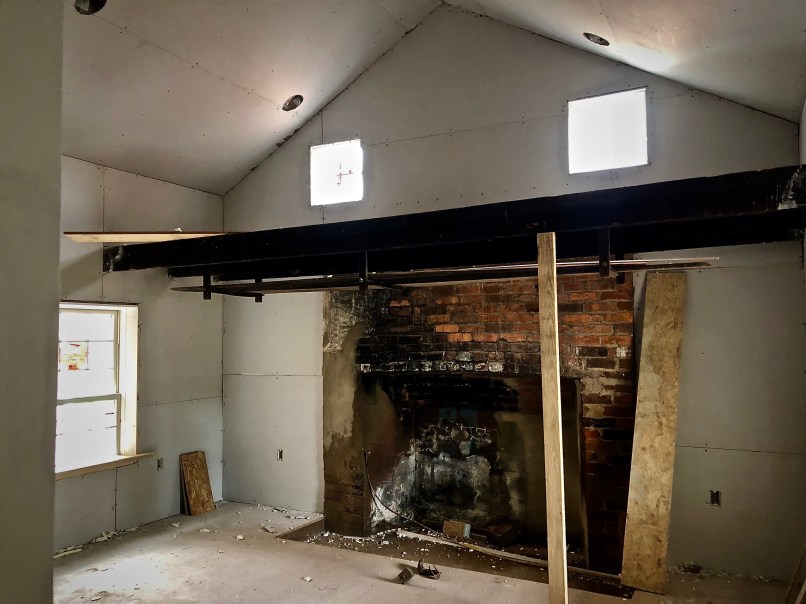
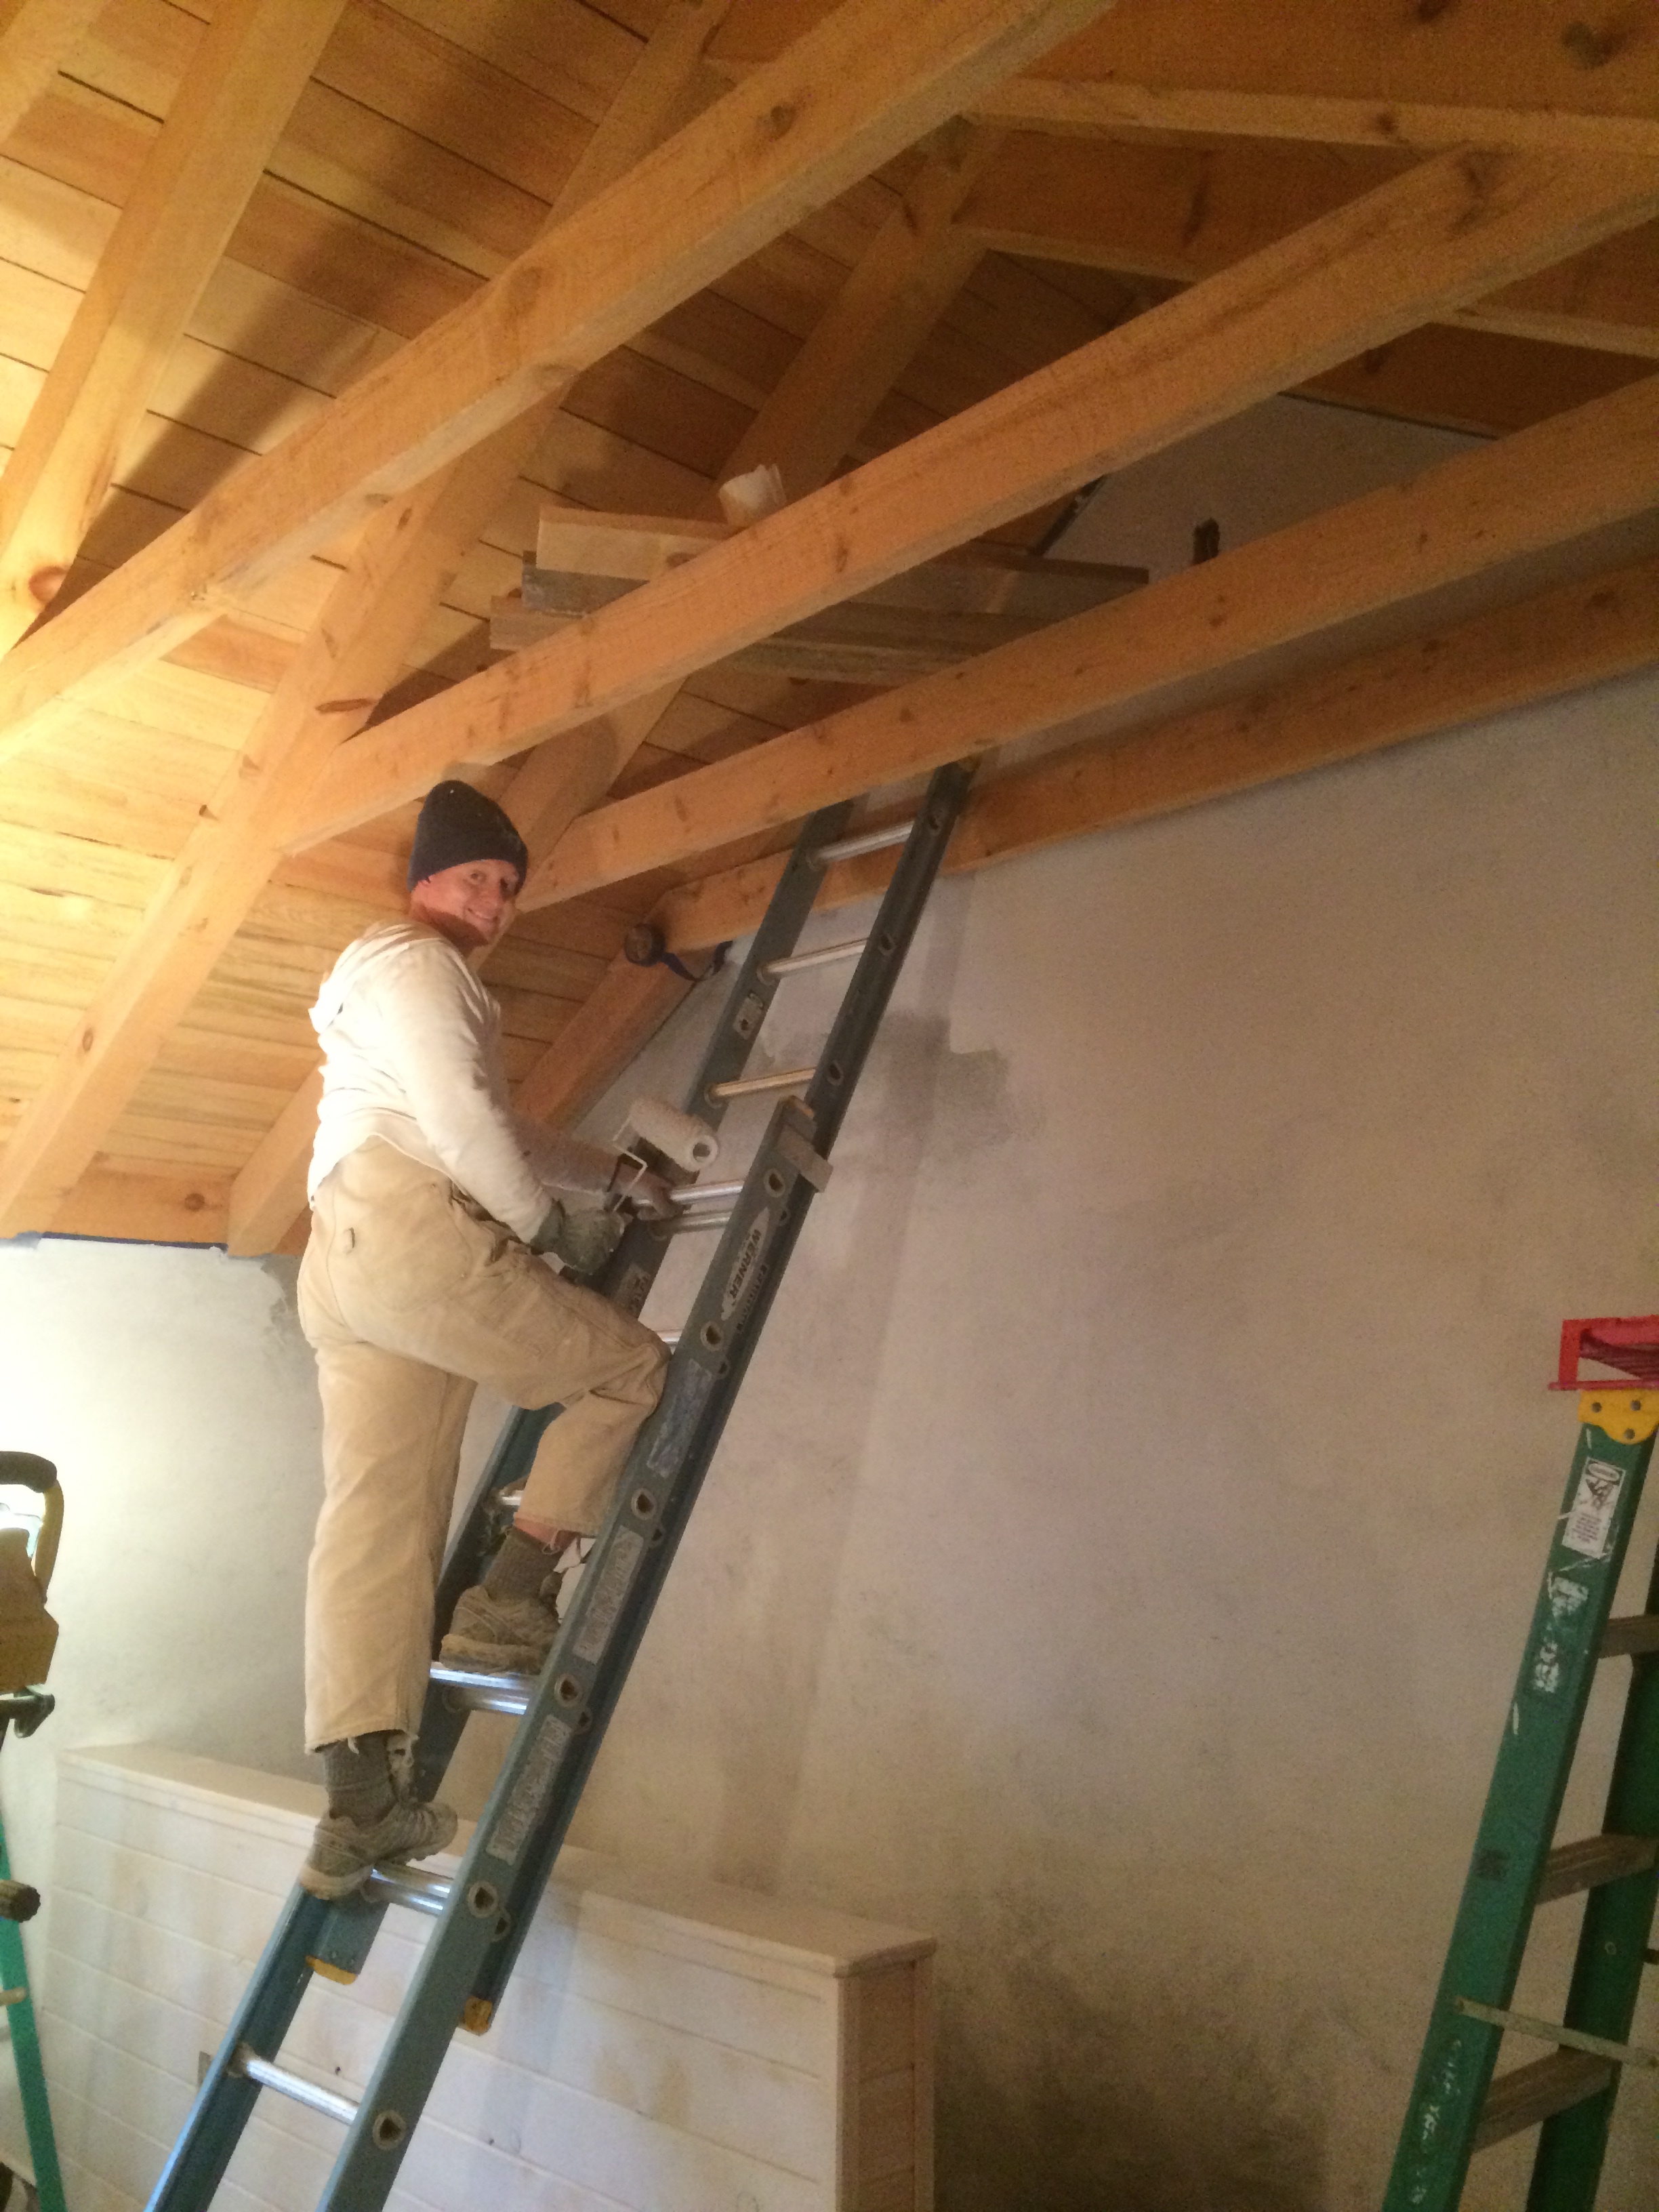
Finally, we got yet another little surprise when re-constructing this room.  The remaining original beams that you see in the shots above support a hanging shelf.  There is no indication this fireplace ever had a mantel, so we are guessing that this shelf served that purpose, hanging from the original beams.  One day we were up on a ladder inspecting the brick work and looked down at the shelf:

IMG_0723

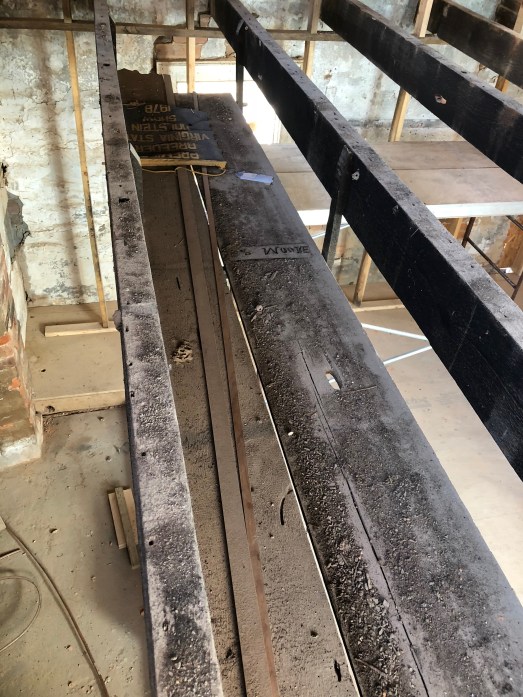
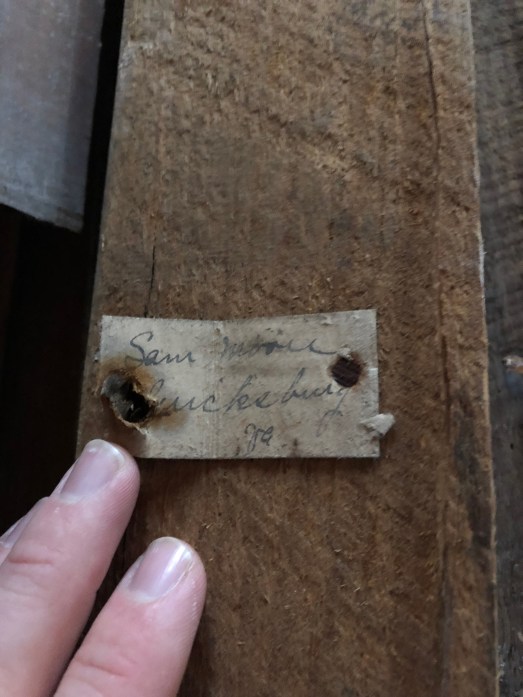
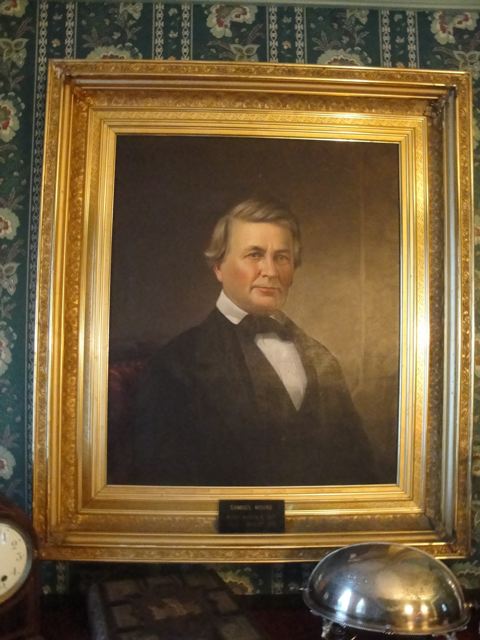
In the center of that photo you can see an old tin stencil:

IMG_0724

“S. Moore” – Samuel Moore bought the house in 1846!  Looks like no one had cleaned that shelf in quite a while.  We think this stencil would have been used to mark trade goods coming from Edge Hill.  Pretty neat!

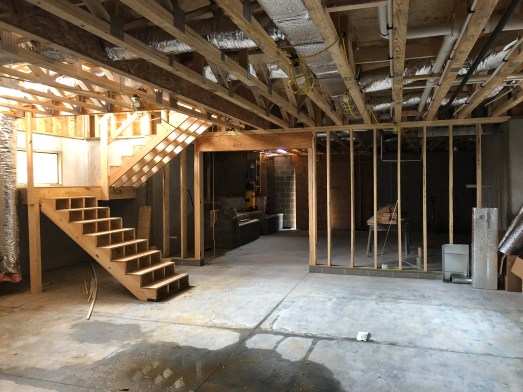
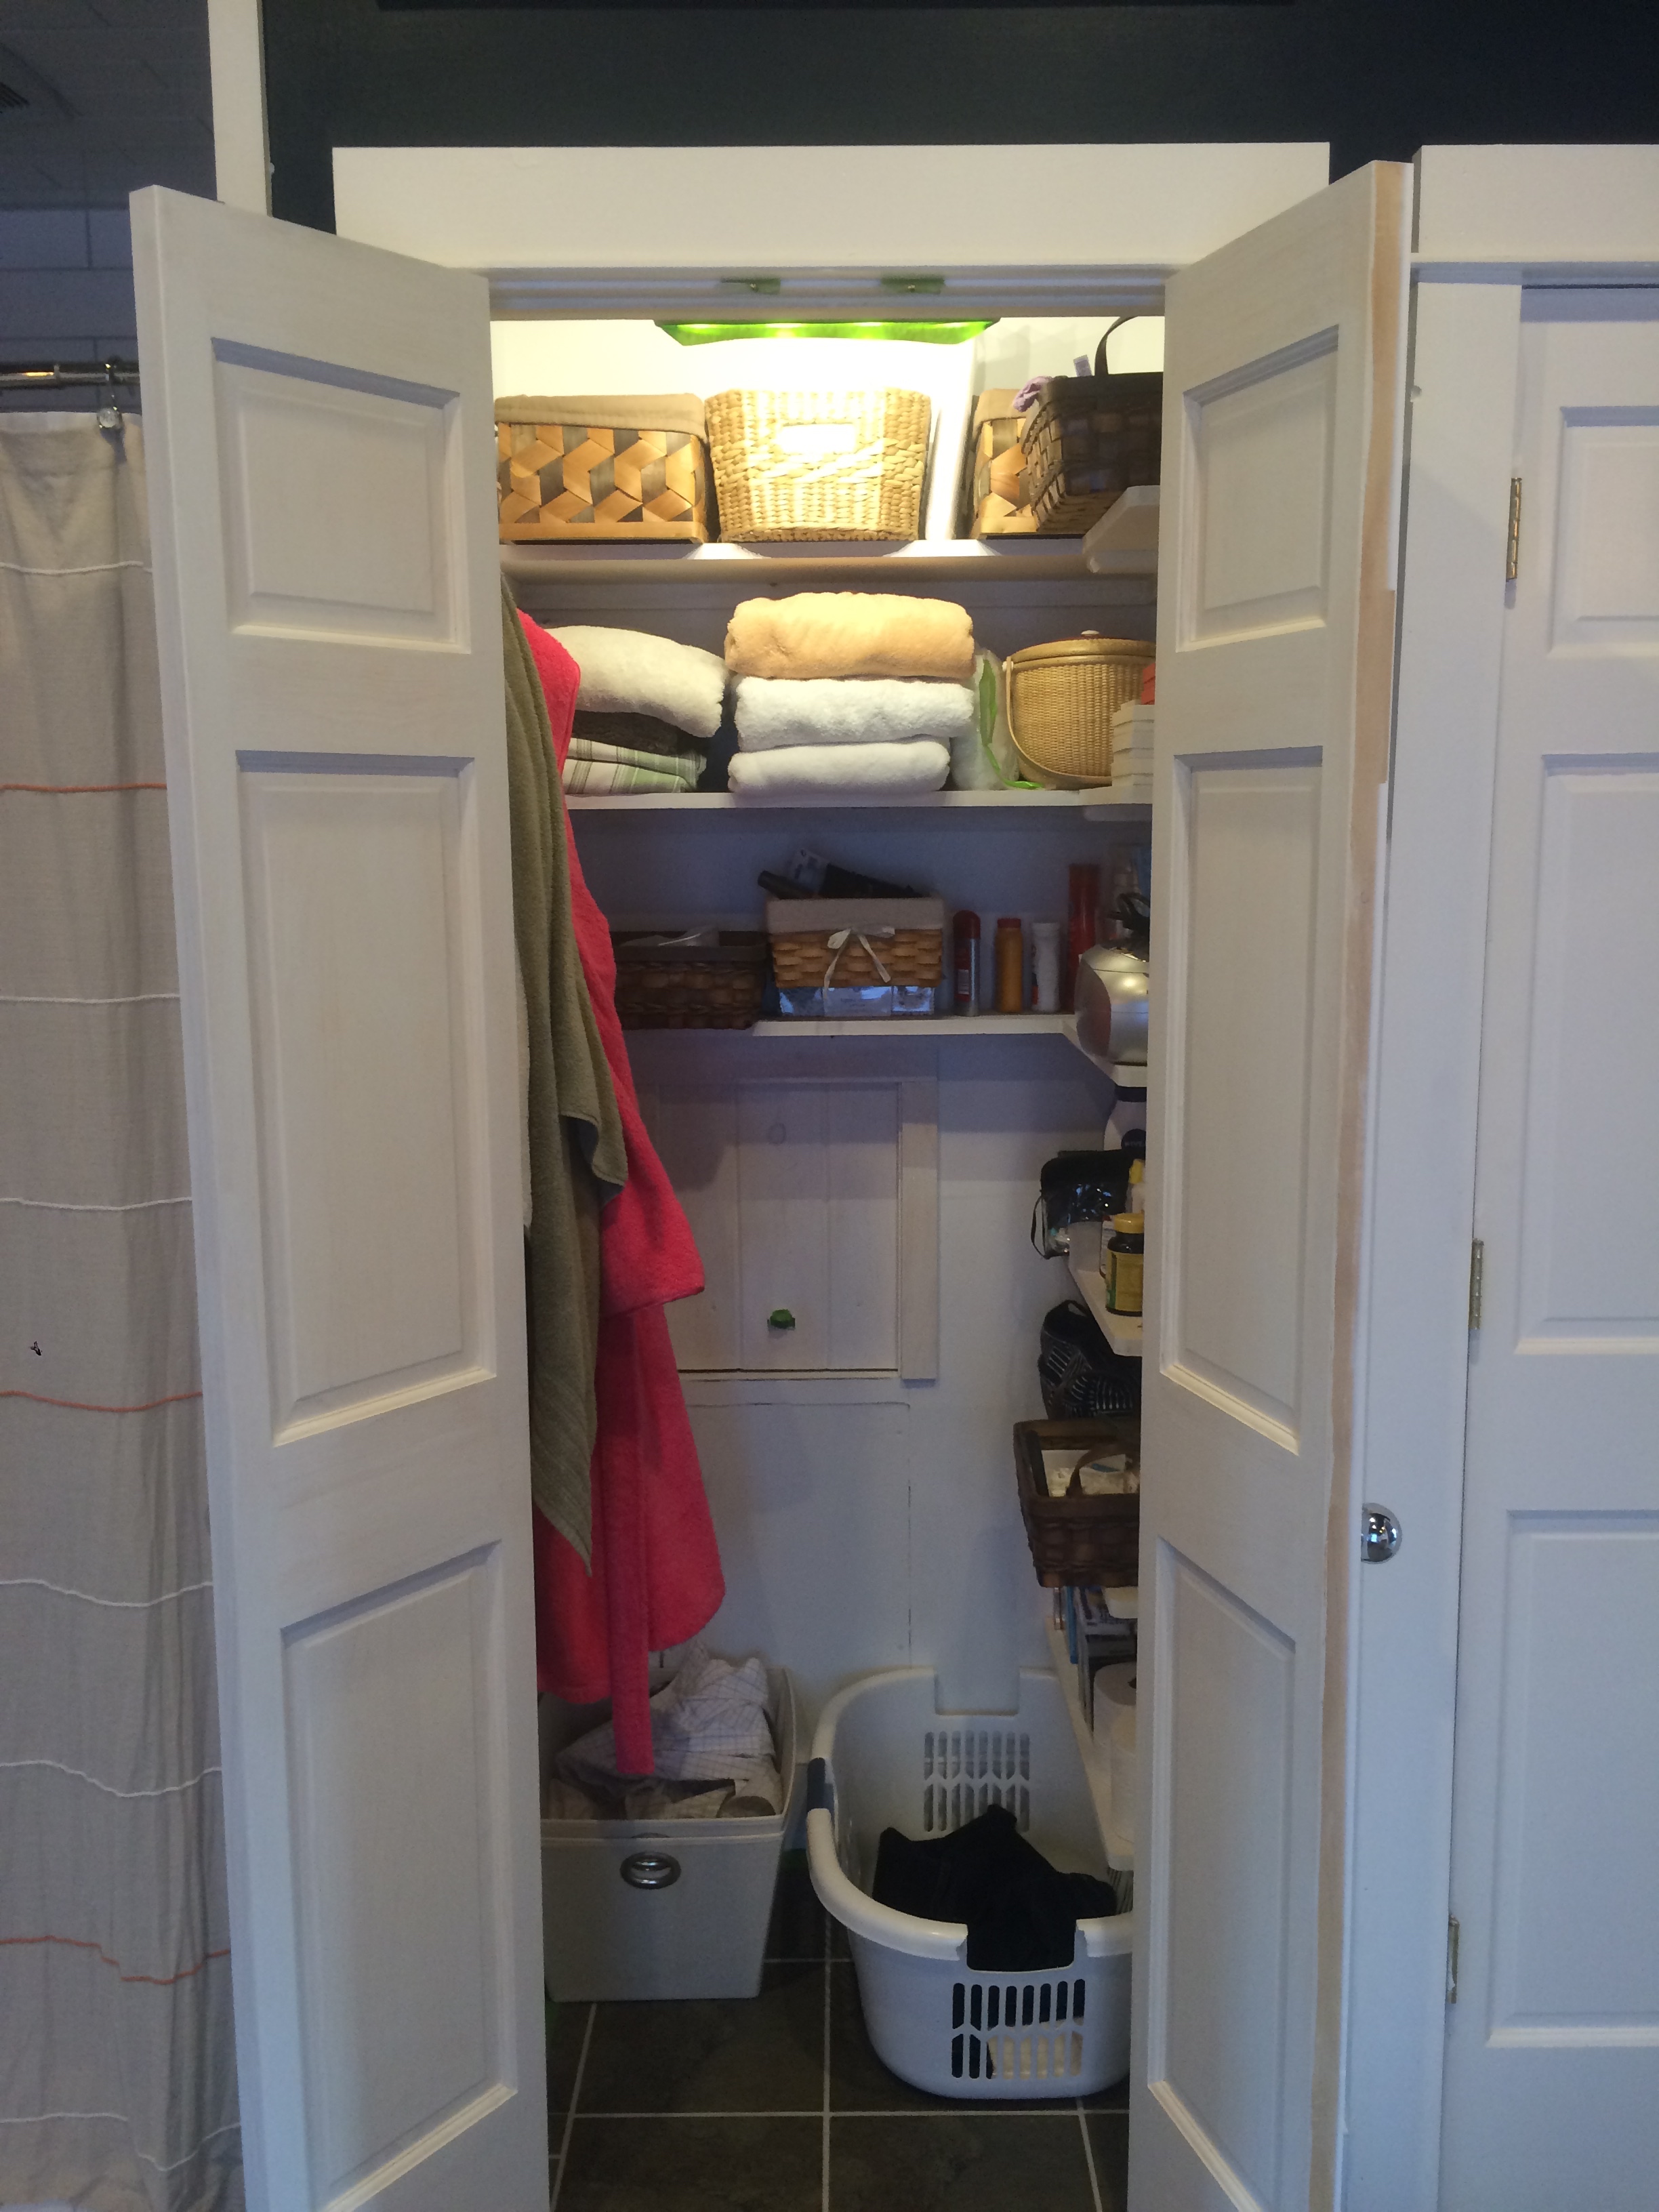
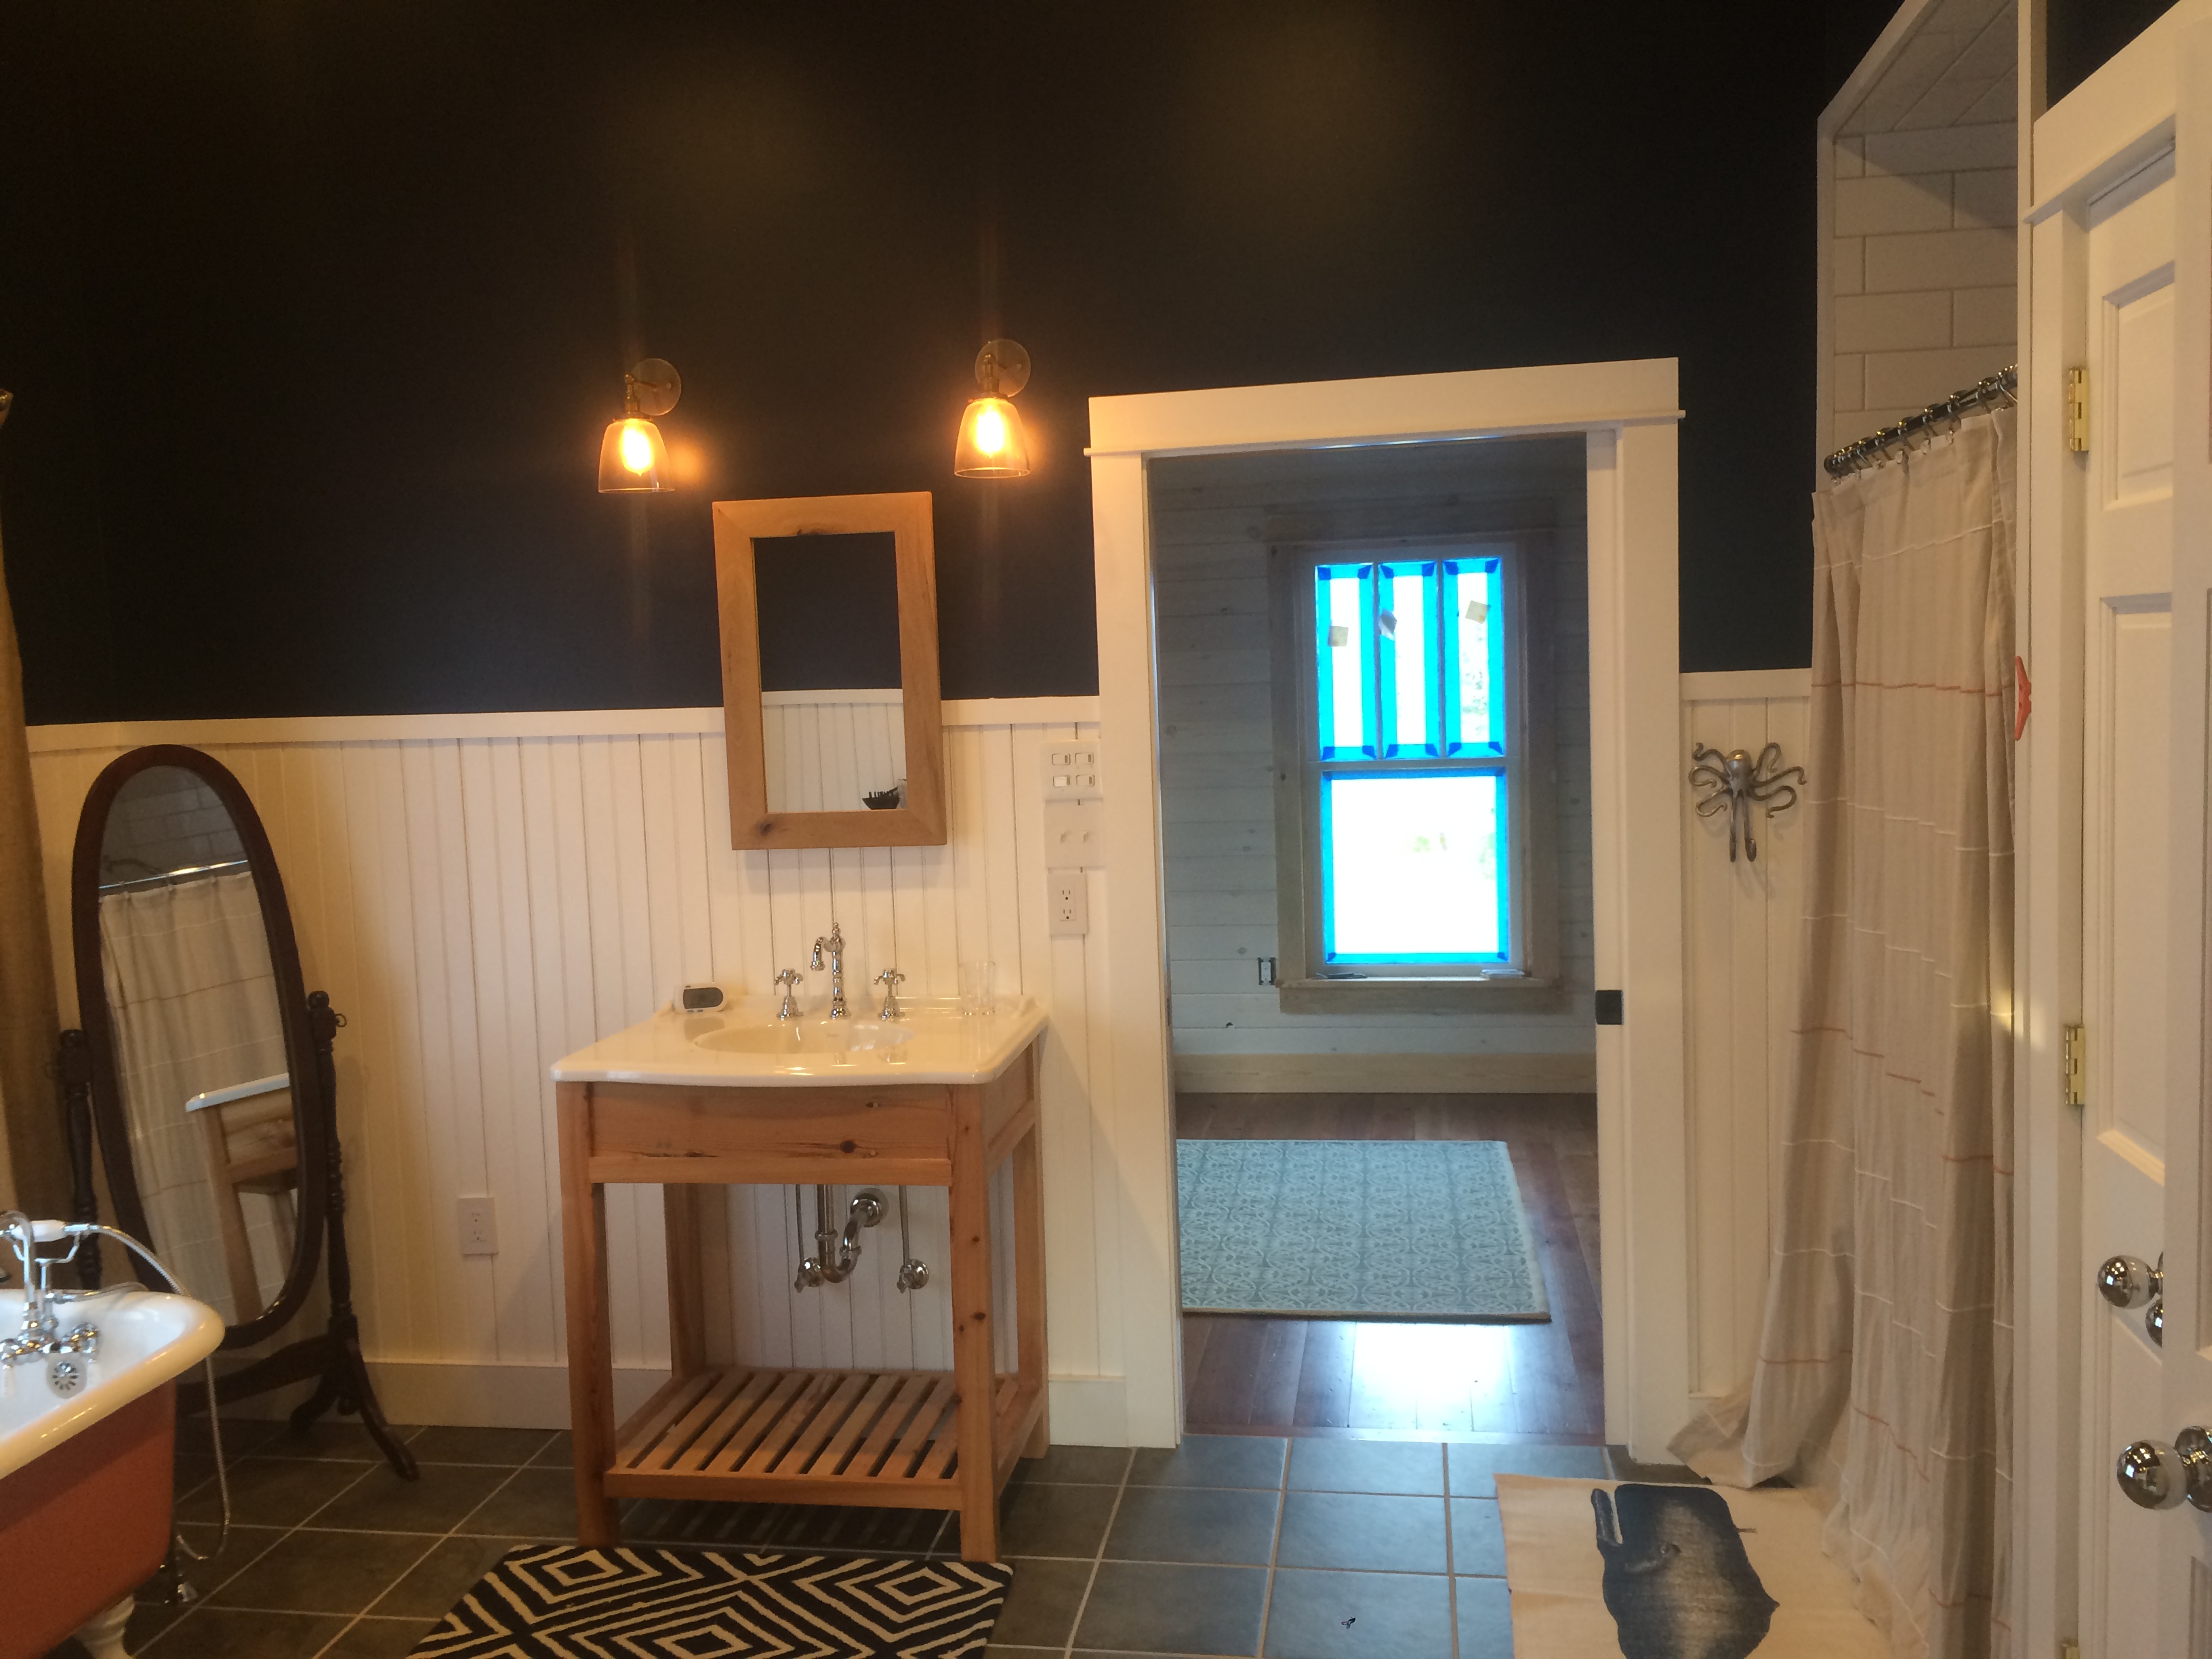
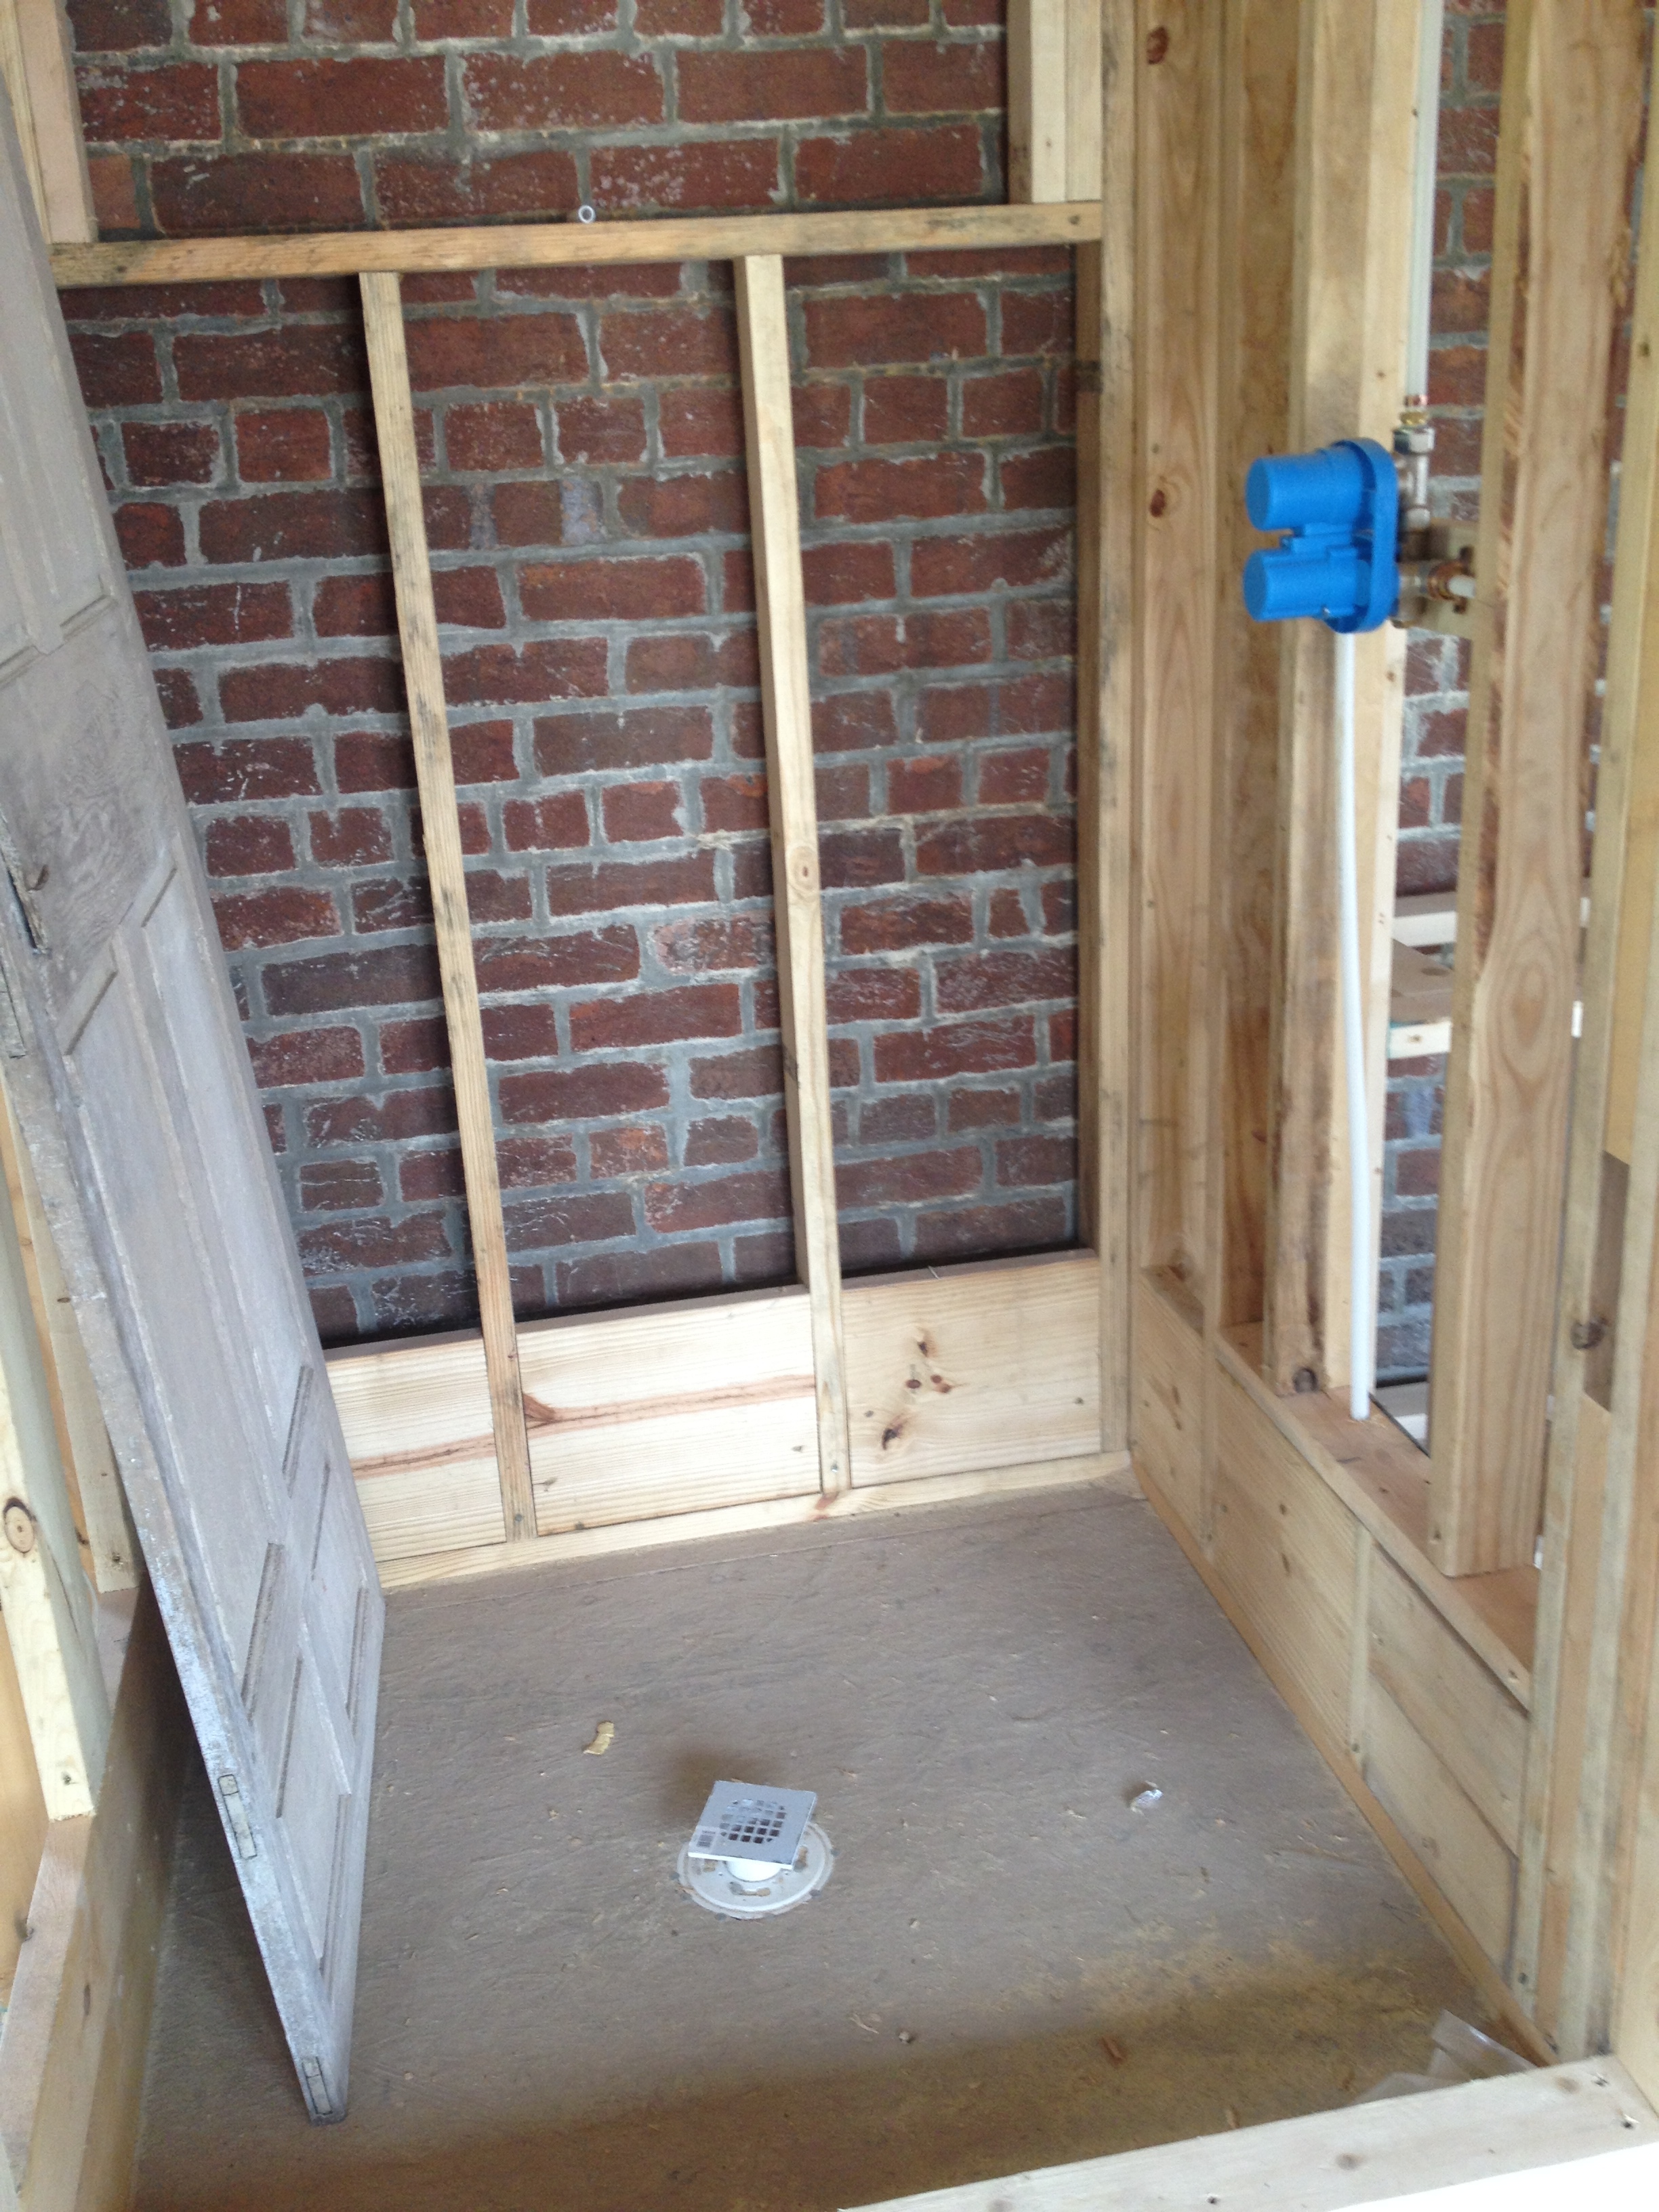
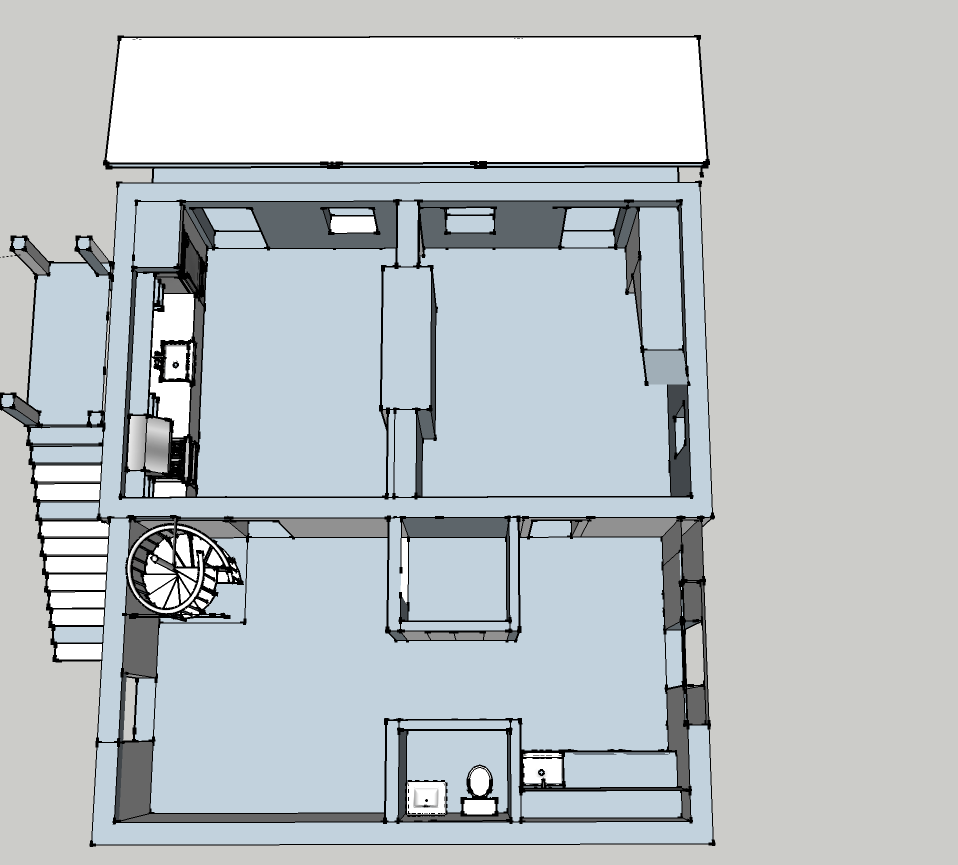
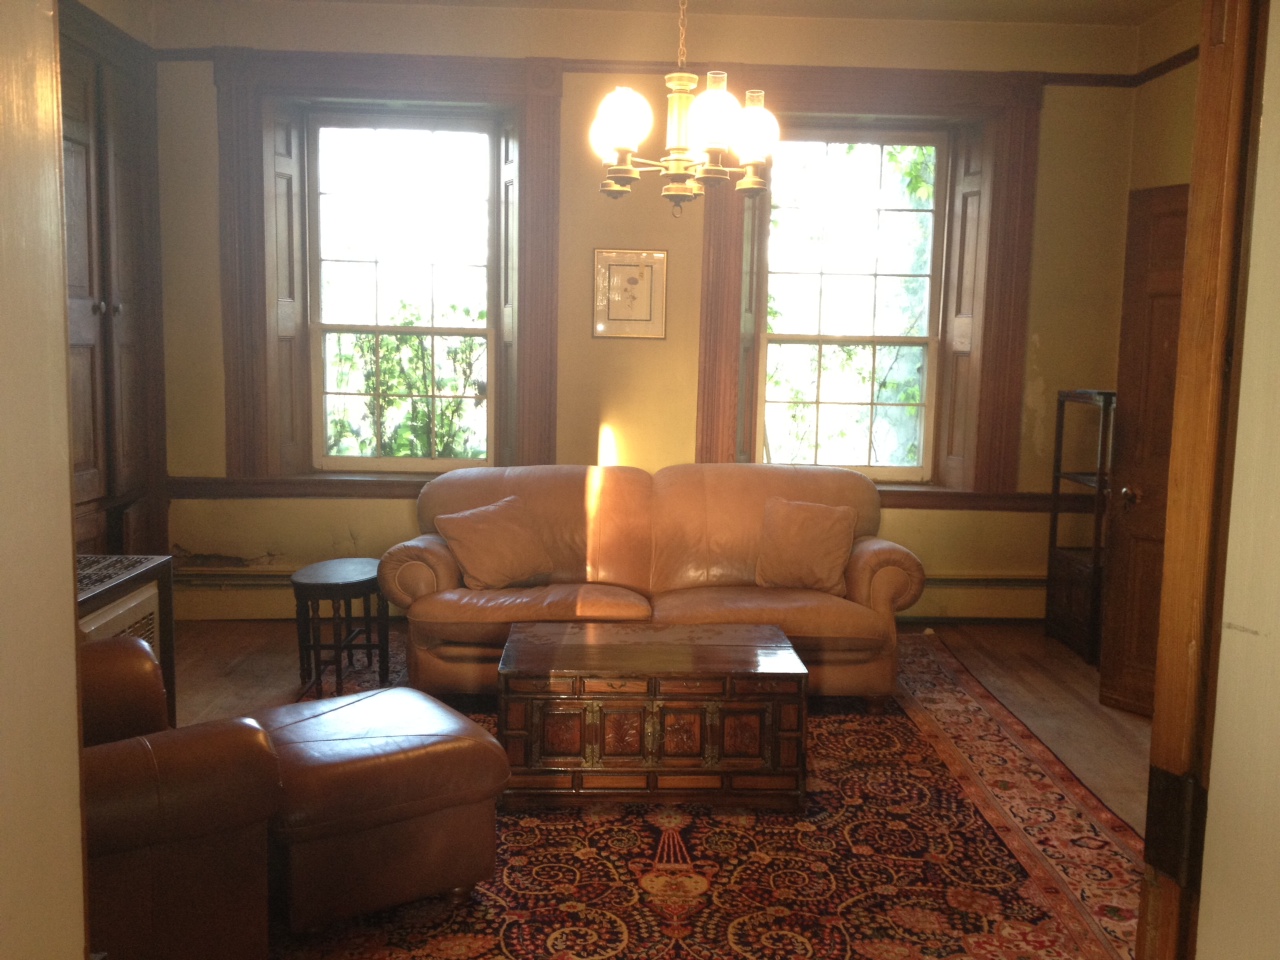
Saving the summer kitchen has been a real labor of love. We see ourselves using this space almost daily for the duration of our lives at Edge Hill, first as an office/workspace, and then, in our golden years, a downstairs bedroom for single-floor living.  We have designed this space to “age-in-place”: ensuite to the room shown above we have a good-size closet and full bath that is fully handicap accessible.  We will love our bedroom upstairs with its view of the river, but are under no illusion that we will always want to (or be able to) go up and down the grand staircase.  Incorporating the Bill Logan maxim of the 5 Ps -“Prior Planning Prevents Poor Performance” – we have a space that will hopefully see us through.

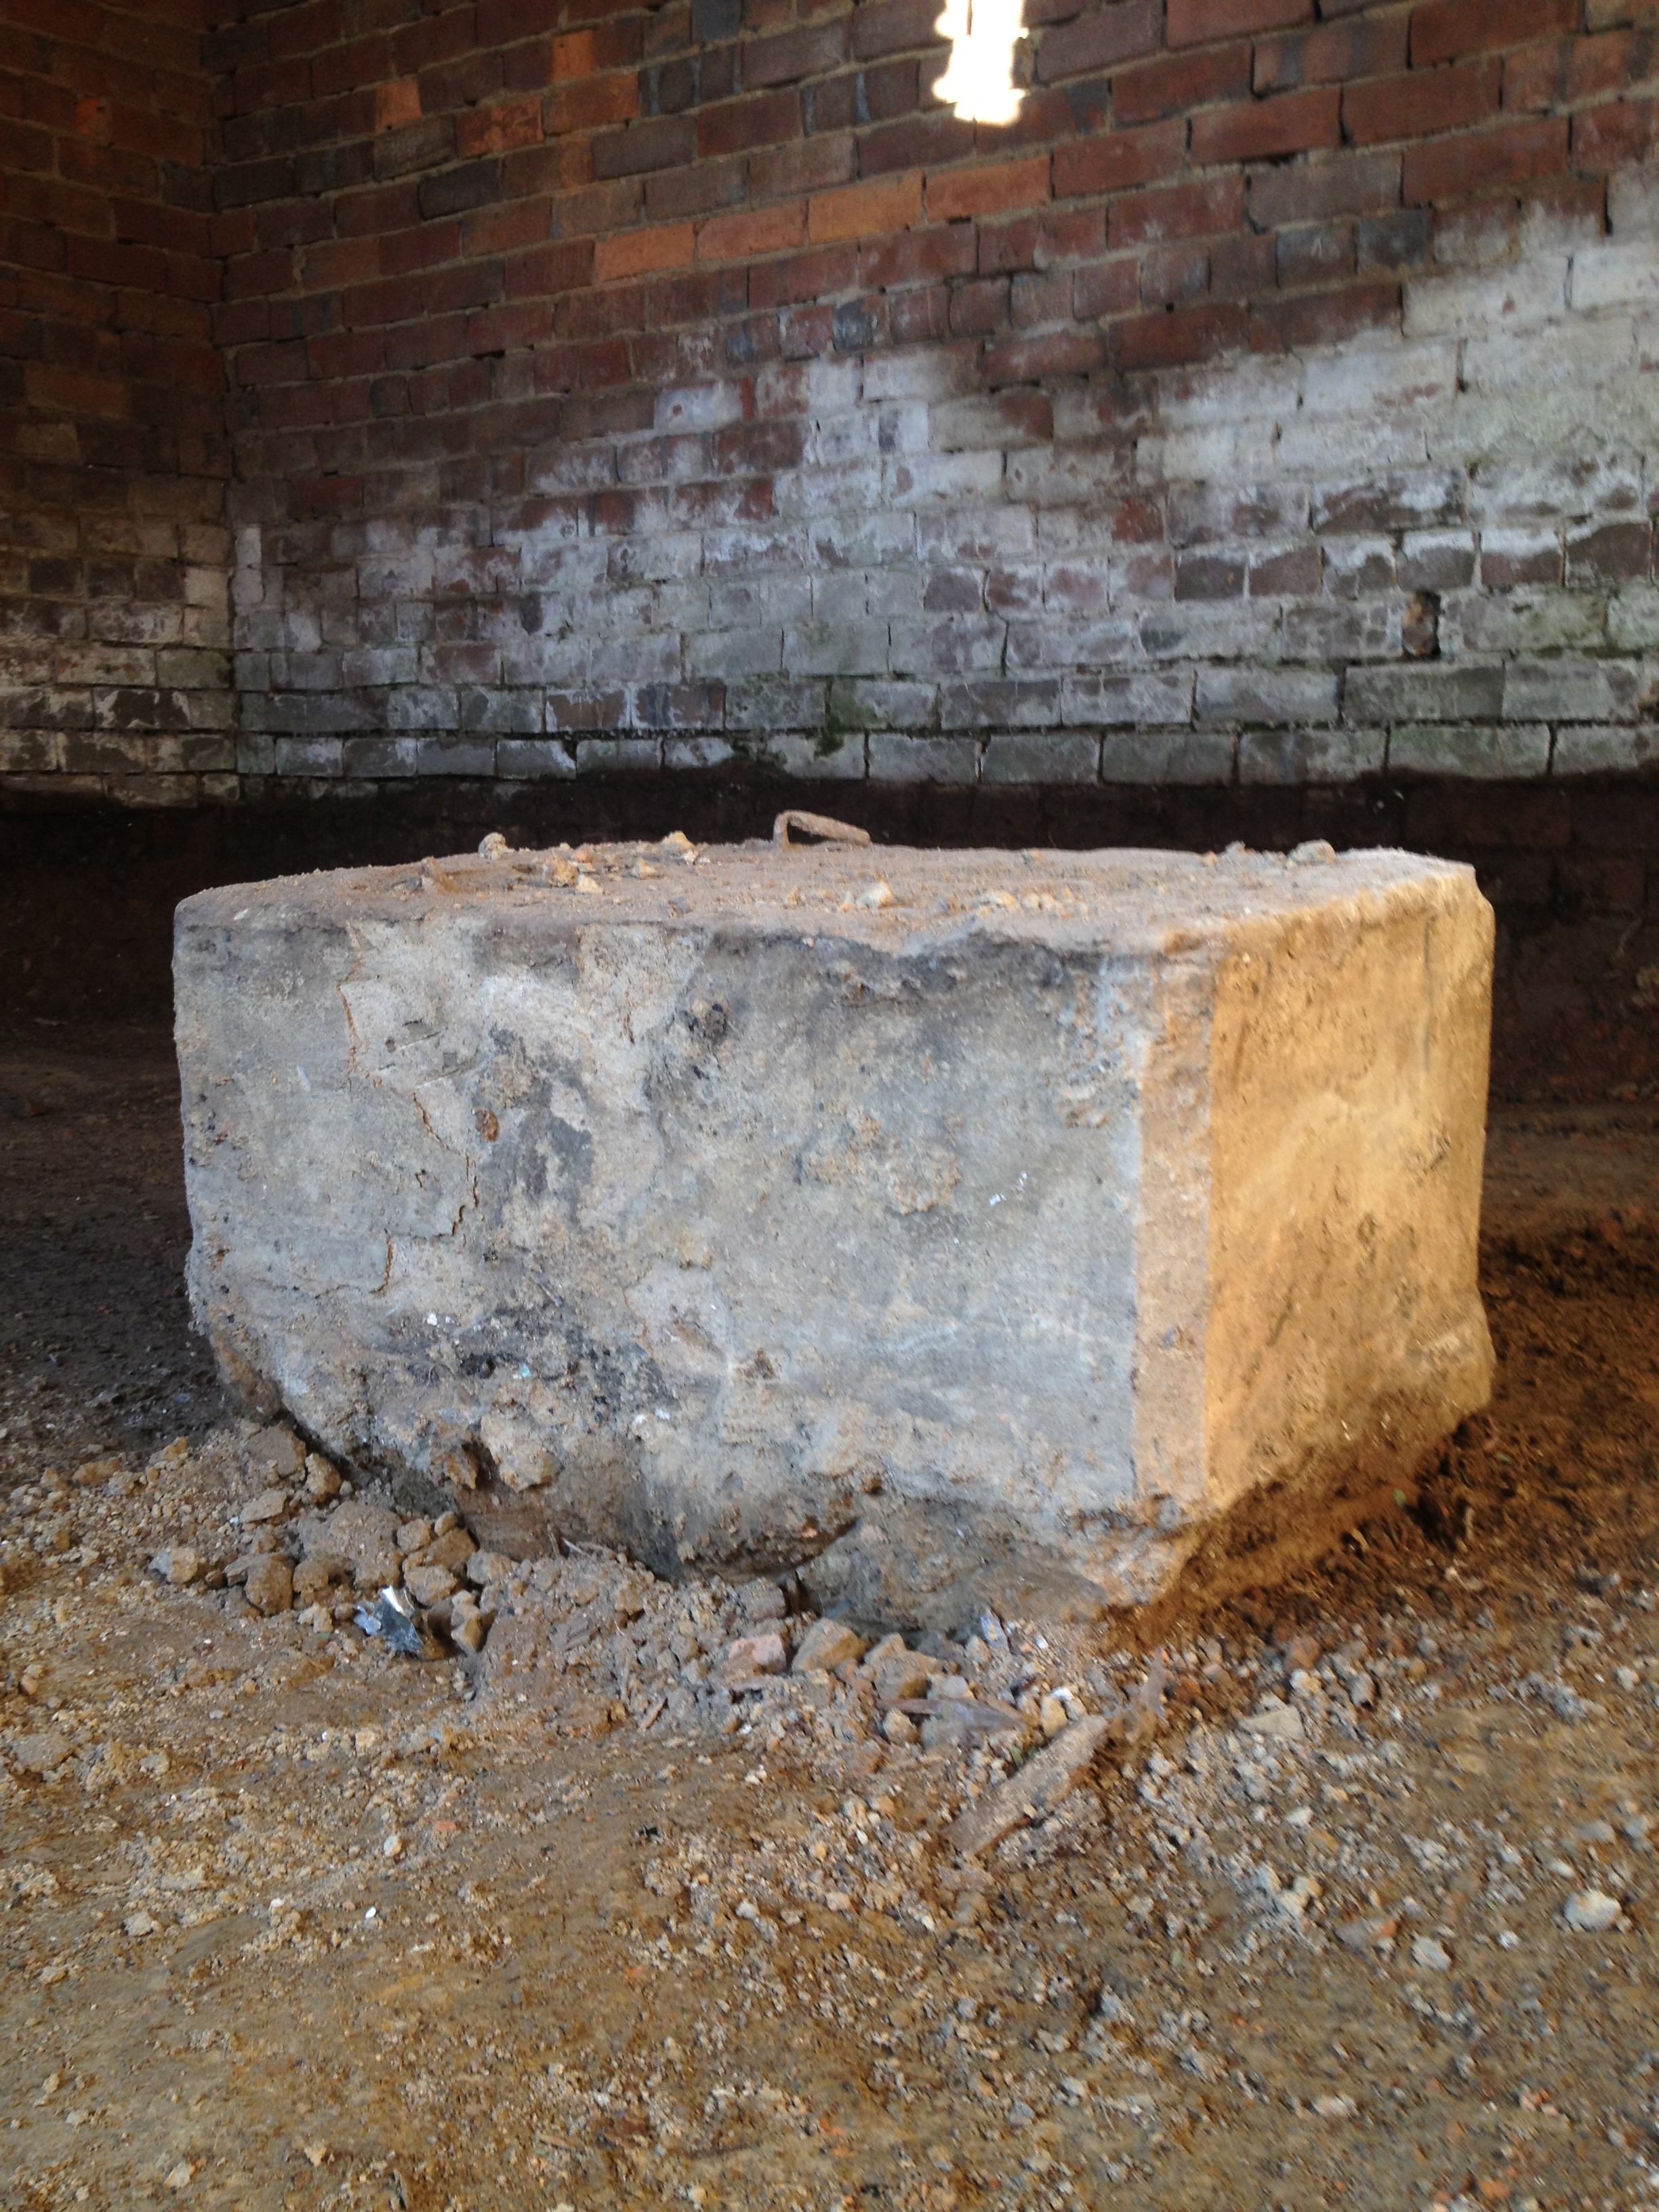
Further, if you recall, the summer kitchen was the only part of Edge Hill that originally had a basement space, which we think was the original root cellar.  We have saved and incorporated that room into our basement . . . which one day may hold an extensive collection of Three-Buck Chuck!

We morbidly joke that with the scope of this project, we both plan to die in this house (we wouldn’t be the first).   Our family has picked up on this, and a couple of birthday’s ago one of us got this card from the Winters’ side:

IMG_7373.JPG

Assuming we achieve the goal of out-living our renovation, now we can joke, with more specificity and certainty, this will be the room we die in!

Window to the Stars

A micro post- but, MACRO excitement.  The crowning feature of our addition is the roof lantern skylight.  As most of you know, we are taking a lot of design cues from Thomas Jefferson, but our inspiration structure – Pavilion IX on the Lawn at UVA – has a hipped roof that comes to a point at a chimney, and we don’t have a fireplace in the middle of our building . . . so we looked at other, better-known Jefferson structures – and – jackpot!  Jefferson loved natural light, utilizing oversized windows in many structures, and had a particular penchant for skylights.  He had them in the dome rooms at both Monticello and UVA’s Rotunda, and he also had skylights in his second-story rooms at Monticello.

After some design discussions, we chose the folks at Renaissance Conservatories in Pennsylvania, and they delivered the final product this week!

IMG_0563

All set!  Now to stand back and enjoy the view…

IMG_0572

IMG_0571

. . . and all of that natural light!

IMG_0569

And, one of the coolest features: we can remote vent this side light window to get some airflow when the weather cooperates!

IMG_0558

We are still waiting on the pointed finials, which will cap off the completed look, but those will be installed down the road.  Now, let’s hope this week of rain lets up sometime soon so we can check out the stars.

Spring Growth

It feels like spring has sprung here in the Shenandoah Valley – the trees are budding, blooms are popping up, and we are having temperatures in the 90s today.  Time for sunglasses and ice cream!

Logans2018-047

Things at Edge Hill are looking sunny, too.  Chad has been hard at work in our little garden.  We’ve always had big dreams for an idyllic spot where we could drink wine, watch the kids run, and enjoy the butterflies landing soundlessly on our growing harvest.  A couple of years ago, Chad and Steve put in some sweat equity to build beautiful garden boxes:

IMG_1354

Then, last year (I think?), I got Chad this industrial table and stools made out of a tractor gear that he’d had his eye on . . . but time and weeds (and chickens) crept in through the mulch:

IMG_1524

This year, Chad got 6 tons (literally) of stone delivered to finish off the look.  The stone actually got delivered just before a seasonally late March snow, and the girls thought the pile of rocks made a great sledding slope.  You can see the stone pushing up against the beds on the left (not the extra-giant mound of fill dirt in the back), and also behind Caroline and the snowman in the shot on the right:

Guys, that’s as much stone as the weight of an elephant!  Chad spread the stone by hand (he was paying penance for a crime in a former life) and added a border to keep the stone from drifting away over time.   The finished product is beautiful!

IMG_0430

We did, in fact, enjoy a glass of wine by candlelight out there the other night.  The dusk truck traffic diminishes the ambiance a bit, but it was still delightful (everything is relative).  We are growing tomatoes (heirloom and cherry), banana peppers, jalapeños, serranos, chard, lettuce, and radishes, to name a few.  The tomato harvest has been dismal the last two years, so we’ll see what we get . . .

At our last house update, we had taken everything down to the dirt – in other words, as low as we could go.  Literally and figuratively.  We were feeling the construction blues, for sure – timeline and budget both took a bit of a hit.  As you’ll remember, termites were to blame.

IMG_0111

Out came the floors and joists – a complete gut job.

IMG_0069

We have, however, gotten the termite problem remedied (I think Orkin wants to kill us, because they have had to come back out ~3 times, but they have been great to work with).  The good news was that, in ripping out almost all of the floors in the Big House, we gave the tradesmen much easier access to the crawl space – the plumbers and electricians were delighted that they avoided crawling on their bellies with the creepy crawlies to run wires and ducts.  We were also able to add back a much stronger floor system, complete with concrete piers.

This improvement actually stabilizes the walls of the house, too, so were are 3 for 3: 1) termites eliminated; 2) stronger infrastructure; and 3) happy subcontractors.

IMG_5949.JPG

IMG_9354

The subfloor has already been put back down, so we are back to where we started but with an upgraded model:

IMG_9018

IMG_7943

Now that we are building instead of tearing down, we have started getting to some of the *fun* decisions.  There is, however, no thrill without some stress, right?  We are going a little crazy right now trying to make sure that every outlet and light switch is in the right spot (and thus trying to anticipate where our un-purchased, twinkle-in-our-eye future furniture will be placed, where we will want Christmas lights, and where we think we will need feature lighting on the antique art we will surely acquire at a charming antique shop in the south of France on our tenth wedding anniversary (Chad, are you reading this?  I hope you’re booking plane tickets . . .)).

But, despite all of that, it has been great to see things taking shape.  Our bathrooms have been framed up, the central vac lines have been installed, the door from our master bedroom to master bath has been cut through the brick wall (see on the left wall of the first picture below):

IMG_1138

(and here it is again, from the other side of the new, Kool-Aid Man doorway – straight ahead in the picture below – Oh, yeah!)

IMG_0804

and, the porch outside the mudroom is taking shape:

IMG_0666

AND – almost all of the exterior brick has been completed!  The match with the original stuff is AWESOME – we are so pleased!

IMG_1708

We are starting to source light fixtures, and faucets, and tile, and wall paper, and door knobs – OH MY! Heaven help us!

We have also acquired a trench the size of the Mariana out back to daylight our foundation drains.  It involved an unintentional cut to the water line for the entire farm and a much rockier project than the subs expected, but they got the job done.

IMG_8719

Happy spring, y’all!  Cheers to coming out of the winter season without too many snow days!

Getting Worse/Getting Better

We are pretty sure whoever came up with the maxim, “It gets worse before it gets better”, was renovating an old house.  In our project planning, we told our builder to assume worst-case scenarios for the Big House . . . all the plumbing needed to be re-done, we needed to remove the old heating systems, we needed to install air conditioning, we needed a new roof . . . pretty much everything but walls and floors . . . Weeeelllll, we knew we would need to do some work to “shore up” one of the sagging floors, but we almost didn’t even count that in the face of all of the other work on the list.  Relatively, a minor thing.  I mean, we were living there for two years!

IMG_0555

The sag, however, should should have tipped us off.  We found out there there was some termite activity, but again, we had lived there, how bad could it have been??

Bad.  Very, Very Bad.

Apparently, termites had, and have, been living there for decades, cozy deep in our floor joists, drawing moisture from the poor drainage plan and exterior walls.

Termites

These terrors spilled out of a beam this week.  We had already had the house sprayed, and now have a direct-dial-cell-phone relationship with our local Orkin man.  At this point, we moved full steam ahead in the removal of every single floor joist in the larger rooms of the Big House in an attempt to eradicate any “home” that termites may have established at Edge Hill.

IMG_0069

IMG_0215

IMG_0182

Let’s see that side-by-side:

This work has given us a dramatic perspective on the construction of the Big House, with foundations (and fireplaces) running deep (but a complete lack of vapor barriers).

The removal of the floors has felt like we are ripping out the heart of the Big House, but we are taking all of these steps with our eye on the future.  Insecticide (all of it, right now, please) will be applied.  Vapor barriers will be laid. New beams will be installed.  The original pine floor boards will be salvaged and returned for the next 180 years.  There will be holiday parties and fetes for years to come.  But for now, we have dirt pits and and thresholds four feet above grade.

We did make one more interesting discovery.  In the rear parlor of the big house, there was a small-board floor installed overtop the original pine floorboards, and we had speculated that they were put in to help prop up a sagging floor.  Turns out, that floor had been there a while:

IMG_0054

This tag says: “Sam Moore” “Quicksburg, Va”.  Sam Moore bought the house in 1846!  We don’t know why he installed this flooring overtop the original pine flooring, but we have salvaged it and plan to incorporated it into the floor of the Summer Kitchen.

Upstairs, we have also been de-constructing, and opening a passage from our master bedroom into the future en-suite. 

IMG_0193

Meanwhile, in the new addition, we look less like a disaster area.

Bricks are going up!

IMG_0099

Stairs are going in!

IMG_0170

The basement floor is poured!

IMG_0171

We have also tied the addition into the original summer kitchen, and integrated the summer kitchen and root cellar into our addition:

IMG_0172

IMG_0165
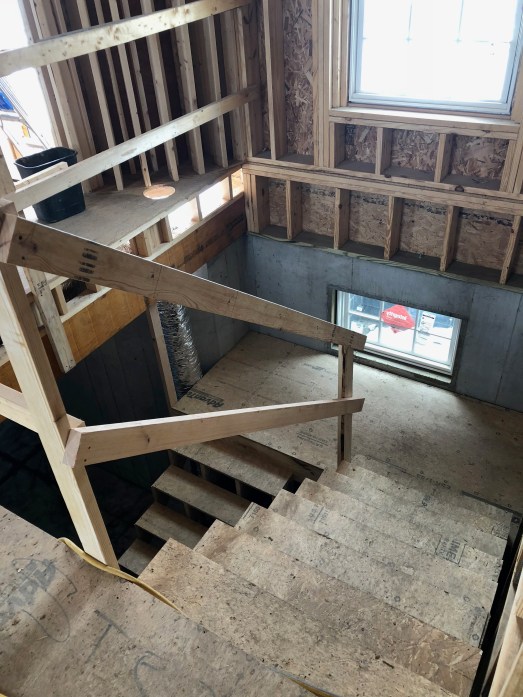
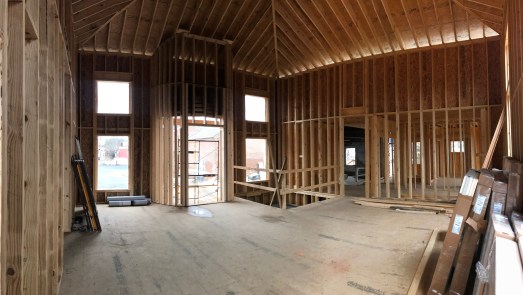
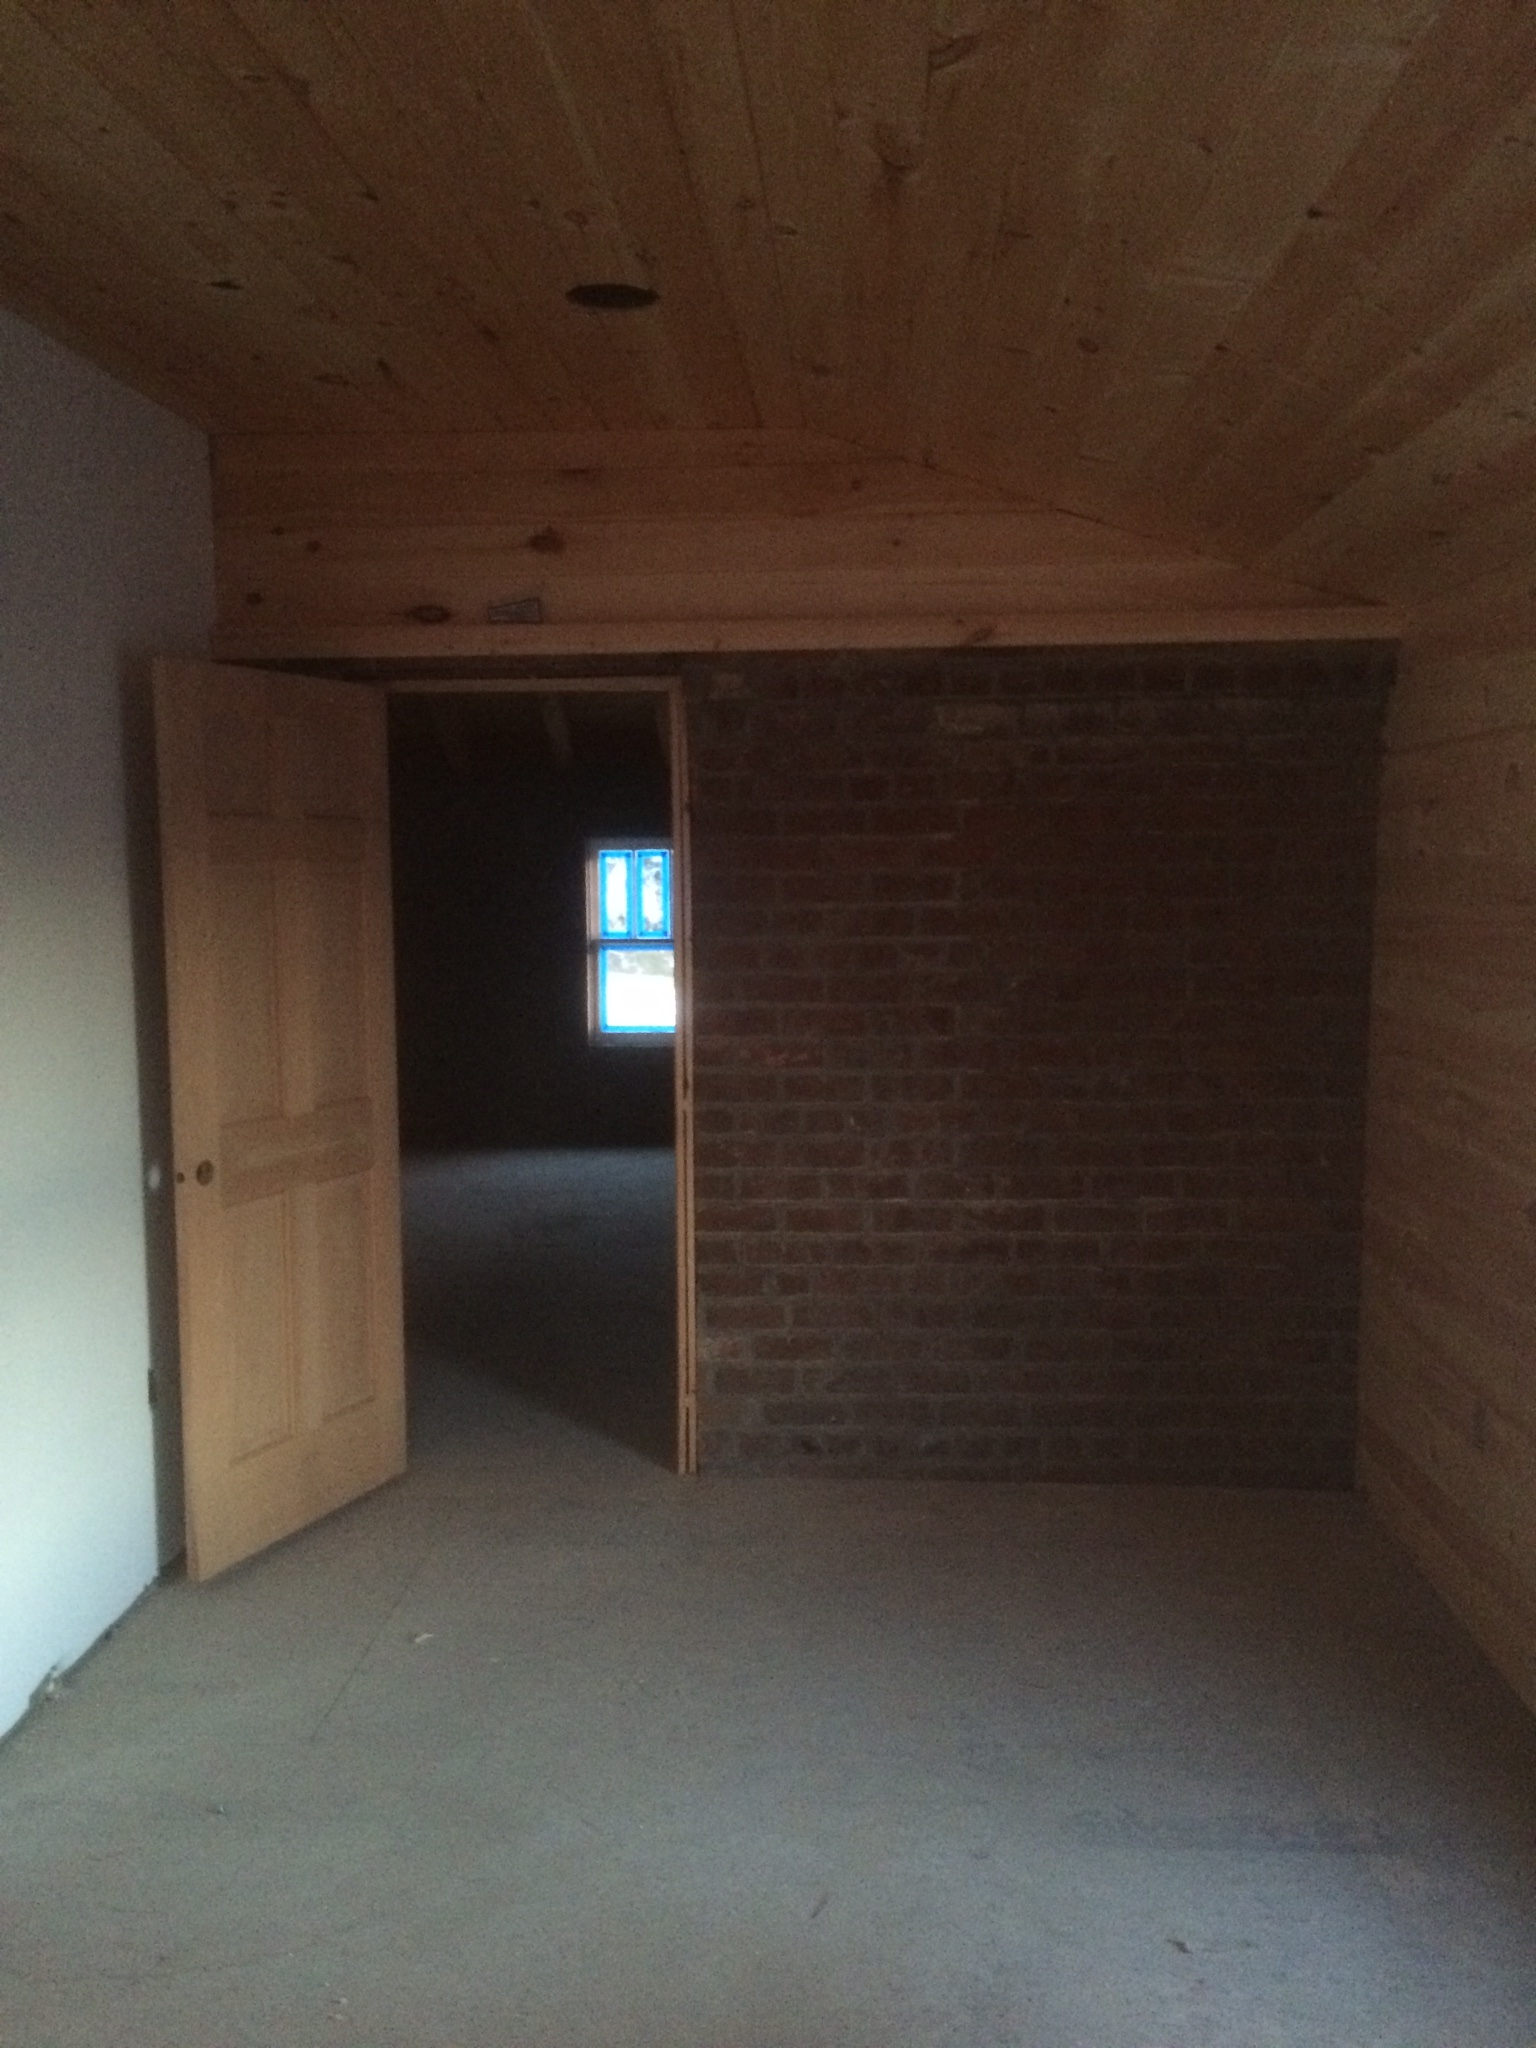
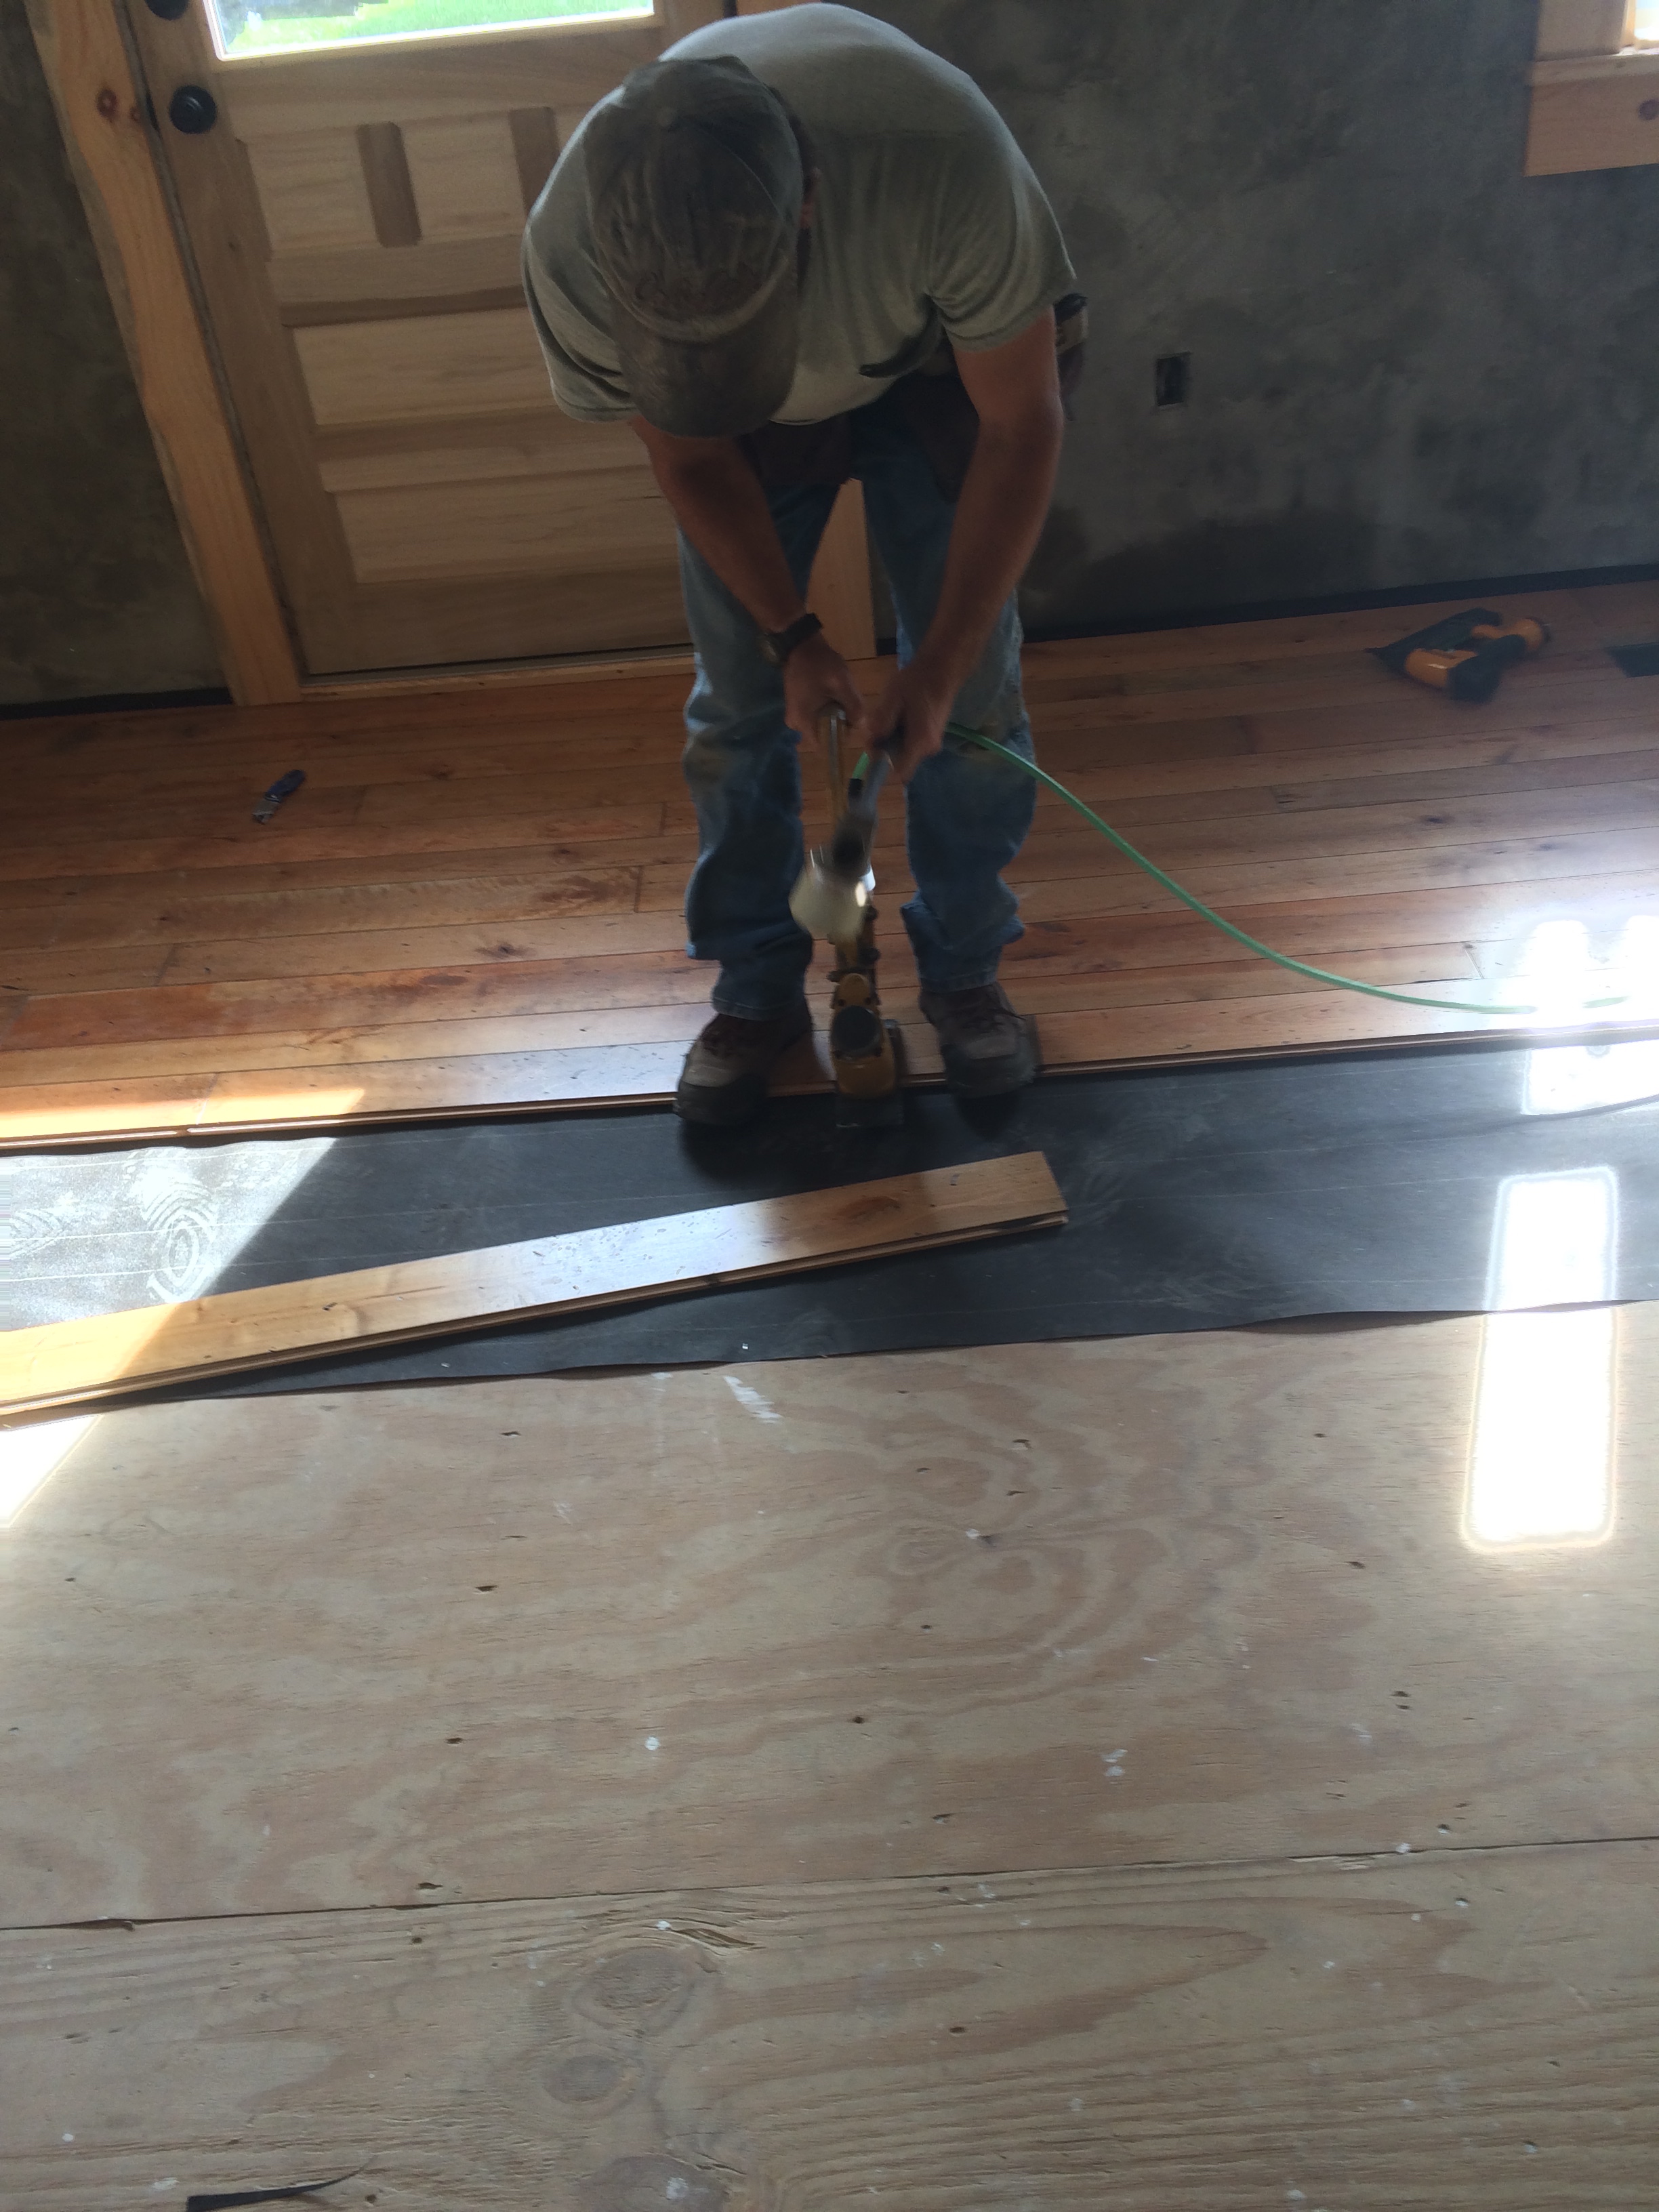
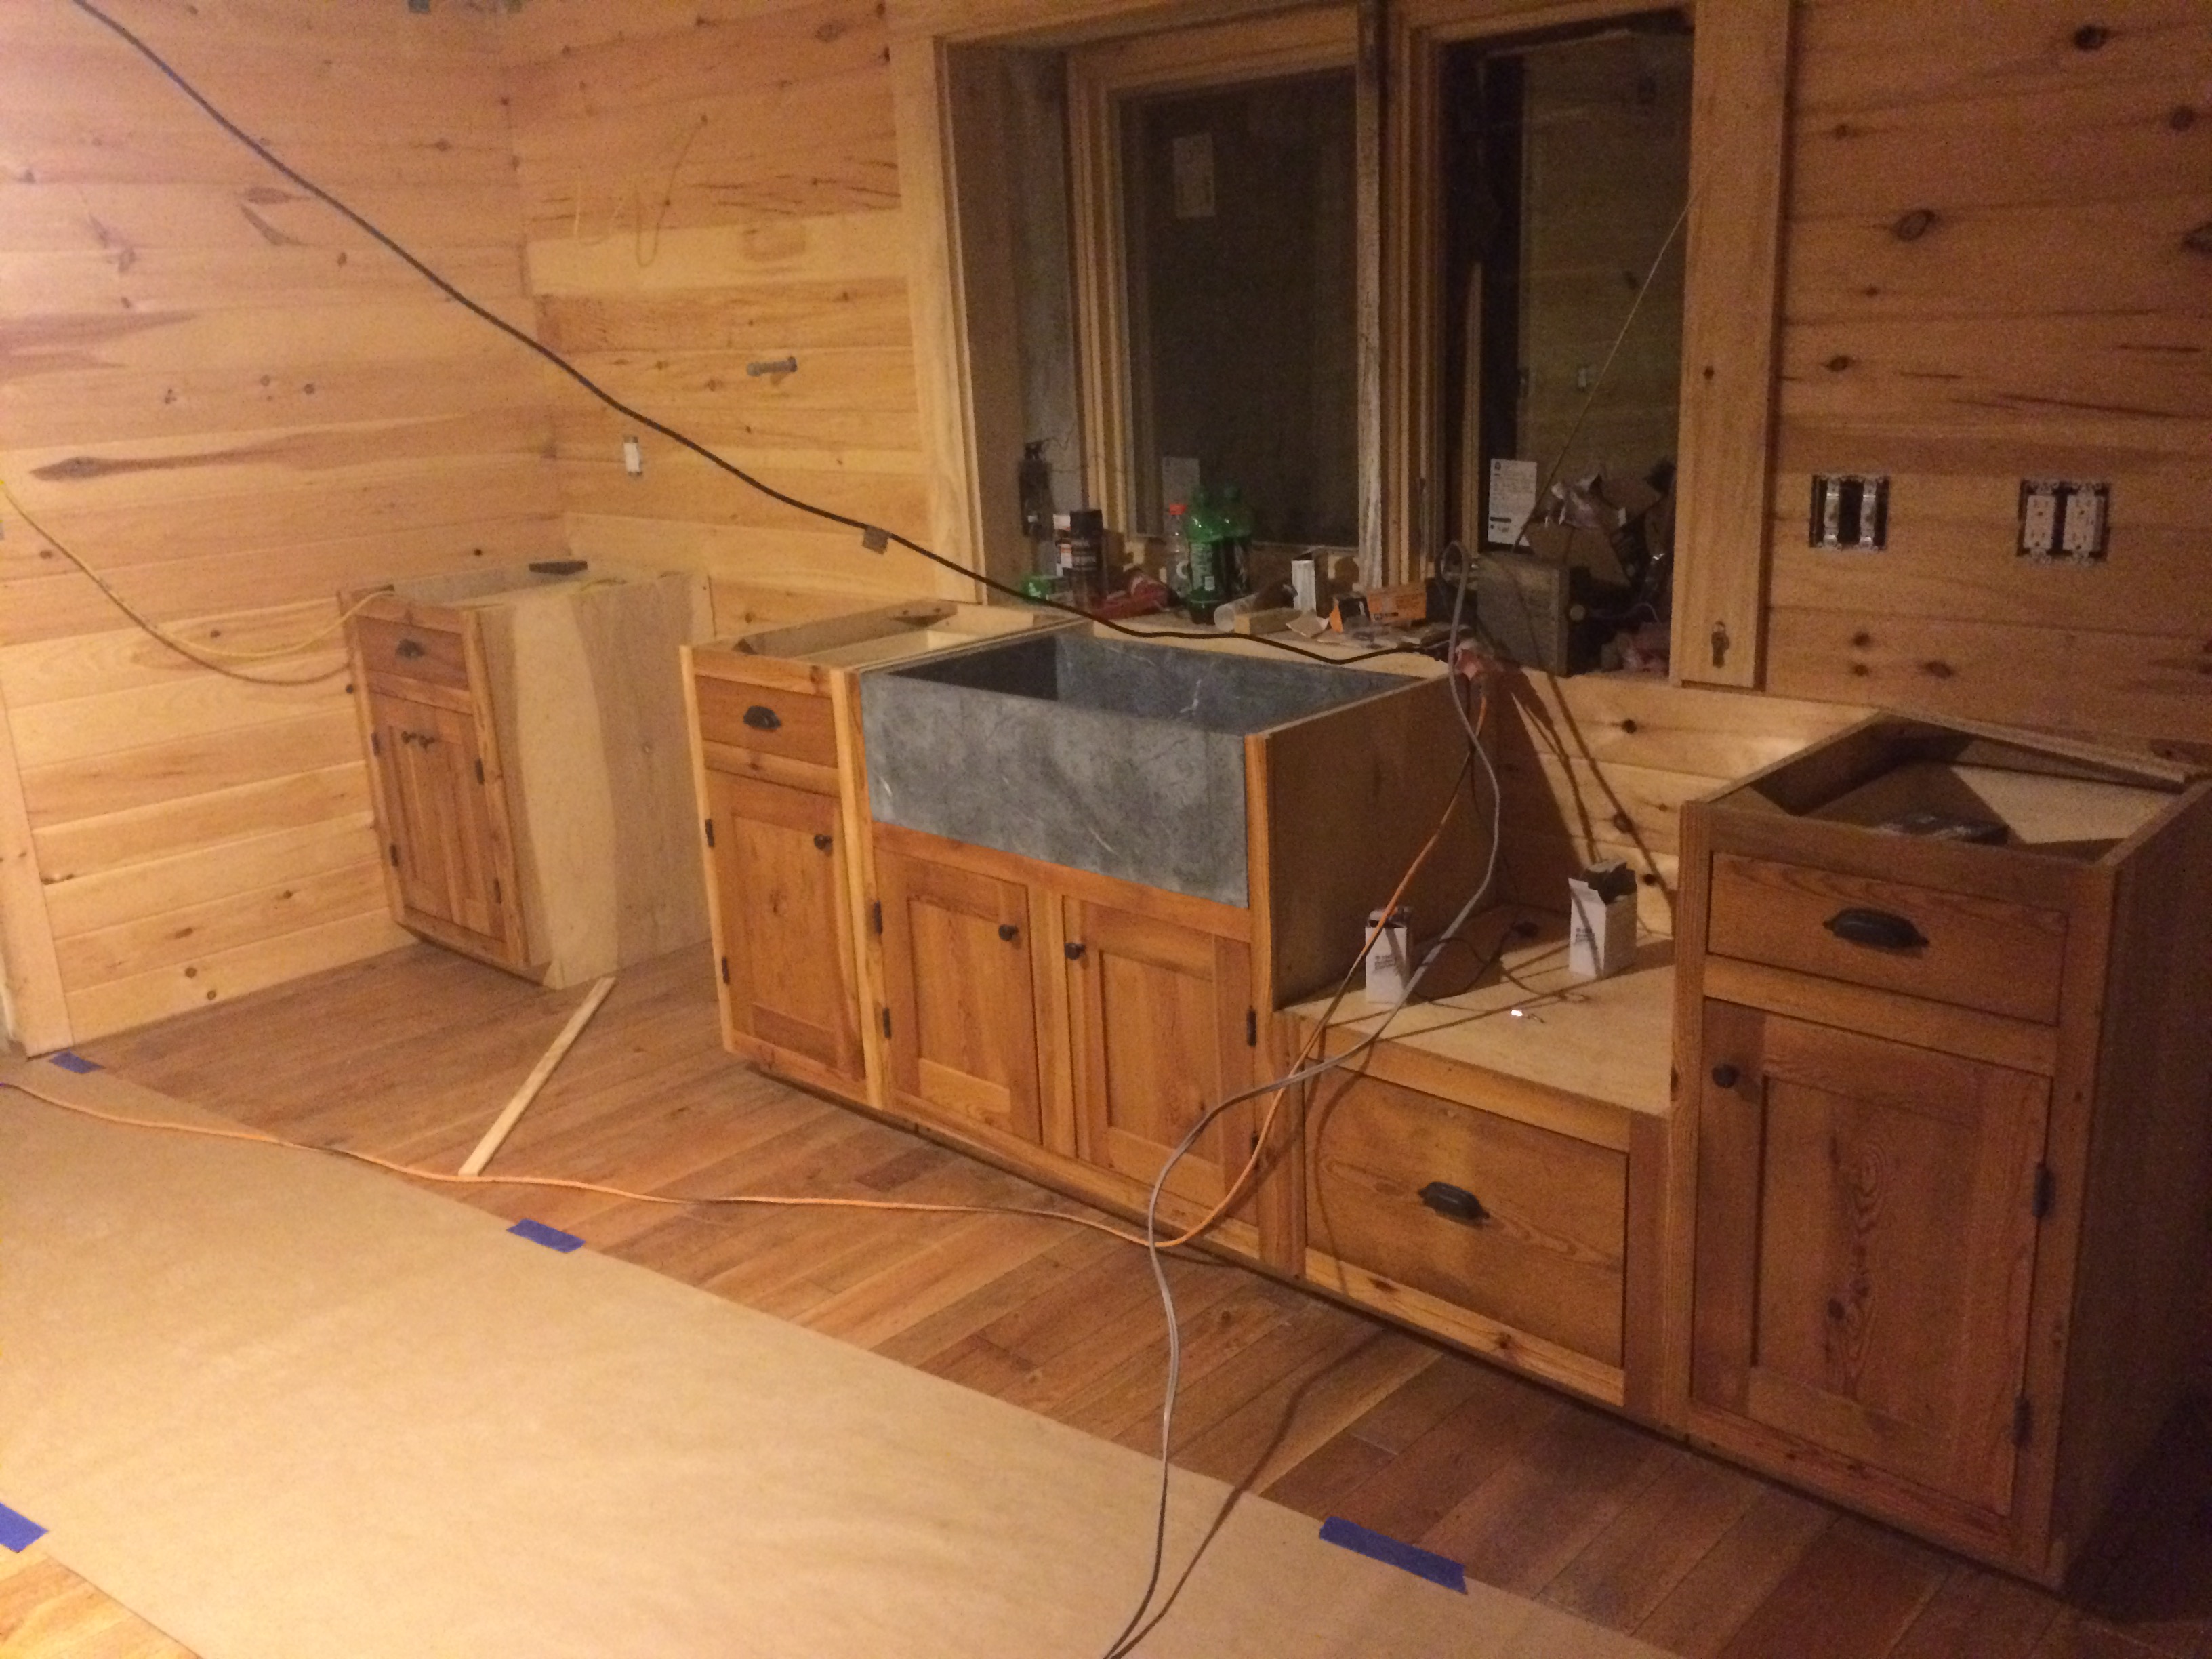
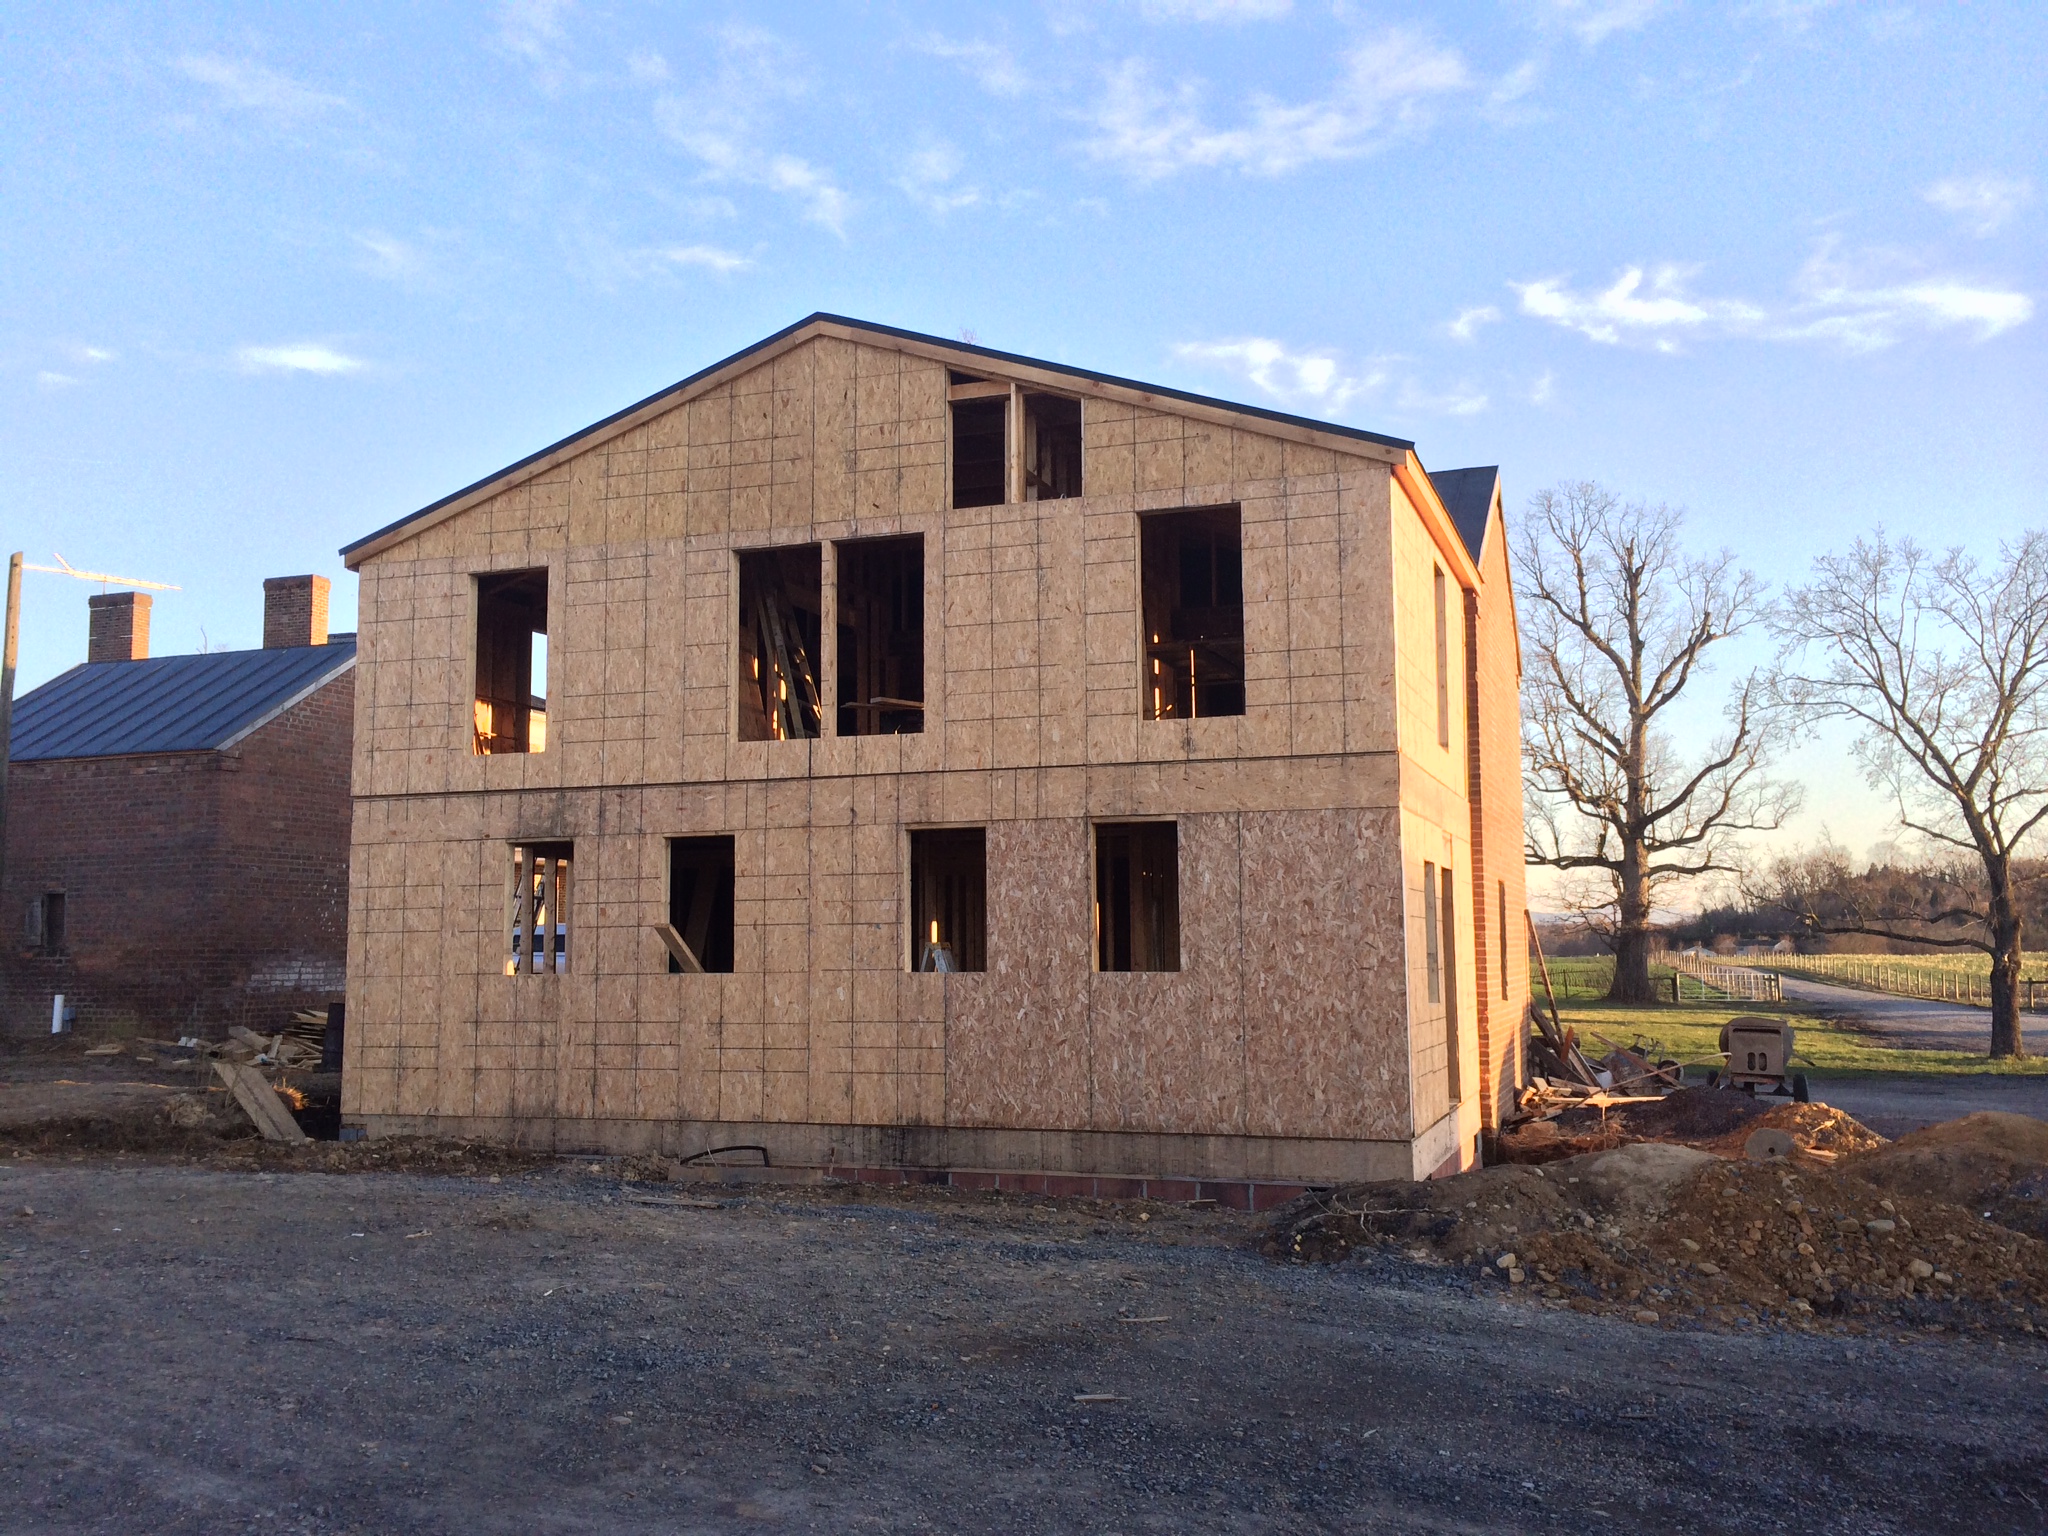
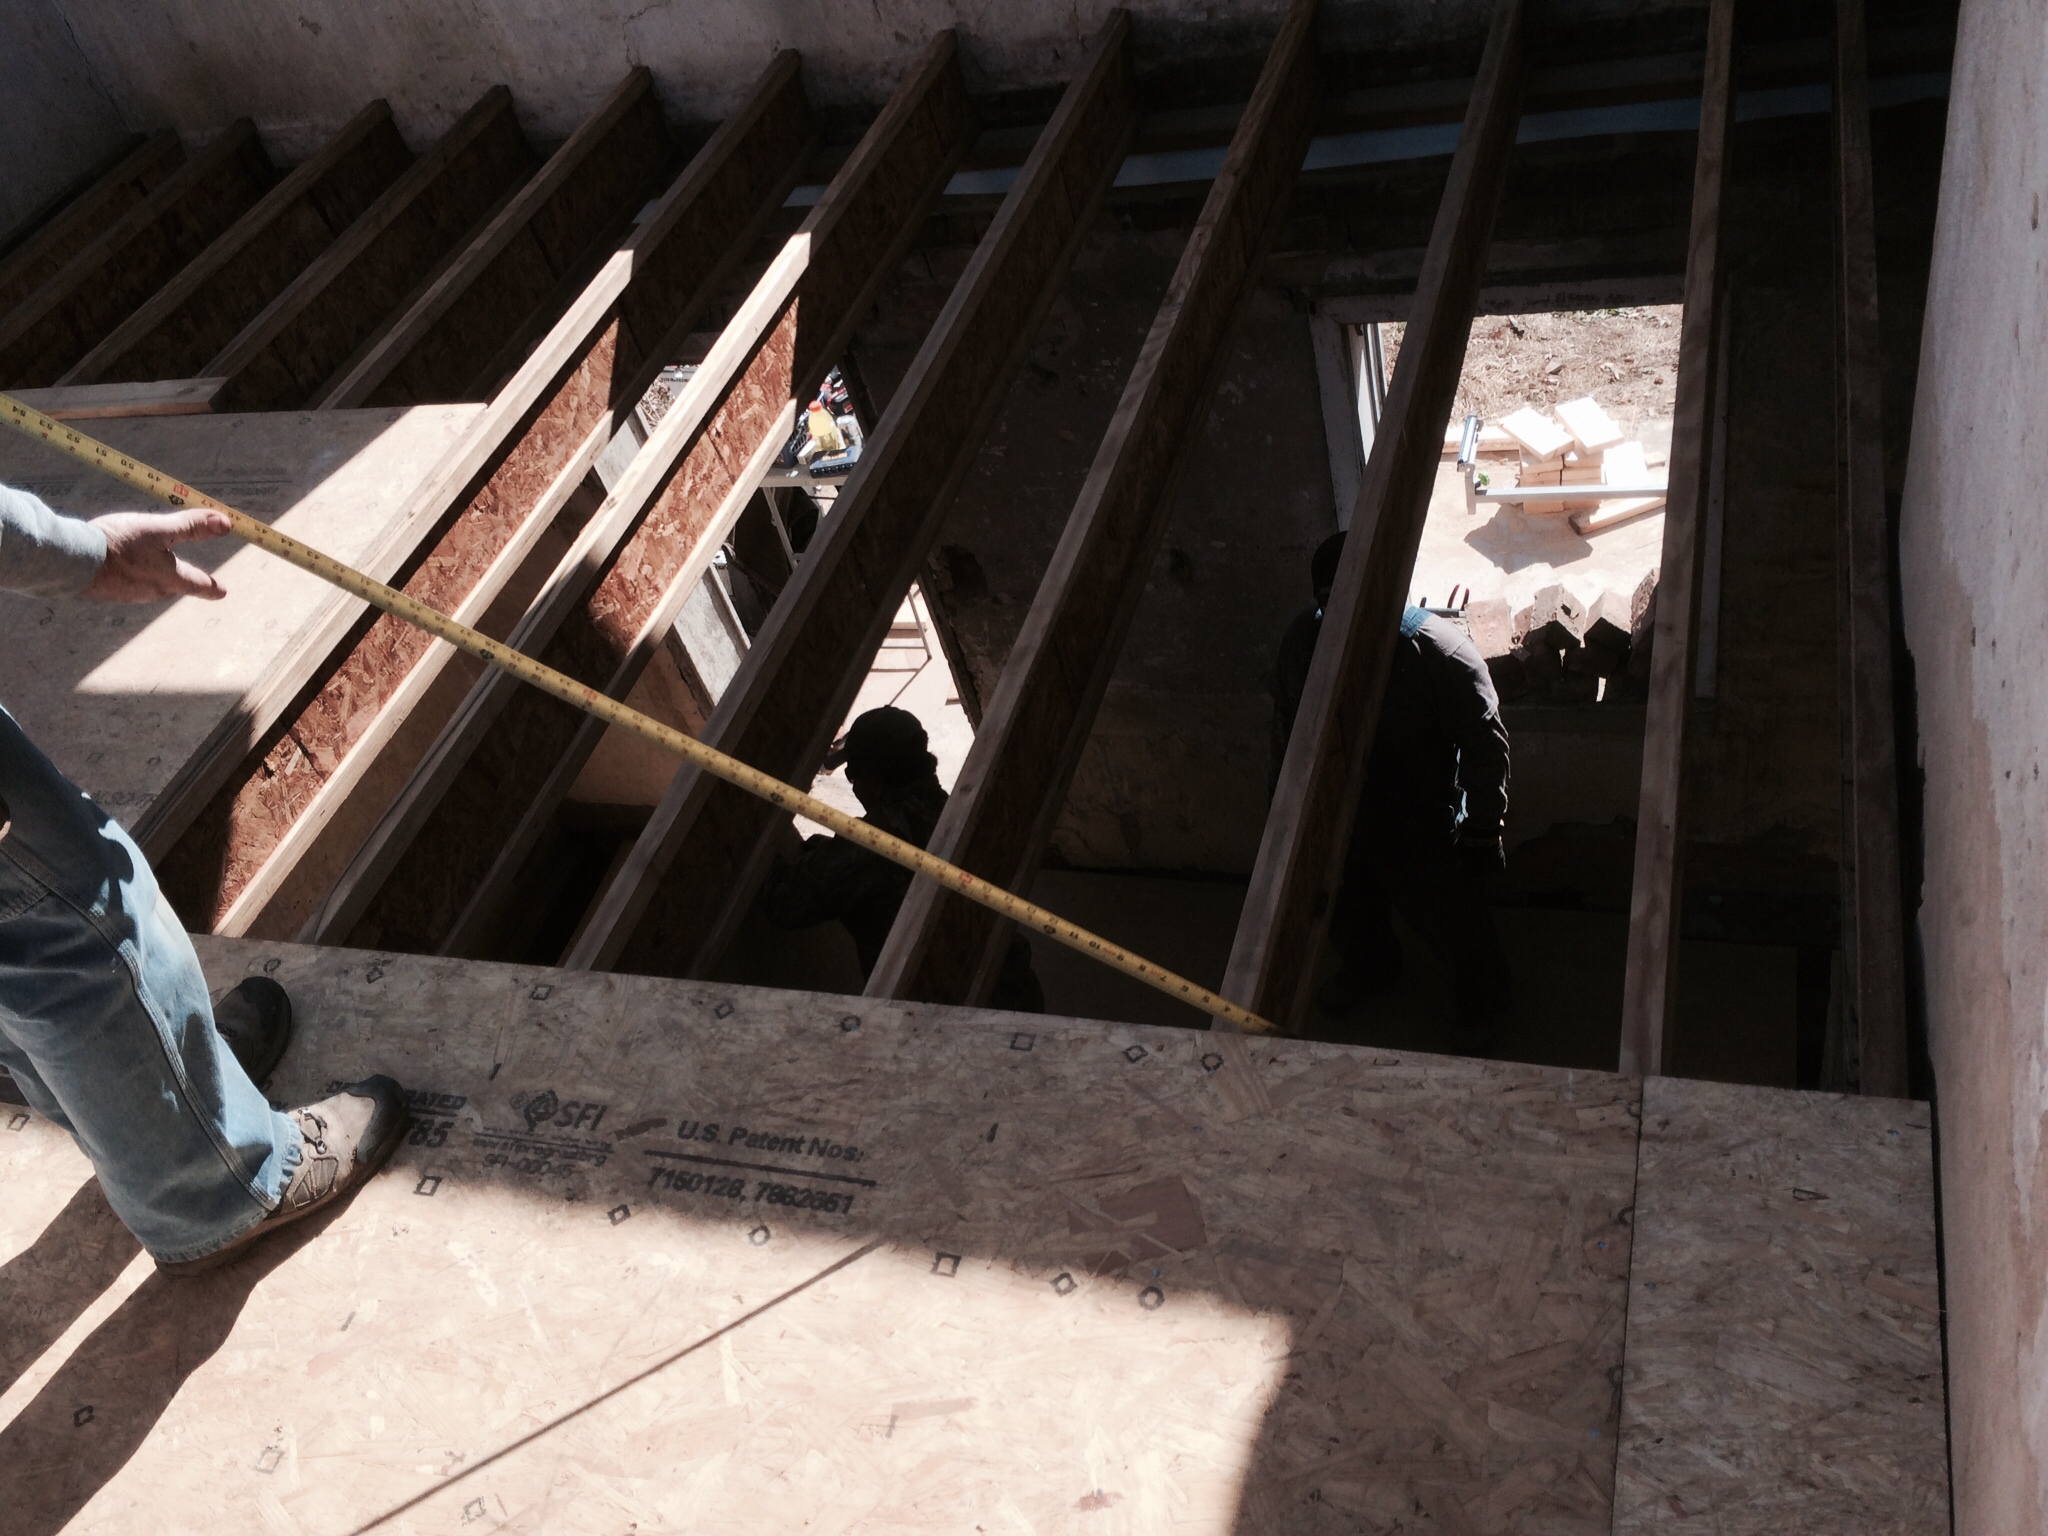
At this point, as we walk around, the house looks raw and open, but we know the next few weeks will see us turn the corner and we will begin thinking about floors, finishes, and final coats of paint.  Until then we will dream about it getting better.

Behold: the Frame-Up!

We usually love snow, but this year Edge Hill has been hit by every dry slot the meteorologists’ forecasts, leaving us with a very dry and mostly mild winter.  Bad for sledding, GREAT for house building.  Thanks, Mother Nature!

Our last post left you with a view of the below-grade poured walls, with the north wing of the house begging to rise up and show its new form.  Ta-Da!

IMG_3028

What we’re calling the “Pavilion” (in other words, the addition – in blue, above) and the rehabilitated (and somewhat expanded) Summer Kitchen (center building to the left of the Pavilion, above) are all framed up and connected!  First, they started on the floor structure which ties into the Big House for one unified first floor level .

IMG_2764

Then, up went the walls.  The framers actually framed, sheathed, and insulated these sections on the ground and then raised the whole unit as one:

IMG_2812

It’s like a very complicated barn raising!  Taking advantage of some new insulating techniques, our house has a rigid foam insulation on the exterior, house wrap, and then the spray-foam insulation will be applied after all of the trades complete rough-in.  Placing a layer of insulation on the exterior of the vapor barrier will hopefully help prevent any mold-inducing condensation from occurring inside the wood framing of our walls.  For maximum coverage, the entire interior will also get a course of spay foam insulation.  We should be nice and sealed up (or, as sealed up as a new-old house can be).

Finally, the walls are up, and you can see the small second story addition (our new closet) taking shape:

IMG_2876

The roof for the Pavilion was framed on the ground and then a crane placed it and the other roofing trusses in place:

IMG_2879

IMG_2886

IMG_2891

Next came the curved entry called an “exedra”. Think of this like one half of a clam shell above the door.  We straight up stole this from good ol’ Thomas Jefferson and we feel no shame.  For more about Pavilion IX, the T.J. structure that inspired our Pavilion, look here.   The framers told me that they had previously done an arched entry, a curved wall, and a dome, respectively, but they had never done all three at once!

IMG_2918

They nailed it!  Here is a view from the inside:

IMG_2933

This magnificent room will be the hub of our family life: the kitchen.  A staircase will descend from to the right corner of the above picture (currently boxed off for safety) down into the basement.

Work has also been ongoing in the original portion of the Big House where we are remodeling one the ten original rooms (the only one that had already been remodeled before).  Originally, this upstairs room contained a back staircase and a smaller bedroom, but in 1952 the stairs were removed and a bathroom was installed on the second floor (no more chamber pots or late night outhouse excursions! Luxury!).

We are taking that room and dividing it into two bathrooms, one en suite to the master bedroom and one hall bath/laundry combo for the twins.  We are so very happy we will be keeping the other nine rooms of the Big House virtually identical to their original form, but we had to have some upstairs bathrooms, y’all (and do you REMEMBER what that existing bathroom looked like?  Frat-tastic).

During our demo, we found this amazing architectural ghost of the old back stairs, and you can just see how those risers clipped the frame of the door below (see the diagonal line in the top right trim?), and how good of a job they did in matching that trim when the stairs were removed.

IMG_3019

And here is a shot of the staircase peeking down from the second story; those stairs were quite narrow!  Suck it in!

IMG_3013

Last, I will leave you with what may be our favorite find to date.  I was removing some old sheets of particle board “flooring” in the attic in preparation for the vacuum removal of the dirty old cellulose insulation, when I stumbled upon this scrap of paper.  It was dark.  I picked it up and put it in my pocket.  The next day I remembered it, retrieved it, and was amazed.

The stamps read “Confederate States”, and this envelope is addressed to Capt. James Beale, 14th Regiment Va [illegible], Jenkins Brigade [illegible].

img_0022.jpg

You. Guys.  James Madison Hite Beale is thought to have BUILT Edge Hill circa 1840!  This is concrete proof tying him to the house!  We have no idea how it survived, but it is a great find and we are excited to add it to our treasure trove of house history (we also have an original signature from JMH Beale, but admittedly we bought that on eBay).  We keep saying we are at the end of our treasure-finding days, but who knows what will turn up next!

Until our next post, I’ll leave you with our new favorite view on the farm, which is shot from the window in our future mudroom (just imagine that pile of dirt is some fresh sod, that’s what we do!):

IMG_2814


Still Below Grade

Over the past month, there hasn’t been a lot of visual progress at the site, but here is a quick update.  The basement work is a “go slow and get it right” affair, and since we’ve been planning this project for years, we aren’t in any rush – especially where waterproofing is concerned!  The Cliff’s Notes are the we still have a big hole (“No go down there, not safe!”, as Cora would say), but our basement is taking shape.

The black forms that you see below are a product called Form-A-Drain, which combines concrete forms and drainage in one nice package.  They will stay in place for good as one element of our waterproofing plan for this basement space.

IMG_6584

The concrete footers were poured and then work began to form up the walls of the basement.  This work took time, as the forms are heavy and must be buttressed (see below on the left) and the rebar must be installed prior to the pour.  Below on the right you can see the intersection of the new basement with the foundation of the original Summer Kitchen.  There have been several conversations about getting this right, as it will be a key weak point in making the basement water-tight.

The kitchen pavilion will feature an entryway that curves inward, and below in the center you can see that foundation wall beginning to take its “U” shape:

IMG_2590.jpg


IMG_2598

And . . . drumroll please . . . the forms are down!:

IMG_2705

Climbing down in the hole and finally experiencing the scale of the basement gave great perspective; we are so glad we added the windows to bring in some natural light.

On the exterior you can see the green spray-applied waterproofing membrane, as well as the insulation which will help climatize the space:

IMG_2701

This picture is taken from the “true front” of the house – you can see the summer kitchen, smoke house, and the Little House in the background.

Also, we had our first real “change order” after our builder suggested we could easily add a 10×10 storage room under a future porch that will run along the Summer Kitchen’s north wall.  Below, about half of the space you see with the new footers was in the original plan, as that is where the exterior stairs go down into the basement (that big gap will be double french doors).  The back half of the space was originally just going to be back filled and under a porch with some foundation work, but for less than $1,000.00 we decided make it a useable exterior storage room.  That’s our kind of change order!

IMG_2698

So . . . still below grade, but the flooring system is on order, and over the next month we can’t wait to see our plans rise above grade!

IMG_2665

#Started

After commenting enviously on a friend’s post showing off a beautifully completed kitchen addition, she responded that at least we had #started . . . and so we have!

The selective demolition discussed in our last post progressed for about a week as the crew carefully detached the addition from the Big House and Summer Kitchen in preparation for teardown.  Here you can see the kitchen in the Big House, in which we so excitedly prepared our first hotplate-and-toaster oven meal at Edge Hill, now fully detached from the original portion of the Big House:

IMG_2279

IMG_2327

Above, you can see the original peak of the roof and then the addition with it’s nonconforming brick.  This addition housed the added downstairs bathroom at Edge Hill.  Of note is the door you can see at the bottom of the picture under that bathroom addition, which leads down into the creepy-crawly crawl space (SO MANY WOLF SPIDERS).  You’ll see that space a little later on!

Finally, the Summer Kitchen was fully detached as well, which revealed the full extent of decay in that structure.  One portion of the solid brick interior wall collapsed during demolition, and the remainder and a portion of the exterior wall has been removed as well:

IMG_2289

Time for the big toys to do some heavy lifting.  Cora and Caroline were particular fans of this excitement (from a distance).  Digger Digger Digger!

Our project at Edge Hill has always been a family affair, and thanks to some skilled cousins manning that equipment, those now-separated structures came down fast!  Debris cleanup also went quickly and soon we were down to the dirt (see below: the Little House on the far left, the smoke house in the middle, and the separated Summer Kitchen on the right):

IMG_2382

…and it was time to start digging all the way down:

IMG_2399

Immediately in our path was one of the house’s old cisterns (there are two!), which had to be fully excavated (see the pit at the bottom of the above picture).  It was hand dug, lined with brick, and parged.  What a monumental task building it must have been.   Now that it is removed, we will have to fill the resulting hole with some concrete slurry, so it is an actual money pit!  Haha!

IMG_2435

What a great perspective!  On the right, you can see the foundation of that creepy crawly crawl space, day-lit and home to thousands of spiders no more!  The cistern went down below our final basement grade (in the far right in this corner) . . . man, that sucker was DEEP!  Cora and Caroline have had so much fun playing in the dirt of their future playroom!  They are particular fans of the “muddy puddles”.

In the demolition process, we were left with a cross section of the Summer Kitchen, which we will tie back into our new addition.  I’ve been so impressed at the work of the selective demolition in safely separating the portion of the structure that will be saved from the portion that had to come down.

The basement level of the Summer Kitchen, originally a root cellar, then a boiler room, will be repurposed as a wine cellar (one day).  The kitchen space on the main level of the Summer Kitchen will be a multipurpose room and will physically look much the same as it did upon construction, minus the kitchen furnishings.  We are still deciding if we will maintain the board ceiling above the kitchen space, or if we will remove the board sheeting (leaving the beams) so that when you stand in the space you can see all the way up to the ceiling.  Decisions. Decisions.

And now, a teaser of things to come . . . Footers have been formed up!


We’ve officially #started !

…and We’re Back

Y’all.  We know we haven’t posted in over a year.  We know you have missed our ramblings and photographs of mostly-destroyed things.  We know many of you have wondered if we are throwing in the towel. We. Know.

So, without further ado, feast your eyes upon a sight that made ours well up with tears:

See that big gaping hole on the left?!  Let’s look at that from yesterday’s viewpoint:

For the last year we’ve been waiting for this day.  Rachel and I set out to find a contractor who we felt could appreciate our scope of work, priorities, and who wouldn’t be afraid to question our decisions when he/she felt their experience was leading them to a decision contrary to our initial plans.  Enter Jim Herr.  We met some really great folks in bidding process, but in the end we chose Jim because from the start he offered insight and a perspective on our project that seemed to be the best fit for us.  This meant at one point “going back to the drawing board” and making some changes to our proposed plans to accommodate what Jim had determined we wanted…and we are grateful that his thoughtful consideration of our plans lead him to suggest changes we know will make this project all the better for us in the long term.  And that he made those suggestions before lifting a hammer (or drafting a change order)!

Today was Jim’s first day on the job, and this phase is being termed “selective demolition”.  This is the process of physically detaching the house portion of the Big House and Summer Kitchen structure from the addition that was built to connect those two original buildings.  We know as far back as the 1940s there was an open-air breeze way that connected the Big House to the Summer Kitchen, and we suspect it had been there all along.  In this picture from circa February 1965, you can see an arial shot of the Edge Hill from the front, complete with breezeway (below, it is the one-story portion that extends off the right of the house):

…and in the following picture of the rear of the house, you can catch a glimpse of the breezeway to the left:

Over the years, the breezeway was expanded by our predecessors into a precursor of the modern “open concept” living, kitchen, and dining area:

Here and below, you can see how the breezeway was enclosed and expanded. Today’s demolition provided a great cross-section, showing how they merged the old with the new:

On the right of the picture above is the roof of the original breezeway, and then shedding off to the left is the expansion that roofed over the living and dining space.  Here is a close up of that original breezeway roof structure:

Unfortunately there were some structural problems developing in this area and our plans called for a complete re-design of this transitional space.

This choice was one of our big struggles.  We loved the classic look of the simple breeze way connecting the Big House to the Summer Kitchen.  As you likely remember from history class, early kitchens were housed in separate buildings to minimize the risk of fire in the main house, and often a breezeway such as ours served as a somewhat sheltered path from the kitchen to the house. We thought about reverting back to this open-air walkway for aesthetics, but we couldn’t imagine ourselves cooking and eating in a building that is so removed from the rest of our living area (not to mention trucking over there in all seasons and weather).  Even if we climatized it, we felt it would still be too removed from where the rest of our living will happen – we’d need an intercom to call the kids to dinner.  We explored the idea of not having the kitchen over there, but we couldn’t imagine trying to fit a modern kitchen into the historic Big House.  So, at the end of the day, we decided to re-imagine this liminal space into our dream kitchen “pavilion”, which will connect to the Big House and to the Summer Kitchen by two hyphen structures that resemble the small dependency on the south side of the house.

Here is a view of the enclosed breezeway from the back side (looking through the screen you can catch a glimpse of the portico on the Big House that faces the river) where the previous owners tied the expanded breezeway (through the gap in the middle of the picture), Summer Kitchen (on the right), and a large screened-in area all together, anchored around a large chimney:


And this is a shot from the front, looking through the expanded breezeway to the screened in porch (waaaay in the back).  That chimney is going to shake the ground when it comes down!

Opening this area up also re-opened a space long inaccessible at Edge Hill.  The Summer Kitchen has an attic/loft and the access to that space was closed in by the addition of the screened-in porch area:

Re-opening that space yielded a treasure trove of stored items, including 4 screen doors, an original full-size interior door complete with hardware, half of a missing closet door pair with hardware, completing a set we had thought lost, and some great lengths of baseboard.  Jack. Pot.  Below you can see an closet door pair in the Big House that was missing its “other half”.  All of the built-ins in the house came in quartets, and one of the other doors in the quartet was also repurposed in that very room, so we knew we were likely missing a small door: 

And below you an see a lonely repurposed door, which can now be reunited with its long-lost match!  We plan to reincorporate those doors into a built-in in this very room, getting them as close as we can guess to back to where they were originally installed.

Today was the first step in our next big adventure, and we hope you are able to enjoy the ride with us!

Helllloooo World! Meet the Little House’s Kitchen.

Over the past year, you may have thought that we had raised the white flag of surrender on our project at Edge Hill.  We left you with two babies on the way, busy careers, and a glimpse at a finished bathroom.  In the midst of the chaos of becoming parents to two beautiful girls, we did let a few things slide, like laundry (thanks for the help, Mom!), exercise (we’ll get plenty chasing the girls, right?), and, unfortunately, blogging.  We have, however, taken the past year to make the Little House our home, and we couldn’t be more happy with the result.

The next series of blog posts will go in-depth, room-by-room, to detail our design choices and give those of you enjoying the blog from afar a good idea of how we have set the place up.  Without further ado, the kitchen, in all of it’s panoramic glory:

IMG_0650

IMG_0651

As you may recall, the main existing design feature of the kitchen is the massive, 5ft x 5ft fireplace with working swing arm.  After some intense restoration, see the full transformation:

IMG_4676


IMG_0559

Let’s see that process in slow-motion.  First, repair the physical structure of the fireplace, replace the deteriorated brick with firebrick, install dampeners:

DSCN0606

DSCN0623

Then, excavate the old hearth so a new hearth can be poured.

DSCN0626

IMG_0223

Frame up the house.  IMG_0392

Add some paint, logs, open the dampers and light a match.  Bam.  Jackson approved.

IMG_2921

IMG_0788

IMG_0653

A shout out to local weather forecasters, the Columbia Furnace Storm Team, who we track with great fervor during the winter so we can ensure a full rack of wood is in, dry, and ready to warm our quiet snow days at home.

We’ve already detailed the decisions of using pine salvaged from the original floor joists for our cabinets and soapstone for the countertops. The main run of cabinets is all function, featuring a built in butcher block, efficient gas range and hood (bought used), large farm sink, dish drawer, and fridge.

IMG_0642

Looking closer, for the range we installed a simple and relatively cheap sheet of stainless steel as a backsplash, and added a stainless shelf to arrange our collection of measuring cups and stash the salt and pepper so it is always close at hand.

IMG_0628

At the top of the open shelves we added an electrical outlet so we can blast the tunes during marathon cooking sessions, and the shelves to the left of the range hold our most-used pots and cookbooks.  Ina Garten features heavily, and right now we are also trying out some of the recipes from the Smitten Kitchen by Deb Perelman.  Our go-to for all things classic and comforting is the America’s Test Kitchen New Best Recipe cookbook.  A pot filler was not a “must” for our kitchen, as the range is pretty close to the sink, but we did spring for it and it is great to have a second water source in the kitchen, especially on busy weeknights when one of us is busy washing up the day’s bottles and the other is trying to cook some pasta.


A concession to a lack of drawer storage, we have two crocks divided into wood and stainless that hold our go-to utensils. To the right of the range, we installed a pull-out solution for our smaller skillets and pots, as we hate digging through drawers or shelves to find what we want.  Conveniently, large cutting boards also fit nicely to either side of the pullout.

IMG_0792

For the kitchen faucet, we found a fixture that resembled an old water pump reimagined in chrome.  A hand sprayer came with this model, and it is a great accompanyment to washing up in the extra large sink.

IMG_0791

We went with a smaller dishwashing drawer to maximize space in the kitchen, and reserved the shelves just above the dishwasher to store our everyday dishes.  For our pantry, we found a wonderful old cabinet at Burt Long’s Antiques.

IMG_0649

It dates from about the 1820s and was our big splurge.  It is the perfect size for the space, and for overflow we have another set of shelves in our utility closet.  IMG_0657

Rounding out the kitchen, our secondary bank of cabinets holds the remainder.  Baking, Mixing, Appliances, dish towels, etc. We designed this station with integrated power and for the microwave and with a pull out shelf for our coffee machine and toaster, as we prefer not to have those appliances hanging out on our very limited counter space.

IMG_0654

IMG_0655

With some careful planning, we have our dream kitchen.  I bet you thought we couldn’t cram anything else in, but we still have one last detail on the way.

IMG_0645

See that large blank spot on the wall to the right of the doorway?  Rachel’s Uncle Skip, recently retired, has taken up woodworking and has custom built us the perfect addition to our kitchen: a platter rack!

IMG_5368

Skip recently finished this project, and just this weekend it will make the trek from Texas to Virginia.  We can’t wait to get it installed!

We know we’ve left you hanging over the past year, so here are some pics of us enjoying our kitchen.  It won’t be another year for the next post, we promise!

IMG_2823

IMG_0418

IMG_0476

IMG_0477
IMG_0686

IMG_2824

IMG_4012

Until next time, enjoy the view!

IMG_0297


Mastering the Bath

All-  We feel like we owe a little explanation or two for the belated nature of this update.  Our loyal readers have been patiently (or not so patiently) waiting for the next blog update, and we’ve been a bit delinquent!  Well, let’s cut to the chase. Edge Hill is about to go from sheltering a family of two to sheltering a family of four!  That’s right, Rachel is pregnant, and not being ones to do anything the easy way, it just so happens to be twin girls!

IMG_2945

This is a shot from our first ultrasound way back in March, and it’s the one we keep showing to anyone who will take a gander.  We are now over halfway through our term, and are looking forward to meeting the girls in late August! 

Bump

ChadLogan.Portraits.5.15.15-173


Due to the pregnancy, we were stopped in our tracks with the last of the major efforts left to wrap up the Little House:  painting.  With the fumes, it is recommended to steer clear of this chore for the first trimester at least, and to be honest, we were ready for a convenient excuse to take a break!  The break, however, is over. Time to get back to work. The next series of posts will hopefully walk you through the finished rooms of the Little House, detailing our choices.  We are starting with the Master Bath, the only full bath in the house.  In our past decade or so of life, living through college rooming situations and our first house with its TINY (but nevertheless en suite) master bath, we may have gone a bit overboard on square footage this time. After living with it, however, we can say we have absolutely no regrets!  If you recall from our Sketch-Up designs, the master bath takes up about 1/5 of the upstairs square footage, and is accessed via the closets that adjoin each bedroom (bottom, center):

StairOverview


This is a far cry from the “original” bath-and-kitchen combo that was part of the 1940s first-floor addition to the Little House:


IMG_4686


Yes.  Just under the sink you can see a little patch of green grass.  That is where the water and septic leaked and the floor and wall had completely deteriorated.  There was no shower or bathtub.  Full. Demo. Required.

We moved the full bath to the new upstairs addition, and designed a spacious room with two independent vanities.  We also incorporated the restored clawfoot tub that we discussed in the last post, a large walk-in shower, linen closet, and water closet.  Everything in its place.

We started with five feet of bead board and then painted the upper walls and ceiling in Washington Blue from Benjamin Moore’s Williamsburg Collection.  The deep navy blends the walls into the ceiling and gives the room a great feel.

IMG_2553

The floors are a ceramic tile we found at a surplus auction, and just so happen to be LEED certified.  We really liked the color so we bought a whole skid and used that tile in the downstairs mudroom, powder room, and utility closet, as well!  We went with a mushroom-grey grout, which provides a nice contrast and will also hopefully age well.

For the vanities, we used porcelain tops that we found dirt cheap at the contractor’s auction, and commissioned custom-designed bases after doing some serious Pinterest research.  The bases are constructed from old pine that was salvaged from the house when we did the demo.   We matched the vanity with a medicine cabinet we found TWO Black Fridays ago (that’s right folks, we’ve been sourcing since 2013), also dirt cheap, at the Restoration Hardware Outlet: $75.00 for the pair!

IMG_3201


The vanities are nice and simple, and great for hiding all the crap that would usually live out on the sink deck:

IMG_3188

IMG_3189

Luckily we thought to measure the clearance of the vanity door in relation to the sconce, but we still cut it close!

As you saw before, the tub is a great shade of Tucker Orange from Benjamin Moore’s Williamsburg Collection, which we paired with some custom-painted oars and full length curtains and sheers that emphasize the high ceiling height of the bathroom:

IMG_3182

For the tub, we are very excited to have incorporated a hand shower; it is as if fate knew we would need an extra-efficient baby washing station:

IMG_3193

The interior wall of the bathroom starts on the left with our shower, the linen closet in the center, and the water closet on the right.  The access hatch to the attic HVAC is located above the linen closet and painted the same shade of blue to blend in with the walls and ceilings.

IMG_3190


One priority for the shower was to incorporate a LARGE area to organize all of the bottles that seem to multiply in the shower as time goes on.  We were also contemplating adding a bench, but found a great garden stool online in our orange that fit the bill nicely, so we saved a bit of money and axed the bench.  Down the road we would really like to add a seamless glass door, but as a feature that was entirely discretionary, we decided to save our pennies and spend them elsewhere at the outset.

IMG_2898

IMG_3186

Because the shower stall is large and we like the subway-tile look, we used large-format subway tile, which was economical and “easy” to install (easy, that is, for our contractors – we have not yet tried our hand at tiling).  The floors and back of the niche are tiled in small stone, and we did spring for the anti-microbial grouting on the floor so hopefully we will be mold-free for years to come.

The linen closet might not be magazine-ready, but it is oh-so useful!  The key feature of this closet is the laundry shoot that you can see right in the middle of the back wall.  With our very small interior staircases, we have found no end to our happiness in having this simple solution for lugging our laundry down the stairs.  For the return trip, we got small cloth totes that are easier to manage on the stairs than a regular laundry basket. We lined the rest of the linen closet’s available wall space with shelves and incorporated automatic lighting so the lights are only on when the doors are open, a nice energy-saving feature.

IMG_3194


Moving to the right, the water closet was the one bit of the bathroom where we were able to save the exposed brick walls:IMG_3195

We also used a motion sensing light/fan combo, as this means the lights stay on when the doors close.  The unit runs on a timer, so the lights and fan shut down automatically after the space is vented to save power.  IMG_3197

Finally, one of Chad’s favorite features is the magazine/TP combo rack he found on Amazon.  The water closet doesn’t have a lot of extra room, so this was the perfect solution for a back-up roll and some storage.

The bath is accented with a few nautical touches, including a whimsical octopus towel holder by the shower and cheap boat cleat towel hooks that Chad painted to match the tub:

IMG_3202

The bathroom is now a relaxing sanctuary where we start and end our days, and though we still have some plans for finishing touches we couldn’t be happier with the finished product!

IMG_3184

IMG_3187


Rub a Dub Dub

The thought of soaking in a tub is something that hasn’t occurred to me in about ten years.  Obviously there is no “with soaker tub” option in dorms, and college apartments that do have a shower/tub combination are usually not the kind of tubs you’d want to touch with any part of your body except your feet.  When we lived in Richmond, our master bath only had a shower.  The idea of a bath in the Old House is, as you might expect, simply laughable.  The only bathtub in the house had to be gutted (as you may remember from one of our prior posts),

IMG_0751

and was replaced with a Bath Fitter-type shower insert.

As a result, the thought of sinking into a tub full of bubbles (possibly with a glass of champagne, a perfect mani/pedi, and some Frank Sinatra over the speakers) has been the thing of dreams.  Until now.

Last year, we were lucky enough to obtain an amazing claw foot tub for our Little House bathroom.  Here it is still hooked up in its original bathroom, with just a little antique dirt inside as a special bonus:

IMG_1173

We transported it back to our house and it has been living in a barn out back ever since, awaiting its great makeover.  Although the tub was actually in great shape after a power wash and could have been used as-is, we were hoping to have it refinished eventually for aesthetics.  It had bit of discoloration and a few areas of wear in the ceramic:

IMG_1905

IMG_1906

Once we had the bathroom painted, we used the telehandler to move the unfinished tub out of the barn and lift it up to the second floor entrance so we could put it in the bathroom to try it on for size:

IMG_2607

We love it under the windows (and will love it even more when the paint is removed from the glass and there’s a little more natural light).

Graciously, my parents offered to give us the refinishing as our housewarming gift.  How lucky are we??  The tub refinisher did his work on site by moving the tub into our unfinished closet room and tenting the entire area off with plastic sheeting.

IMG_0260
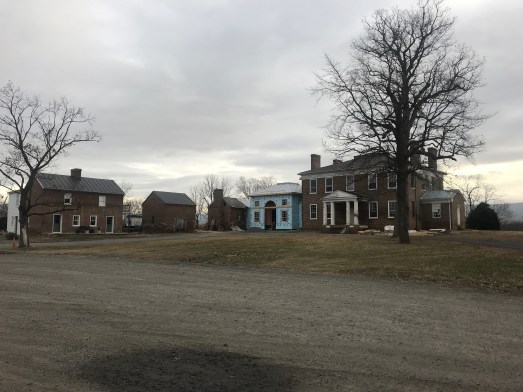
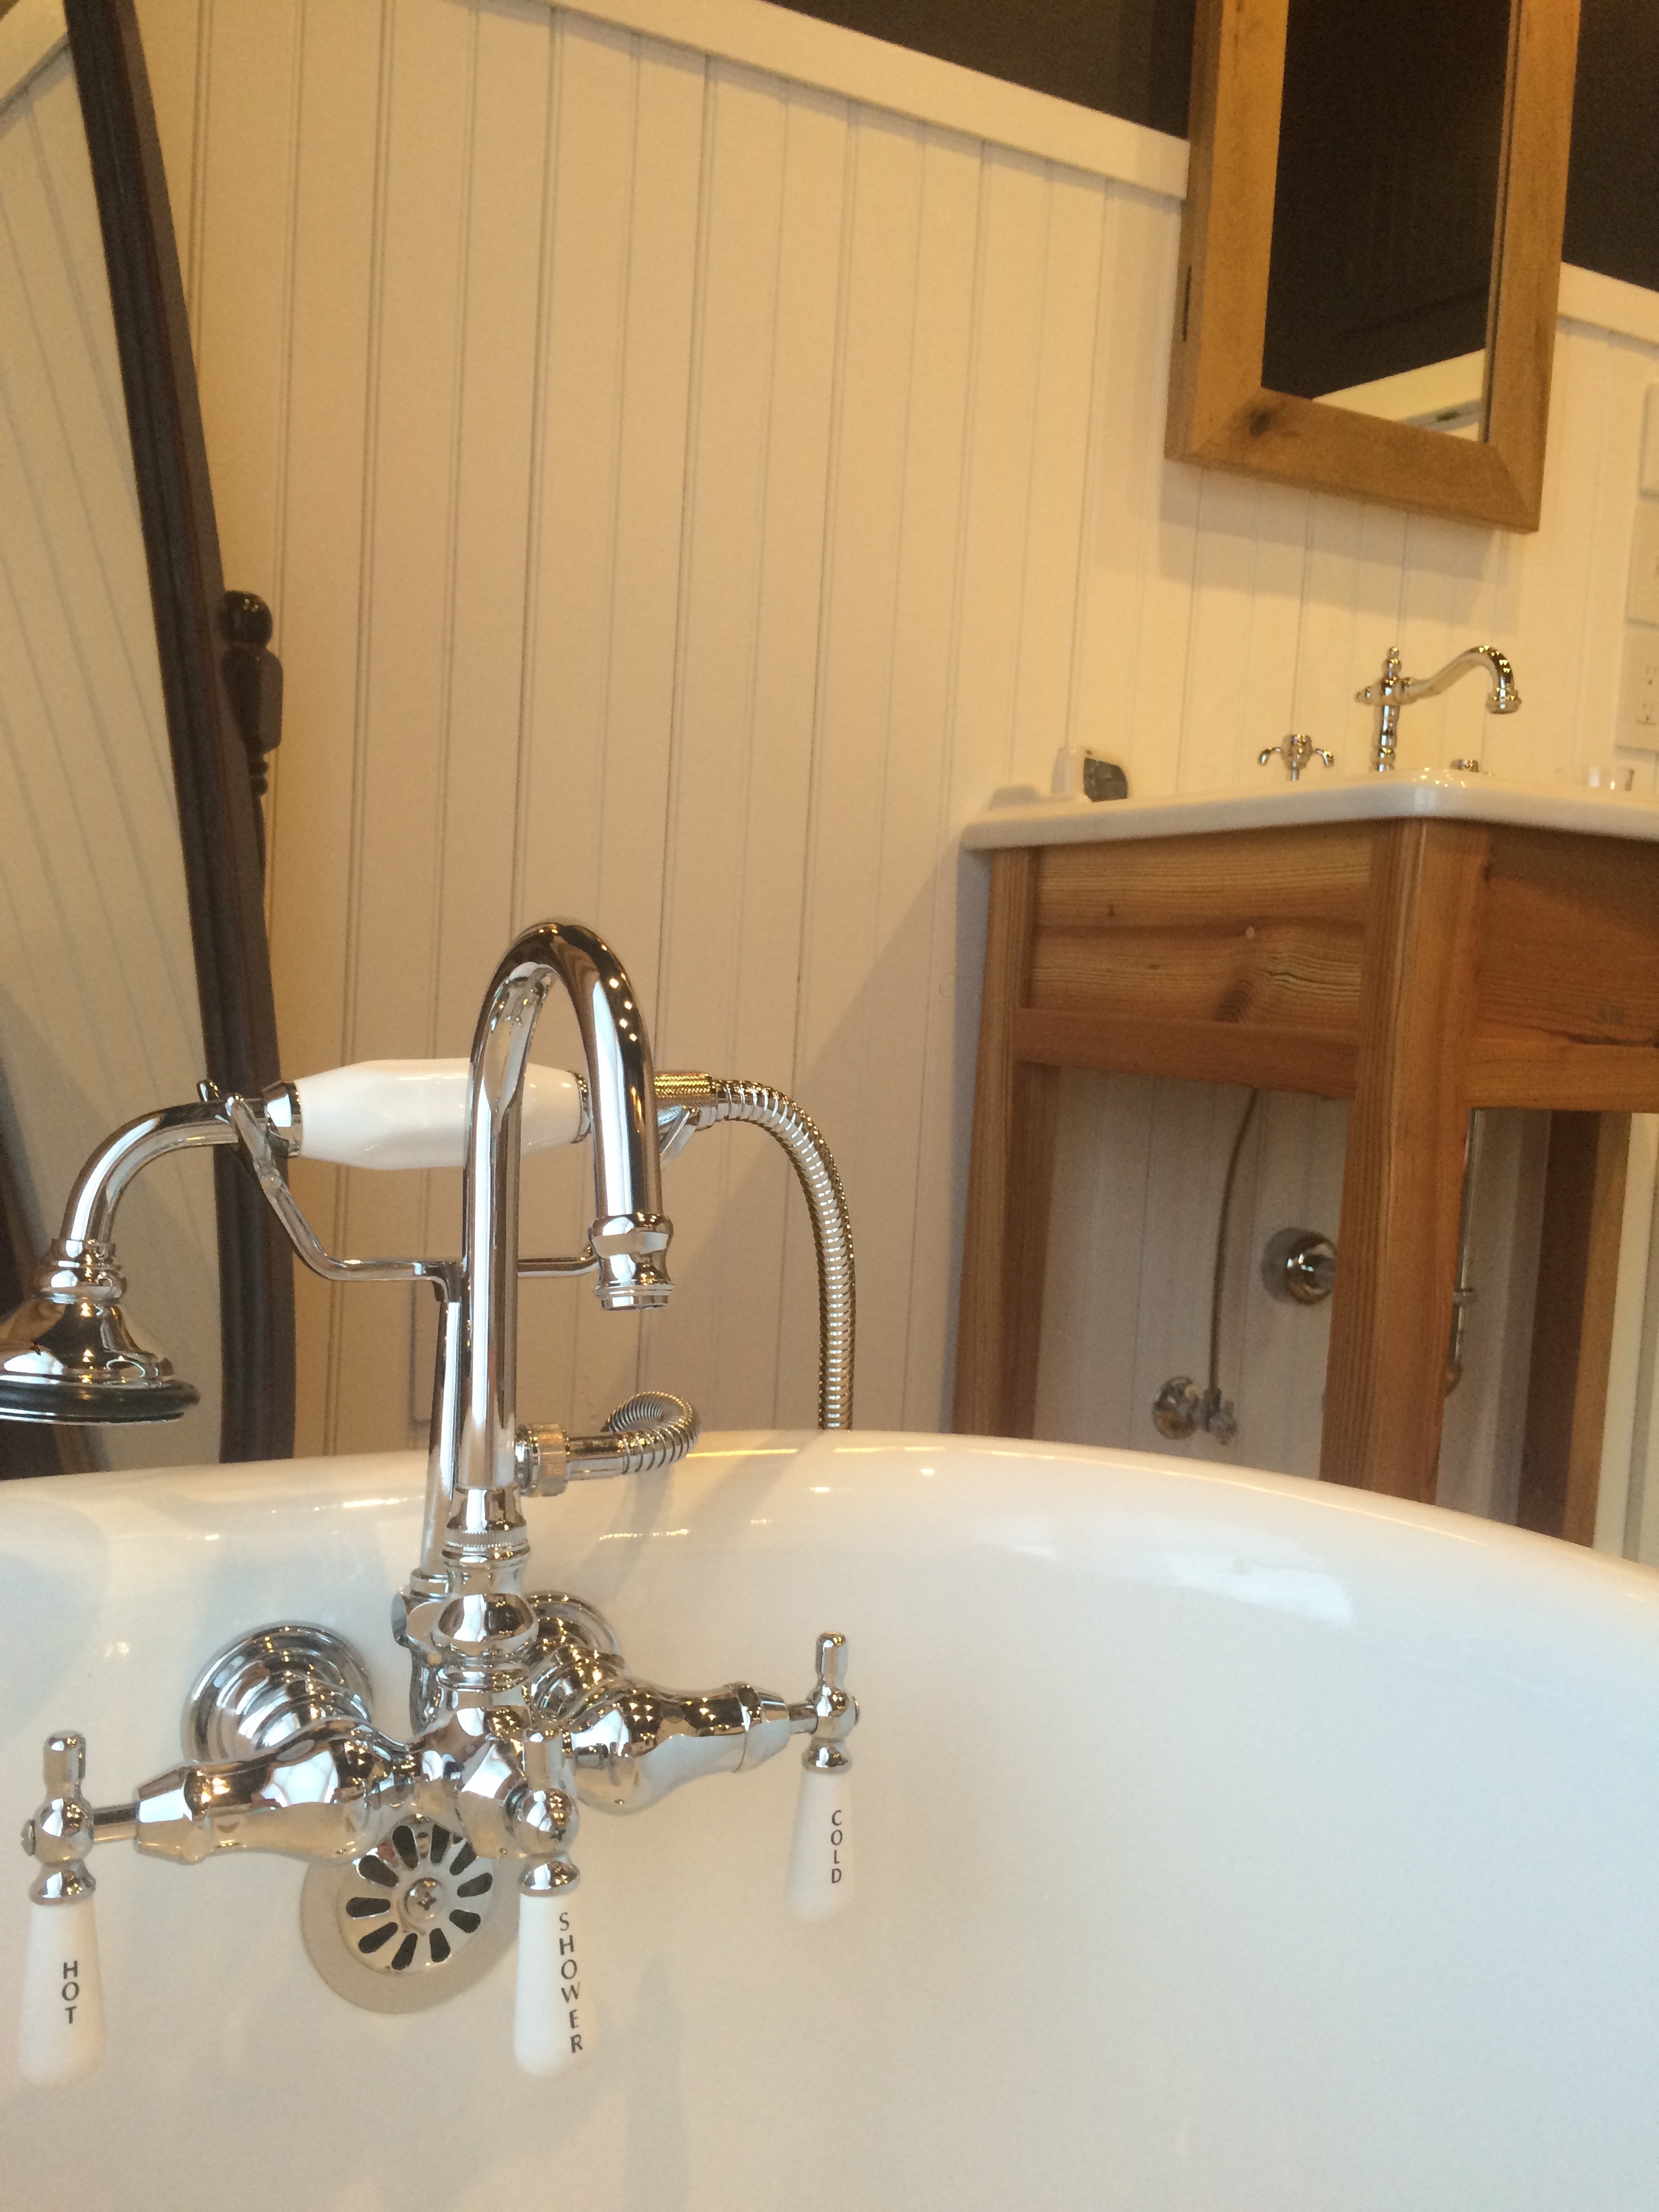
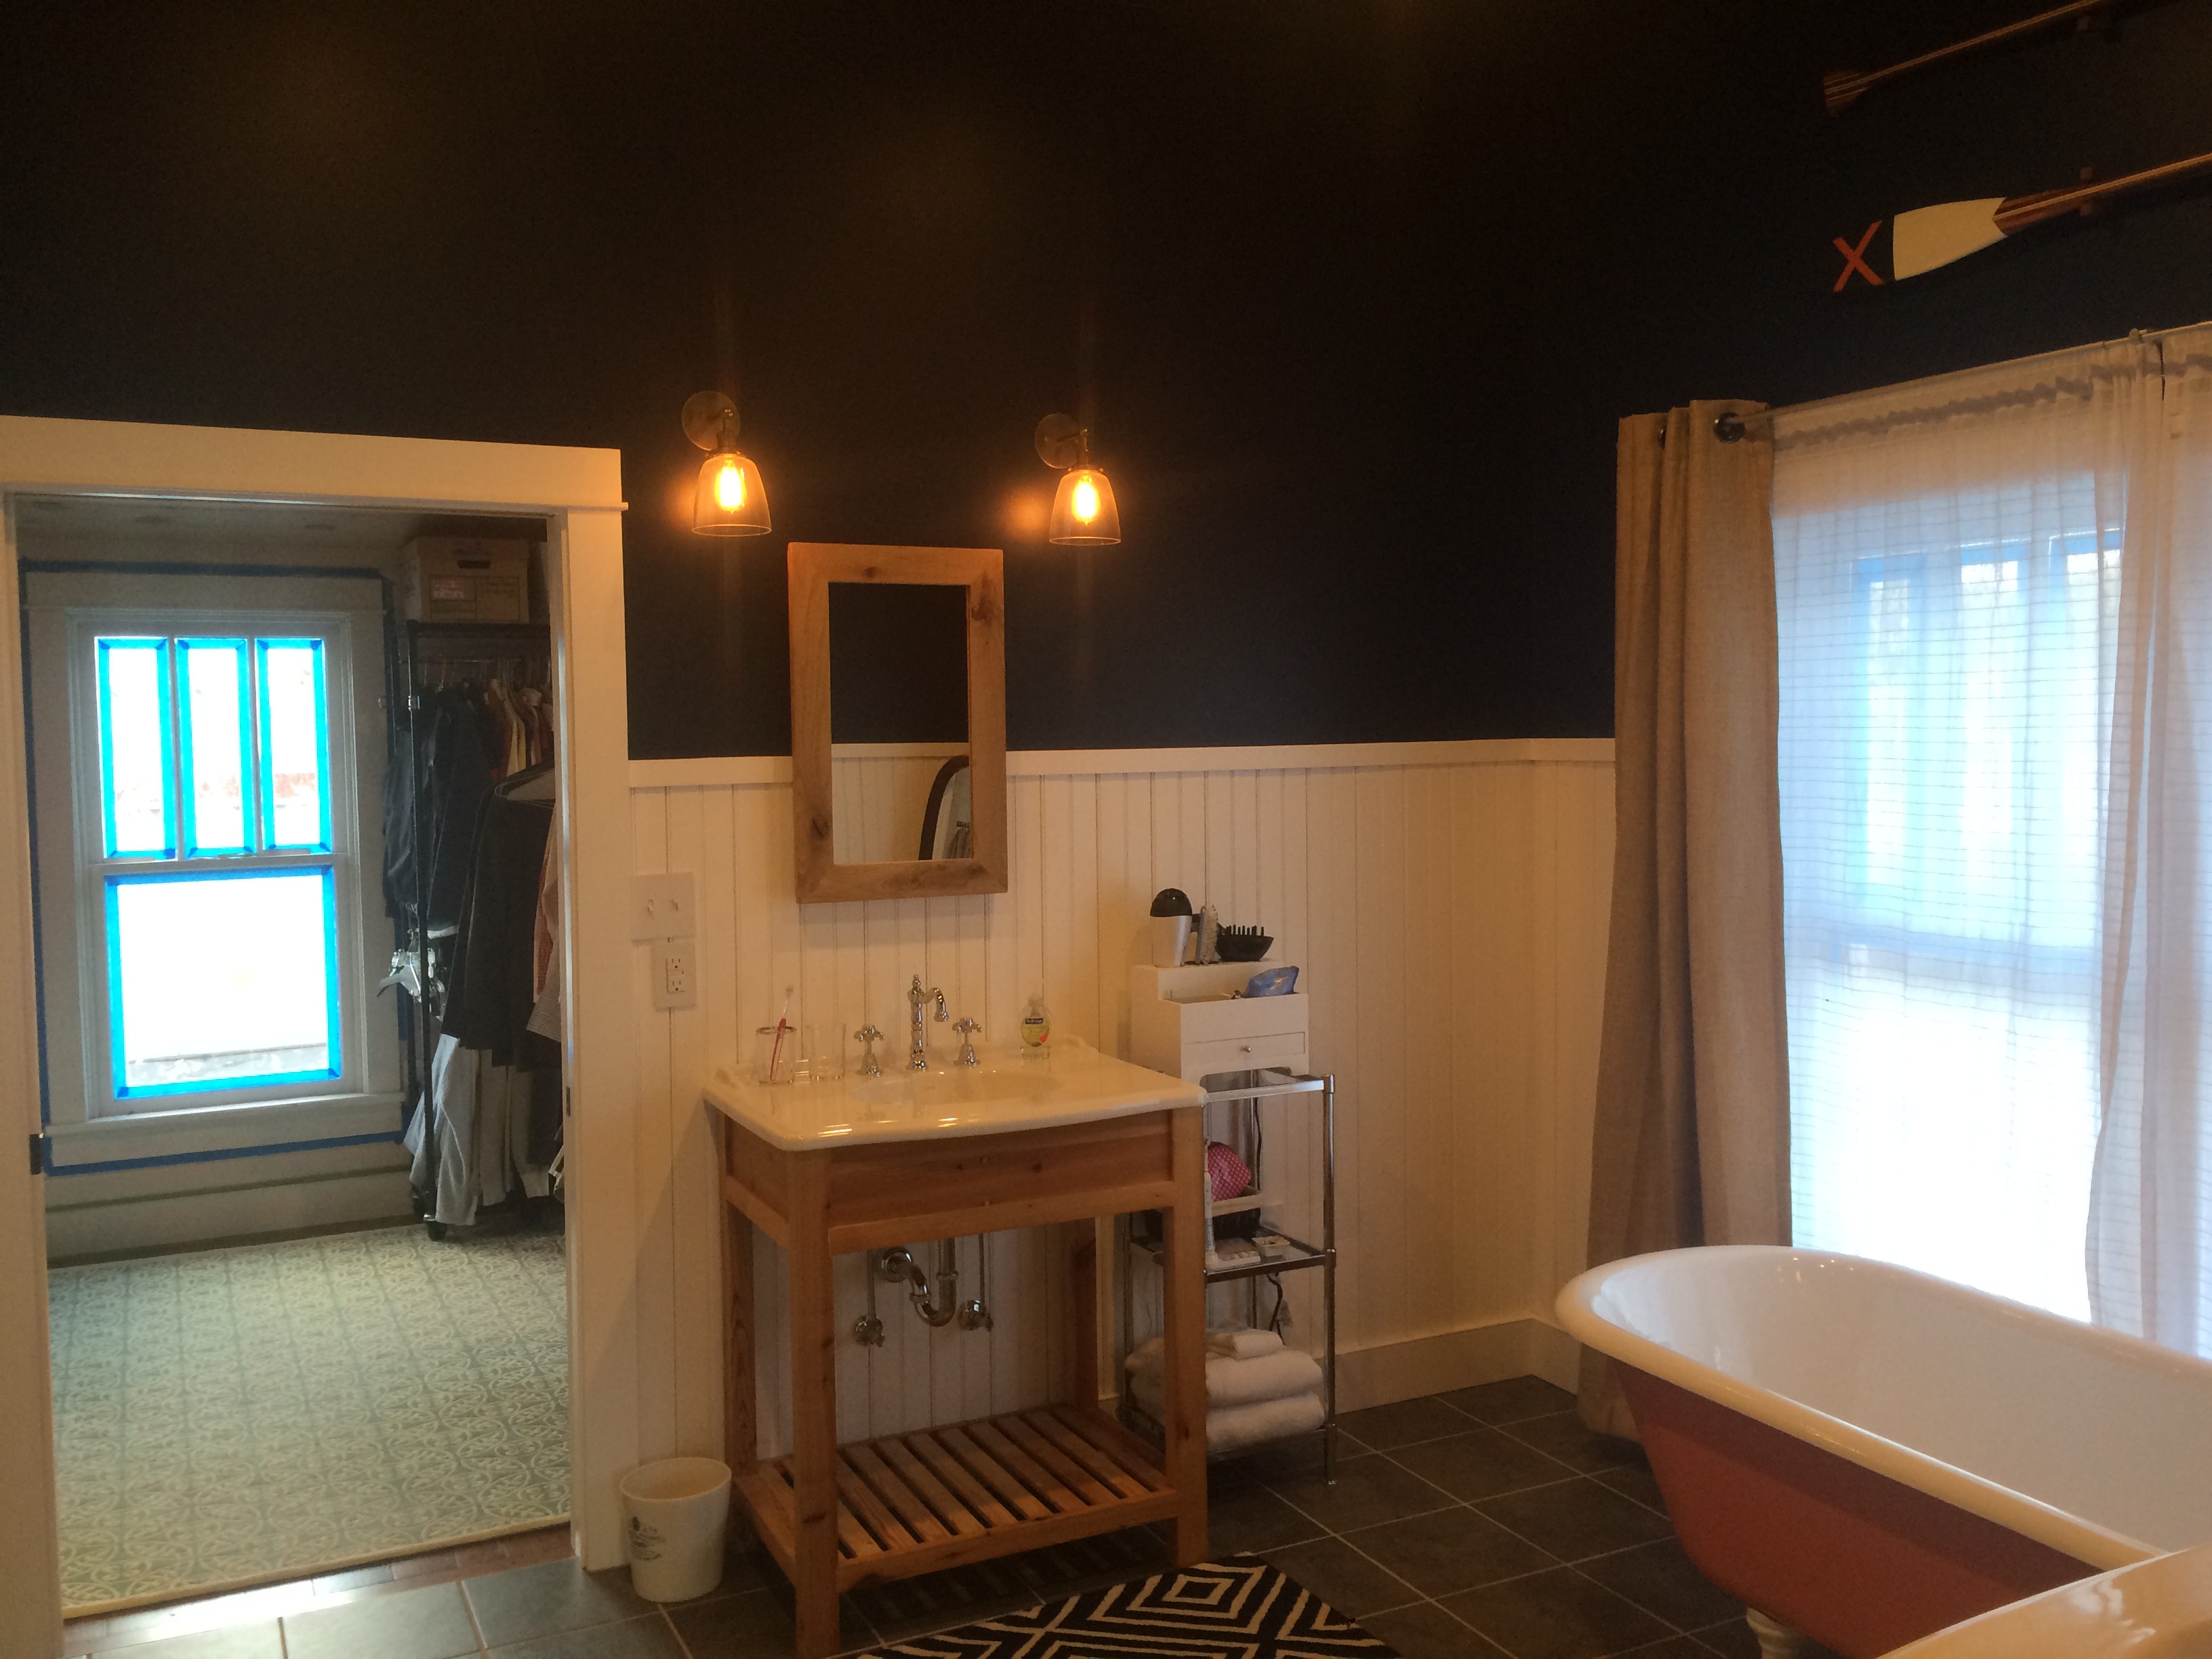
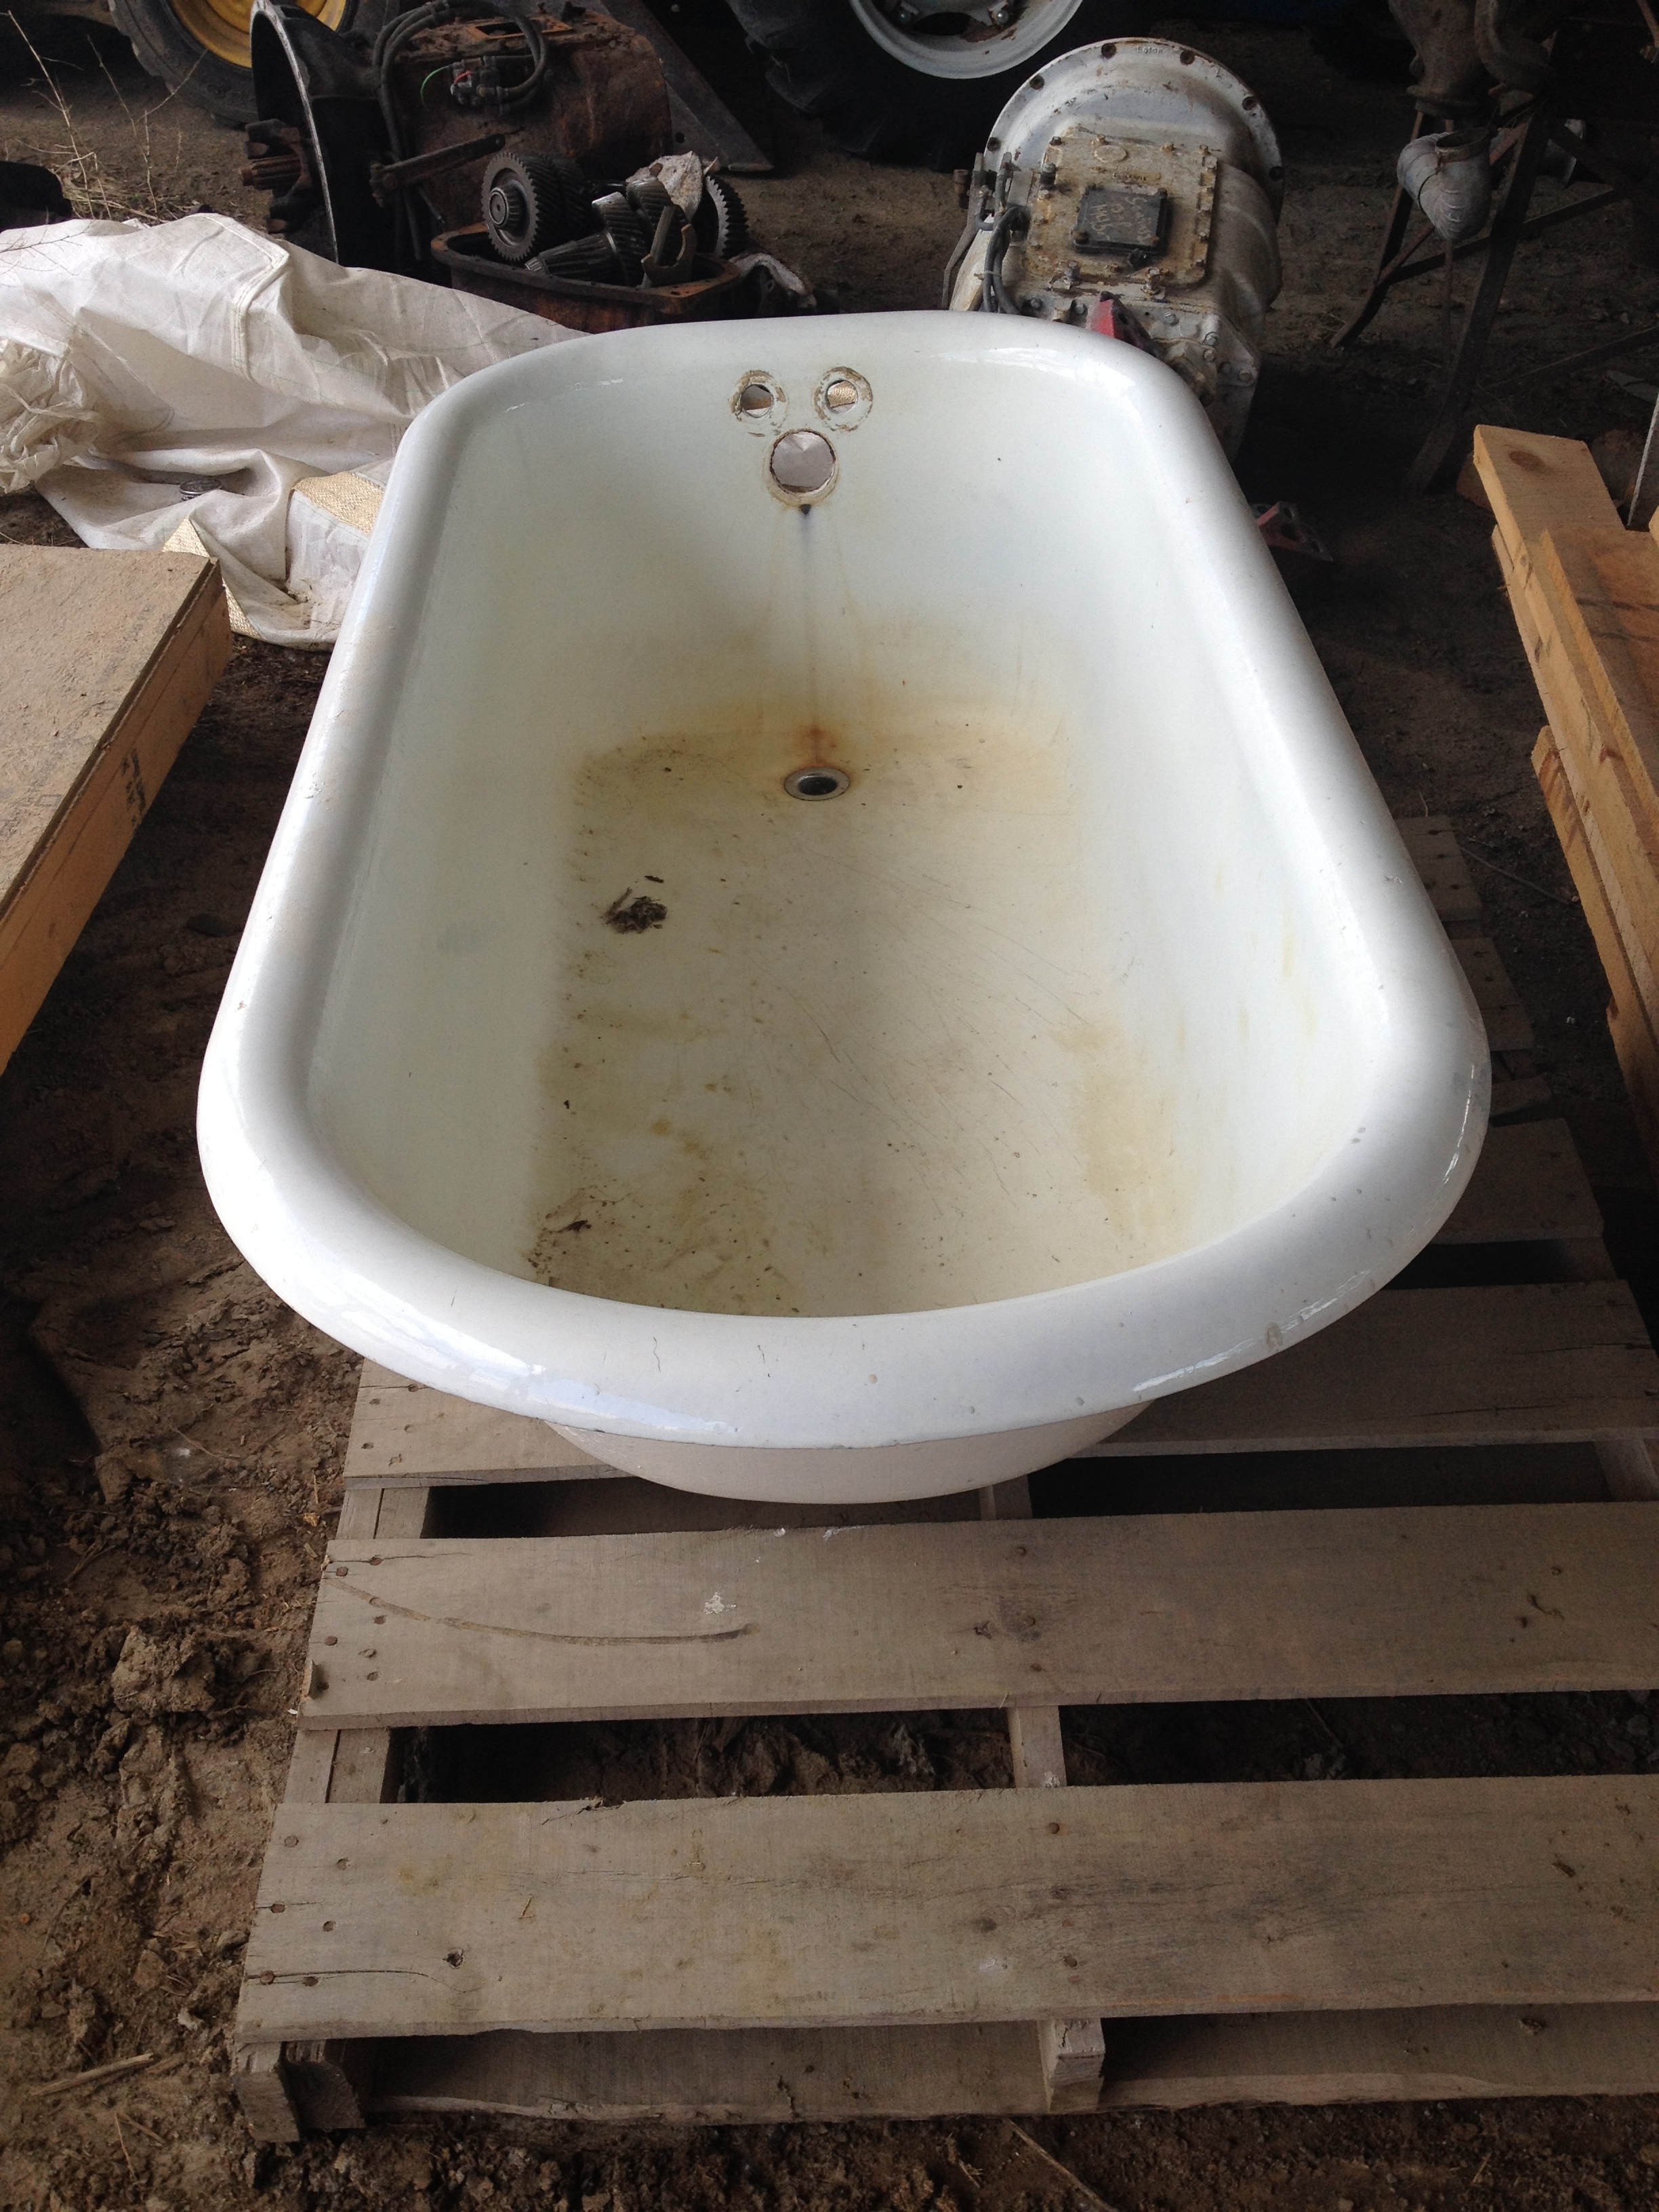
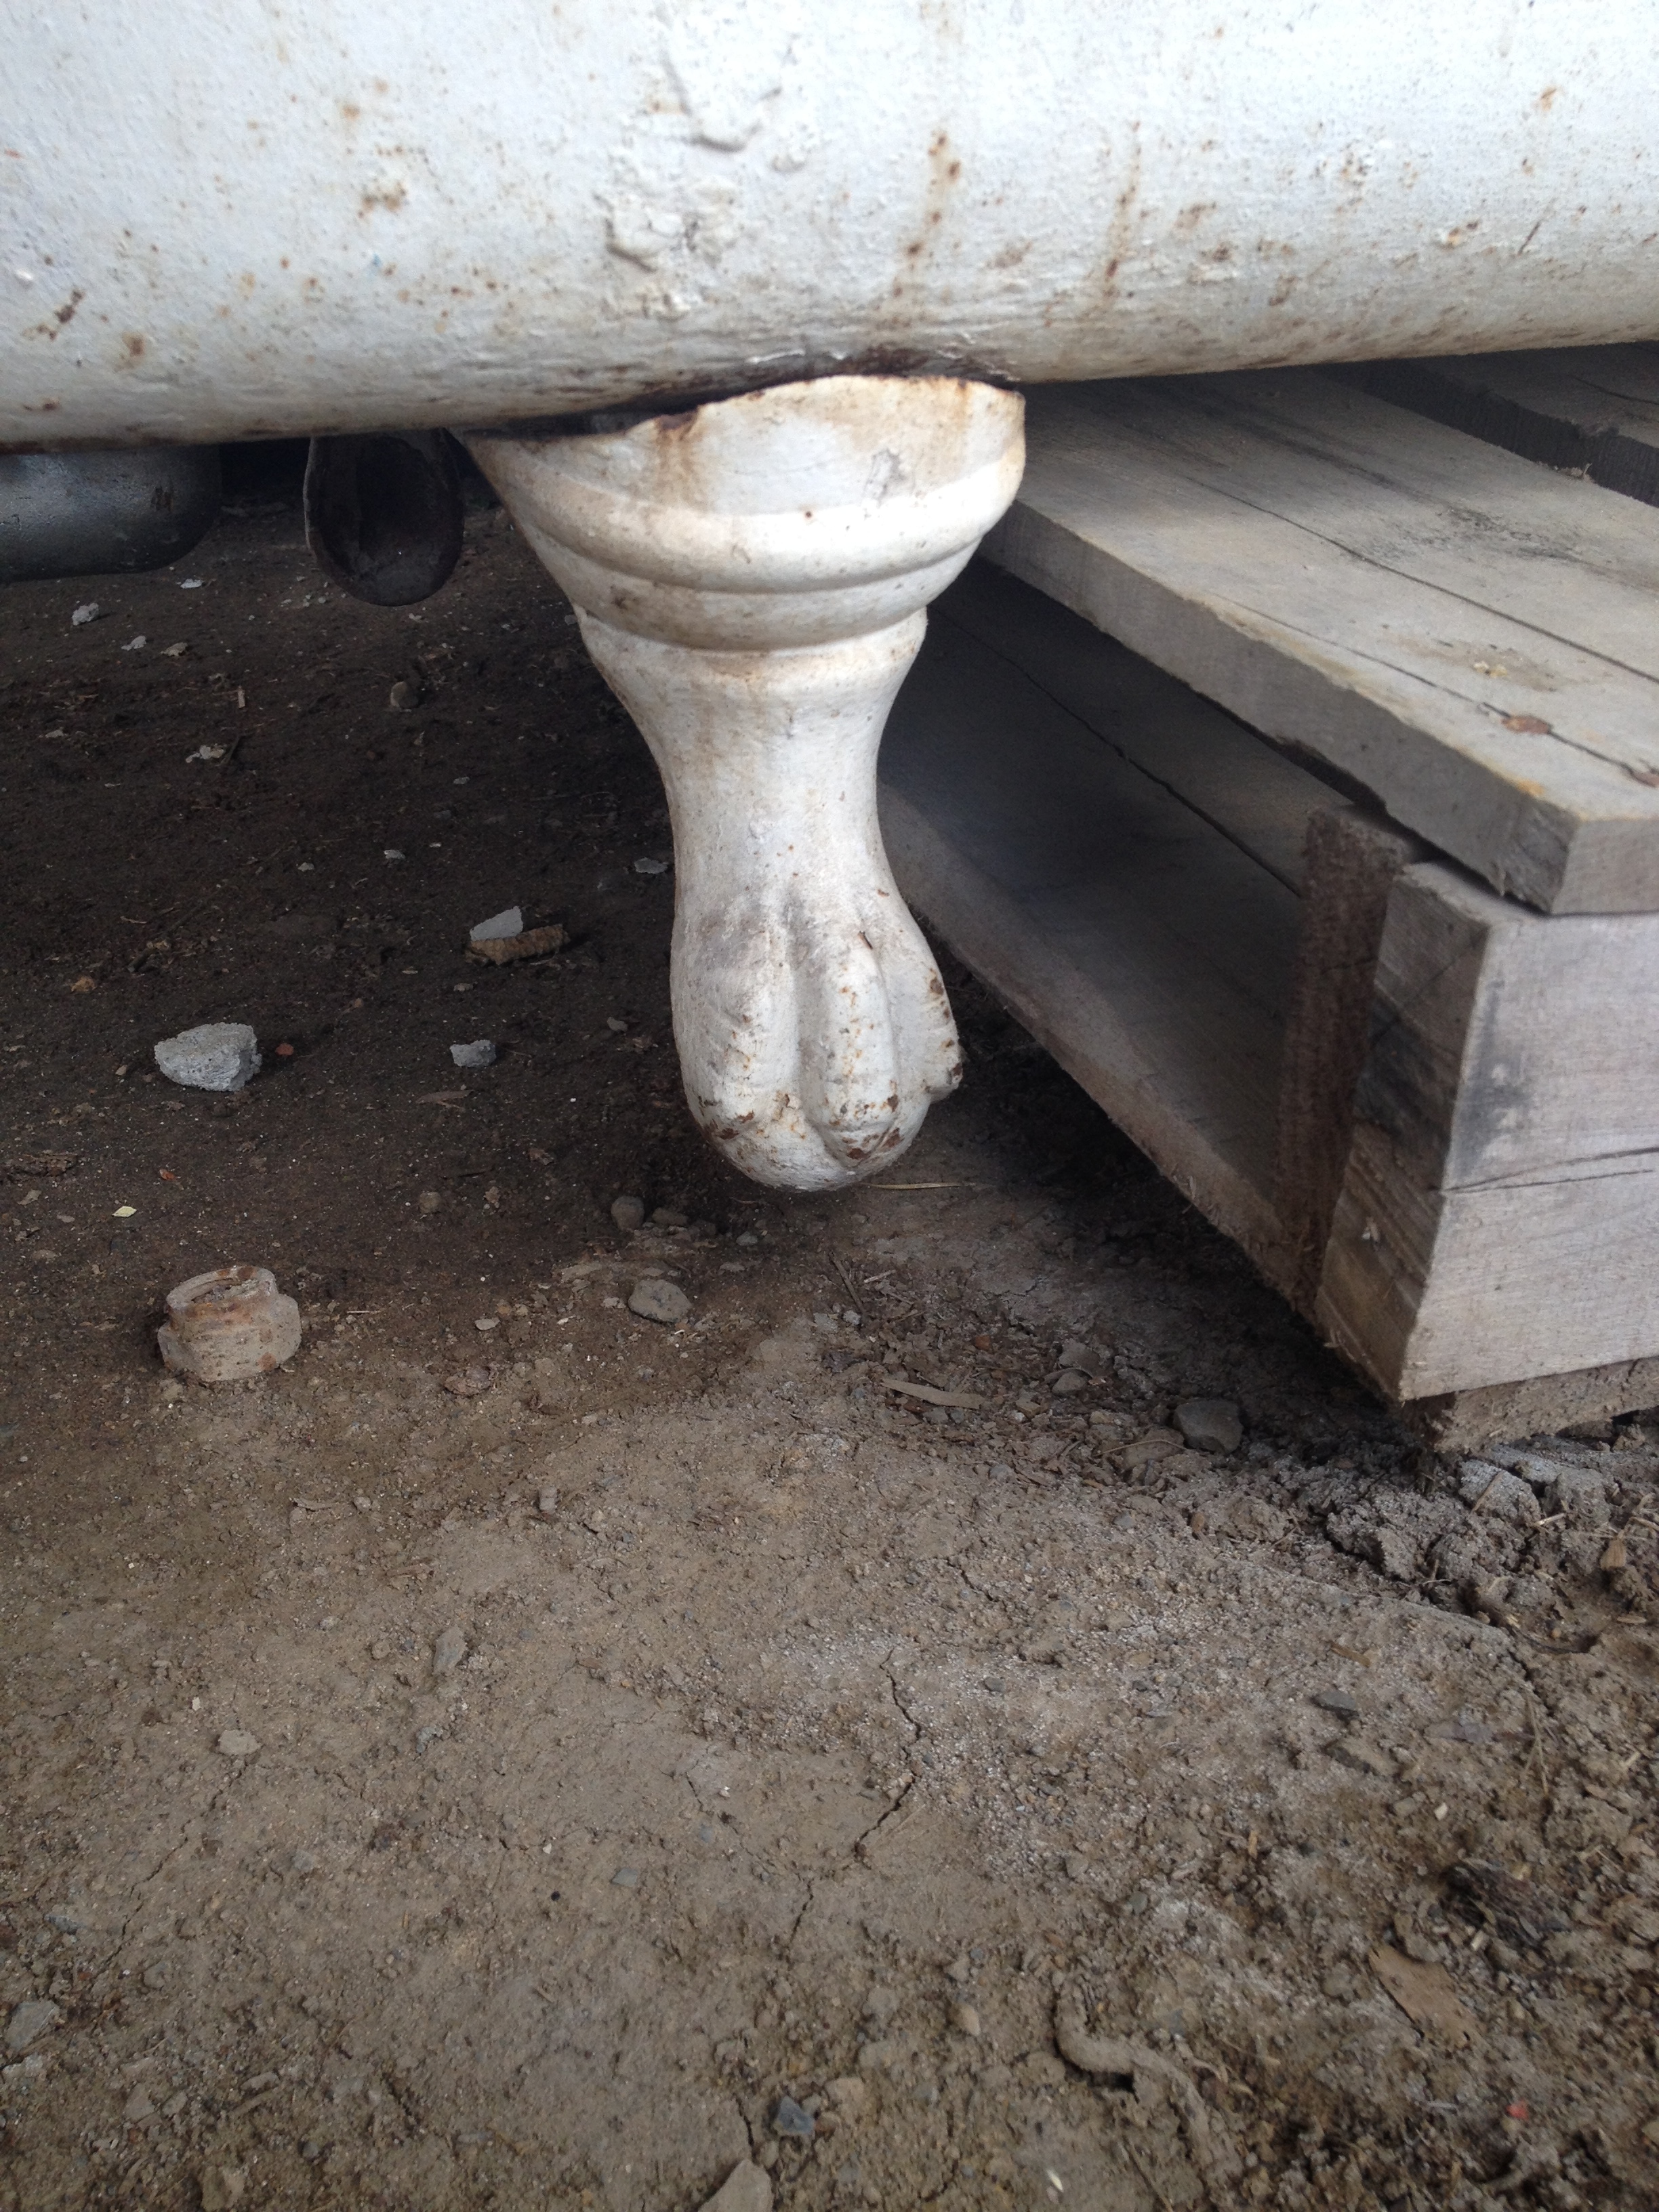
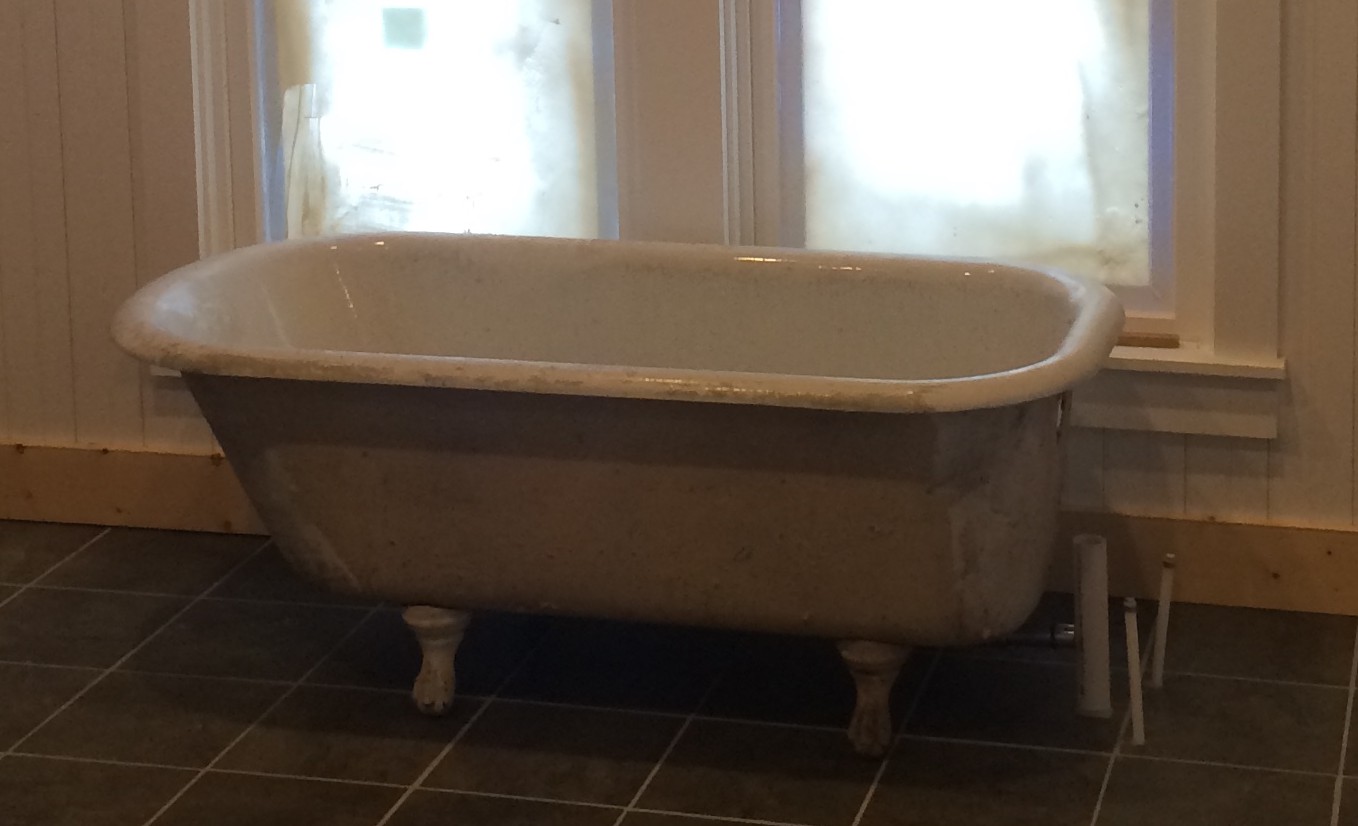
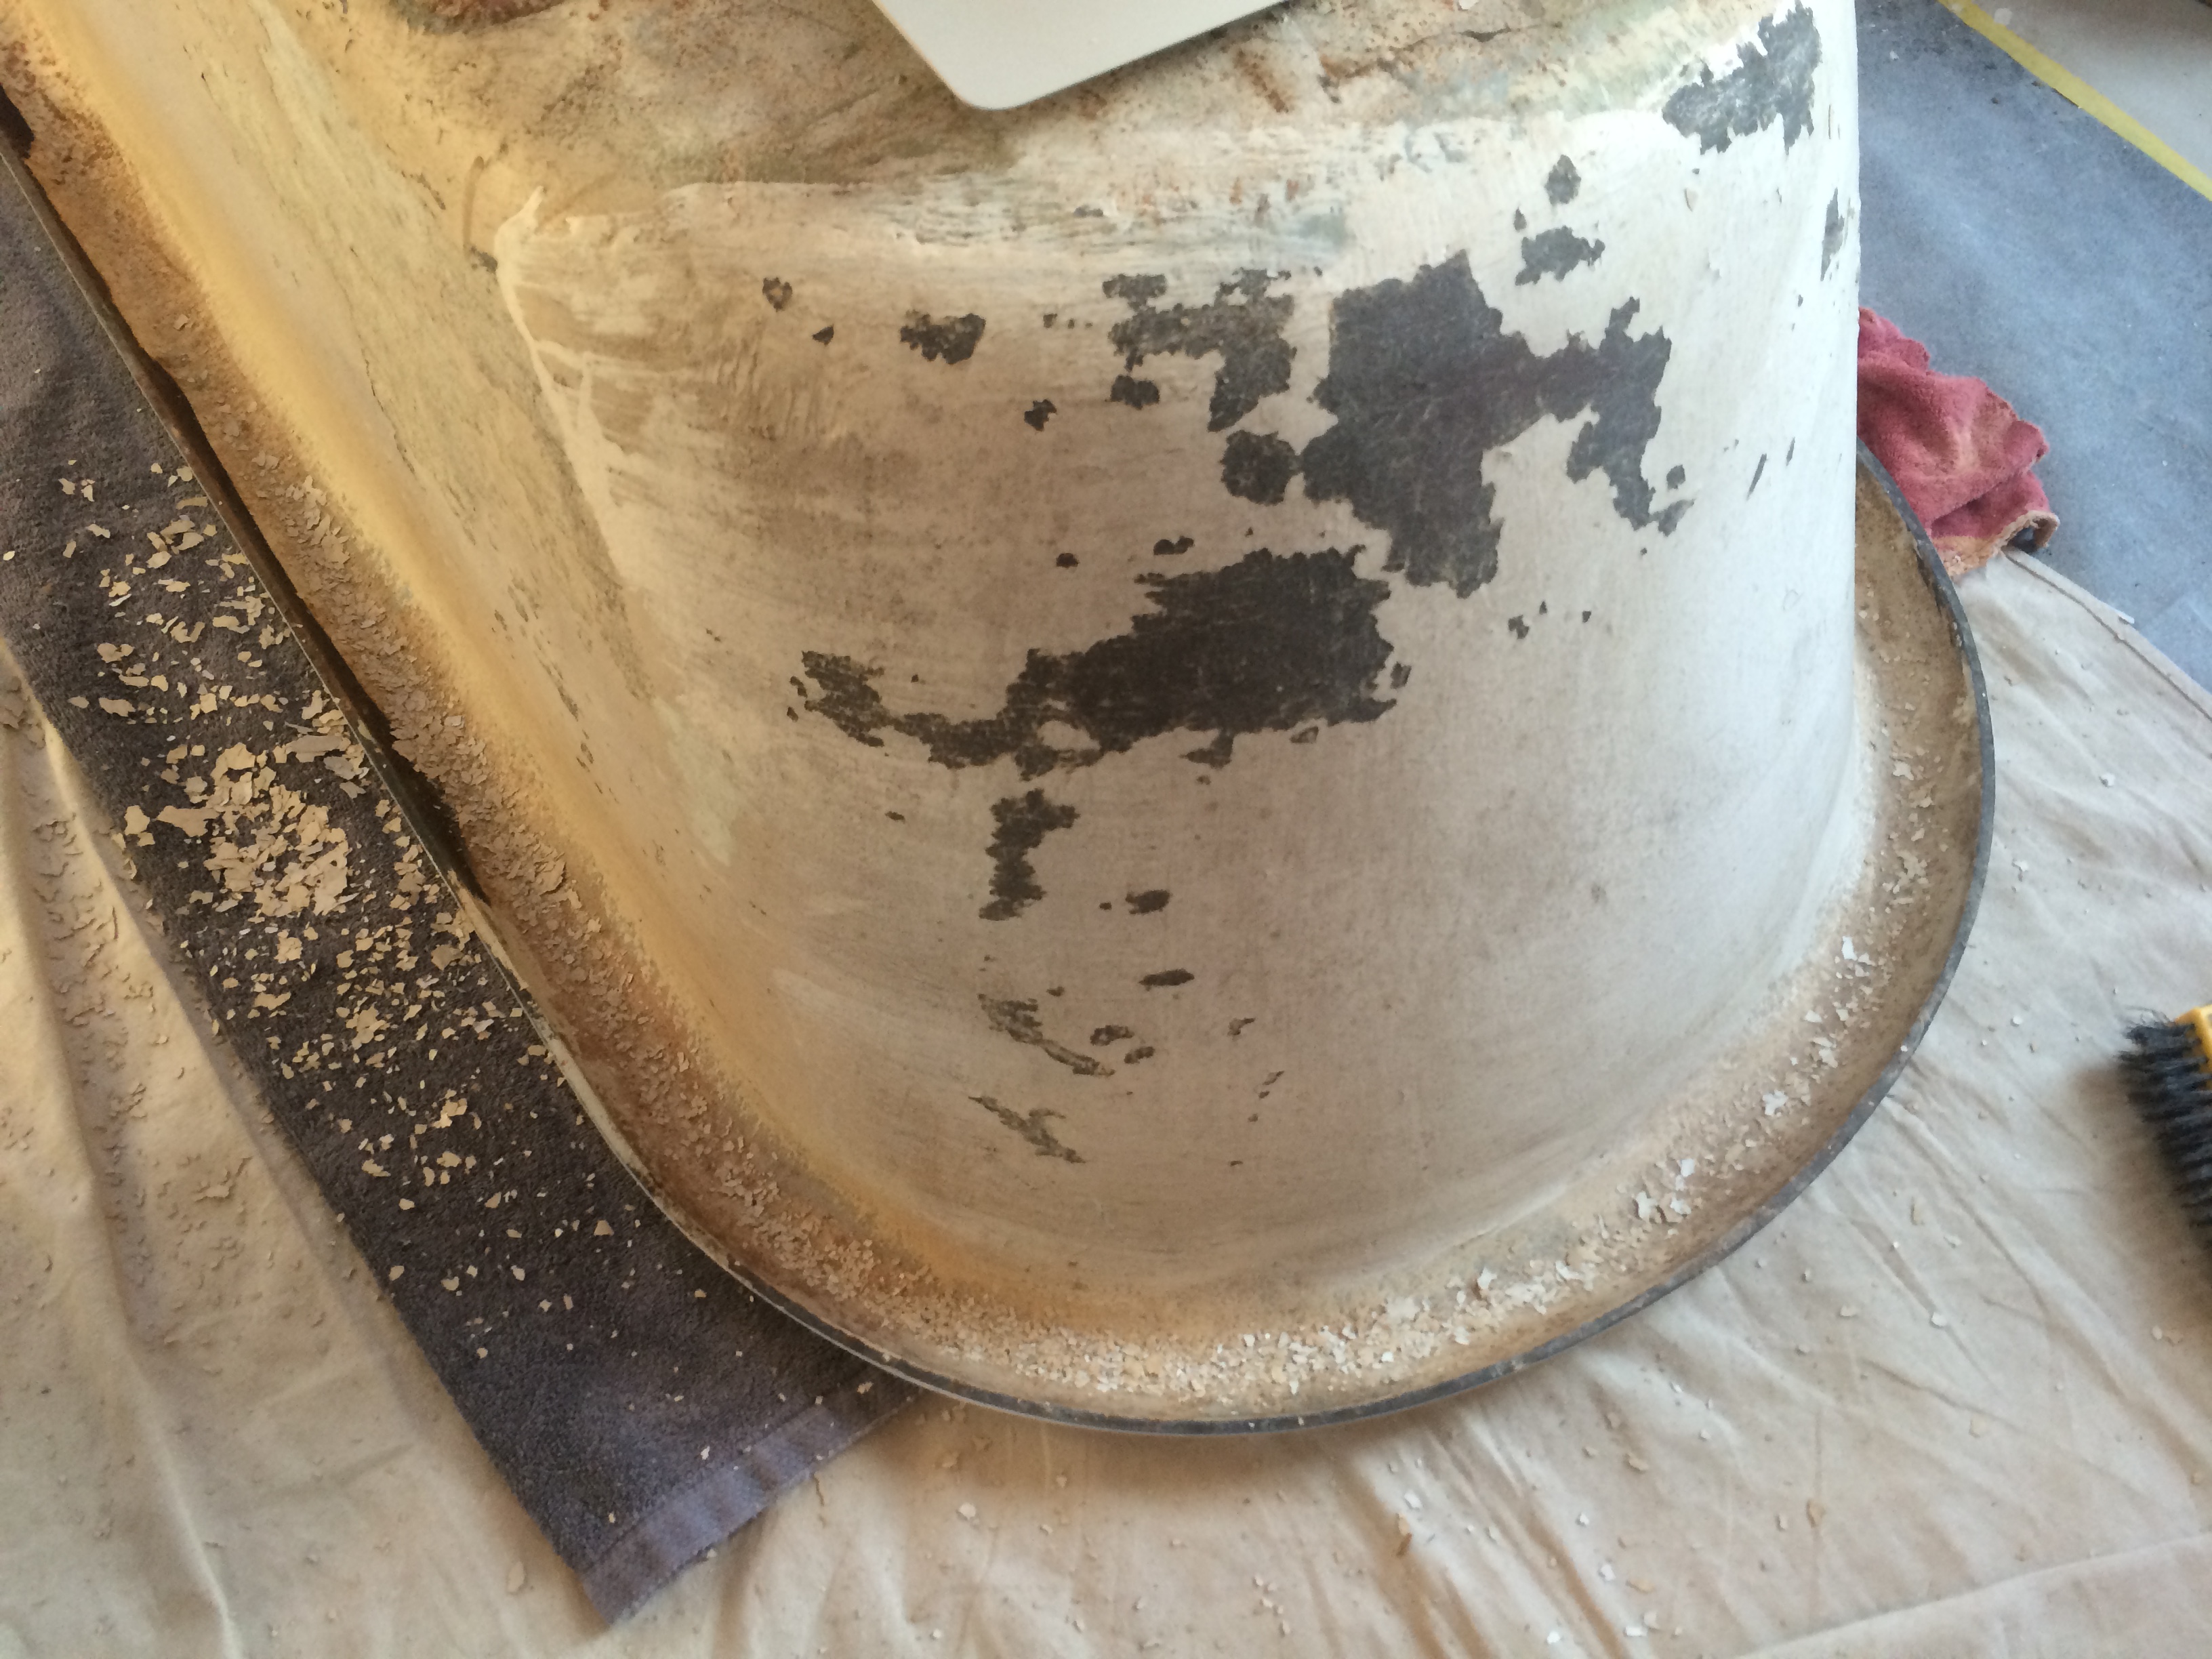
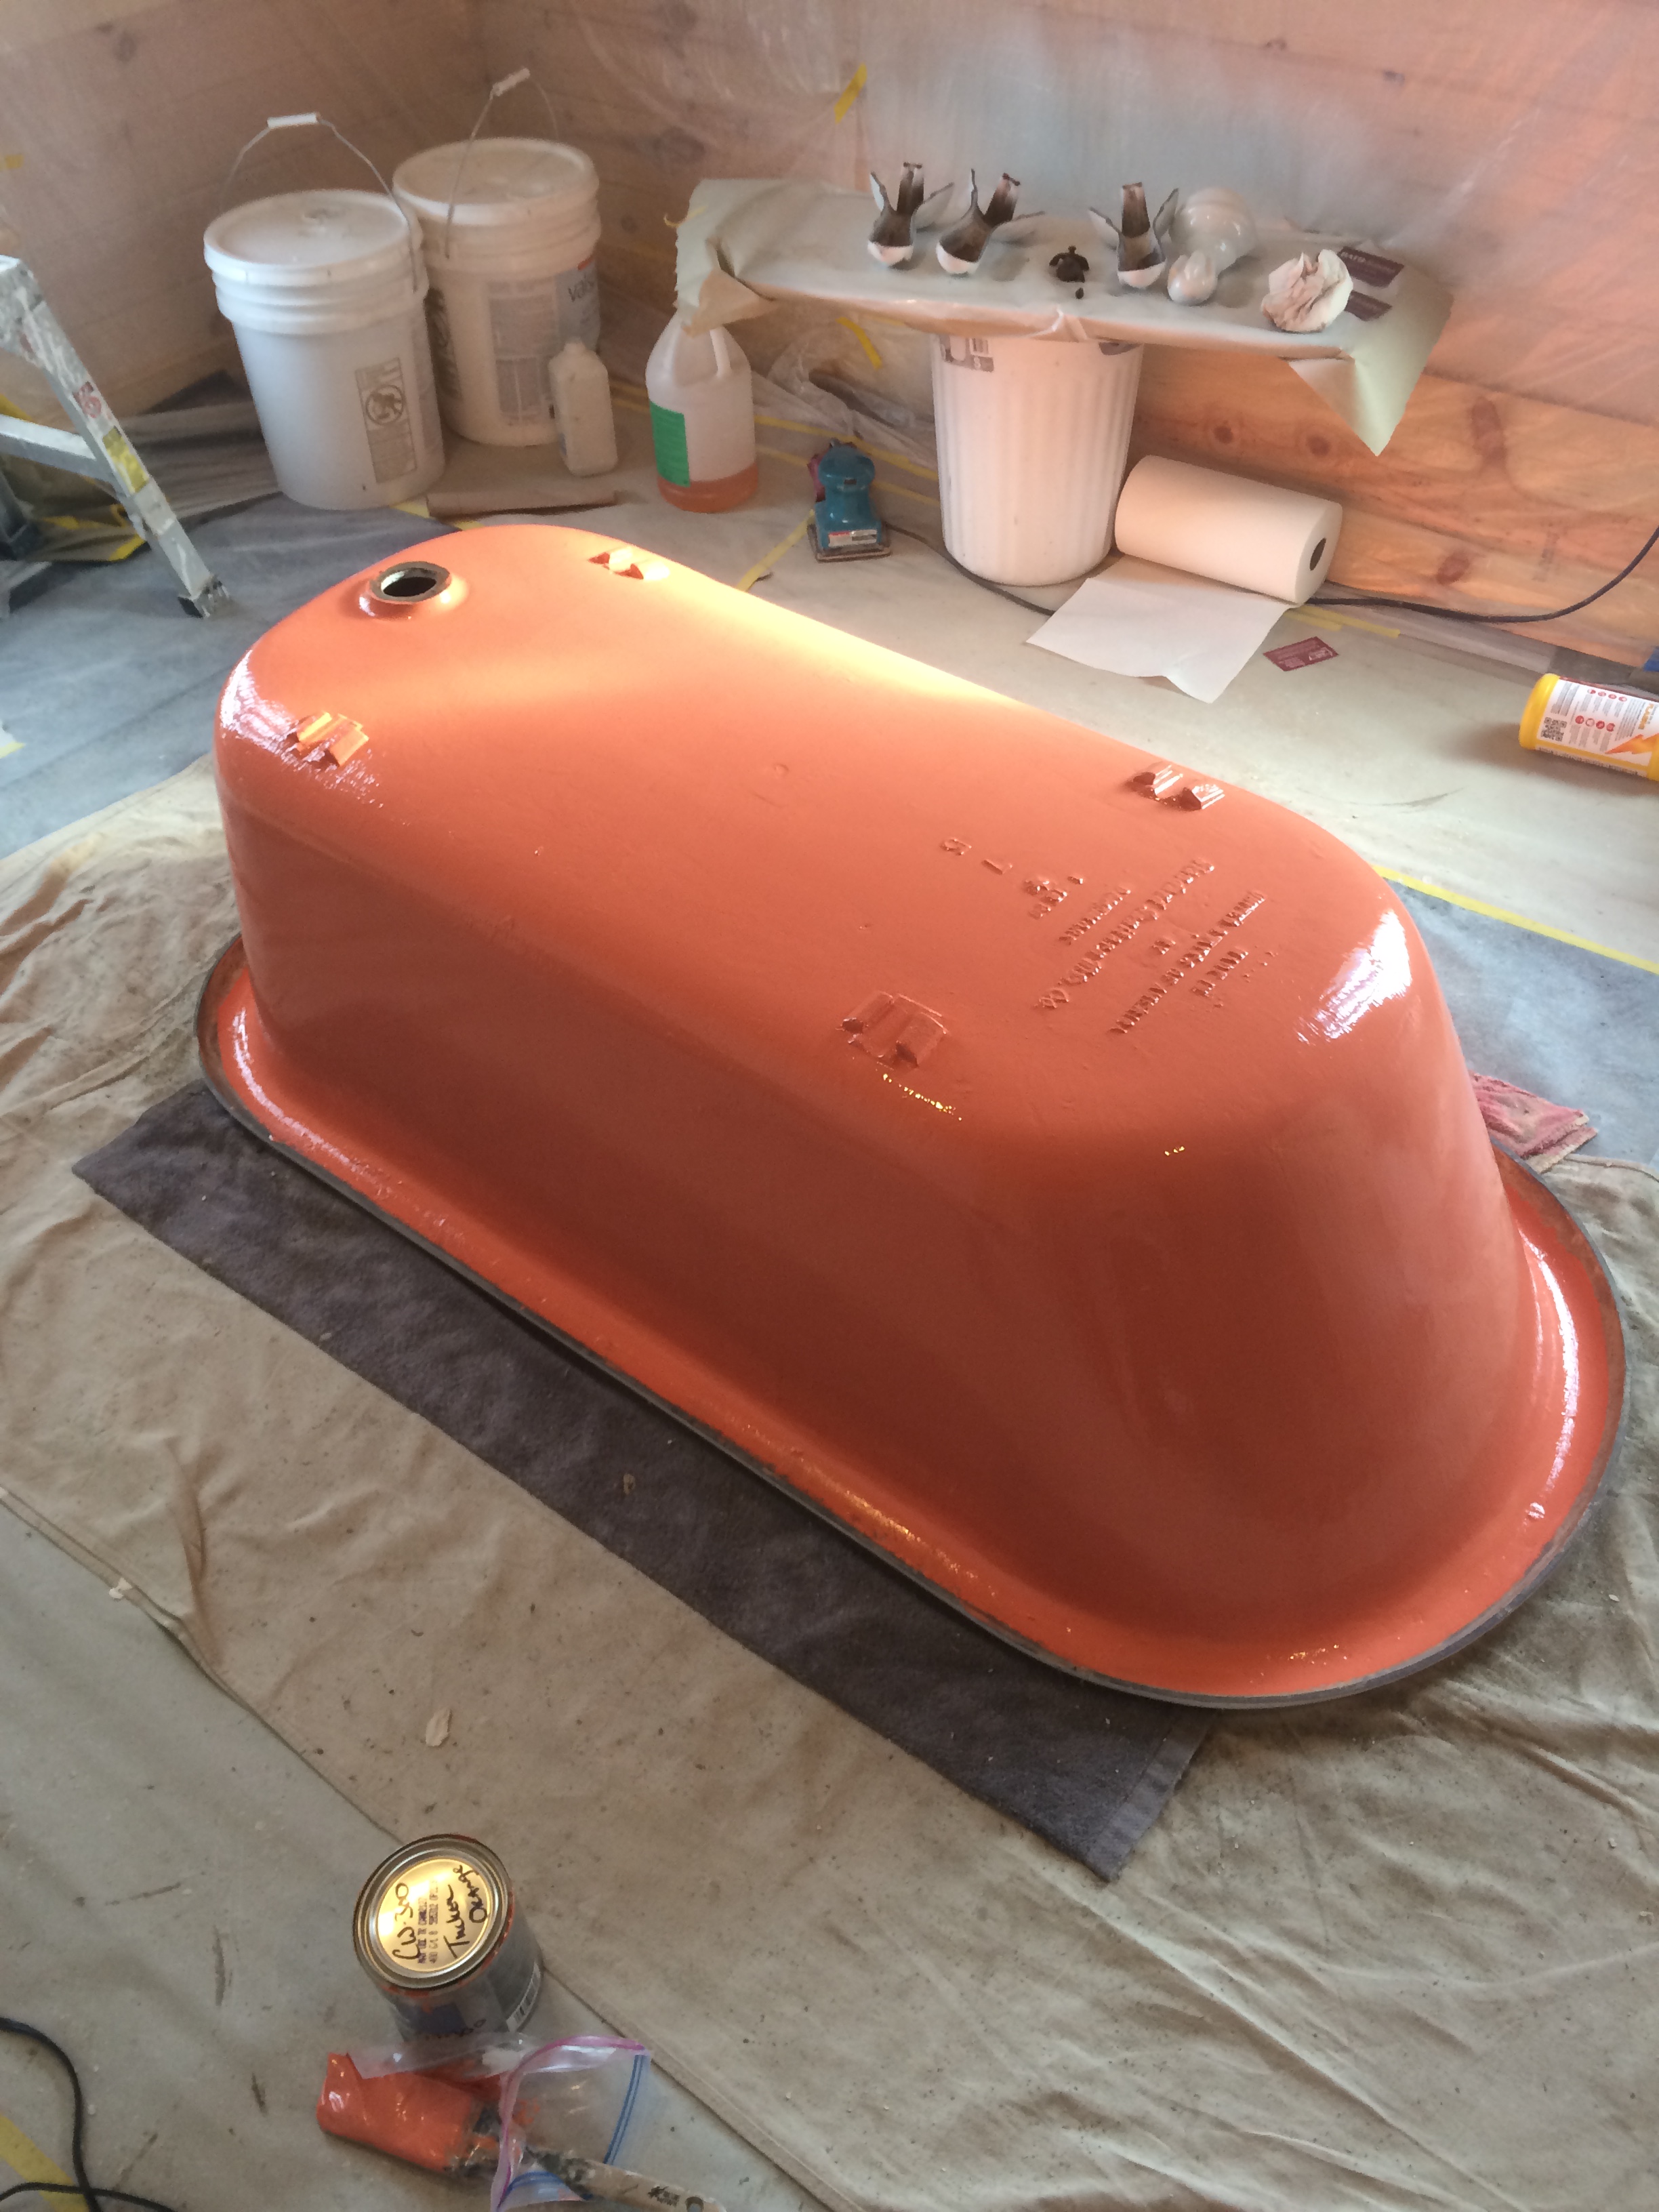
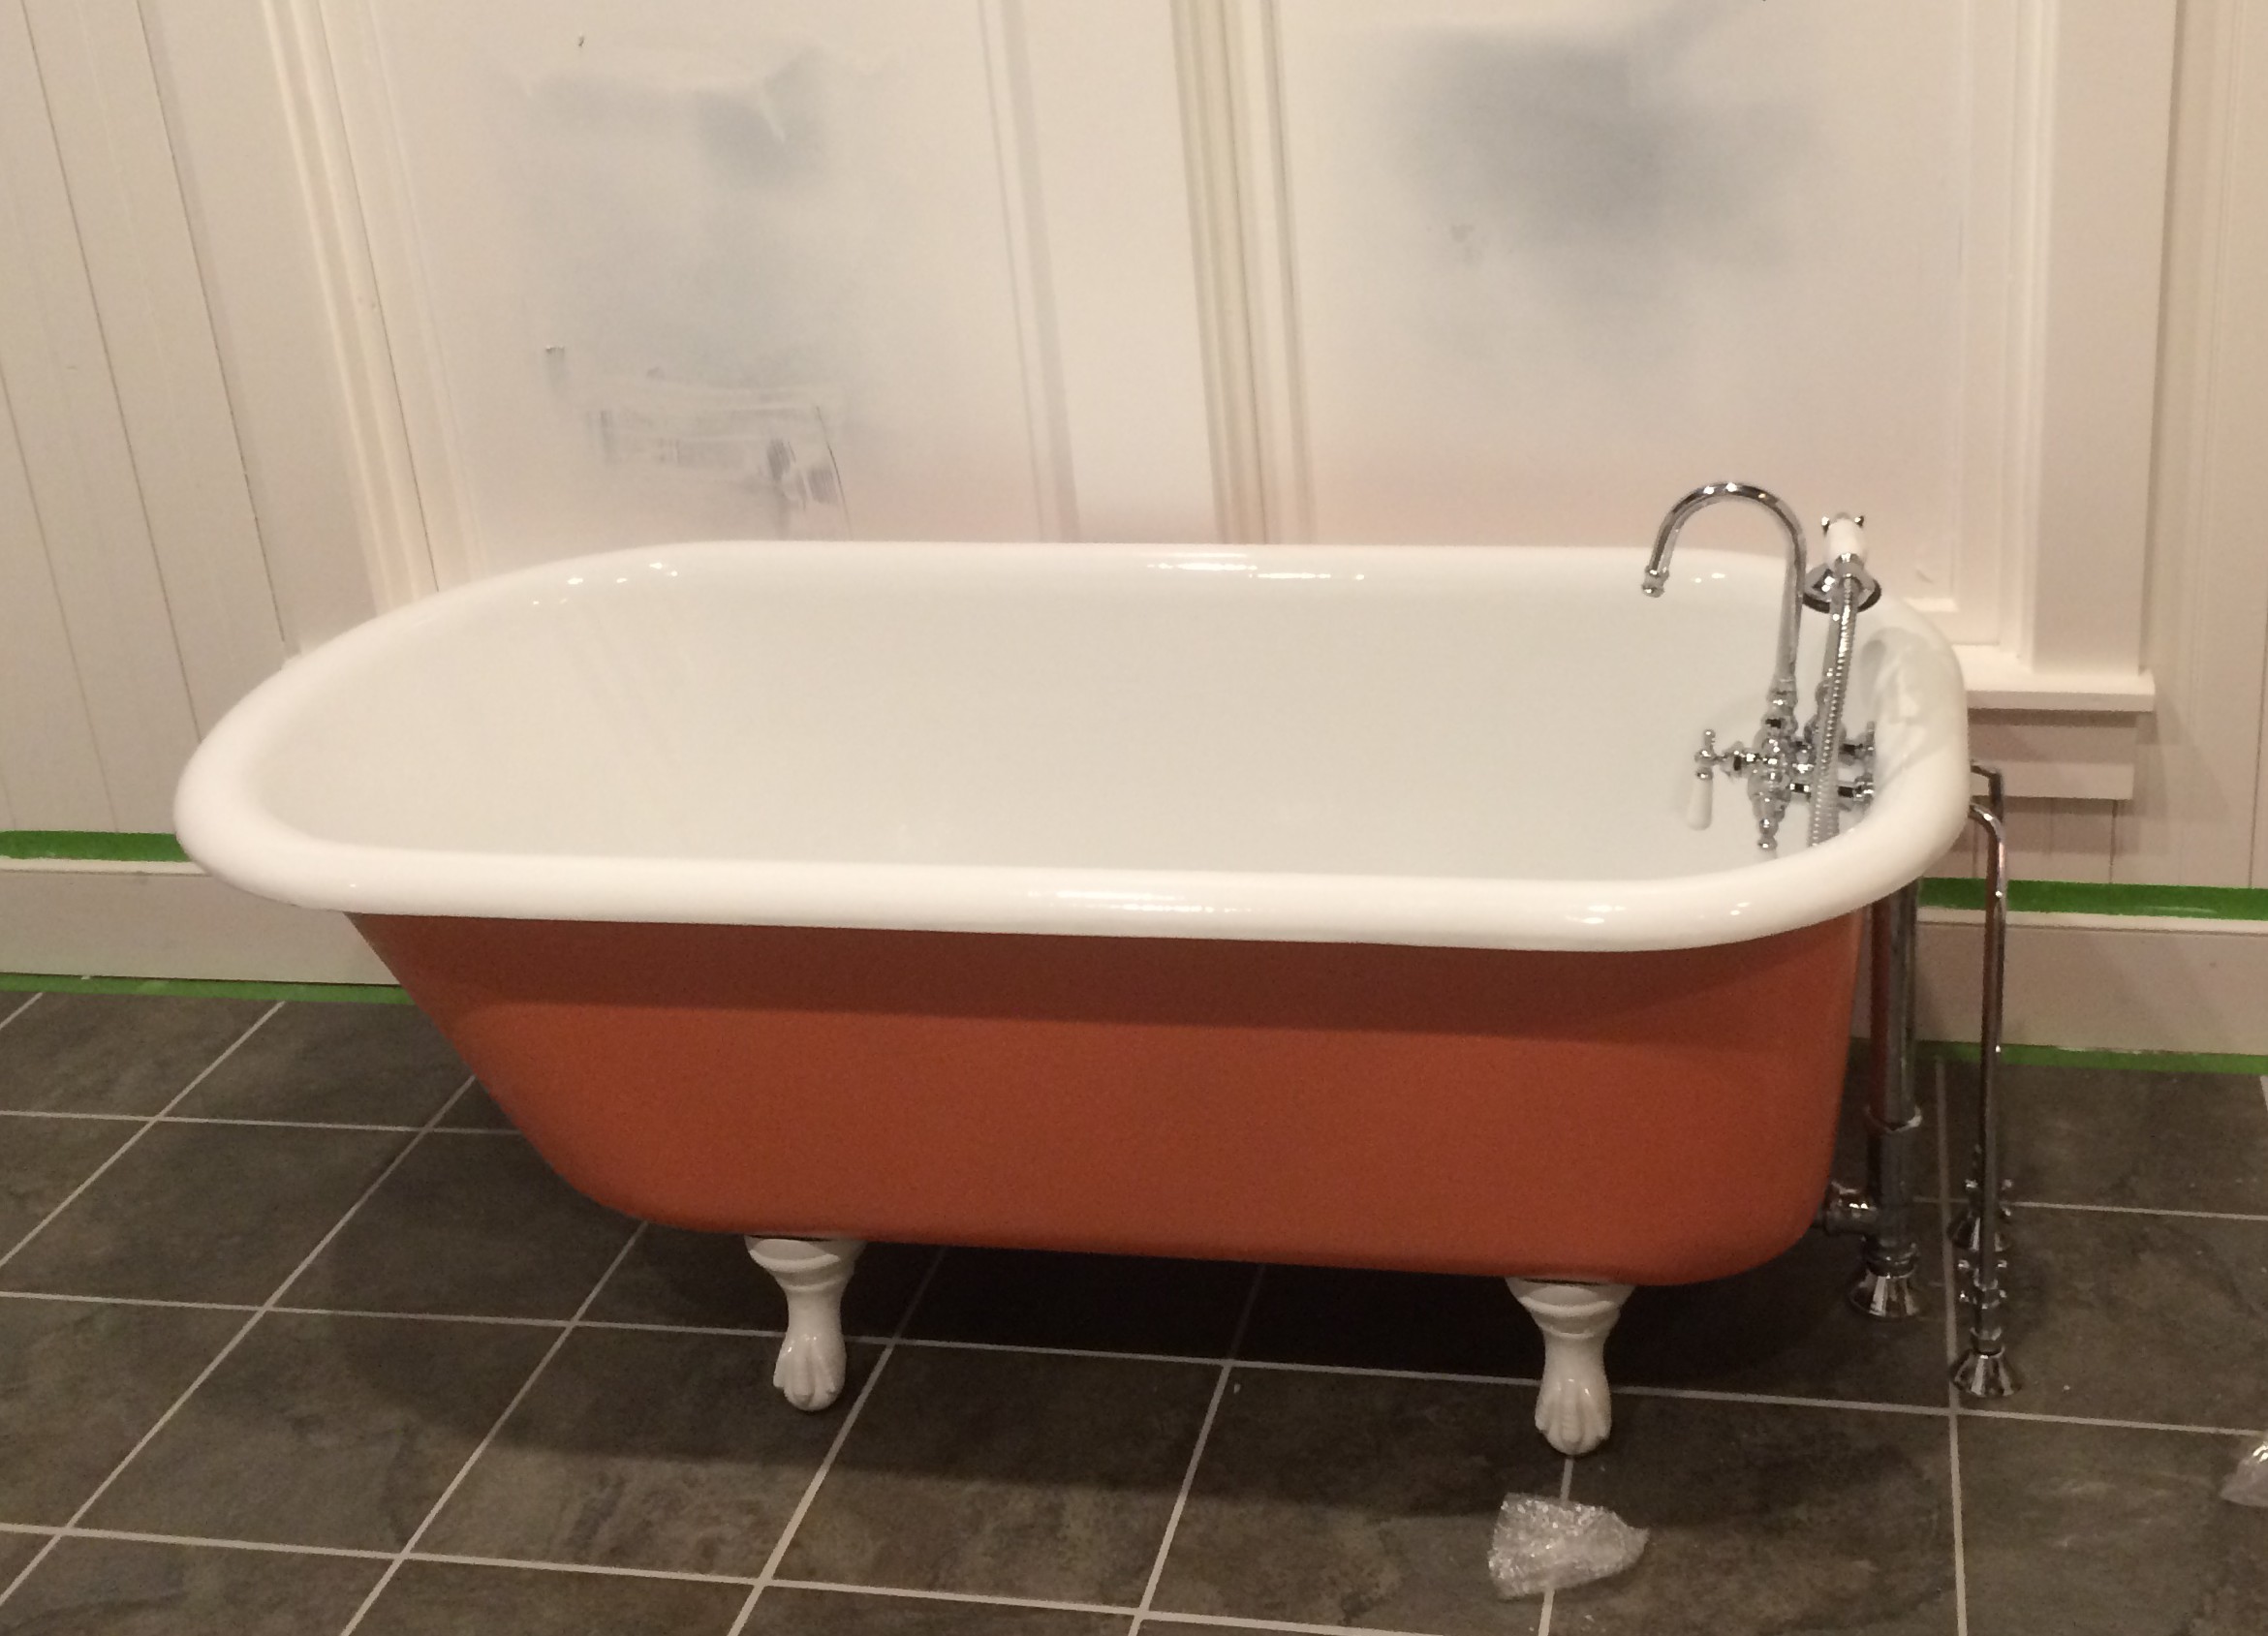
We’ve been told any areas of wear and pitting are filled with a putty-like material to fill the gaps.  Then a spray technique is used to recoat the interior of the tub and the feet.  It looks brand-spanking new!   IMG_0259

For dramatic effect, see the before and the after:

IMG_1905

IMG_0262

IMG_1906IMG_0264

Now, that looks like something I could soak in!  The visions of rubber duckies are dancing in my head…

The last step is to paint the exterior of the tub.  You can purchase a special paint designed to adhere to metal at Benjamin Moore or your other paint store.

IMG_2925

We hemmed and hawed about what color to choose – classic all white?  Traditional black with white feet?  Or something a little…bolder?  Our color scheme in the bathroom has evolved into navy and white with hints of coral, so we decided to upgrade that from a hint to a pop by choosing “Tucker Orange” from Benjamin Moore’s Williamsburg collection for the outside of the tub.

Chad slaved away at this one day while I was out of town.  What a trooper – it turned out to be a bit more of a project than just slapping on a new coat of paint.  First, he needed to remove the original paint, as it was peeled and cracked in places.  Those old paint manufacturers did not mess around.  Chad ultimately used a wire brush attachment for his drill and the electric sander to strip the old paint off, and then replaced it with two coats of Tucker Orange.  The result is stunning – we couldn’t be more thrilled!

IMG_2803

IMG_2804

IMG_2819

IMG_2822

We learned from the gurus at the salvage store in Front Royal that the removable feet are imprinted on the back with either an “L” or an “S” – this means “long” or “short”.  The idea is to put the short feet on the side with the drain so that the gravity will assist the water in flowing out of the tub.  We certainly would have overlooked this without their insight.  Luckily, our feet are in the right positions and our tub is at just the right angle for optimum flow.  IMG_2839

And here to the tub is back in place and ready to be plumbed in.  What do you think?  It’s bold and a little funky, but we’re loving it.

IMG_2841

And the good news is the tub can always be repainted as trends and tastes change!

Add a little hardware, and the tub was ready for its return to glory!  Spoiler alert: I have used the tub already, and it has certainly lived up to everything I dreamed about!

IMG_2854

Big Finishes

We aren’t going to sugar coat it: for as much fun as this project has been, some of the big decisions for the Little House have caused some anxiety. When I call it our dream house, in no small part am I referring to the countless times I’ve dreamed of things NOT coming together. Luckily, we have recently gotten some major hurdles out of the way!

The first of these has been the spiral staircase. We mentioned in a previous post that we had ordered one from a manufacturer in Tennessee, and it arrived last month as the ultimate DIY. Our craftsmen love a challenge, and they had the project almost finished up before we could even take any progress pics.  I think they were just as excited about it as we are!

/home/wpcom/public_html/wp-content/blogs.dir/9bc/35468686/files/2014/12/img_2442.jpg

/home/wpcom/public_html/wp-content/blogs.dir/9bc/35468686/files/2014/12/img_2445.jpg

/home/wpcom/public_html/wp-content/blogs.dir/9bc/35468686/files/2014/12/img_2441.jpg

It is quite narrow; thank goodness our variance was approved! Our contractor then installed the remaining spindles, and it was a wrap:

/home/wpcom/public_html/wp-content/blogs.dir/9bc/35468686/files/2014/12/img_2467.jpg

Another point of stress was our kitchen countertop. In a prior post we mentioned that we wanted to go with soapstone, and to help defray the costs of this choice we did our own “shipping”. We first sourced the sink we wanted: a farmhouse style, extra-wide, single-basin MONSTER. Internet searching revealed several stone shops specializing in soapstone sink construction outside of Philadelphia, PA. After sharking for the best price, last fall we took a day trip up through the Amish Country and collected our treasure, which fit perfectly in our salvaged cabinetry:

/home/wpcom/public_html/wp-content/blogs.dir/9bc/35468686/files/2014/12/img_2312.jpg

For the countertops themselves we already had one piece of soapstone that we recycled from its former life in a Shenandoah County public school that we used to match with the sink. We knew that there was an old soapstone quarry outside of Charlottesville, Virginia, and using a daring leap of logic, we assumed that the public schools of the 1940s and 1950s would have sourced their materials as closely (read: cheaply) as possible. I dialed up the quarry, Alberene Soapstone Company, and they informed me that they are happy to sell their stone by the rectangle slab, but any custom cuts would be up to our installer. Luckily, our craftsmen had worked with soapstone before and felt up to the challenge! One day a few weeks ago I got the call that our slab was ready.  I hopped in one of the big farm trucks and headed to the quarry.

/home/wpcom/public_html/wp-content/blogs.dir/9bc/35468686/files/2014/12/img_2485.jpg

After donning safety attire, we headed to pick up the slab.

/home/wpcom/public_html/wp-content/blogs.dir/9bc/35468686/files/2014/12/img_2500.jpg

/home/wpcom/public_html/wp-content/blogs.dir/9bc/35468686/files/2014/12/img_2509.jpg

Unfortunately it was wrapped up to protect it from road debris during transit, and the anticipation of waiting to see the slab was killer, but well worth it!

/home/wpcom/public_html/wp-content/blogs.dir/9bc/35468686/files/2014/12/img_2539.jpg

The craftsmen then were able to cut it down so our single solid slab extends out into the window sill and accommodates our sink:

/home/wpcom/public_html/wp-content/blogs.dir/9bc/35468686/files/2014/12/img_2545.jpg

The recycled piece was also installed – a perfect match!

/home/wpcom/public_html/wp-content/blogs.dir/9bc/35468686/files/2014/12/img_2591.jpg

Have Yourself a Whitewashed Christmas

We are still very much in a painting phase in the Little House.  As you’ve seen in prior posts, we’ve put quite a few layers of white primer and white paint throughout the house (it feels like we’ve been painting for years), and as clean and crisp as it looks, we’ve been thrilled to finally graduate to more creative applications.

The Little House addition has two closet rooms, both of which are 3/4 barn board.  Many people have expressed a strong preference to see us leave the beauty of the natural wood uncovered; however, we have a bit of an aversion to the 1970s faux-wood paneled look:

3907250016_194bafeee5_z(http://www.huffingtonpost.com/2013/09/12/biggest-design-sins_n_3908869.html)
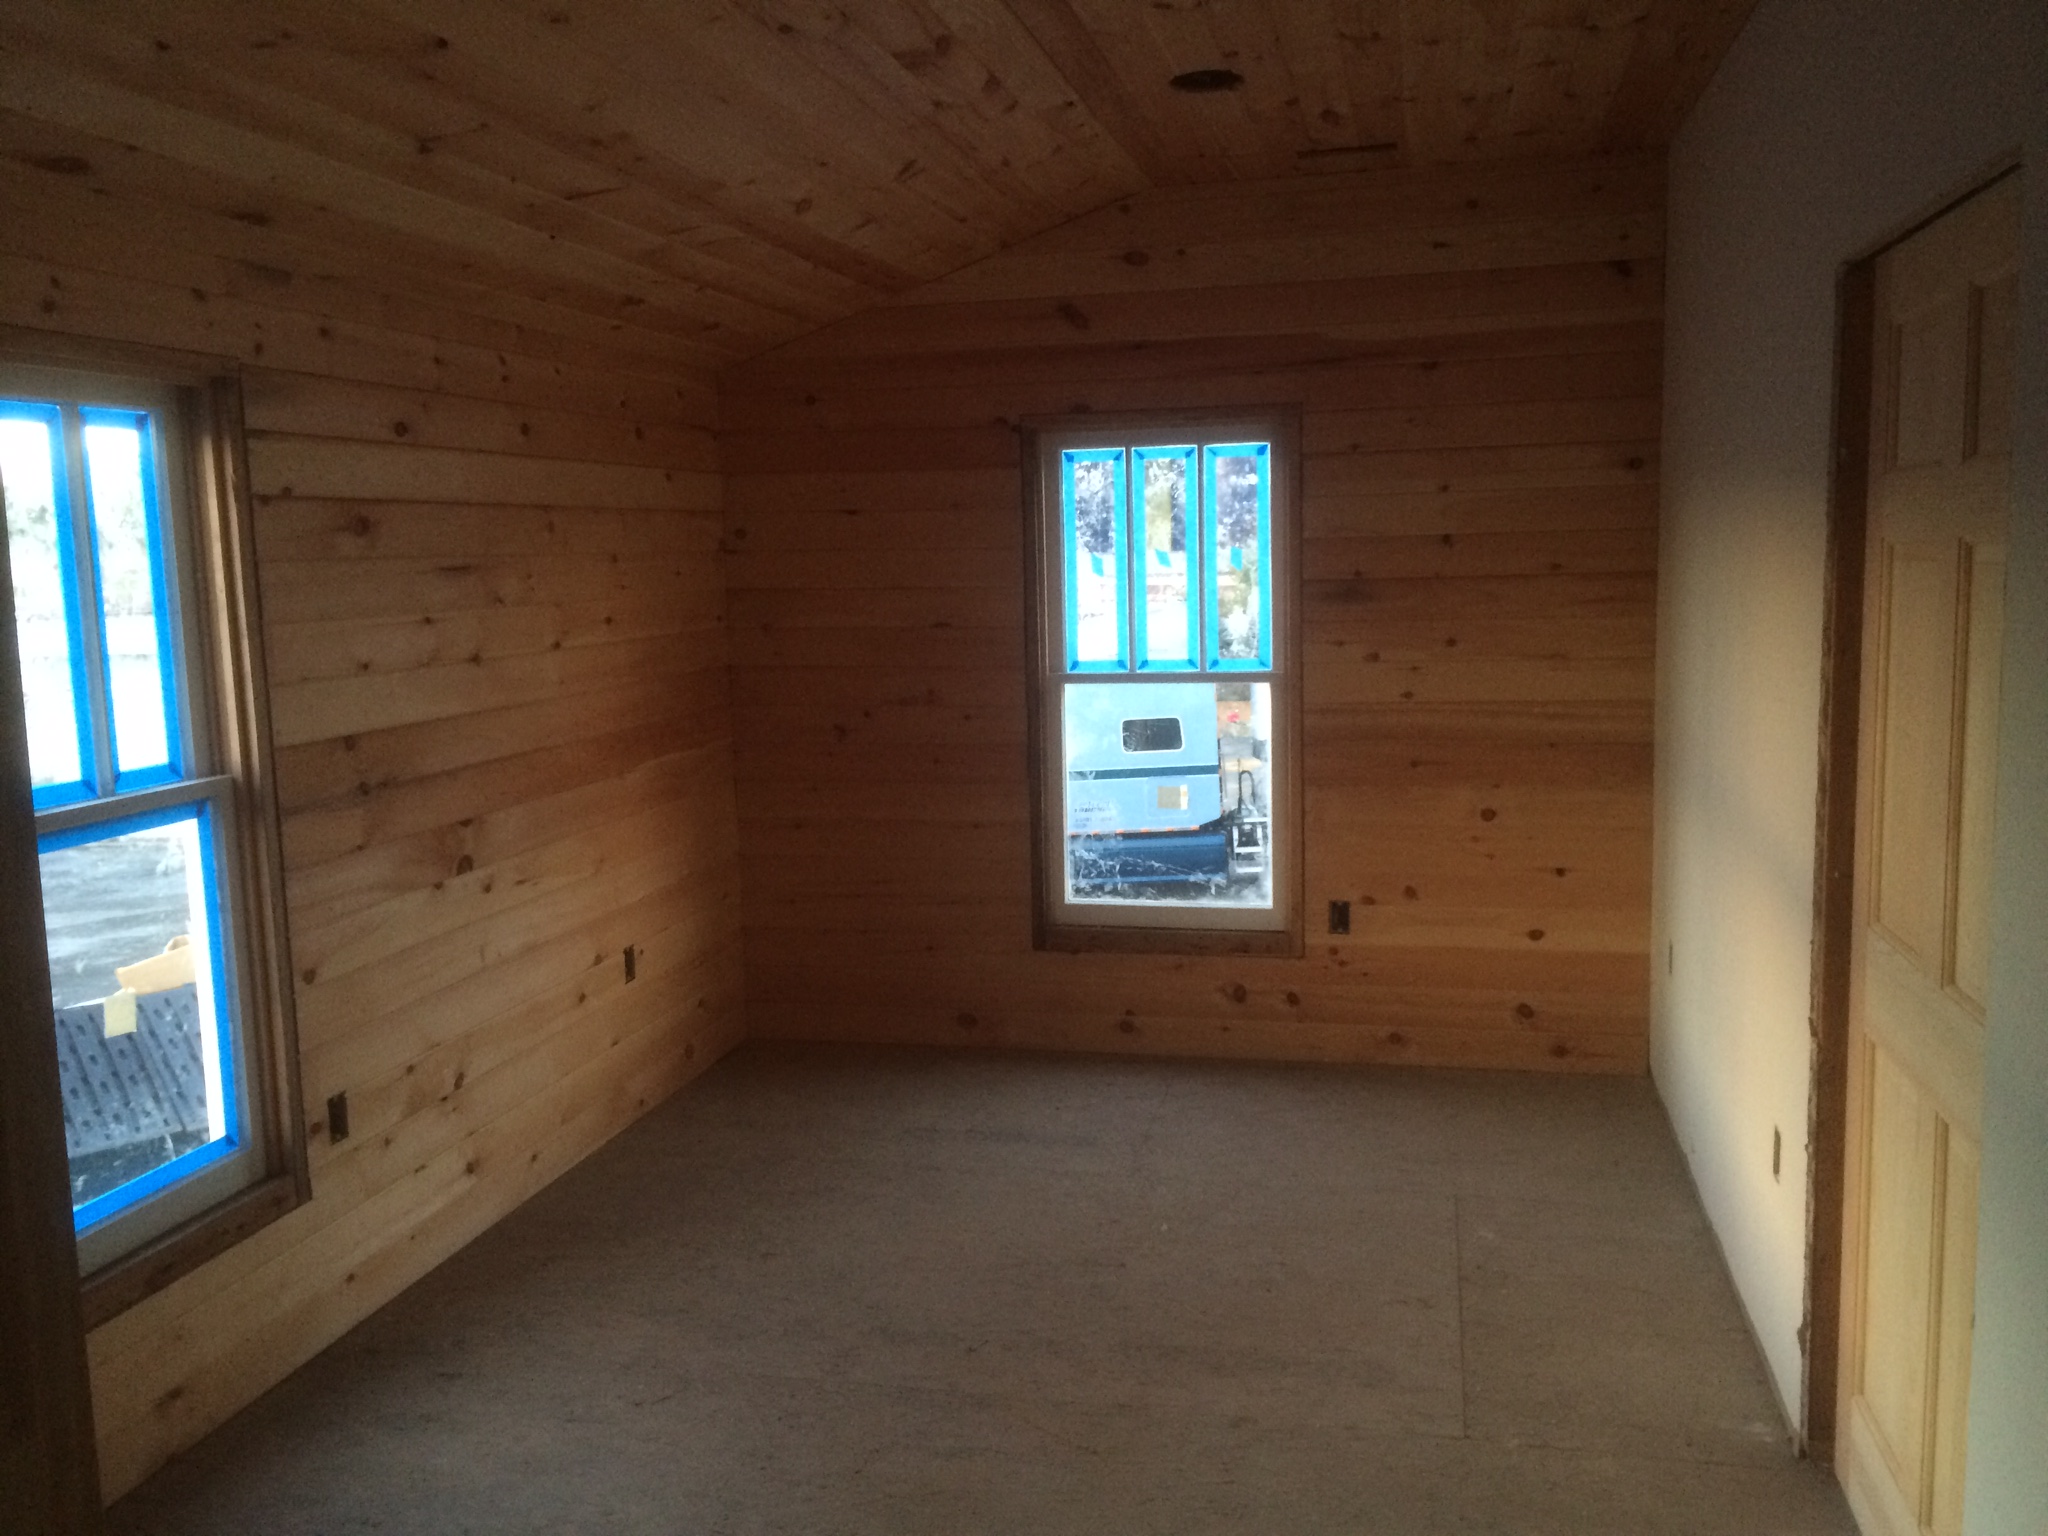
Instead, Chad and I decided to strike a happy medium.  We opted for a white-washed look that would sooth the wood tones but leave the beautiful grain and knots visible.  Whitewashing is typically achieved by applying a white stain to raw wood.  Here’s what we started with in the closets:

vIMG_0008_2f

IMG_0006_2

Sarah Richardson of HGTV did a lot of whitewashing in her adorable little island cottage, which was featured on her show, “Sarah’s Cottage”.  Luckily for us, after filming the show Sarah undertook a thorough explanation of her whitewashing technique.  We have always loved Sarah’s shows because she does not shy away from highlighting her debacles, and whitewashing proved no different.  On her show, Sarah found that her whitewashed pine turned a shade of white-ish pink instead of an idyllic, misty white after applying a pure white stain.  Uh oh.  This is not good, because once raw wood is stained, there’s no going back.  Long story short, Sarah recommends a gray shade of stain instead of straight white to solve this problem.

Dutifully, Chad and I agreed to take Sarah’s advice and set our minds on gray stain.  It turns out that the paint store can mix an infinite number of shades of gray, and it was up to us to decide which shade would suit.  It also turns out that there are two different products: Pickling white and tint.  So, we grabbed a variety of samples and tested away:

White Wash Trial

As you can see, we tried a number of variations on the theme.  With the pickling white alone, we weren’t able to get the color we wanted.  With the gray tint, we got the right color, but couldn’t get the coverage we were looking for.   Ultimately, we decided that the most complicated application looked best (of course): one coat of pure pickling white and a second coat of gray tint.  We used Old masters Penetrating Stain for the gray tint.

IMG_2477And with that decision made, we set to work.  We thought white washing sounded a lot faster than regular paint, so against our better judgment, we set some lofty goals for how quickly we would finish the closets.  As you can predict, we underestimated this by a long shot (yet again).

 IMG_2472

IMG_2478

IMG_2520

Both the pickling white and the tint apply like very, very runny paint.  Because the products go on so thin, we ended up needing one coat of pickling white to cover the grain sufficiently, topped with two coats of gray tint to get the right color.  Below you can see the differences between the different coats:

White Wash Applicatoin

We have the first coat on both closets and have finished all of the whitewashing on the western closet.  As Christmas approached and other house projects took precedence, the second closet stands by unfinished, but we are hoping to get that wrapped up soon.  As with so many of the other house projects, the extra time was worth the effort.  The white wash looks stunning and will contribute to the rustic vibe we’re going for throughout the Little House.

IMG_0183

Compare with the pinker eastern closet, which still needs to be topped off with the gray tint:

IMG_0184

IMG_0186(I promise it is pinker, even if these photos don’t seem quite as dramatic as real life!).  Next time, we’ll share some of the beautiful Benjamin Moore Williamsburg Collection shades we’ve splashed on other parts of the house!  In the meantime, happy holidays from Edge Hill!

P.S.  The blog is currently lagging a bit behind our real-life progress (we’ve been working our butts off without much sleep computer time).  We are going to try and update a couple of times over the holidays, and wanted to note for our loyal readers that this post is our first official post from the Little House. WOOOOOOOOOOOO!

Winter Won.

We were competing against the weather to try and get into the Little House before heat became a living necessity, and we have had to go ahead and call the race. At 14 degrees this morning waking up in the Big House, winter has won.   But we are still hard at it in the Little House!   Over the past few weeks, the craftsmen have been finishing the trim, laying floors, and generally tying up loose ends.  Here you can see the trim details where the skim-coat walls meet drywall and exposed brick:

IMG_2373

We knew that when the finish work began, the end would be in sight, so coming home to this scene last week made our little hearts sing:

IMG_2272

IMG_2276

The original floors in the little house were beyond salvage due to the extensive water and rot damage that made the house such a gut-job to begin with:

IMG_1564

To get an aged look, we stumbled upon some distressed cherry flooring at one of our favorite building-supply auctions, and thought it would be perfect:

IMG_1470

The cherry will darken a bit as it absorbs sunlight, giving a nice rich hue. Our craftsmen have been carefully laying the floors so that our random-width boards in one room match their partners the parallel room; this allows us to have continuous runs at doorways where the two rooms meet.  As you can imagine, this is a bit of a time consuming process.  Once we had floors down in the kitchen, some of our cabinets got to finally come home!  As we mentioned previously, when we demolished the interior of the Little House, we salvaged as much of the structural lumber we could knowing that ultimately we wanted to somehow incorporate it into the new building.   Mr. Henry, our carpenter, was able to painstakingly transform those 180-year-old rough-hewn boards into our beautiful cabinets. Here is a sneak peak!

IMG_2312

We had to go ahead and install this run of cabinets to get a measurement for our soapstone counter tops. In sourcing the soapstone, we knew of a local quarry in Virginia outside Charlottesville and we wanted to use the stone from that close source, if possible. Luckily, the quarry price is about half that of a finish retailer, but it means we are going to have to make the sink cut for our undermount soapstone sink ourselves. While you may be scratching your heads as to how we are going to manage this, the good news is that soapstone is much easier to work with than granite or marble, and our craftsman feels like he is up to the challenge (he already had some practice in Chad’s mom’s kitchen)! The slab should be ready sometime next week, so we are crossing our fingers and our toes that the cut goes well!

On the DIY front, Rachel and I have donned our old clothes and have started painting.  We started in the upstairs bedrooms, where we are leaving the exposed-beam ceilings untouched but we are painting the concrete skim coat on the walls white. The first step in this process was to run the vacuum over the walls to clean off the mortar that has loosened since the walls have cured.

IMG_2338

IMG_2341

Once debris-free, we began to notice some wet patches along the walls when it rained, and after some research we decided to seal the exterior bricks and interior walls to prevent future water damage.   The sealing process was pretty easy. We used Lasti-Seal and applied with a backpack sprayer, and it went very quickly.

IMG_2345

After the sealant had dried (no color change noted!) we began with the primer, applying liberally. We started out attempting to use a paint sprayer,

IMG_2385

but the porous and textured concrete skim made full coverage difficult.  We eventually resorted to hand-rolling with a very high-nap roller, and after 2 coats (or three!) we were happy with the coverage.

IMG_2384

IMG_2380

 IMG_2406

IMG_2407

We moved downstairs and repeated the process, and we now have half of the walls in the house done.  First we started in the kitchen:

IMG_2404  IMG_2403

IMG_2402

And here is a view halfway through, from the painted kitchen to the unpainted living room:

IMG_2411

We will be painting the trim and some of the other rooms with historic Williamsburg colors, and can’t wait to do something other than white!

In the kitchen there are two walls where our need of modern utilities necessitated framing out the walls to allow pipes, etc., to pass through. Those framed walls are clad in barn board, and we are painting that white, too; we are having exposed shelving and didn’t want the room to look too busy.   As for the kitchen fireplace, the rough-sawn mantle is on site and ready to be trimmed and fitted.   We had to replace some of the kitchen fireplace’s original brick with firebrick to protect the integrity of the structure and allow for future use, but since the firebrick is white, we have been debating painting the firebox solid black. We haven’t made a final decision, but solid black seems to be winning at this point.   Anything, however, is better than this:

IMG_1556

On the skilled-labor front, the HVAC equipment is now fully installed INSIDE our house, and we are waiting for a final exterior grading to install the outdoor components.   Our gas line is almost hooked up to the tanks, but the plumber still needs to set our tankless hot water heater and determine what level of water treatment our well water will require.   The electrical is almost finished, with outlets and light fixtures getting mounted this week.   The farm is also undergoing a massive electric infrastructure upgrade (because, apparently, the Little House would have been the straw to break the camel’s back and cause Dad’s grain operation to come to a deafening halt) and Dominion has a completion date for that project of late December. Lucky for us, Dad was able to get the corn off in the field where the power lines must be upgraded, so we are hopefully still on track.

One of our biggest holdouts finish-wise has been our interior set of spiral stairs that will go from the master bedroom closet/sitting room to the downstairs rear living room. When we designed this feature we needed a way for each of the upstairs bedroom occupants to get downstairs without going through someone else’s bedroom (AWK-WARD).

stair

I modeled the stairs after a small set that my parents installed in their home in the ’90s. We left a four-foot rough-in (i.e., a huge hole in the ceiling), and decided to figure out the stairs later. What we wound up figuring out was that Code now requires a FIVE-FOOT diameter stair. Oh. Crap.  After some analysis, we decided that our best bet was to apply for a building variance to allow for the smaller stair. Luckily, our upstairs master bedroom came with a pre-existing exterior door we can use for egress purposes.

IMG_2405

We are pretty sure that there would have been exterior stairs up to that door originally, but we know there haven’t been any for over 80 years, so we just planned a small deck and wide stair for that door so we could move furniture up without dealing with the spiral or the original, TINY, stair. Based on our addition of the exterior stair, our variance was approved! This was a huge relief, but we still had to figure out what spiral stair to use.

As we were searching, our initial thought was to go with metal like my parents, but we soon discovered that most of cheaper metal stairs are sold in kits and are made out of country and include a lot of plastic, exposed screw heads, and PVC. The good options similar to mom and dad’s all called for a three-month custom lead-time, and a $5,000 premium. Changing gears, I was able to find a reasonably priced wooden spiral stair manufacturer not only from good ole’ U-S-A but from our friends down I-81 in Knoxville Tennessee! Maybe one day I’ll get to a post on the enviro-friendly choices we made for the house, but for the stairs we were very happy to have an option from just one state away!  I mentioned to the receptionist that we could install as soon as they were ready, and I don’t know if it was my southern charm or just good luck but she called a few days later and said they had a cancellation and our job went to the workshop last week and should deliver a week early!

Meanwhile, outside the house, our addition is now clad in hardi-plank siding and ready for a coat of paint. Our footers are approved for our exterior staircase and that should go up soon too.

As you can read, we are on the cusp. In just “a few more weeks” this darn thing will be liveable! The bettin’ money is on how many a “few” is, and whether we get our Christmas wish of waking up December 25th to stockings hung on our kitchen mantle with care, or frost on the INSIDE of the windows as we found this morning in the Big House.


The Final Stretch

Hey guys!  We have been waiting to write a post with some substance, because a lot of the current progress at the Little House is tedious detail work that doesn’t photograph well.  After our last post, our craftsman have been hard at work on the windows, doors, and trim of the Little House.  I think we’ve talked enough about windows, so take a gander at this:

IMG_0015_2

That’s right, all of the windows are now in!! This is a huge step forward, as we are now able to make progress on the finish work of the interior.  Also, as I’m sure you’ve noted, we have doors!  The doors have a little story of their own.  When we were demoing the little house, we found a variety of exterior doors on the house.  Thus, in deciding what to keep, we got to do a little picking and choosing!  While assessing our options, we were trying to pick something with a good bit of character, and we were also concerned with boosting our natural light given the small existing windows on the house.  With those considerations, we had an easy winner (sorry for the poor photo, we are currently doing this post while out of town!):

IMG_0019

We also liked this door because it continues a three-or-one fenestration theme we’ve inherited with the little house.  In the existing windows, the sashes are three lights over one light:

IMG_0006

For the door we chose, there is one large pane of glass, and then three panels, one of which is also divided into thirds.  We like the symmetry there, so we saw that as our sign.  We took the original door to a cabinetry craftsman, and he quadrupled it for us.  The first shot shows the two front doors (stacked) beside our inspiration door, and the second shows the slightly larger two rear doors (also stacked):

IMG_0019

IMG_0018

We got some insulated glass panes for the glazing, some Ebay salvaged hinges from the same maker of the hardware that was used on the main houses, knobs and deadbolts to keep out unwanted guests, a little weatherstripping, and BAM:

IMG_0012_2

We have exterior doors!

We also have an exterior door from our master bedroom that will lead out to a small deck for fire egress purposes, and for that spot we didn’t want such a large window as we used on the first floor doors.  Hunting with Mom through an excellent architectural salvage shop in Front Royal, I stumbled across this beauty!

IMG_0037

I was immediately drawn to this guy because of the three light upper window, which keeps with the three-or-one theme and will let some morning sun into the master bedroom without sacrificing privacy.  Salvaged doors are reasonably priced, and after double checking the measurements we sealed the deal:

IMG_0038

After stripping off most of the old paint, our craftsman hung the door.  Now to finish restoration and glaze the upper windows…

IMG_0001

As for the trim, we picked a style that we really liked from a home we visited this past summer:

IMG_0039

This trim is a bit more ornate than the plain board trim that would have certainly existed originally, but we justified this change as reflecting the changed use of the house in its present function.  We liked the clean lines, and our craftsmen Colon and Dustin are using rough-sawn pine lumber to custom-fit each window and door:

IMG_0011_2

(Future Laundry Room)

IMG_0014_2

(Future Kitchen)

The craftsmen have also been hard at work hanging interior doors and finishing our interior wall cladding in our closets:

IMG_0006_2

IMG_0008_2

(Guest Closet)

We also have made some progress in the full bathroom!

IMG_0009_2

Outside the house, several other projects have come to completion, and we now have an approved septic field!  This involved a great amount of digging across a decades-old farm area with multiple hidden utilities just waiting to be found by the excavator, but he did a great job.  Here is where the septic comes into the house, passing under an existing power line:

IMG_0002

And here is the settling tank, all ready to be hooked up:

IMG_0003

The septic line travels about 150 feet over to the distribution box system:

IMG_0034

IMG_0033

And once it was all approved we backfilled, and moved on to the next project!

IMG_0021

Which, it turns out, was another DIY endeavor and turned out to be our least favorite task thus far.  Of course, it involved MORE HAND DIGGING.  About two months ago, we found out that the crawl space under the addition required a french weeping drainage system to meet code requirements and prevent flooding.  As we plan to install several mechanical systems in the crawl space, we didn’t object, but here is where a little prior planning would have made a world of difference.  When the pad for the crawl space was formed, we did not clean around the edges or use cement forms along the rear of the house.  Instead, we poured the concrete right against the dirt of the hole that had been dug, which was perfectly fine.  Until, as it turned out, we had to dig down beside that concrete and install the drainage system.  This entailed us crawling down into the foundation trench and hand digging a channel for the drain tile.  As this earth was previously undisturbed, it was incredibly compacted and filled with river rock.  The progress was slow, back breaking, and tedious (we felt like Jean Valjean), and we were lucky to be able to trench 8 feet in an hour.  For future reference to other diggers, dig a bigger hole, use concrete forms, and install the drain right away!!

IMG_0022 IMG_0025

Here you can see the sill of the footer, and I am using a pick axe to trench down beside it so any water drains into the trench drain tile and not our crawl space:

IMG_0024 IMG_0023

The following day, we painted the foundation with a water sealant coating, just in case the french drain doesn’t 100% solve the problem.  Belts and Suspenders, Folks.

IMG_0028

This stuff wound up getting pretty much all over us, and for future reference, this is a job you want to do in a hat, long sleeves, and pants.  The scrubbing required to remove the tar sealant from skin is brutal.  Don’t even ask about what you have to do to get it out of hair.  At last, we had our drain trench dug and foundation prepped!

IMG_0027

We then laid some landscaping fabric and ran our drain tile with a slight decline to our sump pit (also hand dug):

IMG_0026

Dad found a remnant four-foot piece of large plastic culvert for our sump pit, and we were so grateful!

IMG_0030

IMG_0029

We dug down so the drains would be well above the level of the sump:

IMG_0031

And set the pit into place, drilling 4 and 1/8 inch openings in for the drain tile.  IMG_0032After watching several YouTube videos on the subject (this house couldn’t have been done without YouTube), I found a great how-to on DIY sump pump installation from Apple Drains in North Carolina.  The dude who narrates is hilarious, and he fully explains the all aspects of the project and tells you why you are taking different steps.  I added two lines going into the crawl space, one for the pumps power supply and one for a garden hose that I can hook into a dehumidifyer for the crawl space.  It took me about two hours of measuring PVC and gluing the whole thing together.  Here you can see the white PVC lines running into the pit:

IMG_0003_2

And here you can just see the drain tile poking into the pit on the edges, covered with filtration fabric, and the green device at the bottom of the pit is our pump:

IMG_0005_2

Despite how labor-intensive this task turned out to be, we are hopeful that our crawl space will be moisture free for life, and I have some confidence in knowing how the whole thing works!  After reading all of this, I’m sure you will share in my excitement when I came home to this inspection result:

IMG_0040

Each day we are getting closer, and for our interior design fans, we are nearing the phase where Rachel will take the helm and detail our choices room-by-room.  So exciting we can hardly wait!

Coming Together!

We hope everyone has enjoyed their summer!  With the last few weeks left, you are probably wondering if we are going to make our goal of a fall move-in.  At least, that is the question we keep asking ourselves!  We are at the stage now where so much in the Little House has come together that it seems like we could be just days away from the big move (I mean, it is not exactly like life in the Big House has our standards too high), but in reality, there are still a number of steps to go.  Here is what has been done:

Walls are in! We already discussed the re-parged brick walls, and those won’t change; they will just be painted.  The rest of the house is a 50/50 mix of wooden wall covering and drywall:

IMG_1504

We are using a five-foot bead board wainscoting for our bathrooms and laundry, and here is Rachel in the future water closet in the middle of the drywall process :)

IMG_1509

The tub will go in front of this double window:

IMG_0001

And here is the upstairs bathroom all primed and ready!  From left to right:  Shower, linen closet with laundry chute rough-in, and water closet (the green square is the access to our HVAC):

IMG_0002

The laundry chute leads down to our utility closet, which is just beside our future laundry room.  You can see some of our extra insulation hiding in the chute, which will eventually get a door made out of bead board.

IMG_0007

Back upstairs, our added matching bedroom closets each feature an exposed brick wall that used to be on the exterior of the house.  The new exterior walls and ceiling are dressed up in horizontal barn board, which we ambitiously plan to whitewash based on the methods of HGTV all-star Sarah Richardson:

IMG_0004

IMG_0003

All this hard work has been courtesy of our contractors, and meanwhile Rachel and I have returned to our nemesis:  Windows.  We salvaged the original windows from the Little House, and magically (I kid you not) found extra matching three-light over one-light windows in a building on the property.  All of these were old-school, solid wood sash construction, and we couldn’t bear to pass them up.  Our contractor even custom-made the window jams out of some of our salvaged lumber! Here is a window before restoration in its new frame:

IMG_0920

Of course, the restoration process has meant a couple of stressful nights of paint stripping, wood repair, sanding, priming, and glazing…

IMG_1747

IMG_1748

And  restoring the original window frames:

IMG_1636

IMG_1638

But now we have the first round in and ready for a final coat of paint!

IMG_0006

And here are several windows restored and back home in freshly primed frames:

IMG_0009

Speaking of salvaged lumber, Rachel and I had one of our best days this summer when the first round of furniture we commissioned for the Little House showed up early.  After working so hard to salvage any lumber we could from the demolition of the Little House, these beauties validated all of our efforts.  We hope these pieces never leave the Little House, and are doubly special to us, as the craftsman, Ernest Henry, was a good friend of my late Grandfather French.  It really doesn’t get much more local and meaningful than this!

Mr. Henry started with a rough pile of lumber filled with nails:

IMG_1626

DSCN0599

DSCN0592

He takes all of this to his workshop, removes the nails, then cuts and planes the wood down:

IMG_1745

IMG_1744

And transforms it into beautiful furniture.  I think even Mr. Henry was a little excited when he dropped off our new kitchen table – he said bringing the finished furniture to the house was like a family reunion for all of the old wood:

IMG_1549

Here it is getting a test run:

IMG_1553

We have an odd nook in our downstairs living room, so we designed this writing desk to tuck into it:

photo

And Mr. Henry also made three matching bathroom vanities which we designed around some great sink tops that mom and dad found for a song at a local surplus builders auction (Jackson the Dog approved!):

IMG_1551

We are so pumped with the final product!  Mr. Henry also gave us a sneak peak at our future kitchen cabinets, which will be made out of the same salvaged pine.  Here are some of the front frames:

IMG_1746

We can’t wait until it is time to install the kitchen!

Call in the Pros

Over the last two months, the work on the Little House has been going forward with minimal efforts from yours truly.  With our lives in the Valley now ramping up with various commitments, we are glad to report on some great news.

Our last posts filled you in on the roof and and some electrical progress, bringing us to the step where we needed to finish up the framing and plumbing.  While we are rather proud of our past d0-it-yourself capabilities, we draw the line at potential future fire/water damage.  Luckily, we have had some great help with the basic electrical and have contractors handling the HVAC and plumbing.  Unfortunately, the photos from this phase aren’t the most exciting (so the writing has to be extra good, right?).

Downstairs:

You might remember the old, winding staircase that was original to the house.  Its width and stair height do not meet modern building code requirements, and the staircase had a few structural difficulties . . . The below picture is after we had excavated over two feet of soil from under the floor joists.  Due to the giant crater we created, the stairs were floating approximately three feet above the ground.

DSCN0649

Luckily, if an existing component of the house pre-dates the building code, it is grandfathered in so long as the structure is repaired and not completed replaced.  Thank goodness our craftsmen are the best – they were able to shore up the stairs and now they are sturdy, safe, and gorgeous.  Renewed to their original, narrow-but-charming glory!

IMG_1343

IMG_1345

The little hidey hole under the stairs was also a component the craftsmen were able to save.

IMG_1371

This has been one of our favorite parts of the renovation so far.  Here are the stairs from the top down.  We are finally using them for the first time (without risking life and limb, that is)!

IMG_1348

Downstairs, we also have an electrical panel,

IMG_1342

plumbing for the mudroom laundry,

IMG_1339

plumbing for the downstairs powder room,

IMG_1340

the height of the kitchen window has been adjusted and the plumbing is ready for the sink, dish drawer, pot filler, and refrigerator,

IMG_1334

and we are wired for a chandelier above the kitchen table!

IMG_1336 Upstairs:

Things are moving right along on the second floor, as well.  The brick masons removed the remaining plaster from the walls and cut channels for the electrician to run wires.  The masons then filled the channels with mortar:

IMG_1030

The channel above the door will be for wall sconces (to add a little ambiance), and the lower channels are for light switches and outlets.

IMG_1031

The masons then covered all of the brick with two coats of mortar.  They add score marks to the first layer, as shown below, so that the second layer will adhere to the first more securely.

IMG_1351

And the second coat – voila!

IMG_1365

We plan to paint over the mortar for a finished but rustic look.  We are also really excited about the vaulted ceilings and exposed roof in the bedrooms (we may have mentioned that once or twice).  When the HVAC infrastructure was added, ducts were inserted into the walls and ceiling.

IMG_1351

IMG_1366

We obviously need to find covers for these, but we are so thrilled with the thought of central A/C!

What was once a maze of framing and subfloor is now starting to materialize into a bathroom.  We now have a toilet stall,

IMG_1367

the framing for two medicine cabinets and vanities,

IMG_1358

IMG_1355

and closets that connect to the bathroom!

IMG_1353

Most exciting of all is the claw-foot tub!

IMG_1909

What, you can’t see it?  That’s probably because the tub is still out in a barn :)  We went on an excursion to Walton & Smoot Pharmacy in downtown Woodstock. The pharmacy is still a family-owned business, and is still a social hub right in the heart of town; however, before it was a pharmacy, the building housed Woodstock’s hotel.  The second floor of the building is still the ghost of the old hotel, and sinks, toilets, and tubs are still plumbed in for the skeleton of each room. 

IMG_1173

We were able to find a tub that wasn’t in bad condition, and with the help of a little muscle (a.k.a. Chad’s brother, Daniel, and his friend, Matt), we got the tub back to Edge Hill.  Once the floors are in, we’ll get that baby into place – until then, we are dreaming of the first soak.

IMG_1904

IMG_1906

IMG_1905

Once this baby is all hooked up we are going to refinish and paint it to match the room. We are also jazzed to have the framing up for our shower…

IMG_1908

…which holds water!  (see lower left corner, below).

IMG_1357

Whew.  And to top it all off, last week the building inspector paid one of his merry visits and informed us that our rough in was good to go after we add in a few more electrical outlets (luckily none need to be cut into brick walls!).  WHAT GREAT NEWS!

After we add those outlets, the next step is to add copious quantities of insulation.  After this very cold winter in a non-climate controlled Big House, we are HUGE believers in insulation.

IMG_1373

And, more good news: our drywall installation is booked for the end of June/beginning of July!  Things will really start taking shape over the next weeks, and a fall move-in date is looking to be within the realm of possibility.  Fingers crossed, and, of course, we’ll keep you posted!


The County Farm

We were very sad today to wake to the news that one of Shenandoah County’s most recognizable historic farm structures had succumb to fire early this morning.  The County Farm and its historic Alms House were ravaged by fire, and we understand that it is a near total loss.  The Alms House began its mission of providing a home for those in need in 1798, and has continued that mission in various forms up until today.  Fire is well known to be one of the greatest threats that our historic structures have to continually face, from the days of roaring cooking fires and candles to the modern era of outdated electrical workings that can prove prohibitively expensive to upgrade and maintain. The Northern Virginia Daily did a piece last year about the farm with a shot of it’s past condition, and the Shenandoah County Historic Society has an article detailing the County Farm’s long history.  For those unfamiliar, I was able to find this uncredited rendering of the farm (and if anyone can tell me who to credit I will gladly add that information to this post!):

10253923_10202754847345348_428556997026770281_n

Our wonderfully talented cousin, Marty French, captured the loss of the Alms House this morning:

IMG_7317

IMG_0932

While we don’t yet know what caused the fire at the Alms House, here at Edge Hill we are still utilizing wiring installed in the 1940s, and not without a great deal of trepidation.  None of our outlets are grounded, and countless dinner preparations have been interrupted by a breaker switching when we use our microwave and hotplate at the same time.  The process for updating the electrical systems in these old brick and plaster homes, however, is labor intensive.  As our Little House was a total gut job from the beginning, we can show you in detail what this process entails.  First, you must remove the old wiring:

IMG_0001

When we began working on the Little House, this rat’s nest was still live (this picture is post shut-off)!  We didn’t actually think it was active given its state, but of course we double-checked before messing with any wires and found that power was still going to the Little House.

IMG_0003

This gem was one of the connections we found in the house.  Yes, it is a mess of exposed wires that was just taped over with black electrical tape, and was in close proximity to the shredded newspaper that inhabitants from the 1940s used as insulation.  To remove the wiring, we had to literally rip it from behind the paster in the walls.  Next, we had to come up with our replacement plan, noting the modern code requirements for spacing of electrical outlets.  Since we are keeping the same plaster-over-brick finish in a number of the original walls, this meant calling in the brick masons to bury the new outdoor-rated wiring in our walls:

IMG_0580

The masons had to saw channels into the brick to run the wiring and install the receptacle boxes.  As you might imagine, this is an incredibly dusty and difficult task.

IMG_0633
IMG_0582

IMG_0581

From there, the lines are cemented into place with mortar:

IMG_1031

IMG_1030

In our case, the ends of the electrical lines are then fed through the floors and routed to the new panel box in our utility closet:

IMG_0796

Needless to say, this already tricky task would be greatly compounded if you weren’t also working with open floors and crawl spaces to run the wiring.  We cringe to think of how difficult this will be to accomplish in the main house were we have detailed woodworking and original hand-painted walls that are over one-foot thick and solid brick.

Historic structures require their owners to be constantly endeavoring to update and maintain (read: Spend money!).  This process isn’t cheap and, on balance, requires owners to place an intrinsic value on the experience of preservation and the opportunity to share in a space that has sheltered generations through life’s trials.  I can’t count how many times we’ve questioned the sheer scale and timeline of our project here at Edge Hill, and each time we come to the same conclusion.  We want to be part of the history of this place.  We want to care for it and steward it so that future generations can contemplate the experiences of those who have gone before, and so that they too can leave their mark.

In closing, we ask you to think of the mission of the County Farm and Alms House.  For over 200 years the farm gave shelter and sustenance to those in need.  Those passing through its walls were facing some of life’s toughest struggles, and they took refuge in knowing that our community was dedicated to ensuring a safe place for all.  While we have lost a wonderful structure, that mission remains in our community.  The only question is what we will do going forward.

Houston, We Have a Roof!

It’s been one heck of a year to have an extreme and extended winter season.  Of course it would be the year that our living situation could be considered glorified camping.  When we last posted, it was snowy, cold, and not much progress was being made.  Until last week, it was STILL SNOWY, COLD, AND NOT MUCH PROGRESS WAS BEING MADE.
IMG_0002

Ugh.

Luckily, we have had a turn in the weather, and thus an upturn in the level of progress around Edge Hill.  Once the roof on the Little House was framed,

IMG_0803

then we needed the expertise of our roofer.  The next step was to put on a layer of roofing boards and top it with a layer of spray foam insulation.  Our craftsman, Colon, had been communicating with the roofers, and we didn’t even realize that progress on the roof had been scheduled.  We came home to find a glorious sight:


IMG_0004

After the foam was installed, we still had to remove that pesky power line that was running through the second story of the addition.

photo

Remember the DIGGING Chad did to create a trench for this step?

IMG_0435

 The weather held, and the line was buried just in time to keep the roofing project on schedule.  It was one of those tasks that I thought might never happen – I thought we might just have a thick, black power line humming through our closet, which might not have been the safest idea.  The house looks much better without it!

photo-1

With that last obstacle removed, and with amazing weather (in reality, I think it was only 50 degrees and overcast, but it was dry and above freezing – it’s all relative), the metal roof was finally put in place.

IMG_0017

IMG_0018

IMG_0020

One of the truck drivers even commented that it was starting to look like a building again.

Once the roof was on, Colon got busy installing our salvaged windows.  First, he framed for the windows and cut holes in the exterior plywood according to our grand design.

IMG_0019

(The two holes on the top are the last traces of the power line’s old route).  Next, Colon created new window frames.  Many of the original frames were either missing or too rotten to be saved.

IMG_0014

One by one, Colon is now installing the windows into their respective holes.  Here you can see the top two windows have been installed – minus the lower pane in the left window:

IMG_0020This is a close up of the new upper right window set in place:

IMG_0013

And here is the view from inside!

IMG_0016

We still need to restore each of these windows with new paint and putty, but just getting them into place is a great feeling.

Today, we got more good news.  The building inspector was on site and he approved the framing!  We’ve heard building inspectors are usually wary of saw mill lumber because it does not come certified, but in our case, the engineer’s plans were more than enough to carry the day.

In addition to the house updates, a lot of our readers said they loved hearing about our chickens, and you’re in luck, because that saga has continued.  One of the truck company employees enlightened us about the chickens’ origins; evidently, they were deported!  One of the truck company’s livestock trucks returned to the farm empty and ready to be cleaned out.  When the driver opened the trailer to spray it down, out marched THREE chickens!  As you have probably surmised, Chad and I never laid eyes on Chicken #3 . . . (cue “The Circle of Life”).

The bad news is that, shortly after the last post, Chicken #2 vanished into thin air, as well.  This caused a noticeable change in Blizzard’s morale, and we were resolved to find him some friends before the depression really set in.  We purchased four hens over the phone, and then realized they would probably suffer the same fate as Chicken #2 and #3 if we didn’t build them a coop (as if we didn’t have enough to do).  Chad immediately seized an opportunity to develop a new Google Sketchup masterpiece.

Two weekends ago, we had a surprise visit from some law school friends and we enlisted the cheap labor for the first half of the construction project.  Thanks, Becky and Mark!

IMG_0023

IMG_0024

photo

IMG_0025We built a floor that slides out so we can clean the coop more easily:

IMG_0005

IMG_0027

(New respect for our roofers – cutting these angles is no easy work!)

IMG_0026

  We ultimately moved the whole structure using the skidloader and placed it around the side of the house near our garden and water spigot.  We had a close call unloading it, but all’s well that ends well:

IMG_0031

We obviously still need to paint it, and we had an – ahem – temporary roof of black vapor barrier on just to get started.  Our girls arrived before our roofers did!  When the roofers came to put the big roof on the Little House, they also put a little roof on our chicken coop (apologies for the goofiness of the following candid):

IMG_0009The coop has two side doors – one for refilling water and one for refilling food.

IMG_0010

The coop also has two perches and eight nesting boxes where the hens lay their eggs (of course all five of them use only one of the eight boxes):

IMG_0021 The nesting boxes are on a slight angle so that a) the hens don’t get too comfortable in there, and b) so the eggs will roll to be back of the boxes for retrieval and avoid being pecked by the hens.  There are also doors on the backs of the nesting boxes so we can snatch the eggs more easily:

IMG_0030

We came home with four black copper French marans (black with red crests), which lay dark brown eggs that are supposedly great for cooking (they taste great to us!).  The chicken man also threw in a mixed breed brown leghorn (pronounced “leggern” if you want to sound like you know what you’re talking about) for free, who is our spunky girl.  She escaped within the first twenty-four hours and Chad had to seal crawl under the screened-in porch to rescue her.  Good thing we found her in time – it turns out the crawl space under the screened-in porch is like the Elephant Graveyard in the Lion King . . . lots of bones down there . . .

Status update: Blizzard has made a full recovery and is loving his harem.

IMG_0022

IMG_0011

Raise the Roof

This winter has been an interesting winter to be without heat.  Like so many on the East Coast, we were caught in the “Polar Vortex” and figured out quickly that our pipes all freeze at 25 degrees or colder.  As a reminder, we are currently living in the Big House while the construction on the Small House continues, and the Big House currently does not have operational central heat.  Slippers, thermal underwear, and space heaters are key investments!  We should buy stock in the electric mattress pad company.  If anyone has any insight as to why our cold and hot taps suddenly switched when the pipes froze, we would be glad to learn about this plumbing miracle.

Not only does the water in our pipes freeze, but so does progress on outdoor construction projects…not surprising, but also not great for our very optimistic timeline.  Back around Thanksgiving, we put in a lumber order for the white pine that would form our roof.  Because our house is, well, atypical, we were not candidates for pre-made roof trusses.  We also wanted our craftsman to use the original wooden peg construction, so we were in need of a custom job.  Due to the long wait list, the freezing temperatures, snow, epic mud caused by the snow melt, and then more snow, the lumber order was two weeks late…and then another two weeks late…and then two more weeks late…well, you get the picture.

You can understand our sheer glee when these two deliveries showed up in our driveway:

IMG_0721
IMG_0692

Our craftsman, Colon, wasted no time in getting started on the project.  Hallelujah.  These gems were the preview of what was to come:

IMG_0705

Just before our big snow day about ten days ago, Colon had enough of these bad boys to form the skeleton of the roof over the original structure.

photo 2

photo 3

Although our little snow storm wasn’t great for progress, the project did look beautiful in 15″ of snow.

IMG_0755

IMG_0756

IMG_0759


These roof trusses then get covered with rows of 6″ roof boards.  We were able to scheme with Colon about the roof boards to make a really exciting change to our planned aesthetic.  Instead of insulating under the roof boards and then dry walling the ceilings of the bedrooms between each beam, leaving the beams exposed but the insulation covered, Colon will be able to insulate on the OUTSIDE of the roof boards (between the roof boards and the sheet metal that will form the exterior of the roof).  That way, we can have a COMPLETELY exposed roofing structure on the inside.  Minus some whitewash or paint, the ceilings of our bedrooms will look like this:

IMG_0760


The change in roof design left us needing more lumber (of course).  Fortunately, at this point, we knew exactly how many beams the project would take, and we had a few more than we needed on hand.  However, we were short roofing boards.  Luckily, we were able to find a local who owned just the right saw and he was able to convert our surplus beams into roofing boards.  The project forged ahead.  What a relief after so many other lumber setbacks in the last few months!

After the Great Thaw, Colon was able to finish nearly all of the trusses and (hopefully) will be able to finish putting on roof boards this week.  Chad was able to climb Colon’s scaffolding for some pretty phenomenal shots that we likely will never have the opportunity to get again.  The burgeoning roof and the winter view are gorgeous.

IMG_0804

IMG_0803

IMG_0799

IMG_0809

IMG_0808

IMG_0807

IMG_0806

IMG_0805

What you’re seeing is the convergence of the roof over the original structure, which runs east and west, meeting the roof over the addition, which runs north and south.

IMG_0794


What you may also have noticed is a poorly placed power line running through the second floor of the addition.  We promise that is NOT part of the final plan.  This is the power line that runs electricity to the main house.  Clearly, this needs to be moved.  The idea was to bury the power line, splitting off one portion to the Big House, one portion to the smokehouse, and one portion to the Little House.  Since we already have an idea of the Big House’s power needs, we are hoping to kill two birds with one stone – or one trench.

Unfortunately, this, too, became a little bit of an ordeal.  Sadly, the first trench was dug in the wrong place and was too shallow.  0-1.  Then, it was either frozen or muddy, making it difficult to re-dig.  0-2.  Finally, with a little more digging (didn’t we say we were DONE WITH DIGGING???), we got a trench in the correct place.  The conduit has been run, and as soon as the electric team can get back out, the line will get buried.  We’d do it ourselves, but electrocution might not be worth saving a couple of extra days.

IMG_0686

IMG_0687

IMG_0435

‘Murica.

In addition to running the conduit, the electric team has already installed our panel box, which is located in our future utility room/pantry.

IMG_0795

IMG_0796

Lastly, we’ve brought new meaning to the phrase, “meanwhile, back on the ranch…”  Just before the snowstorm, I went outside with the dogs and noticed an unusual rustling in our 15-foot boxwood.  After a few moments, out popped a ROOSTER.  Just to be clear, we do not own a rooster, nor have we ever seen one near our house.  We don’t have particularly close neighbors, so it is a little bit of a mystery where the rooster wandered away from.  The next day was the big snow, and we found the poor guy stranded in a snowbank:

IMG_0747

Chad half carried, half herded him into our worse-for-wear screened-in porch.  Currently, we are using the porch to store insulated concrete forms, or ICFs, that will one day form the foundation for our addition on the Big House.  They are adult-sized, styrofoam legos into which you poor concrete, providing both stability and insulation.  As it turns out, they also make a great playground for roosters.

IMG_0751

IMG_0748

IMG_0765

The rooster, or Blizzard as he has become known more fondly, decided to stick around.  Not only has he taken to a diet of corn from the grain bins and “layer” feed we purchased at the store, but after about a week, he enticed a lady friend to immigrate with him.  They are a little shy and don’t like to pose for pictures, but here are the best shots we’ve been able to get:

IMG_0792

IMG_0793

Since they are now a struggling, young couple like ourselves, we decided to upgrade them from the ICF coop to something a little more comfortable.  Today, we cleaned out the porch, threw away a bunch of stuff, and organized the ICF blocks.  We had originally tried to craft a coop for Blizzard out of an old file cabinet that we found on the porch…

IMG_0762

IMG_0768

…and today, we turned it on its side to make it more accommodating for a companion.

IMG_0813

I think this chicken coop is very symbolic of our current living situation.  Not beautiful, but we’re working with what we’ve got.  And, hopefully next week, “what we’ve got” will include a roof on the Little House!  Hurray!


Little House, Big Question

Loyal Blog Readers-  Thanks for your patience!  We’ve had to exercise some patience ourselves as our fears of a winter slow-down have come true.  But nevertheless, we have made SOME progress.  When we last left off, we had gotten the house exterior walls all framed up, and were hoping to plow forward with framing the roof with yellow pine.  Unfortunately, the weather these last couple of months have been difficult for harvesting the timber we need for the roof.  We are currently exploring our options on that front, so, in other news…

In taking apart the last bits of the little house for the framing, we made some interesting discoveries.  If you recall the original layout of the little house, there were two rooms on the first floor, and two rooms on the second.  In the rendering below, the original structure is the two rooms to the north.  Our new kitchen will be on the left, and the living room with the original stairs in the corner is the room to the right.

Downstairs Floor Plan

Those two rooms connect via a doorway to the north of the fireplace in the rending above, shown below:

IMG_0269

We have always assumed that this doorway was original, connecting the two rooms of the downstairs.  However, when we got to demoing, we began seeing ghosts!  Architectural ghosts, that is.  We actually found our first clues from the other doorways in the structure.  By examining the brickwork around a door frame or window, we can clearly see where a door was in the original design of the building.  The bricks that form the door openings are all smooth, and there are distinct notch outs where a brick is missing:

IMG_0448

During demo, we found wooden, brick-shaped blocks wedged into those notches, and then the frames of the doors were nailed into those wooden blocks; nails into brick and mortar tend to fail quickly.  This wood block system was also used on the downstairs baseboard.  You can see the perfectly missing brick voids below in the course just below where the plaster ends (the wooden blocks came out with the baseboard when we removed them for storage and restoration).

DSCN0645

In moving to the other doors and windows in the house, it became clear that the two doors that connected the original brick structure to its 1940s addition (shown in an older photo, below):

IMG_0004

And here is a shot of one of the connecting doorways, sans door frame and 1940s addition:

IMG_0062

And here is where the distinction between original and added-later becomes clear:

IMG_0063

As noted above, the bricks along the top portion of this doorframe are smooth-edged, indicating that they were part of the plan from the start.  The lower half of the doorway has bricks that were clearly broken out.  Thus, it is our theory that there were originally windows on the back walls of the downstairs rooms, and that when the 1940s addition was constructed, those windows were expanded into doors!  Also, the wood used on those later door frames is about 1/2 inch thick, whereas the wood on the original doors is at least 1 inch thick (shown below):

IMG_0257

Now, returning to the door connecting the two original downstairs rooms, the edges of those brick are ALL roughly hacked.

IMG_0285

Thus, our theory is that this interior connecting door was added later.  This theory is also supported by the fact that the little house has two original front doors, which would provide independent access to each downstairs room:

IMG_0122

Also interesting: during our demo, we discovered that the stairs are physically built right into the baseboard of the downstairs living room, and their upstairs railing and pine paneling attach directly to the upstairs floor joists, above where the lath and plaster ceiling originally hung, having never been painted!

DSCN0649

Thus, we have a high degree of confidence that the stairs are also original to the structure.  So, here is the big mystery, what was the little house originally used for?!?

Our current theory is that it was a combination of a laundry/kitchen and sleeping/living quarters.  This seems to fit with the general description of laundries as being close to the main house.  This need for proximity might also explain why this structure, partially used for housing workers, is made out of brick rather than timber.  It seems that the builders of Edge Hill, having already gone to the luxury of building a brick smoke house, may have similarly spared no expense on this structure that needed to be close to the main house.

What do you think?

In closing, I want to thank all of our readers who have followed our progress!  There is so much more to come in 2014 and beyond, and in times when it seems that the going is slow, I look at these few pictures:

IMG_4407

Chad & Rachel DA-108

IMG_0634

IMG_0637

We have already come so far!

up Up UP!

At the end of our last post we had gotten the first floor joists installed in the addition and and some of the exterior walls framed up.   IMG_0093

Over the next couple of weekends the framing crew continued hard at work, with rather dramatic results.  During this phase it was so satisfying to see all of our hard planning realized in a physical structure!

The weekend following our last post we continued pushing forward, expanding into the original structure and up!  First, we added the last wall on the first floor addition, which abuts the original structure to carry the floor joists of the second story of the addition.  IMG_0088

Once all four walls were erected, we then had to make sure the structure was plumb and square.  Luckily one of our crew has a bit of experience, and he strung up a line along the rear of the wall with this temporary two by four block.  IMG_0090We then lined up another two by four using the string as a guide, and began adding the temporary braces, keeping everything square.

IMG_0099

This part involved a lot of hammering into position.

IMG_0100

IMG_0104

Finally we were able to begin adding our second story floor joists!

IMG_0106

IMG_0108]

IMG_0115

The next step was to put down the sub flooring of the second story.  Luckily, a few of the farm tools come in quite handy during the construction phase:

IMG_0110

The flooring was installed using nails and glue to make sure we got a good tight fit.

IMG_0120

As we neared completion on the sub flooring, we left Dan a “Go-For” hole so he could get the tools up to the second story:

IMG_0126The area around Dan is where our spiral staircase will eventually be installed.  After we got the subfloor down for the second story, we went back to the first story and installed plywood sheeting on the exterior walls. We then moved into the house, installing the first floor joists on the new poured concrete and cement block foundation that the masons had previously installed.  In the photos below, you can see the framing around the fireplace in what will be our future kitchen:

IMG_0134

IMG_0138
After we installed the floor joists in the main house we went back with vapor barrier, and installed the sheeting underneath the crawl space, stapling everything to the framing:

IMG_0140

IMG_0143

Once the vapor barrier was down, we debated whether we wanted to frame any interior walls, but ultimately decided to so we can conveniently run wiring and utilities in the few necessary areas. First, we had to install a portion of sub flooring to rest the framed walls upon.  We did not install wall to wall sub flooring in the original first floor rooms yet, we still need to run HVAC, plumbing and electric, as we won’t have crawl access to that area once the floors are complete.

IMG_0165

Also, you can see how the brick walls have been roughly parged for strength.  The exposed walls will get a finish coat of the parging cement, and will be white washed.

IMG_0175

After the interior framing was complete, the second story floor joists were installed inside the main structure:

IMG_0149

In the picture below, you can just make out the course of cinder block peaking out from behind the framed wall.  During the planning phase we decided to steal five inches of ceiling high from the second story and give ourselves some extra head room on the first floor.  With the perspective we now have with the framing, we are so happy we took this extra step!  We are planning exposed vaulted ceilings in the second story, so the head room we stole won’t be missed upstairs.

IMG_0151

IMG_0147

With the floor joists in, we then installed the sub flooring in the second story of the main house.

IMG_0153

IMG_0163

IMG_0161

IMG_0166

IMG_0171Next, we framed up the second story exterior walls and faced them with plywood.  Here you can see us making sure the walls are square as they went up: IMG_0129

IMG_0131

And last, but certainly not least, we framed the interior walls.  Well, two walls, a powder room, and a utility room.  Everything else is open!

Our upstairs bathroom will go between these two walls, the extra-wide opening is for the installation of pocket doors.

IMG_0169

Utility room on the left, downstairs half bath on the right:

IMG_0173

ALL FRAMED UP!

Our next post will focus on some of the logistical considerations we have been juggling, and some interesting architectural finds.


The Great Frame-Up

As you know, our forward progress this summer was . . . a little slow, to say the least.  Between studying for the bar and the scheduling delays of some of our professionals, things were moving at a snail’s pace.  Our optimism took a minor hit, as well – we quickly realized that our goal of moving into the Little House by the time the weather got chilly had been a little ambitious.  In the last week or two, however, the pace has really picked up and we are feeling really motivated once again!

After the footers were framed in, we had a few things we needed to get done:

1) Get the concrete footers poured

2) Pour gravel

3) Build a radon vent (Surprise!  We didn’t know we need this until the building inspector came out and failed our site)

4) Lay cinder block on top of the footers

5) Install foundation vents

6) Add a vapor barrier over the gravel, pour the crawl space floor

Here’s what the poured footers looked like:

IMG_0057

Once the footers were poured, we got our DIY hats back on.  Chad’s brother helped get the gravel into the hole, and we used gravel rakes to spread it evenly around the foundation space.

IMG_0059

IMG_0060

The concrete footers then got topped off with a wall of cinder block.

IMG_0026

Please note the very fancy RED cinder block – bought for pennies on the dollar from Dollar General after it purchased too many signature red blocks for building a new location down the road.  Score!  Four courses of cinder block sit on top of the footers to make up the wall:

IMG_0061And voila, with a little help from our masons, we had a wall!

IMG_0073

IMG_0072

We also built a radon vent – this is nestled into the ground when the gravel is put in, and helps flush the radon out without poisoning the house.  The radon system wasn’t something we were warned about during our initial building permit approval; however, when we had our foundation walls inspected, the inspector kindly noted our absence of radon vent.  Of course, this head’s up came 24 hours before the concrete foundation was scheduled to be poured . . . and the vent needs to be installed BEFORE the concrete.  Luckily, it turns out this portion of the radon vent is just PVC pipe, so we used the same bonding agent we had used for the smokehouse conduit.  And yes, I am wielding a sledge hammer.

IMG_0076

IMG_0077

After hearing “radon vent” and “we’re going to do this ourselves,” I was a little skeptical, but after we were done, I was almost underwhelmed with how easy it was.  Wham, bam, two PVC pipes, and thank you, ma’am.  As you can see, the gravel also got covered with vapor barrier as the final step.

One of the last steps before framing was to buy and “install” foundation vents.  I say “install” because after opening the box, there’s not much to it.  The mason’s left holes in the cinder block wall periodically, and we just slid the vents into the hole.  Chad splurged on these and spent an extra $10/vent to get the temperature sensing auto open and close models.  No need to remember twice a year openings and closings!  You can see one of the vents in the bottom left-hand corner of the picture, below.

IMG_0075

Finally, after all these steps were complete, the concrete company came and poured our crawl space floor!  It’s a little hard to see in the picture below, but we swear that’s concrete.

IMG_0038

After all this was done, we called in the big guns for THE day – framing, part 1.  It is hard to explain our joy when we woke up around 6 a.m. last Saturday to see this next to our house:

IMG_0028

We had a crew of 4-6 through the day helping us get the job done.  We figured everyone works a little better with a full stomach, so we started with a breakfast spread:

IMG_0029

And then we got to work.  First, a layer of vapor barrier went on top of the cinder block wall, topped with pressure treated wood (“plate”).  The masons filled the cinder blocks with concrete and left a bolt sticking out periodically; this allowed us to tie the plate into the wall.  Here’s Chad with the roll of blue vapor barrier:

IMG_0032

IMG_0033

IMG_0030

Here’s an aerial shot of the bolt that ties into the cinder block:

IMG_0034

Once the plate was bolted in around the entire wall, then we could set our floor joists at regular intervals.

IMG_0042

You can see in the above picture that they’ve left a square hole; this will be a trap door in our utility closet that will allow access to the crawl space under the house.  Here’s a shot from in the crawl space up at the newly laid floor joists:

IMG_0039

The guys covered the floor joists with glue and then laid down sheets of sub-floor.

IMG_0043

Just in time for us to set up lunch in our brand-new addition (even if it’s a little exposed to the elements right now):

IMG_0048

Chad literally danced a jig on the new sub-floor.  Finally, the crew framed the walls.  They constructed them on the floor and once they were finished they lifted them up into place – like a small-scale barn raising.

 IMG_0044

Then, up, up, and away!

IMG_0050

IMG_0047

And, a panoramic:

IMG_0052

Hooray!  We even walked off the rooms to get a feel for how big the spaces would be.  Here’s the 3D model we posted a couple of posts ago:

Downstairs Floor Plan

The white block at the top is the front porch, so the large rectangular space across the bottom is the new addition.  It’s got a mud room on the right, a powder room, and a living room on the left.  The utility closet with the trap door is the small, square room right in the middle of the addition.  It’s a little breezy now, but some day (hopefully soon), this will be quite a comfortable space.

Sadly, our building inspector had more bad news than just the radon vent.  He also said that the dirt floors inside the existing brick structure (the front rooms on the 3D model, above) need to be 18″ below the floor joists.  We had originally thought it needed to be 18″ below the FLOOR – as you can tell from the process described above, the floor height and the bottom of the floor joists are a good 14″-16″ difference.  And you may have picked up by now that shoveling dirt ranks as one of my least favorite chores in the whole world.  It is really, really not fun.  Luckily, we were able to help recruit Chad’s brother, Daniel, to lend his strong muscles to the cause.

This is my “oh my gosh, we’re shoveling again” picture.  This is before the shoveling began.

IMG_0041

Look, Daniel found a groundhog hole!  How gross is that??

IMG_0045

And inside the hole: a beautiful crafted nest of shredded paper.  Ugh.

IMG_0046

And, the beautiful, beautiful final product.  In most places, we shoveled down the full 14″-18″.

IMG_0053

You can see we had to dig so far down that we hit the bottom of of the hearth.  We’re going to have to ask the masons about how we make sure that’s not a structural problem . . .

IMG_0054

This is an example of what one of the next steps will be: the same thing as outside.  We will lay vapor barrier and plate, then floor joists, and then sub-floor.

IMG_0055We’ve always been impressed by the good work our masons do – you can see that they laid the cinder block footers perfectly.  It might be the first time this old house has had level floors!

IMG_0056

At the end of the day we were exhausted, but so excited.  If the rain ever ends, we will frame the second floor of the addition and lay the floor joists inside the original structure.  We’re moving in the right direction!

Strong Foundations

As you saw in our last post, we were prepping for our foundations to be poured in the renovation of the Little House.  We also had some concrete work scheduled for the smoke house, which will bring us even closer to putting the finishing touches on our first official renovation project at Edge Hill.  Hard to believe!

If you recall, when we moved in the smoke house was the structure that was in greatest need of some immediate TLC.   Over the last year, the structure has been gutted, repaired, repointed, excavated, re-timbered, roofed, and the first layer of interior parging has been applied.  To get the building ready for its lifetime use as our workroom/tool shed/staging area for other rehab projects (think windows!), we wanted to upgrade from a dirt to a concrete floor.

We had already excavated the floor in the smoke house over twelve inches to make room for the concrete, and the next step was prepping the space for the future utilities (electric and water).  Rachel and I got crafty, and went to Lowe’s to pick up some conduit and pipe glue:

IMG_0014

We excavated even further down, fully under the brick foundation of the structure, in order to run our conduit pipes from the inside to the outside.  Then we glued everything – straight pieces of conduit and conduit elbow joints – together:

IMG_0013

Next, we put down a sheet of vapor barrier to protect the concrete, and then topped that with gravel.

IMG_0018

Enter the big guns!  Dad showed up with a bucket loader that could JUST fit through the opening of the smoke house door.  He brought the gravel into the smoke house this way, saving our backs from hours of wheelbarrow work.  Look at how close he was on the clearance – just about two inches – AFTER we took the door frames out!

IMG_0015

IMG_0017

IMG_0016

We carefully covered the vapor barrier with about four inches of stone to form a nice, solid base for the concrete, and then the guys from the concrete company came and leveled and prepped the space with a rebar grid:

IMG_0019

About a week after everything was prepped, we awoke one morning to a glorious sight backing down our driveway!

20130912-144839.jpg

20130912-144812.jpg

They made short work of pouring the floor:

IMG_0021

*Better pictures of the concrete floor will be added ASAP!

…and in almost no time they were on to the next project: the foundations for the Little House’s addition!  They set up the forms for the new footers:

IMG_0022

IMG_0023   IMG_0024

Now that the forms are in, we are waiting on the county building inspector to come give the stamp of approval, and then the concrete guys will be back to actually pour the footers.   Once the concrete has dried, the whole project gets turned back over to the masons, who will lay the masonry for the crawl space.  Our cinder blocks arrived on site last week and are poised and ready!

IMG_0026

Can’t wait for the Little House to officially exit the demolition stage and enter the this-is-finally-starting-to-look-better stage!

Forward Progress

Loyal Readers-

As many of you surely have observed, this summer has been a bit slow on the updates as Rachel prepares for the bar exam and we get organized for our new careers . . . as General Contractors!   Just a few weeks in, and we can see why these guys get paid the big bucks to coordinate construction projects.  In light of our relative ignorance of the construction process, things have been moving slow, but last week, we made progress by leaps and bounds.  Behold:

DSCN0659

Our building permit for the Little House!!

After laboring over the volume of information required a few weeks ago, we were surprised at how fast the actual permit was issued.  And so, we’re off!

The first phase of the rehabilitation of the Little House was to prepare new footers inside the original structure, and dig the foundation for the addition.  Here is the general plan:

Slave House Right

You can see the existing structure in the foreground, with the addition coming off of the rear.  In the picture below, the addition is covered by the roofline that comes perpendicular from the existing structure:

front

The layout of the downstairs preserves the kitchen (top left) and living room (top right) as they were in the existing Little House.  In the picture below the large white rectangle is actually the roof of the porch.  In the addition to the Little House,   there is an office (back left),  and mud room/powder room/utility closet (back right).


Downstairs Floor Plan

Upstairs, the two bedrooms of the original structure remain unchanged, with the very narrow “existing” staircase to the far right (more on this below).  The upstairs portion of the addition includes a central jack-and-jill bathroom flanked on either side by dressing rooms, which address the complete lack of closets in the original house.  We’re also adding back a walk out deck, as the left bedroom currently has a door to nowhere.  We are pretty sure that there would have been a deck structure in the past, but we can find no evidence of the old dimensions and we know there has been no exterior structure on that part of the building since at least the 1940s.

Upstairs Floor Plan

Now that you have context for our dream Little House, here is the dirty truth.  Digging foundations is for the dogs.  What awful, terrible work to embark on in early July.  Oh well, at least it is good exercise!  For the existing structure, the original floor beams were 4×16 timbers that were actually installed with the brick walls, see our last post, in particular, this picture. in the image below, you can see that we have removed those beams and have dug a foundation trench 24 inches below the bottom of those beams.  Our new floor support structure will be installed on the new foundations, and will not rely on the brick structure for support at all.

DSCN0645

DSCN0647

DSCN0651

During this final demo project, we had to remove the floor supports, but also needed to leave the original stairs in tact so they can be repaired.  If we were to demo them completely, we would likely have to install a new set of stairs to code, which would destroy the historic integrity of this charming-yet-narrow, turning staircase.  Lucky for us, it seems that the stairs were entirely floating on their upper supports, and we were able to just remove the floors from under them!

DSCN0649

Here you can see the stairs curving upward on the right side of the door that leads into the little house’s living room.  You can also see just how deep our brick foundations go.  In that image, the door is about three feet above the dirt floor of the crawl space of the living room of the Little House.  Another cool feature of the little house are these wrought-iron hinges, that still supported the door into the little house!  The hinge has a large metal spike that was simply pounded into the door frame, and the bottom decorative leaf has one nail.

DSCN0652

DSCN0655

Below, you can see the thickness of the original door frame.  Also, to the immediate left of the doorframe, you can see a wooden block in the space where an interior brick should be.  As we demoed the Little House, we realized that in order to attach anything to the walls (in this case, baseboard), the builders left voids in the course of brick and then mortised in wood blocks.  Once the blocks were installed, they could then nail whatever they needed into the wood backing block, rather than trying to anchor anything into the brick.

DSCN0656

Outside, we turned to the pros, and had a large foundation dug for the addition.  It is hard to tell from these pictures, but we went down more than four feet!

DSCN0658

DSCN0657

The next step is to form the foundations and have them poured in concrete, then we will back fill the area with dirt and pour a concrete pad for the floor of our crawl space.  Once the concrete work is complete, the masons will install a few courses of cinder block to bring our walls up to grade, and we will frame our structure from there.  Progress!

Speaking of progress, the work on the main house right now is a bit in the conceptual/intangible phase, as we have been working with our (highly recommended!) draftsman, Gary, of Drafting Services in Harrisonburg, to bring our vision of the addition to the main house to life.  Below, a teaser:

DSCN0660

Bonus points to whoever can guess our inspiration for the addition structure in the comments!

Bare Bones

Work continues on the renovation of the Little House, and although to the outsider it might not appear that much progress has been made (“have Chad and Rachel actually made things worse?  Was that even possible?  Looks like it was…”), we promise that, to us, things are looking amazing.  Please keep in mind that it’s all relative, but we’re pretty excited with the progress that’s been made in the last month.

To bring everyone back up to speed, see the picture of the entire property, below:

IMG_1519

The main house is the farthest on the right.  It has a 1970s addition coming off the left/south side, which attaches the main house to the summer kitchen.  The building in the middle of the picture with the gray roof is the smokehouse, and the building on the far right is the Little House – its nakedness in the roof area should make it especially recognizable.

Our last post left off with a house that had no roof and no second-story floors.  Below, we’re standing between the first and second floors.  No big deal.   Please also note the original nails protruding from the beams – a.k.a., the Tetanus Delivery Team.

IMG_1623

IMG_1625

DSCN0553

DSCN0558

DSCN0595

DSCN0594

For a complete gut job, we needed to remove the floors on the first floor, as well, including the floor boards, the deteriorating floor joists, and all of the junk that had fallen from the second floor, above.  We thought we were so clever when we just pushed that stuff down below…until we had to shovel it all out by hand, later…[insert forehead slap, here].

IMG_1541

But before we talk any more about the house, first, I would like everyone to note an important life event: I have officially overtaken Chad for the most degrees in the household.  With all of those letters after my name, they were also able to brainwash me into wearing a graduation hat that is even more ridiculous than normal (a “tam” rather than your standard mortar board – it is questionable whether anyone with curly hair should be allowed to wear these things) – and I LOVED it!  Embrace the nerd.  I was also very honored that Chad’s dad, who is also an alum of the University of Richmond School of Law, was able to present me with my diploma.

IMG_1378

IMG_00028

Once I crossed that stage, my first full time job as an “esquire” became preparing for the bar examination, while also moonlighting as a house flipper.  You’ve got to take study breaks, right?

DSCN0566

As we began pulling the floor boards up with crow bars, we realized that there were two generations of flooring.  The most recent floor consisted of narrow boards running north and south, which much wider boards running east and west underneath.

DSCN0563

In one downstairs room, the two layers of floor were separated by newspaper dating from the early 1940s.  The headlines concerned the war updates from Europe, and there were advertisements for Sealtest milk,  sweat-resistant women’s stockings, and the critically acclaimed “Pabst Blue Ribbon.”  Greatness never dies!

Once all of the floorboards were removed, we found floor joists in a wide array of conditions.  Those exposed to weather were obviously suffering from rot, but some that had remained protected were in near-perfect condition.

DSCN0569

The joists are actually notched into the brick wall; the masons built up to the level of the joists, omitted a brick to leave room for the end of a joist to rest, and then continued to build the wall around and above the joist.

DSCN0574

We removed all of the flooring and joists, loaded them on pallets, and have stashed them away for future use.

DSCN0592

Anyone with suggestions on neat ways to repurpose these, let us know!

While the newer flooring went all the way to the walls in the room with the fireplace, we made a fun discovery when we pulled up that top layer.  The older floor boards stopped short just before the fireplace, where we assume there may have been an over-sized hearth.  Instead of flooring, there was a jumbled pile of broken limestone (possibly pieces of the hearth?) and they appeared to be resting on a stacked-brick foundation (no mortar).  Brick Jackpot!!!

This picture is taken head-on, showing the “course” of brick from eye-level with the hearth, in the background.

DSCN0624

We removed the brick by hand and are hoping to use it as the hearth for the restored fireplace.  And thanks again to Gina for all her help, to whom we owe a lifetime of favors and manual labor!

DSCN0626

DSCN0629

There was also a lovely groundhog den, complete with a straw-lined nest, tucked behind the brick in one corner.  We’ve spared you the pictures of this rodent mansion.

Finally, credit to the professionals who came in and put the most exciting touches on the last month of work.  First, a COMPLETELY RESTORED FIREPLACE in the small house!  The brick masons found the fireplace like this:

IMG_1358

The original swing arm is still in there, but the lintel spanning the top of the fire box was frighteningly bowed and the bricks around the bottom had crumbled away.  Also, it appeared that at some point in time, the fire box was used as a waste receptacle.  There was work to be done.

And voila:

DSCN0623

AMAZING.

To complete this feat, the masons carefully removed the swing arm and any deteriorated brick in the fire box.  They then replaced the removed brick with fire brick (the white bricks, shown above, which are designed to withstand the high temperatures of our future roaring fires).  Next, they removed all of the brick above the lintel, which was essential, due to the deterioration and obvious stress.  To the masons’ surprise, with the weight of the brick removed, the cast iron lintel sprang back into its original straight line.  The masons were also able to install an abnormally large five-foot damper and reinstalled the swing arm.  Finally, they installed cast iron supports into the masonry above the fire box, which will hold our future mantel.

Here’s the team of masons installing the damper under the supervision of Chad’s dad:

DSCN0606

The damper (this shot is taken from underneath, looking up into the chimney at the damper):

DSCN0621

The finished product, minus floorboards and joists.  Notice the supports for the mantel just above the fire box to the right and left:

DSCN0641

Original brick, laid in an alternating pattern, contrasted with the new fire brick:

DSCN0542

Look, it works!

DSCN0540

Holy. Cow.  I’m not sure there are many other 20-somethings that get excited about swing arms and lintels, but we definitely are!

Last, the smokehouse has had an update, too.  The masons have begun parging the walls, a process which entails layering the exposed (and in our case, deteriorating) brick with layers of concrete.  This was common in the 17th and 18th century and will protect the brick from the elements and further deterioration.  The scoring on the cement, seen below, is used on the first layer so that subsequent layers will attach more securely when applied.

DSCN0608

DSCN0619

DSCN0610

DSCN0609

Ultimately, the walls will be whitewashed, as would have been traditional.

Things are moving right along!  Next, we will tackle dirt removal – getting all of the silty dirt out from under the joists so that trenches can be dug for modern footers.  Check your gym pass at the door folks, this will be true heavy lifting!

Demolition Continued

It has been a month of life events (and thus, regrettably, no posts)!   After 10 days on the market and some hectic negotiations (three offers!), our house in Richmond was under contract, and the permanent transition to country life smacked Rachel in the face.  We got a great offer on the house, but the offer came with a May 1 closing date, conveniently two days into her final examination period, and nine days before graduation.  No biggie.  All she had to do was pack our worldly possessions in the spare time that remained after final exam studies, finishing work on the journal, and enjoying the company of the great friends she has made at law school these past three years.  She’s a trooper!  Two weeks ago Dad and I pulled up with a farm trailer and loaded 75% of our furniture, leaving our house in a sad state of disarray and chaos.  Do we still have Pyrex dishes for baking dinner?  Nope, they are packed.  How about microwave-safe dishware to heat leftovers?  They are in the box with the Pyrex.  Luckily a couple of bottles of wine were around when we needed them.

With graduation looming, the chore list has really taken a backseat to other important tasks…like actually graduating.  And then, Rachel’s bar review books arrived.  What. A. Month.

Despite all of the happenings, we have managed to find five spare hours to forge ahead on the demolition of the Slave/Little House.  For those of you coming up to speed, this building will hopefully be our temporary home come fall, and will shelter us as we embark on our extensive renovation/addition project at Edge Hill.  After ripping off the roof last month,

IMG_0027

we turned to the next step in the Little House’s demolition process:  gutting the interior space.  We started with:

IMG_0006


IMG_0010(notice the holes in the floor of this second-story room)


IMG_0012

So I started by ripping down the lathe and plaster ceiling on the first floor (Steve and Gina had been responsible for doing this on the second floor).  I have new respect for them, as I soon learned that this process was basically a dirt shower, and understood why Steve unexpectedly sent us some advanced eyewear last week(!)

IMG_1543

No, we are not headed to AVATAR in 3D.  These goggles have foam seals that press against your face and seal out almost all dust.  Designed for professional spray paint applications, they were a godsend for this job.  Well equipped, we commenced.  Notice the ceiling before:

IMG_1358

and after:

IMG_1541

After the first floor plaster ceiling was down, we went back upstairs.   A lot of debris had accumulated on the second story floor after we ripped off the roof and while the masons worked on the brick, and this had to be removed before we could pull up the flooring.  We shoveled it down through the conveniently pre-existing holes in floor (see the light shining through the ceiling in the picture above? ).

IMG_1544

Once the debris was removed, we moved to the floor boards.  Here, Rachel is inspecting our method of attack (I bet she will love this one).

IMG_1546

After a number of discussions, we settled on our approach of standing on the floor and ripping it out backwards.  This was no small consideration, as our other option was to try to stand on the ground floor and hammer the floorboard up from underneath.  The advantage of that option was standing on terra firma.  The disadvantage was that we both lacked the upper body strength of “Ahhhhnold”, and we were basically standing underneath the falling floor beams once they were loosed.  Ironically, safety drove us back upstairs, where our disadvantage was that most of the underlying support was in a state of decomposition.  We tread carefully (Christine, stop reading here, OSHA ain’t got nothing on us). We prised up each floorboard while trying not to vault ourselves out into the void, and surprisingly made pretty quick progress!

IMG_1548
IMG_1556


Now we just have to do it all over again for the other upstairs room, and then shovel all of the debris out of the building.  What’s everyone doing next weekend?  :)  Yeah right.  Next weekend is Foxfield Races.  We have our priorities, and as the former owners of Edge Hill dabbled in horse breeding, we like to think they would approve.


It Gets Worse Before It Gets Better

Until now, the most fun we have had with demolition was in the upstairs, mint-and-black, goose-border, mold-covered bathroom.  We decided it was time to amp it up a bit and undertake demo on a larger scale.  If the bathroom was bumper cars, this project was a monster truck rally.

You may remember that Edge Hill has a few dependencies – we’ve spent a lot of time restoring the smoke house, but the property also has a summer kitchen and a smaller house which we have nicknamed the “slave quarters.”  It should be noted that this is a point of contention: I am actually highly skeptical that this building was a dwelling place for the farm’s slaves; it sits within a stone’s throw of the main house and has a second story, both of which are highly unusual for Virginia plantations.  Chad, however, disagrees.  He notes that it is also highly unusual (and ostentatious) for smoke houses to be built of brick; our smoke house and “slave quarters” are both built of brick, and thus the other extravagances might be explained by the James Madison Hite Beale’s overall flare for the expensive.  Regardless, John Wayland noted that Edge Hill had as many as 12 slaves, so we are still hoping to one day find an answer to our dilemma!

The original brick house has two rooms on the first floor, one to the left and one to the right, and two identical rooms on a second story.  This is where Holmes Fowle’s daughter, Mary, grew up!

IMG_0001

A one-story addition was added on the back at a later date – based on some newspaper we found backing the linoleum, we know it is at least as old as the 1940s, but might even be older than that (the addition is where the electric and plumbing entered the house).

IMG_0002

By the time Chad and I arrived on the scene, the inside of the slave quarters was in a sad state of disrepair.

The downstairs room on the right:

IMG_0004


This was originally the kitchen, and although the floor and ceiling are rotted, the fireplace still has its original working swing arm!

IMG_4677

IMG_4676

The upstairs room on the right (above the kitchen):

IMG_0010

IMG_4698

The downstairs room on the left:


IMG_0006

The upstairs room on the left:

IMG_0012

IMG_4693

And the addition:

IMG_4687

IMG_4683

As you can see, there is a lot of work to be done.

Our first job was to remove the addition.  We had the electricity turned off:

IMG_0001

Very, ahem, professional…

IMG_0003

and then called in the Grave Digger – well, that is, Paul and the telehandler!  With the fork attachments, Paul was able to simply pop the addition off the back of the house.  If only it was all that easy…

IMG_0004

IMG_0005 IMG_0006

IMG_0007

Afterwards, it looked like the aftermath of a tornado, but all we had to do was load the pieces into a dump truck and wave goodbye.

IMG_0008

IMG_0009

We saved the hard part for Round 2.  Time for us to call on Steve and Gina again!  Isn’t this what all American families do in their spare time – shovel, scrub, and wreck houses that aren’t their own?  Don’t know what we would do without them!  We split into two teams: Chad and I tackled the roof on one half of the house, while Steve and Gina worked from the inside to tear down the ceilings in the second-story room on the other side of the house.

Luckily, Chad and his brother, Gio, had bravely removed the metal portion of the roof a few months ago:

image

image

And yes, they rode up to the roof in the bucket of a telehandler.  So, up we went again:

IMG_0007

While I am not typically afraid of heights, being raised up two stories on the bucket of a telehandler, balancing on the edge while watching Chad scamper up on potentially rotten roofing boards, and hefting 14′ beams over the edge of the bucket and past the roof of the porch without heaving myself over the edge with it – well, this raised my adrenal levels a little higher than the average weekend chores.

IMG_0054

IMG_0018

Chad worked with a crowbar and a saw to pry off each roof board, one by one.  He had to be very, very careful about where he put his weight so that he didn’t end up going through the roof.

IMG_0011

Eventually, it looked more like this:

IMG_0010

And even these pieces came down at the end, but were stacked and saved for later use:

IMG_0029

Possibly to be used as aesthetic exposed beams in the bedrooms of the renovated slave quarters?

Meanwhile, Steve and Gina pulled down lathe and timbers from underneath.  It started like this:

IMG_0013

And with some crowbars, safety goggles, and elbow grease, it finished like this:

IMG_0008

IMG_0020

With a lot of this in between:

IMG_0012

Luckily, Steve only fell through the floor once or twice, with no physical injury :)

And finally, it looked like this:

IMG_0027

IMG_0030

Sometimes it has to get worse before it gets better!

In Our Wildest Dreams

We mentioned in our last post that we had been lucky enough to meet one of Edge Hill’s former residents – talk about an unbelievable opportunity!  A few posts ago, our blog received comments from Cindy and Johnny, whose mother, Mary, had grown up at Edge Hill.  Fate certainly wanted us to meet Mary.  It turns out that Mary now lives a few hours east of Quicksburg, and she had not been to the property in a number of years.  When the Powerball Lotto hit $587 million, Mary’s kids sweetly offered to buy back the old farm in the event that their ticket was the big winner.  Not long after, Mary awoke in the night having dreamt of her beloved Edge Hill.  Mary immediately marched to her laptop (which had only been used a handful of times), logged onto the internet (which also had only been used a handful of times), and Googled “Edge Hill Quicksburg.”  Low and behold, our blog popped up as a search result.  Despite the late hour, Mary immediately contacted her children.  When Chad and I received their comments, we could hardly believe our eyes.  We had often thought that one day we would try to track down the descendants of the home’s prior owners, but we had even speculated that our letters would likely go unreturned.  So, to have the opportunity to speak with someone who had not only lived in the house but also whose memory is impeccable is, well, beyond our wildest dreams.

We were able to organize a meeting with Mary and her family within a few weeks of receiving their comments; Mary graciously invited us to her home and we had the pleasure of meeting her children, their spouses, and her grandchildren.  Edge Hill has a special place in their memories and their family history, and Chad and I were thrilled to hear hours of amazing stories about the house.  Along with the wonderful memories, Mary was kind enough to show us dozens of photos, some of which we captured with our iPhones.  A huge thanks to Mary for sharing the images, and apologies for shaky hands and poor cropping!

Mary’s father, Holmes Fowle, was born at Edge Hill in the early 1900s.  His mother was a Moore (we’ve mentioned Samuel Moore as an owner in a prior post), so Edge Hill was truly the family’s homeplace.  This is a portrait of Samuel Moore that Mary’s family still has – what a handsome devil!

DSC00356

And his wife, Amanda, whose portrait has spooked little kids for generations (although apparently she was a very kind woman):

IMG_1412

 Here is Little Holmes (we heard he was not too fond of this picture because of the “dress”):

IMG_1274

And here is the grown and dashing Holmes, in front of the five-stall horse barn that used to be on the property:

IMG_0011

And here is Edge Hill under the Fowles’ care:

IMG_0007

The little boxwood in the lower lefthand corner, along with its counterpart, is now approximately 12 feet tall!

IMG_4412

The old photo of the house also has two other things of note when compared to the more recent photo, above.

First, the old shot shows the beautiful shutters that adorned the house; although they are not on the house now, they were all diligently removed and stored to await a little TLC to the hardware.  Chad and I just took inventory this weekend and are hoping to restore them to their original glory.

Second, you can see that the current addition (in the immediately preceding picture, the addition stretches off the right side of the house) was predated by an open-air colonnade that connected the main house to to free-standing summer kitchen.  The 1970s addition sits on the same footprint and currently houses the trucking company’s office.

Here are a few other photos and items that Mary graciously shared with us.  It is is so fun to get a feel for what the house has been like through the years!

A beautiful silver service

IMG_1273

A vanity that was originally in the bedroom we will make the master; Mary said her father purchased the bedroom suite from a hotel in Washington, D.C.

IMG_1400

The beautiful runner we knew had once adorned the grand staircase (predating the one we pulled out early last summer).  Mary said her mother, Bootsie (seen here, and apologies if her name is misspelled!), took particular care to make sure the brass guards were polished regularly.

IMG_1404

Here is Bootsie next to the smokehouse; the ash house is the other brick structure over Bootsie’s shoulder.  We think the door to the ash house is what we were looking for when we dug through the pile of dirt behind the smoke house to salvage brick.

IMG_1406

Here are Bootsie and Little Mary on the steps of the “little house,” or what we’ve nicknamed the slave quarters.

IMG_1408

Finally a few oldies-but-goodies:

First, an image of the back entrance of Edge Hill in the Downton Abbey era.  Look at those amazing outfits!  This is now where we pull our cars up.

IMG_1407

This is a shot of one of Holmes’ pheasant hunts on the property.  Mary said he eventually stopped inviting his friends from D.C. to hunt at Edge Hill because they were careless about overhunting!

IMG_1410

We are looking forward to seeing Mary and her family again soon – hopefully, when the weather is warmer, they will be able to come for a visit to see the work-in-progress and give us the historic tour of Edge Hill.  We are so thrilled to share this experience with them and look forward to a long friendship!

Smokehouse Phoenix

Hey everyone! Can you believe it is February? It seems like the holidays flew by, and in the midst of merry-making and cold weather, DIY progress slowed a bit around Edge Hill. Professionals, however, come for paychecks and brave the cold. There have been a lot of jobs around the farm that we have tackled willingly, but Rachel and I draw a hard-and-fast line at masonry; that is a job for the true professionals.

When Rachel and I were looking at houses in Richmond three years ago, we were sold on our little two-bedroom in Stratford Hills for a great number of reasons, one of the best being low maintenance!

IMG_0191

We’re going to miss this place! The Richmond home is solid brick construction, and we knew that meant no painting, reduced insect issues, etc. Edge Hill has taught us, however, that even brickwork needs lovin’ too. And when it does need work, it translates to some major TLC. You might remember that our brick smoke house was in dire straights when we arrived on the scene:

Chad & Rachel DA-108

IMG_4407

IMG_0738

(this is the view along the top of the back wall; look at how the vegetation turned the timbers into a nice foothold…and eventually dirt!)

IMG_0457


IMG_0710

You’ll also remember that, at the end of the summer, we got some help tearing down the roof, removing the rotten rafters, and clearing out the junk that was inside the smoke house.

IMG_0678

IMG_0709

IMG_0706

IMG_0679

Even though we had cleared the place out, the smokehouse was still listing at an uncomfortable angle…think colonial America’s version of the Leaning Tower of Pisa. Time to call in the professionals: Chuck and his team of brick masons prevented the structure from falling down before our eyes.

The masons went through a “repointing” process – they removed the old mortar and replaced it (this 2.5 minute video is very similar to the process Chuck used). They also used the pallets of brick we salvaged from the brick mound early in the summer . The masons worked on our property primarily on the weekends, which meant we got to observe the process!

IMG_1124

(this is actually the summer kitchen, but you get the idea)

Our first and main concern was the corner of the smokehouse, which was mysteriously missing a sizable chunk right at car-bumper height, and the accompanying decayed wall had been haphazardly repaired with cement slathered into the brick voids.

img_0457-e1359820818746

Our masons agreed this was the first priority. The guys got right on it:

IMG_0766

We are using Type S mortar and sand so the color is very close to the original mortar color. The guys started by routing out the joints:

IMG_0763

And then proceeded to rebuild!

IMG_0787

IMG_0799

While there is some discoloration, fear not! There is a lot of moisture in the bricks and mortar that will evaporate over time, and once the weather is warm again each wall will be gently washed down to remove any excess brick/mortar dust. Last, repairing the east face of the structure was was a job that required a LOT of brick…which we did not have. Our hand-made, original bricks are conveniently size extra-large, meaning that matching brick must be custom-made for approximately $5.00 a brick. We (or should I say, our wallets) were in desperate need of a creative solution.

The masons said they could fix the wall’s structural integrity by using cinder blocks as an internal layer, and, because our walls are SO THICK, they could then face the exterior with “facing brick” made from our small reserve of original brick. This meant they would cut each of our old bricks into three slices, and preserve the historic look without having to patch in bricks that aren’t a perfect match!

View of the cinder blocks in place:

IMG_1159

View of the exterior!

IMG_1014

Once the brick was all repaired and stable, time to call in Colon and frame up the roof:

IMG_1145

IMG_1013

We designed the roof trusses exactly like the old rotten ones we took down, adding back the wooden pegs for an authentic timber-framed aesthetic. In the shot below, you can see the pegs as well as the ONE old beam that has survived 180 years!!

IMG_1187

And last, but certainly not least, the roofers came and did their job. Their work was done in a New York Minute, so we only got one picture of their progress:

IMG_1204

And, voila (this image was made only slightly more dramatic by Instagram photo filters)!

IMG_1186

Compare:

IMG_4407

And again, here it is today:

IMG_1178

The Smokehouse: Risen from the ashes!

And speaking of ashes, the smokehouse transformation doesn’t stop there. I decided that it would be best to go ahead and pour a concrete floor in the smokehouse, as we anticipate using it as a workspace and garden shed. I didn’t just want to pour concrete on top of the current grade, so I made the decision that the floor would need to be excavated substantially to accommodate the appropriate depth of concrete while also preserving the head clearance under the meat smoking beams. Get out your digging shovel: this was a do-it-yerself job.

IMG_1177

IMG_1198

While digging, I found the original soot line under layers of dirt. This is where the floor height would have back when meats were still being smoked! Here’s another shot, showing the layers of debris.

IMG_1200

We dug down about a foot and a half. Trust me, this process felt like it was going to take all winter. But then the in-laws showed up for Smoke House Round Two! Thanks to Steve and Gina, we had four backs hard at work and we were able to move the dirt efficiently. During the process, we uncovered this cement block, that had been entirely buried pre-dig. We think it may have been the rest for an engine crane at one point when the smoke house was converted to a garage.

IMG_1176

IMG_1188

You can see the white line on the wall where the floor was when we started (the white sediment is salt that leeched into the brick during the smoking process). In our excavation we also found some ham bones, a horse shoe, and a bunch of old pottery shards. Our single most exciting find was:

IMG_1212

The hood ornament to an old Packard automobile, quite the luxury car in the early 1900s! This is more proof of the smokehouses’ transforming uses. Usually the Packard winged goddess of flight holds a tire, so we aren’t sure if this piece is after-market, but we do have some confirmation that at least one Packard made the smokehouse garage its home in the 1930s.

In an amazing turn of events, our next blog post will return to the history of the farm, as we have been delighted to make primary contact with one of the home’s former residents!! We’ll leave you with this teaser of things to come: a shot, backdropped by the smokehouse, taken in the early 1900s:

IMG_1198

You can even see how the door boards were originally aligned. HISTORY!

Last, but certainly not least, we want to thank papa Bill for making the smoke house restoration a reality!

Cheers to 2012!

WordPress sent us a really neat summary of Living on the Edge(Hill)’s activity in 2012; can you believe this stat?

Screen Shot 2013-01-03 at 11.35.56 AM

We had readers in 27 countries!  This may have been an accident, but we’re grateful for all of you who read our blog on purpose and who are sharing this journey with us.  We have gotten so many helpful suggestions, hints, and help (a book on window restoration, using exterior storm windows, what mixture to best clean hardwood floors, what a thermocoupler is,  extra pairs of work gloves, etc.) – thank you, thank you, thank you!

Dreams for Edge Hill in 2013:

  • More refurbished windows!
  • Breaking ground on a modern addition (hopefully complete by the middle of 2014…? A girl can dream!)
  • A completed smoke house
  • A completed slave quarters
  • More history of Edge Hill’s former inhabitants, hopefully backed by some concrete documentation
  • Research on restoring and/or replacing plaster walls

Even though it is a crisp 28 degrees in 75% of our house today, we are still enjoying the ride and can’t wait to see what 2013 will bring.  Happy New Year!

What a Family Tree!

I’m sprinting down the final stretch towards my last exam, but in the meantime I’ve needed a few, ahem, study breaks…as they say, “if you want to know where your heart is, look to where your mind goes when it wanders.”

Chad & Rachel Day-After Sepia, Back of House

So, in my study breaks, I’ve done a little more research about “our” history.  Here is the Cliff’s Notes of where we left of last time:

Edge Hill: Native Americans –> Joist Hite –> Daniel Holman –> 92 Years of Holman Progeny –> James Madison Hite Beale

I wanted to dig a little deeper into J.M.H.B.’s past, and found some neat connections.  J.M.H.B.’s dad was Colonel Taverner Beale (owner of Mt. Airy, across the river), whose dad was Captain Taverner Beale, whose dad was Thomas Beale.

Turns out Colonial America was a small place.  Capt. Taverner (Grandpa) was married to a woman named Fanny Madison; her nephew was an overachiever: he drafted the Constitution AND became President AND has a university named after him 20 minutes from our hourse.  Geeze, way to make everyone else look bad (he also had a pretty cool house – Montpelier, not too far down the road).

madison

Soooo…that means, President Madison was Col. Taverner’s (dad, owner of Mt. Airy) first cousin, and thus President Madison was J.M.H.B.’s (our guy) first cousin once removed.  Any other genealogy nerds out there getting goosebumps?

Turns out good ol’ Fanny had longevity genes – she outlived her first husband, Capt. Grandpa Taverner, and remarried a man named Jacob Hite.  Jacob’s dad was Joist, the original land grantee, who sold the Edge Hill grant to Daniel Holman.

Okay – buckle your seat belts:

Joist –> son Jacob -m- Fanny Madison (President Madison’s aunt)

Joist –> son Isaac -m- Nelly Madison (President Madison’s sister)

Woah.  Isaac and Nelly built Belle Grove Plantation outside of Winchester, Virginia, which can be seen from I-81; it is still one of best preserved pieces of architecture from early America.

BG vista

bg

Okay, here we go again:

Capt. Taverner -m- Fanny Madison (first marriage) –> Col. Taverner –> J.M.H.B.

Jacob Hite -m- Fanny Madison (second marriage)

Jacob already had a daughter when he married Fanny; her name was Elizabeth Hite.  And, keeping it in the family, guess who fell in love:  Fanny’s step-daughter Elizabeth, and her son from her first marriage, Col. Taverner!  So:

Capt. Taverner -m- Fanny Madison –> Col. Taverner -m- Step-Sister Elizabeth Hite –> J.M.H.B.

Thus, Joist Hite is J.M.H.B.’s maternal grandfather and the man who helped begin the settlement of Edge Hill, which would later become J.M.H.B.’s home place.

We also found another cool connection: Tim McGraw.

tim mcgraw

No, I promise this isn’t a typo!  In my expert research (read: Googling), I found a few links mentioning both Joist AND this country legend.  Bizarre.  It turns out that Tim was on the reality series Who Do You Think You Are?, which helps celebrities trace their family roots.  I suspect you can guess where Tim’s search took him…  You can see the episode on YouTube in parts:

Part 1, Part 2, and Part 3 (roughly 45 minutes and really easy watching).

There’s a lot of really neat information about Joist’s journey to America, his rise to fortune, and what the wilderness of young America was really like.  And, it turns our, Joist is an adaptation of the German name “Justus,” and would’ve been pronounced “Yoast.”  Go figure.  Also, a 16 year-old George Washington traveled throughout the Shenandoah Valley on a surveying trip and mentions the hospitality of the Hite Family – George Washington surveyed our land!!!  Another tie to great American history!

Yay genealogy!

Windows Restorations

As promised, here is the next round of the window process (see Part I, here).

This post covers steps 4-6:

4) Remove all of the old paint and window glazing putty from the de-glassed window sashes.

5) Using wood epoxy liquid and compound, restore the integrity to any damaged/soft/rotting wood.

6)  Sand the cleaned and repaired sashes and dry-fit the glass.

At the outset, I need to send a big thanks out to Nancy and Comer, who loaned me their copy of Working Windows by Terry Meany, an excellent resource with over 200 pages of window advice.  Where was this when I started out?!

Down to business.  When I last left you, I had gotten the glass out of the windows, but the frames were untouched.  Untouched, aside from 200 years of Mother Nature hammering away with all she had.  This left the frames in pretty poor shape: IMG_0880

OMG!  This window was actually one of the worst, thank goodness, but it is a good example and really covers all of the bases when it comes to restoration requirements.  As shown above, this window had severe rot, and as shown below, the wooden pins were coming out of the mortise and tenons:

IMG_0882

Additionally, the joints were deteriorating and had whole pieces missing.

IMG_0883

The first step in the process was to remove all of the old paint and any remaining putty to be able to really see what I was working with.  First, I went to Lowes and got paint stripper; that’s basic, right?  Wrong.  I tried both of the brands they offered, and both wound up with me just scraping at the paint and trying not go gouge the wood.

IMG_0884

Next step: Amazon.  I’ve found that when I don’t know how to best tackle a product, the reviews on Amazon can generally point you in the right direction.  I searched and searched, and kept coming back to one product, Soygel, which (*bonus*) is soy-based!  No awful toxic mess.  But, it was about three times the price…this soy stuff better be good.  I got just one quart to start out.  In reading the reviews, everyone noted that there are no miracles; Soygel works best over about 24 hours of setting in, not right away.  Additionally, some reviewers noted that covering the Soygel with plastic wrap prevents evaporation and makes it work “better.”  My scientist side again comes out!  I tried putting it on thin, thick, covered thin, and covered thick.

IMG_0934

IMG_0935

IMG_0936

IMG_0937

Regardless, it all came off like this!

IMG_0941

There was still a little scraping and clean up to, but I was able to get most of the paint off…for residuals, I employed the heat gun (again, in full respirator mask), which seems to work on the stubborn areas where the Soygel doesn’t help, or, if you don’t have the 24-hour lead time!

Next, I had to tackle the parts of the wooden frames that went sans paint for a decade (or four).  The weathered wood was particularly spongy, especially on the muntins where moisture had seeped behind the putty and was trapped there, providing the perfect mold and insect habitat.  Enter the rehab tools.  Abatron makes my “products of choice” list for historic restoration projects, and is noted in Working Windows.  Though the stuff can be a little expensive, it works miracles:

IMG_0919

Pictured above are Abatron’s LiquidWood and WoodEpox, and some denatured alcohol, which is the universal solvent for these products.  They both come in two parts that only activate when they are mixed together.  The LiquidWood infiltrates the voids that develop in the wood through the rot process and solidifies there, reinforcing the structural integrity of the wood, and it doesn’t rot any further!  When I’m tackling a couple of windows, I thoroughly mix a good amount in a clear condiment bottle (I bought 12 off of Ebay for $7.00); the squirt nozzle allows you to apply the LiquidWood right where you need it and not make a mess of things.

IMG_0926

Once the LiquidWood is on the desired surface, I use a paint brush to apply it evenly and ensure full penetration. LiquidWood, however, is just for where the wood is weathered or slightly “spongy.”  For the parts where the wood has already rotted off or where voids, insect boreholes, or breakages have occurred, you need the big guns: WoodEpox.  To start out, you again mix equal parts, but this time it’s like play-dough!

IMG_0928

IMG_0929

Once it is all mixed together, I prime the target surface with LiquidWood, which infiltrates down into the base, the wood around the areas is usually pretty bad itself, and then I slather on the WoodEpoxy.  I have found that the denatured alcohol makes this product a lot easier to work with and helps keep it from sticking to your gloves, etc., while you are applying it.

IMG_0930

It is important to put on more than you really need, because once it is all dry, you sand it down to get the profile and surface you want; if you skimp you might find yourself having to go back and add more – a real pain due to the drying time required.

IMG_0931

Once it is done, it has to set for a couple of days.

IMG_0932

IMG_0933

IMG_0955

And when it is dry, you just sand it down until it is flush with the existing frame.  Voila!

IMG_0956

Muntins and rabbits are particularly tricky; again, the key is to put on more than you need and sand down when it is dry.

IMG_0958

All trimmed down!

IMG_0957

After it has set thoroughly, I sand the wood all over one last time to ensure that the surface is smo0th and free of imperfections.  After sanding, I take each piece of glass and dry-fit it back into the frame.  This process is essential to do before you add putty, as you don’t want to try and force the glass into the frames, and the dimensions have changed since the muntins have been restored with putty.  I found that this step took extra time with the sander to ensure that each piece of window glass had a nice snug fit.

Next up, window putty!  Or, the process of separating the men from the boys.

‘Tis the Season at Edge Hill!

First, apologies for the absence of posts this fall.  When I’m back at school, Chad works harder than ever on the house, but he doesn’t always have extra hands for picture-taking!  We can’t wait to provide a window update, as the first set is back in the frame and they look AMAZING!  Also, we may have a roof on the smokehouse this week…get ready for it!

This weekend, we broke up the monotony of my final-exam studying with plenty of holiday cheer.  Chad has had a few issues with the heater in the last few weeks (I think the house was an average of 40 degrees in mid-afternoon, requiring some serious Eskimo-style layering), but now the entire first floor is opened up, warm, and feeling like a real house.

Here are a few pictures of Christmas season at Edge Hill!

First, a “big” welcome to Jackson, the newest member of our family!  We don’t know if he’s ever seen a Christmas tree, since he grew up in Hawaii (do they have to import Christmas trees there? Or do they just decorate palm trees?).  He is just as goofy as Afton and we’re having a blast integrating him into our “pack.”

IMG_1085

Cami is not too sure if she’s a fan of TWO Great Danes in one house, so she watched the Christmas prep from a distance.

IMG_1094

We got a wild hare mid-decorating and decided to pull down some of the paneling above the Great Room fireplaces.

Here’s the “before”:

IMG_1065

And…what’s this? A little corner of wall paper showing from behind the paneling?

IMG_1073

And another piece hiding up in a corner where a piece of panel had already fallen down:

IMG_1068

And, down it came!  You can see the plastic vapor barrier that was behind the paneling. 

IMG_1066

IMG_1076

IMG_1072

IMG_1071

IMG_1070

IMG_1069

It makes the whole room start to feel less dark and depressing.

IMG_1080

IMG_1081

AND!  The remains of the border we found above the second mantel has the same pattern as some of the gorgeous wall paper we uncovered in our attic adventure (And this is one of our favs, it’s gilded)!

IMG_1075

And here is the full pattern:

IMG_0520

Most of the decorations are courtesy of my Aunt Barbie, Uncle Skip, and cousins Jen and Christine, who gave us “Our First Christmas” as a wedding present.  It is so nice to have five tubs full of yuletide spirit in our first few years of (student-loan ridden) married life!  Barbie also made the adorable little cross-stitched pillow, below.

IMG_1106

IMG_1102


IMG_1100

IMG_1083

Apologies for the poor lighting in the next picture, but when we moved in this door was laying on its side mysteriously in the Great Room sans hardware…and now is hanging AND has a doorknob, so it is exciting to have a picture of this guy pulling his weight!  The icing on the cake is that this is our bedroom door, so we are no longer living in a cut-through space!

IMG_1104

Now that we’ve got a bedroom door, maybe we’ll get a chance to remove these wonderful mirrors above the very traditional mantle…

IMG_1103


A little mistletoe for the front hall:

IMG_1105

And, drum roll, please…the TREE!

IMG_1093

IMG_1098

A 10.5-foot beast – what a treat to have room for a big tree!  Unfortunately, we accidentally picked one with razor-sharp needles, but Chad valiantly lit the whole thing in record time and we decorated with the first round of ornaments (there are still a few that need to make the trip from Richmond).

We hope some of you will get a chance to stop by while the house is decorated.  Happy Holidays, everyone – and for those of us who are still students, best of luck with final exams!

Windows: What was I thinking?

So you know how sometimes you start a small project, say…stopping that leak in the cabinet underneath the sink, and low and behold it is time to replace the plumbing in your entire house?  Enter: Edgehill Windows.

After some assessment it looks like I have stockpiled material for several (long overdue) posts, but here is how it all began.

About a month and a half ago I decided that I needed a place for various projects as the winter weather approached.  Luckily, Edgehill was constructed as a working plantation home, and, as such, comes complete with an external office, the South wing, that is only accessible from the outside.

In the traditional separation of spaces that would be expected on plantations of the 1700s and 1800s, the farm office was an isolated room so that the business workings of the farm and all of the range of clientele did not enter the family’s living areas to conduct business.  No horse trading in the living room, please.  In thinking about our plans for the room, Rachel and I have envisioned a home office that is insulated from the chaos our friends with children tell us we are heading for just a few years down the road.  At present, however, the room is in pretty rough shape (but what around here isn’t!).

I decided that the first step for the South wing was to stop any further damage (also a theme around here).  I had an obvious starting point:

No/broken windows = water damage, insect infestation, dirt and debris, increased thermal damage from freeze/thaw cycles, basically nature’s first opening to reclaim the space.  So I said to myself, no big deal, I’ll just get some glass cut and patch that bad boy right up.  What a fool I was.

After getting some window panes ordered from B & L Glass in Harrisonburg (those guys are great, and incredibly fast!), I got on my ladder and started to remove the old pieces of glass.  Unfortunately, the wood started coming off as well.  I quickly realized that I wasn’t doing a ton of good in replacing just the broken panes when the bottom of the lower sash had some considerable rot damage, and paint was peeling everywhere.  What to do?  Google, obviously.

I put down the scraper and retreated to the computer to get some advice from the experts on a prognosis for my windows.  From my hours of blog reading I came up with the general spectrum of my options.

1) New Windows! Maybe tilt-outs! Vinyl that never needs painting!  Insulated Low-E Glass!  Thanks Google advertisers, but with our goal of saving as many of the historic features of the home as possible, it seems almost sacrilegious to think of removing our 170 year old (mostly) solid-wood craftsmanship.

2)  A quick patch.  Replace the broken panes only, but expect to be back on the ladder as the glazing compound from the other window panes sheds down in a rain of crap every time window is opened, and who knows, maybe the remaining old glass itself will fall out too.

3)  Complete Restoration.  Can you see the aforementioned plumber planning his next vacation?  A quick search revealed that this option is either: Incredibly expensive (think removing all windows, shipping them off to a professional shop, waiting several months, and having them returned and installed) or a DIY project on steroids.  Being a broke public servant with a wife in graduate school, you can see where this is headed.  I knew that with the winter approaching I would need a job that I could work on in the evenings while Rachel is grinding out her last year at law school, and the more I researched the process the more it seemed that this task would certainly fit the bill.

I decided I needed a plan of attack.  My research led me to these general steps:

1) Remove the windows from the frame entirely (full restoration of a window still in the frame is nigh-on-impossible).

2) Carefully remove the old glass, salvaging as many of the wavy old panes as possible.

3) Clean the salvaged glass.

4) Remove all of the old paint and window glazing putty from the de-glassed window sashes.

5) Using wood epoxy liquid and compound, restore the integrity to any damaged/soft/rotting wood.

6)  Sand the cleaned and repaired sashes and dry-fit the glass.

7) Prime the sashes with good quality oil based primer.

8) Install glass with oil-based glazing compound.  Wait two weeks.

9) Paint.

10)  Install.

OH HOLY CRAP WHAT HAVE I GOTTEN MYSELF INTO?  Well, you are probably also thinking, what have you gotten yourselves into, this post is going to be days long!  In order to not short change or bore to death, the remainder of this post will be dedicated to Steps 1-3.  It looks like steps 4-6 will be getting their own post, 7 will have its own post, and 8-10 will close it out.  I told you I was sitting on a stock pile!

I got a pretty hilarious comment when I started with step 1.  My brother Daniel had been around the farm a couple of days and knew I had started working on the windows of the South wing, and then one day he drove by and the window sashes were just gone.  He became concerned that I had just lost patience and had a rage moment.  Rather, I had just made the determination that I would be tacking the windows on my own terms, and not on a ladder:

Leaning against the wall in the picture above are the two pieces of trim that hold the bottom pane in the window frame, and form half of the track that the window slides up along.  Luckily, the windows in the house are not weighted, and thus I had no complicated ropes and pulleys to deal with.  The top window sash just sat nestled into its frame on this ledge (it didn’t lower, unlike the windows in the a main house):

Once the windows were out and I was off the ladder, the project immediately felt more manageable.  Now to remove the glass.   I started with just a putty knife and determination and wound up with shards of wavy glass and a horrible temper.  Back to google.  My options turned out to be chemicals, heat gun, or broken glass.  I chose heat gun.  A quick run the the hardware store and I returned with what seemed to be a souped-up hair dryer, the 1200 watt Wagner:

I chose this bad boy because it was pretty cheap ($25-ish), had decent online reviews, and because it comes with two heat settings.  I had read online that you can’t heat the glass up too much, or it cracks.  I can now tell you as a primary source that it certainly does.  After trying a few tricks, I found that if I held a wide metal blade putty knife as a shield over the glass where I was heating the putty the glass stayed cool and the heat was directed right where I wanted it (Sorry no pic here, not enough hands!). I also found that those little metal points that hold the window glass during glazing are a blessing in that they can save a pane from falling out when the putty has failed, but if the putty is still good those little suckers are hard to find and if you press on them the wrong way you will crack your glass.  Moral of this story: Go slow:

Also, a word to the wise, you never know what is in that old putty or paint on the putty, which you are essentially vaporizing; I donned a respirator for this job, and for several others in the window escapade:

Last trick.  I realized that I didn’t necessarily have to get all the putty off the window glass with the heat gun to remove the glass from the sash.  This is good news as it means less chance of breakage, but it also means you have windows with glazing compound stuck all over them.  I did some research and decided to try an experiment.  I went to Lowes and picked up a gallon of acetone (nail polish remover) and soaked the dirty windows in pure acetone (careful here, acetone can be nasty on skin, its fumes are terrible, it is ridiculously flammable, and it is HORRIBLE on some kinds of plastics as will be part of a later post.)  This is where having a PhD candidate in Materials Engineering for a brother comes in handy.  Gio kindly did a little chem and told me that acetone would not react with Aluminum.  Thus, I went to food lion and got the largest cheap foil pan I could find:

As acetone is also highly evaporative, I decided to use saran wrap to mitigate my losses:

Careful though!  Any time the saran wrap hit the acetone it completely melted away.  Note all of the glazing compound above?  Now see:

Amazing! (The green glass in this picture is new, so you can also get an idea of my range of thickness in the old glass, pretty interesting).  I still have a little to scrape off the edges, but it came right off.  The scientist in me wants to tell you that I tried this with two time periods, about 4 hours of soaking and 24 hours of soaking.  Four hours didn’t cut it, but 24 hours worked magic, I hardly had to scrape at all!  And the acetone loosened EVERYTHING, not just the glazing compound.  Last, I found that the acetone didn’t lose its efficacy through multiple uses, I was able to clean several batches of window glass with one pour of acetone; just be diligent about keeping the foil covered so you don’t lose much to evaporation.

That whole process only took a week!…er…this is going to be long process.  Up next:  More experiments! Paint removal and wood restoration take center stage.   As always, if you have any advice, please let us know!

Us in 15(ish) Years? 

Us in 15(ish) Years?

See this wonderful article about Mt. Airy Plantation in Richmond County, Virginia (on the Northern Neck) – a young family has recently moved in on a quest to preserve the estate as a home first and foremost, but also as a rare historical treasure.  It completely embodies the dreams we have for Edge Hill.  We hope our house will look this good by the time we have two elementary school-aged kids!  Unlikely, but we can always dream… :)

Edge Hill 101

“Outstanding among the old ante bellum southern plantations is Edge Hill, at Quicksburg.  Standing majestically on the edge of a hill overlooking to the east many acres of rich bottom land is the beautiful old colonial mansion house with adjoining slave quarters.”

This post will focus on the history of the Edge Hill property from the time of the English land grants to the construction of our house, with more to follow in subsequent posts.

This post might get a little text-intensive, but we will try and spice things up with photos as we can.  Our sources mainly include local texts – we owe much thanks to John Wayland, whose detailed book contains an exhaustive account of how the Edge Hill property has changed hands, which we will now plagiarize  summarize.  We also got a nice surprise that we mentioned (ages ago) as the “more information” we were waiting on to do this post: the Google machine led us to the special collections library at Marshall University in West Virginia, where there is a collection of original letters, including several from James Madison Hite Beale, the man who built our house; copies of those letters arrived in the mail last week!  MAJOR SCORE!  But more on that later; now, to start at the beginning…

The Native Americans once hunted…ha!  We can’t go that far back, so we’ll start with the English “acquisition” of the New World.

Land in the Shenandoah Valley initially belonged to one of several wealthy English land barons, and Edge Hill was no exception.  Ownership of Edge Hill purportedly transferred into private-citizen hands October 21, 1731, when an Order of Council of the Virginia Colonial Government gave Joist Hite and Robert McKay the right to settle 100 settlers on 100,000 acres in the Shenandoah Valley.  One of those settlers was Daniel Holman, who had been chosen to settle the fertile river bottom plot that is now Edge Hill.  This transaction was soon challenged by Lord Fairfax, who also had a large land grant in the Valley.  Fairfax disputed Hite and McKay’s claim to settle the Valley, and ultimately Daniel Holman petitioned Fairfax directly to clear title to his land.  In 1750,  he received three Fairfax grants, 550 acres of which ultimately became Edge Hill.  This is an overview of the land grants in the region:

And here is a close up of the Holman grants:

You can see “Edge Hill” in the center of the map; also note the “Old River Channel” (referenced below).

Except “Edge Hill” wasn’t Edge Hill back then – it was temperate forest.  Enter the mule, plow, and other accoutrements of mastering the wilderness.  When Daniel Holman passed away, his son, Jacob Holman, inherited the land.  In the Revolutionary War, Jacob Holman rose to the level of captain and in his later years became one of the largest farmers in the Valley, and a significant slaveholder.  At death, his will listed 17 slaves by name, which were passed to his family.

When Jacob Holman died in 1784, the property passed to his heirs, and, though separately owned at times, remained in the Holman family for a total of 92 years.  In 1823 and 1824 Abraham Hoffman purchased the two parcels of Edge Hill that had been separated in the Holman family’s inheritance scheme for a total of $17,700.

In 1829, five years later, the progenitor of Edge Hill as we now know it entered the scene.  Colonel James Madison Hite Beale purchased the reunified Holman land grant for $19,484.  At that time, the deed book noted that the parcel contained 613 3/4 acres.

Wait, What?  The original parcels were 550 acres, where did that extra 63 and 3/4 acres come from?  Was it a gift from God?  Well, as it turns out, sort of!  Between the time of the original platting of the property showing 550 acres and 1829, the whole Shenandoah River, which forms the east boundary of the property, MOVED!  Remember the “Old Channel” noted above?  And, instead of a big to-do, the property owners to the East agreed that the 63 and 3/4 acres of their land that was now stranded on our side of the river should be included in the Beale purchase.  That’s what I call neighborly love.

So who was Colonel Beale?  A little digging has told us quite a bit.  Colonel Beale was the son of Taverner Beale, who originally owned Mt. Airy plantation, located just down the road from Edge Hill.  In approximately 1800, the locally-famous Mt. Airy stone house was constructed on the property (after the Beales had moved on):

(Thanks, Google Earth!)

Mount Airy is a property with its own richly-detailed past; at one point it became the summer home for the Vanderbilts, and you can read more about it  here.

With his well-heeled neighbors in their stone house down the road, in the late 1830s James Madison Hite Beale set off to build his own large farm home.  The entry in Life Along Holman’s Creek helps us date construction the best:

We know from the other dates listed that James Madison Hite Beale ultimately sold Edge Hill in 1846 and moved to Point Pleasant, (now West) Virginia, and thus 1840 is listed as the approximate build date of the still-existing house by J. Floyd Wine in Life Along Holman’s Creek.

Additionally, thanks to our amazing find from Marshall University, we know a bit about the personal dealings of Mr. Beale.  He was a wealthy business man, and most of the correspondence relates to his business transactions.  Attached to one letter we found a great hand-drawn map of the property:

In addition to being a farm owner, the interwebs tell us that:

Beale was elected as a Jacksonian to the Twenty-third and Twenty-fourth Congresses (March 4, 1833 – March 3, 1837). He served as chairman of the Committee on Invalid Pensions (Twenty-fourth Congress). He resumed agricultural pursuits.

Beale was elected as a Democrat to the Thirty-first and Thirty-second Congresses (March 4, 1849 – March 3, 1853). He served as chairman of the Committee on Expenditures on Public Buildings (Thirty-first Congress), Committee on Manufactures (Thirty-second Congress). He declined to be a candidate for renomination in 1852. He resumed agricultural pursuits. He died in Putnam County, W.Virginia, August 2, 1866.

(We found this description on academystamp.com, where, apparently, we can purchase a copy of James Madison Hite Beale’s signature.  Hellloooo Anniversary Present.)

From an ancestry website, we have found images of Beale’s final resting place in West Virginia:


In 1846, as mentioned above, JMH Beale sold the property to a colorful man named Samuel Moore.

Moore and his family will be the subject of the next installment of the known-history posts.  In the mean time, if you see anything that seems off, we will pass the buck and blame it on to our sources!  But seriously…if you are in possession of more accurate information, please pass it along and we’ll make the appropriate updates!


All Great Artists Sign Their Work

This summer, we tackled quite a few projects, and we DEFINITELY got our hands dirty in the process.  A little grime didn’t scare us – attic dust (including a two-foot snake skin), greasy carpet, musty closets, rotting wood, spider webs, rodent nests – we saw it all.  With all this in mind, please be impressed when we declare this our dirtiest job of the summer.

I think at this point, we’ve also established degrees of dirty: there’s dusty-dirty, dirt-from-the-earth-dirty, dirt-due-to-time-dirty, and trash-dirty.  This project created a new category: unsanitary-dirty.

What project deserves these lofty descriptions?  None other than the upstairs bathroom:

Before we moved in this summer, the bathroom situation was my “deal breaker” – I told Chad if I had to use this bathroom in the middle of the night, we were moving out and finding an apartment.  Luckily, although the downstairs bathroom isn’t really our style, it is completely functional, has worked great this summer, and kept me from having a meltdown over the past few months.

Chad’s brother Daniel is moving in soon, and in lieu of rent, he is paying us in a quick fix to the bathroom (this is mutually beneficial, as it means Daniel will also have a private boudoir).  The plumber came to do a quick assessment and we got some great news: no evidence of lead pipes!  Turns out, we’re too old for even that.  Some not so great news: the pipes are galvanized steel, and thus have a propensity to rust and prove difficult to work on.  To prep for the plumber’s big project, Chad and I put our work gloves back on and embarked on the type of demo often featured on HGTV.  We were, however, determined not to look as wimpy with a sledge hammer as the owners on TV.

First, the toilet:

Yeeeaaah…and the flusher was broken.

Luckily, the Logan Farm magically produced an extra toilet; however, the plumber said, “You’re replacing this really old toilet…with an old toilet?”

Chad just laughed – it was free, so we’re not looking the gift horse in the mouth.

Luckily, although it was covered in crud, the flange is in tact and ready for the replacement commode.  We were also wondering if the leak marks in the hallway below were from the toilet’s plumbing, but our fancy-shmancy Tupperware container didn’t seem to catch any drips, so we the shower seems to be the culprit.

We plugged the hole to prevent any noxious fumes from escaping:

The panel for the plumbing is right next to toilet – the one thing that was moderately convenient in this whole bathroom.

The brass-colored pipe at the bottom in the middle is for the tub’s overflow system; however, our tub had a fatal flaw.  The tub’s overflow hole should be linked to the brass overflow pipe by a connector.  Unfortunately, our tub lacked the connector, and the open hole was separated from the brass pipe by an inch-long gap.  The last handyman’s fix?  Clearly, the tool that fixes everything: DUCT TAPE.

See that duct-tape patch at the top of the tub?  That’s all that was between the dining room ceiling, below, and a really gross tsunami.  I don’t think the duct tape was always up to the job, based on the water stains and the crumbling lathe we found this summer.

Ultimately, the brass pipe would need to come out in order to remove the tub.  After much twisting, torquing, and jiggling, Chad finally resorted once more the Saws-All:

Freeing the tub also requiring removing the layers of surround and tile above the tub.  Enter the sledge hammer…and our rusty kitchen knife.

We didn’t exactly have a putty knife, so the rusty, old kitchen knife we found in May had to do:

You can just call him “Thor.”

Note: we only had one hammer, but we found the back of a crow bar also serves well.

We had to take one portion of tile off all the way to the door frame (on left), revealing some of the original horse-hair plaster and lathe underneath.

On the back wall (pictured just above), we noticed the framing had some writing – another find!  This time we have the (presumed) contractor signing his framing; he must have been proud!  This also helps us date the bathroom installation (if you crane your neck sideways you can see):

And by helps, we mean date this board explicitly to November 21, 1952, nearly 60 years ago…but that’s nothing for this old house.

In attempting to get a clear shot of this writing, we had to remove an oddly placed cross two-by-four, which seemed to have a lot of nails fastening it to…something.  We went around to the opposite wall and discovered we had just ripped out the support for the neighboring closet’s clothes bar…oops!

This closet is slated to be gutted, so we weren’t so worried about its structural integrity, but this escapade led us to examine the rear wall of the closet:

Wallpaper!  While someone has obviously gone to great lengths to remove most of the wall paper in the house, this closet went overlooked.  It appears that the general motif does match the style of the papers we found in the attic, so it is a good chance that it is original-ish.

We were glad that the owners who removed the rest of the wallpaper weren’t 100% thorough!

But, back to the bathroom.  We were able to completely finish removing the tile, and with the help of Chad’s dad and brother, were able to get the extremely heavy, cast-iron tub out and down the stairs.  The “finished” product looks like this:

Hopefully next time, we’ll actually be able to show you a bathroom rebuilt, rather than just something we’ve torn down (it’s becoming a theme for us)!

Holy Smokehouse!

So with the summer winding down, we have a few large projects to check off the list before our life becomes back-and-forths between work, law school, and UVA football.  Rachel’s now entered her last week of her summer at BotkinRose in Harrisonburg, and we’ve been commenting a lot on how fast the summer seems to have gone…and then again, how some parts seemed to last forever.  Like the weeks awaiting our appliances, the week without a dryer because it blew up, the week waiting for our first green tomato to turn, or the week when Afton mysteriously developed a stomach ailment and aimed at all of our carpeted surfaces.  What a summer!

And what a lot of work it seems that we have been able to accomplish (even in the face of the mountain ahead).

With all of this reminiscing on our minds, there was one task that we had been putting off – time to call in the reserves.  The in-law reserves, that is.  On a rare weekend with no family events (and no major golf commitments – Steve’s tee time was 6:30 a.m., so he was done before lunch), the Winters Family piled into their car and came to the country….where they were promptly put to work.

Rehabilitating the dependencies is one of the main goals for this fall/winter, and the first step in that process was the removal of all of the debris that decades of neglect and rainstorms have deposited on our poor smokehouse:


And the view into the rafters:


Apparently the smokehouse had served as a repository for a surprising number of old gutters, unused timber, and a random collection of detritus.  Add a 200 year-old roof and countless windstorms and you get the perfect mix of rotted out support beams, dangling sheet metal, and the worst kind of Jenga you could imagine; a veritable death trap.  Oh, and did I mention that the floor contained a mix of Virginia creeper and POISON IVY?  The. Worst.

After a consultation with our craftsman, Colon, we were told the first step was to remove everything except the four brick walls and any of the structurally sound timbers.  We were advised to obtain scaffolding, and, as luck would have it, Dad purchased some at a sale years ago (and Mom, despite several close calls, did NOT throw away the all-important connector pins which transform scaffolding from pile of metal poles to a useful support structure).

Enter the Winters Fam:


Minus the wedding attire, these folks were ready to get down and dirty:


(We promised Gina some quality time with a sledge hammer.  Wish Granted…oh, and she may have forgotten appropriate footwear and attire…farm wardrobe to the rescue!).

First step:  Haul out all of the ground timber that had fallen over the years and any low-hanging fruit.

Second Step: Construct scaffolding in an area least likely to be struck by falling debris:


Step 3:  Start pulling, and pray your target doesn’t pull back:


Piece by piece, we slowly removed all of the old wood, metal, and trash.  We got two full loads of wood for the burn pile:


And one load of metal for the scrap yard:


As we came to the end, things were looking pretty…well, at least there was no more rotten wood!


(Note the salt line on the brick, above – the demise of the poor sports car in the ’60s.)


There would have originally been a 4×8 beam in each of those notches, and the smokehouse would have had a total of 12 said beams for holding salted meats in the process of being smoked.  When we got into tearing out, only 8 beams remained and of those, the two pictured are the only that we kept, and we might lose one of those to its current state of decomposition.  But hey, one 200 year-old beam is still pretty awesome!

Also, during the deconstruction, we found just a few of the original roof trusses:


Looking more closely:

Wooden peg construction, the real deal!  A profile shot:

While these beams aren’t salvageable, we did get one (!) full length truss (the side that the roof lies on) and one (!) full length cross support, when, together with a second truss, these form the famous “A” frame that originally supported the roof.  We are going to use this construction method as a template for our new structure.

We also found some paneled shutters, which we believe might have been original to the house. There are some louvered shutters on the property as well, but these paneled shutters have peg construction, and appear to be perfect matches to the hinges that are also on the house:

Lastly, we noted that every piece of wood taken from the structure was riddled with nails to hang meats.  After spending the day handling the wood, we noticed we could even smell the smoky scent in the old beams.  It smelled like authenticity.

After our day of de-construction, Rachel and I did a little Google-ing and discovered a few fun facts about smokehouses, which we will leave  you with:

  1. There were originally smokehouses on every self-respecting plantation.  Think of them as modern-day meat refrigerators; if you wanted pork in the summer, it had to be an extremely fresh slaughter or salted and smoked.
  2. Meats would sometimes be kept for 3 years in a smokehouse, and most smokehouses were constructed with very secure doors, as the smoking typically only took place for about a month after slaughtering (February to March), but meat thieves were at it all year long.
  3. Of the 88 original structures found in Colonial Williamsburg, 12 are smokehouses.  It seems that practicality is a good form of preservation.
  4. Smokehouses were traditionally made of wood; “[l]avishing the investment of bricks on a utilitarian building devoted to a smoky, almost industrial use was pure ostentation.”  Lucky us!  It seems that the process of smoking and salting meat is directly inapposite to brick preservation.  As mentioned before, the salt erodes the integrity of the brick, and salty brick is mercilessly attacked by fowl as a source of mineral supplement.

Next post we’ll be back in the house, tackling Dan’s bathroom:


Holy mother of frat bathrooms.

Landscaping: Part Deux

In our last post, we were optimistic for a quick turn-around on the landscaping endeavor.  Alas, stormy weather, Gio’s awesome wedding, and a suspicious rash of farm truck break-downs forced us to push the finishing touches on this project to the back burner.  UNTIL YESTERDAY.

When you last checked in, this is where we were:


Bare, and mercifully vine-less…but with a long row to hoe (insert thigh slap and pathetic laugh here)!

Next step: bring in the tiller!


Our muscle man, Paul, came in with the tiller to remove the massive root structures that were left behind after hacking out the leafy tops.  Voila:


(Looked more dramatic in person, I promise).  Although Paul is quite good with the farm equipment, we asked him not to go TOO close to the house with the ferociously spinning blades, so we came behind him and pulled any remaining roots and stalks out by hand.  It was at this point that Chad and I both learned some fun things.

  1. Urushiol is an oil not exclusive to the leaves of poison ivy plants (which were long-gone at this point), but also exists (and thrives) in the plant’s woody stalks and roots (for up to 5 (!) years).
  2. Gym shorts and a t-shirt with the sleeves cut off do not provide sufficient protection against urushiol.
  3. According to the dermatologist, one of us is in the 15% of the population that is immune to the scourge of urushiol.
  4. Chad is The 85%.

Within 24 hours of exposure, Chad was feeling very itchy and very desperate.  Sam and Gio’s wedding was in 6 days, and there may or may not have been facial swelling (let’s not even talk about the other portions of his body).  Luckily, Harrisonburg has one natural-remedies store, and although we were not interested in the seaweed cookies or homeopathic poison-ivy pills, the jewelweed soap was a god-send.  Combined with a gallon of calamine lotion and self-control against the itch worthy of a gold medal, Chad was looking good as ever for Sam and Gio’s pictures.

With the poison ivy saga and a happily married couple behind us, we felt ready to tackle the yard once more.

Taking inspiration from Longbranch Plantation in Upperville, we wanted to do a border of pea gravel along the edge of the house to prevent any future weeds and vines from climbing up the brick, fronted by a bed of the five boxwoods I gave Chad for our anniversary.  We started by raking the tilled ground as level as possible, and used landscape edging from Lowe’s to define our beds.

Measure it out, then score with the Saws-All where it needs to turn to keep it approximately 2 feet from the house.  Checking the distance at several places keeps it from looking like you were drinking cocktails while gardening.

Each piece of edging comes with 4 stakes to secure the piece at various places.

And, as always, Afton was nothing but helpful.

Next, time to class it up.  Remember those bricks in the dirt mound a few weeks ago?  Part of the process of salvaging the brick was segregating the perfect bricks from those that had chips, cracks, and missing parts.  Although we can’t use these broken bricks in any structures, we collected two full pallets that are PERFECT for landscaping:

We dug a little trench along the edging, nestled the bricks in, with the good edge up, and packed extra dirt around them to keep the line secure.

Finally, we used landscape fabric and accompanying pins (also from Lowe’s) –

– and laid it out across the bed to even further prevent weeds and vines.

After laying the fabric, we topped it off with the gravel.  Chad found an unexpected good deal on reclaimed stone from a flat-roofed building at Grass Roots Landscaping outside Harrisonburg.  It turned out to have a little dirt in it, but otherwise was exactly what we wanted.

(Please note: Chad’s brother, Daniel, is in the process of moving in with us!  He brought a bed, clothes, and…”road” tires for the ‘Stang.  Not entirely sure what that means, but they totally work with our decor).

FINALLY, we were going to plant these dang boxwoods.  Same process applied for this step as with the one before: level with a rake, plant the boxwoods, cover with landscaping fabric, top with mulch.

We measured to allow for the average maximum diameter of 3 to 5 feet – we’re hoping eventually the line of individual plants will merge into a stately hedge.

Bring in the mulch!

And (drumroll, please)…..

Fewer bugs, less poison ivy, and a little easier on the eyes.

Now, let the sun shine – we’ll provide the daily 25 gallons of water from the spigot across the yard!

Landscaping: The Machete Stage

Edge Hill has fertile soil.  This is a double-edged sword – great for corn and tomatoes,

but not so great for keeping your house from being devoured by Virginia Creeper and poison ivy.

(Luckily, this is the slave house – even the main house wasn’t quite this bad.)

The stranglers were inching their way up to the second-story windows of the house even though Chad had ripped them all down within the last year.  Two weeks ago, Chad went at the vines with a chemical assault (Round Up), weakening their defenses.   After the withering had begun, we picked a perfect evening to take our first stab at “landscaping.”

We grabbed some shovels, shears, and work gloves –

– and began hacking away at the Virginia Creeper around the front of the house.

We started by giving the plants’ foliage a buzz cut, and discovered one of the reasons we’ve had so many bugs inside our house.  Major ant, wasp, and cricket habitat (Chad took a stinger to the hand with the first cut).  There were also dozens of well-fed praying mantises who evidently got too stuffed to keep the thriving insect population at bay.

After trimming back the ground growth, we stumbled upon a magical outdoor liquor cabinet:

As we peeled back the layers of scrub, we found the step we had been tripping over for months, decorated with a few beer cans and shreds of plastic.

After a few more slashes with the shears and an epic battle between our lower backs and some well-rooted vines, we had made great, great progress.

When we came back a few days later to pick up the trash and sweep off the porch, we found ANOTHER HOUSE TREASURE:

“Edge Hill”

“1920”

If you look closely, you can see the above inscriptions are etched into the concrete step leading onto the front porch of the house.

After we cleared the above-ground portion of the plants, we brought in a tiller to turn over the cleared ground and prepare the bed for planting.  Depending on the weather, we’re hoping to write about Landscaping: Phase 2 later this week!

A Long-Awaited Upload

So far, we have been taking all of the pictures for our blog with the iPhone camera, which has actually done admirably well.  This is largely due to the fact that our slightly nicer camera has been out of commission – the cord we needed to upload pictures from the camera to the computer has been missing for quite a while….

…and by a while, I mean since September.

We finally got a card reader and released the pictures that have been hostage on our nice camera.  We found fun pictures from a  horse race in the fall (woohoo, Fall Foxfield!) and a few of the house that have been waiting to be unlocked.  Here are a few of the better ones:

This black snack somehow slithered to the top of the woven wire fence in our front yard – he’s about 3 feet long, 4 feet off the ground, and wound like a corkscrew around the top wire!


Afton really wants to make friends with the mama cows and their calves, which were also in our front yard for a while.

But she’s like the 7 year-old boy who flirts by leaving a slug on your desk or punching you in the arm – more annoying than endearing:

And finally, a few other wall paper images.  This one was too delicate to unroll in one piece, but was a beautiful pattern – wish we would’ve found it in better shape.

This is a tulip wall paper –

– that matches the tulip border:

And, on the back of this piece –

– we found these amateur charcoal and pastel sketches:

What gems!

Let There (Not) Be Light

The history post we mentioned last time is coming, folks, we promise!  We’re tracking down a little bit more information and then we can give you the most up-to-date version of the story we have.

In the meantime…

Chad and I would like to share our mentality about this whole fixer-uper process.  We like to do things right, but sometimes that can be expensive (we dream of Viking, Sub-Zero, custom cabinetry, and granite counters).  Our approach is to keep the shabby things we can live with until we can afford  the things we REALLY want (read: when we’re mortgaged up to our necks).

This post is about some exceptions to that general  rule.

For example, one of our current “dining room” chairs is a little shield back we almost literally stole at an estate sale:

Price tage: $3.  For serious.

We love estate sales for finding great deals, especially on antiques or interesting art.  Our rules: be picky (don’t buy something just because it’s cheap) and set hard budgets before the heat of the auction starts to carry you away.  Recently, this practice has helped us score a couple desperately-needed rugs, bedroom pieces, and some…unique…items.  We keep our eye on the monthly auctions at both Pangle’s and Laughlin’s in Woodstock.

Today, we also broke down and made another purchase that clearly breaks our rule, as this purchase was neither high style nor high dollar – purely a temporary fix, but this time we are completely thrilled with the decision.

Here is our bedroom, originally a formal dining room, but en suite to the only serviceable full bath in the house:

And here is the truck stop, as seen out the above-pictured right-hand window:

Aaaand they often pull up just outside this window, as their office is immediately to the right of our third bedroom window:

(That white portion you can see is the entrance to the addition where the trucking business office is located, on the other side of our kitchen).

There are three primary reasons we decided is was positively imperative that we update the decor of the bedroom:

1) The windows are approximately 6 feet by 4 feet, which is great for illuminating this large, dark old house…

BUT Afton, the World’s Neediest Great Dane, wakes up with the sun at approximately 6:30 a.m. to let us know her bladder will absolutely not make it one more second and can she please go out right now I mean RIGHT NOW MOM AND DAAAAAAAD!

2) Due to their irregular schedule, we are fairly sure that the drivers, on more than one occasion, had the chance to catch us mid-wardrobe change (hopefully they missed the show, sorry guys…and girls!).

3) Lighting:

So today, while I was a busy-bee with law school responsibilities, Chad made a stop at our closeout retailer of choice, Tuesday Morning.  As his cousin/aunt Susan says, the “thrill of the hunt” is the only way to make it through these places.

During today’s excursion, a “kill” was achieved!  In our last few trips, we could find some curtains, but never enough that matched.  Today, not only did we find four that matched, but they go with the gold-and-maroon theme we, ahem, inherited with the house.  (Hey Dan: Go Maroons?).

Also, we found some bargain lamps to complete the look:

Tying it all together:

Not too bad!  And for $130, this splurge was a good way to achieve essential functionality while saving for the down-the-road furnishings this future dining room will demand.

Buried Treasure

Last weekend, we spent hours in the sun on a Quixotic hunt for the bakery door buried beneath the mound of bricks, spiders, and rubble.  Alas, the door was never found.  On Sunday, we moved on to the next pile of debris….

We’ve been slowly progressing through the house, scrub brush in hand, in an effort to clear out every corner (and this house has quite a few corners).  We had successfully emptied every room, save one: the hottest, darkest, and dustiest of them all: THE ATTIC…the Final Frontier.

The stairs that previously had the red runner have a counterpart up to a “third floor” – the dramatic ascent is slightly anticlimactic.

Hard to believe Chad had already cleared out a whole room’s worth of the previous owner’s possessions.  What you’re seeing here, folks, is your attic multiplied by ten extra decades.  Imagine how many boxes of Christmas lights and baby clothes you have tucked away in your attic, confident that every item would undoubtedly be put to great use again in the future…and then remained there for the rest of its days.  One trip at a time the stuff multiples, and one trip at a time, Chad and I took it all the way down to the dump trailer.

Step One: Sunlight is the best disinfectant.

The attic has a hatch that provides roof access.  It, however, is not for the faint of heart (me), and I left it up to Chad to survey the roof’s status and to take in the beautiful view.

Step Two: Start hauling.  Carefully.

Chad and I are really dorky and we see the potential in weird, old things, like bent lamp shades, a vinyl GM luggage rack circa 1970, a tripod base with no top, and a few old wooden barrel hoops.  But, all in all, it was mostly twenty trips up and down three flights of stairs to the dumpster.  As the day wore on, the attic began to heat up, and just like my paleontology phase the day before, the charm was wearing off as the thermometer was rising.

After about 3 hours of trash removal, we were down to the final corner in the entire house.  It was a corner with absolutely no light, a suspect floor, and my patience was shot.  There was boxes with miscellaneous broken item and melted goo (what the heck WAS that?), and a trunk full of mildewy looking paper scraps.

And, for the love of Pete, is that more red berber carpet in that box???

We were initially of a mind to heave the whole thing into the dumpster (we’d been picking small scraps of paper up off the floor for hours – these were conveniently packaged in an easy-to-trash box!), but cooler heads prevailed.

We carefully unrolled a few scrolls of crumbly paper, and to our delight, we hit pay dirt.  This pile of paper turned out to be the remnants of old wall paper – beautifully, and miraculously preserved, 19th-century, hand-painted, wall paper:

Digging further into the trunk, we also found a musty old book.

THIS IS THE MOMENT I DREAMED ABOUT AS A KID – FINDING AN AWESOME TREASURE IN A NASTY OLD ATTIC!!!! WOOOOOO!!!!!! (and yes, I really did dream about this…)

The book is a record of hundreds of purchases made in 1839.  It is organized chronologically, providing a daily account of who shopped, what they bought, and how much it cost.  Callico, butter, gloves, nails, quince, and the list goes on…in perfect penmanship, nonetheless.

The store was in Mount Jackson, which is still just up the road and is home to our closest grocery store.  Some of the customer names in the ledger are family names that are still prominent in the area.

We also found these tags:

We knew that Samuel Moore had been one of Edge Hill’s original owners!  Hooray!  We did a little quick research and realized that the Moore Family had owned a locally famous general store, later burned by Sheridan’s Army in the Civil War.  All the puzzle pieces in the trunk started falling into place.  More to come in our next post regarding this awesome history lesson.

We also found some turn-of-the-century hand weights:

I think they only weigh about one pound each, so you’d have to do about 3,000 reps to get a burn.

The trunk also contained what we believe are some of the house’s original window valances – wall paper backed with newspaper, and adorned with cut-outs of flowers.  The newspaper articles are from the 1890s and seem to originate from Minnesota.  Luckily, the red fabric poking out of the box turned out not to be more berber runner, but rather the tassels on the valances.  Maybe not the most beautiful specimens any more, but fabulous that they have made it this long in the hot, hot attic.

Our last treasure was a wonderful map – we haven’t taken pictures yet, as this might be the subject of a future escapade and thus of a future post.  It’s huge, and simply identifies the center of the African continent as “Unexplored Territory.”  So.  Cool.

In the words of the immortal Forest Gump: life at Edge Hill’s like a box of chocolates…you never know what you’re gonna get :)

Brick by Brick

Edge Hill has three out-buildings: a summer kitchen, a smoke house, and farm hand’s (slave’s?) quarters. Unfortunately, the smoke house is in the worst shape of the three.  The roof has fallen in, which has, in large part, been the culprit causing the building’s deterioration.

(Smokehouse on the left, summer kitchen with addition to main house on the right)

(Farm hand’s quarters on the left, summer kitchen on the right)

The smokehouse was also the site of what some friends have dubbed the “Hurricane Katrina” wedding shoot (in a good, artsy way, I think!):

Evidently the gentleman who owned the property in the ’60s thought the smokehouse would make the perfect little garage for his new sports car.  He gleefully straightened it up, pulled the convertible in, and watched from the main house as winter set in.  When he flung the “garage” open a few months later to take his car out for its first spring spin, he was horrified to find that the salt in the walls, from decades of curing meat, had completely rusted out his toy.  I think he wished so many bad things on the poor smoke house that the roof subsequently caved in.

There were quite a few bricks lying in piles around the smokehouse and the summer kitchen – a combination of bricks that have fallen off the corners of the buildings and the remnants of what was once an outdoor “bakery” directly behind the smoke house that collapsed years ago.  At some point, the broke-down bakery and other bricks were bulldozed into a huge pile of dirt, rubble, and random trash:

If you can believe it, Chad had already worked on this pile for a few hours last weekend…

So, we went at it this morning.  The goal was to pull out any in-tact bricks to save for re-use down the road, and find any bricks with at least one complete side to use in landscaping.  The previous owner of the house also hinted that the pile might contain the bakery’s metal oven door.  BURIED TREASURE!

With trowel in hand, I felt like a kindergartener saying, “I want to be a paleontologist when I grow up!  Yeah, dinosaur bones!”  There was some bizarre excitement about finding glass bottles, old hinges, and LOTS of spiders (before today, I was unfamiliar with the woodlouse hunter/roly-poly killer), ants (this pile was the Manhattan of the ant world), centipedes (as Gina would say, centipedes of prehistoric proportions), and roly-poly bugs (the roly-poly killer spiders now make more sense) .

The skid loader pictured above was CRUCIAL to our endeavor – the perks of living on a working farm!  I even learned to drive it today (although Chad isn’t ready to let me maneuver the attachments quite yet…)!

Four hours later, the novelty of digging in a large pile of dirt in 90-degree heat had worn off, especially when it became clear the pile did not contain the door we had been hunting.  Yet, we succeeded in setting aside an entire pallet of whole bricks, and another pallet and a half of partially useable bricks, in addition to the complete removal of the pile.

A little summer sun and manual labor was well worth having this eye sore transformed into original materials we can save for later (read: money saved)!

In other news, summer has officially come to Quicksburg: the corn (while not yet quite as high as an elephant’s eye) grows noticeably every day!

See the rows?

Stairway to Heaven

We like to dramatize the house and imagine what it will look like in 20 years to ease the pain of its current condition just a bit.  Here’s what we imagine it looks like:

And here’s sassy ol’ me:

And this is how romantic our house (and living in the same zip code for a few months) makes us feel:

But “Rhett” and “Scarlett” are our middle names, after all:

The reality is, we have a pretty awesome staircase.  It is straight ahead as you enter the front door, goes up to a landing, and then makes a u-turn up six more stairs to get to the second floor.

The original banister is still in tact minus 6-7 pickets – pretty good for 170ish years of kids sliding down it.  Mary Poppins would be jealous.  It is, however, a “use at your own risk” banister right now – when you put your body weight on it, the whole banister does creak out at a startling angle.

The side of the staircase also has amazing paneling and gingerbread details.  There doesn’t seem to be any damage and there might only be one layer of paint on this wall(!).

Unfortunately, as you may have noticed from some of the above pictures, the stairs have been sporting a red, berber runner for quite a number of years.  Although you might be imagining something luxurious –

– trust me – it’s not.  Despite multiple vacuumings, our runner still has quite a lot of stuff in it.  Not to mention a healthy portion of spider webs and leftover spider dinners.

Rather than one, long piece of fabric, each stair was covered with its own piece of runner, held tight to the stairs with (what was once) a brass strip.  The brass strips were screwed into the back of each stair:

I went ahead of Chad with the screw driver, clearing out cob webs and removing the brass strips.  Chad admittedly had the harder job, bringing up the rear by ripping up the carpet and the pads underneath.

Unfortunately, in addition to being held down with tacks, someone went a little Annie Oakley with the staple gun…roughly 10 tacks and 20 staples per stair, and 22 stairs plus the landing…you can do the math, but we were certainly becoming experts with the pliers and the back of the hammer.

Even though the bizarre paint layers make our “new” stairs look a little zebra-esque, “frankly, my dear, I don’t give a damn.”  It’s so much better than it was, and what a thrilling surprise to find that, despite discoloration, the hardwood underneath is in amazing condition.

Lipstick on a Pig

Hey All-

Sorry for the radio silence.  These last two weeks have been a whirlwind of Brooke and Travis and Jackie and David’s weddings, Gio’s bachelor party, my five year UVA reunion, and a bridal shower and bachelorette party for Gricelda.  Whew.  This post is going to focus on the “livability” updates we have done to the house to get us to one notch above camping.

First and Foremost:  The Kitchen.

The previous owners of Edge Hill did a bit of an addition/renovation combination on the north side of the house, connecting the main house to the summer kitchen in the form of a “Florida Room”, and in that space they made their kitchen, laundry, and an additional living area:

Subsequently, the living space in that portion of the house morphed into the office for the trucking company that still operates on the property, and in preparation for our move in we wanted to close off the kitchen/laundry portion from the office portion.  At the start of the project, the kitchen and pantry were still full, though they hadn’t been used for much more than the sink in a number of years:

On the weekend before our big move in, with our big yellow gloves up to our elbows, Mom and I scrubbed.  And scrubbed.  And ripped up contact paper.  And took out a full trash can that appeared to have ripened.  We also removed all of the old appliances.  Mid-clean, we had made good progress:

But Mom was still freaking.  I mean, look at the floor in the laundry room (or should I say subfloor – not much of the original linoleum was left)!  Enter the professionals.  We put in an emergency call to our favorite craftsman, Colon, and he came to the rescue.  We found a bit of “reject” vinyl flooring for next to nothing, and got everything painted a nice, clean, bright, WHITE.  And voila!


So with a little elbow grease, some hand-me-down appliances, and a lot of white kilz paint, we have a great laundry room and kitchen (for those who have seen the Charlottesville house – strangely similar?).  BUT, the catch is, all of this hard work is temporary.  The plan down the road is to start from scratch on the north end of the house, removing the current addition and replacing it with a bit of a re-designed kitchen/entertaining space with a matching period exterior.  As for the “when” on that project, stay tuned!

The Great Dryer Affair

You know those times in life where you can either chose to cry or laugh?  We are currently having those on a nightly basis.  So far, we’ve had no trouble laughing about all of it – they say laughter makes you live longer, right?  Readers, bear witness to the Great Dryer Affair (of 2012 – I’m sure there will be more to come).

As of Tuesday morning, we didn’t have any appliances in the house.  None, zip, natta – no range, no oven, no dish washer, no microwave, no refrigerator, no washer and dryer.  BUT on Tuesday, thanks to the strong muscles of Chad’s brother, Daniel, and the gracious assistance of Chad’s mom, Dee-Dee, we got a hand-me-down refrigerator, washer, and dryer in place, all ready to be hooked up (we’ll address the refrigerator in a “kitchen” post, soon to come).  The washer and dryer were left-overs from the Logan beach house, and although they are well-loved, they work, and that’s all we can ask for!

First, Chad got the washer hooked up – we gleefully began the first load, hardly believing that we had a real-live washing machine at our disposal (if you can imagine how many disgustingly dirty, wet rags we have, you’d be excited, too).  We stopped to eat dinner and came back to find a floor full of water.  [PANIC ENSUES].  Luckily, it was just a result of worn-out tubing, and we happened to have an extra.  Luck was in our favor!

On to the dryer.  Chad had to climb down into the creepy crawly basement where the dryer vent exits and the circuit breaker lives:

Image

He bravely risked his own life for our cleanliness.

Then, we realized we didn’t have a cord that matched this outlet:

Image

So we ran to Lowe’s in Woodstock, got a cord, and returned to conquer the dryer.  The cord fit the outlet perfectly, but the cord connects to the dryer in three places – and one of the screws for one of these attachments was missing.  Of course.  Luckily there is a truck stop in our driveway (haha), so Chad made a few trips back and forth to find something that would suffice.

Image

(Where’s Chad?)

Image

(There’s Chad!)

Finally, at 11:00 p.m., one screw fit…I hit the “start” button, and…nothing.  Out of sheer frustration, Chad shook the machine and…the light inside the dryer came on.  I hit start, and the machine lurched from its slumber.  Sometimes, a little kick in the shin IS all it takes – I should’ve known that much from rugby (we think the connection point may have oxidized and just needed some of the build-up knocked off)!

We found this obviously brand-new bottle of detergent:

Image

And Chad did a victory dance:

Image

And now we have clean clothing.  Hallelujah.

Finders Keepers

It has come to my attention that there are actually a handful of people reading this blog now, so although our internet connection at the house is spotty at best, I wanted to try to post a few pictures of some of the hilarious things we have been discovering as we live in the house.

Last week, we purchased a few odds and ends at a local auction – imagine 10-15 estate sales all going on in one location, once a month.  One item we snagged was a 4-poster bed, and, because no one purchased the art work that had been displayed on the mattress, the auction house threw in the art work as well.  WHAT A STEAL.

Since we are both lawyer-types, it was absolutely necessary for a copy of the Constitution to be displayed in our home.

Next is the token image of our buddy Thomas “T.J.” Jefferson, founder of the great University of Virginia.  Here, he is pictured debating Alexander Hamilton about the soundness of creating a national bank – and boy is he mad (and possibly cross-eyed?).

 We are also feeling very patriotic with a NYC skyline, pre-911.

Rounding it out is an amazing…?  Not really sure what this one is, and you can see the lines from the Sharpie marker, so I’m pretty sure we got a steal because this one is clearly an original piece.

 In addition to the art, I found this fun detail in our bedroom:

 I’m pretty sure that’s a bullet hole, folks.  That’s all we know about the incident, and I think that’s enough said.

BUT – when you have a view like this, how can you criticize the decor?

The Dream

Hey guys!

I guess it is time for me to do my first post.  Later on I’ll detail the history of the house, but I’ll start with how Rachel’s and my dream of Edge Hill got started.

As little boys, Daniel and I would often discuss who was going to live where when we grew up.  For some reason (likely beaten submission) I didn’t put up much of a fight when Daniel unequivocally said he wanted mom and dad’s house.  That left me on the hunt.  I had always liked my grandparent’s limestone house on Lee Street in Woodstock, but one day when I about 12 years old we went to dinner at house that dad was buying as a part of a new farm.  The previous owners were good friends of the family, and we got a tour of the house with all of the architectural details highlighted.  I fell in love.

In my fourth year at Virginia I took a class with Architectural Historian Richard Guy Wilson focusing on early american architecture, and for my final paper in the class I did a study on the property, and I think that was when I made my decision; one day I would live at Edge Hill.  But who would want to live there with me?  As you have seen, the house isn’t quite move in ready.  What young woman would want a life in the country in a run down house where what doesn’t work far outnumbers what does?
Enter Rachie.  As most of you well know, Rachel and I met my first year of law school, and a little over a year later we were engaged.  What you may not know is that as a little girl Rachel also had an interest in historical homes.  Well maybe more than an interest.  She would full on dress the part in colonial garb while volunteering at Sully Plantation.  JACKPOT!

I don’t remember the exact first time I took Rachel, but I remember two reactions: Shock and Awe.  The place was in such a rough state that it was hard to believe it could be livable, but the potential was also shining though the cracks in the plaster.  At that point, I began experimenting with a 3D design program called google sketch up.  Though the design process, Rachel and I began to envision a home where we could grow old together.  Literally.  We are using ADA standards for the bathrooms so we can wheel each other around if that ever becomes necessary.

The only loose end with our dream was the timing.  When Rachel and I got married, we weren’t sure what we would be doing three months later, she was deciding on law schools and I was job hunting for after the bar.  Well, two years down the road it seems that fate took control and here we are, both working in Harrisonburg and jumping head first into life at Edge Hill.  It seems that the only one who has no worries about this whole process is Afton, who spent a hour this morning harassing the cattle and sprinting in her new yard.  Now if only mom would get here already!

The Final Countdown!

Today, Chad has officially moved into Edge Hill!  Is it crazy that I am jealous?  That house and I are going to get A LOT of quality time in the coming months…Chad has spent a week of evenings scrubbing and mopping, and last weekend we both cleaned so hard we were sore for days.  But, with this much dirt and grime built up, it doesn’t take much to see a VAST improvement!

For the summer, we will be living in only two rooms due to our limited A/C supply (old window units borrowed from Chad’s parents).  We have converted the formal dining room into our master bedroom (it has a full bathroom en suite, go figure), and the adjoining parlor as our living room.  See the following “before” and “after” shots:

Image

Image

Image

A HUGE thanks to Dee-Dee, Chad’s mom, for all of her help with the moving and decorating!  What a trooper!

ImageImage

We are filling the huge rooms with hand-me-down furniture and enjoying the “eclectic” feel.

The rooms have absolutely beautiful details – pictures rails, chair rails, ornate door frames, and locks that are original to the house.  The original owners had the doors painted with faux grain, and we are hoping to save this in as many rooms as possible.  The hardwood floors are original in the entire house EXCEPT these two rooms – termite damage in the 1950s caused them to be replaced.  As a result, the “new” floor boards are slightly narrower, but still beautiful and almost entirely in great condition.   Image

Original knobs and locks – every door has a deadbolt!  We’ll be in trouble if our future kids ever figure this out!

Image

(This is pre-clean, but you get the idea)

Afton is already making herself at home chasing cows and enjoying the great outdoors – she also took no extra time finding her nap spot and is as excited as we are to finally be settling in.  I can’t wait to join Chad on Sunday!!!

Let the fun begin…

Hello, world!

If you’re reading this blog, it is likely you are a friend or family of either Chad or myself.  As such, you likely know about our dream of moving into Edge Hill, an 1840s plantation in Quicksburg, Virginia.  In its current state, the house is neither glamorous nor move-in ready.  Many of its original historical elements have been diligently preserved…and not much else.  On the way out is a truck stop whose office was run out of an addition built onto the original structure in the 1960s, and on the way in are Chad, myself, and our Great Dane, Afton.

I am finishing up my second year of law school at the University of Richmond this Friday (!), and after a year of living apart, Chad and I will be moving back in together for the summer.  Those of you who have seen the state of Edge Hill know that along with this transition comes the challenge of making the house liveable…with a lot of elbow grease and TLC.  See, for example, this pic from the day-after shoot with our wedding photographer in one of Edge Hill’s out buildings:

Luckily, the main house doesn’t look quite this bad and mainly craves some strong bleach and lots of scrubbing.

We are looking forward to sharing this journey with you – the ups, the downs, and the unexpected surprises.  Thanks in advance for all of your interest and advice!  Buckle your seat belts!!!

– Rachel, Chad, and Afton