Strong Foundations

As you saw in our last post, we were prepping for our foundations to be poured in the renovation of the Little House.  We also had some concrete work scheduled for the smoke house, which will bring us even closer to putting the finishing touches on our first official renovation project at Edge Hill.  Hard to believe!

If you recall, when we moved in the smoke house was the structure that was in greatest need of some immediate TLC.   Over the last year, the structure has been gutted, repaired, repointed, excavated, re-timbered, roofed, and the first layer of interior parging has been applied.  To get the building ready for its lifetime use as our workroom/tool shed/staging area for other rehab projects (think windows!), we wanted to upgrade from a dirt to a concrete floor.

We had already excavated the floor in the smoke house over twelve inches to make room for the concrete, and the next step was prepping the space for the future utilities (electric and water).  Rachel and I got crafty, and went to Lowe’s to pick up some conduit and pipe glue:

IMG_0014

We excavated even further down, fully under the brick foundation of the structure, in order to run our conduit pipes from the inside to the outside.  Then we glued everything – straight pieces of conduit and conduit elbow joints – together:

IMG_0013

Next, we put down a sheet of vapor barrier to protect the concrete, and then topped that with gravel.

IMG_0018

Enter the big guns!  Dad showed up with a bucket loader that could JUST fit through the opening of the smoke house door.  He brought the gravel into the smoke house this way, saving our backs from hours of wheelbarrow work.  Look at how close he was on the clearance – just about two inches – AFTER we took the door frames out!

IMG_0015

IMG_0017

IMG_0016

We carefully covered the vapor barrier with about four inches of stone to form a nice, solid base for the concrete, and then the guys from the concrete company came and leveled and prepped the space with a rebar grid:

IMG_0019

About a week after everything was prepped, we awoke one morning to a glorious sight backing down our driveway!

20130912-144839.jpg

20130912-144812.jpg

They made short work of pouring the floor:

IMG_0021

*Better pictures of the concrete floor will be added ASAP!

…and in almost no time they were on to the next project: the foundations for the Little House’s addition!  They set up the forms for the new footers:

IMG_0022

IMG_0023   IMG_0024

Now that the forms are in, we are waiting on the county building inspector to come give the stamp of approval, and then the concrete guys will be back to actually pour the footers.   Once the concrete has dried, the whole project gets turned back over to the masons, who will lay the masonry for the crawl space.  Our cinder blocks arrived on site last week and are poised and ready!

IMG_0026

Can’t wait for the Little House to officially exit the demolition stage and enter the this-is-finally-starting-to-look-better stage!

Smokehouse Phoenix

Hey everyone! Can you believe it is February? It seems like the holidays flew by, and in the midst of merry-making and cold weather, DIY progress slowed a bit around Edge Hill. Professionals, however, come for paychecks and brave the cold. There have been a lot of jobs around the farm that we have tackled willingly, but Rachel and I draw a hard-and-fast line at masonry; that is a job for the true professionals.

When Rachel and I were looking at houses in Richmond three years ago, we were sold on our little two-bedroom in Stratford Hills for a great number of reasons, one of the best being low maintenance!

IMG_0191

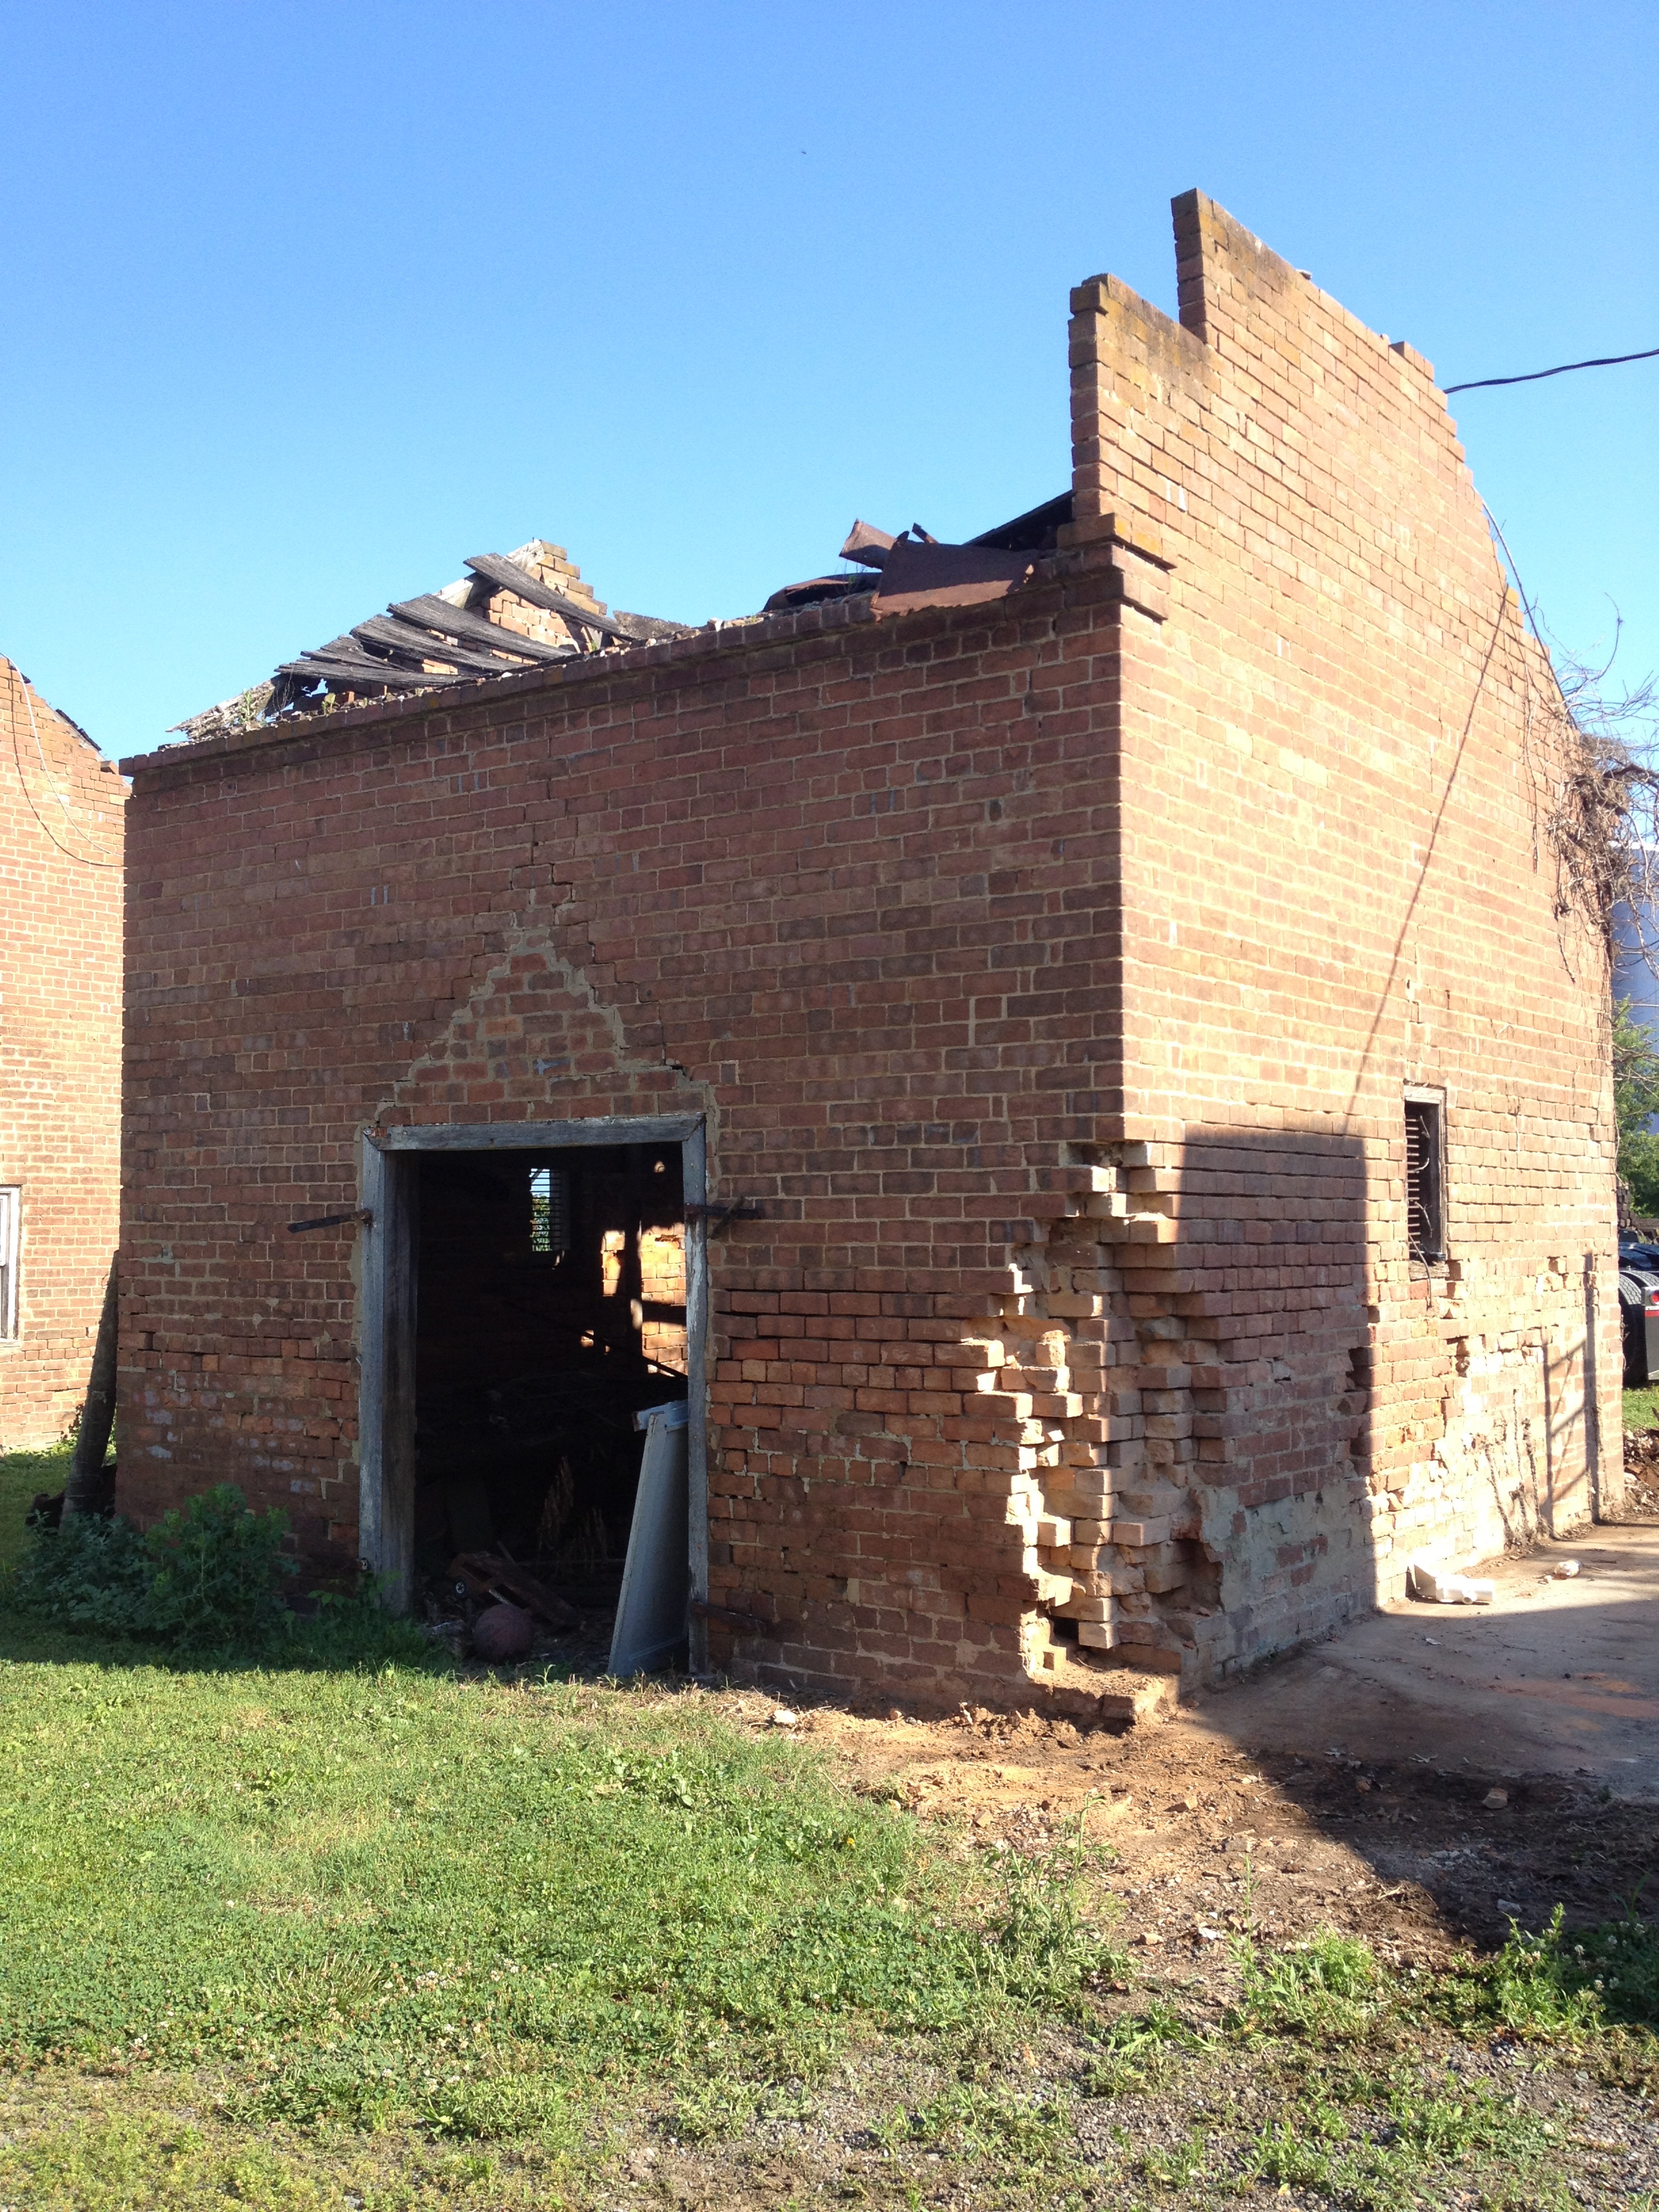
We’re going to miss this place! The Richmond home is solid brick construction, and we knew that meant no painting, reduced insect issues, etc. Edge Hill has taught us, however, that even brickwork needs lovin’ too. And when it does need work, it translates to some major TLC. You might remember that our brick smoke house was in dire straights when we arrived on the scene:

Chad & Rachel DA-108

IMG_4407

IMG_0738

(this is the view along the top of the back wall; look at how the vegetation turned the timbers into a nice foothold…and eventually dirt!)

IMG_0457


IMG_0710

You’ll also remember that, at the end of the summer, we got some help tearing down the roof, removing the rotten rafters, and clearing out the junk that was inside the smoke house.

IMG_0678

IMG_0709

IMG_0706

IMG_0679

Even though we had cleared the place out, the smokehouse was still listing at an uncomfortable angle…think colonial America’s version of the Leaning Tower of Pisa. Time to call in the professionals: Chuck and his team of brick masons prevented the structure from falling down before our eyes.

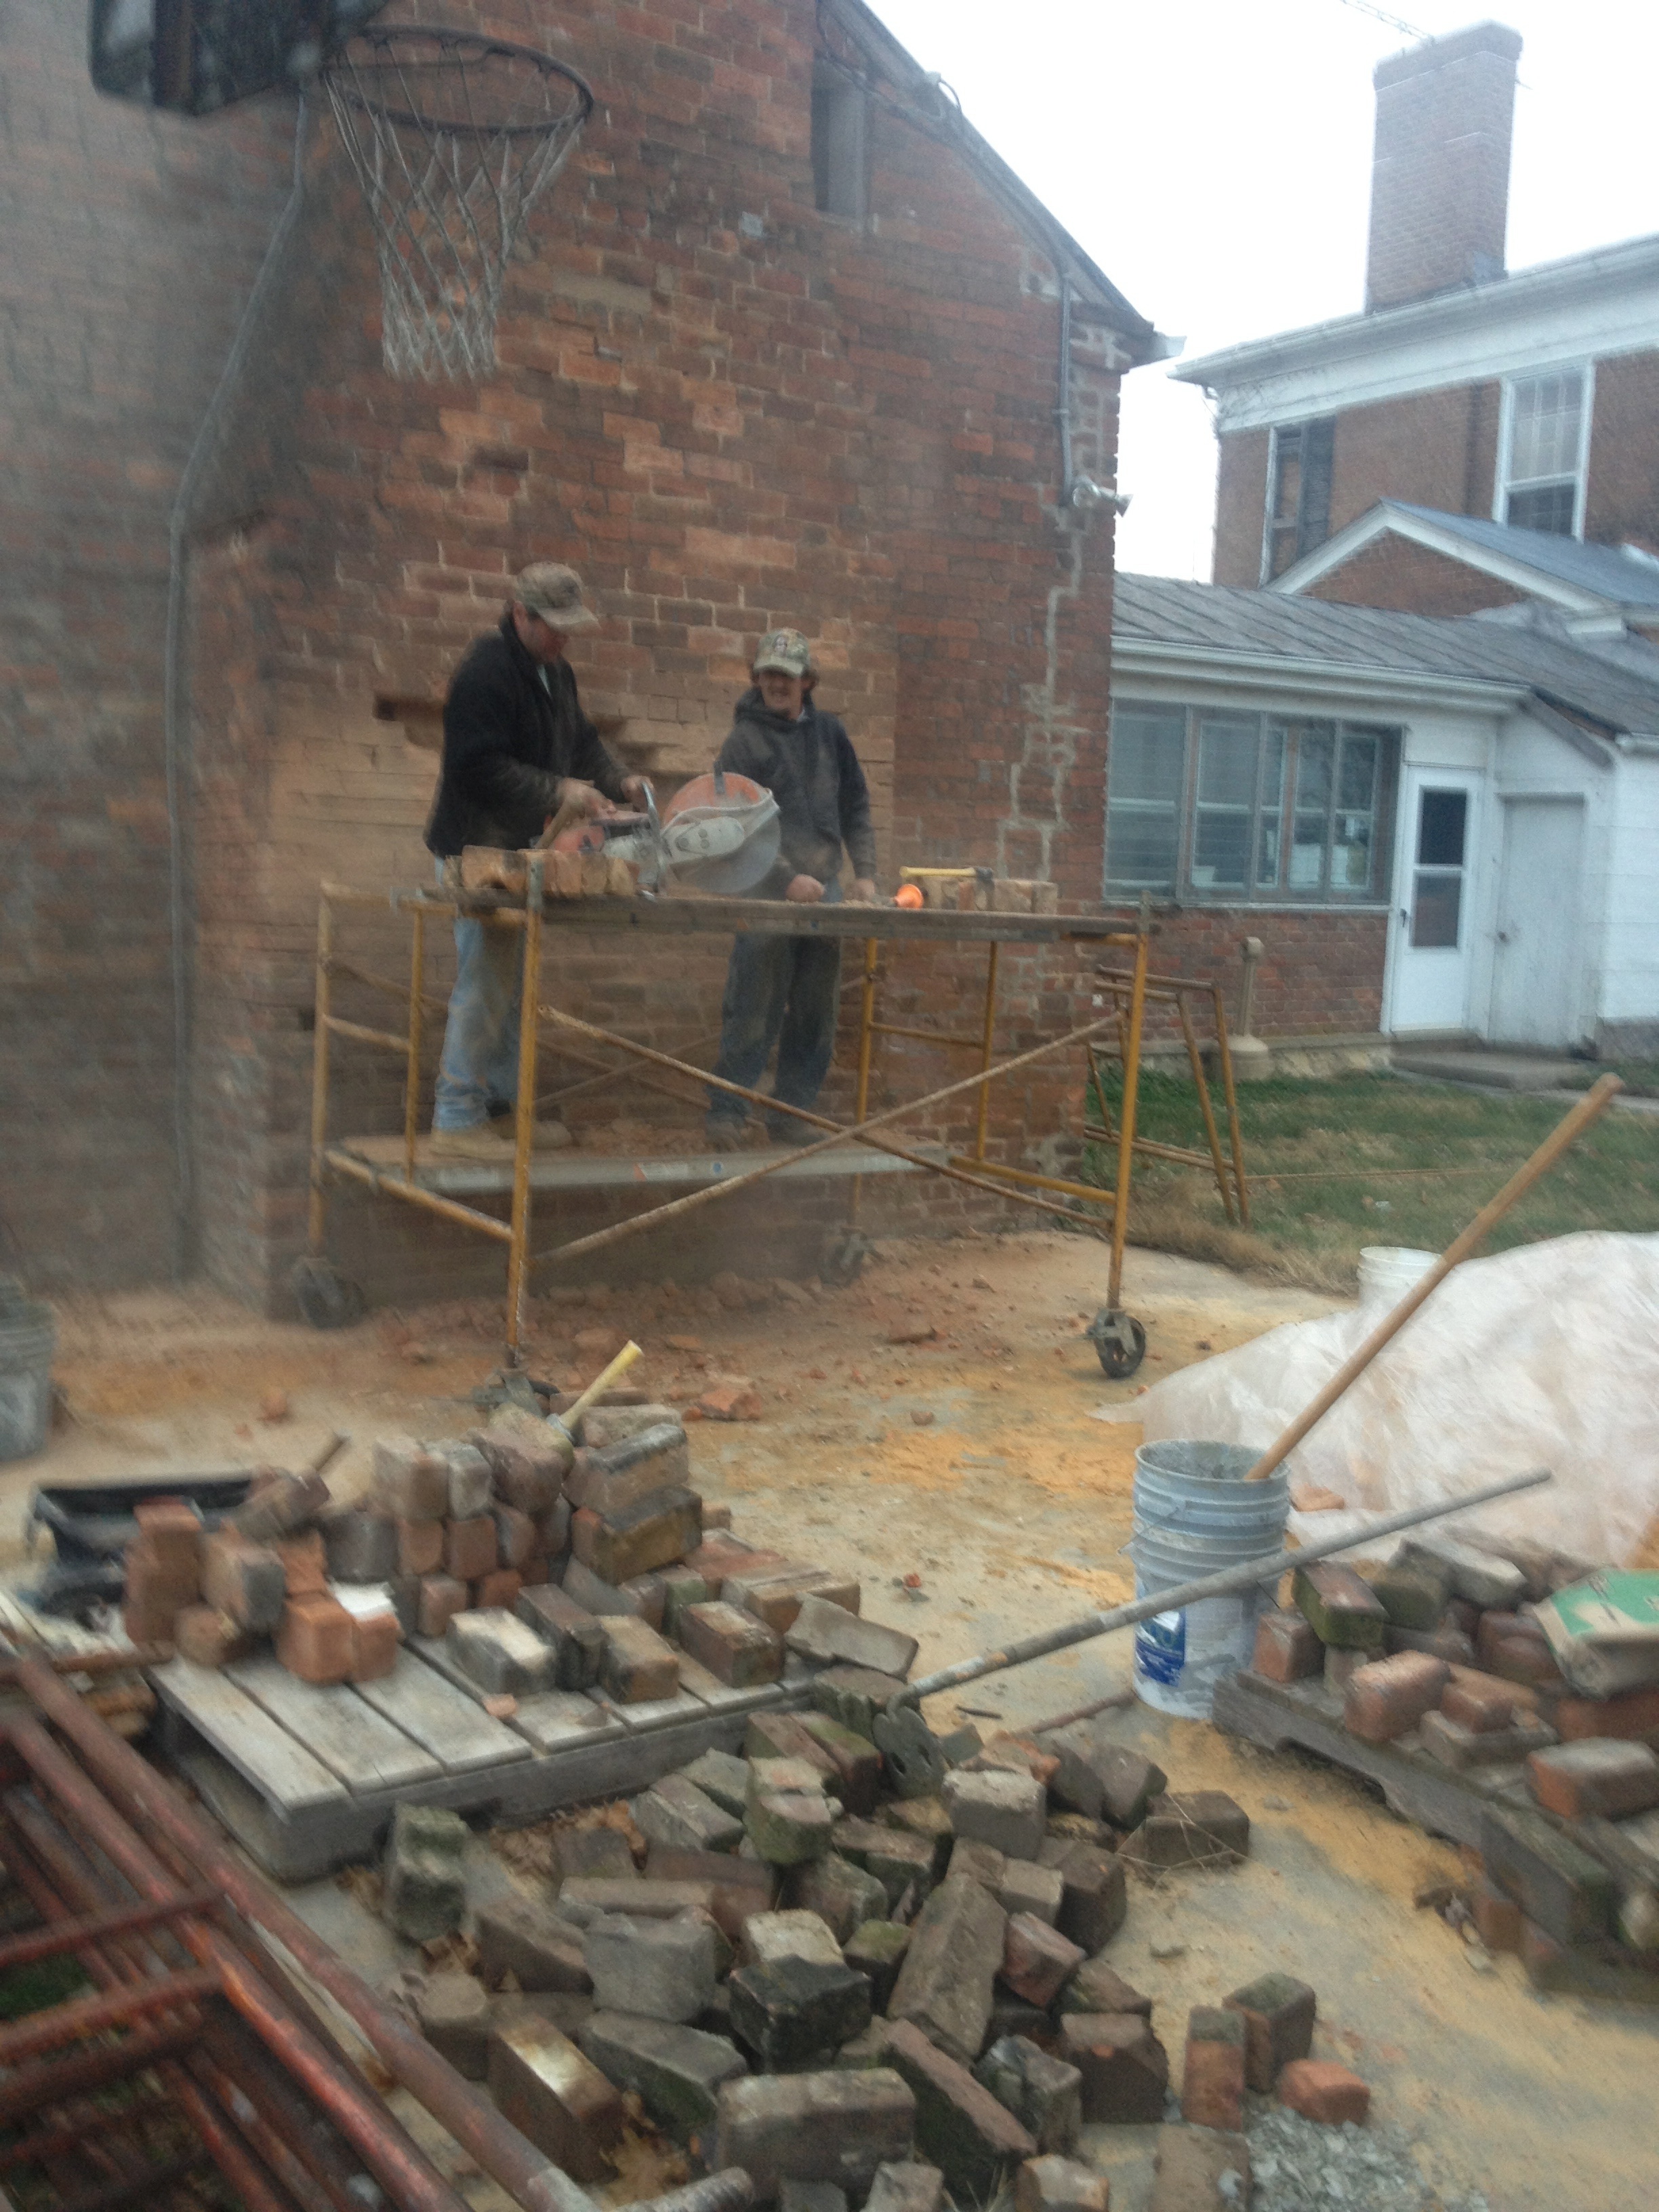
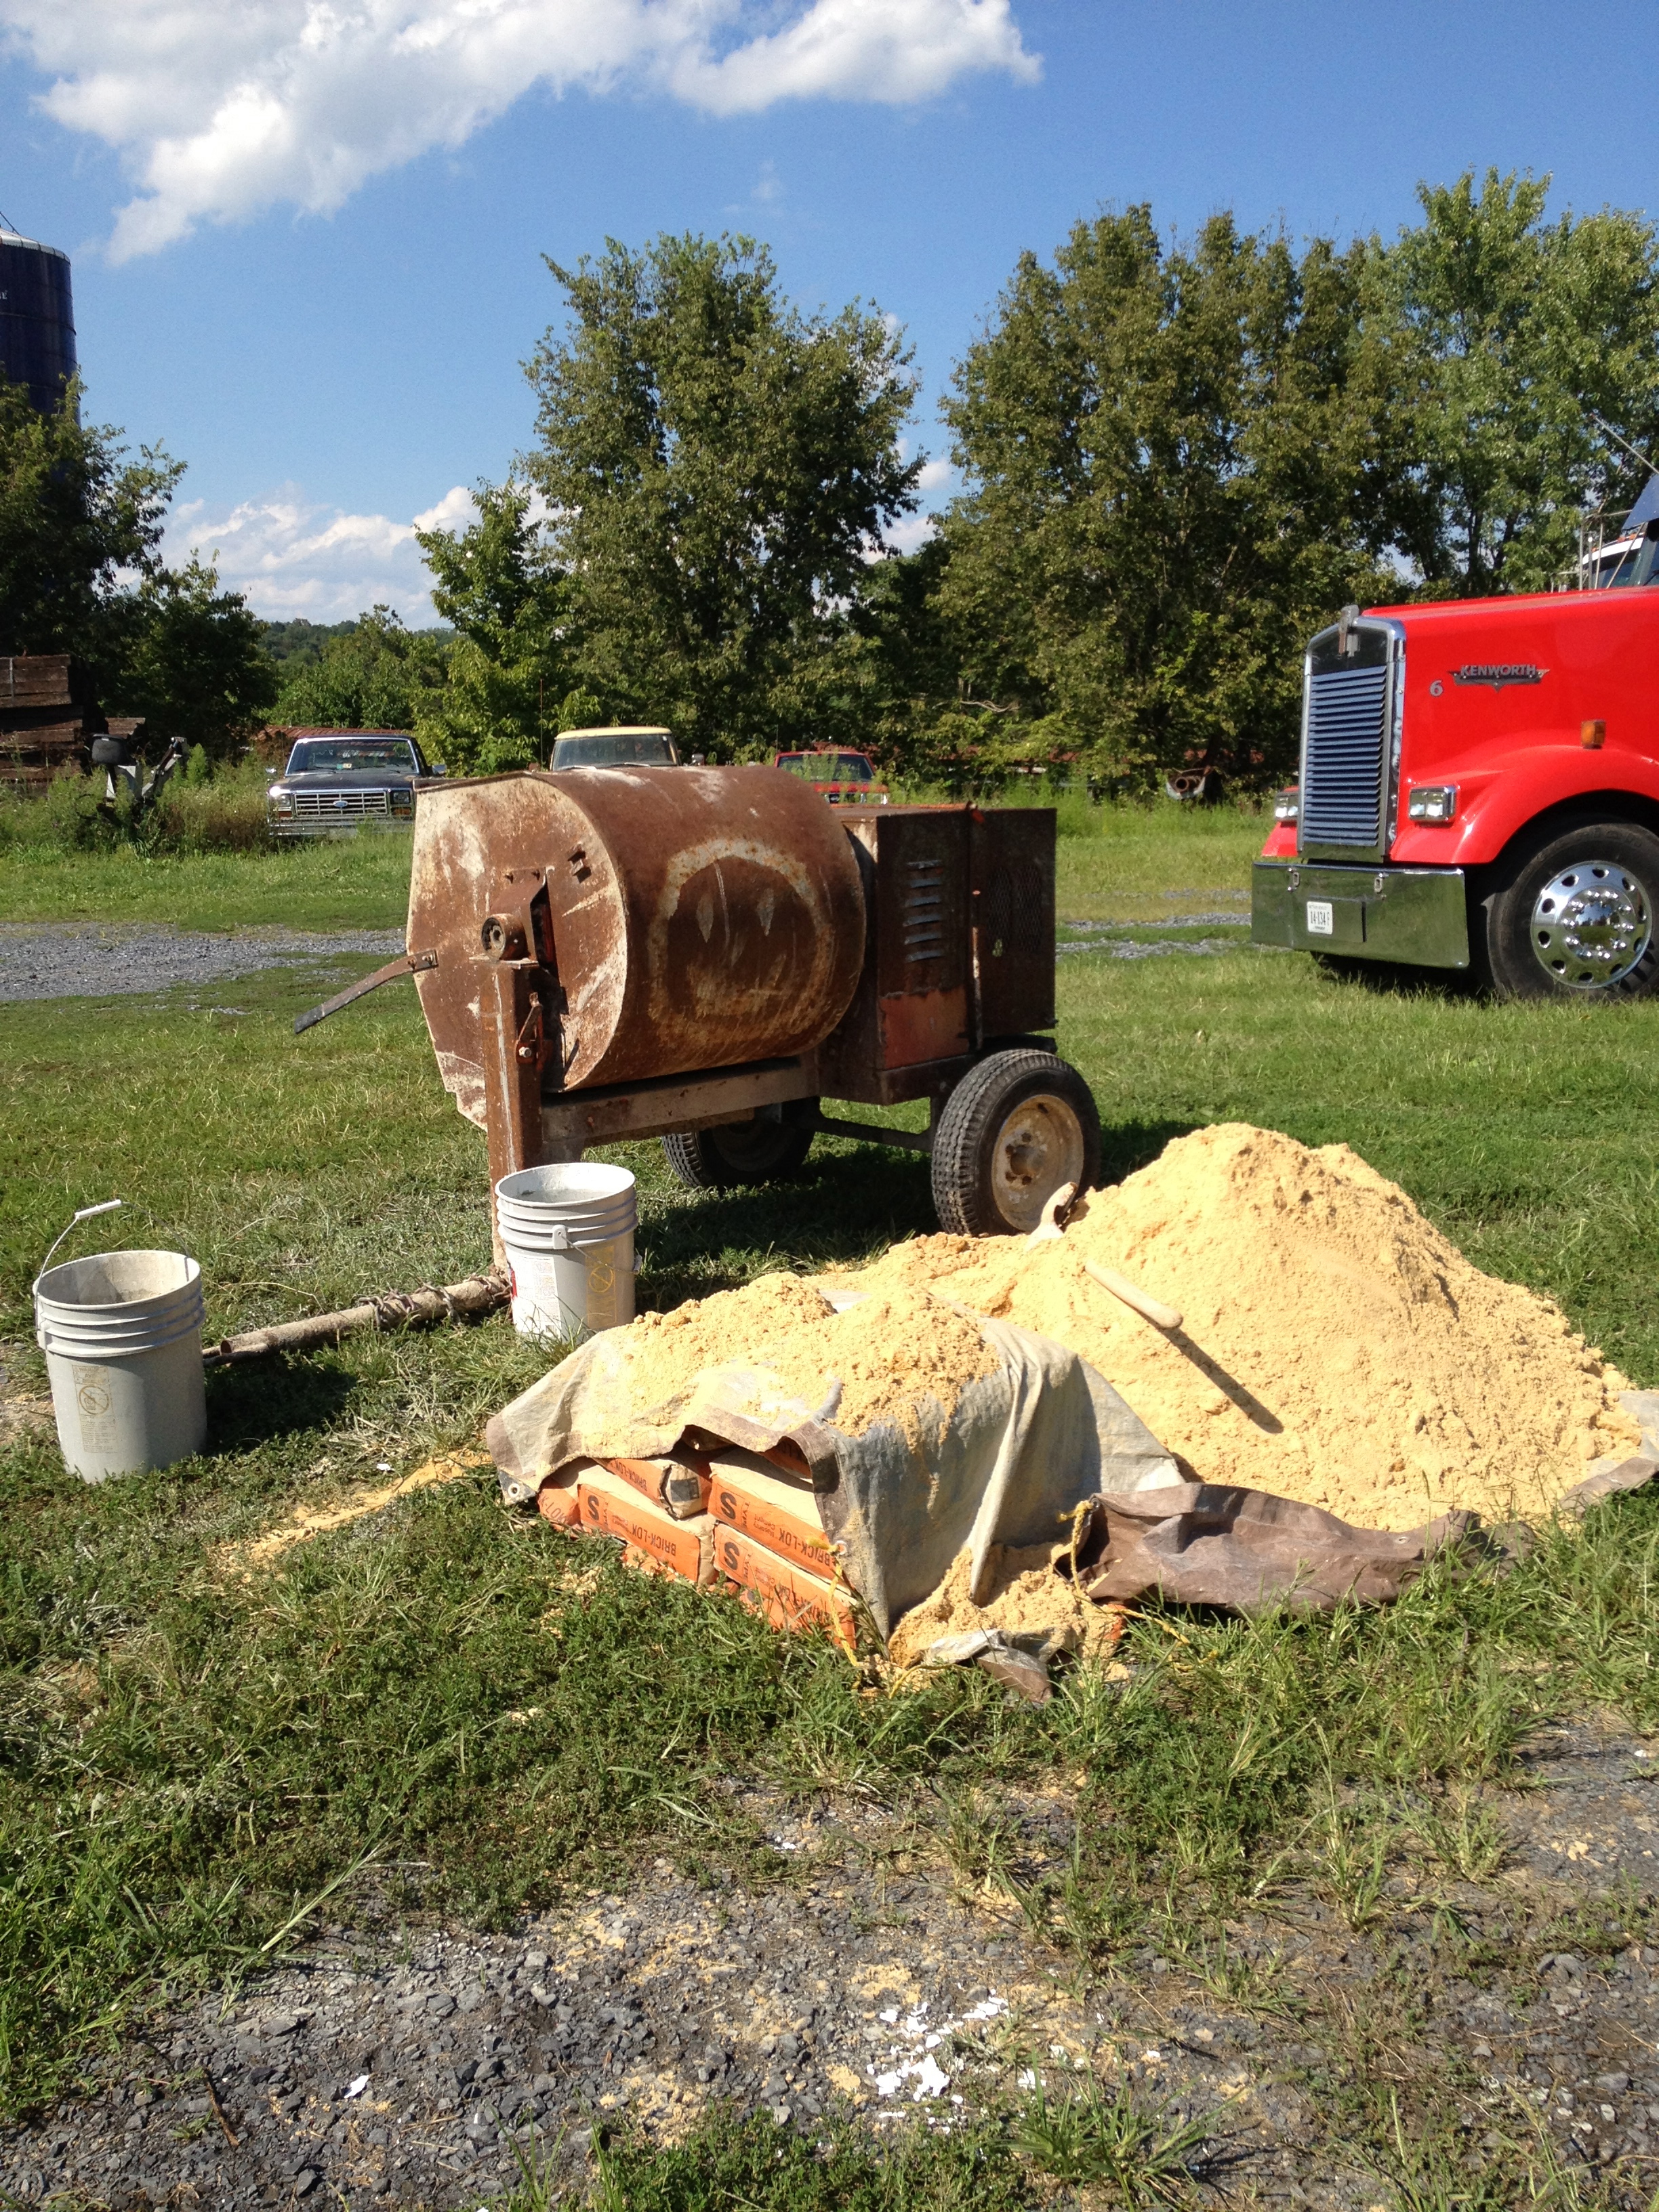
The masons went through a “repointing” process – they removed the old mortar and replaced it (this 2.5 minute video is very similar to the process Chuck used). They also used the pallets of brick we salvaged from the brick mound early in the summer . The masons worked on our property primarily on the weekends, which meant we got to observe the process!

IMG_1124

(this is actually the summer kitchen, but you get the idea)

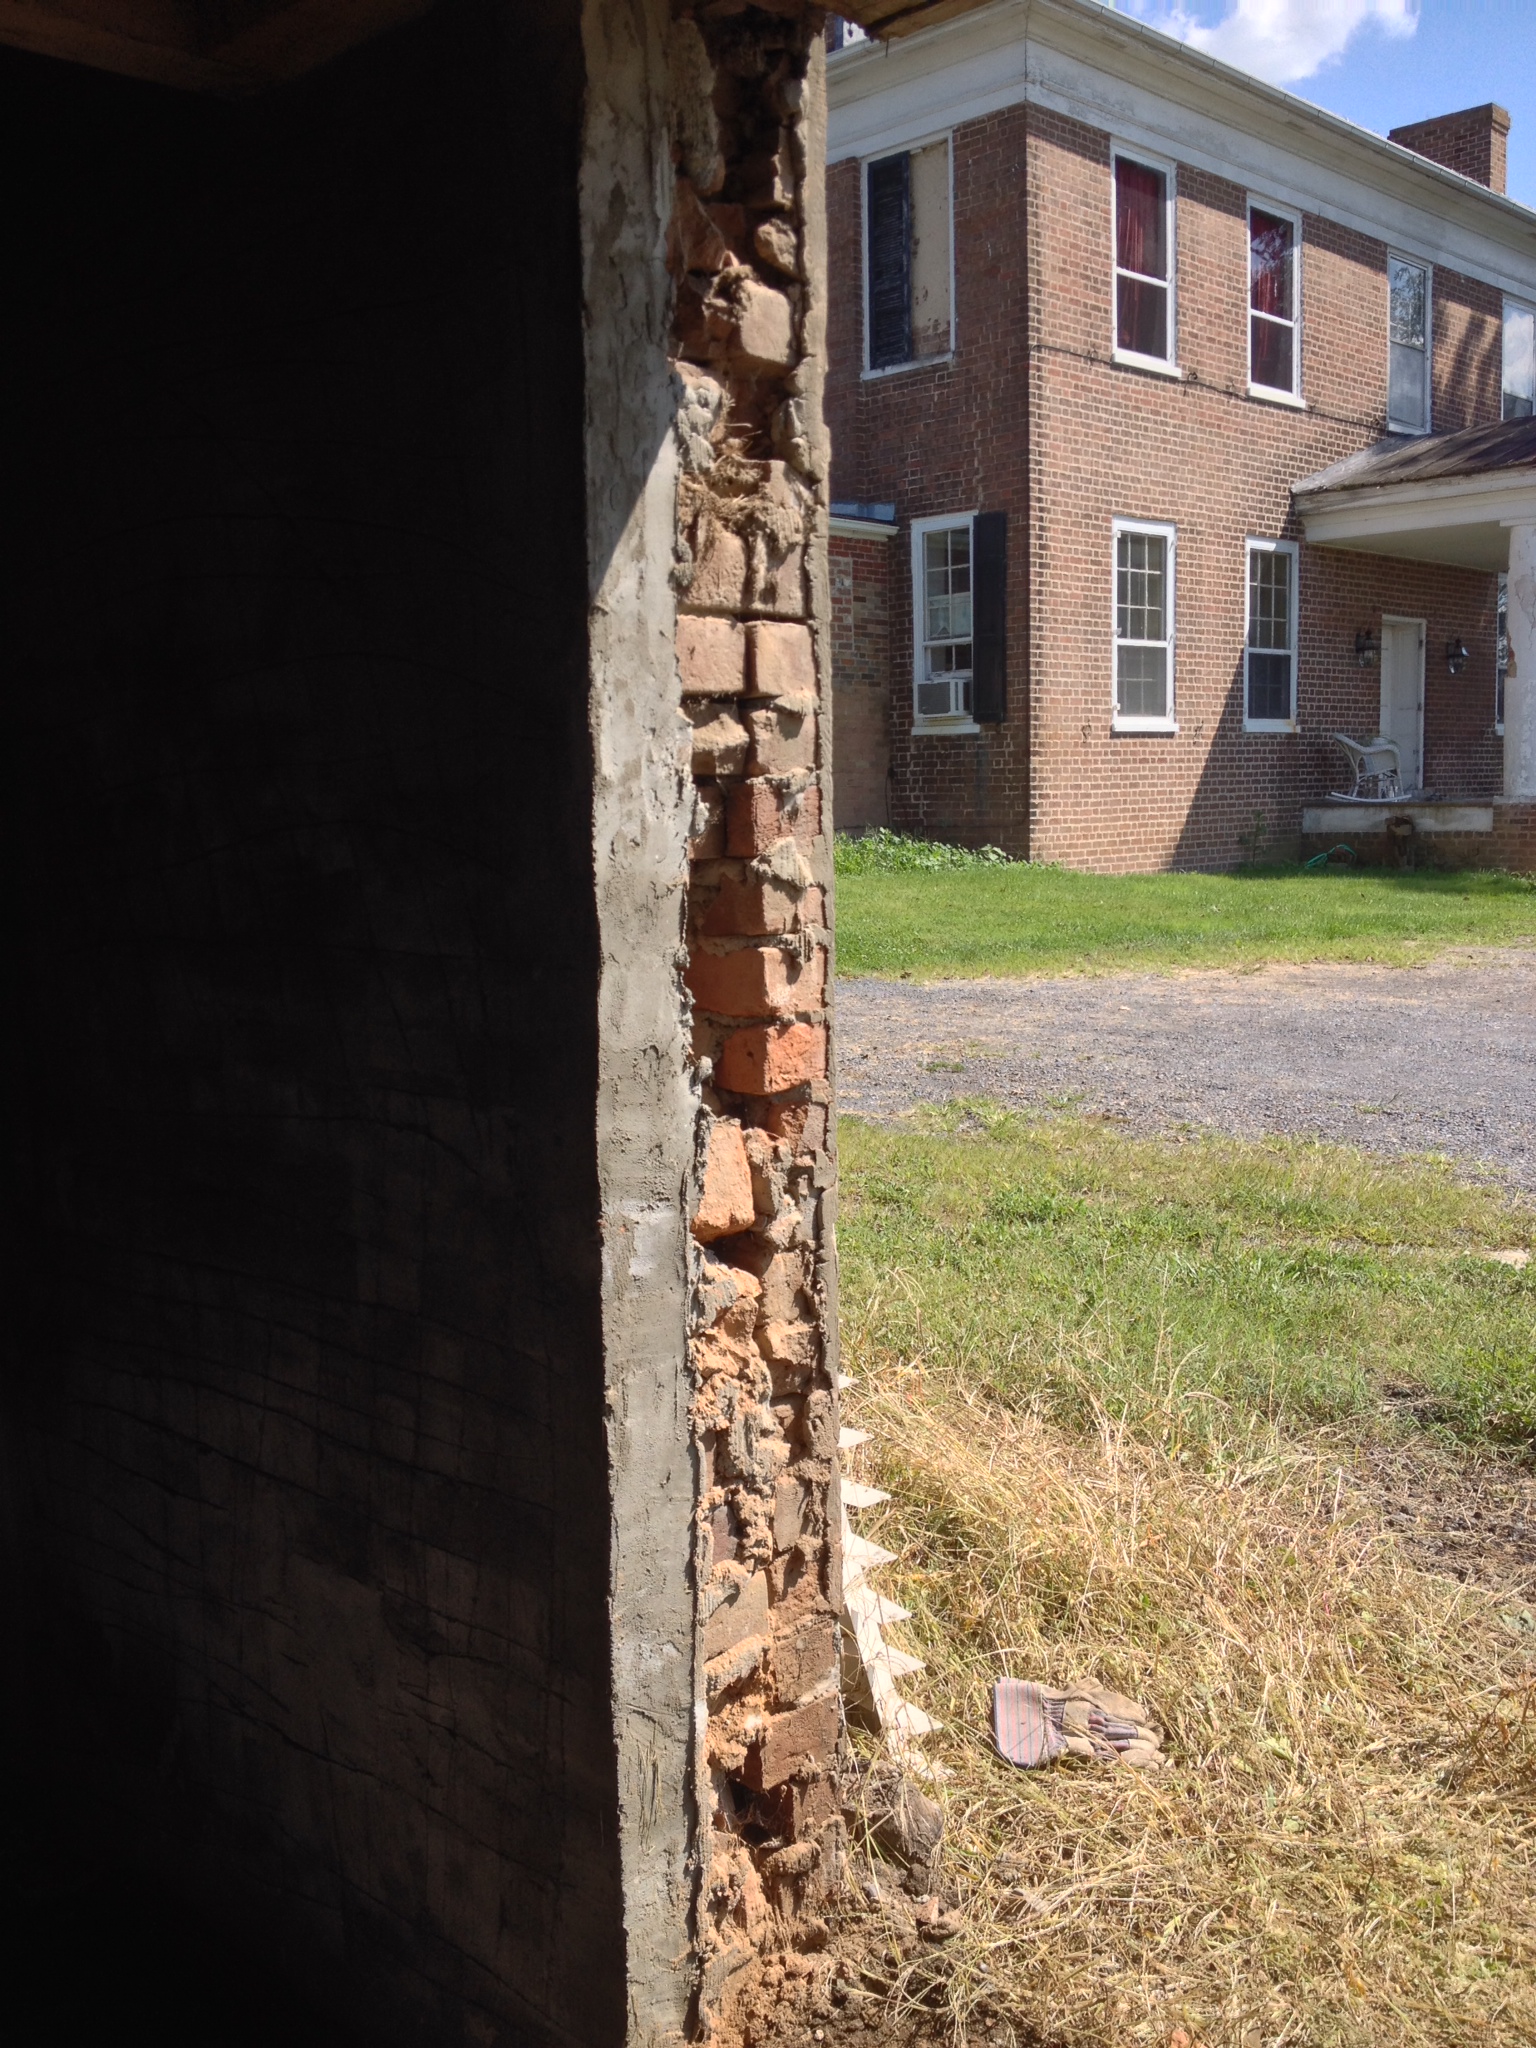
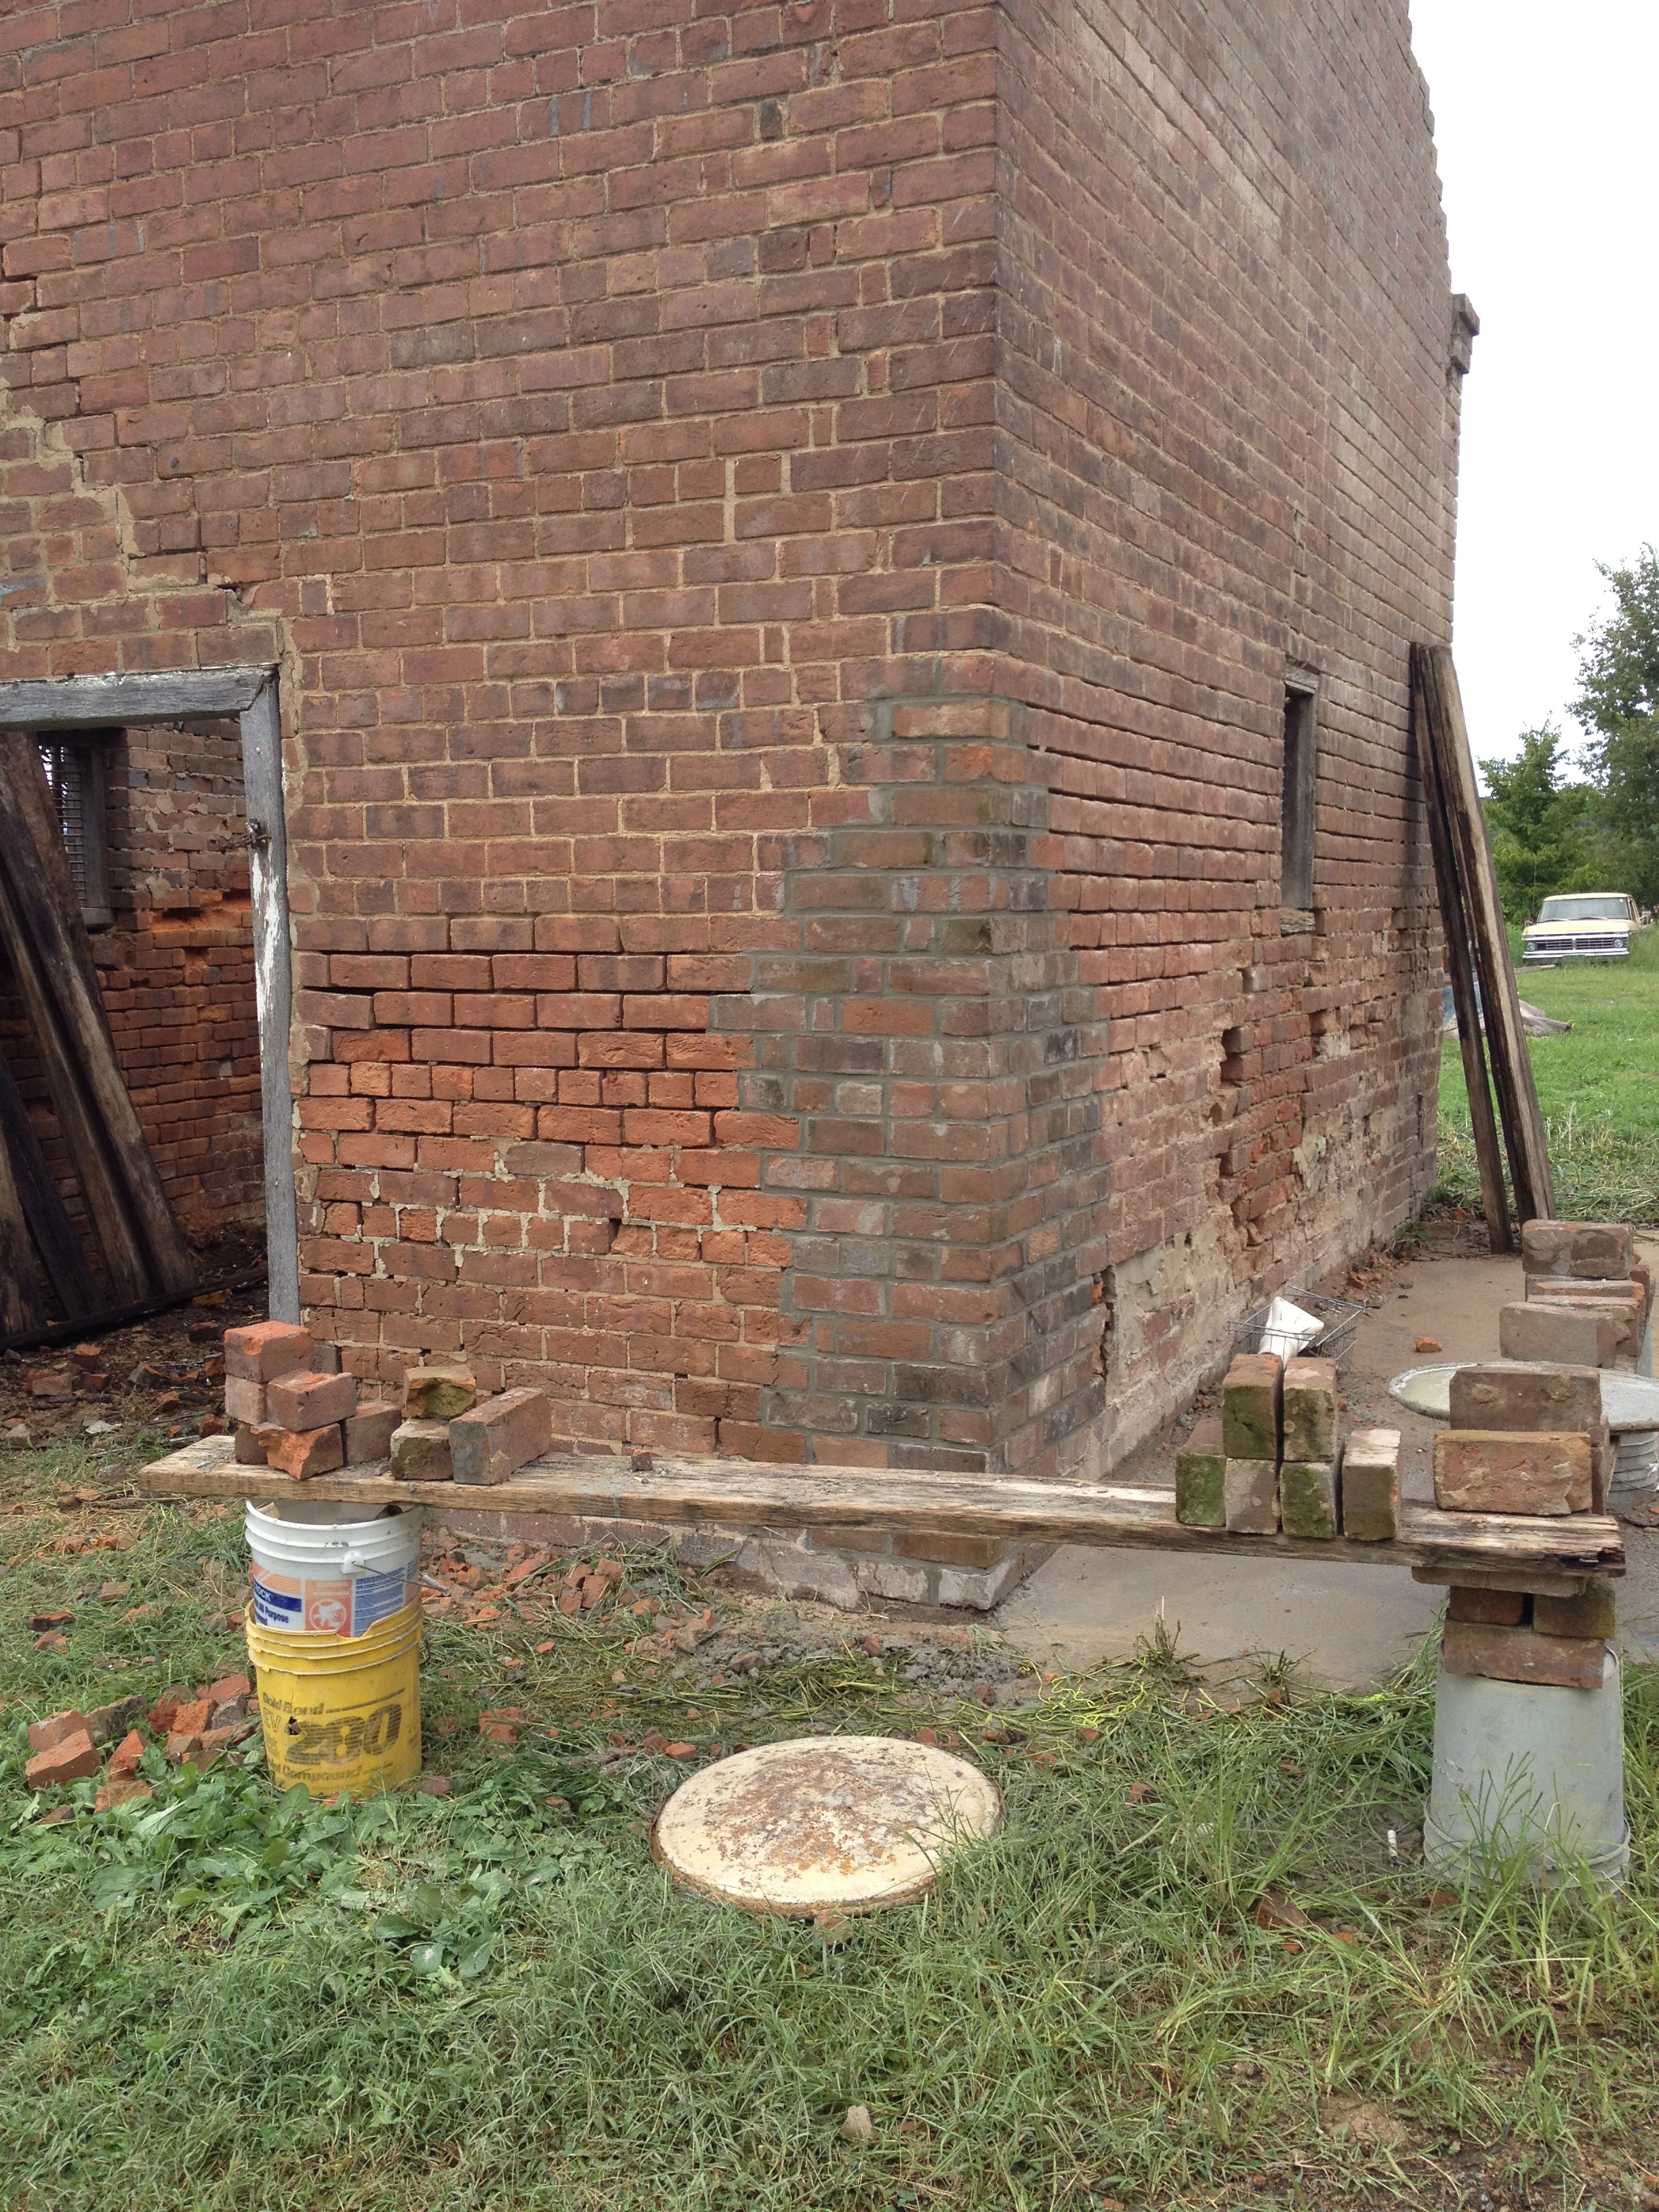
Our first and main concern was the corner of the smokehouse, which was mysteriously missing a sizable chunk right at car-bumper height, and the accompanying decayed wall had been haphazardly repaired with cement slathered into the brick voids.

img_0457-e1359820818746

Our masons agreed this was the first priority. The guys got right on it:

IMG_0766

We are using Type S mortar and sand so the color is very close to the original mortar color. The guys started by routing out the joints:

IMG_0763

And then proceeded to rebuild!

IMG_0787

IMG_0799

While there is some discoloration, fear not! There is a lot of moisture in the bricks and mortar that will evaporate over time, and once the weather is warm again each wall will be gently washed down to remove any excess brick/mortar dust. Last, repairing the east face of the structure was was a job that required a LOT of brick…which we did not have. Our hand-made, original bricks are conveniently size extra-large, meaning that matching brick must be custom-made for approximately $5.00 a brick. We (or should I say, our wallets) were in desperate need of a creative solution.

The masons said they could fix the wall’s structural integrity by using cinder blocks as an internal layer, and, because our walls are SO THICK, they could then face the exterior with “facing brick” made from our small reserve of original brick. This meant they would cut each of our old bricks into three slices, and preserve the historic look without having to patch in bricks that aren’t a perfect match!

View of the cinder blocks in place:

IMG_1159

View of the exterior!

IMG_1014

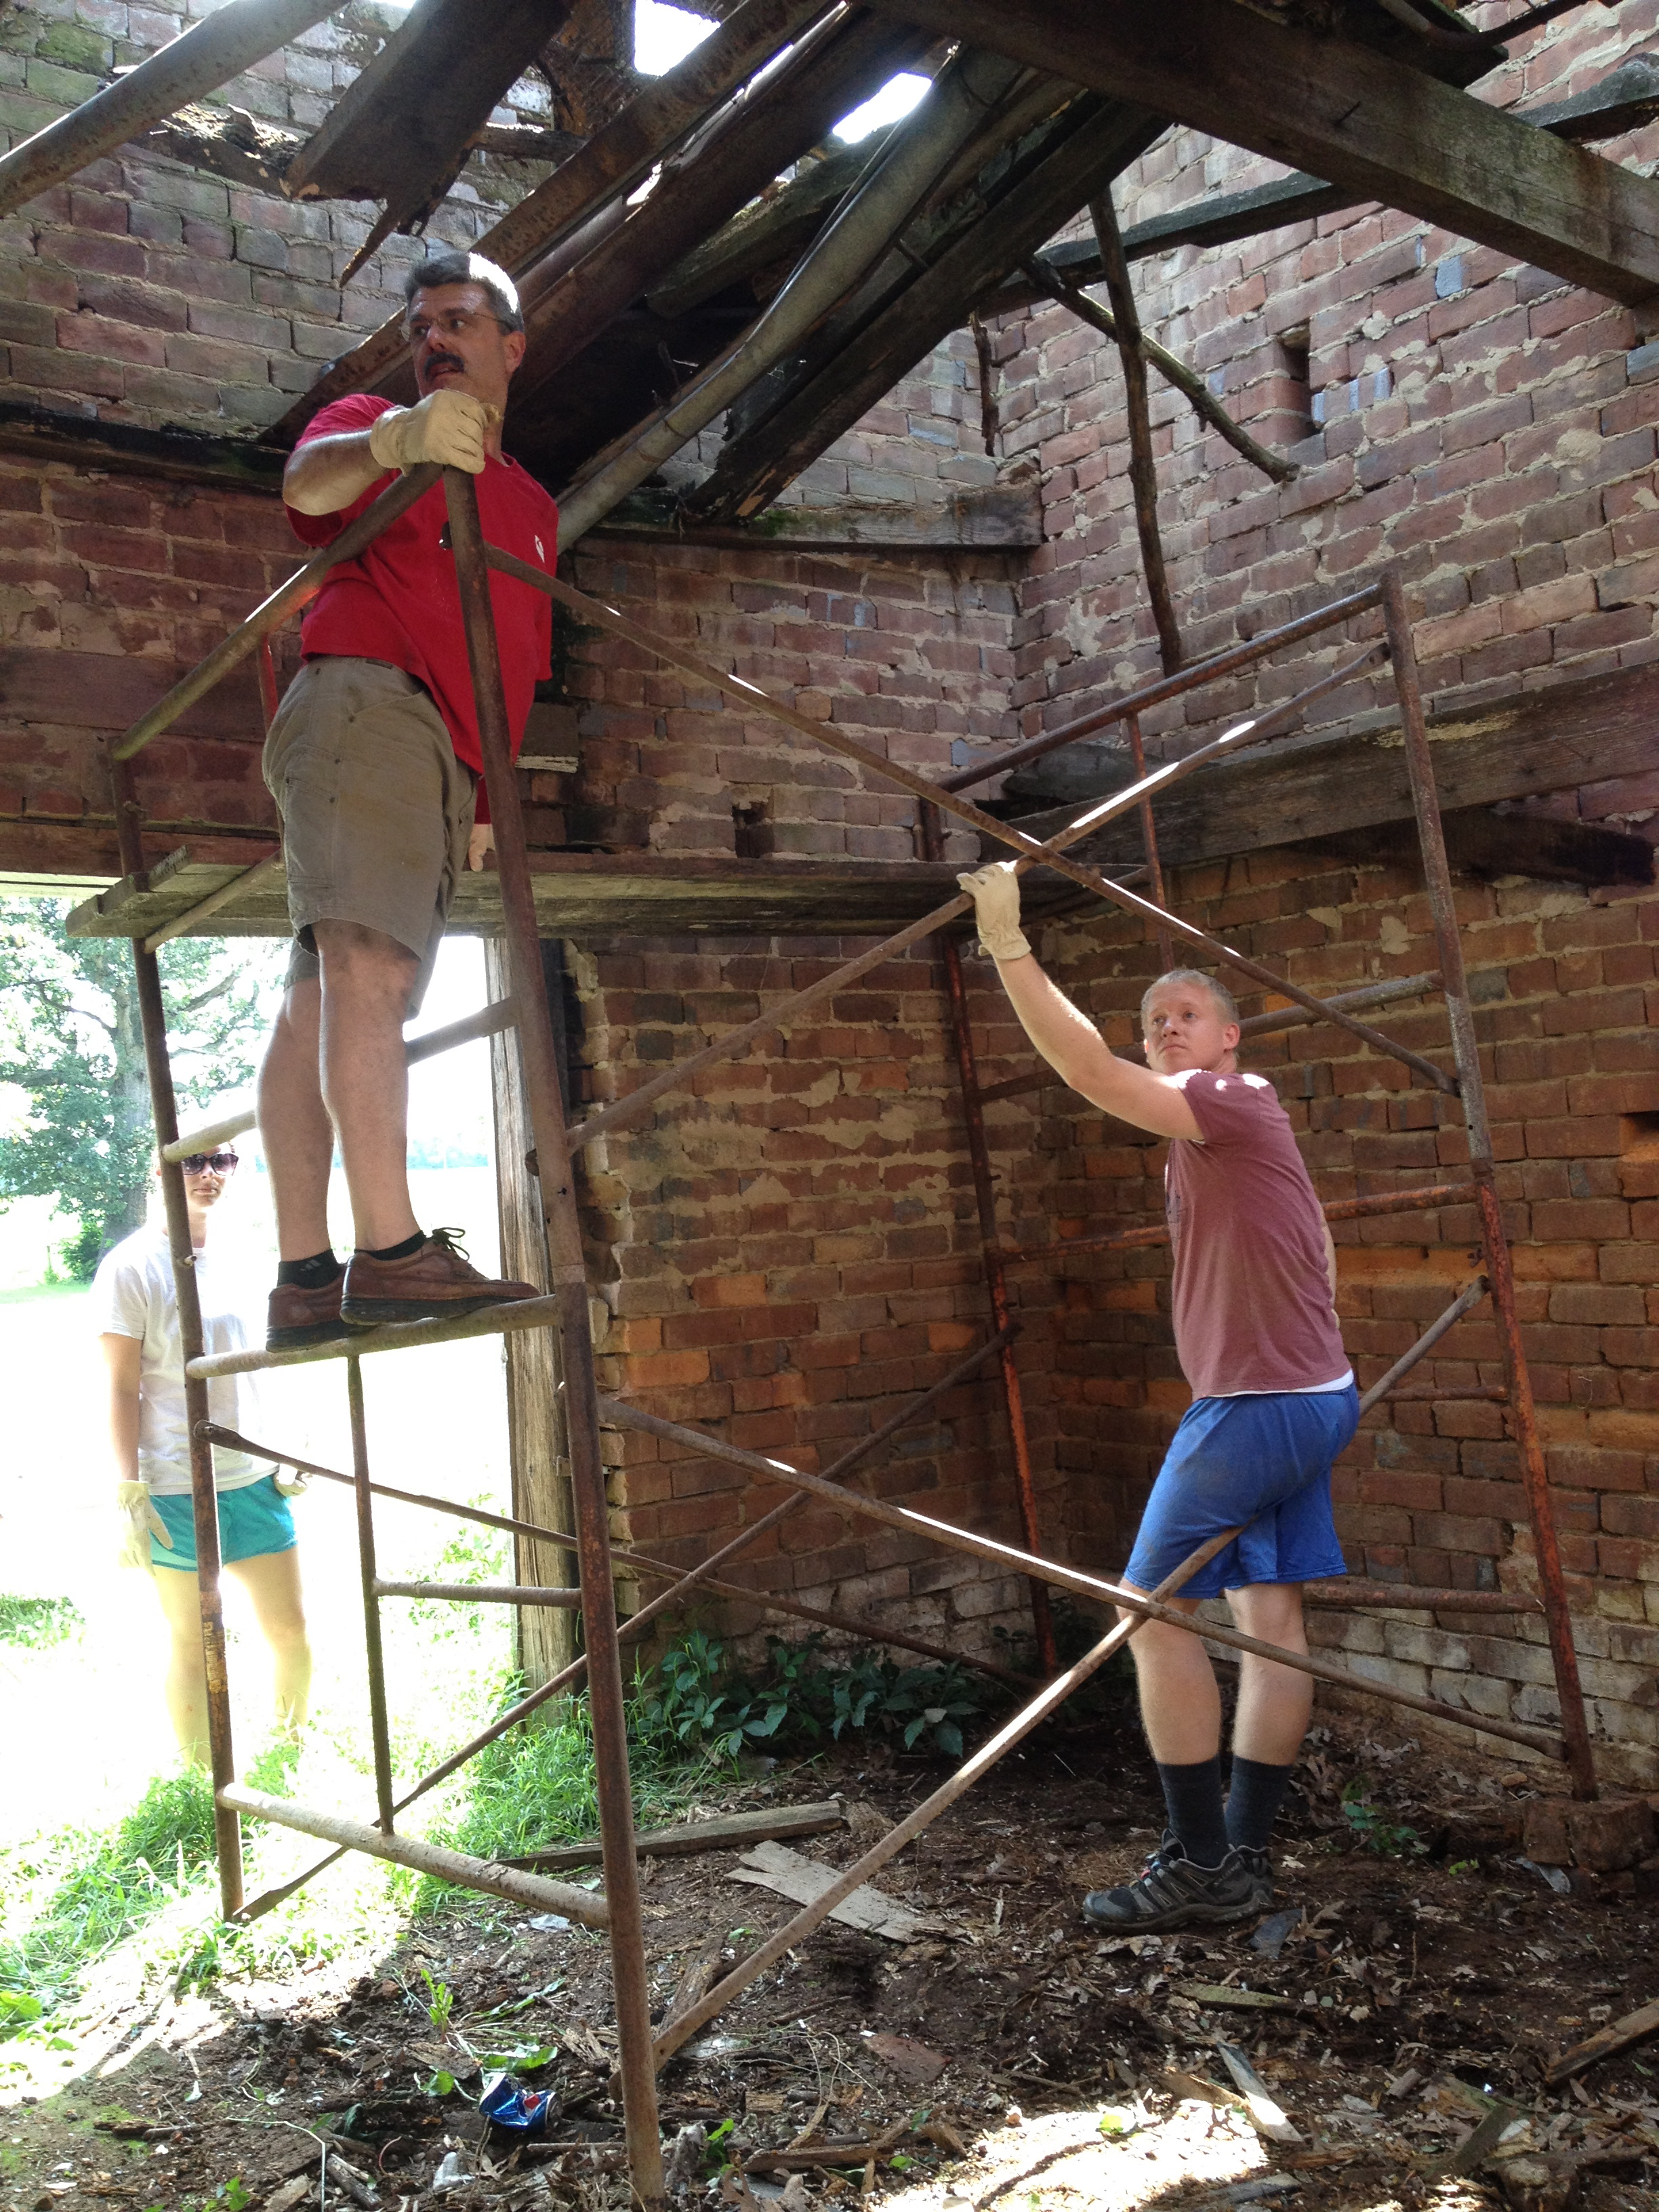
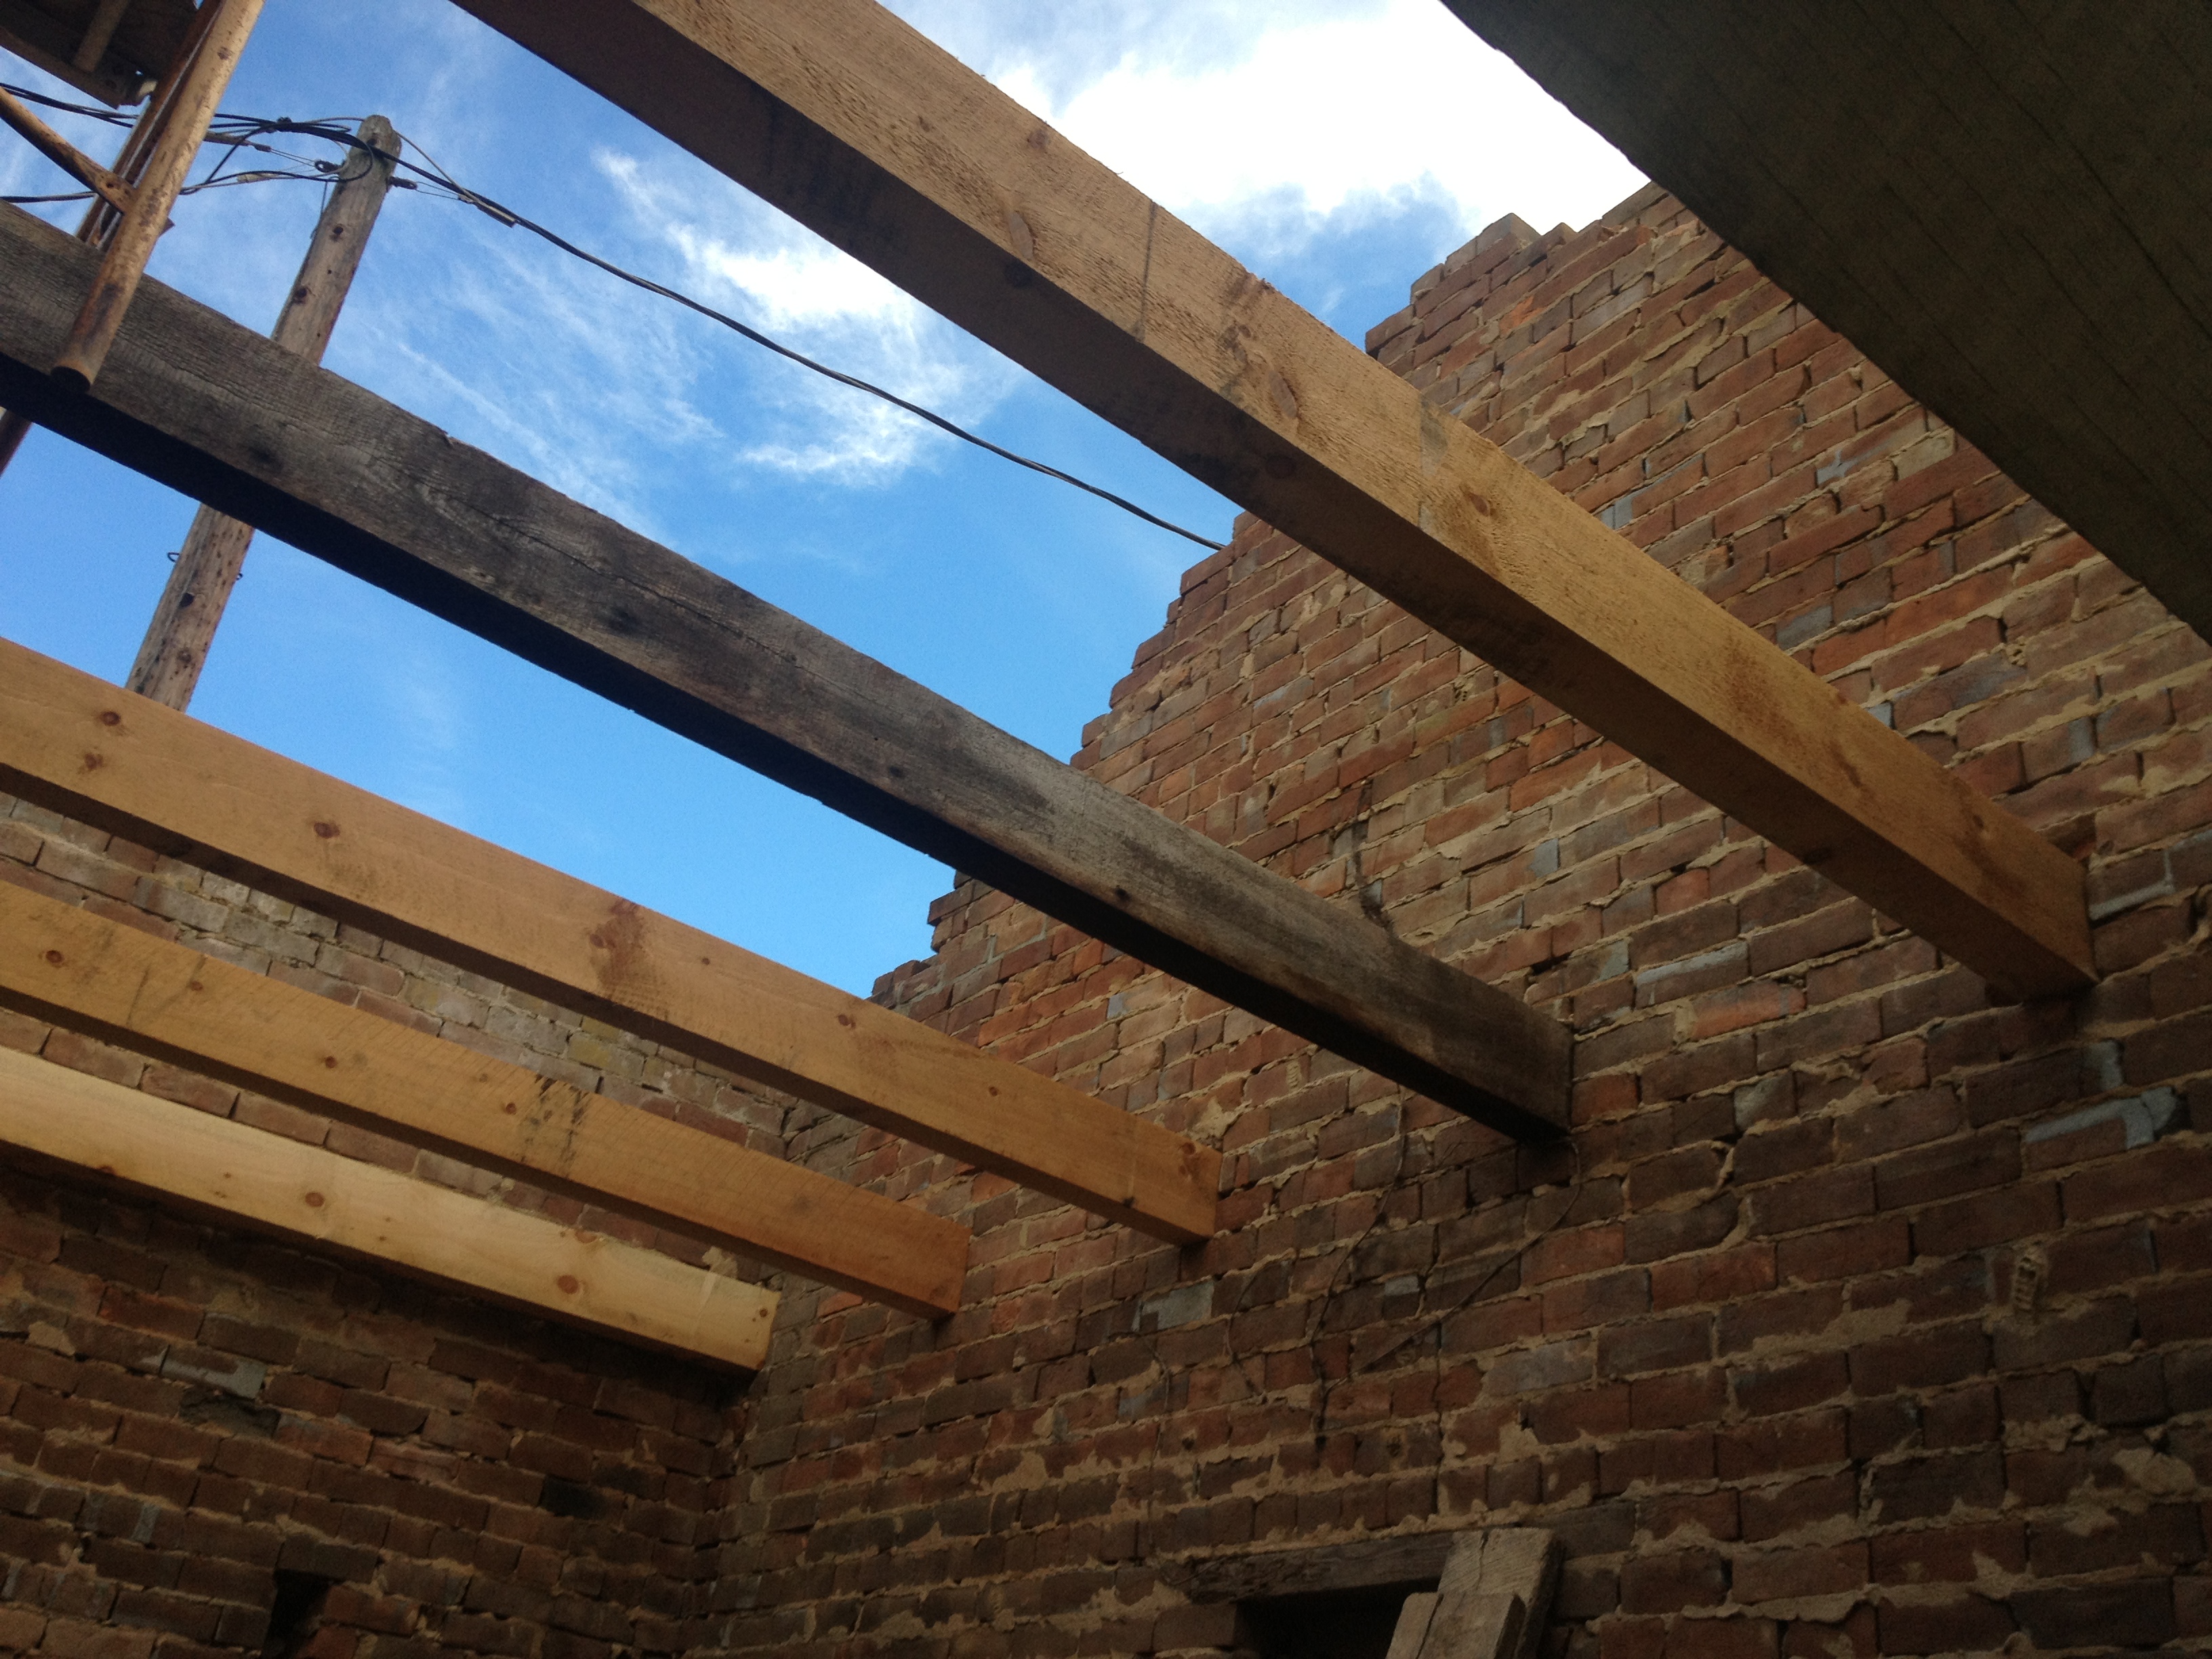
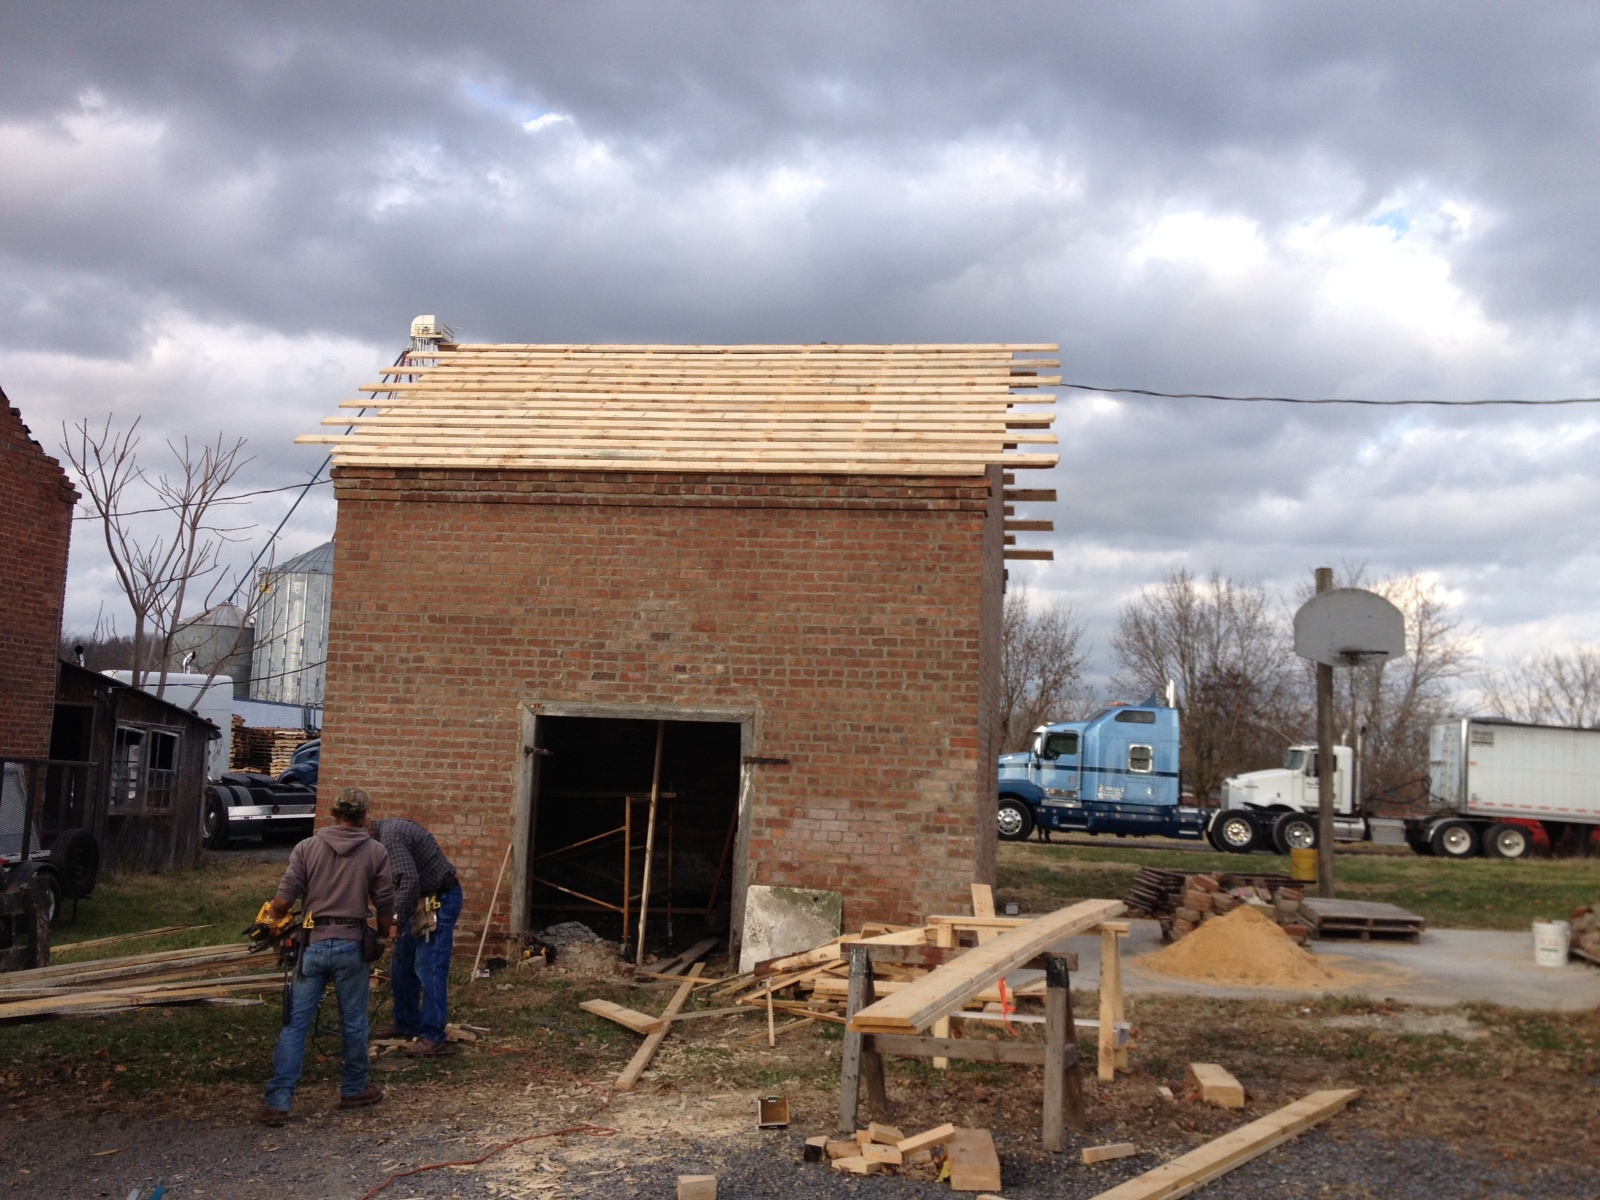
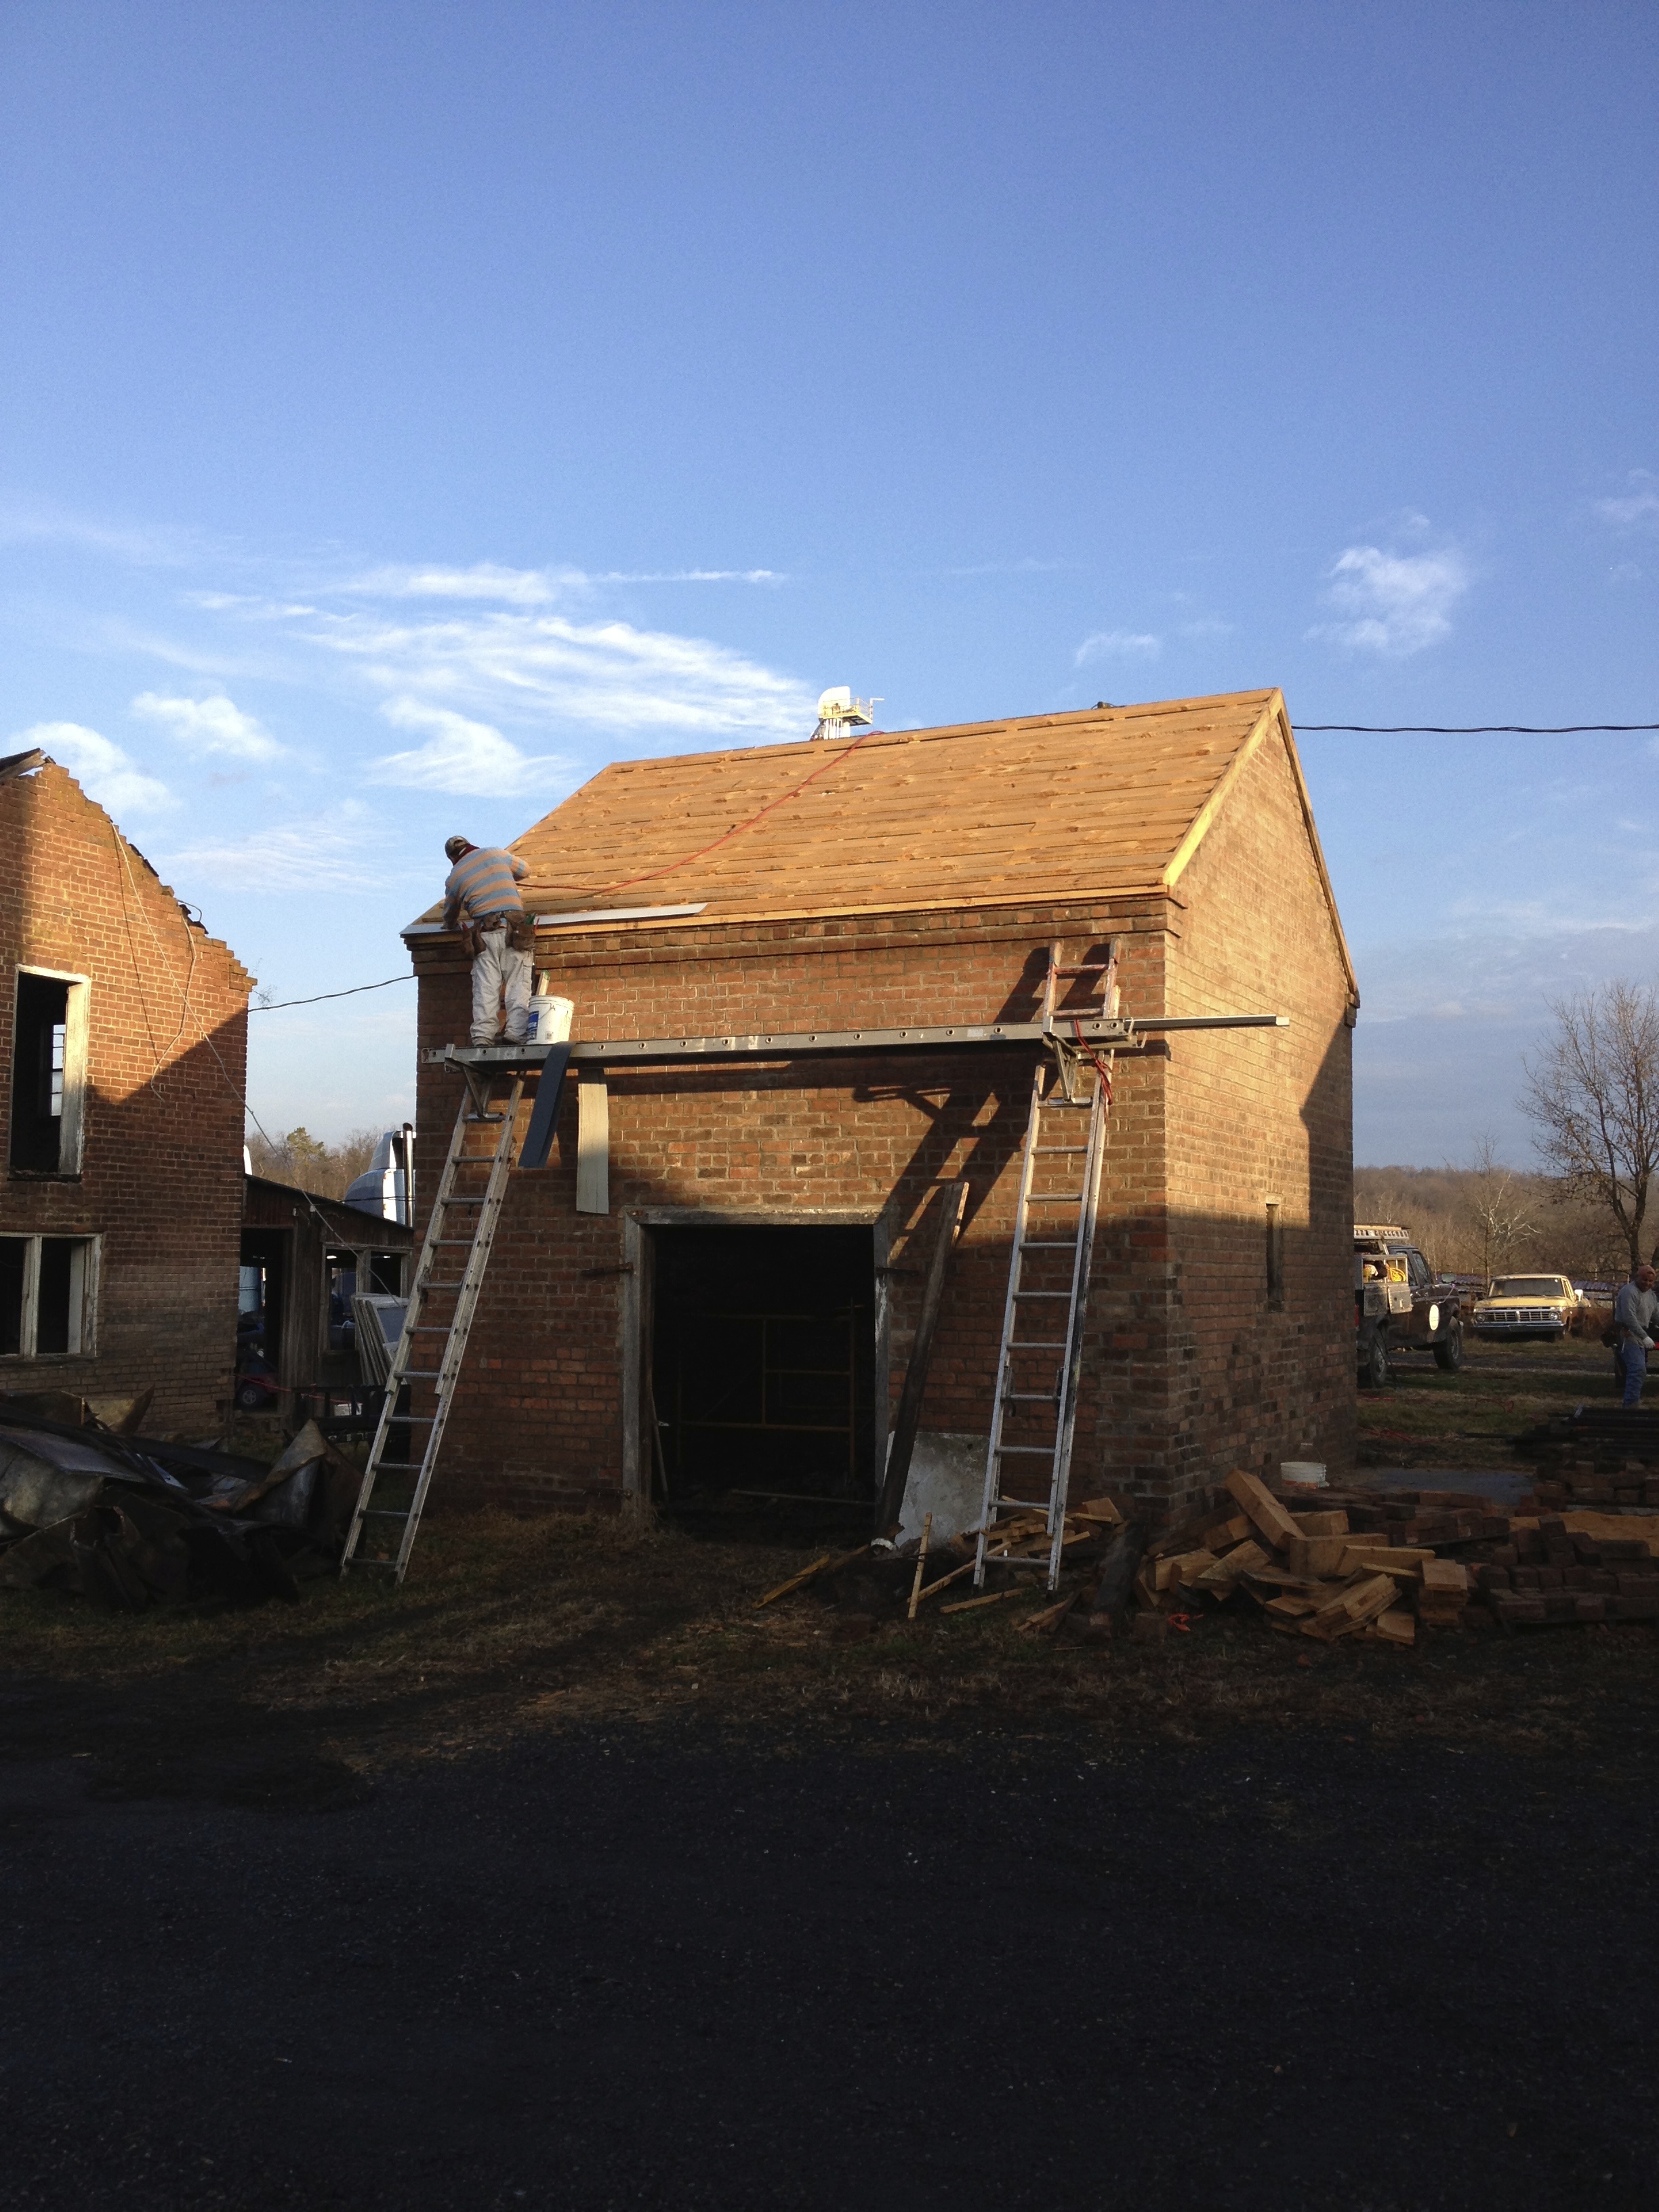
Once the brick was all repaired and stable, time to call in Colon and frame up the roof:

IMG_1145

IMG_1013

We designed the roof trusses exactly like the old rotten ones we took down, adding back the wooden pegs for an authentic timber-framed aesthetic. In the shot below, you can see the pegs as well as the ONE old beam that has survived 180 years!!

IMG_1187

And last, but certainly not least, the roofers came and did their job. Their work was done in a New York Minute, so we only got one picture of their progress:

IMG_1204

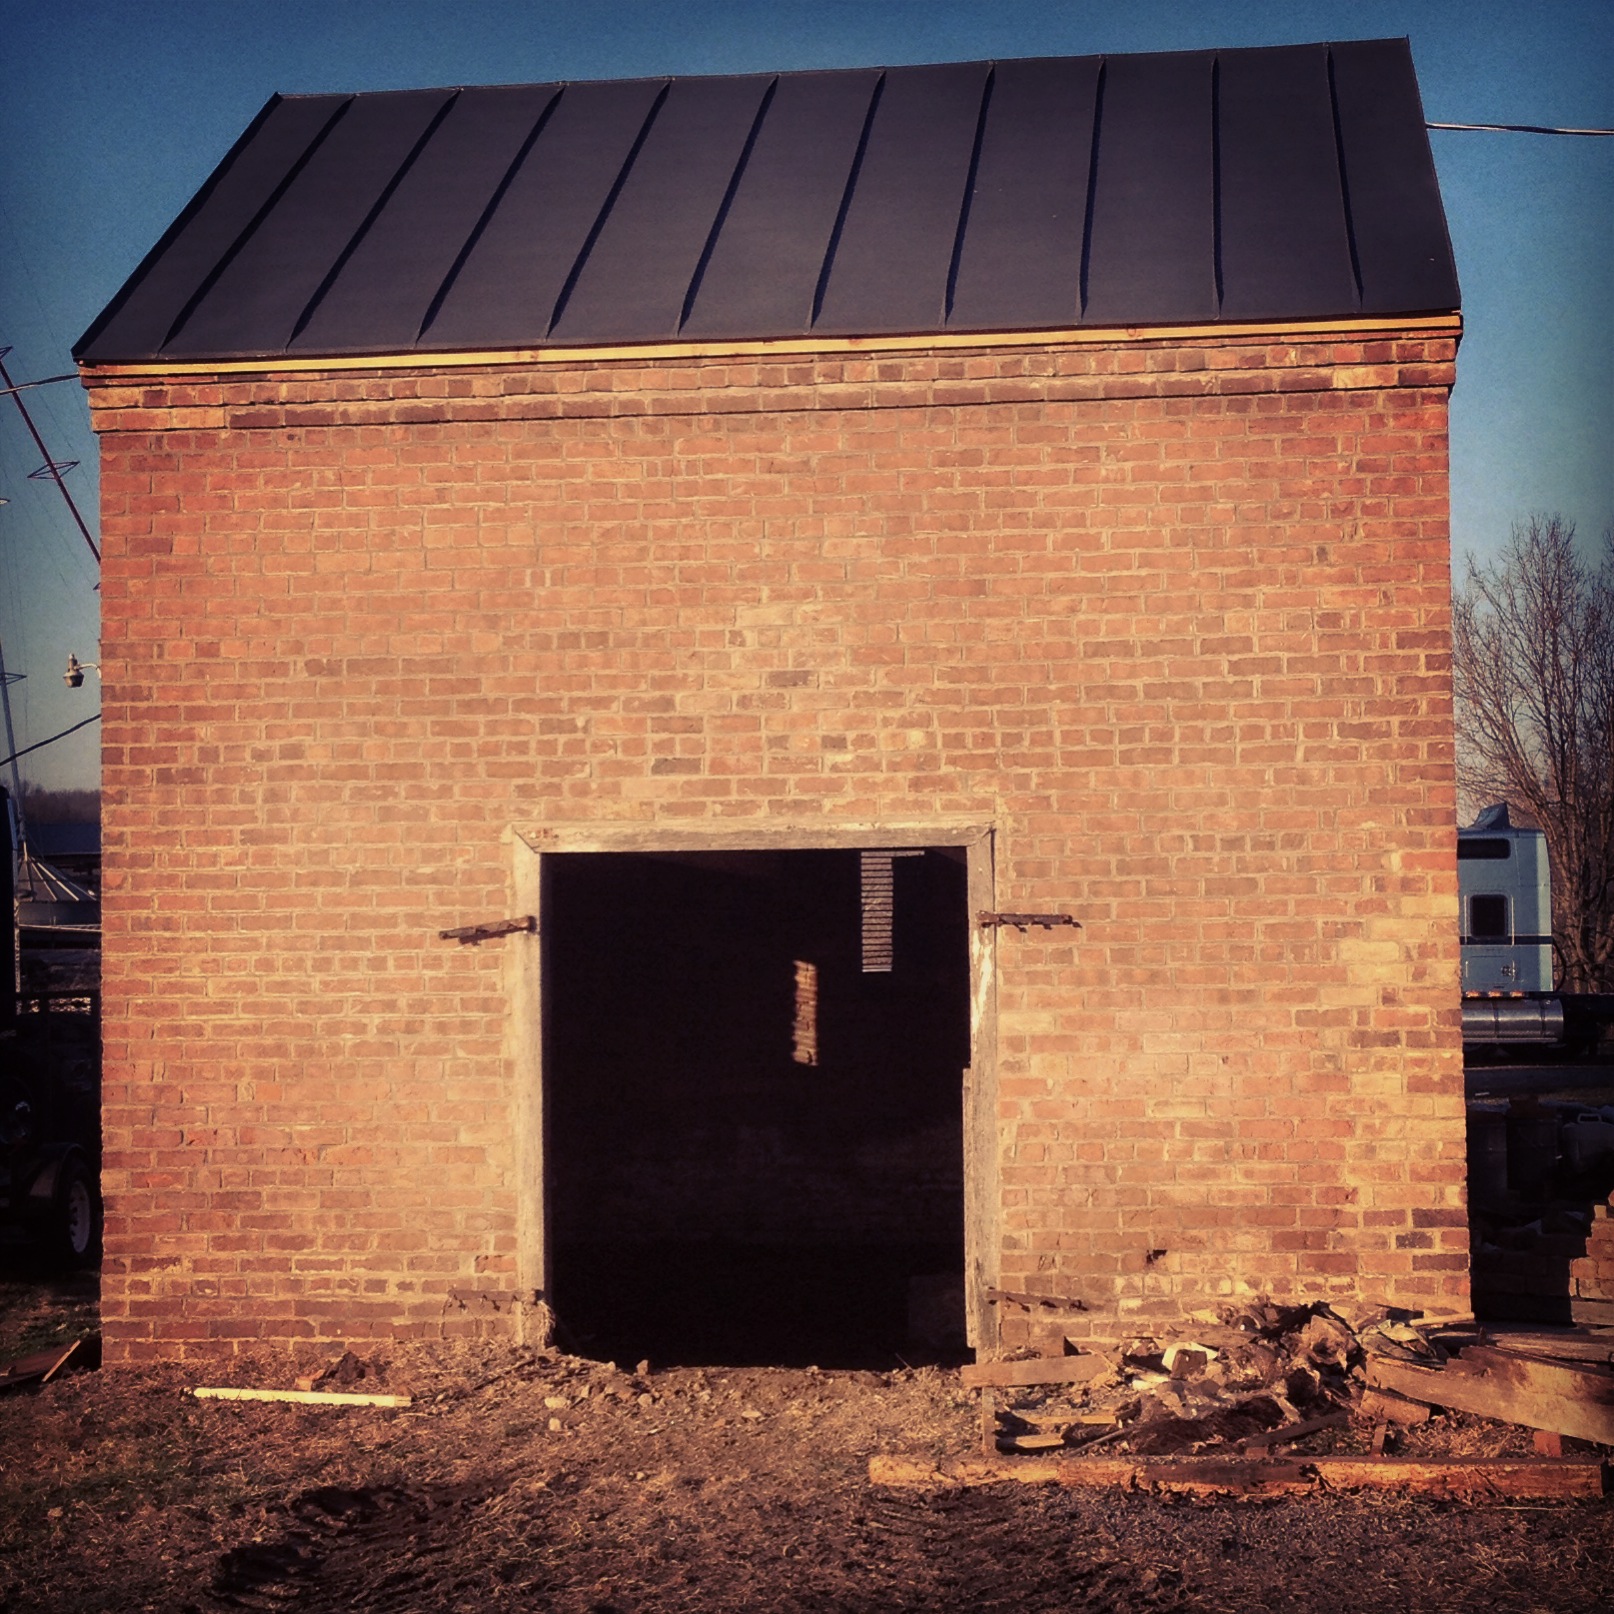
And, voila (this image was made only slightly more dramatic by Instagram photo filters)!

IMG_1186

Compare:

IMG_4407

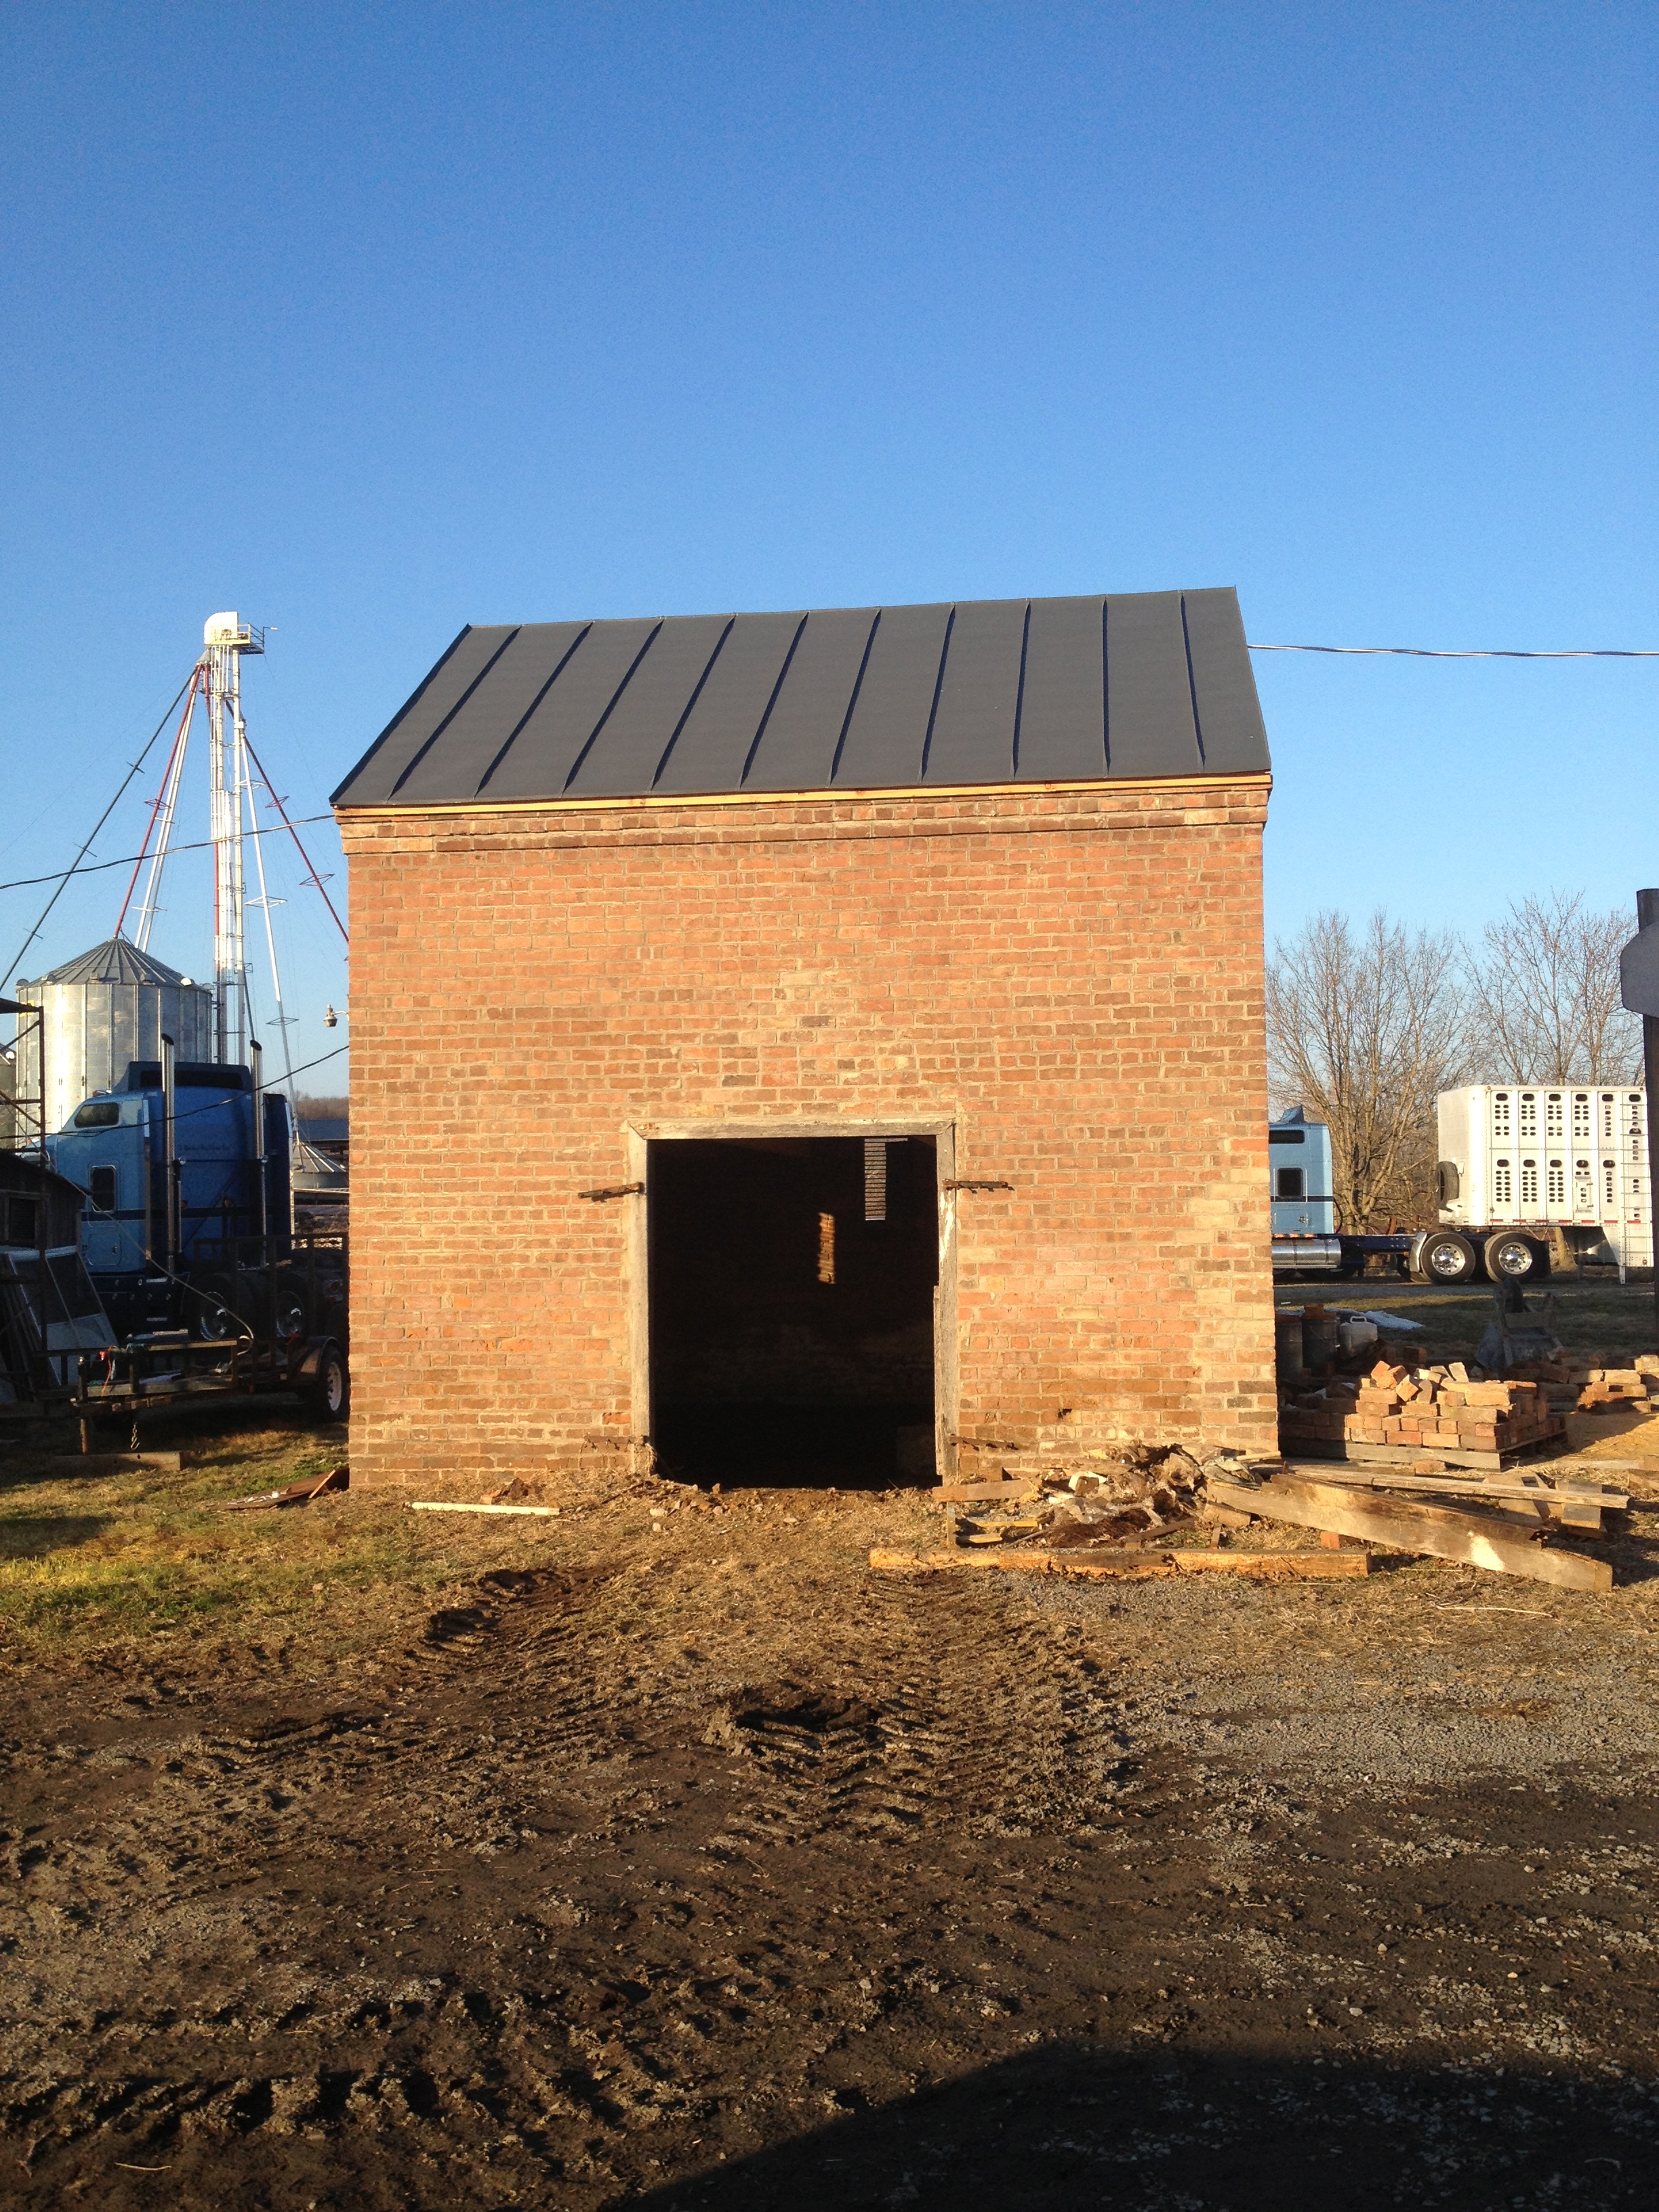
And again, here it is today:

IMG_1178

The Smokehouse: Risen from the ashes!

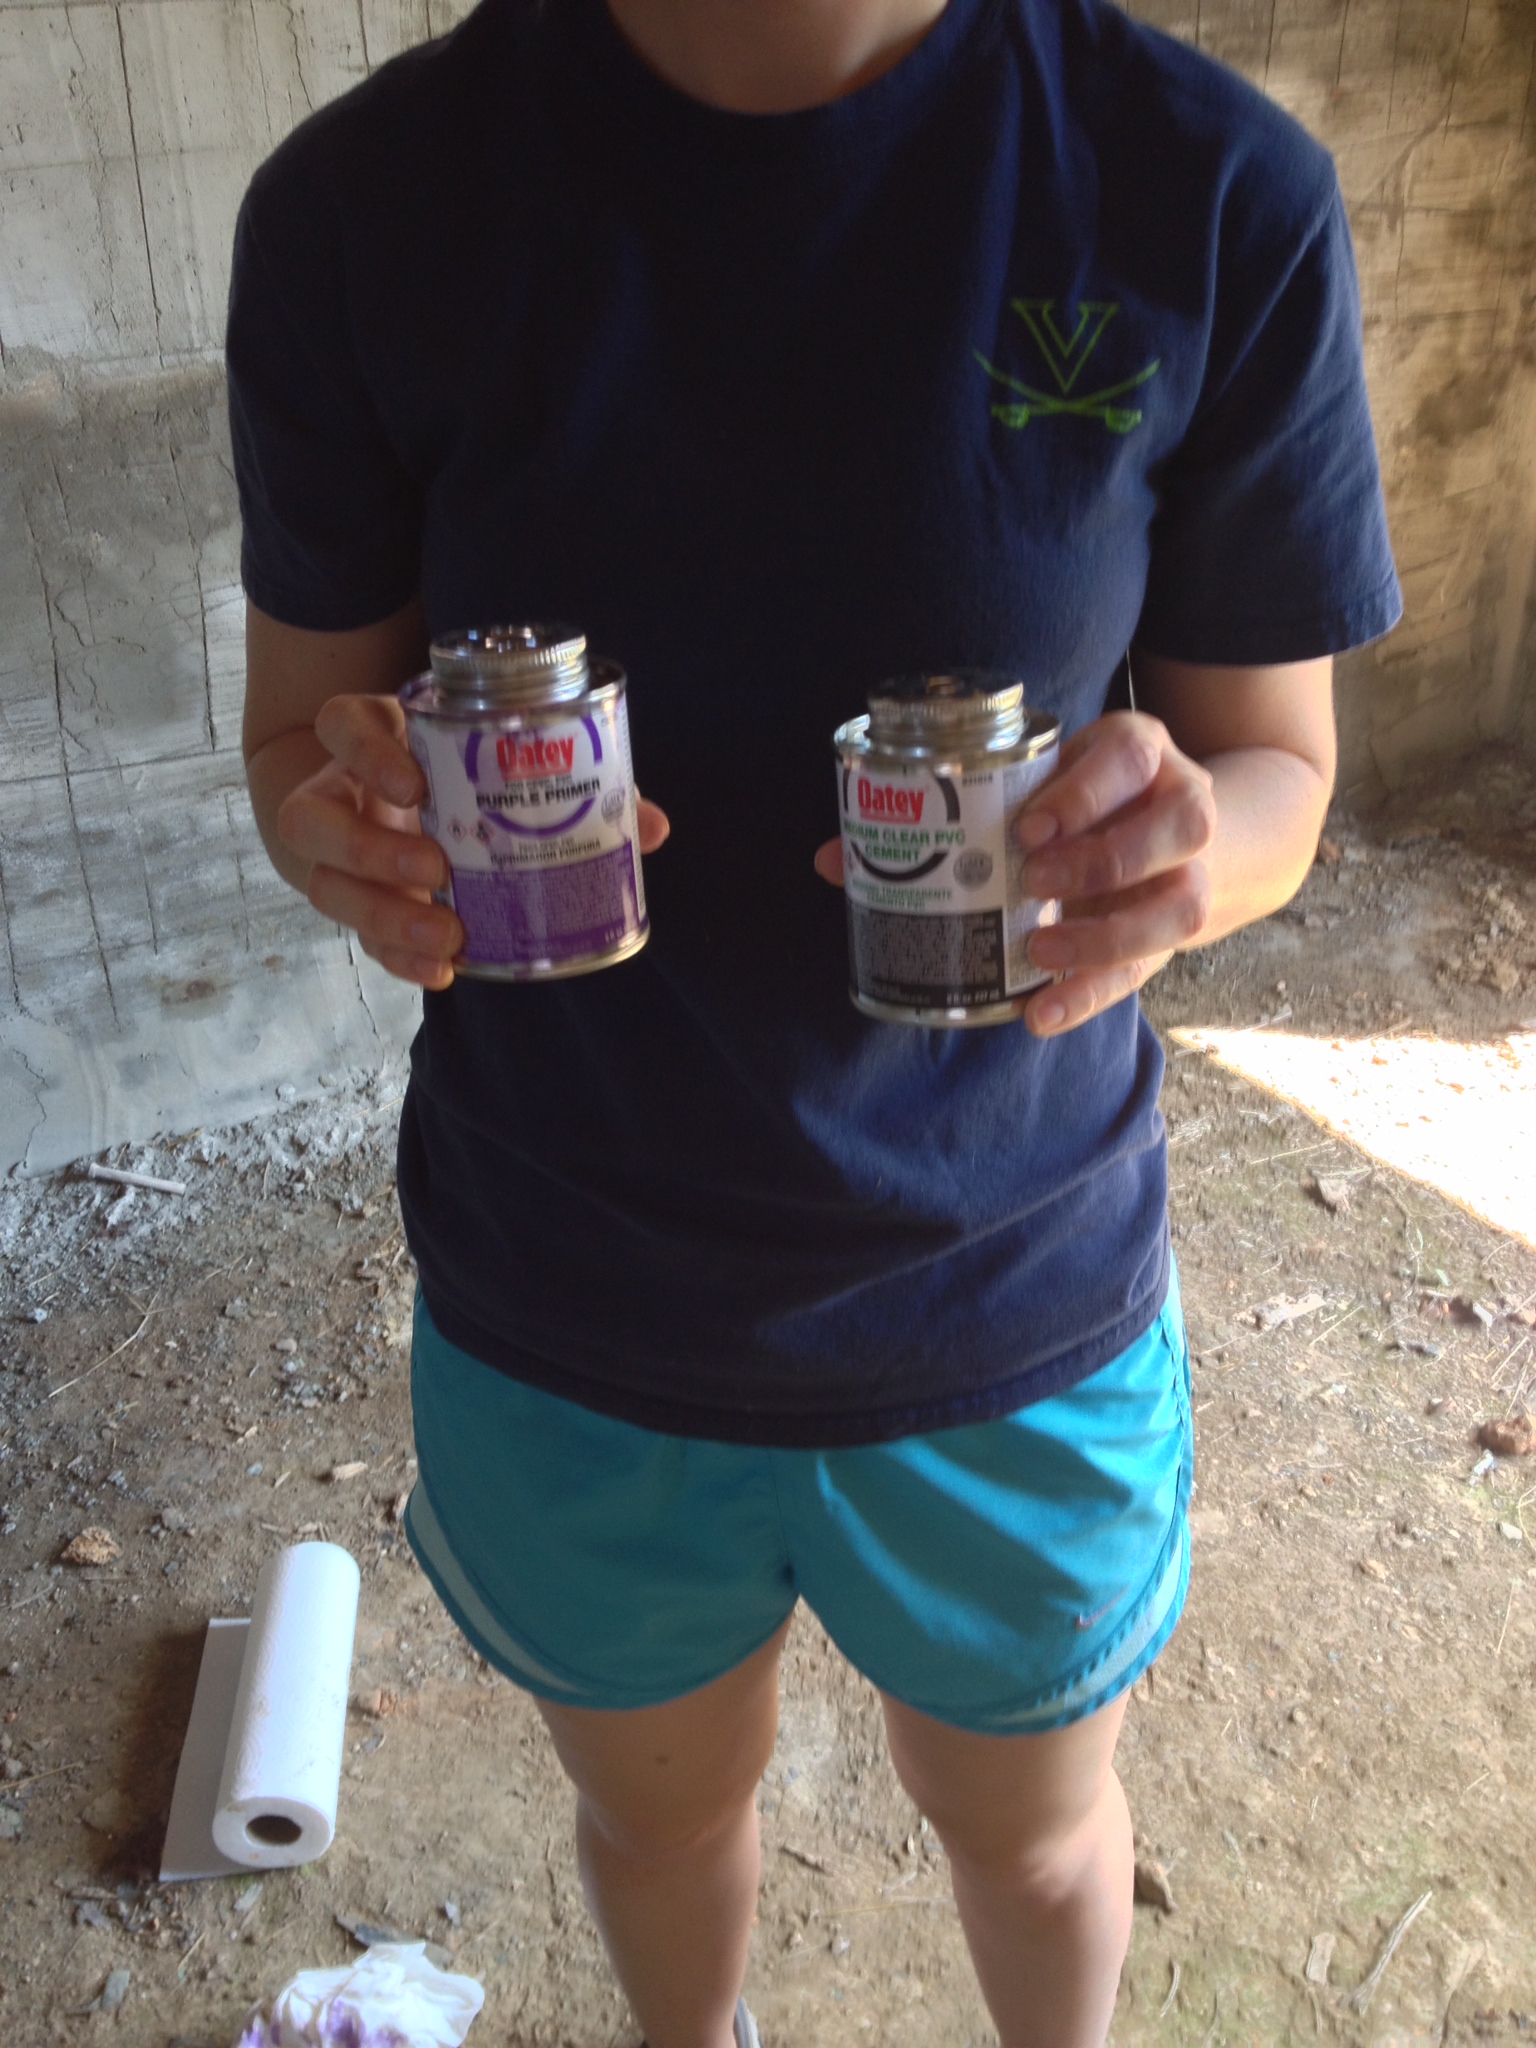
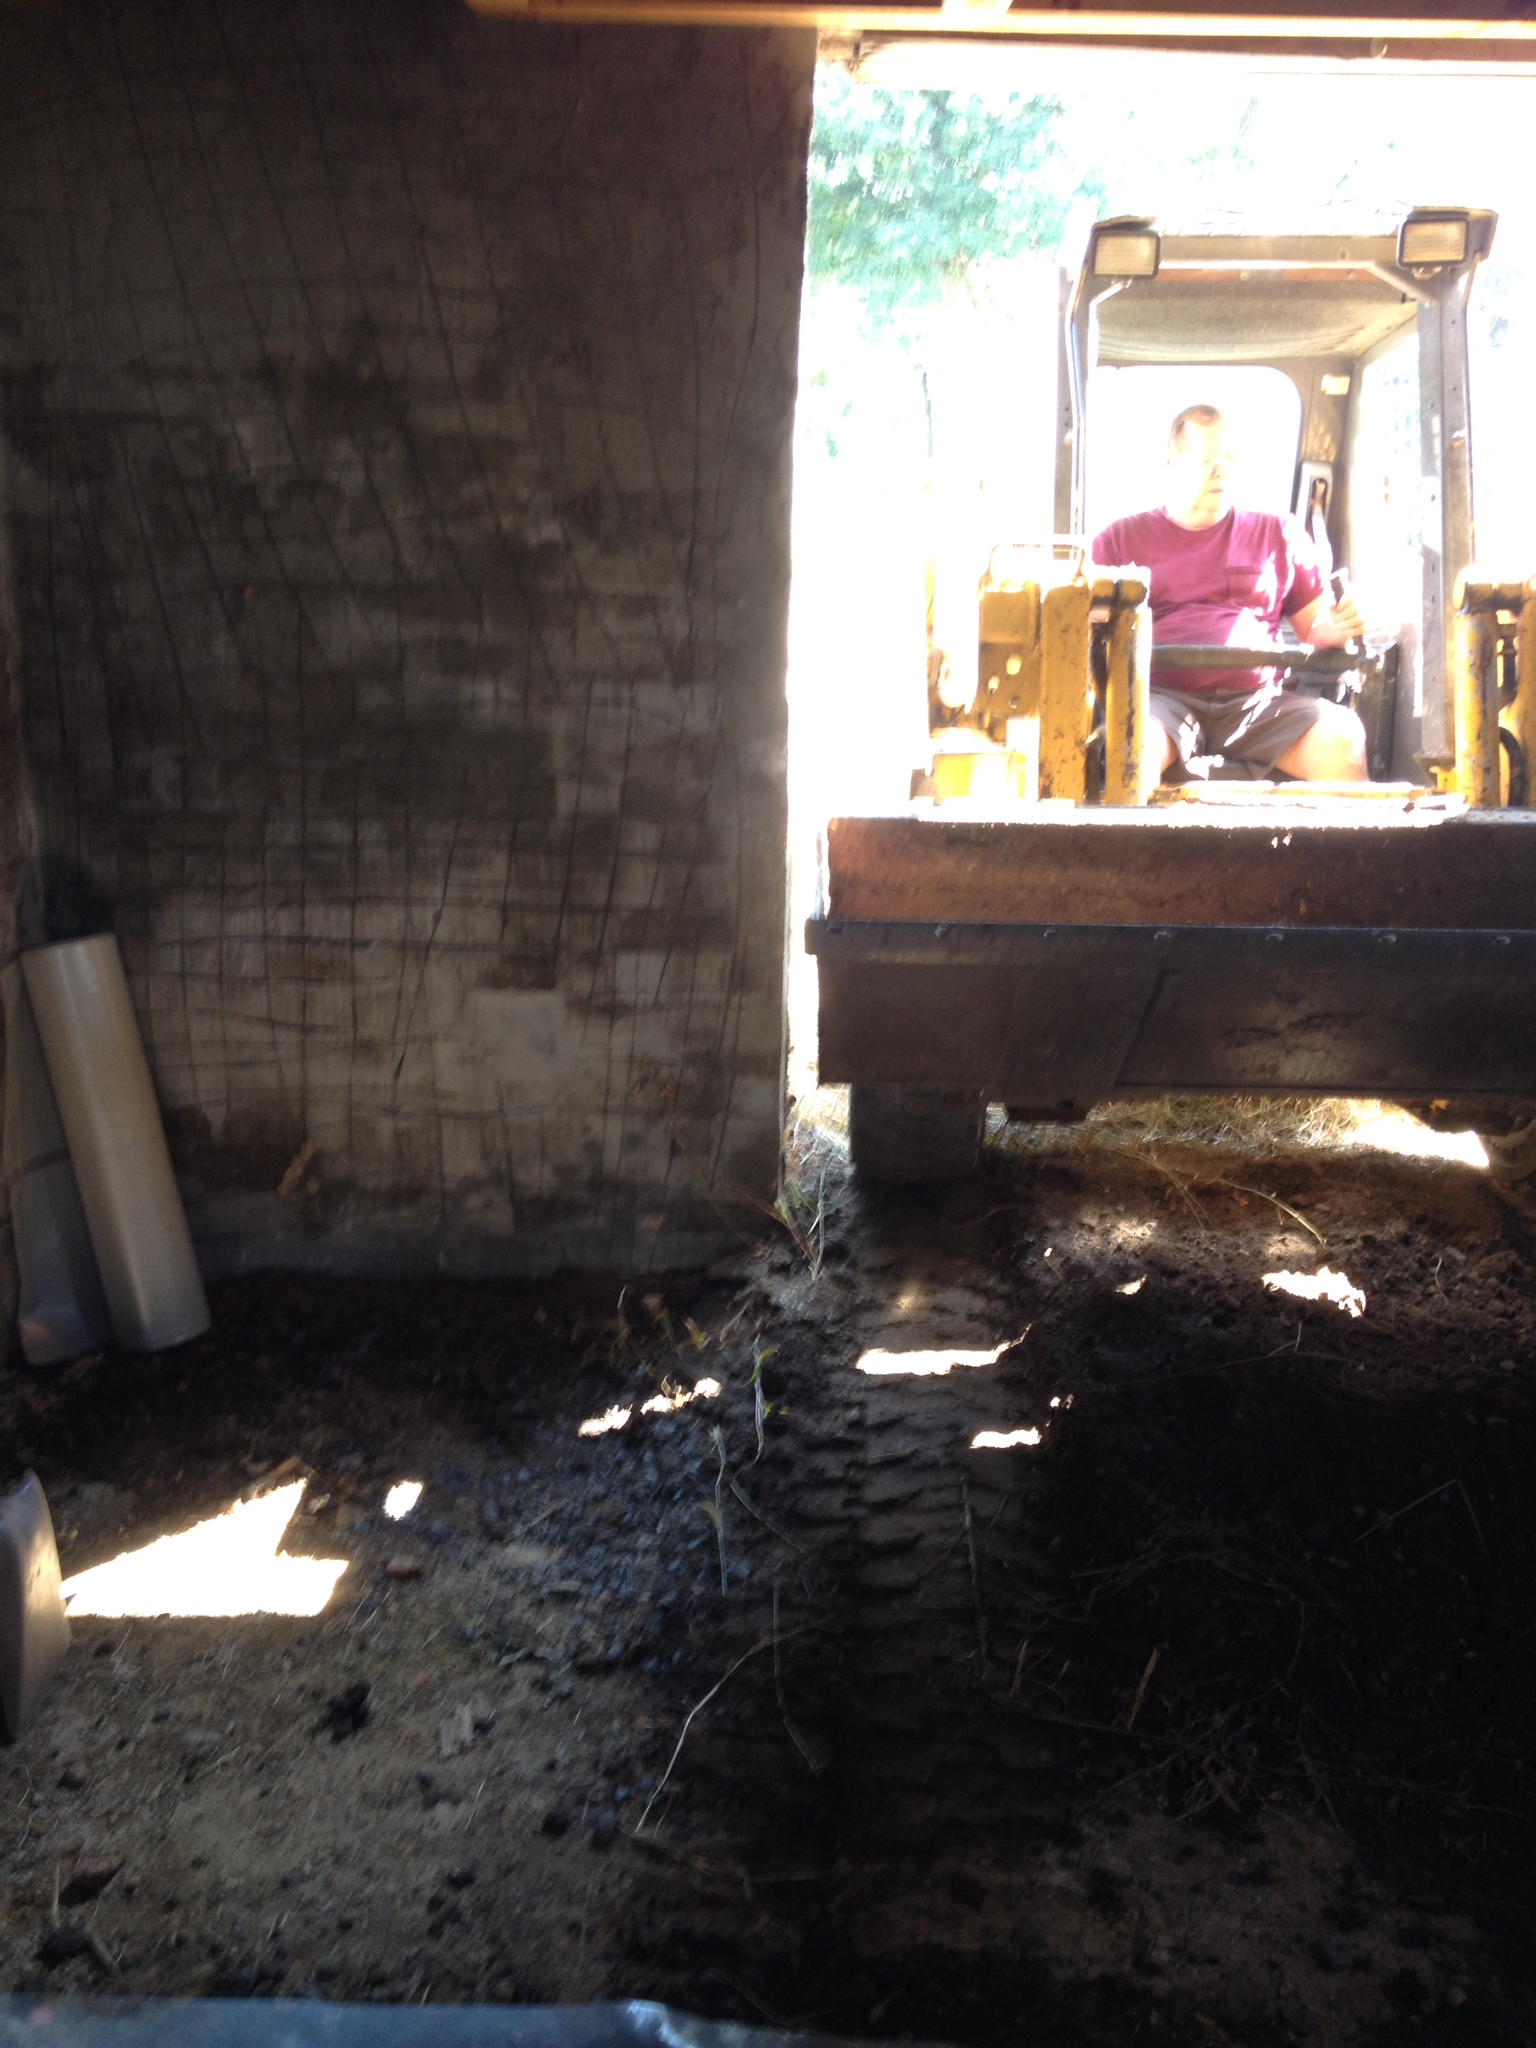
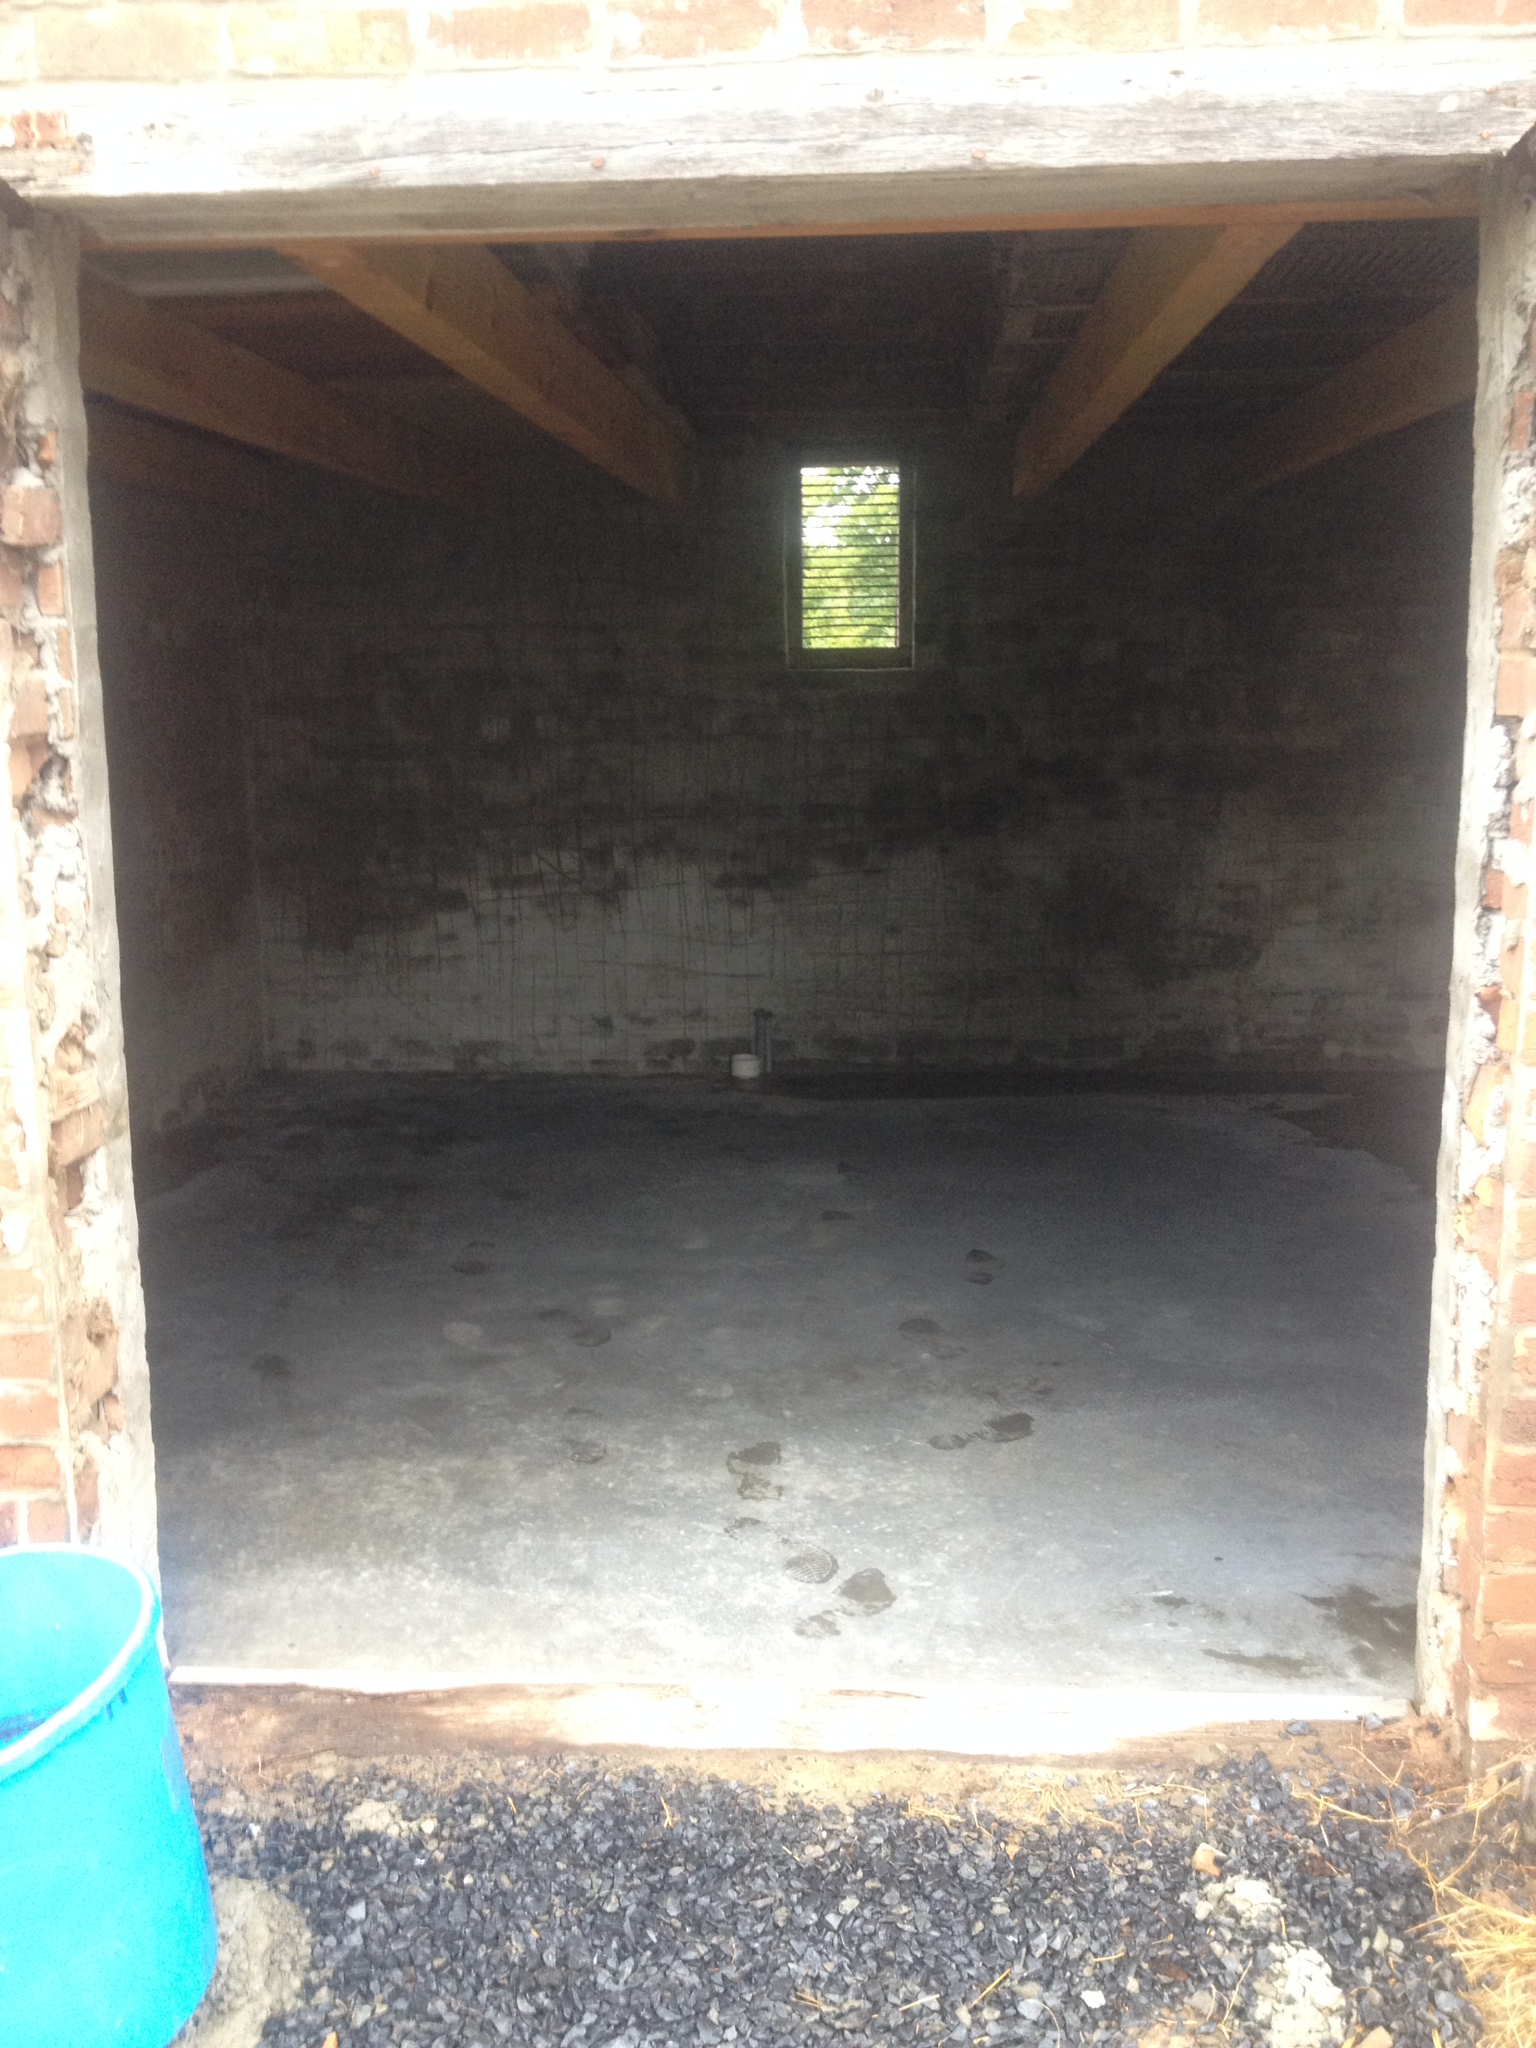
And speaking of ashes, the smokehouse transformation doesn’t stop there. I decided that it would be best to go ahead and pour a concrete floor in the smokehouse, as we anticipate using it as a workspace and garden shed. I didn’t just want to pour concrete on top of the current grade, so I made the decision that the floor would need to be excavated substantially to accommodate the appropriate depth of concrete while also preserving the head clearance under the meat smoking beams. Get out your digging shovel: this was a do-it-yerself job.

IMG_1177

IMG_1198

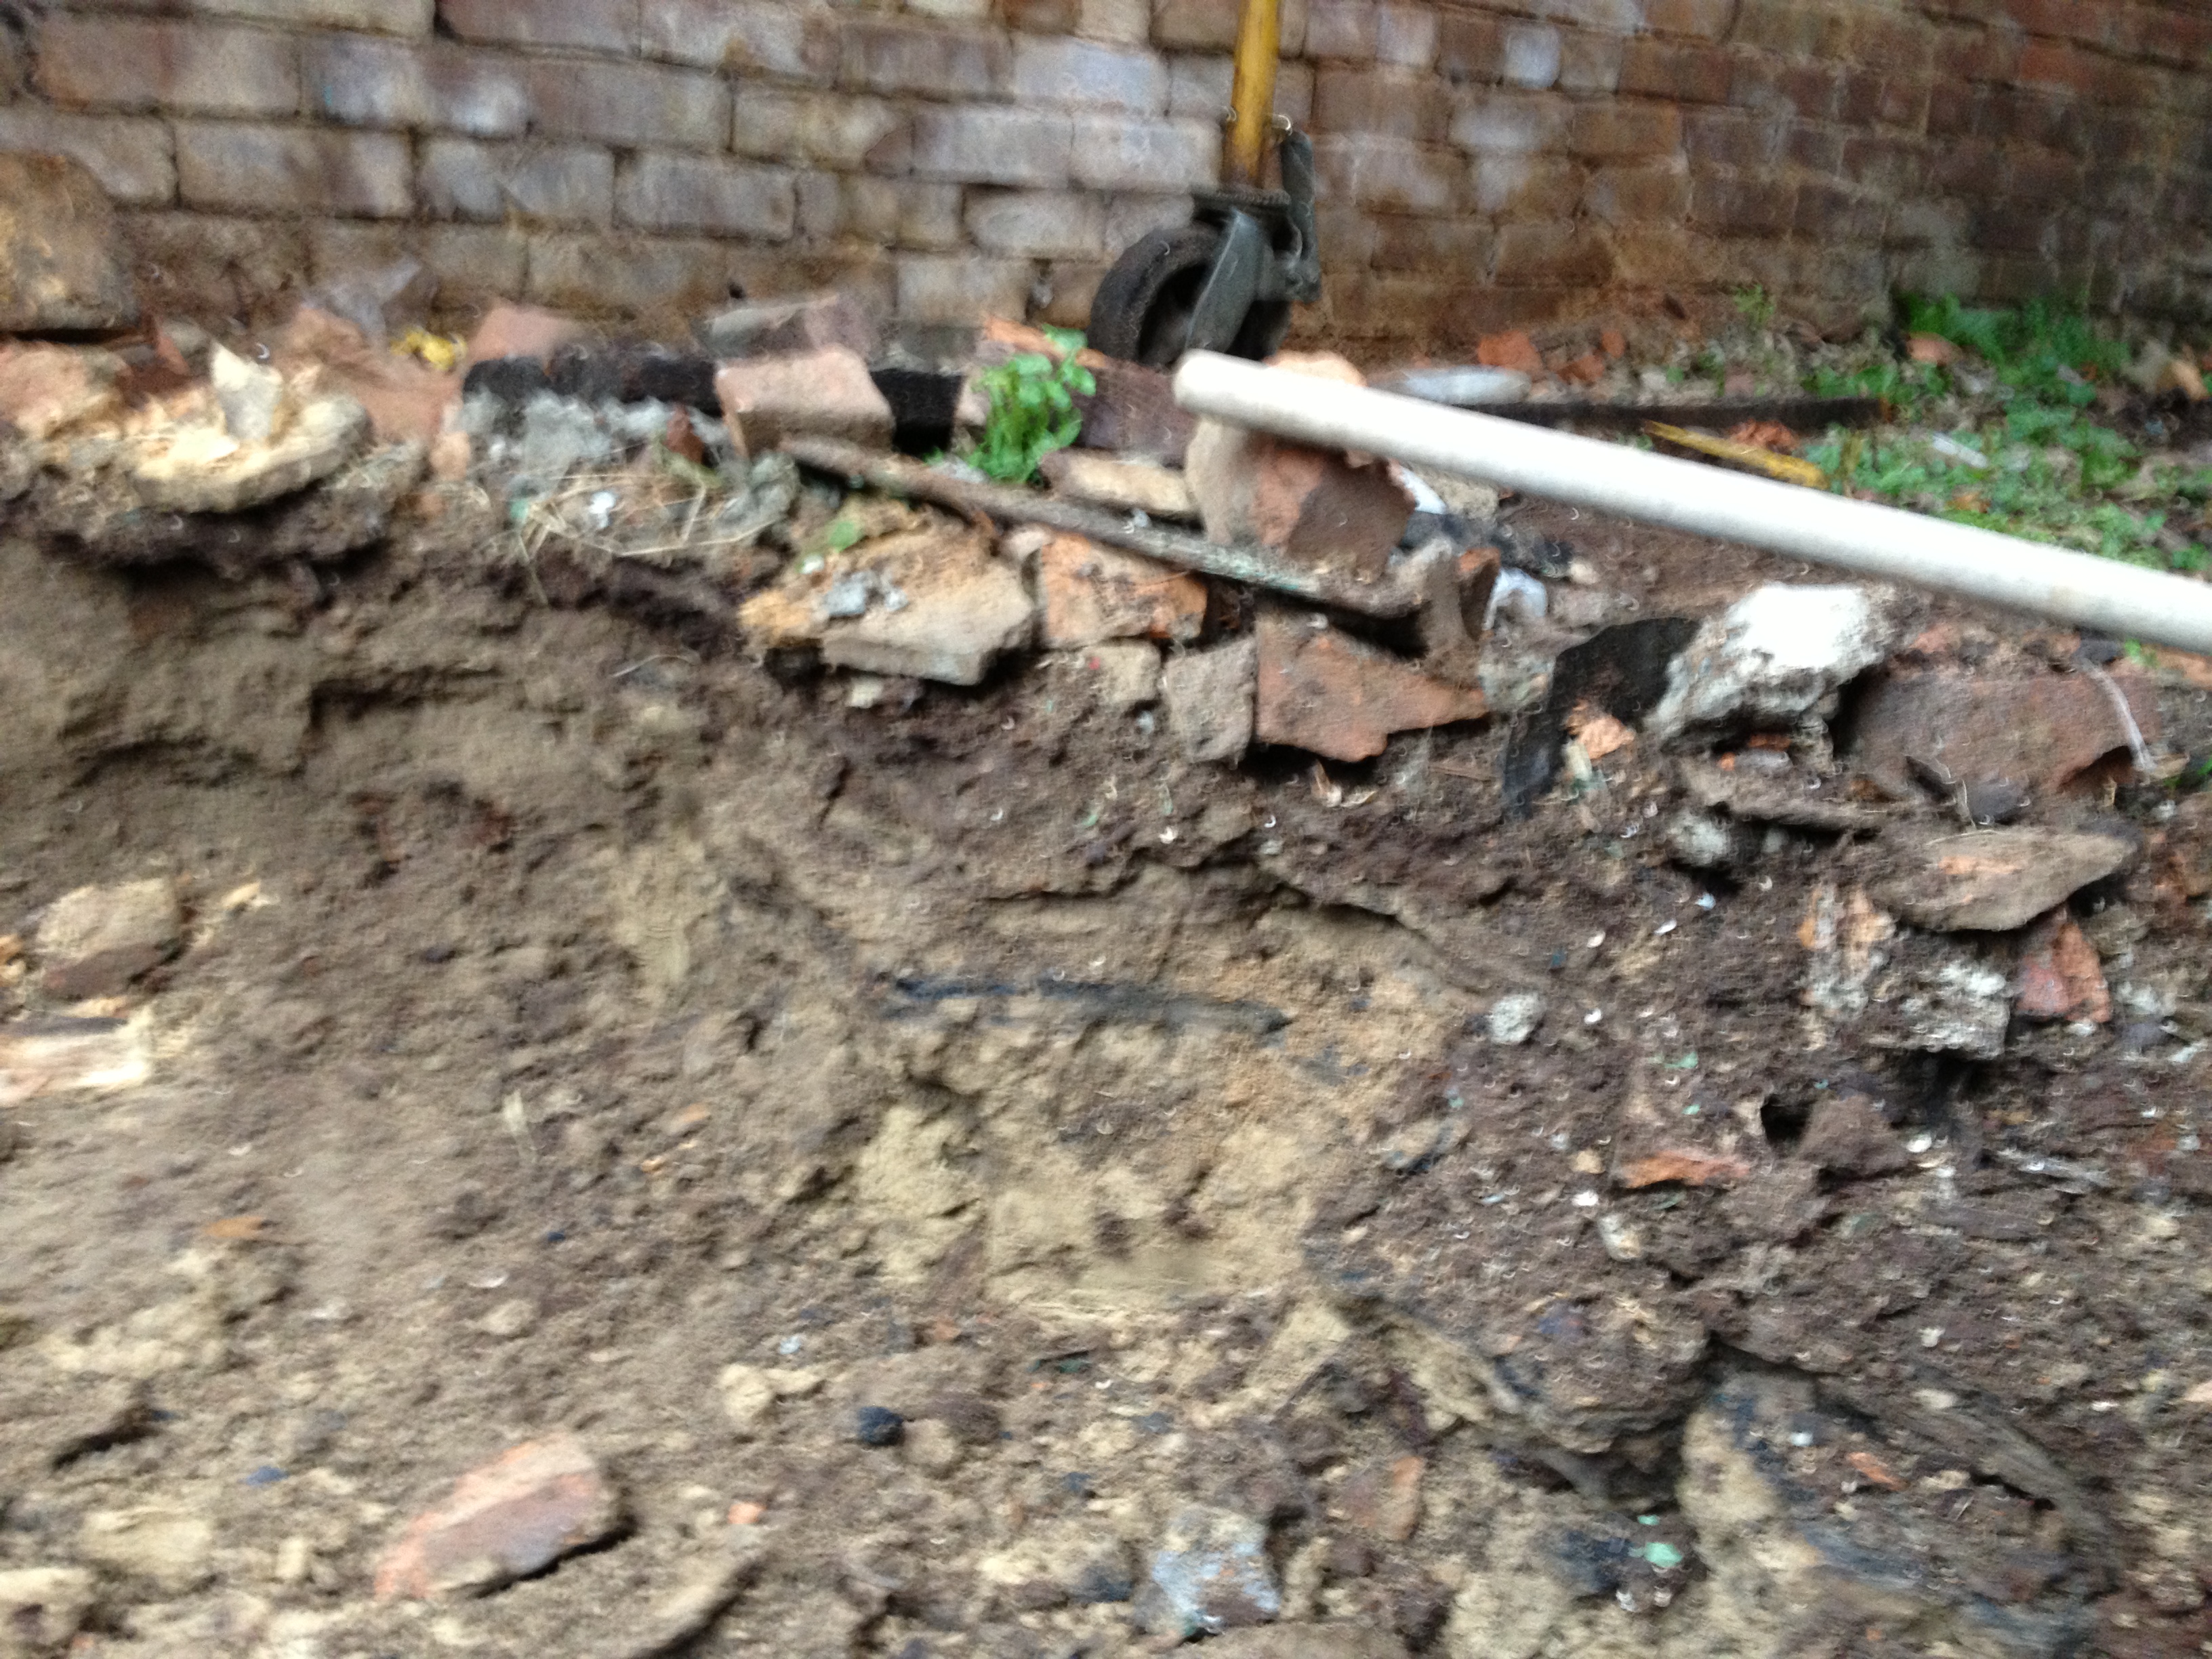
While digging, I found the original soot line under layers of dirt. This is where the floor height would have back when meats were still being smoked! Here’s another shot, showing the layers of debris.

IMG_1200

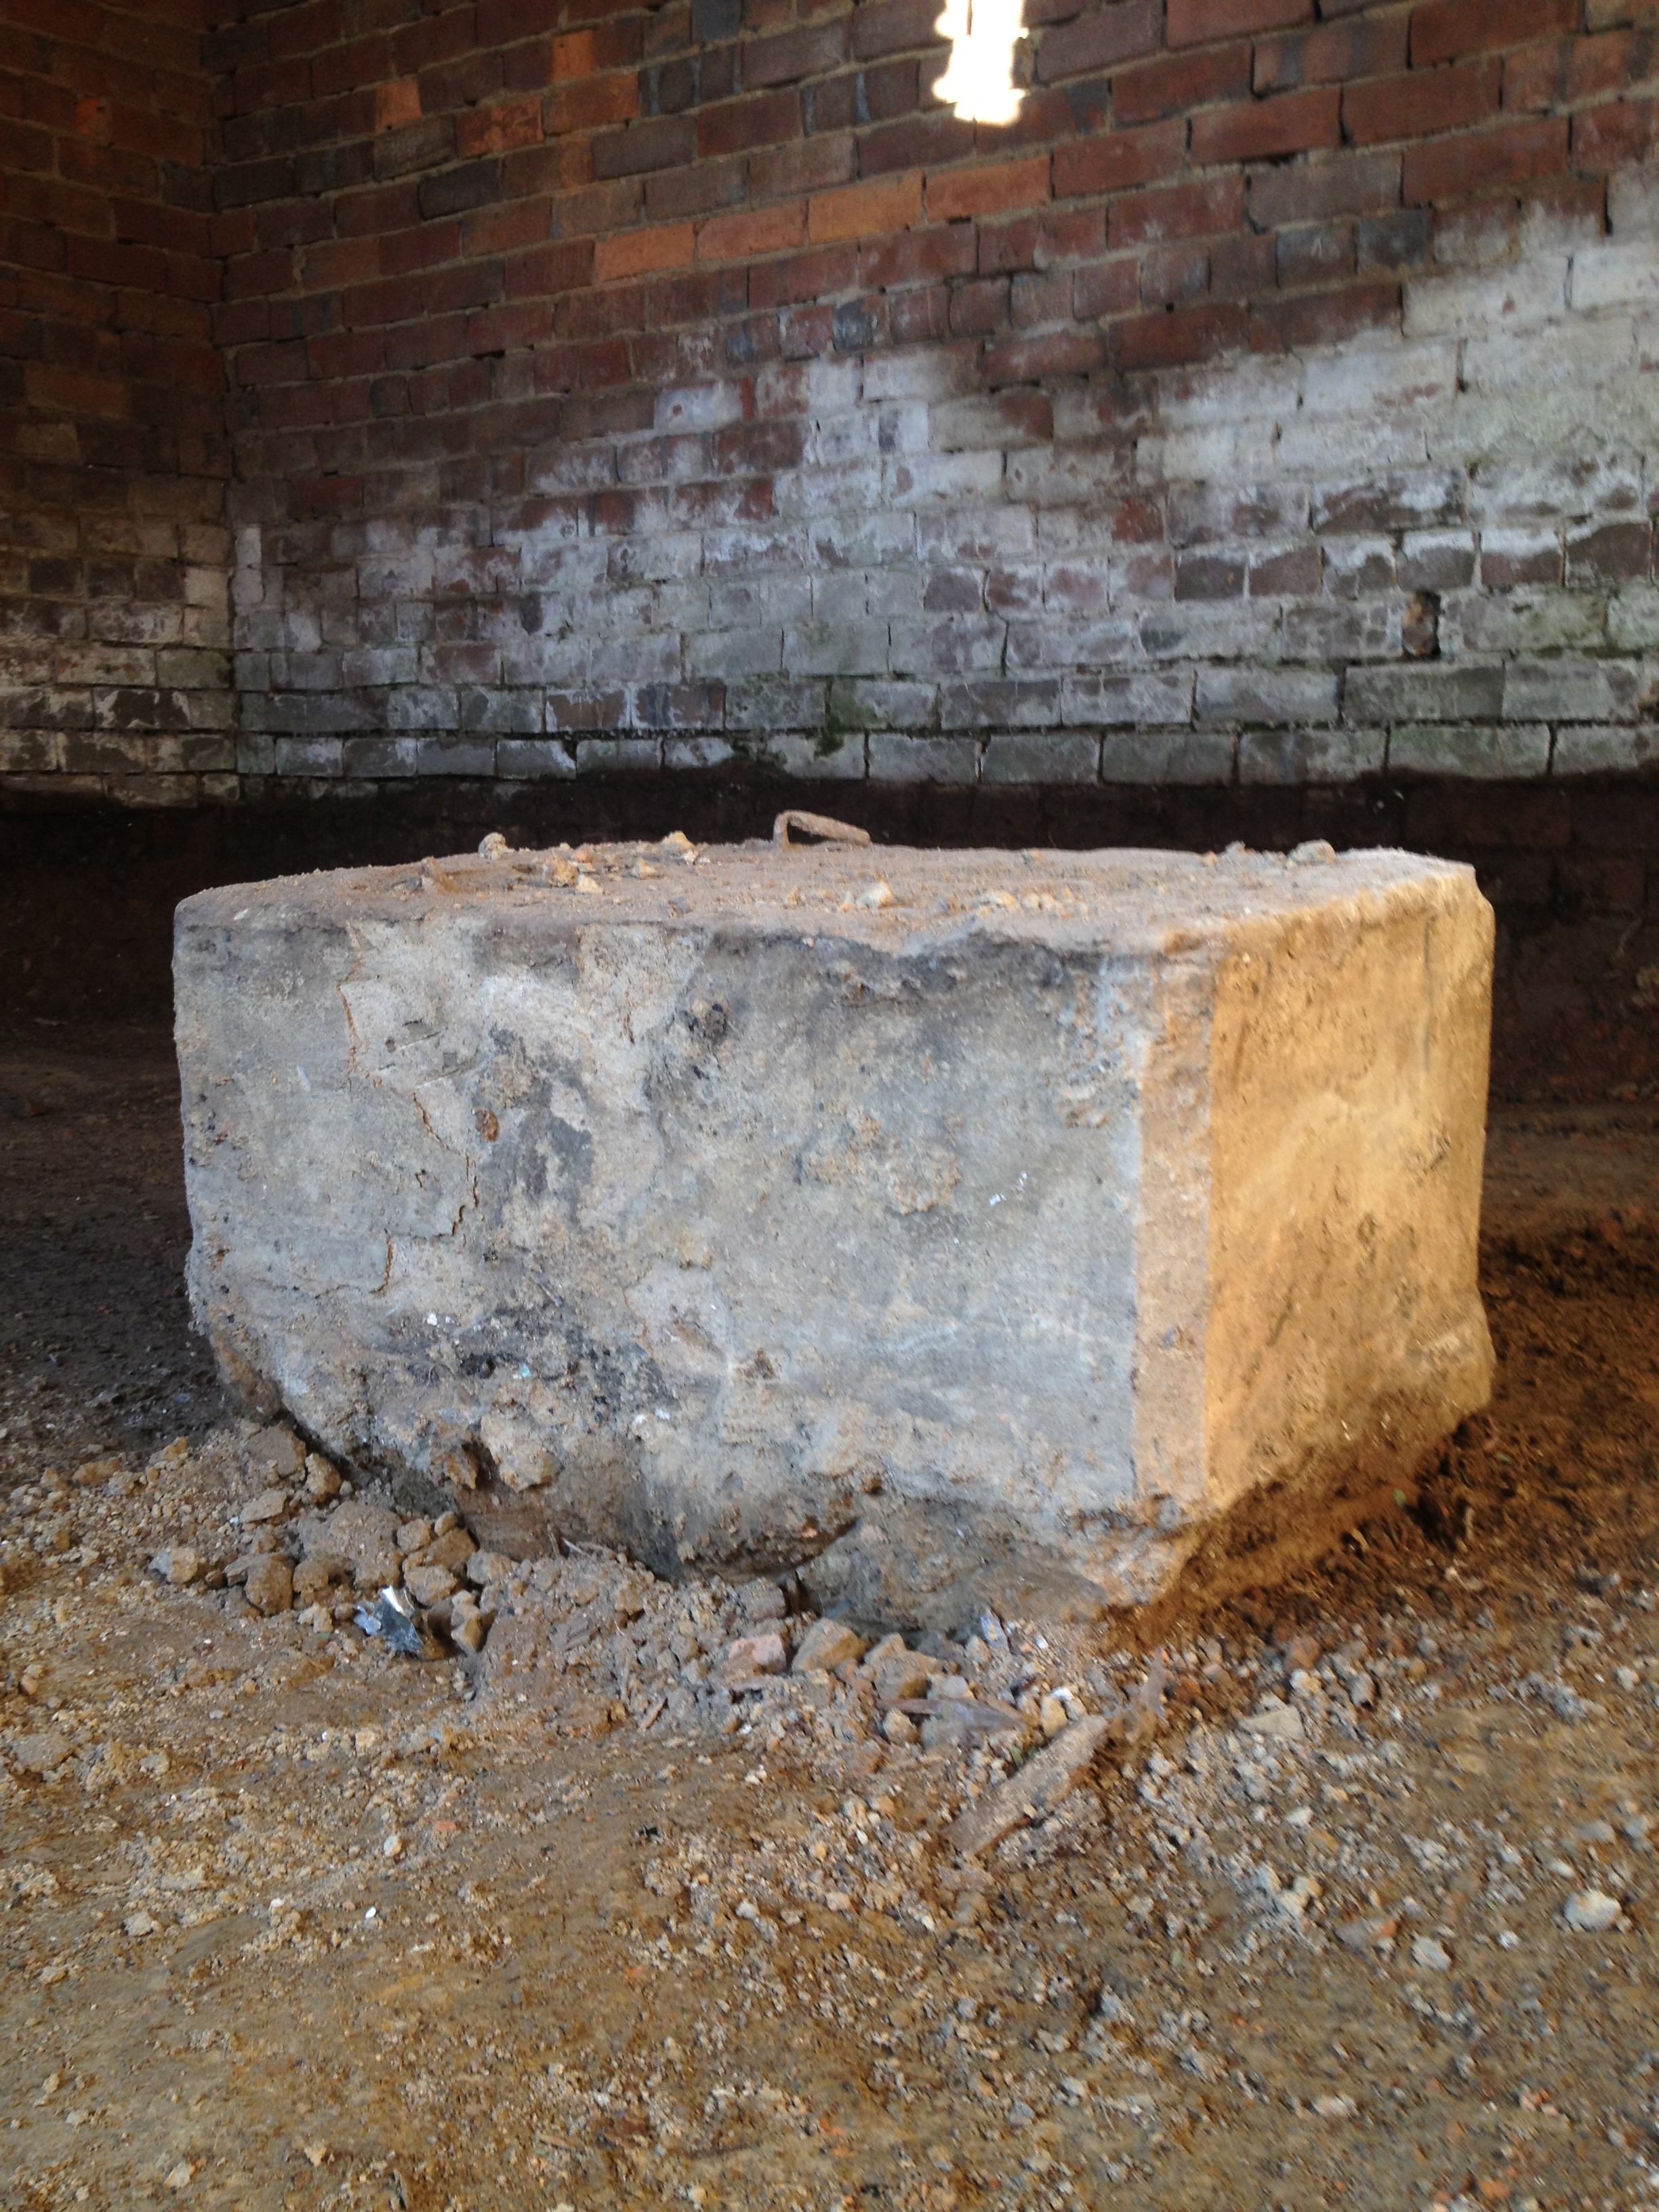
We dug down about a foot and a half. Trust me, this process felt like it was going to take all winter. But then the in-laws showed up for Smoke House Round Two! Thanks to Steve and Gina, we had four backs hard at work and we were able to move the dirt efficiently. During the process, we uncovered this cement block, that had been entirely buried pre-dig. We think it may have been the rest for an engine crane at one point when the smoke house was converted to a garage.

IMG_1176

IMG_1188

You can see the white line on the wall where the floor was when we started (the white sediment is salt that leeched into the brick during the smoking process). In our excavation we also found some ham bones, a horse shoe, and a bunch of old pottery shards. Our single most exciting find was:

IMG_1212

The hood ornament to an old Packard automobile, quite the luxury car in the early 1900s! This is more proof of the smokehouses’ transforming uses. Usually the Packard winged goddess of flight holds a tire, so we aren’t sure if this piece is after-market, but we do have some confirmation that at least one Packard made the smokehouse garage its home in the 1930s.

In an amazing turn of events, our next blog post will return to the history of the farm, as we have been delighted to make primary contact with one of the home’s former residents!! We’ll leave you with this teaser of things to come: a shot, backdropped by the smokehouse, taken in the early 1900s:

IMG_1198

You can even see how the door boards were originally aligned. HISTORY!

Last, but certainly not least, we want to thank papa Bill for making the smoke house restoration a reality!

Brick by Brick

Edge Hill has three out-buildings: a summer kitchen, a smoke house, and farm hand’s (slave’s?) quarters. Unfortunately, the smoke house is in the worst shape of the three.  The roof has fallen in, which has, in large part, been the culprit causing the building’s deterioration.

(Smokehouse on the left, summer kitchen with addition to main house on the right)

(Farm hand’s quarters on the left, summer kitchen on the right)

The smokehouse was also the site of what some friends have dubbed the “Hurricane Katrina” wedding shoot (in a good, artsy way, I think!):

Evidently the gentleman who owned the property in the ’60s thought the smokehouse would make the perfect little garage for his new sports car.  He gleefully straightened it up, pulled the convertible in, and watched from the main house as winter set in.  When he flung the “garage” open a few months later to take his car out for its first spring spin, he was horrified to find that the salt in the walls, from decades of curing meat, had completely rusted out his toy.  I think he wished so many bad things on the poor smoke house that the roof subsequently caved in.

There were quite a few bricks lying in piles around the smokehouse and the summer kitchen – a combination of bricks that have fallen off the corners of the buildings and the remnants of what was once an outdoor “bakery” directly behind the smoke house that collapsed years ago.  At some point, the broke-down bakery and other bricks were bulldozed into a huge pile of dirt, rubble, and random trash:

If you can believe it, Chad had already worked on this pile for a few hours last weekend…

So, we went at it this morning.  The goal was to pull out any in-tact bricks to save for re-use down the road, and find any bricks with at least one complete side to use in landscaping.  The previous owner of the house also hinted that the pile might contain the bakery’s metal oven door.  BURIED TREASURE!

With trowel in hand, I felt like a kindergartener saying, “I want to be a paleontologist when I grow up!  Yeah, dinosaur bones!”  There was some bizarre excitement about finding glass bottles, old hinges, and LOTS of spiders (before today, I was unfamiliar with the woodlouse hunter/roly-poly killer), ants (this pile was the Manhattan of the ant world), centipedes (as Gina would say, centipedes of prehistoric proportions), and roly-poly bugs (the roly-poly killer spiders now make more sense) .

The skid loader pictured above was CRUCIAL to our endeavor – the perks of living on a working farm!  I even learned to drive it today (although Chad isn’t ready to let me maneuver the attachments quite yet…)!

Four hours later, the novelty of digging in a large pile of dirt in 90-degree heat had worn off, especially when it became clear the pile did not contain the door we had been hunting.  Yet, we succeeded in setting aside an entire pallet of whole bricks, and another pallet and a half of partially useable bricks, in addition to the complete removal of the pile.

A little summer sun and manual labor was well worth having this eye sore transformed into original materials we can save for later (read: money saved)!

In other news, summer has officially come to Quicksburg: the corn (while not yet quite as high as an elephant’s eye) grows noticeably every day!

See the rows?